
By now, you should have quite a few modified files in your development branch. As part of your development process, you should be committing changes and pushing them back to GitHub on a regular basis. As we discussed earlier in this chapter, you should be testing your code after every 20 or so lines that you add or change in your code. You should also be committing your changes after each time you successfully test them. By regularly pushing your changes to GitHub, it allows other developers to make sure that your work is not affecting any changes they are making to the same code base. As well, it allows them to help out with your development branch when needed. To push our changes back to GitHub, after committing our changes to our branch, we simply use the push command and specify the name of the branch that we are developing on:
git push -u origin feature-simplexml
When we've completed and committed all our code changes, and have tested our development branch in our development and test environments, it's time to get our changes reviewed and then merge them back into production.
The best way to get our code reviewed is by submitting a Pull request for our branch within GitHub. By submitting a pull request in GitHub, it gives developers the ability to send a request to colleagues or other developers to view the changes and see if there are any potential issues that may have been missed. It also lets developers suggest potential ways of enhancing our code further. To create a pull request, we can do the following:
- We access our repository page in GitHub and click on the New Pull Request button.
- We should now see a similar page to the following screenshot. The reason behind the
pullrequest is to compare our branch and the master code. As you can see in the following screenshot, we can choose the base as master (or any other branch) and then select ourfeature-simplexmlbranch from the drop-down list to compare with: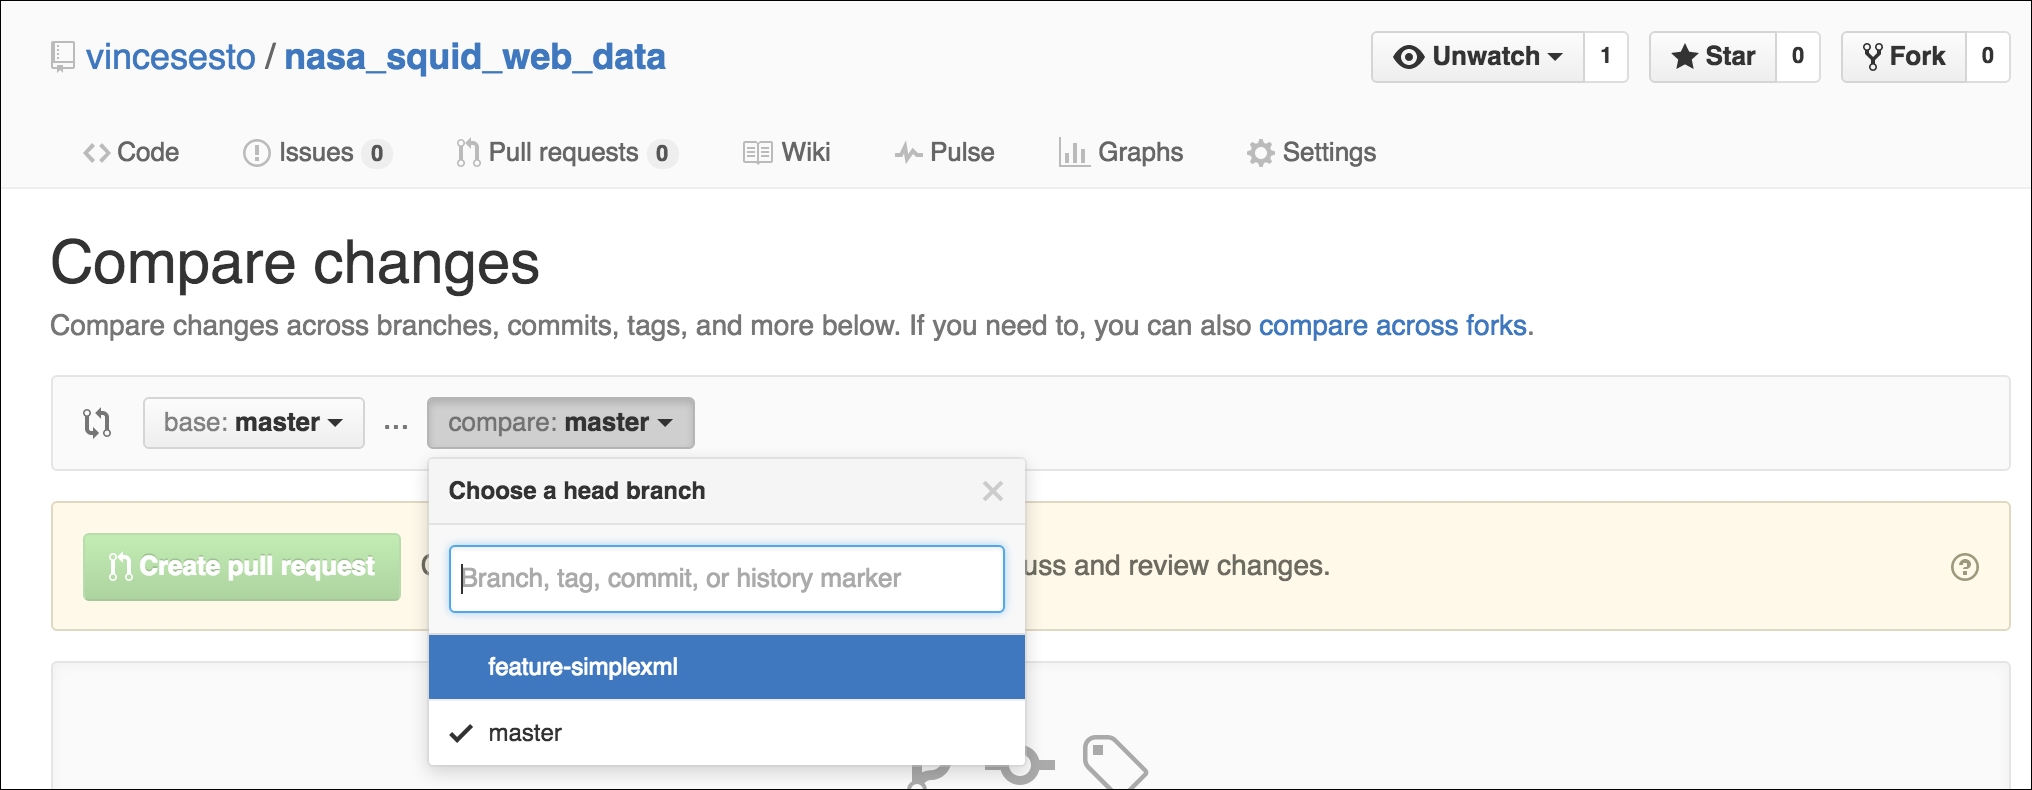
- By selecting our branch, we are then able to give our pull request a meaningful title. There is also a comment area to allow you to leave a list of changes you have made to your code.
- Then click on the Create Pull Request button. Once the pull request is created, we can see that our pull request has been given a number. Most likely, for our first pull request, it will be
#1. The following screenshot is what your pull request should look like: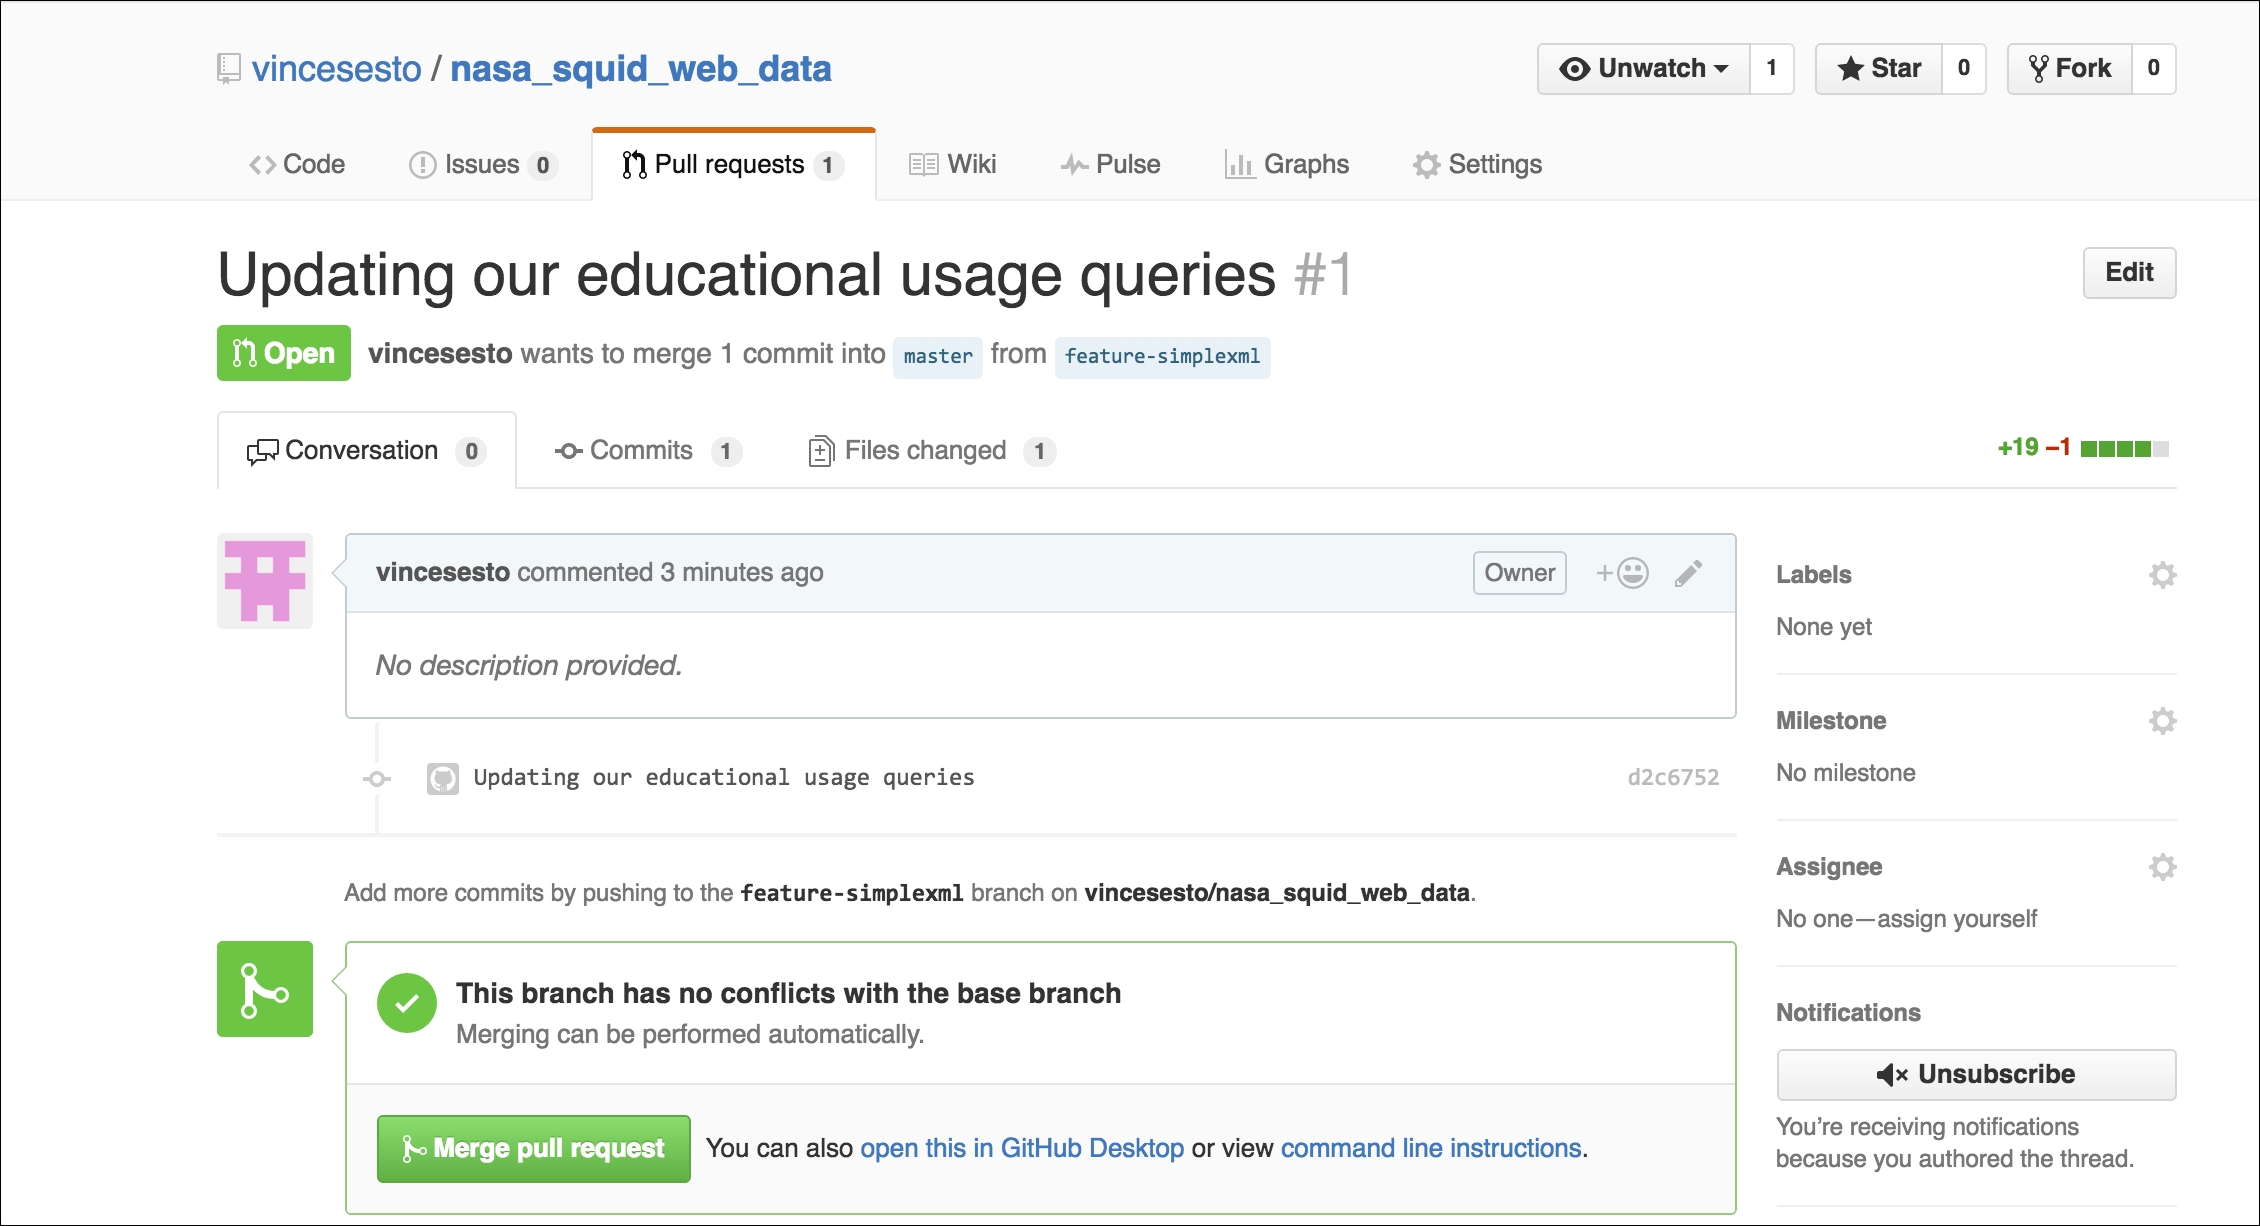
- Any developers who are set as watchers will be notified of the pull request and you can also send the URL out to other developers for them to view.
- By clicking on the Files Changed tab of the pull request, you are able to see a breakdown of all the changes made compared to the master branch. Comments can be made directly on the code pages and to the entire pull request. Changes and comments can also be voted on.
- As you can see from our pull request, we are also given the option to Merge pull request. This is the final step in the process before we release our master branch into production.
- Once we confirm that we are merging our pull request, we are given the opportunity to delete the branch, as this is usually a best practice to keep our repository clean and limit the number of branches we create.
We are now able to release our changes to our production environment. In this instance, we would simply access our production Splunk Server, locate our Splunk App directory, and then perform a Git pull.
This will now pull down all the changes we have made to our development branch that have now been merged back into our master code. All that would be left would be to restart our Splunk Server to allow the changes to take effect.