
We have put in place a way to access one of our new dashboards without having to do this in the Dashboards menu, but we can take this further and place the rest of our dashboards as menu items across the top of our screen. We can also move the original menu items of search, pivot, alerts, reports and dashboards under one drop down menu. There is not a lot of work to get this done, but we will start over, in this exercise we will make the changes on our development server environment through a text editor or your favorite code editor:
- Log into your development environment and as we have already made some changes to our navigation, the most up to date version of our navigation will be moved to our local directory from the default. To access our navigation, change into the following directory:
cd $SPLUNK_HOME/etc/apps/nasa_squid_web/local/data/ui/nav/ - Open the
default.xmlfile with a text editor or your favorite code editor and we can get started with our changes. - Remove all the lines, and we are going to start from scratch with the following four lines to open our
navelement. The first line will remain the same, and as our search view will remain as search, but we will move our three main dashboards that we created following from that.1 <nav search_view="search" color="#65A637"> 2 <view name="nasa_web_usage" default='true' /> 3 <view name="simplexmldashboard" /> 4 <view name="basic_dashboard" /> - Our
nasa_web_usagedashboard will remain as the default dashboard to be displayed when the SplunkApp is loaded and keeps thedefault=trueoption. - We now want to set up the old menu items and group them together in a drop-down menu. This is where we can use the collection element. Enter the following line of code, where we open the collection element and give it the label option of
Splunk Tools:5 <collection label="Splunk Tools" >
- We can then add the rest of the menu items that will be displayed in the drop down menu with the next five lines:
6 <view name="search" /> 7 <view name="pivot" /> 8 <view name="reports" /> 9 <view name="alerts" /> 10 <view name="dashboards" /> - We are not finished yet. We want to add in a link to the current NASA website, but we want to separate it from the the other items in our drop-down menu. This is where we can use the
dividerelement. Then create a link to the http://www.nasa.gov/ website site with ahreftag, as we would with HTML script.11 <divider /> 12 <a href="https://www.nasa.gov/">NASA Website</a> - Finally, all we need to do is close off the collection and
navelements:13 </collection> 14 </nav> - Save our changes and then clear the Splunk cache, as we have in previous chapters, by entering the following url into our browser:
http://<host:port>/debug/refresh
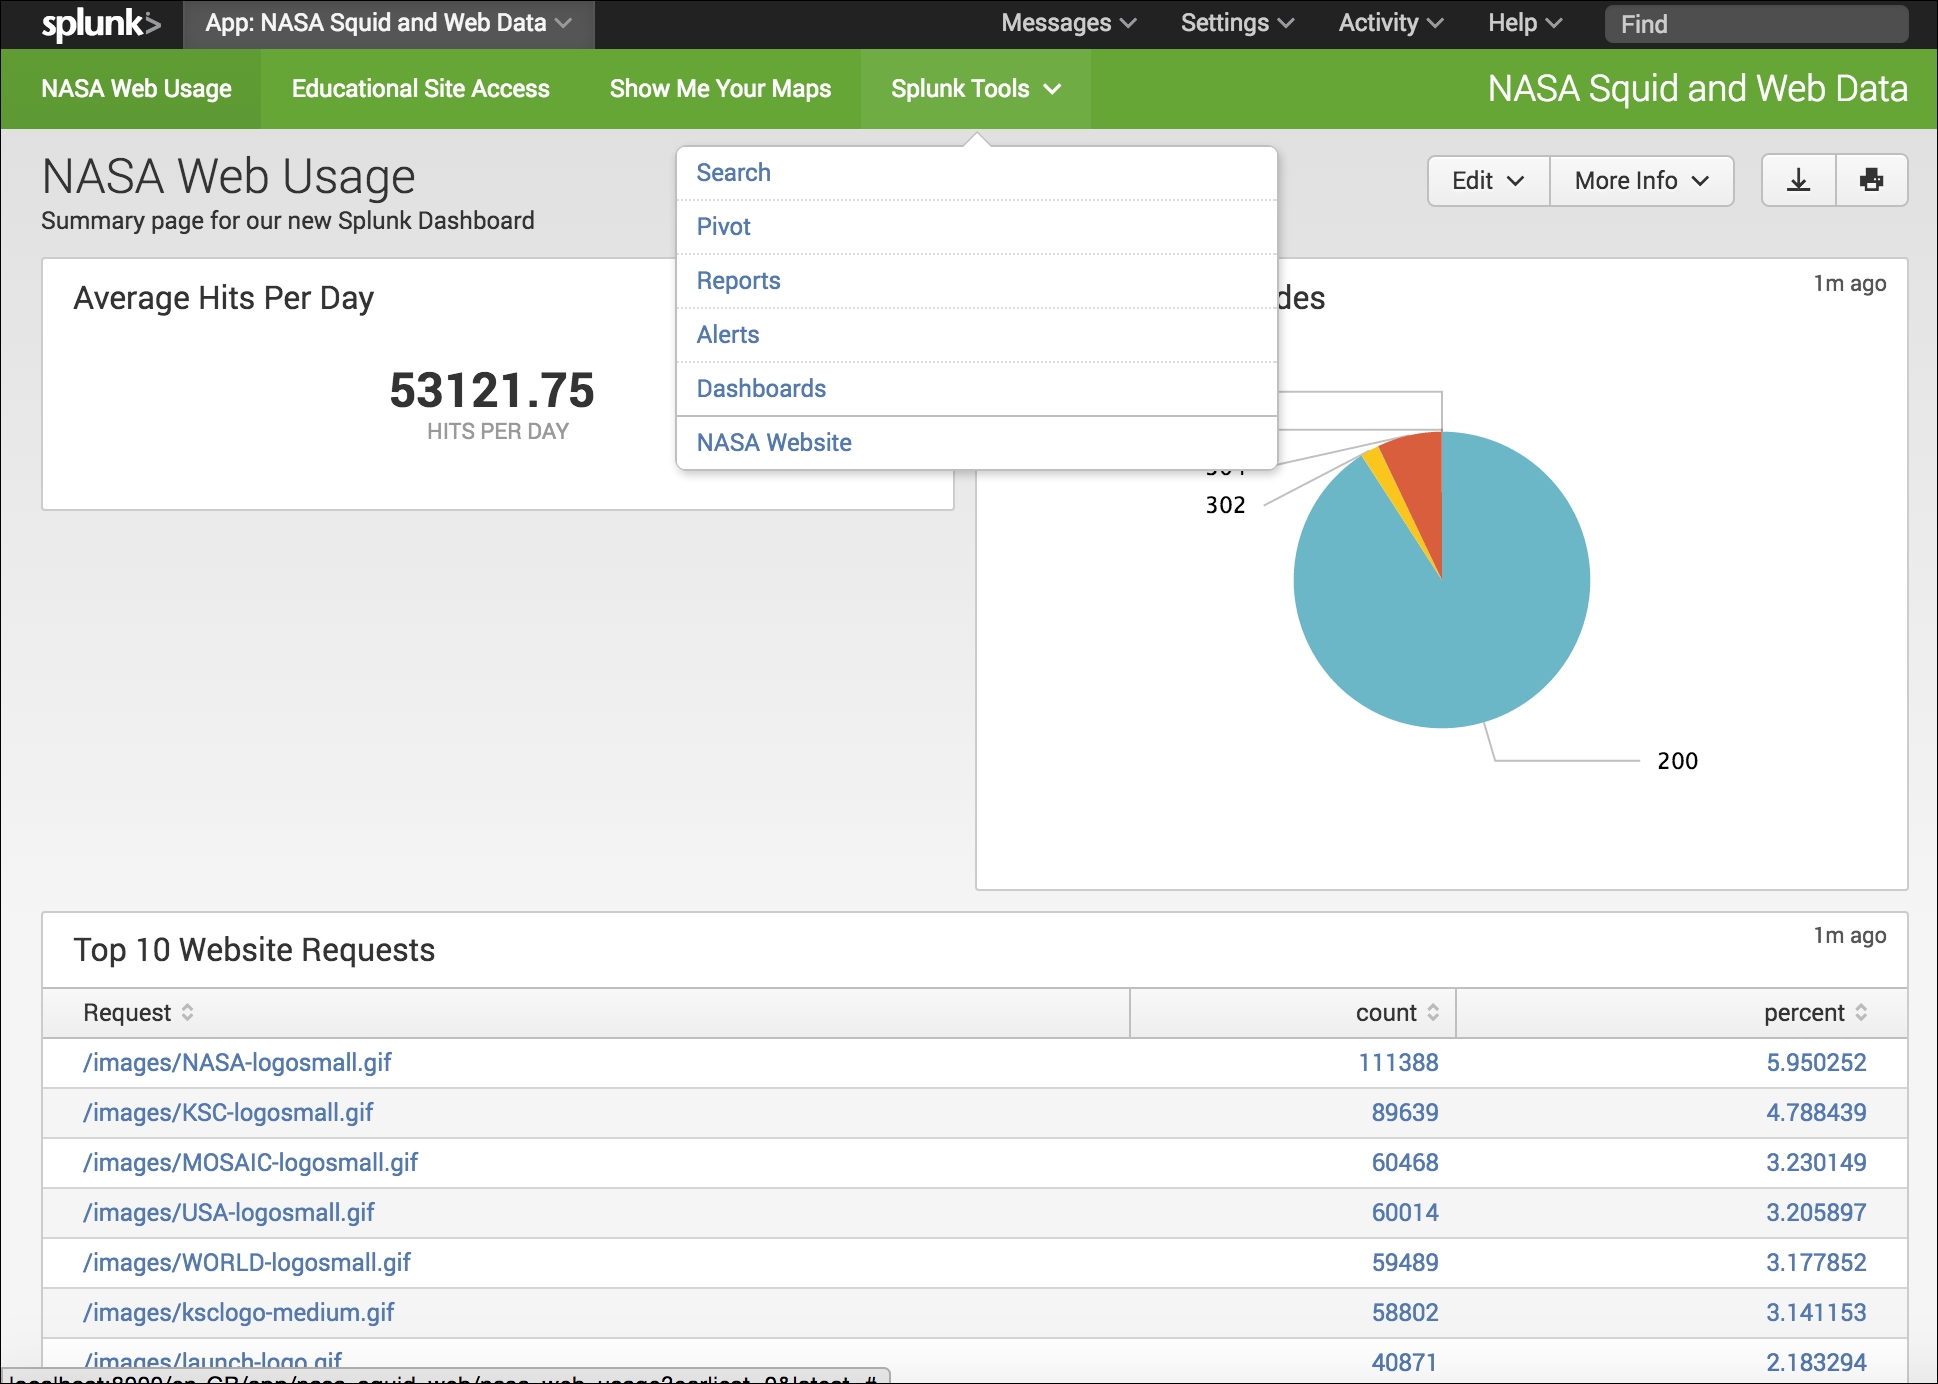
We have done a lot of work here, and if all works to plan we should be seeing a page similar to the following screenshot. We have our dashboard labels used as the menu items across the top of the SplunkApp. The last menu item also has a downwards arrow, which gives us an indication that there is a drop-down menu, and in this instance the remaining Splunk tools that we added and the current NASA website link divided from the other menu options.
If you need further information on the navigation menu within Splunk Simple XML, it can be found in the reference documentation at the link: http://docs.splunk.com/Documentation/Splunk/latest/AdvancedDev/BuildNavigation.
Commit your changes, and push them back to GitHub. Deploy to your test environment, test, and deploy to your production environment. We have taken our NASA Squid and Web Data App as far as we will in this book, and it's time for us to move onto our second example, where we use Splunk to create an App to view a biological simulation of cell growth.