6
Understanding Helm Templates
One of the fundamental features of Helm is to create and maintain the Kubernetes resources that comprise an application. Helm accomplishes this with a concept called templates. Templates represent the core component comprising Helm charts, as they are used to configure Kubernetes resources based on a given set of values.
In Chapter 4, Scaffolding a New Helm Chart, you scaffolded a new Helm chart by using the helm create command, which created basic templates under the chart’s templates/ folder. In this chapter, we will dive deep into the world of Helm templates, and at the end, we will revisit the scaffolded templates to make improvements and deploy the Guestbook frontend. By the end of the chapter, your Helm chart will be able to deploy the full Guestbook architecture—from the Redis backend added in Chapter 5, Helm Dependency Management, to the frontend that we will add later in this chapter.
Here are the main topics for this chapter:
- Helm template basics
- Template values
- Built-in objects
- Helm template functions
- Helm template control structures
- Generating release notes
- Helm template variables
- Helm template validation
- Enabling code reuse with named templates and library charts
- Creating custom resource definitions (CRDs)
- Post rendering
- Updating and deploying the Guestbook chart
Technical requirements
This chapter requires the following tools:
- minikube
- kubectl
- Helm
- Git
We will use minikube to explore several examples throughout this chapter, so feel free to start your minikube environment by running the following command:
$ minikube start
Once minikube has started, create a new namespace for this chapter, like so:
$ kubectl create namespace chapter6
If you have not already cloned the example Git repository in previous chapters, do so by running the following command:
$ git clone https://github.com/PacktPublishing/Managing-Kubernetes-Resources-using-Helm.git
Now that your environment is set up, let’s explore this chapter’s first topic—Helm templating.
Helm template basics
Helm templates are used to dynamically generate Kubernetes YAML Ain’t Markup Language (YAML) (or JavaScript Object Notation (JSON)) resources. They consume a set of default and user-provided values to generate resources that comprise a Kubernetes application. You’ve had some exposure to templates already in Chapter 4, Scaffolding a New Helm Chart, when you ran the helm create command, which generated a set of starter templates. In the Git repository cloned previously, these templates are located at chapter6/guestbook/templates/. Here’s a short snippet of the deployment.yaml Helm template, located within the chapter6/guestbook/templates/deployment.yaml file:
apiVersion: apps/v1
kind: Deployment
metadata:
  name: {{ include "guestbook.fullname" . }}
  labels:
    {{- include "guestbook.labels" . | nindent 4 }}
spec:
  {{- if not .Values.autoscaling.enabled }}
  replicas: {{ .Values.replicaCount }}
  {{- end }}
  selector:
    matchLabels:
      {{- include "guestbook.selectorLabels" . | nindent 6 }}
  template:
    metadata:
      {{- with .Values.podAnnotations }}
      annotations:
        {{- toYaml . | nindent 8 }}
      {{- end }}
      labels:
        {{- include "guestbook.selectorLabels" . | nindent 8 }}
You may find the syntax from the preceding code snippet to be odd, as it resembles a YAML file, but it contains characters that are invalid per the YAML specification. To understand this syntax, we must first talk about Go. Go is a programming language developed by Google in 2009. It is the programming language used by Kubernetes, Helm, and many other tools in the container community. A core component of the Go programming language is templates, which are used to generate files of many different formats. Helm’s template engine is built off of Go and can be thought of as a superset of Go templates. Go templates provide the fundamental syntax and control, while Helm adds extra capabilities to enhance the template engine’s capabilities.
Helm templates contain various different actions, or strings, that begin with two opening curly braces ( {{ ) and end with accompanying two closing curly braces ( }} ). Actions mark locations where data processing occurs or where control structures such as conditionals and loops are implemented. You can see different actions located throughout the code snippets and in other Helm chart templates under the templates/ directory. While actions appear in local template files, they are processed and removed during processing, such as during an installation or upgrade, to produce a valid Kubernetes YAML resource.
There are many different components such as objects, functions, and control structures that you can leverage to write actions throughout your Helm chart templates. We will explore each of these throughout this chapter. Let’s begin by discussing how the values component can be used within chart templates.
Template values
In previous chapters, we described values as parameters that are used to configure a Helm chart. Now, we will gain an understanding of how values are integrated into chart templates to dynamically generate Kubernetes resources.
Here is a basic ConfigMap template from the Git repository at chapter6/examples/values-example/templates/configmap.yaml:
apiVersion: v1
kind: ConfigMap
metadata:
  name: values-example
data:
  config.properties: |-
    chapterNumber={{ .Values.chapterNumber }}
    chapterName={{ .Values.chapterName }}
The last two lines of this template contain {{ .Values.chapterNumber }} and {{ .Values.chapterName }} actions, which are used as placeholders for the chapterNumber and chapterName values. This allows the ConfigMap to be parameterized based on the default chart values and the values the user provides during installation or upgrade.
Let’s take a look at the default chart values located at chapter6/examples/values-example/values.yaml. You can see these here:
chapterNumber: 6
chapterName: Understanding Helm Templates
Given this Values file, we would expect the default ConfigMap to be rendered like this:
apiVersion: v1
kind: ConfigMap
metadata:
  name: values-example
data:
  config.properties: |-
    chapterNumber=6
    chapterName=Understanding Helm Templates
You could verify this on your own by running the helm install command, as we have demonstrated in previous chapters, but it may be more convenient to leverage a new command, helm template, which is used to render template resources locally, but not install them to the Kubernetes cluster. The helm template command, as shown here, has the same syntax as helm install:
helm template <RELEASE_NAME> <CHART_NAME> [flags]
Let’s use this command to render the values-example chart templates locally. Proceed as follows:
- Run the helm template command, pointing the <CHART_NAME> parameter to the values-example folder, as follows:
$ helm template example chapter6/examples/values-example
- You should see the ConfigMap rendered as shown previously, with the actions replaced by chapterNumber and chapterName values, as illustrated in the following code snippet:
<skipped for brevity>
data:
config.properties: |-
chapterNumber=6
chapterName=Understanding Helm Templates
Unless we intend to install resources to the minikube environment, we will use the helm template command to quickly demonstrate templating constructs throughout this chapter. That way, you won’t have to worry about cleaning up after each exercise. We will return to using helm install at the end of this chapter when we install an updated version of the Guestbook Helm chart.
As you saw in the preceding example, templates that reference values refer to a construct called .Values each time an action is being used as a placeholder for chart values. .Values is one of several built-in objects that are at your disposal as a Helm chart developer. Let’s explore these built-in objects next.
Built-in objects
Built-in objects are essential building blocks that you can use to write your own Helm charts. As mentioned previously, they provide access to chart values by using the .Values object, but there are many more objects to explore that provide access to additional information and features.
The following table lists these built-in objects:
|
Object |
Definition |
|
.Values |
Used to access values in the values.yaml file or values that were provided using the --values and --set flags |
|
.Release |
Used to access metadata about the Helm release, such as its name, namespace, and revision number |
|
.Chart |
Used to access metadata about the Helm chart, such as its name and version |
|
.Template |
Used to access metadata about chart templates, such as their filename and path |
|
.Capabilities |
Used to access information about the Kubernetes cluster |
|
.Files |
Used to access arbitrary files within a Helm chart directory |
|
. |
The root object |
Table 6.1 – Built-in Helm objects
Each object contains fields and functions that are accessible by using dot notation. Dot notation is used to access an object’s properties. For example, imagine the following Values file is provided:
books:
  harryPotter:
    - The Sorcerer's Stone
    - The Chamber of Secrets
    - The Prisoner of Azkaban
  lotr:
    - The Fellowship of the Ring
    - The Two Towers
    - Return of the King
The .Values object would now contain the following properties:
- .Values.books.harryPotter (list of strings)
- .Values.books.lotr (list of strings)
In Helm (and Go templates), a dot (.) is also used to represent object scope. The dot represents global scope, from which all objects are accessible. A dot followed by an object name limits the scope of that object. For example, the .Values scope limits visibility to the chart’s values, and the .Release scope limits visibility to the release’s metadata. Scopes play a significant role in loops and control structures, which we will explore later in this chapter.
While the .Values object is the most common object that you will use throughout Helm chart development, there are other built-in objects that we will discuss. We’ll start with the .Release object next.
The .Release object
The .Release object is used to retrieve metadata about the Helm release being installed. Two common attributes that are used from within the .Release object are .Release.Name and .Release.Namespace, which allow chart developers to substitute the release name and namespace in their chart templates.
Consider the following example template, located at chapter6/examples/release-example/templates/configmap.yaml in the Git repository:
apiVersion: v1
kind: ConfigMap
metadata:
  name: {{ .Release.Name }}
data:
  config.properties: |-
    namespace={{ .Release.Namespace }}
In the template, we are setting the ConfigMap’s name to the name of the Helm release, and we are setting the namespace property to the release namespace.
When running the Helm install, upgrade, or template commands, you can see the {{ .Release.Name }} and {{ .Release.Namespace }} actions get replaced with their actual values, as illustrated in the following code snippet:
$ helm template release-example chapter6/examples/release-example
---
# Source: release-example/templates/configmap.yaml
apiVersion: v1
kind: ConfigMap
metadata:
  name: release-example
data:
  config.properties: |-
    namespace=default
As you can see, the ConfigMap name has been generated as release-example, and the namespace property has been generated as default (if we had selected a different namespace using the -n flag, that value would have been reflected instead). By using the .Release object, we were able to leverage the name and namespace that were provided when invoking Helm rather than creating repetitive values in values.yaml for the name and namespace.
There are several more objects besides name and namespace under .Release that you can leverage in your chart templates. The following table lists each .Release object, with the descriptions quoted from the Helm documentation at https://helm.sh/docs/chart_template_guide/builtin_objects/#helm:
|
Object |
Description |
|
.Release.Name |
The release name |
|
.Release.Namespace |
The namespace to be released into |
|
.Release.IsUpgrade |
This is set to true if the current operation is an upgrade or rollback |
|
.Release.IsInstall |
This is set to true if the current operation is an install |
|
.Release.Revision |
The revision number for this release |
|
.Release.Service |
The service that is rendering the template (this is always equivalent to the "Helm" string) |
Table 6.2 – .Release objects
We will explore the .Chart object next.
The .Chart object
The .Chart object is used to retrieve metadata from the Chart.yaml file of the Helm chart that is being installed. It is commonly used for labeling chart resources with the chart name and version. Let’s take a look at the example template at chapter6/examples/chart-example/templates/configmap.yaml from the Git repository. You can view this here:
apiVersion: v1
kind: ConfigMap
metadata:
  name: {{ .Release.Name }}
  labels:
    helm.sh/chart: {{ .Chart.Name }}-{{ .Chart.Version }}
    app.kubernetes.io/version: {{ .Chart.AppVersion }}
data:
  config.properties: |-
    chapterNumber={{ .Values.chapterNumber }}
    chapterName={{ .Values.chapterName }}
As you can see in the metadata.labels section, the template is using the {{ .Chart.Name }}, {{ .Chart.Version }}, and {{ .Chart.AppVersion }} actions, which retrieve the name, version, and appVersion fields from the Chart.yaml file. Here, you can see the Chart.yaml file for this example chart:
apiVersion: v2
name: chart-example
description: A Helm chart for Kubernetes
type: application
version: 1.0.0
appVersion: 0.1.0
When we use the helm template command to render this template locally, we see the fields from the Chart.yaml file are used in the ConfigMap resource, as illustrated here:
$ helm template chart-example chapter6/examples/chart-example
---
# Source: chart-example/templates/configmap.yaml
apiVersion: v1
kind: ConfigMap
metadata:
  name: chart-example
  labels:
    helm.sh/chart: chart-example-1.0.0
    app.kubernetes.io/version: 0.1.0
data:
  config.properties: |-
    chapterNumber=6
    chapterName=Understanding Helm Templates
The .Chart object can reference any field from the Chart.yaml file. For a full list of Chart.yaml fields, please refer to Chapter 4, Scaffolding a New Helm Chart.
The .Template object
The .Template object is used to retrieve metadata about the current template that is being rendered. It is the simplest built-in object (besides .Values) and contains only two objects underneath, as outlined here:
- .Template.Name—The file path to the template being rendered (such as mychart/templates/mytemplate.yaml)
- .Template.BasePath—The path leading up to the templates directory (such as mychart/templates)
In our experience, the .Template object is rarely used, but it can be useful if you need to reference the template’s file path in your chart.
The .Capabilities object
The .Capabilities object is used for getting information about the target Kubernetes cluster. There are many objects underneath .Capabilities, but the most common are .Capabilities.APIVersions.Has and .Capabilities.KubeVersion.
The .Capabilities.APIVersions.Has object is a function that returns a Boolean based on whether or not the Kubernetes cluster has a given application programming interface (API) version. Here is an example invocation:
{{ .Capabilities.APIVersions.Has "batch/v1" }}This action would return true or false based on whether or not the cluster contains the "batch/v1” API version. .Capabilities.APIVersions.Has is most commonly used in conditional logic to install a resource only if the cluster contains a particular API version. Conditional logic will be covered in the Helm template control structures section later in this chapter.
The other commonly used .Capabilities object is .Capabilities.KubeVersion. Use this property to retrieve the version of the Kubernetes cluster. For example, the following action would return a v1.21.2 string (or similar, based on the version of Kubernetes being used):
{{ .Capabilities.KubeVersion }}Other .Capabilities objects, such as .Capabilities.KubeVersion.Major and .Capabilities.KubeVersion.Minor, allow chart developers to get only the major or minor version of the Kubernetes cluster (as opposed to the whole Semantic Versioning (SemVer) version). For a full list of objects under .Capabilities, visit the Helm documentation at https://helm.sh/docs/chart_template_guide/builtin_objects/#helm.
The .Files object
Occasionally, you may encounter use cases where you need to include contents from files in your chart templates. You can include file contents by using the .Files object. This is used primarily with ConfigMap and Secret resources, where the data section is provided or supplemented by a separate configuration file. Note that files must be located within the Helm chart directory (but outside of the templates/ folder) in order to be referenced with .Files.
The .Files object contains several other objects underneath. The most basic is .Files.Get, which is a function that retrieves the contents of the provided filename. Imagine a ConfigMap template such as this (this template is also located in the Git repository at chapter6/examples/files-example/get):
apiVersion: v1
kind: ConfigMap
metadata:
  name: {{ .Release.Name }}
data:
  config.properties: |-
    {{ .Files.Get "files/config.properties" }}
The .Files.Get function in the example is being used to get the contents of the files/config.properties file, which is a path relative to the Helm chart root. This file is located at chapter6/examples/files-example/get/files/config.properties in the Git repository and contains the following:
chapterNumber=6
Now, when we render this template, we will see the following output:
$ helm template basic-files-example chapter6/examples/files-example/get
---
# Source: files-example/templates/configmap.yaml
apiVersion: v1
kind: ConfigMap
metadata:
  name: basic-files-example
data:
  config.properties: |-
    chapterNumber=6
Three other important objects under .Files are .Files.Glob, .Files.AsConfig, and .Files.AsSecret. First, .Files.Glob, is a function that returns a list of file objects that match a provided global (glob) pattern. A glob pattern is a set of names with wildcard characters (*). For example, the files/* glob would match each file under the files/ folder.
The .Files.Glob object is commonly used with .Files.AsConfig and .Files.AsSecrets objects. .Files.AsConfig is a function used to return the file as a YAML dictionary, where the key is the name of the file and the value is the file contents. It is called AsConfig because it is useful when formatting different ConfigMap data entries. The .Files.AsSecrets function is similar, but in addition to returning files as a YAML map, AsSecrets also Base64-encodes the contents of the file—this is useful for creating data for Kubernetes Secrets. Do keep in mind that sensitive files should never be checked into a Git repository in plaintext (though we have one such file in the example Git repository for demonstration purposes).
The following templates demonstrate the usage of these objects and are also located in the Git repository at chapter6/examples/files-example/glob:
---
apiVersion: v1
kind: ConfigMap
metadata:
  name: {{ .Release.Name }}
data:
{{ (.Files.Glob "files/chapter*").AsConfig | indent 2 }}
---
kind: Secret
<skipped for brevity>
Data:
{{ (.Files.Glob "files/secret*").AsSecrets | indent 2 }}
The files folder contains the following files:
- chapter.properties
- secret.properties
When this template is rendered, the contents of both files are generated as YAML maps under the ConfigMap’s data, as illustrated in the following code snippet:
$ helm template glob-example chapter6/examples/files-example/glob
---
# Source: files-example/templates/configmap.yaml
apiVersion: v1
kind: ConfigMap
metadata:
  name: glob-example
data:
  chapter.properties: |
    chapterNumber=6
    chapterName=Understanding Helm Templates
---
# Source: files-example/templates/secret.yaml
apiVersion: v1
kind: Secret
<skipped for brevity>
  secret.properties: dXNlcm5hbWU9bXl1c2VyMTIzCnBhc3N3b3JkPW15cGFzczEyMwo=
In the previous example, you likely noticed the usage of | indent 2. This represents a pipeline and function that will be explored thoroughly in the next section, Helm template functions. For now, all you need to worry about is that the output is indented by two spaces in order to produce properly formatted ConfigMap and Secret resources.
Other .Files objects are .Files.GetBytes, which returns a file as an array of bytes, and .Files.Lines, which is used to iterate over each line of a file.
Helm template functions
One of the common traits of any templating language is the ability to transform data. Thus far, when referring to .Values or any of the other built-in objects within Helm, we have only made reference to the resource as-is, without any form of data manipulation. Where Helm really begins to shine and show its true power is its ability to perform complex data processing within templates through the use of template functions and pipelines.
Since Helm uses Go as the basis for its own templating language, it inherits the capabilities provided by functions. A Go template function is comparable to any other function that you may have interacted with in another programming language. Functions contain logic designed to consume certain inputs and provide an output based on the inputs that were provided.
When using Go templates, functions make use of the following syntax:
functionName arg1 arg2 . .
A function that is commonly used within Helm charts is the quote function, as it encompasses quotation marks surrounding an input string. Take the following ConfigMap located in chapter6/examples/functions-example/templates/configmap.yaml from the Git repository:
apiVersion: v1
kind: ConfigMap
metadata:
  name: {{ .Release.Name }}
  labels:
    helm.sh/chart: {{ .Chart.Name }}-{{ .Chart.Version }}
    app.kubernetes.io/version: {{ .Chart.AppVersion }}
  annotations:
    {{- toYaml .Values.annotations | nindent 4 }}
data:
  path: {{ .Values.fs.path }}
  config.properties: |-
    {{- (.Files.Get "files/chapter-details.cfg") | nindent 4}}
The path property in the preceding ConfigMap represents a filesystem location that is consumed by an application, as shown in the following code snippet. The value referenced by this property is located in the values.yaml file:
fs:
  path: /var/props/../configs/my app/config.cfg
The resulting template would be rendered as follows (some fields were omitted for brevity):
...
data:
  path: /var/props/../configs/my app/config.cfg
...
A potential downstream issue within a consuming application could result if it did not contain logic to appropriately manage whether spaces could be present within the input.
To avoid these potential issues, add the quote function that will surround the property with quotation marks, as shown in the following code snippet:
apiVersion: v1
kind: ConfigMap
metadata:
  name: {{ .Release.Name }}
  labels:
    helm.sh/chart: {{ .Chart.Name }}-{{ .Chart.Version }}
    app.kubernetes.io/version: {{ .Chart.AppVersion }}
  annotations:
    {{- toYaml .Values.annotations | nindent 4 }}
data:
  path: {{ quote .Values.fs.path }}
...
Use the helm template command to render the chart locally to see the function in action, as follows:
$ helm template functions-example chapter6/examples/functions-example
The result upon template rendering produces a/var/props/../configs/my app/config.cfg string that not only enhances the readability of the property but protects any consuming application.
quote is just one of over 60 functions included within Helm. While some of the functions are sourced from Go templates, the majority are part of the Sprig template library. The Sprig library includes functions to implement more complex capabilities within charts, such as the ability to perform mathematical formulas, conversion operations, and the management of data structures, including lists and dictionaries.
The functions inherited from Go and Sprig can be found in the Go documentation at https://pkg.go.dev/text/template#hdr-Functions and in the Sprig template library at http://masterminds.github.io/sprig/.
One of the more recent functions added to Helm is the ability to query resources from a running Kubernetes environment through the use of the lookup function. Helm chart developers can make reference to a single resource or references of a given type across a namespace or cluster and inject the results within their templates.
The lookup function takes the following form:
lookup <apiVersion> <kind> <namespace> <name>
For example, to query a ConfigMap called props in the chapter6 namespace, use the following function:
lookup "v1" "ConfigMap" "chapter6" "props"
The result from the lookup function is a dictionary that can be further navigated as necessary to retrieve individual properties on the returned resource.
So, to extract a property defined on a ConfigMap called author containing the default name of the author for all WordPress posts, the following code would be added within a Helm template:
{{ (lookup "v1" "ConfigMap" "chapter6" "props").data.author }}As you can see, we are first retrieving a dictionary of values containing the props ConfigMap and then navigating to the author property on the ConfigMap data structure.
You are not limited to querying for a single resource when using the lookup function and can instead search for all resources of a given type within a single namespace or within all namespaces. This can be accomplished by substituting empty quotes for either the namespace and/or resource name, as shown in the following template:
lookup "v1" "ConfigMap" "chapter6" ""
One final important note when working with the lookup function is that it can only be used when resources are being deployed to a Kubernetes cluster, such as through the helm install and helm upgrade commands. This is due to the requirement that there be an active connection to a Kubernetes cluster as part of the execution process being performed. For commands such as helm template, where templates are being rendered locally and there is no interaction with a Kubernetes cluster, the lookup function will not return any meaningful results.
Helm functions and their ability to influence Helm template commands are just the first steps toward adding more dynamic mechanisms to chart templates. Multiple template commands can also be chained together to perform a series of complex actions through the use of pipelines.
Pipelines are a borrowed concept from Unix where the result from one command is fed in as the input of another command. You can see an illustration of this in the following code snippet:
cat file.txt | grep helm
Commands are separated by the pipe (|) character (hence the name pipeline) where in this case, the output of the contents of the file.txt file is provided as an input to the grep command. grep processes the input, filters out any presence of the word helm from the input, and provides it as an output that is printed to the screen.
Pipelines can be applied to Helm in a similar fashion. Let’s return to the prior example where we introduced the quote function to add quotation marks to a filesystem path. Instead of using the value property as a function argument, inverse the order to pipe the contents of the value into the quote function, as follows:
{{ .Values.fs.path | quote }}The end result remains the same whether calling the function directly or using the pipeline approach. However, in practice, you will find that pipelines are the preferred option over directly invoking functions, given the extensibility of chinning template commands.
You may also have noticed that the fs.path value includes a reference to a relative path (denoted by ..). This may be difficult for some to read and or understand if they are unfamiliar with the syntax. Fortunately, there is a function included in the Sprig library called clean that can resolve the path fully and remove any relative paths automatically. This function can be added to the existing pipeline, as shown here:
{{ .Values.fs.path | clean | quote }}In the ConfigMap within the functions-example Helm chart from the Git repository, apply the preceding changes and then use the helm template command to see the changes in action. Upon instantiation, the rendered template would look like this:
"/var/configs/my app/config.cfg"
Functions and pipelines are both extensively used within Helm, and it is important that as a chart developer, you have insights into the available options in order to design charts effectively. Let’s take a moment to look at a few more commonly used functions.
Values files, as we have seen, contain a dictionary of key/value pairs. While individual key/value pairs can be referenced, there are plenty of situations where a deeply nested structure would want to be injected instead. Fortunately, several Helm functions can help in this situation.
As you recall, the YAML language is very particular about the specific indentation and spacing of content. To account for this, Helm provides the toYaml function, which allows a dictionary of values to be provided, and for it to be formatted appropriately, regardless of how deeply nested it is. An example of this can be found within the ConfigMap that we have been using thus far in this section where a dictionary of annotations is injected from properties defined in the Values file, as illustrated in the following code snippet:
apiVersion: v1
kind: ConfigMap
metadata:
  name: {{ .Release.Name }}
  labels:
    helm.sh/chart: {{ .Chart.Name }}-{{ .Chart.Version }}
    app.kubernetes.io/version: {{ .Chart.AppVersion }}
  annotations:
    {{- toYaml .Values.annotations | nindent 4 }}
data:
…
The following content is defined within the chart values.yaml file:
annotations:
  publisher: "Packt Publishing"
  title: "Managing Kubernetes Resources Using Helm"
You may also notice that the result of the toYaml function is then piped to another function called nindent. The use of this function is a necessary requirement to manage the formatting of the content; otherwise, a rendering error would occur. Both indent and nindent provide formatting capabilities by indenting content a certain number of spaces, crucial when working with YAML. The difference between indent and nindent is that nindent will add a newline character after each line of input, a required step in our use case as there are multiple annotation properties defined within the Values file.
Process the chart using the helm template command to visualize how these values would be rendered, as follows:
$ helm template functions-example chapter6/examples/functions-example
apiVersion: v1
kind: ConfigMap
metadata:
  name: functions-example
  labels:
    helm.sh/chart: functions-example-0.1.0
    app.kubernetes.io/version: 1.16.0
  annotations:
    publisher: Packt Publishing
    title: Managing Kubernetes Resources Using Helm
The final Helm function that we will look at in detail is used when performing more complex rendering of templates. Earlier in this chapter, you learned how external files can be referenced within charts and their values injected into templates using the built-in .Files object. While Helm’s templating capabilities can be used to evaluate resources within template files, there are cases where there is a need to perform evaluation against externally sourced files. Take a look here at the ConfigMap once again and note the config.properties key:
  config.properties: |-
    {{- (.Files.Get "files/chapter-details.cfg") | nindent 4}}
Instead of including the values directly within the ConfigMap, they are instead sourced from a file located at files/chapter-details.cfg, as illustrated in the following code snippet:
chapterNumber={{ .Values.book.chapterNumber }}
chapterName={{ .Values.book.chapterName }}
However, when the chart is rendered using helm template, the desired values are not substituted as we would expect, as we can see here:
  config.properties: |-
    chapterNumber={{ .Values.book.chapterNumber }}
    chapterName={{ .Values.book.chapterName }}
This situation occurs since template processing only occurs by default, within files in the templates folder and not in any externally sourced content. To apply templating to external sources that are brought into templates, the tpl function can be used, as shown here:
...
  config.properties: |-
    {{-  tpl (.Files.Get "files/chapter-details.cfg") . | nindent 4}}
What you may be wondering about when looking at the updated content of the ConfigMap is the presence of the period (.) before the pipe. This character indicates the scope that will be passed to the templating engine. We will cover this topic in detail in the next section.
Use the helm template command to confirm that values are substituted appropriately thanks to the inclusion of the tpl function, as follows:
$ helm template functions-example chapter6/examples/functions-example
...
config.properties: |-
chapterNumber=6
chapterName=Understanding Helm Templates
The template functions addressed in this section only scratch the surface of the functions provided by Helm. The following table lists a few other important functions that chart developers should be aware of in order to fully take advantage of what Helm has to offer:
|
Function |
Description |
Example |
|
printf |
Returns a string based upon a formatting string and arguments |
printf "A cat named %s has %d lives." $name $numLives |
|
default |
Assigns a string “placeholder” if the content of $value is nil or empty |
default "placeholder" $value |
|
list |
Returns a new list based upon a series of inputs |
list "ClusterIP" "NodePort" "LoadBalancer" |
|
has |
Determines if an element is present in a list |
has 4 $list |
|
b64enc/b64dec |
Encodes or decodes with Base64. Useful when working with Secrets. |
b64enc $mySecret |
|
atoi |
Convert a string to an integer |
atoi $myIntegerString |
|
add |
Adds a list of integers |
add 1 2 3 |
|
upper/lower |
Convert the entire string to uppercase or lowercase |
upper $myString |
|
now |
Gets the current date and time |
Now |
|
date |
Formats a date in the specified format |
now | date "2006-01-02" |
Table 6.3 – A list of common Helm functions
With a better understanding of the ways that Helm can be used to manipulate and format content within templates using functions, let’s turn to how we can introduce flow control to manage the content that will be rendered.
Helm template control structures
The way in which templates are generated can be managed by chart developers thanks to the functionality provided by control structures. Included in the actions component of the Go templates, control structures enable fine-grained flow control for determining the types of resources that should be generated and how they are rendered.
The following control-structure keywords are available:
- if/else—Creating conditional blocks for resource generation
- with—Modifying the scope of resources being generated
- range—Looping over a set of resources
There are occasions where portions of a template would need to be included or excluded based on some sort of condition. In this situation, an if/else action can be used. Here is a basic example for conditionally determining whether to include a readiness probe as part of a deployment resource:
{{- if .Values.readinessProbe.enabled }}
readinessProbe:
  httpGet:
    path: /healthz
    port: 8080
    scheme: HTTP
  initialDelaySeconds: 30
  periodSeconds: 10
{{- end }}
The readinessProbe section will only be included when the condition evaluates to true. However, it is important to note that the condition is actually a pipeline where multiple statements can be chained together to aid in the creation of complex conditionals. The logic behind the if/else action can also be interpreted as follows:
{{ if PIPELINE }}
  # Do something
{{ else if OTHER PIPELINE }}
  # Do something else
{{ else }}
  # Default case
{{ end }}
The conditional statements and their associated if/else action should look familiar to anyone with prior programming experience. But what is the logic behind determining whether a pipeline is true or false?
A pipeline fails to evaluate to true when the following is returned:
- A false Boolean
- A numeric 0
- An empty string
- nil (whether it be empty or null)
- An empty collection
So, in the previous scenario where conditional logic is applied to the readiness probe, the probe would only be included if the value is readinessProbe.enabled=true.
Nesting of conditionals can also be applied within templates. The following code snippet illustrates how conditionals can be used to determine the type of probe that should be applied to readinessProbe:
 {{- if .Values.readinessProbe.enabled }}
readinessProbe:
{{- if eq .Values.readinessProbe.type "http" }}
  httpGet:
    path: /healthz
    port: 8080
    scheme: HTTP
  initialDelaySeconds: 30
  periodSeconds: 10
{{- else }}
  tcpSocket:
    port: 8080
{{- end }}
{{- end }}
An httpGet probe type will be applied when the readinessProbe.type property is equal to "http". Otherwise, a Transmission Control Protocol (TCP) probe will be used.
eq (short for equals) within the if statement is one of the available Boolean functions that test the equality of the two arguments. When the readinessProbe.type is equal to http, the httpGet probe type will be applied. Otherwise, a TCP probe type will be used.
A full list of available Boolean functions is provided here:
- and
- or
- not
- eq (short for equals)
- ne (short for not equals)
- lt (short for less than)
- le (short for less than or equal to)
- gt (short for greater than)
- ge (short for greater than or equal to)
Another method of flow control available for chart developers is the ability to modify the scope of the resources being rendered. A period (.) represents the current scope, and thus far, we have been operating at the root or top-level scope. Each of the built-in objects that were covered earlier in this chapter is available at this level. However, when working with objects with deeply nested structures, there may be a desire to modify the scope being applied to avoid rather unwieldy property references.
The with action provides these necessary capabilities to modify the current scope.
Take a look at the flowcontrol-example Helm chart located at chapter6/examples/flowcontrol-example within the Git repository. Included within the values.yaml file is a deeply nested dictionary of properties, as illustrated here:
book:
  chapter6:
    props:
      chapterNumber: 6
      chapterName: Understanding Helm Templates
These values should look familiar given that they have been used several times in this chapter, but note that they are now placed into a deeply nested dictionary. They could be referenced in the following manner:
chapterNumber: {{ .Values.book.chapter6.props.chapterNumber }}
chapterName: {{ .Values.book.chapter6.props.chapterName }}
However, by using the with action, the current scope is changed so that references within the block begin at .Values.book.chapter6.props, greatly increasing the readability and reducing the complexity. You can see an illustration of this in the following code snippet:
{{- with .Values.book.chapter6.props }}
  chapterNumber: {{ .chapterNumber }}
  chapterName: {{ .chapterName }}
{{- end }}
This is illustrated within the ConfigMap located at chapter6/examples/flowcontrol-example/templates/configmap.yaml. Render the chart using the helm template command to confirm that values within the ConfigMap are generated properly, as follows:
$ helm template flowcontrol-example chapter6/examples/flowcontrol-example
One very important note when modifying scope is that chart developers may be caught off guard when attempting to reference any built-in objects such as .Release or .Chart within a block where the current scope has changed.
Attempting to use the following templating within the ConfigMap would result in an error upon instantiation:
{{- with .Values.book.chapter6.props }}
  chapterNumber: {{ .chapterNumber }}
  chapterName: {{ .chapterName }}
  ChartName: {{ .Chart.Name }}
{{- end }}
Error: template: flowcontrol-example/templates/configmap.yaml:12:22: executing "flowcontrol-example/templates/configmap.yaml" at <.Chart.Name>: nil pointer evaluating interface {}.Name
This is due to the fact that the current scope within the with statement is no longer at the root scope where the built-in objects reside. Fortunately, Helm provides a way to reference the root scope by using $. By adding $ to the .Chart.Name reference, a rendering error will no longer occur. You can see this in use in the following code snippet:
{{- with .Values.book.chapter6.props }}
  chapterNumber: {{ .chapterNumber }}
  chapterName: {{ .chapterName }}
  ChartName: {{ $.Chart.Name }}
{{- end }}
The final flow-control action that chart developers need to be aware of is range—this is useful when performing foreach style iteration over lists and dictionaries. Similar to the with action, the range action also modifies the scope of resources being rendered.
For example, say the following were included as values within a values.yaml file to represent ports associated with a Service resource:
service:
  ports:
    - name: http
      port: 80
      targetPort: 8080
    - name: https
      port: 443
      targetPort: 8443
By using the range action, these values can be then applied to the Service, as shown in the following example:
apiVersion: v1
kind: Service
metadata:
  name: {{ .Release.Name }}
  labels:
    helm.sh/chart: {{ .Chart.Name }}-{{ .Chart.Version }}
    app.kubernetes.io/version: {{ .Chart.AppVersion }}
spec:
  type: ClusterIP
  ports:
  {{- range .Values.service.ports }}
    - port: {{ .port }}
      targetPort: {{ .targetPort }}
      protocol: TCP
      name: {{ .name }}
  {{- end }}
  selector:
    app: {{ .Release.Name }}
The range action modifies the scope in a similar fashion as the with action so that within the block, the current scope represents each port within the ports list during each iteration of the loop and can be referenced accordingly. An example of this in practice can be found in the flowcontrol-example chart within the Git repository located at chapter6/examples/flowcontrol-example.
Generating release notes
One special type of Helm template is called the NOTES.txt file, located in a Helm chart’s templates/ folder. This file is used to dynamically generate usage instructions (or other details) for applications once they are installed with Helm.
A NOTES.txt file uses the same exact templating syntax as Kubernetes resource templates and can be seen in the following example:
Follow these instructions to access your application.
{{- if eq .Values.serviceType "NodePort" }}
export NODE_PORT=$(kubectl get --namespace {{ .Release.Namespace }} -o jsonpath="{.spec.ports[0].nodePort}" services {{.Release.Name }})
export NODE_IP=$(kubectl get nodes --namespace {{ .Release.Namespace }} -o jsonpath="{.items[0].status.addresses[0].address}")
echo "URL: http://$NODE_IP:$NODE_PORT
{{- else }}
export SERVICE_IP=$(kubectl get svc --namespace {{ .Release.Name }} wordpress --template "{{ range (index .status.loadBalancer.ingress 0) }}{{.}}{{ end }}")
echo "URL: http://$SERVICE_IP"
{{- end }}
These examples would provide instructions on how to access applications deployed by the chart. They would be displayed during the install, upgrade, and rollback phases, and can be recalled by running the helm get notes command. By providing a NOTES.txt file, chart developers can provide additional insight on how to better use applications that have just been deployed.
In the next section, we will discuss Helm template variables.
Helm template variables
In addition to leveraging values and other built-in objects, chart developers can create variables of their own within chart templates to provide additional processing options. A common use case for this approach is flow control, but template variables can serve other use cases as well.
A variable in a chart template is defined as follows:
{{ $myvar := "Hello World!" }}The preceding example creates a variable called myvar and sets the value to a string equaling to Hello World!. Variables can be assigned to objects as well, such as a chart’s values, as illustrated here:
{{ $myvar := .Values.greeting }}Once a variable is defined, it can be referenced in the following way:
data:
  greeting.txt: |-
    {{ $myvar }}
Another example of using variables is in a range block, where variables capture the index and value of list iterations, as illustrated in the following code snippet:
data:
  greetings.txt
{{- range $index, $value := .Values.greetings }}
    Greeting {{ $index }}: {{ $value }}
{{- end }}
index represents the current loop iteration number and value represents the value from the list for the iteration. The previous snippet is rendered as follows:
data:
  greetings.txt
    Greeting 0: Hello
    Greeting 1: Hola
    Greeting 2: Hallo
Variables can also simplify the processing of map iterations, as shown here:
data:
  greetings.txt
{{- range $key, $val := .Values.greetings }}
    Greeting in {{ $key }}: {{ $val }}
{{- end }}
A possible result might look like this:
data:
  greetings.txt
    Greeting in English: Hello
    Greeting in Spanish: Hola
    Greeting in German: Hallo
Another common use case for Helm variables is to refer to values outside of the current scope.
Consider the following with block:
{{- with .Values.application.configuration }}
My application is called {{ .Release.Name }}
{{- end }}
A template such as this one would fail to process since .Release.Name is not under the scope of .Values.application.configuration. One way this can be remedied is by setting a variable to .Release.Name above the with block, as follows:
{{ $appName := .Release.Name }}
{{- with .Values.application.configuration }}
My application is called {{ $appName }}
{{- end }}
While this is a possible solution to this problem, the approach of using a dollar sign ($) to refer to the global scope is preferred as it requires fewer lines to configure and is easier to read as the complexity increases. In this case, this template could be rewritten like so:
{{- with .Values.application.configuration }}
My application is called {{ $.Release.Name }}
{{- end }}
We will explore template validation next.
Helm template validation
When working with Kubernetes and Helm, input validation is automatically performed by the Kubernetes API server when a new resource is created. This means that if an invalid resource is created by Helm, an error message will be returned by the API server, resulting in a failed installation. Although Kubernetes performs input validation, there may still be cases in which chart developers will want to perform validation before the resources reach the API server, such as to return a simple error message or to limit the range of possibilities to the user.
In Helm, input validation refers to validating user-provided values to ensure that users have provided a proper set of values. You can perform this validation in three different ways (or a combination of these three), as follows:
Let’s begin exploring input validation by first looking at the fail function.
The fail function
The fail function is used to immediately fail the Helm installation and is often used in cases where users have provided an invalid value. In this section, we’ll explore an example use case of the fail function that restricts user input and halts the installation if the user has provided a value outside of the expected set of values.
Many Helm charts support values for setting the Kubernetes Service type. There are many different Service types that a user could choose from, but here are a few:
- ClusterIP: Assigns an Internet Protocol (IP) address to the Service. Reachable only from within the cluster.
- NodePort: Exposes a port on each Kubernetes node. Reachable from outside the cluster.
- LoadBalancer: Creates a load balancer on the cloud provider where Kubernetes is deployed, if applicable.
Let’s assume that we want to restrict users to be able to only create a ClusterIP or NodePort Service. We can use the fail function to fail and provide an error message if the Service type is not one of these two types.
The example in the Git repository, located at chapter6/examples/fail-example, demonstrates this use case. In the values.yaml file, we see the following value:
service:
  type: ClusterIP
In the service.yaml template (located in the chart’s templates/ folder), we see the following lines of code:
{{- $serviceTypes := list "ClusterIP" "NodePort" }}
{{- if has .Values.service.type $serviceTypes }}
  type: {{ .Values.service.type }}
{{- else }}
  {{- fail "value 'service.type' must be either 'ClusterIP' or 'NodePort'" }}
{{- end }}
In the previous template snippet, we first created a variable called serviceTypes and set it to a list of strings, containing the ClusterIP and NodePort types. Then, in an if action, we used the has function to determine whether or not the service.type value was included in the serviceTypes list, representing the set of permitted values. If the value provided was found, then we assume that the input was valid and render the service type and proceed with the installation. Otherwise, the fail function would be invoked, failing the installation and displaying to the user a message that explains the reason for the failure.
Since the default service is already ClusterIP (as seen in the values.yaml file), we know that running helm template or helm install without providing any additional values would be successful. But let’s see what happens if we try to set the service.type value to an invalid setting, such as LoadBalancer. This is what we’d see:
$ helm template fail-example chapter6/examples/fail-example --set service.type=LoadBalancer
Error: execution error at (fail-example/templates/service.yaml:10:6): value 'service.type' must be either 'ClusterIP' or 'NodePort'
As you can see in the error message, the fail function caused rendering to fail early and displays an error message that was coded in the Service template.
Let’s look at the next way to perform input validation—the required function.
The required function
The required function, as with fail, is also used to halt template rendering. The difference is that, unlike fail, the required function is used to ensure that a value is not left blank when a chart’s templates are rendered. It is named as such because it requires a user to provide a value when specified.
Take a look at this snippet of the values.yaml file from the chart at chapter6/examples/required-example:
service:
  type:
In the service.yaml template for this chart, we see the following output:
spec:
  type: {{ required "value 'service.type' is required" .Values.service.type }}
This invocation of required checks to see if the string represented by the service.type value is empty. If it is empty, rendering fails and an error message is displayed. Otherwise, it renders the service.type value.
We can see this in action by using the helm template command, as follows:
$ helm template required-example chapter6/examples/required-example
Error: execution error at (required-example/templates/service.yaml:6:11): value 'service.type' is required
As expected, we receive an error message stating that the service.type value is required. The user can then remedy this error by providing a value for service.type by using either the --set or --values flags.
Let’s explore the final validation method that we will touch upon—the values.schema.json file.
The values.schema.json file
The values.schema.json file is used to define and enforce a schema for your chart’s values. Whereas the required and fail functions are invoked from within chart templates, the values.schema.json file allows you to set value requirements and constraints in a single location. This file also adds additional validation capabilities, such as setting minimums and maximums for integer values.
The values.schema.json file is based on the JSON Schema vocabulary. An exhaustive overview of JSON Schema is out of scope for this book, but you can explore the vocabulary yourself by visiting http://json-schema.org/specification.html.
Let’s review an example values.schema.json file, located in the chart at chapter6/examples/schema-example within the Git repository. You can see a representation of this here:

Figure 6.1 – Sample values.schema.json file
This schema provides validation for the following objects under .Values:
|
Object |
Validation |
|
.Values.image |
Ensures that the image object exists |
|
.Values.image.repository |
Ensures that the image.repository value exists and is a string |
|
.Values.image.tag |
Ensures that the image.tag value exists and is a string |
|
.Values.service |
Ensures that the service object exists |
|
.Values.service.type |
Ensures that the service.type value exists and is set to either ClusterIP or NodePort |
|
.Values.service.port |
Ensures that the service.port value exists and is greater than or equal to 8080 |
Table 6.4 – Values that are validated in the example values.schema.json file
As shown in the preceding table, there is a lot of robust validation being performed by providing the values.schema.json file. More values could be added to the schema file, but we’ve only included a small amount for demonstration purposes. Sometimes, it is useful to include all supported values in the values.schema.json file for purposes of self-documentation or to ensure that all values are strictly validated.
When using a values.schema.json file, error messages are handled for you automatically. For example, let’s see what happens if we try to set service.type to LoadBalancer (which is not supported in the enumerator (enum) defined in the schema). Here’s the result:
$ helm template schema-example chapter6/examples/schema-example --set service.type=LoadBalancer
Error: values don't meet the specifications of the schema(s) in the following chart(s):
schema-example:
- service.type: service.type must be one of the following: "ClusterIP", "NodePort"
Notice we did not have to specify the specific error message to return to the user—the JSON Schema library provided it for us.
In this section, we reviewed three different input validation strategies. Next, we’ll look at enabling template reuse with named templates and library charts.
Enabling code reuse with named templates and library charts
When creating template files, there may be boilerplate or repetitive blocks of YAML among the different Kubernetes resources in a chart.
For example, you may strive to use a consistent set of labels for each resource, as illustrated here:
labels:
  "app.kubernetes.io/instance": {{ .Release.Name }}
  "app.kubernetes.io/managed-by": {{ .Release.Service }}
  "helm.sh/chart": {{ .Chart.Name }}-{{ .Chart.Version }}
  "app.kubernetes.io/version": {{ .Chart.AppVersion }}
The preceding labels could be copy-pasted manually throughout your templates, but this would be cumbersome, especially if you wanted to make updates to these labels in the future. To help reduce the amount of boilerplate code and to enable reuse, Helm provides a construct called named templates.
Named templates, as with regular Kubernetes templates, are defined under the templates/ directory. They begin with an underscore and end with the .tpl file extension. Many charts (including our Guestbook chart) leverage a file called _helpers.tpl that contains these named templates, though the file does not need to be called helpers. When creating a new chart with the helm create command, this file is included in the scaffolded set of resources.
To create a named template, chart developers can leverage the define action. The following example creates a named template that can be used to encapsulate resource labels:
{{- define "mychart.labels" }}
labels:
  "app.kubernetes.io/instance": {{ .Release.Name }}
  "app.kubernetes.io/managed-by": {{ .Release.Service }}
  "helm.sh/chart": {{ .Chart.Name }}-{{ .Chart.Version }}
  "app.kubernetes.io/version": {{ .Chart.AppVersion }}
{{- end }}
The define action takes a template name as an argument. In the preceding example, the template name is called mychart.labels. The common convention for naming a template is $CHART_NAME.$TEMPLATE_NAME, where $CHART_NAME is the name of the Helm chart and $TEMPLATE_NAME is a short, descriptive name that describes the purpose of the template. The mychart.labels name implies that the template is native to the mychart Helm chart and will generate labels for resources it is applied to.
To use a named template in a Kubernetes YAML template, you can use the include function, which has the following usage:
include [TEMPLATE_NAME] [SCOPE]
The TEMPLATE_NAME parameter is the name of the named template that should be processed. The SCOPE parameter is the scope in which values and built-in objects should be processed. Most of the time, this parameter is a dot (.) to denote the current top-level scope, but any scope could be provided including the dollar-sign ( $ ) symbol, which should be used if the named template references values outside of the current scope.
The following example demonstrates how the include function is used to process a named template:
metadata:
  name: {{ .Release.Name }}
{{- include "mychart.labels" . | indent 2 }}
This example begins by setting the name of the resource to the name of the release. It then uses the include function to process the labels and indents each line by two spaces, as declared by the pipeline. When processing is finished, a rendered resource may appear as follows for a release called template-demonstration:
metadata:
  name: template-demonstration
  labels:
    "app.kubernetes.io/instance": template-demonstration
    "app.kubernetes.io/managed-by": Helm
    "helm.sh/chart": mychart-1.0.0
    "app.kubernetes.io/version": 1.0
Helm also provides a template action that can also expand named templates. This action has the same usage as include, but with one major limitation—it cannot be used in a pipeline to provide additional formatting and processing capabilities. The template action is used to simply display data inline. Because of this limitation, chart developers should use the include function over the template action since include has feature parity with template but also provides additional processing options.
Named templates are excellent for reducing boilerplate in a single Helm chart, but imagine you want to share common boilerplate (such as labels) across multiple Helm charts. To do this, you can leverage library charts. Library charts are similar in structure to application charts, but their type field in Chart.yaml is set to library. Library charts also differ in that they cannot be installed—a library chart’s purpose is to provide a set of helper templates that can then be imported among different application charts by using dependency management.
An example of a library chart is Bitnami’s common chart, which can be seen at the following link: https://github.com/bitnami/charts/tree/master/bitnami/common. There, you will find that each of the chart’s templates is actually a tpl file that contains named templates within. Here is an abbreviated list from Bitnami’s common library chart:
- _affinities.tpl
- _capabilities.tpl
- _errors.tpl
- _images.tpl
These named templates can be used by adding the following dependency to any application Helm chart:
dependencies:
  - name: common
    version: 0.x.x
    repository: https://raw.githubusercontent.com/bitnami/charts/archive-full-index/bitnami
Then, any chart importing this dependency can leverage any template by referencing the template name with the include function—for example, {{ include "common.names.fullname" . }}.
In the next section, we will explore how Helm can handle the creation of Kubernetes custom resources (CRs).
Creating CRDs
While Helm is often used to create traditional Kubernetes resources, it can also be used to create CRDs and CRs. CRDs are used to define resources that are not native to the Kubernetes API. You may want to use this functionality to augment the abilities that Kubernetes provides. CRs are resources that implement the CRD’s specification. As a result, it’s important to ensure that a CRD is always created before the CRs that implement it.
Helm is able to ensure CRDs are created and registered to Kubernetes before CRs are included in a Helm chart when CRDs are included in the chart’s crds/ folder. All CRDs defined under this folder are created before those in templates/.
An example crds/ folder is shown here:
crds/
  my-custom-resource-crd.yaml
The my-custom-resource-crd.yaml file may have the following contents:
apiVersion: apiextensions.k8s.io/v1
kind: CustomResourceDefinition
metadata:
  name: my-custom-resources.learnhelm.io
spec:
  group: learnhelm.io
  names:
    kind: MyCustomResource
    listKind: MyCustomResourceList
    plural: MyCustomResources
    singular: MyCustomResource
  scope: Namespaced
  version: v1
Then, the templates/ directory can contain an instance of the MyCustomResource resource (that is, the CR), as illustrated here:
templates/
  my-custom-resource.yaml
There are a few important caveats to note when creating CRDs with Helm. First, CRDs cannot be templated, so they are created exactly as defined under the CRDs folder. Second, CRDs cannot be deleted with Helm, and as a result, they also cannot be upgraded or rolled back. Third, creating CRDs requires cluster-admin privileges within the Kubernetes cluster. Note that these caveats apply to CRDs, not CRs. Since CRs are created in the templates/ folder, they are treated by Helm like regular Kubernetes resource templates. CRs also typically do not require elevated permissions to the level of cluster-admin, so they can typically be installed by normal users.
Throughout this chapter, we have discussed using templates to render Kubernetes resources with Helm. In the next section, we will discuss how advanced Helm chart users can further process Kubernetes resources while running an installation.
Post rendering
When developing Helm charts, you should carefully consider each of the different values that need to be included in your chart. For example, if you know users may need to change the Service type within Service templates, you should expose a value to do so to keep your chart flexible. The same idea holds true for image names, resources, health checks, and other settings users would need to configure based on your use case.
Sometimes, however, users will still require additional flexibility that is not provided by a Helm chart. This is where post rendering comes into play. Post rendering is an advanced feature of Helm that allows users to perform further modifications to rendered chart templates when they install your chart. It is often seen as a last resort if they require modifications that your Helm chart does not allow.
Post rendering is applied by adding the --post-renderer flag to the install, upgrade, or template commands. Here is an example:
$ helm install <release-name> <path-to-chart> --post-renderer <path-to-executable>
The <path-to-executable> parameter is an executable file that invokes the post-renderer. The executable could be anything from a Go program to a shell script invoking another tool, such as Kustomize. Kustomize is a tool used for patching YAML files, so it is often used for post rendering.
We won’t dive deep into Kustomize because it is out of scope for this book. However, we have included an example of using Kustomize as a post-renderer in the Git repository at chapter6/examples/post-renderer-example that can be invoked as follows, assuming that the kustomize command-line tool is available on the local machine:
$ cd chapter6/examples/post-renderer-example/post-render
$ helm template nginx ../nginx --post-renderer ./hook.sh
The hook.sh file invokes Kustomize, which patches the deployment and service YAML resources with custom environment variables and the NodePort service type, as defined in the kustomization.yaml file.
In this section, we discussed post rendering. One note before we depart from this topic is that post rendering should not be considered part of normal Helm usage. As a chart developer, you should ensure that your chart is flexible enough for users to leverage your chart as-is out of the box. As a chart user, you should try to avoid using post renders unless absolutely necessary. This is because you need to remember to use the --post-renderer flag on each Helm upgrade, or the patch will be inadvertently omitted. Post-renderers also require additional effort from the user to maintain, as there may be tooling or other prerequisites needed.
Throughout this chapter, we have covered each of the key components of Helm templates. Next, we will tie this all in by returning to our Guestbook chart. We will make small updates to the scaffolded values.yaml file and the deployment.yaml template, and we will deploy our Guestbook Helm chart.
Updating and deploying the Guestbook chart
In order to successfully deploy our Guestbook application, we need to add values to configure the following details:
- Configure the Redis service names and disable Redis authentication
- Create environment variables for defining the names of the Redis leader and follower
We will begin by first handling Redis values.
Updating Redis values
In Chapter 5, Helm Dependency Management, we created a Redis dependency for creating a backend. Now, we will add a couple of values to our values.yaml file to complete the configuration.
The values that we need to add are in the Git repository at https://github.com/PacktPublishing/Managing-Kubernetes-Resources-using-Helm/blob/main/chapter6/guestbook/values.yaml#L5-L8 and are shown in the following snippet:
redis:
  fullnameOverride: redis
  auth:
    enabled: false
The redis.fullnameOverride value is used to ensure that deployed Redis instances are prefixed with redis. This will help ensure the Guestbook application is talking to consistently named instances.
Setting the redis.auth.enabled value to false will disable Redis authentication. This is necessary because the Guestbook frontend is not configured to authenticate with Redis.
That’s all the changes needed for Redis. Let’s update the Guestbook values and templates next.
Updating Guestbook’s deployment template and values.yaml file
The helm create command we used in Chapter 4, Scaffolding a New Helm Chart, did an excellent job of giving us almost all of the templating features we need for this application, but there is one gap that we need to fill in order to deploy Guestbook. We need to be able to set environment variables in the Guestbook deployment in order to tell the frontend how to connect to Redis.
If we observe the Guestbook source code at https://github.com/GoogleCloudPlatform/kubernetes-engine-samples/blob/main/guestbook/php-redis/guestbook.php, we can see three different environment variables that need to be set, as follows:
- GET_HOSTS_FROM: Informs Guestbook whether or not it should retrieve the Redis hostnames from the environment. We will set this to env so that hostnames are retrieved from the two environment variables defined next.
- REDIS_LEADER_SERVICE_HOST: Provides the hostname of the Redis leader. Because the Redis dependency we are using specifies the leader as redis-master, we will set this value to redis-master.
- REDIS_FOLLOWER_SERVICE_HOST: Provides the hostname of the Redis follower. The Redis dependency we are using specifies the follower as redis-replicas, so we will set this value to redis-replicas.
Since the scaffolded deployment.yaml template did not allow for environment variables to be created, we need to write this logic into the template ourselves. We can do this by adding the lines located at https://github.com/PacktPublishing/Managing-Kubernetes-Resources-using-Helm/blob/main/chapter6/guestbook/templates/deployment.yaml#L50-L51, which are also shown here:
env:
  {{- toYaml .Values.env | nindent 12 }}
Here, we added a new env object. Underneath, we are using the toYaml function to format the env value (which we will add shortly) as a YAML object. Then, we are using a pipeline and the nindent function to form a new line and indent by 12 spaces.
Next, we need to add the env object with the associated content to our values.yaml file. An example of this is located at https://github.com/PacktPublishing/Managing-Kubernetes-Resources-using-Helm/blob/main/chapter6/guestbook/values.yaml#L10-L16 and is also displayed here:
env:
  - name: GET_HOSTS_FROM
    value: env
  - name: REDIS_LEADER_SERVICE_HOST
    value: redis-master
  - name: REDIS_FOLLOWER_SERVICE_HOST
    value: redis-replicas
With the Guestbook chart’s values and template updated, let’s move on to the next section.
Deploying the Guestbook chart
Now, it’s time to deploy a fully functional Guestbook instance with our Helm chart! First, start your minikube environment and create a new namespace for this chapter, as shown here. If you already started and created the chapter6 name at the beginning of this chapter, you can skip the next two commands:
$ minikube start
$ kubectl create namespace chapter6
Then, use the helm install command to deploy the Guestbook instance, as illustrated here. You should also watch the pods in the namespace for the Redis pods to become ready:
$ helm install guestbook chapter6/guestbook -n chapter6
$ kubectl get pods –n chapter6 –w
Once the Redis instances are ready, hit Ctrl+C to stop watching resources and then use the kubectl port-forward command to expose your Guestbook frontend to localhost on port 8080:
$ kubectl port-forward svc/guestbook 8080:80 -n chapter6
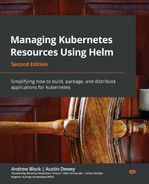
Once the Guestbook service is exposed, you can navigate to the http://localhost:8080 Uniform Resource Locator (URL) in your browser. The Guestbook frontend should appear. Try entering a message, such as Hello world!, and a message should appear under the blue Submit button, as illustrated here:
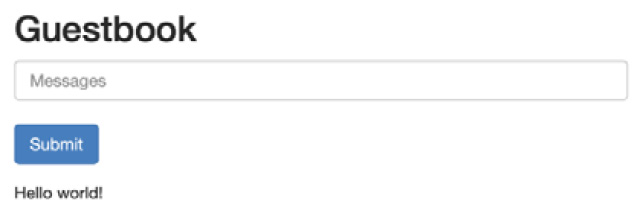
Figure 6.2 – The Guestbook frontend after the Hello world! message has been submitted
If you are able to load the page in a browser and enter a message, then congratulations! You have successfully built and deployed your first Helm chart! However, as with any software product, you can always continue to make improvements. We will enhance this chart in the next chapter by adding upgrade and rollback hooks for performing backup and restore of the Redis database.
For now, when you are done working, feel free to clean up your environment and stop your minikube instance, as follows:
$ kubectl delete ns chapter6
$ minikube stop
This brings us to the end of the section.
Summary
Templates represent the core of Helm’s functionality. They allow you to create a variety of different Kubernetes resource configurations by enabling dynamic YAML generation. Helm’s template engine, based on Go templates, contains several built-in objects upon which chart developers can build charts, such as the .Values and .Release objects. Templates also provide many different functions to provide robust formatting and manipulation, along with control structures for enabling conditional logic and loops. Besides rendering Kubernetes resources, templates can also be used to abstract boilerplate by using named templates and library charts.
By incorporating the capabilities provided by templates, we were able to make small modifications to the Guestbook chart at the end of the chapter by enhancing the content of the values and the deployment.yaml chart template, which resulted in the ability to deploy the Guestbook application successfully. In the next chapter, we will continue to explore templates and enhance our Helm chart by learning about and leveraging lifecycle hooks.
Further reading
To learn more about the basics behind creating Helm charts, consult the Chart Template Developer’s Guide page on the Helm documentation at https://helm.sh/docs/chart_template_guide/.
Questions
See if you can answer the following questions:
- Which Helm templating construct can you take advantage of to generate repeating YAML portions?
- What is the purpose of the with action?
- What are the different built-in objects in Helm templates?
- How does a Kubernetes resource template differ from a named template?
- How does an application chart differ from a library chart?
- What can a chart developer do to perform input validation?
- What are some examples of different functions commonly used in Helm templates?
- What is the difference between a template variable and a value?