
Most diagrams contain text as well as shapes. By default, most Visio shapes appear either without text or with placeholder text. Adding text or replacing the placeholder text is easy—you simply select the shape and type.
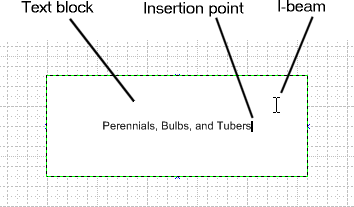
The area in the shape where the text appears is called a text block. When you start typing, a blinking cursor appears at the insertion point so that you can keep track of the text placement. The pointer changes to an I-beam when you place it over the text block, indicating that you can click anywhere in the text to insert new text, delete text, or select existing text to replace or format it.
After you add text to a shape, you can format the text using the same methods you would use in any other program in the Microsoft Office System. You can change the font type, size, color, style, and alignment by using the familiar toolbar buttons on the Formatting toolbar. You can also use the Text command on the Format menu. When you want to apply the same text formatting to all the text in a shape, you simply select the shape, and any text changes you make apply to all the text in the shape.
Tip
You can also move, resize, and rotate a text block independently of its shape by using the Text Block tool. For example, you might want to position the text block for an arrow at the end of the arrow rather than over the center of it. Or you might want the orientation of a text block to be different than its shape orientation. To use the Text Block tool, click the Text Tool down arrow, and then click. Text Block Tool For more information about using the Text Block tool, type "text block tool" in the "Type a question for help" box. Then click the "Rotate, move, and resize a text block" topic.
You can also create a text-only shape —text that's not associated with a shape—on the drawing page. For example, you can add a title, footer, or bulleted list to a diagram. Just click the Text Tool button on the Standard toolbar, click the location on the drawing page where you want the text to appear, and then type. After you add a text-only shape to a diagram, you can select, move, rotate, and format it just as you would any other shape.
In this exercise, you work with a diagram that has already been started for you using the Block Diagram template. You drag shapes from a stencil onto the drawing page, add text to shapes, revise the existing text in shapes, add a text-only shape, and then save the diagram.
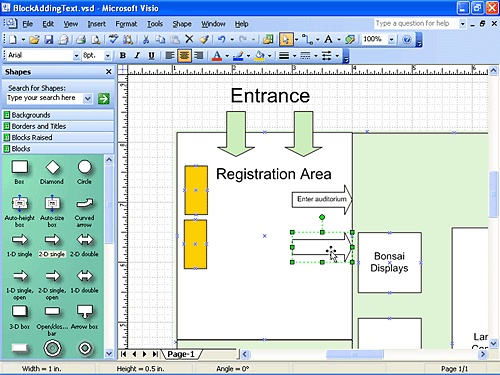
OPEN the BlockAddingText file in the My DocumentsMicrosoft PressVisio 2003 SBSAddingShapes folder.
From the Blocks stencil, drag the 2-D single arrow shape onto the drawing page and position it directly below the Enter auditorium arrow shape.
Notice how the shape snaps to the grid, even though the grid is obscured by the white Registration Area shape.
With the 2-D single arrow shape selected, type Enter auditorium.
As soon as you start typing, the text block opens and a blinking cursor appears in the text block. Visio centers the text in the shape.
Click the pasteboard to close the text block and deselect the shape.
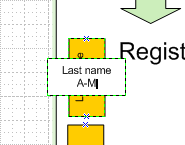
Select the top gold rectangle in the left area of the drawing page. Type Last name, press the
 key, and then type A-M.
As you type, Visio displays the text block horizontally for ease of reading.
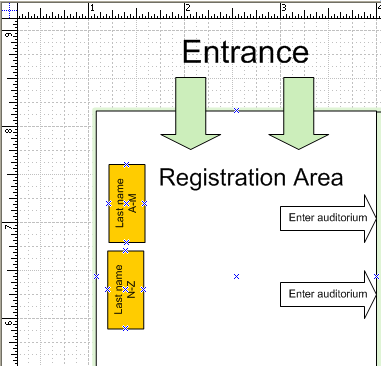
Click the pasteboard to close the text block and deselect the shape.
Visio displays the text vertically in the shape.
Repeat steps 4 and 5 for the bottom gold rectangle, but type N-Z (instead of A-M).
Visio displays the text vertically in the shape.
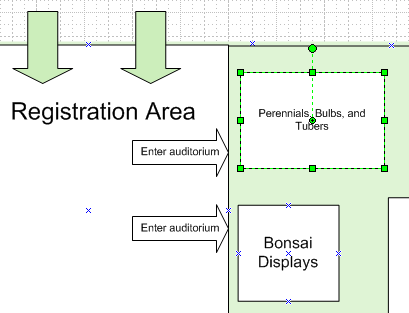
From the Blocks stencil, drag a Box shape onto the drawing page and position it above the Bonsai Displays box shape.
Align the Box shape with the Bonsai Displays box shape by snapping the Box shape to the grid.
With the Box shape selected, type Perennials, Bulbs, and Tubers.
Visio adds the text to the shape, centers it, and wraps it to fit inside the shape.
Click the pasteboard to close the text block and deselect the shape.
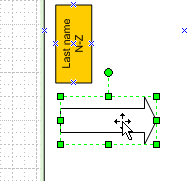
From the Blocks stencil, drag the 2-D single shape onto the drawing page and position it below the Last name N-Z box.
With the shape selected, type Enter classroom.
Visio adds and centers the text in the shape.
Click the pasteboard to close the text block and deselect the shape.
If you can't see the Classrooms and Demos shape on the drawing page, drag the vertical scroll bar (on the right side of the drawing window) down until the shape is visible.
On the Standard toolbar, click the Text Tool button.
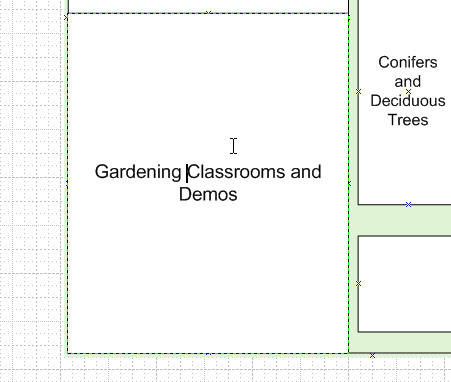
In the Classroom and Demos shape, click to the left of the letter C in Classroom.
The text block opens and a blinking cursor appears at the insertion point.
Type Gardening, and then press the
 key.
key.The new text appears in the shape.
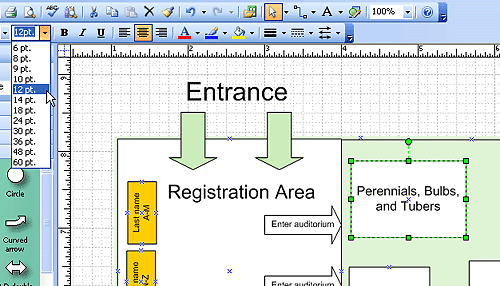
If you can't see the Perennials, Bulbs, and Tubers box shape, drag the vertical scroll bar up until the shape is visible.
On the Standard toolbar, click the Pointer Tool button.
Click the Perennials, Bulbs, and Tubers shape to select it.
On the Formatting toolbar, click the Font Size down arrow to display a list of font sizes.
Click 12 pt. in the list.
The font size of the text in the selected shape increases to 12 points.
If you can't see the top of the drawing page, drag the vertical scroll bar up until it's visible.
On the Standard toolbar, click the Text Tool button.
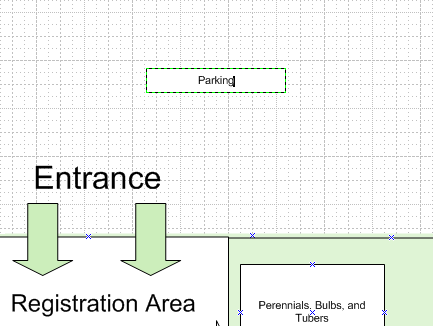
Approximately one inch above and to the right of the Entrance text, click to create a text-only shape.
A text block opens and a blinking cursor appears.
In the text block, type Parking.
Press the
 key to close the text block.
The text-only shape is selected.
On the Formatting toolbar, click the Font Size down arrow to display a list of font sizes.
Click 24 pt. in the list.
The font size of the text in the selected shape increases to 24 points.
On the Standard toolbar, click the Save button to save your changes to the diagram.
CLOSE the BlockAddingText file.