Tables are a useful tool for laying out and formatting Web pages in Microsoft Expression Web. Tables consists of horizontal rows and vertical columns. The intersection of a row and column is called a cell, which contains the information you want to present. A table in Expression Web has two main uses: page layout and data formatting.
A layout table creates a grid on your page, which you can use to position various elements—text and graphics—on the page to create an overall look. Due to limitations in HTML for arranging information, page layout is one of the most important aspects of using a table in Expression Web.
In addition to page layout, tables also make it easy to manage and present your data. These conventional tables that format your data in a tabular way are like the ones you might create in some of the other Office programs, such as Microsoft Excel, PowerPoint or Word.
The main difference between layout tables and conventional tables is the additional page layout options to arrange and modify cell properties. If you create one type of table, yet determine later you need the other, you can switch between the two types.
Once you have your table designed, you can modify it by changing the cell formatting, and the way cells are viewed on your page. You can also add, modify and delete various cells, rows, and columns in your table. Adding a rounded corner or a shadow effect to your cells could provide that extra touch. You might even have a table where you need to split a cell into two cells, or merge other cells into one cell.
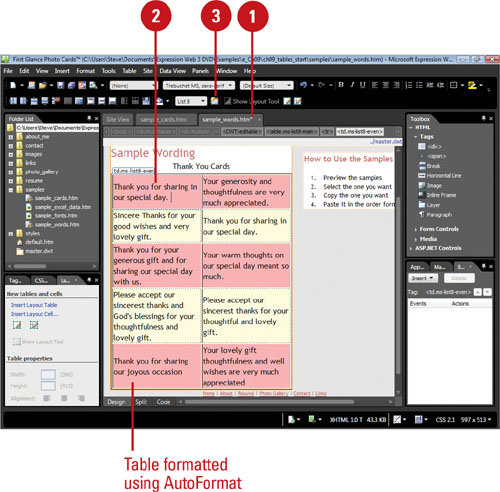
Some of the final touches such as formatting your overall table, adding color, and including some graphical images to the table can really make your data stand out.
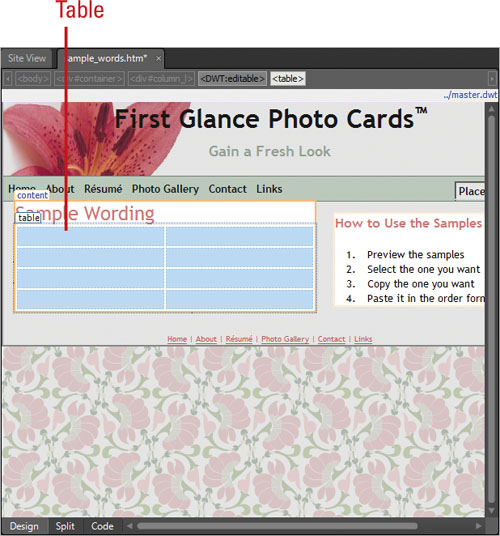
A layout table helps you organize data and design the overall look of a Web page. A layout table creates a grid on the page, which you can use to map out the location for each element you want to display on the page. You can create your own layout table grid or use one of the table layout templates that comes with Expression Web. The templates provides a quick and easy way to create a table grid. Once you create a layout table, you can create additional cells and insert your content.
 Open and display a blank Web page.
 Click the Panels menu, and then click Layout Tables to display the Layout Tables panel.
If you want to display more information, click the Maximize button in the Layout Tables panel.

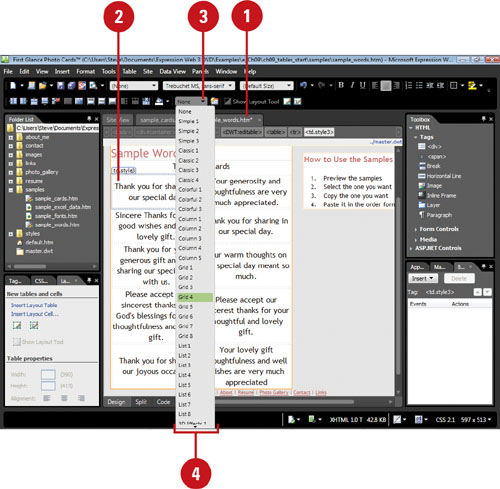
 Use one of the following methods to create a layout table.
Click the Insert Layout Table link to create a one cell layout table.
Click the Draw Layout Table button, and then drag to create a table.
Click any of the templates in the Choose Layout area.
 Click in a cell, and then add content.
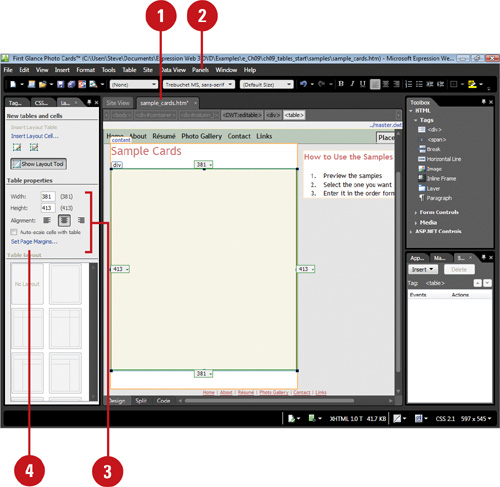
- Open and display the Web page with the layout table you want to change.
- Click the Panels menu, and then click Layout Tables to display the Layout Tables panel.
- Use the Table properties area to change the layout table.
Width. Changes table width.
Height. Changes table height.
Alignment buttons. Changes table alignment on the page to the left, center, or right.
Auto-Scale Cells With Table. Select to keep the width of the table equal to the sum of its cell width.
- To set page margins, click Set Page Margins on the panel, enter the margins you want, and then click OK.
Did You Know?
You can also use the size label in the table layout to resize a cell. Click the size label on the top or at the side, and then select the option you want on the menu. To enter an exact row height or column width, click Change Row Height or Change Column Width. To have the cell shrink or grow at content changes, click Make Row Autostretch or Make Column Autostretch.
Expression Web makes a distinction between conventional cells and layout cells. Conventional cells contain no special properties, while layout cells do. These special properties, for example, allow you to have individual borders, rounded corners, shadows, and resize or reposition layout cells without affecting other layout cells. When you add a layout cell in a layout table, Expression Web adds and sizes rows and columns to create the cell in the location where you want it. The rows and columns serve only to position the cell. When you add more layout cells, the rows and columns change. After you create a layout cell, you can move and resize it to create the layout you want. Before you can move or resize a layout cell, you need to first select it (point to the edge, and then click the blue edge).
- Open and display the Web page with the layout table you want to use.
- Click the Panels menu, and then click Layout Tables to display the Layout Tables panel.
- Click the Draw Layout Table button on the panel.
- Drag a layout table on the page.
 Click the Draw Layout Cell button on the panel.
 Drag a layout cell in the layout table.
To draw multiple cells, press and hold Ctrl while you drag each cell.
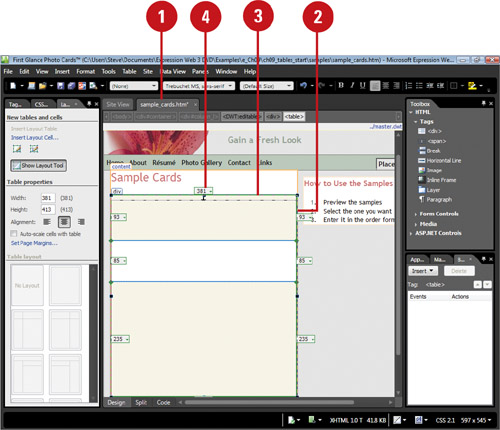
- Open and display the Web page with the layout cells you want to change.
- Point to the edge of the layout cell to display a blue edge.
- Click the blue edge to select the layout cell.
- To move the layout cell, drag the tab at the top of the cell with the cell size or the blue edge.
- To resize the layout cell, drag a handle to the desired size.
Before you can modify a layout table, you need to first select it and you must not be in drawing mode. You can click the Draw Layout Cell button to change modes. To select a layout table, point to the table edge, and then click the green edge. When you select a layout table, list arrows appear at the edges, indicating the size of the row or column. You can click the list arrows to change row and column properties.
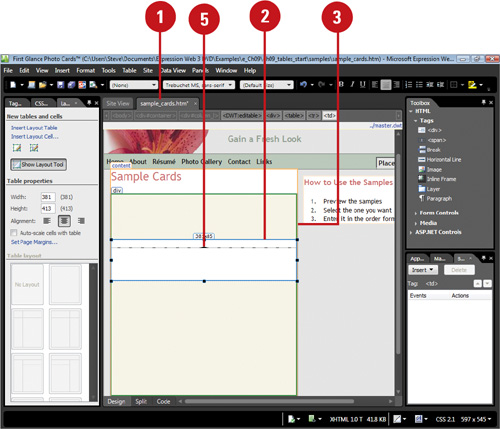
- Open and display the Web page with the layout table you want to use.
- Point to the edge of the layout table to display a green edge.
- Click the green edge to select the layout table.
- Click the list arrow for the row or column you want to modify, and then click Change Column Height or Change Width Height to open a dialog box. You can select some options directly from the submenu without opening the dialog box (if so, skip Steps 5 and 6).

- Select the row or columns options you want. The column options include:
Column Width. The column width.
Clear Contradicting Width. Select to correct two or more cells in the same column with different heights.
Make Column Autostretch. Select to let the browser determine the width of the column.
Use Column Spacer Image. Select to control the width of the column by adding a transparent picture to the last row.
- Click OK.

You can create a table based on Microsoft Excel data by pasting the information as static data or using Active Server Pages (ASP) and Microsoft’s Internet Information Services (IIS) to provide live data. This task focuses on inserting Excel data into a table. During the process Expression Web translated the file data to HTML. Depending on the file, the headers and column labels and table may be large, which you can change using the font commands on the Common toolbar and the Table Properties dialog box.
- Open and display a blank Web page to insert the data.
- Click the Insert Table button on the Standard toolbar, and then click the first cell to create a single-cell table.
- Click in the single-cell table.

- Open Microsoft Excel, and then open the file you want to use.
- Select the data in the Excel file, copy the data, and then close Microsoft Excel.
- Switch back to Expression Web, and then click in the single-cell table.
 Click the Paste button on the Standard toolbar.
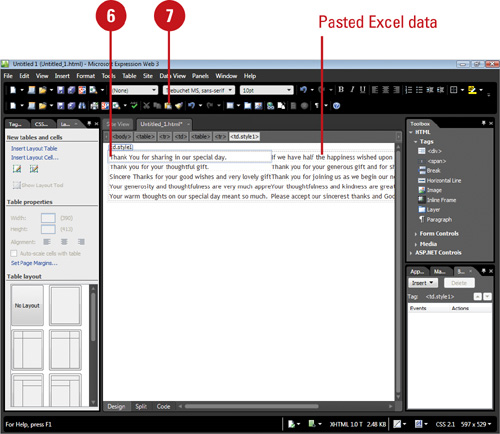
The data is inserted as a borderless table indicated by the dashed outline.
 To change the table size, right-click the table, click Table Properties, change the table size and any other options you want, and then click OK.
 To change the font type and font size, use the list arrows on the Common toolbar.
Though you might want to reference and analyze information, the best way to initially display large amounts of data is through the use of tables. Tables are defined by their various components; the cell, the row, and the column. The number of rows determines the height of the table, and the number of columns the width. The combination of the two determines the total number of cells that can hold information. You can quickly create a table by using the Insert button on the Standard toolbar and choosing how many rows and columns you want, or by using the Insert Table command and selecting the options you want in the Insert Table dialog box.

- Click where you want to create a table.
- Click the Table menu, point to Insert, and then click Table.
- Define the attributes of the table, some options include:
Rows. The number of rows you want in your table.
Columns. The number of columns you want in your table.
Alignment. The position you want to assign the table text.
Specify Width. The width of the table in pixels or percentages.
Cell Padding. The space, in pixels, between the data and the inside of the table cell.
Cell Spacing. The space (in pixels) between the cells.
Border Size. The thickness level (in pixels) you want to assign to the table’s border box.
Background color or picture. The color or picture you want in the background of the table.
Set as Default. Select to set current options as the default for all new tables.
- Click OK.

Once you create your table, you enter text into cells just as you would in a paragraph, except pressing the Tab key moves you from cell to cell. The first row in the table is good for column headings, whereas the leftmost column is good for row labels. To enter text in cells, you need to know how to move around the table and select the rows and columns.
- Open and display the Web page you want to use.
- Position the insertion point in the table where you want to enter text.
The insertion point shows where text you type will appear in a table.
- Type your text, and then perform one of the following:
Press Enter to start a new paragraph within that cell.
Press Tab to move the insertion point to the next cell to the right (or to the first cell in the next row).
Press the arrow keys or click in a cell to move the insertion point to a new location.

If the cell size changes as you type to accommodate the text, you can change cell properties to keep the cell width constant.
See Also
See “Changing Cell Properties” on page 236 for more information on setting width and height options.
Refer to this table for methods of selecting table elements, including:
The entire table
One or more rows and columns
One or more cells

Did You Know?
You can see the selection difference between layout and conventional tables. When you select a conventional table in Design view, it appears with a solid black background. When you select a layout table, it appears with a green border.???
Table . Selecting Table Elements
To Select | Do This |
|---|---|
The entire table | Click in a cell, click the Table menu, point to Select, and then click Table. |
One or more rows | Position the pointer along the left edge of the row you want to select (a black arrow appears), and then drag to select the rows you want, or click the Table menu, point to Select, and then click Row. |
One or more columns | Position the pointer along the top edge of the column you want to select (a black arrow appears), and then drag to select the columns you want, or click the Table menu, point to Select, and then click Column. |
A single cell | Drag a cell or click the cell with the black arrow, or click the Table menu, point to Select, and then click Cell. |
More than one cell | Drag with the black arrow to select a group of cells. |
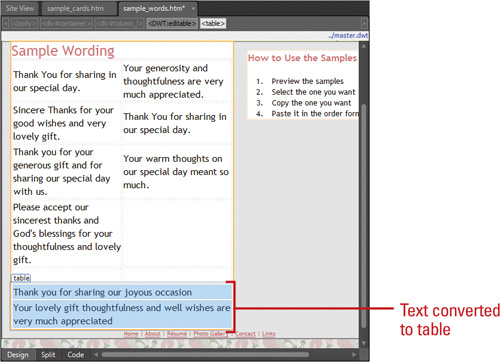
If you have existing text separated by paragraphs, tabs, or commas, you can convert the text to a table. When text is separated by paragraphs, tabs, or commas, it’s known as delimited text, which is commonly used to delineate data for tables, spreadsheets, and databases. During the conversion process, you can select the character used to separate the text on your page to create a table.
- Open and display the Web page you want to use.
- Select the text you want to convert to a table.
- Click the Table menu, point to Convert, and then click Text to Table.
- Click the option to designate the character used to separate the text (commas, paragraphs, etc.).
- Click OK.

Did You Know?
You can create a one-celled table. Click the None option in the Convert Text to Table dialog box.
HTML doesn’t support tabs as a character separator. HTML doesn’t directly support tabs as a character to separate text, so we recommend avoiding them, if possible, despite their presence on the Convert Text to Table dialog box.
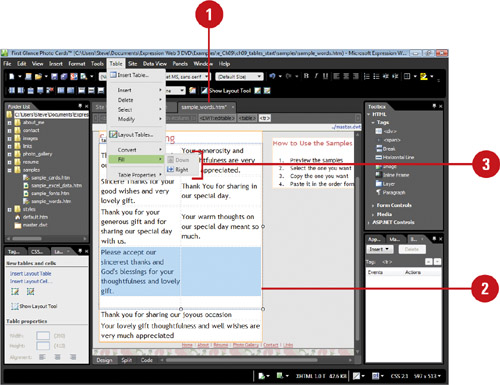
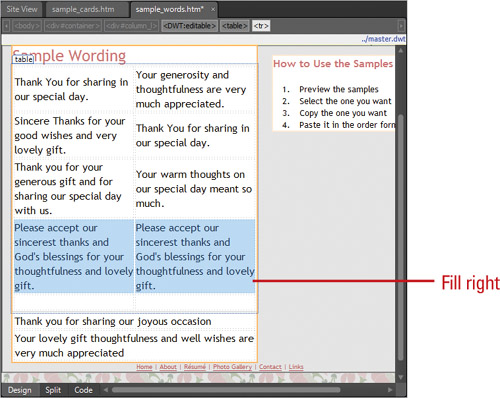
A table needs information, and while you will normally enter most of that data manually when creating a new table, text can also be easily copied into a row or column of cells. The Fill Down and Fill Right commands allow you to propagate repeating content to table cells below or right of the currently selected cell.
- Open and display the Web page you want to use.
- Select the cell with the text to be copied along with the adjacent cells in a row or a column by dragging the cursor either to the right (row) or down (column).
- Click the Table menu, point to Fill, and then click Right or Down. All selected cells, in the row, or column now contain the text from the original cell.
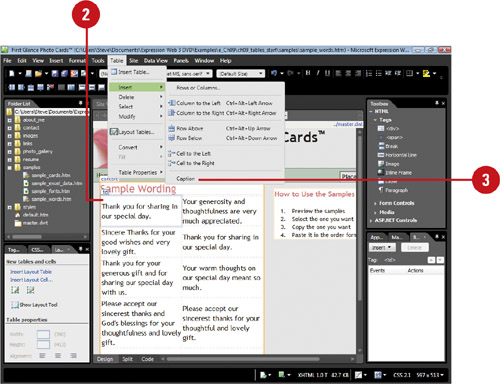
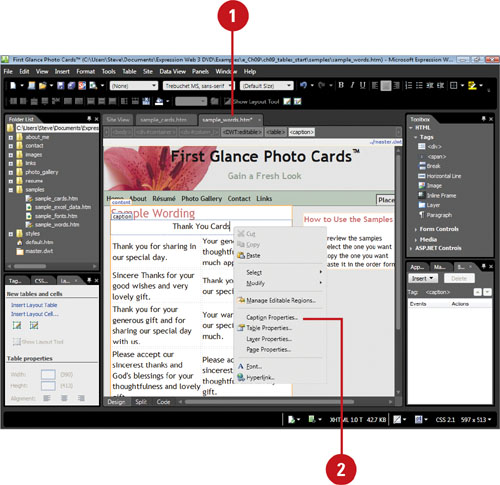
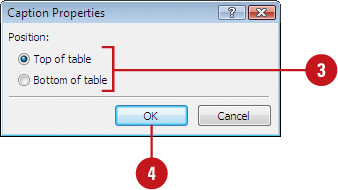
A caption is an important way to provide information about the data in a table. When you insert a table caption, it appears at the top of the table, but you can move it to the bottom. When you enter caption text, the rows and columns in the table grow to accommodate the cell contents.
- Open and display the Web page you want to use.
- Position the insertion point anywhere inside the table.
- Click the Table menu, point to Insert, and then click Caption.
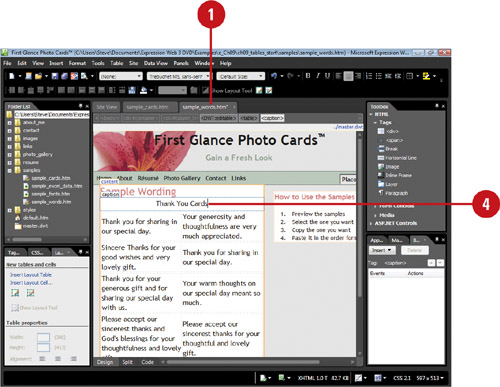
The text insertion point appears at the top of the table (top is the default selection).
- Type the caption for the table at the insertion point.
As you begin to work on a table, you might need to modify its structure by adding more rows, columns, or cells to accommodate new text, graphics, or other tables. The table realigns as needed to accommodate the new structure. When you insert rows, columns, or cells, the existing rows shift down, the existing columns shift right, and you choose what direction the existing cells shift. Similarly, when you delete unneeded rows, columns, or cells from a table, the table realigns itself.
- Open and display the Web page you want to use.
- Click to position the insertion point to the right of the cell where you want to add another cell.
- To add a single cell, click the Table menu, point to Insert, and then click Cell to the Left or Cell to the Right.
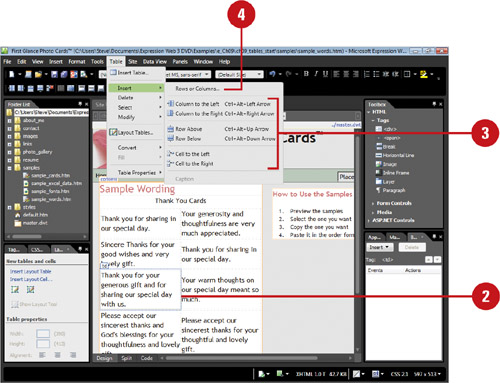
- To add multiple rows or columns, click the Table menu, point to Insert, and then click Rows Or Columns.
To add a single row or column, click the Table menu, point to Insert, and then click Columns to the Left, Column to the Right, Row Above, or Row Below.
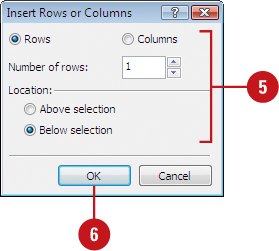
- Enter the number of columns or rows you want to add to the table, and the related options.
- Click OK.
The new columns or rows are added to the table underneath or to the right of the insertion point.
Expression Web provides three commands—Distribute Rows Evenly, Distribute Columns Evenly, and AutoFit To Contents—you can use to create evenly spaced rows and columns in a table. However, due to limitations in HTML regarding table dimensions, browsers often override table alignment settings, so its important to test pages with tables in several browsers. If you need to adjust a single row or column, you can use the mouse pointer to drag the border to a new location.
- Open and display the Web page you want to use.
- Select the rows and columns you want to resize.
- To distribute rows or columns evenly, click the Table menu, point to Modify, and then click Distribute Rows Evenly or Distribute Columns Evenly.
- To minimize the size of rows and columns to fit the cell contents, click the Table menu, point to Modify, and then click AutoFit To Contents.


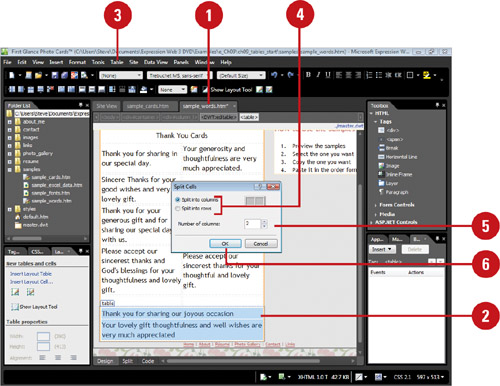
Cells can also be split or combined (also known as merged). Often there is more to modifying a table than adding or deleting rows or columns; you need to make cells just the right size to accommodate the text you are entering in the table. For example, a title in the first row of a table might be longer than the first cell in that row. To spread the title across the top of the table, you can merge (combine) the cells to form one long cell. Sometimes to indicate a division in a topic, you need to split (or divide) a cell into two.
- Open and display the Web page you want to use.
- Select the cell or cells you want to split.
- Click the Table menu, point to Modify, and then click Split Cells.
- Click the Split into columns option or the Split into rows option.
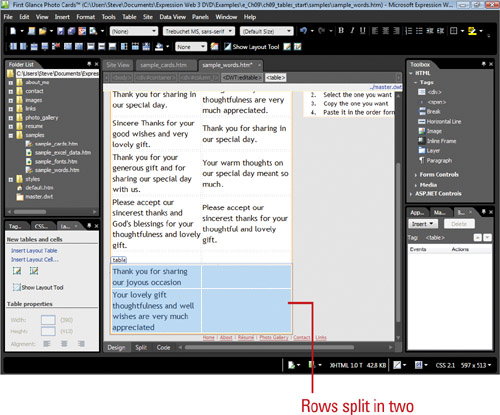
- Type the number of columns or rows into which you want the cells split.
- Click OK.


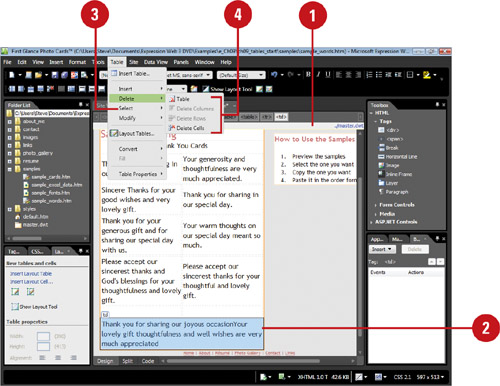
If you no longer need a table element, you can remove it. Tables, cells, rows, columns, and captions can all be easily deleted in Page view. You can use the commands on the Table menu or the Backspace and Delete keys. The Backspace key deletes the selected table, cell, column, or row and its contents, while the Delete key deletes only the contents of the selected table, cell, column, or row.
- Open and display the Web page you want to use.
- Select the table, cell, row, column, or caption you want to delete.
- Click the Table menu, point to Select, and then:
To delete a table, click Table.
To delete a cell, click Cell.
To delete a row, click Row.
To delete a column, click Column.
- Click the Table menu, and then click the delete command you want: Table, Delete Columns, Delete Rows, or Delete Cells.
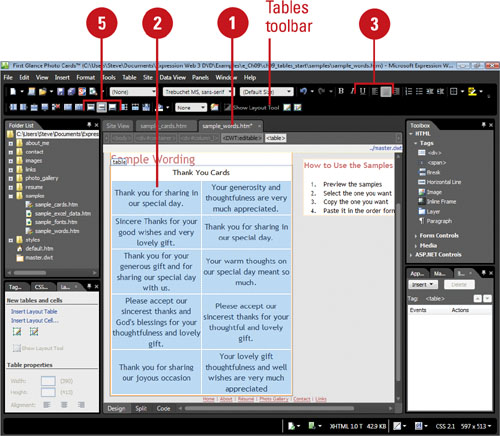
You can align the cell content in a table to any border. Expression Web makes it easy with the alignment buttons on the Formatting and Tables toolbars. The Formatting toolbar contains the Align Left, Center, and Alight Right buttons and the Tables toolbar contains the Align Top, Center Vertically, and Align Bottom buttons.
- Open and display the Web page you want to use.
- Select the rows or columns in which you want to align cell contents.
- Use the alignment buttons on the Formatting or Common toolbar.
Align Left. Aligns to the left edge of the cell.
Center. Aligns to the horizontal center of the cell.
Align Right. Aligns to the right edge of the cell.
- If necessary, right-click any toolbar, and then click Tables to display the Tables toolbar.
- Use the alignment buttons on the Tables toolbar.
Align Top. Aligns to the top of the cell.
Center Vertically. Aligns to the vertical center of the cell.
Align Bottom. Aligns to the bottom of the cell.
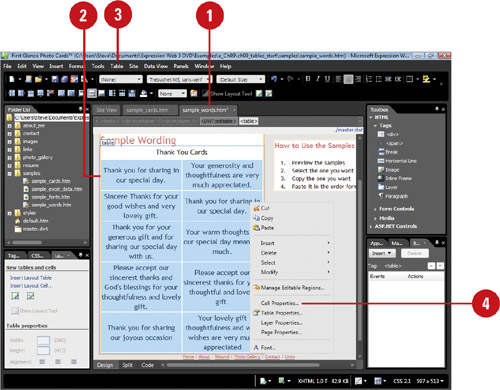
Once you create a table and enter information, you can modify a variety of elements in the table, including alignment, cell spacing, cell padding (the space around the cell contents), height and width, border size, and color. You can change all of these properties in the Table Properties dialog box.
- Open and display the Web page you want to use.
- Right-click the table, and then click Table Properties.
- You can set the table’s layout modifying the following parameters or accepting the default settings.
Alignment. Set the position for the table on the page (left, right, center).
Float. Indicate whether you want text surrounding the table to flow around the left or right side of the table. If you do not want text to flow around the table at all, select Default.
Cell Padding. Change the space between a cell border and its content by entering a number in the box.
Cell Spacing. Change the space between the table cells by entering a number in the box.
Specify Width. Set the width of the columns in pixels or percentage of the available screen space.
Specify Height. Set the height of the columns in pixels or percentage of the available screen space.

- You can set the table’s borders modifying the following parameters or accepting the default settings.
Size. Enter the width of your table border in pixels. If you don’t want a border, enter 0 (zero).
Color. Select one color for the table border from the dialog box’s list color menu.
- To select a color for the table background, in the Background area, click the Color list arrow, and then select a color from the Color palette.
- Click OK.

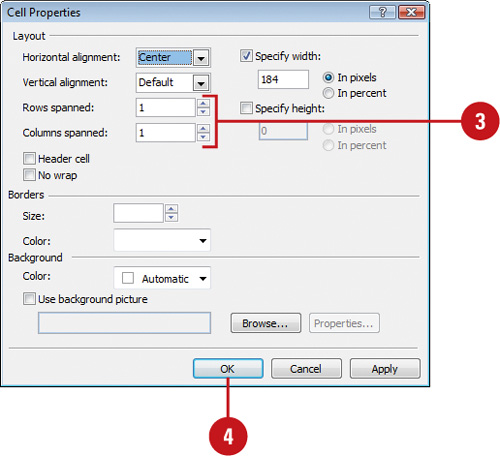
You can use the Cell Properties dialog box to resize rows or columns of cells and change the span between cells in a table. You can also change the cell alignment, size, and border or background color. If the text or images in a cell are larger than the set values, the table or its elements will be upsized to contain the content. The cell span feature is designed to create various widths or heights within cells on the same table.
- Open and display the Web page you want to use.
- Click to place the insertion point within a row or column you want to resize.
- Click the Table menu, point to Select, and then click Row, Column, or Cell.
- Right-click the selected element, and then click Cell Properties.
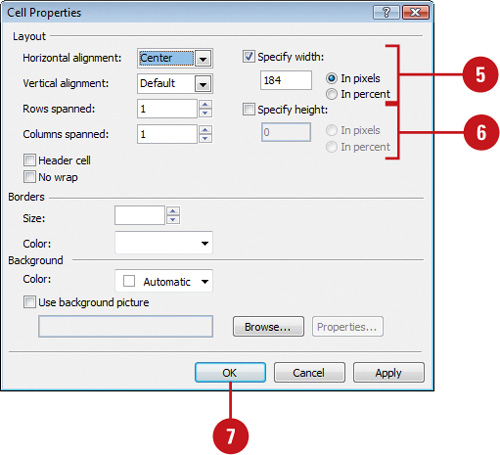
- To set the width, click the Specify width check box to select it, and then enter a value in pixels or in percent.
- To set the height, click the Specify height check box to select it, and then enter a value in pixels or in percent.
- Click OK.
- Open and display the Web page you want to use.
- Select the cell you want to change, right-click the cell, and then click Cell Properties.
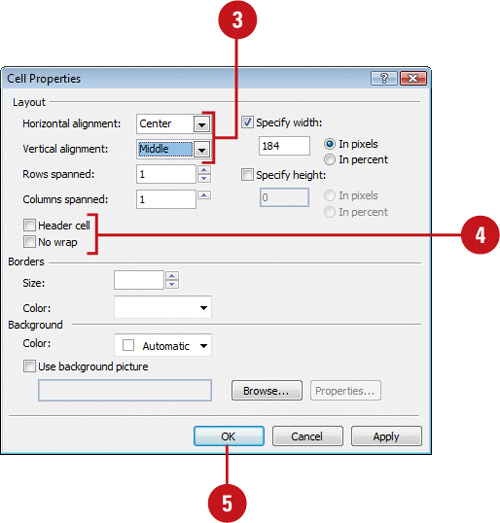
- Set the cell alignment options you want.
Horizontal Alignment. Click the Horizontal Alignment list arrow, and then select an alignment.
Vertical Alignment. Click the Vertical Alignment list arrow, and then select an alignment.
- You can set the cell’s layout using the following parameters:
To set cells as header cells, select the Header cell check box.
To wrap your text within a cell, clear the No wrap check box.
- Click OK.
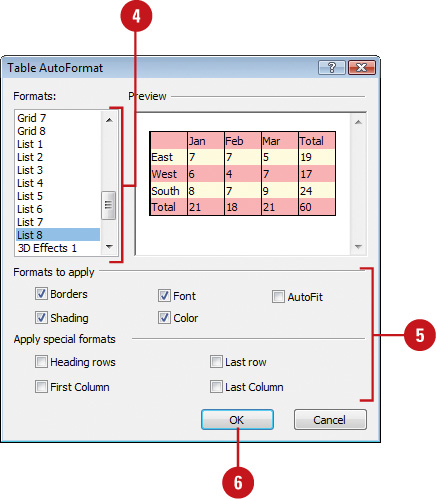
A uniform background color isn’t always the best solution. For example, if you have a large table with a lot of columns, it might be easier for the reader to follow particular rows of information if your table uses alternating background colors for each row. Or perhaps you just want to have a different color in the first row or column (or both) to pull out the key terms that organize the data. Either way, you can use a color template to format your table, regardless of the number of cells it contains, or their arrangement.

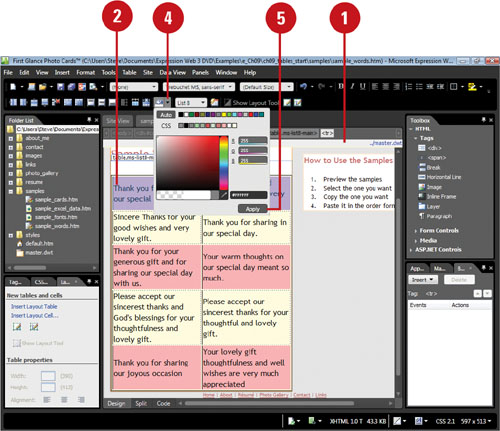
Tables are transparent by default, showing the background color or pattern of the Web page as the background of the table. If this is not the best design choice, consider adding a different color as the background. You can change the color table elements quickly using the Fill Color button on the Tables toolbar. If you want to change several color options at once, you can use the Table Properties dialog box. You can also add color to cells and borders. A cell border can contain one or two colors (the second color adds depth, or a 3-D type), and each individual cell within a table can have its own one or two-colored border.
- Open and display the Web page you want to use.
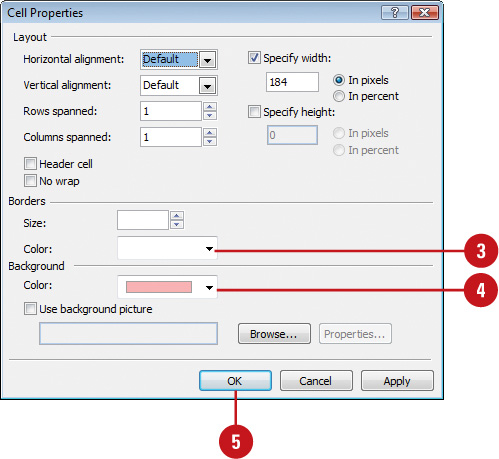
- Right-click the table cell, and then click Cell Properties.

- Click the Color list arrow, and then select a color.
- You can set the cell’s background using the following parameters in the Background area:
Click the Color list arrow, and then select a color.
- Click OK.
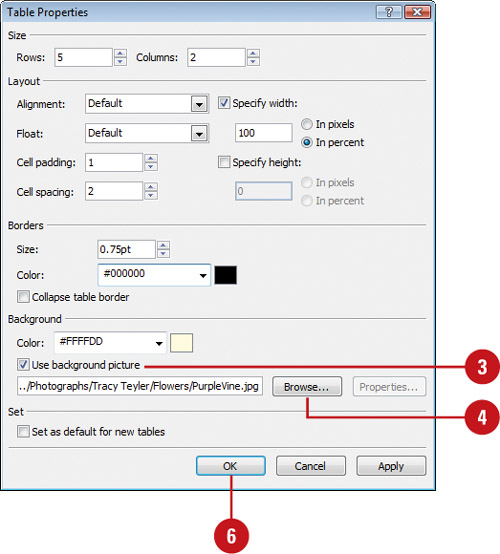
Because tables are supported by many browsers, they can be used to help lay out a page’s text and graphics. Tables provide an ideal way to present images in a unified manner, which browsers can consistently display in the same way. You can insert pictures into a single cell or an entire table using the Cell Properties and Table Properties dialog boxes.
- Open and display the Web page you want to use.
- Right-click the table or cell, and then click Table Properties to add a table image or Cell Properties to add a cell image.
- Select the Use background picture check box.
- Click Browse.
- Locate and select the picture you want to use, and then click Open.
- Click OK.