
As you build your Web pages, you’ll find that entering, selecting, correcting, moving, and copying will become commonplace. You can use all of the text functions as you do in any other Microsoft program. With Microsoft Expression Web, you can use all the common moving, deleting, and copying functions that you have already grown accustom to. You can also find and replace and format text just as you would in Word or Excel.
When entering text, you might find it necessary to add a bulleted or numbered list. You can also create sublists and collapsible lists to use on your pages. Choosing the alignment of your text, your line spacing, and paragraph indents all work the same way as other Microsoft programs.
A style is a collection of formatting settings saved with a Web site or template that you can apply to text, graphics, and tables at any time. Expression Web comes with a standard set of styles you can apply to text. If you modify a style, you make the change once, but all text tagged with that style changes to reflect the new format. In Chapter 12, you’ll learn how to create a Cascading Style Sheet (CSS), which is style information that can be referenced by individual or multiple Web pages.
Of course, while working with all of this text, using Expression Web’s spell checker is a must. You can spell check, add familiar or custom words to your dictionary, check for common grammatical errors, or use the Thesaurus to enhance your Web pages. International Microsoft Expression Web users can change the language that appears on their screens by changing the default language settings.
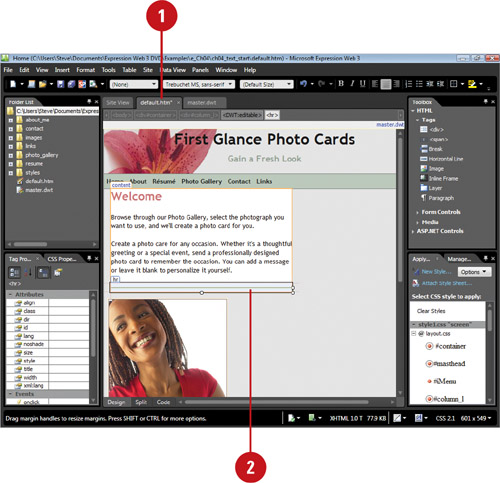
There are two methods of entering text on a Web page: as part of a template or from scratch. When starting out, we strongly recommend that you work from a template. If you are working with templates, you can begin by editing the boilerplate text that opens as part of the template.
Select the template text that you wish to replace and begin typing. The boilerplate text disappears and your text begins flowing into that section of the template. Be sure to constrain your text to the original area provided in the template and, if necessary, edit what you wish to say to make the copy fit within the allotted space.
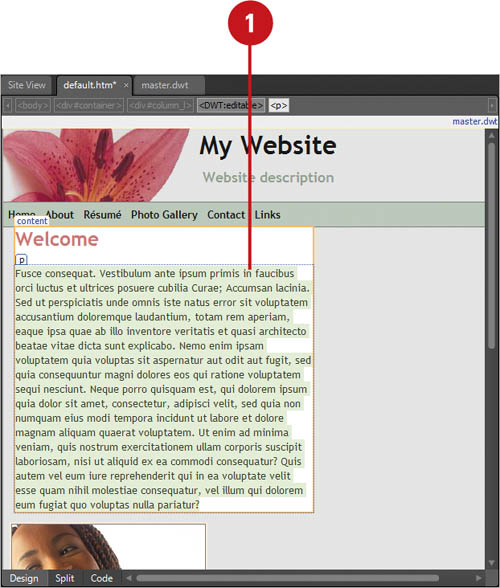
The other way to enter text is on a blank page. Create a new Web page, and then start typing. When you enter text, Expression Web automatically places text inside a container as an HTML tag. An HTML tag is code inserted in a document that specifies how the document, or a portion of the document, should be formatted. HTML defines the structure and layout of a Web document by using a variety of tags and attributes. The opening tag (<p>) marks the start of the paragraph code and a closing tag (</p>) marks the end of the paragraph, denoted by the forward slash (/). When you select a container, the tag type appears as a tab identifying the container.???

Table . Common Tags
Symbol | Defines |
|---|---|
<html> | Start of the HTML document |
<head> | The document heading |
<body> | The body of the document |
<title> | The document title |
<div> | A section in a document |
<span> | A section in a document |
<h1> | Text heading |
<p> | A paragraph |
<style> | Format of text |
<img> | An image placeholder |
<a> | A hyperlink |
<iframe> | An inline frame |
<!-- comment --> | A comment |
The first step in working with text is to highlight, or select, the text you want. Once you’ve selected it, you can format, replace, delete, copy, and move (cut) words, sentences, and paragraphs within one Web page or between Web pages. When you finish with or decide not to use a selection, you can click anywhere in the page to deselect the text.
 Position the pointer in the word, paragraph, line, or part of the page you want to select.
 Choose the method that accomplishes the task you want to complete in the easiest way.
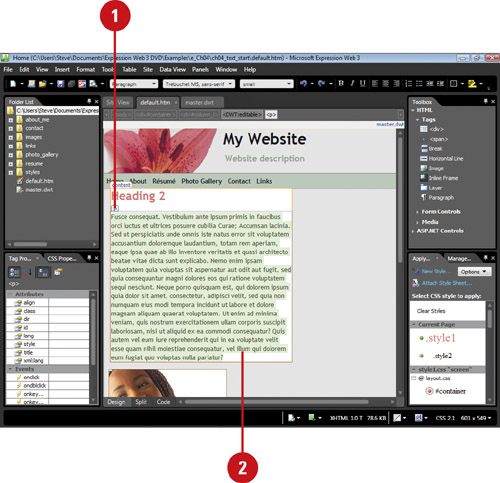
Refer to the table for methods to select text.
See Also
See “Working with Template Content” on page 26 for information on working with content from a template.???
Table . Selecting Text
To Select | Do This |
|---|---|
A single word | Double-click the word. |
A single paragraph | Triple-click a word within the paragraph. |
A single line | Click in the left margin next to the line. |
Any part of a page | Click at the beginning of the text you want to highlight, and then drag to the end of the section you want to highlight. |
A large selection | Click at the beginning of the text you want to highlight, and then press and hold Shift while you click at the end of the text that you want to highlight. |
You can edit text in Expression Web several ways. First, you can select the text you want to edit, and then type text to replace it or press the Delete key to remove it. Another way to edit text is to place the insertion point in the text, and then type to insert text or press the Backspace or Delete keys to remove it. The Backspace key deletes text to the left, while the Delete key deletes text to the right.

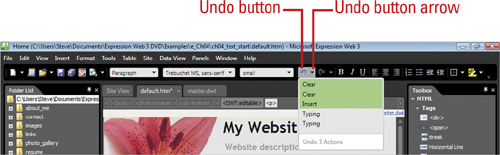
Everyone makes mistakes and changes their mind at some point, especially when creating or revising a document. With Expression Web, you can instantly correct typing errors by pressing a key. You can also reverse more complicated actions, such as typing an entire word, formatting a paragraph, or creating a chart. With the Undo button, if you change your mind, you can just as easily click the Redo button to restore the action you reversed.
Click the Undo button on the Common toolbar to reverse your most recent action, such as typing a word, formatting a paragraph, or creating a chart.
Click the Redo button on the Common toolbar to restore the last action you reversed.
Click the Undo button arrow, and then select the consecutive actions you want to reverse.
Click the Redo button arrow, and then select the consecutive actions you want to restore.

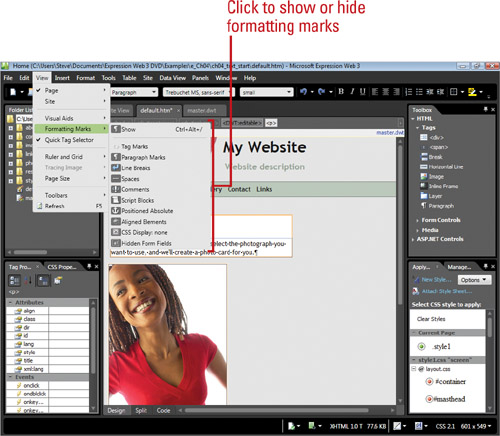
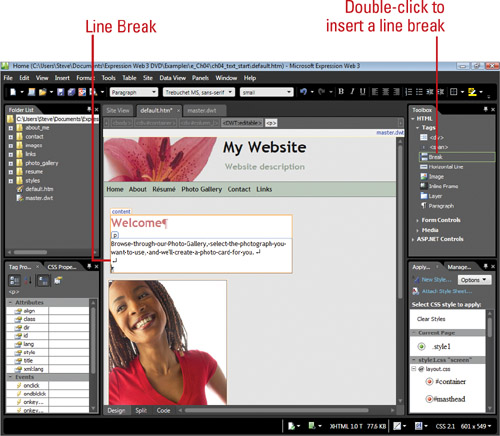
As you enter or modify text on a Web page, the text automatically wraps within a container to create a paragraph. If you want to create a paragraph, all you need to do is press Enter, which inserts a paragraph break. When you insert a paragraph break, Expression Web automatically creates a new paragraph container, which is denoted with a tab labeled with a p. If you want to insert a line, yet still remain in the same paragraph, you can insert a line break. Sometimes it’s hard to see the difference between a paragraph or line break, so Expression Web provides the option to show or hide formatting marks. In addition to showing or hiding line breaks and paragraph marks, you can also show or hide spaces, comments, script blocks, container position, aligned elements, and other code-related elements.
Show or Hide All Formatting Marks. Click the View menu, point to Formatting Marks, and then click Show.
You can also click the Show Formatting Marks button on the Standard toolbar.
Show or Hide Line Breaks. Click the View menu, point to Formatting Marks, and then click Line Breaks.
You can also click the Show Formatting Marks button arrow on the Standard toolbar.
Show or Hide Paragraph Marks. Click the View menu, point to Formatting Marks, and then click Paragraph Marks.
You can also click the Show Formatting Marks button arrow on the Standard toolbar.
Click where you want the text to break, and then press Shift+Enter.
Click where you want the text to break, click the Insert menu, point to HTML, click Break, click the break option you want, and then click OK.
Click where you want the text to break, click the plus sign (+) next to Tags in the Toolbox panel, and then double-click the Break icon.
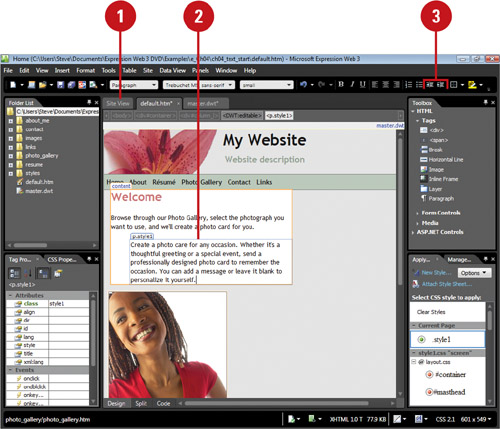
Click where you want a new paragraph, and then press Enter.
Click where you want the text to break, click the Insert menu, point to HTML, and then click Paragraph.
Click where you want the text to break, click the plus sign (+) next to Tags in the Toolbox panel, and then double-click the Paragraph icon.

Text can be moved and copied in Expression Web just like in other word processing software. You can move or copy text within a Web page, between Web pages, or to another program. When you cut (for a move) or copy text or graphics, Expression Web places it on the Clipboard. To complete the copy or move, you paste the data stored on the Clipboard in another location. You can use the commonly used Paste command or the Paste Text command, which provides options to control line breaks and white space. When you paste an item with the Paste command, the Paste Options button appears allowing you to keep or remove formatting or keep HTML or Text only. When you use the Paste Text command, the Paste Text dialog opens allowing you to select the option you want. To copy or move text or graphics without using the Clipboard, you can use a technique called drag-and-drop. Drag-and-drop makes it easy to copy or move text or graphics short distances on your Web page.

- To move the text from its current location, click the Edit menu, and then click Cut. The text is removed from its current location and placed on the Clipboard.
 To copy the text to a new location, click the Edit menu, and then click Copy. A copy of the text is placed on the Clipboard.
 Click to position the insertion point where you want to place the cut or copied text.
 Click the Edit menu, and then click one of the following:
Paste. Pastes the text and retains the source formatting.
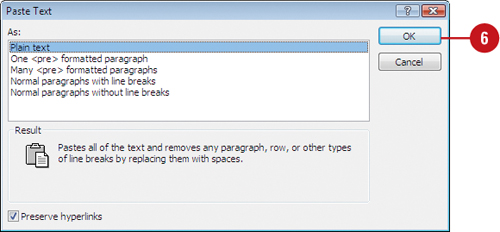
Paste Text. Select a paste option in the Paste Text dialog box, and then click OK.

The text is copied from the Clipboard to the new location, but also remains on the Clipboard for future placements.
 If necessary, click the Paste Options button, and then click an option to adjust the pasted item.
Did You Know?
You can turn on or off paste options. Click the Tools menu, click Page Editor Options, click the General tab, select or clear the Show Paste Options buttons check box, and then click OK.???
Table . Paste Text Options
Select | To Do This |
|---|---|
Plain text | Insert plain text with spaces replacing any line breaks in pasted text |
One <pre> formatted paragraph | Use <pre> (preformatted) tag to maintain all line breaks of pasted text |
Many <pre> formatted paragraph | Use <pre> tag to maintain all line and paragraph breaks of pasted text |
Normal paragraphs with line breaks | Convert any lines breaks to <br> (line break) tag and any paragraph breaks to <p> tag |
Normal paragraphs without line breaks | Pastes text without line breaks |
Indenting paragraph text allows you to shift text to make it stand out. You can indent text to create an outline or indent the first line of a paragraph. You can use the Increase Indent Position and Decrease Indent Position buttons on the Formatting toolbar to quickly change text position or use the Paragraph dialog box to set more precise positioning. Line spacing is another way to vary the look of a Web page. The lines in a Web page are single-spaced by default, but you can easily change line spacing to double or 1.5 lines to allow extra space between every line. Sometimes, you’ll want to add space above and below certain paragraphs, such as for headlines or indented quotations to help set off the text.
- Open and display the Web page you want to use.
- Select the paragraph you want to change.
- Click an indent button on the Formatting toolbar to apply the attribute that you want the selected text.
Increase Indent Position button. Increase the indent position to the right.
Decrease Indent Position button. Decrease the indent position to the left.
Did You Know?
You can change character spacing. Select the text you want to change, click the Format menu, click Font, click the Character Spacing tab, click the Spacing list arrow, click Normal, Expanded, or Condensed, click the Position list arrow, click a vertical position option, and then click OK.
- Open and display the Web page you want to use.
- Select the paragraph you want to change.
- Click the Format menu, and then click Paragraph.
- Type the space you want indented on the left side of the selected paragraph (in points).
- Type the space you want indented on the right side of the selected paragraph (in points).
- Type the space you want indented before the first line of the selected paragraph (in points).
 Click OK.
- Open and display the Web page you want to use.
- Select the paragraph you want to change.
- Click the Format menu, and then click Paragraph.
- Click the Line Spacing list arrow, and then click the spacing you want.
- Type the space you want to add before (above) each selected paragraph (in points).
- Type the space you want to add after (below) each selected paragraph (in points).
- Click OK.

Text alignments vary the look of a Web page and help lead the user through the text. You can align text along the left or right margin, in the center, or equally across the page. Left-aligned text works well for body paragraphs in most cases, but other alignments vary the look of a page and help lead the reader through the text. Right-aligned text, which is even along the right margin and ragged at the left margin, is good for adding a date to a letter. Justified text spreads text evenly between the margins, creating a clean, professional look, often used in articles. Centered text is best for titles and headings. You can quickly change text alignment using alignment buttons on the Common or Formatting toolbar.
- Open and display the Web page you want to use.
- Select the text you want to align.
- Click an alignment button on the Common or Formatting toolbar to apply the attribute that you want the selected text.
Align Left button. Aligns text along the left margin. The text is uneven along the right margin.
Center button. Aligns text in the middle of the page.
Align Right button. Aligns text along the right margin. The text is uneven along the left margin.
Justify button. Aligns text evenly between the two margins (only on Formatting toolbar).
See Also
See “Setting Text Indention and Spacing” on page 86 for information on changing text indention and spacing.
Expression Web comes with a host of symbols and special characters for every need. Insert just the right one to keep from compromising a Web page’s professional appearance with a hand-drawn arrow («) or missing mathematical symbol (å). Before you insert a symbol, be aware that not all browsers support all symbols. Be sure to test your pages on several browsers.
- Open and display the Web page you want to use.
- Click where you want to insert a symbol or character.
- Click the Insert menu, and then click Symbol.
- To see other symbols, click the Font list arrow, and then click a new font.
- To select a subset, click the Subset list arrow, and then select the subset you want.
Some common subsets include Currency symbols, Arrows, and General Punctuation.
- Click a symbol or character.
- Click Insert.

See Also
See Chapter 5, “Working with Web Page Graphics” on page 117 for information on inserting graphics.
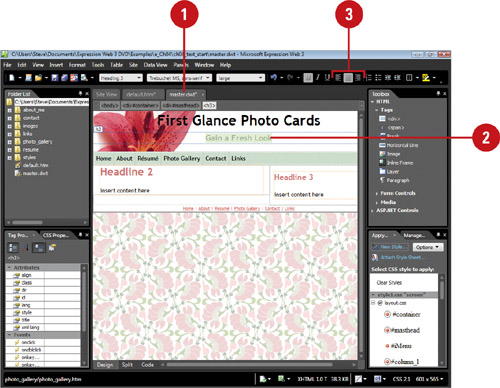
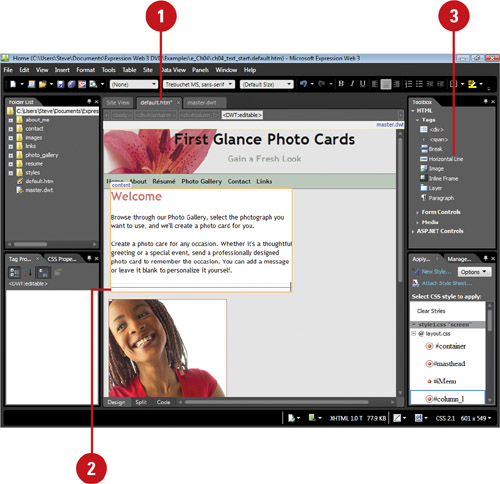
Horizontal lines have a variety of uses in the construction of a Web page. Whether they’re used to separate sections of a page or to underline an important piece of text, you have several decisions to make. Lines have a variety of properties that you can modify, including width, height, alignment, and color.
- Open and display the Web page with the horizontal line you want to change.
- Double-click the horizontal line you want to modify.
- Select the formatting options you want.
Width. Width of the line. Specified in pixels or as a percentage of the window width.
Height. Height of the line in pixels.
Alignment. Alignment of the line on the page.
Color. Color of the line, unless you want it shaded. If you select a color, shading is no longer an option.
Solid Line. Select the check box to create a solid line. Clear it to create a shaded line.
- Click OK.

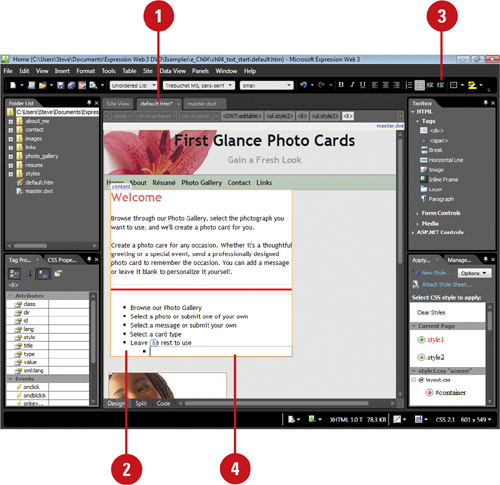
The best way to draw attention to a list is to format the items with bullets or numbers. For different emphasis, you can change any bullet or number style to one of the predefined formats. You can also customize the list style or insert a picture as a bullet. If you move, insert, or delete items in a numbered list, Expression Web sequentially renumbers the list for you. Every time you press Enter, a new bullet will appear. To end a list, press Enter twice.
- Open and display the Web page you want to use.
- Select the text you want to change into a bulleted or numbered list, or click where you want to start a list.
- Click the Bullets or Numbering button on the Common toolbar.
- If you’re starting a list, type the first entry, and then press Enter.
- Type the next entry, and then press Enter.

- To end the list, press Enter twice.
Did You Know?
You can remove bullets or numbering from a list. Select the list with the bullets or numbering, and then click the Bullets or Numbering button on the Common toolbar.
You can add more items to a list. Click at the end of the line above where you want to add an item to the list, and then press Enter. To create a sublist, press Tab.


Did You Know?
You can insert a custom bullet. Produce a custom bullet, and then save it, preferably in either GIF (.gif) or JPEG (.jpg) format. In Expression Web, place the insertion point at the place where you want to start the list. Click the Format menu, click Bullets and Numbering, click the Picture Bullets tab, click the Specify picture option button, click Browse to locate your creation, double-click a picture, and then click OK. You can proceed as you would with any other bullet style.
You can use the Style list arrow to format a bullets or numbered list. Click the Style list arrow on the Common toolbar, and then click Unordered List <ul> or Ordered List <ol>. An unordered list is a bulleted list, while an ordered list is a numbered list.
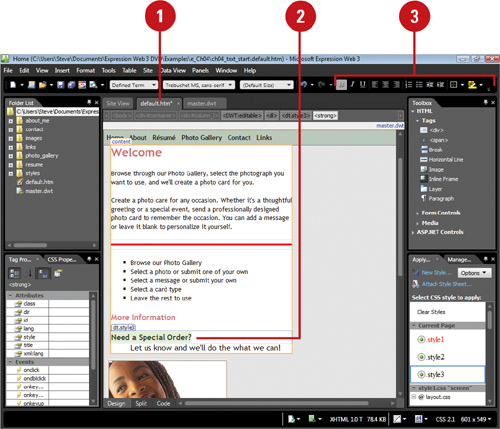
In addition to the standard bulleted and numbered lists, you can also create indented lists, or sublists. A sublist creates multilevels in a list. You can create a sublist with a bulleted or numbered list. You use the Increase Indent button on the Formatting toolbar to create the multilevels. If you want to insert a line to create a sublist, you can press Tab or use the Increase Indent button.
- Open and display the Web page you want to use.
- Select the text you want to change into a sublist, or click where you want to start the sublist (press Enter to create a new line).
- Click the Increase Indent button on the Formatting toolbar.
If you create a new line, you can press Tab to create a sublist.
Expression Web creates a sublist bullet.
- If you’re starting a sublist, type the first entry, and then press Enter.
A style is a collection of formatting settings saved with a Web site or template that you can apply to text, graphics, and tables at any time. If you modify a style, you make the change once, but all text tagged with that style changes to reflect the new format. Expression Web provides you with Built-In Styles, or you can create your own User-Defined Styles. Both built-in and user-defined styles are available from the same style list while you edit a page. When you create a user-defined style, you can also create an embedded Cascading Style Sheet (CSS), which is style information that is applied to the open Web page.
- Open and display the Web page you want to use.
- Select the text you want to apply a style.
- Click the Style list arrow on the Common toolbar.
- Click a style from the drop-down list. The default styles include:
(None)
Paragraph <p>
Heading1 <h1> through Heading 6 <h6>
Unordered List <ul>
Ordered List <ol>
Defined Term <dt>
Definition <dd>
Address <address>
Preformatted <pre>
Block Quote <blockquote>

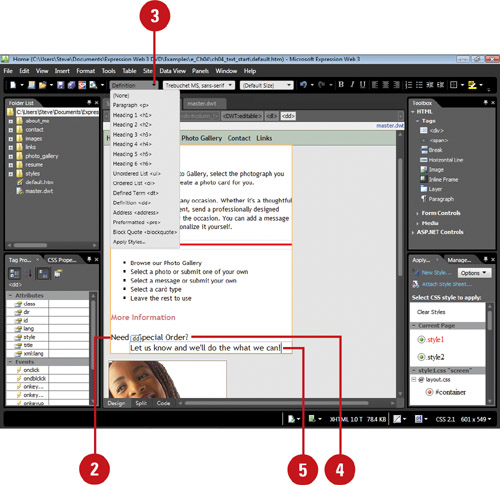
You can use the Styles list arrow on the Common toolbar to quickly format text as a heading or definition list. A heading provides structure for a Web page by providing visual indicator of what is important. The default styles include six different headings, labeled Heading1 <h1> through Heading6 <h6>. Heading1 is the largest size and Heading6 is the smallest size. If you have a list of definitions you want to include in a Web page, you can use the Define Term <dt> and Definition <dd> styles to format the information you want to provide.
- Open and display the Web page you want to use.
- Select the text you want to change into a heading or subheading.
- Click the Style list arrow on the Common toolbar.
- Click a style (such as Heading 1, Heading 2, etc.) from the drop-down list.

The text is defined with the heading tag associated with it (<h1> to <h6>).
- Open and display the Web page you want to use.
- Click to place the insertion point where you want to place a definition.
- Click the Style list arrow on the Common toolbar, and then click Defined Term.
- Type the term name, and then press Enter.
The term is defined with the <dt> tag and the definition is indented.
- Type the definition for the term name, and then press Enter.
The definition is defined with the <dd> tag.
- Type the next term name, press Enter, type the definition, and then press Enter.
- To end the definition list, press Enter twice.
You’ll often want to format, or change the style of text to add emphasis to part of a Web page. Boldface, italics, underlines, and other text effects are toggle switches, which means you simply click to turn them on and off. For special emphasis, you can apply multiple formats, such as bold and italics. You can also change the font typeface and size. Using one font typeface for headings and another for main text adds a professional look to your Web page.
- Open and display the Web page you want to use.
- Select the text you want to format.
- Click a formatting button on the Common toolbar to apply the attribute you want.
Bold button.
Italic button.
Underline button.
Font Color button arrow, and then select a color.
Highlight button arrow, and then select a color.
- Open and display the Web page you want to use.
- Select the text you want to format.
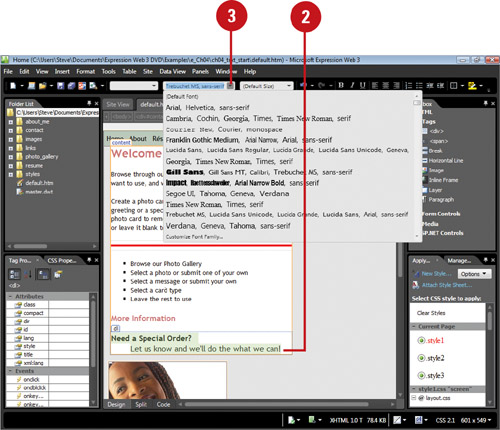
- Click the Font list arrow, and then click a font typeface.
See Also
See Chapter 12, “Creating Styles and Layouts with CSS” on page 287 for information on formatting text using cascading style sheets, which provides consistent formatting for Web pages.
- Open and display the Web page you want to use.
- Select the text you want to format.
- Click the Format menu, and then click Font.
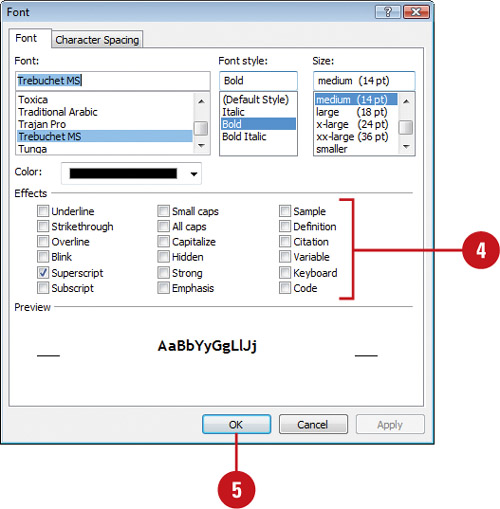
- Select the formatting options you want.
Select a font.
Select a font style.
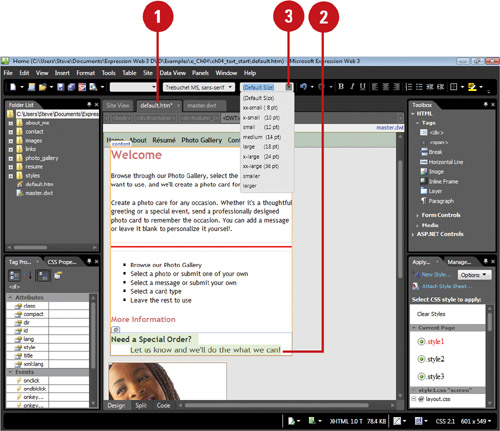
Select a font size.
Select a font color on the Color list.
Under Effects, select the effect of your choice, if any.
- Click OK.

Expression Web comes with simple special effects you can quickly add to text on your Web pages. Some of the effects add style to your text, such as Blink or Overline, while others define the type of text, such as Definition or Citation, on your Web pages.
- Open and display the Web page you want to use.
- Select the text you want to format.

- Click the Format menu, and then click Font.
- Select or clear the font special effects check boxes. The unique effects to Expression Web include:
Overline. Draws a line above the text.
Blink. Applies blinking animation to the text.
Capitalize. Capitalizes the first letter in each word.
Strong. Applies a stronger emphasis to the text.
Emphasis. Applies a subtle emphasis to the text.
Sample. Applies a fixed width font to the text.
Definition. Specifies the text as a definition.
Citation. Specifies the text as a reference to other sources.
Variable. Specifies the text as a variable or program argument.
Keyboard. Specifies the text that is entered by a user.
Code. Specifies the text as a programming code.
- Click OK.
Expression Web comes with a standard set of 16 colors. In addition to the standard colors, Expression Web allows you to add more colors to the set for use on your Web pages. More Colors are additional colors that you can add to each color menus—the Font Color button menu, for example. More Colors are useful when you want an object or picture to always have the same color. They are also useful when you want to change the color of an object to a specific color, but the standard colors don’t not have that color. Colors that you add to a specific color menu appear in all color menus and remain in the menu even if the color scheme changes.
- Open and display the Web page you want to use.
- Click any color list arrow (such as Font Color button arrow) to open a color palette.

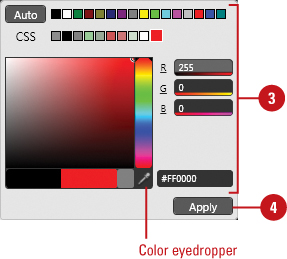
- Do one of the following:
Click a color from the expanded palette. Every time you click a color, its corresponding hexadecimal value appears in the Value box.
Enter a hexadecimal value in the Value box. An example of such a value would be HEX={99,FF,CC}.
To select a color from anywhere on the screen, click Color eyedropper, and then click any color on the screen.
- Click Apply.
Suppose that you discover you have misspelled or want to change a word throughout an entire Web page. You do not need to read through the document to find every instance of the word and manually change it. The Find and Replace commands can do that for you. Expression Web can find every instance for you, and walk you through the Web site from page to page until all the corrections have been made. In addition to text, you can also find and replace code. You can search one or more Web page or an entire Web site. When you search multiple pages, the results appear in a Find panel.
- In the Folder List, open or select the one or more pages you want to search.
To select multiple pages, use Ctrl+click.
- Click the Edit menu, and then click Find.
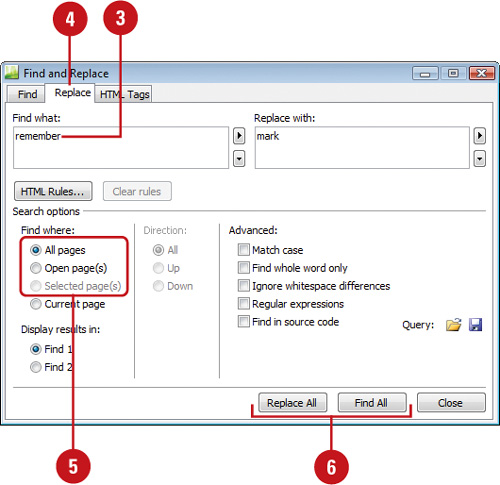
- Enter the text for which you are searching, or click the Regular expression list arrow, and then select a special character or option.
- If you want to replace the text or code found, click the Replace tab, and then enter the replacement text.
- Click the Current page option.
- Select the search parameters you want (Match case, Find whole word only, etc.).
- Select one of the following buttons:
Find All or Find Next button. Locates all instances or the next instance of the text.
Replace All or Replace button. Replaces all instances or the selected instance of the text.
 When you’re done, click Close in the dialog box and panel.
- In the Folder List, open or select the Web site you want to search.
- Click the Edit menu, and then click Find.
- Enter the text for which you are searching.
- If you want to replace the text or code found, click the Replace tab, and then enter the replacement text.
- Click the Selected Pages option or the All Pages option.
- Click Find All or Replace All.
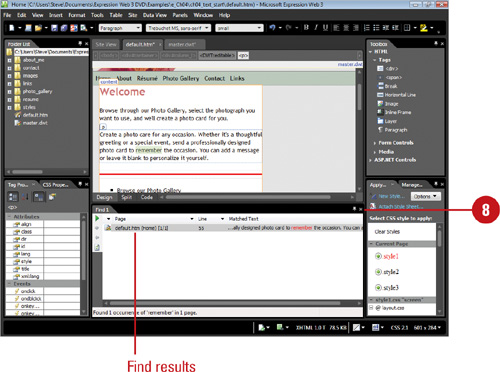
The list of pages containing the selected or replaced word(s) opens in the Find pane at the bottom of the Editing window.
- When Expression Web lists the pages in which the text you’re seeking was found (step four), you can open any of these pages by double-clicking the page from the list. The first instance of the text you’re looking for is highlighted. This text can be replaced via the Replace command.
- To continue searching the page, click the blue Next or Back arrows in the Find pane.
 When you’re done, click Close in the dialog box and panel.
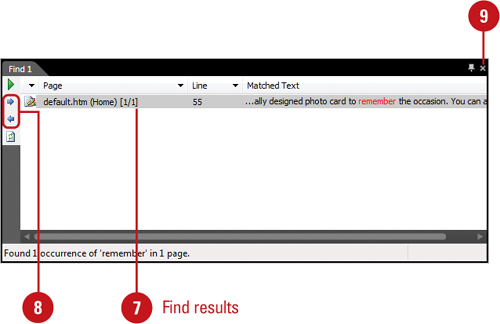

In addition to finding and replacing text and code, you can also find and replace HTML tags. The Find and Replace dialog box includes an HTML Tags tab, which you can use to search for and replace HTML tags. You can search one or more Web page or an entire Web site. When you search multiple pages, the results appear in a Find panel, which makes it easy to view and work with the results in different page view. The Split view allows you to search for tags without having to change your view.
- In the Folder List, open or select the one or more pages you want to search.
To select multiple pages, use Ctrl+click.
- Click the Edit menu, and then click Find.
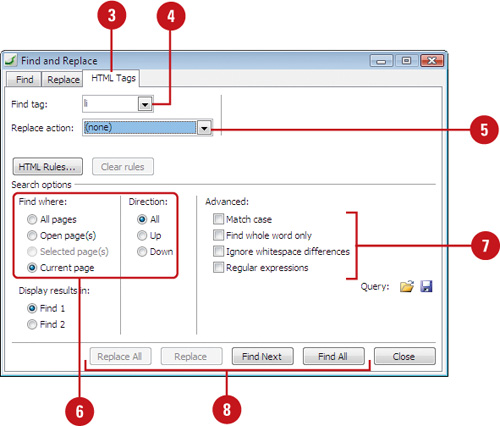
- Click the HTML Tags tab.
- Click the Find tag list arrow, and then select the tag you want to find.
- If you want to replace the tag, click the Replace action list arrow, select an action, and then specify what you want to replace it with.
- Click the find where and direction options you want.
- Select the search parameters you want (Match case, Find whole word only, etc.).
- Select one of the following buttons:
Find All or Find Next button. Locates all instances or the next instance of the text.
Replace All or Replace button. Replaces all instances or the selected instance of the text.???
The list of pages containing the selected tags opens in the Find pane at the bottom of the Editing window.
- When Expression Web lists the pages in which the text you’re seeking was found (step four), you can open any of these pages by double-clicking the page from the list. The first instance of the text you’re looking for is highlighted. This text can be replaced via the Replace command.
 To continue searching the page, click the blue Next or Back arrows in the Find pane.
 When you’re done, click the Close button in the Find pane.
Did You Know?
You can display two different find results. Expression Web provides two Find panes. In the Find and Replace dialog box, you can select the one you want to use. This means you can work with two different find results at the same time.
You can save searches as a query. Perform a search using the Find and Replace dialog box, and then click the Save Query button. To open a previously save query, click the Open Query button.
Using Expression Web, you can correct spelling errors on a Web site immediately, or create a task for each page with an error and correct them later. Begin by opening the page whose spelling you want to examine. If you commonly use words unique to a hobby or profession that would not appear in a normal dictionary, or are unlikely to be part of the common vernacular, consider adding them to your dictionary so that they will not repeatedly be called into question during spell checks.
- Open and display the Web page you want to check, and then click where you want to start checking.
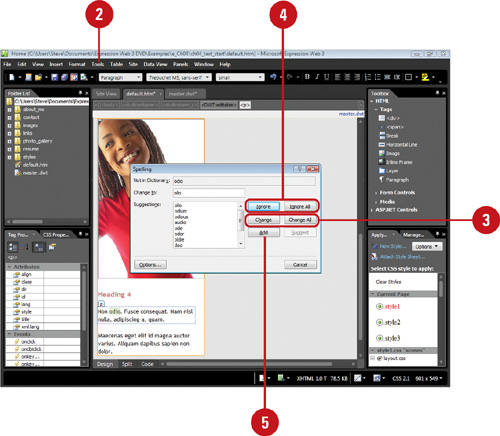
- Click the Tools menu, point to Spelling, and then click Spelling.
The program begins scanning the pages for words that aren’t in its dictionary.
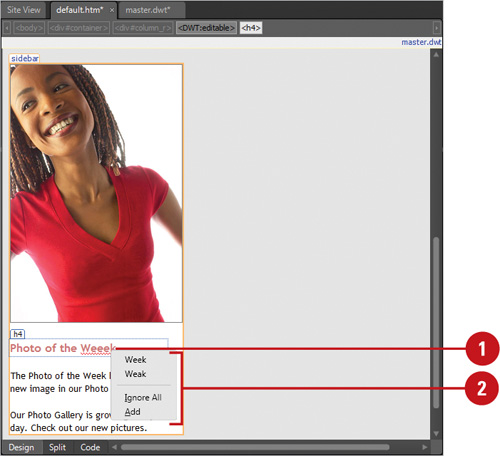
- Click the suggested word or type the correct word, and then click Change. Click Change All to correct all instances of the word.
- If the unrecognized word is correctly spelled but the program doesn’t know it (as with a name, for example), click Ignore to ignore this instance of the word, or click Ignore All to ignore all instances of this word.
- Click Add to add this word to your custom dictionary.
- When the spell checker reaches the end of the document, if it hasn’t searched the beginning, a prompt will ask if you want it to resume the search at the start of the document.
- When you’re done, click OK.
- If necessary, click the Panels menu, and then click Folder List to display the Folder List.
- Select the Web site or the pages you want to check. To select multiple pages, click the first page, and then press and hold down Ctrl while clicking the other pages.
- Click the Tools menu, point to Spelling, and then click Spelling.
- Click the Entire Web Site option or the Selected Page(s) option.
- Click Start.

- Double-click the first misspelled word in the list. If a misspelled word needs to be corrected, the Spelling dialog box opens. Otherwise, the Continue With The Next Page? dialog box opens.
- To correct a misspelled word, use the buttons in the Spelling dialog box to change or ignore the misspelled word. To continue spell checking the next page, click Next Page.

- If you want to stop the spell check or it is done checking all the pages, click Back To List.
- Click Cancel to close the Spelling dialog box.

Before you can use a custom dictionary, you need to enable it first. You can enable and manage custom dictionaries by using the Custom Dictionaries dialog box. In the dialog box, you can change the language associated with a custom dictionary, create a new custom dictionary, or add or remove an existing custom dictionary. If you need to manage dictionary content, you can also change the default custom dictionary to which the spelling checker adds words, as well as add, delete, or edit words. If you mistakenly type an obscene or embarrassing word, such as ass instead of ask, the spelling checker will not catch it because both words are spelled correctly. You can avoid this problem by using an exclusion dictionary. When you use a language for the first time, Expression Web automatically creates an exclusion dictionary. This dictionary forces the spelling checker to flag words you don’t want to use.
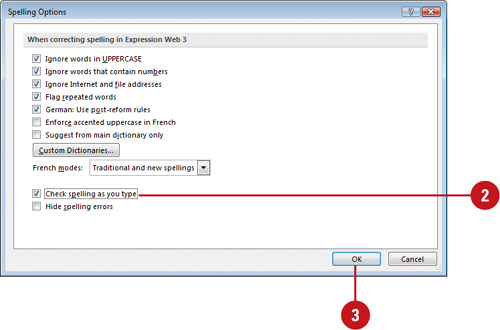
- Click the Tools menu, point to Spelling, and then click Spelling Options.
- Click Custom Dictionaries.
- Select the check box next to CUSTOM.DIC (Default).
- Click the Dictionary language list arrow, and then select a language for a dictionary.
- Click the options you want:
Click Edit Word List to add, delete, or edit words.
Click Change Default to select a new default dictionary.
Click New to create a new dictionary.
Click Add to insert an existing dictionary.
Click Remove to delete a dictionary.
- Click OK to close the Custom Dictionaries dialog box.
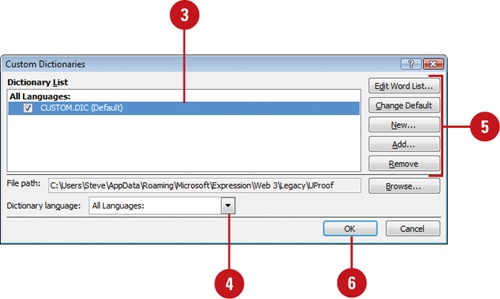
- Click OK.

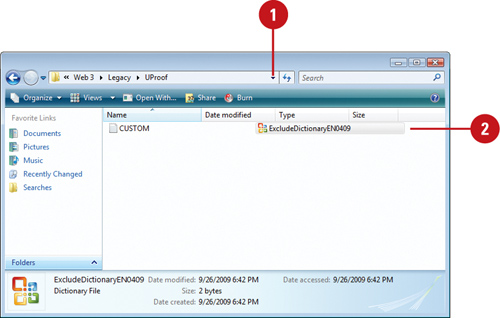
- In Windows Explorer, go to the folder location where the custom dictionaries are stored.
Windows Vista/7. C:Usersuser nameAppDataRoamingMicrosoftExpressionWeb 3legacyUProof
Windows XP. C:Documents and Settingsuser nameApplication DataMicrosoft ExpressionWeb 3legacyUProof
- Locate the exclusion dictionary for the language you want to change.
The file name you want is ExcludeDictionary Language CodeLanguage LCID.lex.
For example, ExcludeDictionary EN0409.lex, where EN is for English.
Check Word Help for an updated list of LCID (Local Identification Number) number for each language.
- Open the file using Microsoft Notepad or WordPad.
- Add each word you want the spelling check to flag as misspelled. Type the words in all lowercase and then press Enter after each word.
- Save and close the file.
International Expression Web users can change the language that appears on their screens by changing the default language settings. Before you can use a different language, you need to install the Microsoft Expression Web Language Pack for the languages you want to use in a Web site. After you install a language, you can set the default language for a Web page, Web site, and a custom dictionary. If the text in your Web page is written in more than one language, you can designate the language of selected text so the spelling checker uses the right dictionary. However, the keyboard you use to enter text determines the language used by the spelling checker.
- Open and display the Web page you want to use.
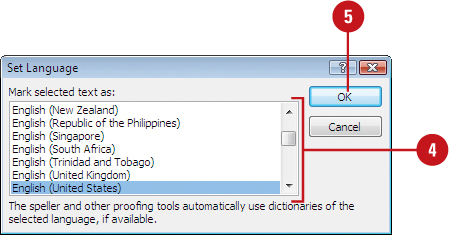
- Select the text you want to mark.
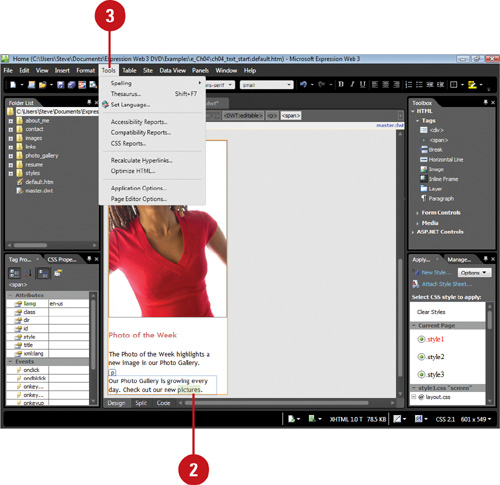
- Click the Tools menu, and then click Set Language.

- Click the language you want to assign to the selected text.
- Click OK.
Did You Know?
You can specify your keyboard layout. After you enable editing for another language, such as Hebrew, Cyrillic, or Greek, you might need to install the correct keyboard layout so you can enter characters for that language. The keyboard you use to enter text determines the language used by the spelling checker. In the Control Panel (Classic view), double-click the Regional and Language Options icon, click the Language (XP) or Keyboards and Languages (Vista) tab, and then click Details (XP) or Change Keyboards (Vista) to check your keyboard.

See Also
See “Changing Web Page Properties” on page 54 for information on setting the language used for spell checking on a Web page.
See “Using Custom Dictionaries” on page 108 for information on setting the language used for a custom dictionary.
As you type, a red wavy line appears under words not listed in Expression Web’s dictionary (such as misspellings or names) or duplicated words (such as the the). You can correct these errors as they arise. When Expression Web learns the spellings of words you use regularly, it even automatically corrects some errors as you type. If the unrecognized work is correct, you can add it to the dictionary.
Repeating the same word in a Web page can reduce a message’s effectiveness. Instead, replace some words with synonyms, words with similar meanings, or find antonyms, words with opposite meanings. If you need help finding exactly the right word, you can use the Thesaurus.

When you type text in a page, Expression Web applies a set of default text attributes. You can change the default text for Design and Code views. In Design view, you can change the default proportional and fixed-width fonts. A proportional font has variable spacing between letters, while a fixed-width font has the same spacing between letters. Proportional fonts are typically used for Web page text, while fixed-width fonts are typically used for working with code. When you are working with large amounts of text, a fixed-width font is easier to read.

Instead of applying one font to text in a Web page, you can apply a set of fonts, known as a font family, in order to increase the likelihood that the visitor’s computer system will have one of the fonts you specify. Expression Web comes with a few font families when you install the program, such as Arial, Helvetica, sans-serif. You can modify an existing font family or create your own. When you create your own, use fonts that are the same relative size, so using any of the fonts in the font family looks the same on any computer.
- Click the Tools menu, and then click Page Editor Options.
- Click the Font Families tab.
- Click (New Font Family) to create a new one or click an existing one to change it.
- To add a font to a family, select a font, and then click Add.
- To remove a font families, select the font family, and then click Remove.
- To change the priority order, select a font family, and then click Move Up or Move Down.
- Click OK.

If you have a word processing document that you want to use as a Web page, you can copy all or part of the text file, and then use the Paste Text command on the Edit menu to insert the contents. Expression Web allows you to copy text in several formats, including Rich Text Format (.rtf), Text Files (.txt), Word 2007 (docx), Word 97-2003 (.doc), and HTML (.htm, .html).
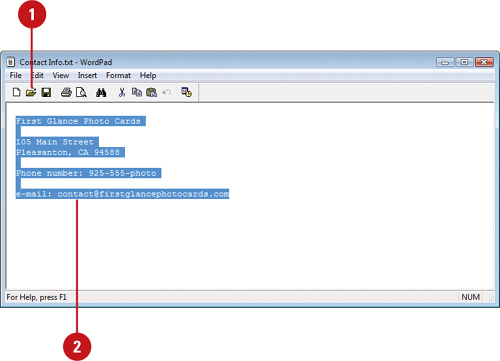
- Open document with the text you want to paste into a Web page.
- Select the text you want to use, copy the text, and then exit the program.
- In Expression Web, open and display the Web page you want to use.
- Click where you want to insert the content of the file.
- Click the Edit menu, and then click Paste Text.
- If necessary, select an option, and then click OK.
See Also
See “Moving and Copying Text” on page 84-85 for more information on selecting paste text options.