Microsoft Expression Web 3 is a professional design tool to create Web sites that conform to modern, standards-based sites on the Web. Expression Web is part of the Microsoft Expression Studio, which also includes Expression Design, Blend plus Sketchflow, and Encoder. Expression Design is a professional illustration and graphic design tool that lets you build compelling elements for both Web and desktop application user interfaces. Expression Blend plus Sketchflow (New!) is a professional design tool that allows you to create engaging, Web-connected, user experiences for Windows. Sketchflow allows you to quickly prototype a Blend project. Expression Encoder is a program that allows you to prepare your edited video projects for use and playback on the Web in Silverlight media applications.
Before you install Expression Web 3, you need to check your computer hardware and software and make several setup decisions that relate to your computer. After installing Expression Web 3, you will find many of the same elements that you’ve come to know from other Microsoft programs.
There are four different Web site views in Expression Web that help you work more efficiently. The first one, Folders view displays a list of files in the Web site, organized by folder. Reports view displays a list of information and links to help manage the site. Another, Hyperlinks view shows the structure of the page links in the form of a flowchart. When you’re ready to publish your Web site, Publishing view (New!) displays a comparison of files in the current local Web site and the remote site using different settings.
Once you’ve familiarized yourself with the look and feel of Expression Web, you can begin using it by creating a simple Web page. You can insert, copy and paste text and get it ready to add more specific elements as your skills progress. After creating your page, you can save it to work on later.
Before you can install Expression Web 3, you need to make sure your computer meets the minimum system requirements. You need to have a computer with the following minimum configuration:
PC with Pentium 700 or faster processor.
Windows XP Service Pack 2, Windows Vista, Windows 7 or later operating system.
512 MB of RAM or more.
1.5 GB of available hard disk space; a portion of this disk space will be freed after installation.
DVD-ROM drive.
1024 x 768 or higher resolution monitor.
Broadband connection.
If you are not sure that your computer meets the minimum requirements, you can check your computer for the information. In Microsoft Windows XP, Vista, or 7, you can check system information on your computer using the System Information accessory. Click the Start button on the taskbar, point to All Programs, click Accessories, click System Tools, and then click System Information.
During the installation of Expression Web 3, Microsoft .NET Framework 3.5 Service Pack 1, or later is also installed on your computer. If a problem occurs, you can install it separately. The software is available for download at www.microsoft.com/downloads

You can install Microsoft Expression Web 3 by using a stand-alone installation or a Microsoft Expression Web 3 Studio installation from a disc or download. Expression Web 3 Studio includes Expression Web 3, Expression Design 3, Expression Blend 3, and Expression Encoder 3. When you install Expression Encoder 3, you also get Expression Encoder 3 Screen Capture (New!), which allows you to capture screens or video on your computer. When you install Expression Web 3, you also get Expression Web 3 SuperPreview (New!), which allows you to preview Web pages for multiple browsers. A Setup Wizard guides you step-by-step through the process of installing the software. When you install Expression Web 3 Studio, you can select the individual programs that you want to install. If want to modify the installation, you can restart the installer to change, repair, or remove it.
 Insert the Microsoft Expression Web 3 or Microsoft Expression Web 3 Studio disc into your drive.
The Microsoft Expression Web Setup Wizard appears.
If the Setup Wizard doesn’t start, open the disc, and then locate and double-click the WebDesigner.exe icon. You can also download the software from the Microsoft Web site at www.microsoft.com.
You can also purchase and download the software from the Microsoft Expression site at www.microsoft.com/expression, and then double-click the downloaded file.
 Click Accept to the License Agreement. If prompted, type the 25-character product key, type the optional code, and then click Next.
 Select the software options you want and follow the Setup Wizard.
Click Options to set additional custom options.
 Click Install.
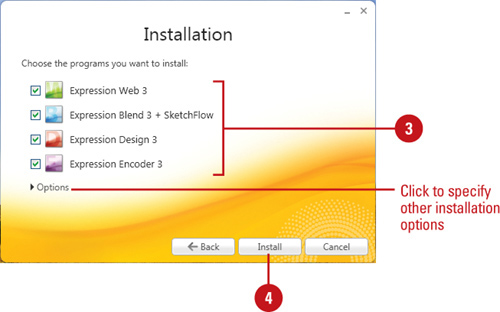
 When the installation is complete, click Finish.
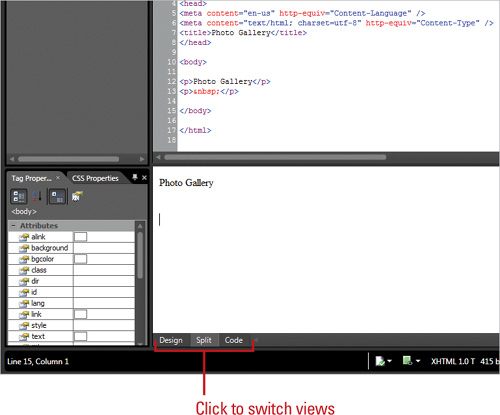
When you first open Expression Web 3, the program window opens, displaying a blank new page, menus, a toolbar, panels, and a status bar. The title bar across the top of the screen contains the program and Web site name, with the menu bar directly below it, and the Common toolbar below the menu bar. The panels provide options that relate to the current task. The View tabs—which offer access to Design, Split, and Code modes—occupy a small area at the bottom of the screen. These tabs allow you to view pages from different perspectives; the program’s default is Design view.
- Click the Start button on the taskbar.
- Point to All Programs.
- Click Microsoft Expression.
- Click Microsoft Expression Web 3.

The Expression Web 3 program opens and a blank new page appears, ready for you to enter text. By default, this page is titled Untitled_1.htm.
- If prompted to set Expression Web as your default HTML editor, click Yes or No.
If you don’t want to perform this check each time you start Expression Web, clear the Always perform this check when starting Expression Web check box.

Expression Web 3 appears with a gray color scheme for the program window that complements the look of other Microsoft Expression Studio programs. The gray color scheme is only applied to the program window, dialog boxes continue to use your Windows color scheme. In Expression Web 2, the program provided an option to view the Expression Web program window with your Windows color scheme instead of the gray color scheme. In Expression Web 3, the option is no longer available.
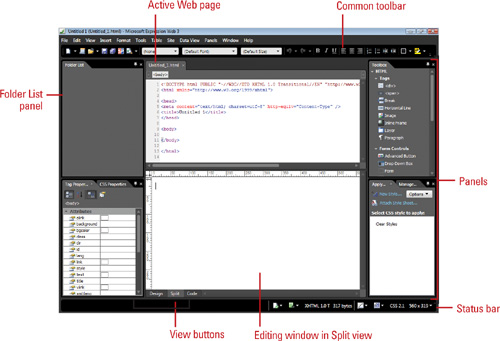
Toolbars contain buttons you can click to carry out commands you use frequently. Expression Web provides 11 different toolbars for you to use to execute commands. The Common toolbar appears by default under the menu bar and provides the most commonly (as the name suggests) used commands. You can quickly show the toolbars you need or hide the ones you no longer use to customize the way you use Expression Web. When you show a toolbar, it appears under the menu bar along with any other toolbar in a docked position. If you want to move a toolbar into a different position under the menu bar, you can make the change using the mouse.
- Click the View menu, and then point to Toolbars.
- Click the unchecked toolbar you want to display or the checked toolbar you want to hide.

Did You Know?
You can use menus to execute commands. Instead of using toolbars to execute commands, you can also use the menu bar. An icon to the left on a menu means a toolbar button is available for that command. A keyboard combination to the right of a menu command indicates a shortcut key is available for the command.
- If you’re not sure what a toolbar button does, point to it to display a ScreenTip.

- To choose a command, click a toolbar button or click the Toolbar Options list arrow, and then click a toolbar button.

When you select a button from the list arrow, the button appears on the toolbar, showing only the buttons you use most often.
Move. Point to the title bar of a undocked toolbar or the dotted lines on the left side of a docked toolbar, then click and drag (the cursor changes to a four-headed arrow) the toolbar to a new location.

When you start Expression Web, four panels appear by default: Folder List, Tag Properties, Apply Styles, and Toolbox. You can open any of the 19 panels in the Expression Web window using the Panels menu. The panels are grouped together in a window based on the sections displayed on the Panels menu and appear as tabs in the same panel. When you no longer need a panel or need more room, you can close a panel or turn on AutoHide to collapse a panel until when you need it (New!). When you open and close panels or move them around, Expression Web saves the arrangement and uses it as the default the next time you start the program.
Open. Click the Panels menu, then click the closed panel you want to open. The panels with a check mark next to the name are already open.
Close. Click the Panels menu, then click the open panel you want to close, or click the Close button in the upper-right corner of the panel.

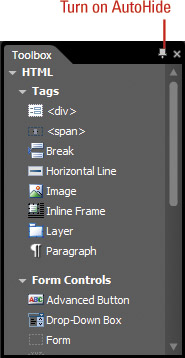
AutoHide On. Click the Turn on AutoHide button (New!) in the upper-right corner of a docked panel. The panel collapses along the side of the window. You can point to the panel name to display it.
AutoHide Off. Point to the hidden panel, click the Turn off AutoHide button (New!). The panel expands to its original size.
AutoHide All. Click then Panels menu, and then click AutoHide All Panels (New!) to turn on or off.

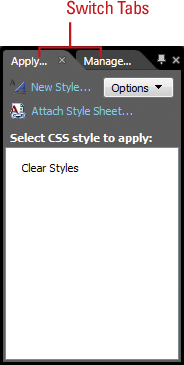
Switch Tabs. Click a visible tab to display it in front.
If there are to many tabs to display, click the left or right arrow below the title bar to scroll to the tab you want.
View Tools. In the Toolbox, click the right arrow to expand a single category or click the down arrow to collapse a single category.

Dock. Click the panel’s title bar or tab name, and then drag it to either side of the Editing window. As an undocked panel approaches the other panels, it snaps in place (docked).
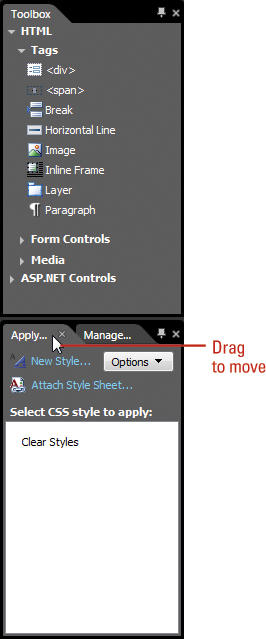
Undock. Click the panel’s title bar or tab name, and then drag it to a new location.
Move. Click the panel’s title bar or tab name, and then drag it within the pane area.
Restore Default Positions. Click the Panels menu, and then click Reset Workspace Layout. Expression Web displays the four default panels in their original position.


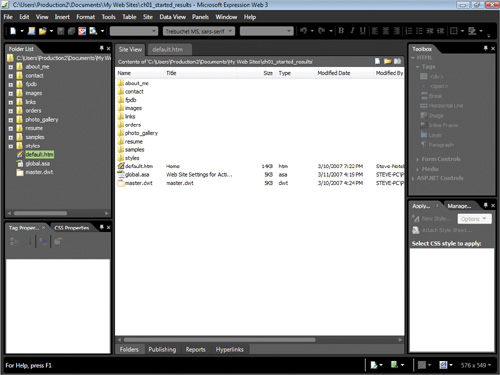
The Folder List is a useful panel for managing files and folders. When you create or open a Web site, a tab for the site appears at the top of the Editing window, with all the site’s file listed in the window and adjacent Folder List. The Folder List displays the file hierarchy of all the folders and files in your Web site, and the Editing window displays Web site files and folders, or individual Web pages. This arrangement enables you to view the file hierarchy of your Web site and the contents of a folder simultaneously, making it easy to copy, move, delete, and rename files and folders. Using the plus sign (+) and the minus sign (–) to the left of an icon in the Folder List allows you to display different levels of folders in your Web site without opening and displaying the contents of each folder. You can open folders and files by double-clicking them. When you open a Web page, the icon changes (adding a pencil) to make easier to identify.
- Open the Web site in which you want to view.
- If necessary, click the Panels menu, and then click Folder List to display the Folder List.
- Perform the commands you want to display folder structure and contents:
To show the file and folder structure, click the plus sign (+).
To hide the file and folder structure, click the minus sign (–).
To display the contents of a folder, click the folder icon.
To open a file, double-click the file.
When you start Expression Web, a blank new page appears, ready for you to enter text. By default, this page is titled Untitled_1.html. You can create new Web pages and sites in several ways: using the New Document button on the Common toolbar or the New command on the File menu. Expression Web numbers new pages consecutively. The insertion point (blinking cursor bar) appears in the page where text will appear when you type. As you type, text moves, or wraps, to a new line when the previous one is full. You can move the insertion point anywhere within the page so that you can insert new text and edit (or insert, revise, or delete) existing text. You can copy or move items (including blocks of text) from one place to another within a Web page, or from other programs.
- Click the New Document button on the Common toolbar.
You can also click the File menu, point to New, and select the page type you want. The default page type is HTML.
- Click where you want to insert text, or select the text you want to edit.

- Make the change you want:
Type to insert new text.
Press Enter to begin a new paragraph or insert a blank line.
Press Backspace or Delete to erase text to the left or right of the insertion point.
Use the Copy or Cut and Paste buttons on the Common toolbar to copy or move items around.
Saving your files frequently ensures that you don’t lose work during an unexpected power loss. The first time you save a Web page, specify a file name and folder in the Save As dialog box. The next time you save using the Save button on the Common toolbar or Save command on the File menu, Expression Web saves the file with the same name in the same folder. If you want to change a file’s name or location, you can use the Save As dialog box again to create a copy of the original file.
- Create or open the Web page you want to save.
- Click the File menu, and then click Save As.
- Click an icon on the Navigation pane to open a frequently used folder.
- Navigate to the drive and folder location where you want to save the Web page.
- Type a name for the page, or use the suggested name.
 To edit the page title, click Change title, type a title for the page, and then click OK.
 Click Save.
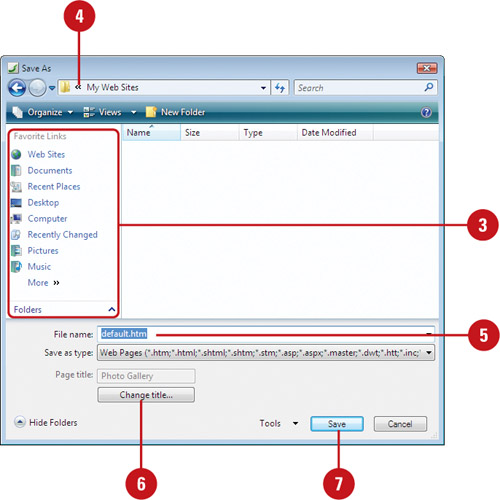
 If the Save Embedded Files dialog box appears, click OK.
Opening a Web page is a simple procedure and can be accomplished using the Open button arrow on the Common toolbar. You can open a Web page from your local hard drive, a network drive, or a Web server using an Uniform Resource Locator (URL). By default, Expression Web opens the last Web site you worked on every time you open the program. If you open a new page while another site is still open, the new page opens in a new Expression Web window. For Web pages you recently opened, you can quickly reopen them again by pointing to Recent Files on the File menu, and then selecting the Web page you want to open.
- Click the Open button arrow on the Common toolbar, and then click Open.
- Click an icon on the Navigation pane to open a frequently used folder.
- Navigate to the drive and folder location where you want to open the Web page.
- Select the page you want to open from the page list in the working folder, or type the URL of the page you want.
- Click Open.

Did You Know?
You can open a recently opened Web page. If you’ve recently accessed a Web page, you can use the File menu to quickly open it again. Click the File menu, point to Recent Files, and then click the file you want.
See Also
See “Opening Web Pages from Within a Web” on page 46 for information on opening Web pages within a Web site.
Expression Web displays the contents of a Web site and Web page in different ways to help you work efficiently with your content. When you click a Web Site tab, Expression Web displays four views at the bottom of the window, which you can also access from the Site menu.
Folders view displays a list of files in the Web site, organized by folder. From this view, you can manage files and folders, and open files with the corresponding editor.
Publishing view (New!) displays a comparison of files in the current local Web site and the remote site. From this view, you can copy a working version of a site to the live site on a service provider’s Web server.
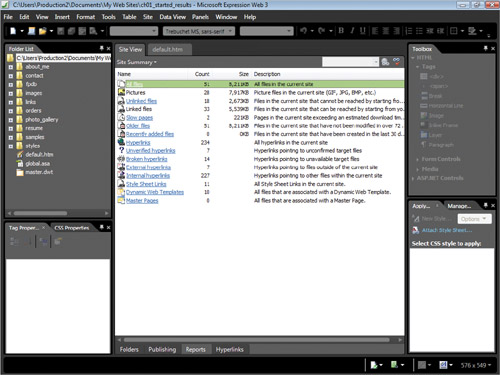
Reports view displays a list of information and links to help manage the site.
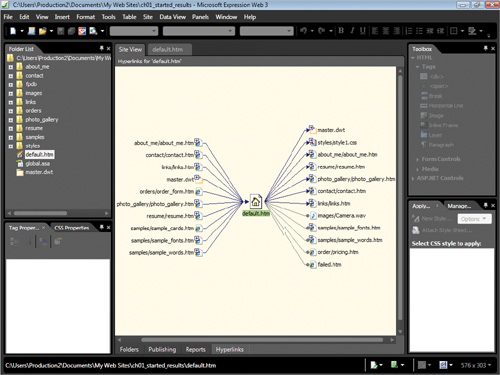
Hyperlinks view displays files in a site, organized by hyperlink reference.
When you click a Web page or document tab, Expression Web enters Page view and displays as many as three views at the bottom of the window.
Design view displays Web pages in WYSIWYG (What You See Is What You Get) view for editing.
Split view displays the screen in half horizontally. The top half displays the current page in Code view and the bottom half displays the current page in Design view.
Code view displays the HTML and any embedded code for a page.
Folders view

Publishing view (New!)
Hyperlinks view

Page view
The tabs across the top of the Editing window indicate the currently open Web pages and sites. You can click the tab to display the page or site you want. At the bottom of the Editing window, the view buttons—Design, Split, and Code—appear for the currently page tab. Design view displays the page or site as it appears on screen, while Code view displays the HTML code that makes up the page or site. Split view shows you Code view at the top and Design view at the bottom. This view is helpful for learning how the code and design elements work.
Web Pages or Web Sites. Click the tab with the name you want to display.

When you’re working in Design or Split view, you can use Expression Web visual aids to make it easier to work with page elements, such as borders, margins and cell padding that are normally invisible. Sometimes it’s hard to adjust elements without being able to see the edge. For example, the Margins and Padding command on the Visual Aids submenu makes it easier to view and change the margins and table cell padding on a page. You can show or hide all the visual aids at once or select each item individually. The Visual Aid menu highlights the menu icon or display a checkmark when a visual aid is turned on.
All. Click the View menu, point to Visual Aids, and then click Show.
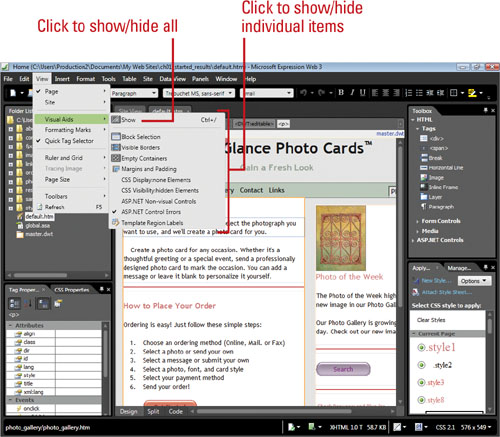
Individual. Click the View menu, point to Visual Aids, and then click each item you want to show or hide.
The Visual Aids submenu remains open until you click away, so you can click multiple items.
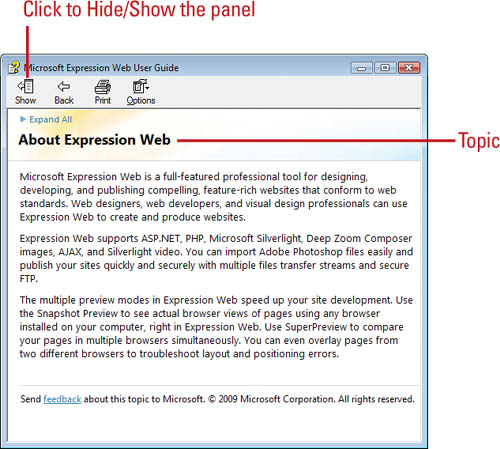
At some time, everyone has a question or two about the program they are using. The Expression Web Help Viewer provides the answers and resources you need, including feature help and related information. The Help Viewer allows you to browse an extensive catalog of topics using a table of contents to locate information, or enter keywords or phrases to search for specific information. When you use any of these help options, a list of possible topics is shown to you with the most likely answer or most frequently-used at the top of the list.
- Click the Help menu, and then click User Guide.
- Locate the Help topic you want.
Click a Help topic link on the Getting started page.
Click the Contents tab, click a Help category (plus or minus sign next to a folder icon to expand or collapse) and then click a topic (page icon).
- Read the topic, and then click any links to get Help information.
Click Collapse All to collapse all categories or click the Expand All to expand all categories.
Click the right arrow to expand a single category or click the down arrow to collapse a single category.
- Click the Back button on the toolbar, or click the Options button on the toolbar, and then click, Forward, Stop, Refresh, and Home to move around in the Help Viewer.
If you want to print the topic, click the Print button on the toolbar.
- When you’re done, click the Close button.

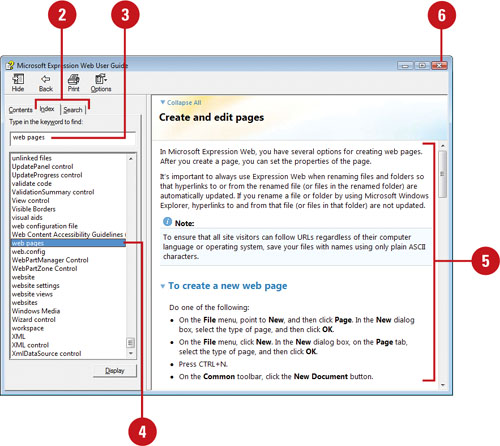
- Search for the Help topic you want.
Click the Search tab to locate topics by keywords.
Click the Index tab to locate topics from an index list.
- Type one or more keywords in the Keyword box, and then click List Topics (for the Search tab).
- Double-click a topic.
- Read the topic, and then click any links to get information on related topics or definitions.
- When you’re done, click the Close button.
- Display the dialog box in which you want to get help.
- Click the Help button (? icon).
The Expression Web Help window opens, displaying help related to the dialog box.
- Read the topic, and then click any links to get information on related topics or definitions.
- When you’re done, click the Close button.
Expression Web offers a quick and easy way to get updates of any new software downloads that improve the stability and security of the program. From the Help menu, simply select the Microsoft Expression Web Online command to connect to the Microsoft Expression Web Online Web site, where you can have your computer scanned for necessary updates, and then choose which updates you want to download and install. You can use Microsoft Expression Web Online Web site to check out other options that are available. Using the links on the Expression Web site, you can check out Expression Web-related news, obtain the most up-to-date help from Microsoft, and locate training and assistance with any aspect of Expression Web.
- Click the Help menu.
- Click Microsoft Expression Web Online.

The Microsoft Expression Web Online Web site opens, displaying the Downloads page.
- Click Downloads, and then check the Web site to find out if you need Expression Web updates, and then choose the updates you want to download and install.
- When you’re done, click the Close button.

Did You Know?
You can access other helpful resources from the Help menu. The Help menu also includes commands to access other helpful resources, including Microsoft Expression Web Online, Keyboard Shortcuts, Privacy Statement, Customer Experience Improvement Program, Register Expression Web, Enter Product Key, and About Microsoft Expression Web.
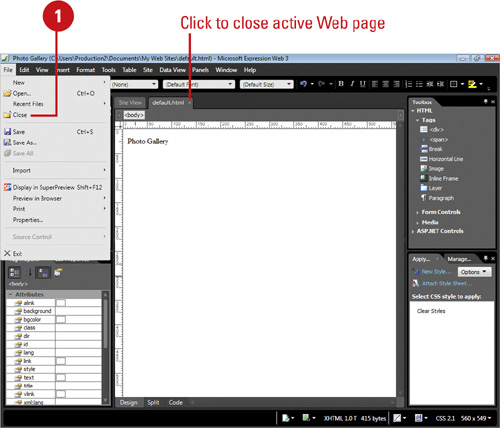
After you finish working on a Web page, you can close it and open another one, or close it and exit Expression Web. Closing a Web page makes more computer memory available for other processes. Closing a Web page is different from exiting Expression Web: after you close a Web page, Expression Web is still running until you exit it.