
Before jumping in and letting your creative energy take over, it’s wise to plan out what you want your Web site to accomplish. Taking the time now to plan your overall ideas and getting them down on paper will save you hours of work later on. Maybe you want to create a business site that will have a corporate style to it. Perhaps you’re a hobbyist who wants to display your favorite collection. Either way, having an image and content to match your product will take some planning and research.
Microsoft Expression Web helps you create a Web site in two general ways—by a template or from scratch. A template opens a Web site with predefined headings, links, and placeholder text that specifies what information you should enter.
As far as content, Expression Web makes it easy to import a file, folder or an entire Web site. There is a wizard, called the Import Site Wizard, that can step you through the process. If you find that you need to insert a page or two into your site, you can do it through a blank page, or even using a template to add a page or two. After you finish working with a Web site, you can to save the material.
If you want to use an entire Web site or some individual Web pages in another site, you can create a Web Package, which allows you to export the Web content you want from a Web site in a single file that you can import into another Web site. If you no longer need a Web site, you can delete it.
Before you begin developing your Web site in Expression Web, there are several issues to consider and a few decisions to make. First, of course, is the question of what type of Web site you want to build. What is the focus of your design? Are you looking to create a personal site? Maybe you want to create a business or organization site.
After you’ve considered these questions, you need to decide whether you intend to work from a template or create your Web site from scratch. Creating a Web site one page at a time is a lot harder than using a template. Expression Web provides a variety of templates representing the most popular Web site styles. A template provides a complete multiple-page site with Web pages, a common look and navigation system, and placeholders for your content. After you create a site using a template, you can customize it to your specific needs by replacing the headers, textual arrangements, or graphic elements.
When you create a Web site, Expression Web creates Web page files, Cascading Style Sheets (CSS) files, script files, image files, and other folders for the purpose of organizing site files. Expression Web tracks files and folders in a Web site using hidden files known as metadata. The hidden files are stored in hidden folders that begin with _vti in the main Web site folder. You don’t need to change anything in these folders, you just need to know why they exist if they become visible.
When you create a Web site, you need to decide which type of site you want to create. There are three types of Web sites: Disk-based, FTP (File Transfer Protocol), and HTTP (Hyper-Text Transfer Protocol) or secure HTTP (HTTPS) with Secure Sockets Layer (SSL).
A disk-based Web site is located at a specific disk location, which can be a local hard disk or network drive, and useful for Intranets (internal Web sites) or publishing to a remote Web server later. An FTP site is typically located on a remote Web server and useful for fast file transfer and working remotely. An HTTP or HTTPS site is located on a remote Web server and useful for browsing Web pages and working remotely. If you want additional security and your Web server is configured to allow SSL visitors, you can enable SSL so credentials are encrypted.

Expression Web comes with templates that make it easy to create a Web site. A template opens a Web site with predefined headings, links, and placeholder text that specifies what information you should enter (such as your address). A Web site template includes a set of related Web pages with established links ready for you to customize the content and the necessary CSS files to create a uniform display. You can use the Web Site tab on the New dialog box to create a Web site using templates, which include One Page Web Site, Empty Web Site, and several site variations for Organization, Personal, and Small Business.
 Click the New Site button on the Common toolbar.
You can also click the Site menu, and then click New Site (New!).
 In the first pane, click Templates.
 Click the template icon you want to use.
 Specify the location where you want to store the Web site (click Browse, if necessary) and a name at the end.
Disk-based. Enter a path location. For example: C:web sitemysite
FTP. Enter an ftp site address. For example: ftp://ftp.website.com/mysite
HTTP. Enter an http site address. For example: http://www.website.com/mysite
 If you specify an http site, select the Use Encrypted Connection (SSL) check box to create a secure site.
 To add the site name to the managed list (New!), select the Add to Managed List check box, and then use the default name or type one.
 Click OK.
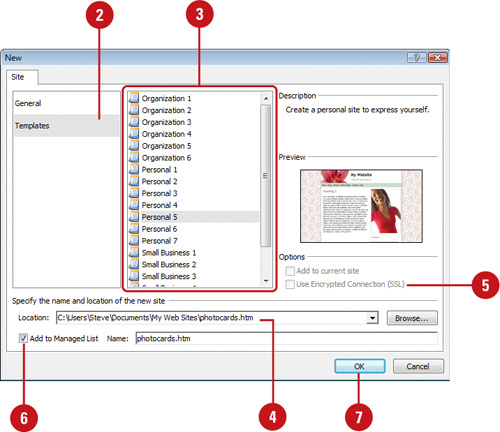
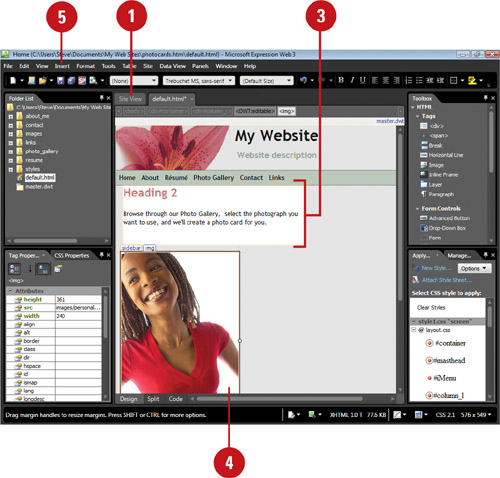
After you create a template or open an existing one, you can replace the content on any of the pages with your own material. The site’s home page—the first page that appears when you type a URL—is called default.html or default.htm. When you open the home page, you can select elements, such as headlines, text, or images and insert new content. If an element is shared by multiple pages, such as the site’s name or navigation bar, you need to open the locked content in a .dwt file (typically called master .dwt). When you make changes on a Web site or page, an asterisk (*) appears on the tab next to the name indicating changes have not been saved.
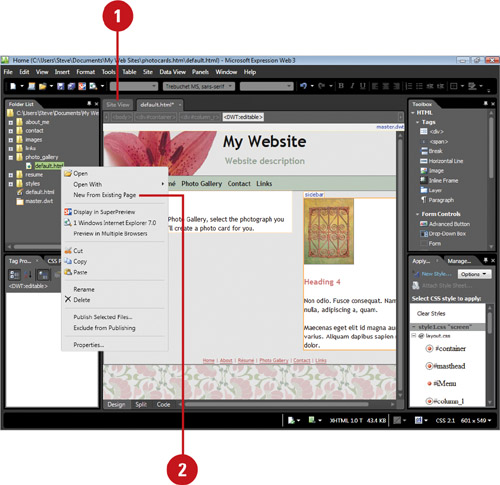
- Open the Web site based on a template you want to change.
- Double-click the file you want to open in the Folder List.
Home page. Double-click default.html or default.htm.
Master page. Double-click master.dwt.
- Select and replace the elements you want, such as text, headings, site name, or navigation.
- Click the Save button on the Common toolbar.

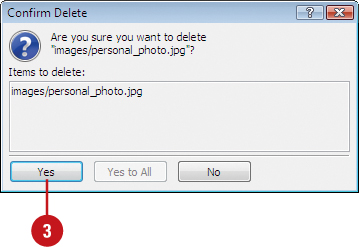
An alert message appears, asking if you want to save your changes.
- Click Yes, and then click Close to close the status dialog box.
Any changes made to the master appear on the home page and all other site pages.
- Open the Web page with the template content you want to replace.
- Select the heading or paragraph text you want to change.
- Type or paste in your own text.
- Select an image you want to replace.
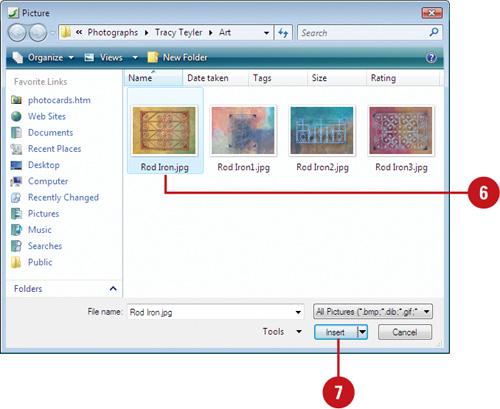
- Click the Insert menu, point to Picture, and then click From File.
The Picture dialog box opens.
- Locate and select the picture you want to insert.
- Click Insert.
The Accessibility Properties dialog box opens.
 Type a description.
 Click OK.
The original image is replaced by the new image. You can resize the graphic to fit where you want.
See Also
See “Resizing and Resampling Graphics” on page 128 for information on resizing graphics and using the Pictures toolbar.
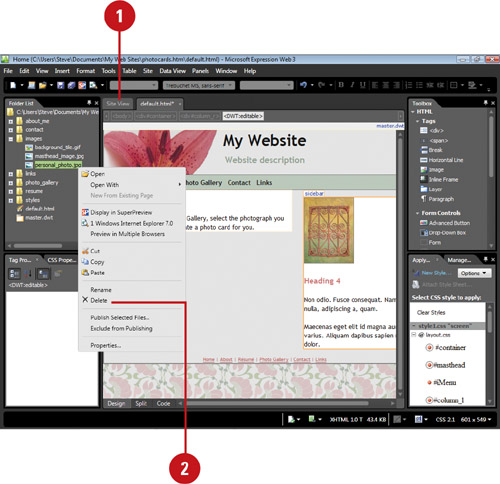
When you create a Web site from a template, you are bound to get files and folders from Expression Web you don’t need. You can quickly right-click the file or folder you no longer want in the Folder List and delete it from the site. Since the template files all work together, you can copy a template file from the site and save it with a new name to create a new Web page that works with the other Web site files.

When you start Expression Web, a blank Web page opens based on a default blank template. The default blank template defines the page margins, default font, and other settings. The blank Web page doesn’t become a Web site until you save it. Instead of starting Expression Web and saving the new page, you can use the New dialog box to quickly create a one page blank Web site, which you can fill in. You can then add new pages easily and link them together to create a connected Web site. If you need a blank Web site without any of the related files and folders that come along with it, you can create an empty Web site.
- Click the New Site button on the Common toolbar.
You can also click the Site menu, and then click New Site (New!).
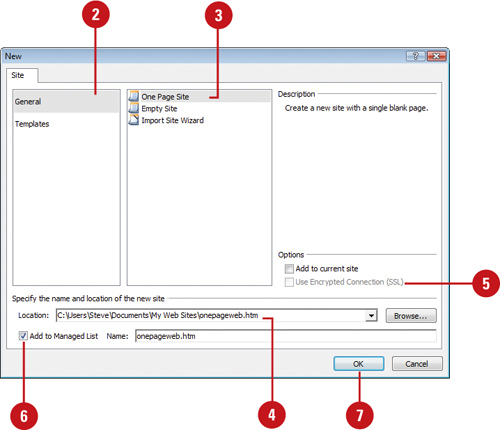
- In the first pane, click General if necessary.
- Click One Page Web Site.
- Specify the location where you want to store the Web site (click Browse, if necessary) and a name at the end.
Disk-based. Enter a path location. For example: C:web sitemysite
FTP. Enter an ftp site address. For example: ftp://ftp.website.com/mysite
HTTP. Enter an http site address. For example: http://www.website.com/mysite
- If you specify an ftp or http site, select the Use Encrypted Connection (SSL) check box to create a secure site.
- To add the site name to the managed list (New!), select the Add to Managed List check box, and then use the default name or type one.
- Click OK.
- Click the New Site button on the Common toolbar.
You can also click the Site menu, and then click New Site (New!).
- In the first pane, click General if necessary.
- Click Empty Web Site.
- Specify the location where you want to store the Web site (click Browse, if necessary) and a name at the end.
Disk-based. Enter a path location. For example: C:web sitemysite
FTP. Enter an ftp site address. For example: ftp://ftp.website.com/mysite
HTTP. Enter an http site address. For example: http://www.website.com/mysite
- If you specify an ftp or http site, select the Use Encrypted Connection (SSL) check box to create a secure site.
- To add the site name to the managed list (New!), select the Add to Managed List check box, and then use the default name or type one.
- Click OK.

If you need to update an existing Web site, Expression Web gives you ways to open the site. You can use the Open button arrow on the Common toolbar or the Recent Sites command on the Site menu. In the Open Site dialog box, you can open a Web site from your local hard drive, a network drive, a Web server using a Web address, known as a Uniform Resource Locator (URL), or the managed site list (New!). If you type a file name in the Site name box, Expression Web opens that file using the Windows file system. If you type a Web address, such as www.mywebsite.com, Expression Web retrieves all the files from that location just like a browser. When you open several pages at the same time, they all appear in the same window. However, if you open a new site while another site is still open, the new site opens in a new Expression Web window.
- Click the Open button arrow on the Common toolbar, and then click Open Site.
You can also click the Site menu, and then click Open Site (New!).
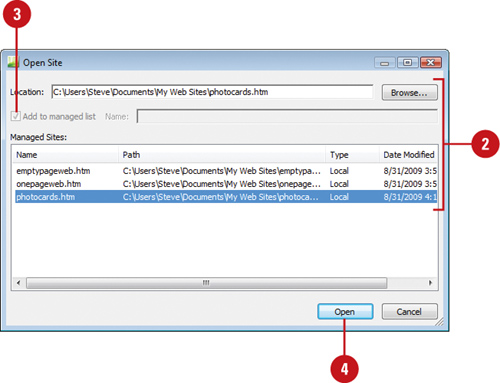
- Select the Web site that you want to open:
Managed Site. Select the site from the list of managed sites (New!).
Browse. Click Browse, navigate to the site location, select the site, and then click Open.
- To add the site name to the managed list (New!), select the Add to Managed List check box, and then use the default name or type one.
- Click Open.
- Click the Open button arrow on the Common toolbar, and then click Open Site.
- Select the Web site that you want to open:
Managed Site. Select the site from the list of managed sites (New!).
Browse. Click Browse, type the URL (either an http or ftp address) or select an existing shortcut to the Web site you want open, and then click Open.
- To add the site name to the managed list (New!), select the Add to Managed List check box, and then use the default name or type one.
- Click Open.

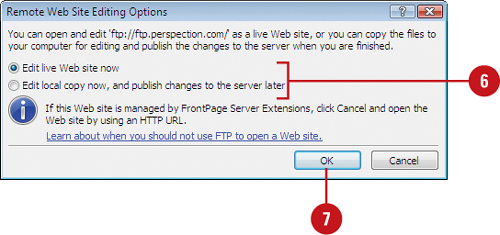
- Type the user name and password for the Web server, and then click OK.
- Click the Edit live Web site now or Edit local copy now, and publish changes to the server later option.
- Click OK.
The Web site opens, displaying the site folders and files in the Folder List.
Did You Know?
You can automatically open the last opened site. Click the Tools menu, click Applications Options, select the Open last Web site automatically when Expression Web starts check box, and then click OK.???
When you’re working on a Web site, you might want to import a page file (or even an entire folder) or an entire site that was created in Microsoft FrontPage or another program. Expression Web makes it easy to import a file, folder, or a Web site. When you import a Web site, Expression Web uses the Import Web Site Wizard to step you through the process. The wizards helps you transfer files using SFTP (Secure Shell File Transfer Protocol) (New!), FTPS (File Transfer Protocol over Secure Sockets Layer) (New!), FrontPage Server Extensions, WebDAV (Distributed Authoring and Versioning), file system, and HTTP (directly from a Web site on the Internet). When you import a site created with FrontPage, Expression Web recognizes the pages and the code (with FrontPage Server Extensions) behind it. However, you can use the code on new pages, which means you’ll need to modify the pages over time to meet standard coding. If you have a Web Package, which is a reusable Web site or parts of a Web site in a single file, you can also import it into a Web site.
- Open the Web site in which you want to import Web content.
- Click the File menu, point to Import, and then click File.
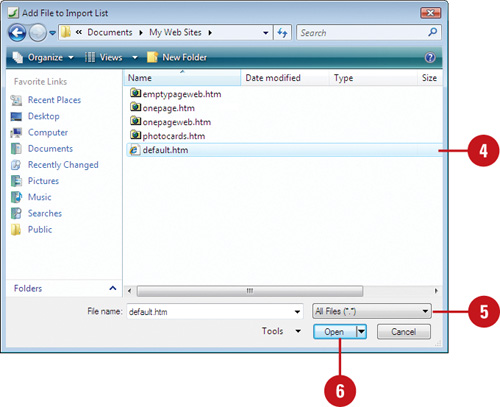
- Click Add File or Add Folder.
- Navigate to the location with the file, folder, or URL you want to import, and then click the file or folder.
- Click the File as type list arrow, and then click the file type you want.
All Files
HTML (.htm, .html)
GIF and JPEG (.gif, .jpg)
Microsoft Office Files (.doc, .xls, .ppt)
- Click Open to add it to the Import dialog box.
- Select all the files that you want to import.
- Click OK.

- Open the Web site in which you want to import Web content.
- Click the Site menu, point to Import, and then click Import Site Wizard.
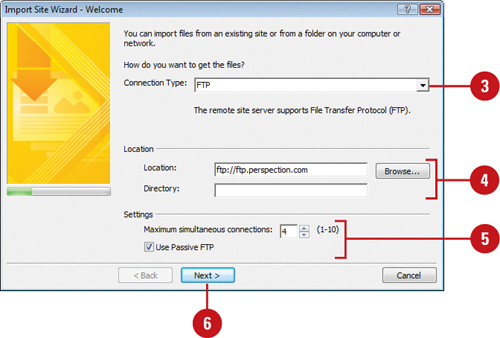
The Import Site Wizard dialog box opens.
- Click the Connection Type list arrow, and then select option indicating how you want to get the files (New!).
- Type a Web site location or click Browse and select one. See the example above the Web Site Location box.
- If available, specify any additional options (New!) for the selected connection type.
- Click Next to continue.
If requested, enter a username and password, and then click OK.
- If available, type the location where you want to create a local copy of the site or click Browse and select one.
If a site is already open, select the Add to current Web site check box.
- Click Next, and then specify the options you want to limit how many levels below the home page to import or limit the import to a maximize size or only HTML and image files, if available.

- When you’re done, click Finish.
The wizards imports the Web files into corresponding folders in your site.???
Whether you have a Web site created using a template, or are beginning from scratch, you will eventually need to add new pages to the site. New pages can be blank or template based, so it is also possible to integrate template pages with your own pages that you created from scratch. The New dialog box contains an extensive selection of single-page templates. After you create the new page, you need to create a hyperlink to the existing Web.
- Click the Web Site tab for the site in which you want to add a new page.
- If necessary, click the Panels menu, and then click Folder List to display the Folder List.
- Right-click a blank area of the Folders List, point to New, and then click HTML.

A new file appears in the Folder List, and is assigned a default name which is highlighted and framed in a box.
- Type a new name (including .htm at the end) for the page, and then press Enter.
- Drag the file name icon for the page where you want it in the Folder List.
Expanding and contracting perforated lines appear any place where your page can be positioned.
- When the new page is where you want it, release the mouse button to position the page.
- Double-click the new page to open it for editing.

- Click the Web Site tab for the site in which you want to add a new page.
- Click the New button arrow on the Common toolbar, and then click Page.
- Click the tab with the page template you want to use.
General. Creates HTML, ASPX, ASP (New!), PHP, CSS, Master Page, Dynamic Web Template, JavaScript, XML, Text File, Create from Dynamic Web Template, or Create from Master Page.
ASP.NET. Creates ASPX, Master Page, Web User Control, Web Configuration, Site Map, and Create from Master Page.
CSS Layouts. Creates an HTML file and links it to a CSS file.
Style Sheets. Initializes a cascading style sheet (CSS) file to standardize the appearance of Web pages.
Frames Pages. Creates frame pages.
- Click the template you want to use.
- Click OK.

- Click the Save button on the Common toolbar.
- Navigate to the Web site folder location where you want to add pages.
- Type a name for the page, or use the suggested name, and then click Save.???
Table . General Page Formats
Type | Description |
|---|---|
HTML | Creates a blank standard HTML page |
ASPX | Creates an ASP.NET 2.0 Web form |
ASP (New!) | Creates a blank ASP page |
PHP | Creates a PHP (PHP Hypertext Preprocessor) file |
CSS | Creates a blank CSS file |
Master Page | Create an ASP.NET 2.0 master page that you can use as a template |
Dynamic Web Template | Creates a Dynamic Web Template that you can attach to other pages for a consistent look |
JavaScript | Creates a file for the JavaScript language |
XML | Creates a blank XML file |
Text File | Creates a blank text file |
Create from Dynamic Web Template | Creates a Web page based on a Dynamic Web Template |
Create from Master Page | Creates an ASP.NET Web form based on an ASP.NET master page |
A Web Package allows you to package an entire Web site or parts of a Web site in a single file that you can use (import) in another Web site. To create a Web Package, you use the Export to Web Package command on the Site menu. In the Export Web Package dialog box, you select the files and folders you want to include in the Web Package file (.fwp), provide property information about the files and folders, and select dependency options for use during the import process.
- Open the Web site with the files and folders you want to export into a Personal Web Package.
- Click the Site menu, and then click Export to Web Package.
- In the left pane, select the files or folders you want in the Web Package.
- Click Properties.
- Enter the title, description, author, and company information you want.
- Click OK.
- To display file dependencies, click Show Dependencies, and then select a file in the left pane.
- To change the dependency option, click the Dependency Checking list arrow, then select an option.
- Click OK.

 Navigate to the location where you want to save the Web Package.
 Type a name for the Web Package.
 Click Save, and then click OK upon completion.
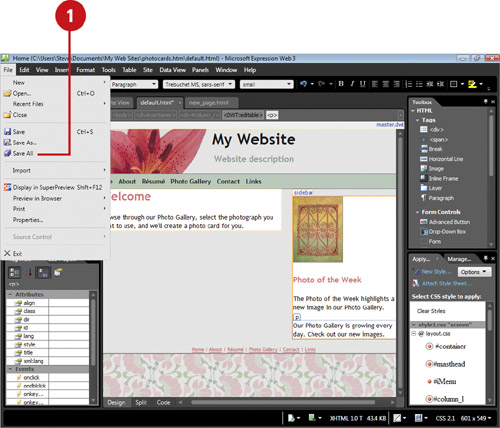
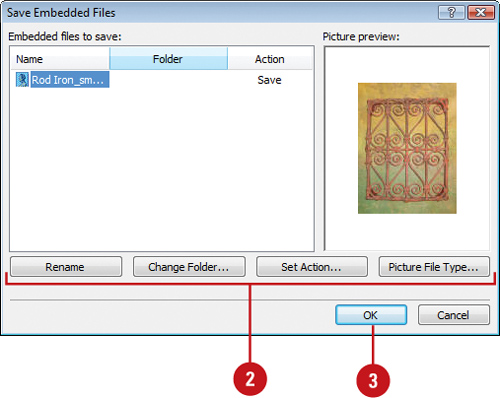
After you finish working with a Web site, you need to save the material. When you make changes on a Web site or page, an asterisk (*) appears on the tab next to the name indicating changes have not been saved. When you save a Web site, you save each Web page and any related, or embedded, files, such as graphics, included with the pages. You can use the Save All command on the File menu to quickly save all modified files. If graphics on a Web page need to be saved, the Save Embedded Files dialog box appears, asking you to select any options you want and save the files.
- Click the File menu, and then click Save All.
- If necessary, specify which image files you want to save with the Web page or pages, and where to save them.
Rename. Rename the embedded file name.
Change Folder. Change the embedded folder location.
Set Action. Set option to save or not save an embedded file.
Picture File Type. Change the graphic type and quality.
- Click OK.
When you create a Web site using a template or wizard, Expression Web automatically give the site a general name (mysite1, mysite2, etc.) and saves it. You can rename the site to something more meaningful to you. You can right-click the Web site folder or use the Site Settings command on the Site menu.

If you no longer want or need a Web site you can delete it. When you delete a Web site, Expression Web deletes everything it contains, including Web pages, pictures, text files, Expression Web files, and all folders. If you want to save any files in the Web site folder, you need to back them up before deleting the site.
- Open the Web site you want to delete.
- Click the Site menu, and then click Delete.

- Click the Delete this Web site entirely option.
- Click OK.

Did You Know?
You can delete only the hidden data for a Web site. If you want to keep Web pages and related content, such as images, for a Web site, yet remove the hidden tracking and organization files used by Expression Web, the Delete command allows you the option to do it. Click the Site menu, click Delete, click the Delete only hidden metadata files from this Web site preserving all other files and folders option, and then click OK.
Expression Web makes it easy to work with multiple Web sites by adding them to the managed site list (New!). The managed site list allows you to keep a list of new or existing sites for easy access in the future. This takes the Recent Sites submenu on the Site menu to the next level. When you create a new site using the New Site dialog box or open an existing site using the Open Site dialog box, you can quickly add it to the managed site list. Once the site is added to the managed site list, you can quickly open it using the Open Site dialog box. If you no longer want a site in the list, you can remove it by using the Managed Site List dialog box.
- Open the Web site you want to delete.
- Click the Site menu, and then click Manage Sites List.
- Click Refresh to update your list of local sites.
- To remove a site from the list, select the site, click Remove.
- To add a site, click Add, navigate to the site location, select the site, and then click Add.
- Click Done.

See Also
See “Creating a Web Site Using a Template” on page 25, “Creating a Page Site” on page 30-31 or “Opening an Existing Web Site” on page 32-33 for instructions on adding a site to the managed sites list using the New Site dialog box or Open Site dialog box.