
Chapter 10: Reducing Localization Costs with Machine Translation
About a decade and a half ago (before the internet was what it is today), one of the authors went on a sightseeing trip to Switzerland. It was an impulsive, last-minute decision and was carried out with not a lot of planning. The travel itself was uneventful, and the author was aware that German is an acceptable language in Switzerland, and so busied himself with the English to German Rosetta tone during the trip. Based on advice from friends who had been to Switzerland before, a rough itinerary was put together that included visits to Zurich, Interlaken, Bern, and so on. With his very naïve German and, more importantly, due to the excellent English spoken by the Swiss, the author relaxed and even started enjoying his trip – until, of course, he went to Geneva, where everyone spoke only French. His attempt to converse in English was met with indifference, and the only French words the author knew were "oui" (meaning "yes") and "au revoir" (meaning "goodbye")! The author ended up having to use sign language, pointing to menu items in restaurants, asking about places to visit by showing a tourist guidebook, and so on to get through his next few days. If only the author had access to the advanced ML-based translation solutions that are so common today – Geneva would have been a breeze.
In his book The World Is Flat published in 2005 (almost the same time this author was on his way to Geneva), Thomas L. Friedman detailed the implications of globalization in the context of how technological advancements, including personal computers and the internet, have led to collapsing economical distinctions and boundaries, so much so that it has leveled the global arena. When enterprises go global, one of the most common tasks they encounter is the need to translate the language of their websites into the local language of the country or state they choose to operate in. This is called localization. Traditionally, organizations hired a team of translators who painstakingly translated the content of their websites, page by page, taking care to retain the correct context of what was being expressed. This was manually fed into multiple pages to stand up their websites. This was both time-consuming and cost-prohibitive but since it was a necessary task, organizations had no choice. Today, with the advent of ML-based translation capabilities such as Amazon Translate, localization can be performed at a fraction of the cost compared to before.
In the previous chapter, we saw how to harness the power of NLP with AWS AI services to extract metadata for financial filing reports for LiveRight so that their financial analysts can look into important information and make better decisions with respect to financial events such as mergers, acquisitions, and IPOs. In this chapter, we will see how NLP and AWS AI services help to automate website localization using Amazon Translate (https://aws.amazon.com/translate/), a ML-based translation service that supports 71 languages. You do not need to perform any ML training to use Amazon Translate as it is pre-trained and supports invocations through a simple API call. For use cases that are unique to your business, you can use advanced features of Amazon Translate such as Named Entity Translation Customization (https://docs.aws.amazon.com/translate/latest/dg/how-custom-terminology.html), Active Custom Translation (https://docs.aws.amazon.com/translate/latest/dg/customizing-translations-parallel-data.html), and so on.
To learn how to build a cost-effective localization solution, we will cover the following topics:
- Introducing the localization use case
- Building a multi-language web page using machine translation
Technical requirements
For this chapter, you will need access to an AWS account. Please make sure that you follow the instructions specified in the Technical requirements section of Chapter 2, Introducing Amazon Textract, to create your AWS account. Make sure that you log into the AWS Management Console before trying the steps in the Building a multi-language web page using machine translation section.
The Python code and sample datasets for our solution can be found at the link here: https://github.com/PacktPublishing/Natural-Language-Processing-with-AWS-AI-Services/tree/main/Chapter%2010. Please use the instructions in the following sections along with the code in the repository to build the solution.
Check out the following video to see the Code in Action at https://bit.ly/3meYsn0.
Introducing the localization use case
In the past few chapters, we looked at a variety of ways NLP can help us understand our customers better. We learned how we can build applications to detect sentiments, monetize content, detect unique entities, and understand context, references, and other analytics processes that help organizations gain important insights about their business. In this chapter, we will learn how to automate the process of translating website content into multiple languages. To illustrate this example, we'll assume that our fictitious banking corporation, LiveRight Holdings Private Limited, has decided to expand internationally to delight potential customers in Germany, Spain, and the cities Mumbai and Chennai in India. The launch date for these four pilot regions is coming up fast; that is, in the next 3 weeks. The expansions operations lead has escalated his concerns to senior management, stating that the IT teams may not be ready with the websites in the corresponding local languages of German, Spanish, Hindi, and Tamil on time for the launch. You get a frantic call from the director of IT, your boss, and she has asked you, the application architect, to design and build the websites within the next 2 weeks so that they can use the last week for acceptance testing.
You know that a manual approach is out of the question as it's going to be impossible to hire translators, complete the work, and build up the websites within 2 weeks. After some quick research, you decide to use Amazon Translate, an ML-based translation service, to automate the translation process for the websites. You check the Amazon Translate pricing page (https://aws.amazon.com/translate/pricing/) and realize that you can translate a million characters for as low as $15 and that, more importantly, for the first 12 months, you can take advantage of the AWS Free Tier (https://aws.amazon.com/free/), which allows you to translate 2 million characters per month, free of charge. For the pilot sites, you perform a character count and see that it's around 500K characters. In the meantime, your director reaches out to ask you to create a quick demonstratable prototype of the About Us page (https://github.com/PacktPublishing/Natural-Language-Processing-with-AWS-AI-Services/blob/main/Chapter%2010/input/aboutLRH.html) in the four target languages of German, Spanish, Hindi, and Tamil.
We will be walking through this solution using the AWS Management Console and an Amazon SageMaker Jupyter notebook. Please refer to the Signing up for an AWS account section of the Setting up your AWS environment section of Chapter 2, Introducing Amazon Textract, for detailed instructions on how to sign up for an AWS account and sign into the AWS Management Console.
First, we will create an Amazon SageMaker Jupyter notebook instance (if you haven't done so already in the previous chapters), clone the repository into our notebook instance, open the Jupyter notebook for our solution walkthrough (https://github.com/PacktPublishing/Natural-Language-Processing-with-AWS-AI-Services/blob/main/Chapter%2010/Reducing-localization-costs-with-machine-translation-github.ipynb), and execute the steps in the notebook. Detailed instructions will be provided in the Building a multi-language web page using machine translation section. Let's take a look:
- In the notebook, we will view the English version of the About Us page.
- Then, we will review the HTML code of the About Us page to determine what tag components need translating.
- Next, we will install an HTML parser library for Python (https://www.crummy.com/software/BeautifulSoup/bs4/doc/) and extract the text content of the tags we are interested in from our HTML page into a list.
- We will use the boto3 AWS Python SDK for Amazon Translate to get a handle on and invoke the translation function. We will do this in a loop to get the translated content in German, Spanish, Hindi, and Tamil.
- Then, we will take the original HTML (in English) and update it with content for the corresponding tags for each of the four languages to create four separate HTML pages.
- Finally, we will display the HTML pages to review the translations.
Once you've done this, you can upload the HTML to an Amazon S3 bucket and set up an Amazon CloudFront distribution to provision your website globally in minutes. For more details on how to do this, please refer to this link: https://docs.aws.amazon.com/AmazonS3/latest/userguide/website-hosting-cloudfront-walkthrough.html. In this section, we introduced the localization requirements for LiveRight, the people who are looking to expand internationally, and who need local language-specific web pages for their launch in these markets. In the next section, we will learn how to build the solution.
Building a multi-language web page using machine translation
In the previous section, we introduced a requirement for web page localization, covered the design aspects for the solution we will be building, and briefly walked through the solution components and workflow steps. In this section, we will start executing the tasks to build our solution. But first, there are some prerequisites we will have to take care of.
Setting up to solve the use case
If you have not done so in the previous chapters, as a prerequisite, you will have to create an Amazon SageMaker Jupyter notebook instance and set up Identity and Access Management (IAM) permissions for that notebook role to access the AWS services we will use in this notebook. After that, you will need to clone the GitHub repository (https://github.com/PacktPublishing/Natural-Language-Processing-with-AWS-AI-Services) and create an Amazon S3 (https://aws.amazon.com/s3/) bucket. Finally, you must go to the Chapter 10 folder and open the Reducing-localization-costs-with-machine-translation-github.ipynb notebook to start the execution process.
Note
Please ensure you have completed the tasks mentioned in the Technical requirements section.
Follow the instructions documented in the Creating an Amazon SageMaker Jupyter Notebook instance section of the Setting up your AWS environment section of Chapter 2, Introducing Amazon Textract, to create your Jupyter Notebook instance. Let's get started:
Important – IAM role permissions while creating Amazon SageMaker Jupyter notebooks
Accept the default for the IAM role at notebook creation time to allow access to any S3 bucket.
- Once you've created the notebook instance and set its status to InService, please attach the TranslateFullAccess policy to your Amazon SageMaker notebook IAM role. To execute this step, please refer to the Changing IAM permissions and trust relationships for the Amazon SageMaker notebook execution role section of the Setting up your AWS environment section of Chapter 2, Introducing Amazon Textract.
- Now, go back to your notebook instance and click on Open Jupyter from the Actions menu:
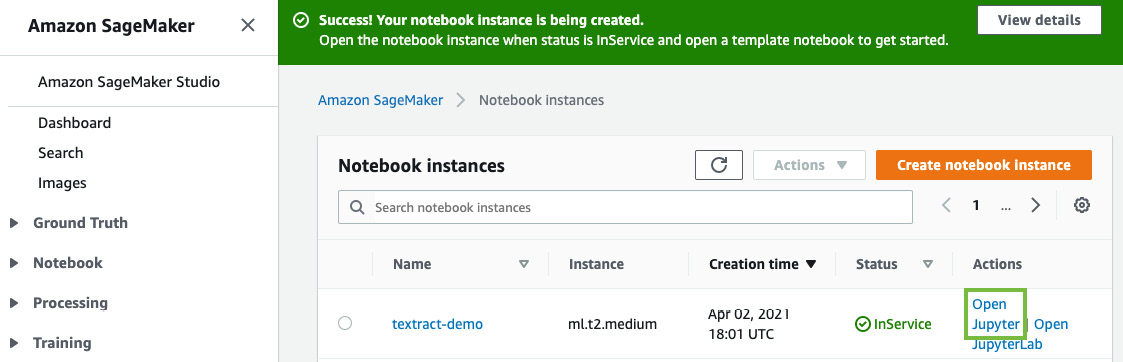
Figure 10.1 – Opening the Jupyter notebook
This will take you to the home folder of your notebook instance.
- Click on New and select Terminal, as shown in the following screenshot:

Figure 10.2 – Opening a terminal in Jupyter notebook
- In the terminal window, type cd SageMaker and then git clone https://github.com/PacktPublishing/Natural-Language-Processing-with-AWS-AI-Services, as shown in the following screenshot. If you have already done this in the previous chapters for this notebook instance, you don't have to clone the repository again:

Figure 10.3 – The git clone command
- Now, exit the terminal window and go back to the home folder – you will see a folder called Natural-Language-Processing-with-AWS-AI-Services. Upon clicking this folder, you will see chapter-10-localization-with-machine-translation. Click this folder and then open the Reducing-localization-costs-with-machine-translation-github.ipynb notebook.
Now that we have created our notebook instance and cloned our repository, we can start running our notebook code.
Running the notebook
Open the notebook you cloned from this book's GitHub repository (https://github.com/PacktPublishing/Natural-Language-Processing-with-AWS-AI-Services/blob/main/Chapter%2010/Reducing-localization-costs-with-machine-translation-github.ipynb), as we discussed in the Setting up to solve the use case section, and execute the cells step by step, as follows:
Note
Please ensure you have executed the steps in the Technical requirements and Setting up to solve the use case sections before you execute the cells in the notebook.
- Execute the first cell in the notebook, under the Input HTML Web Page section, to render the HTML for the English version of our web page:
from IPython.display import IFrame
IFrame(src='./input/aboutLRH.html', width=800, height=400)
- You will see that the page has a few headings and then a paragraph talking about Family Bank, a subsidiary of LiveRight Holdings:

Figure 10.4 – English version of the web page
- Execute the following cell to review the HTML code for our web page:
!pygmentize './input/aboutLRH.html'
- We will see the following output for the web page. The areas highlighted in the following output are the tags we are interested in translating for our target web pages. In this code block, we can define the title of the web page and some default JavaScript imports:
<!DOCTYPE html>
<html>
<head>
<title>Live Well with LiveRight</title>
<meta name="viewport" charset="UTF-8" content="width=device-width, initial-scale=1.0">
<script src="https://ajax.googleapis.com/ajax/libs/jquery/3.4.0/jquery.min.js"></script>
<script src="https://cdnjs.cloudflare.com/ajax/libs/popper.js/1.12.9/umd/popper.min.js"></script>
<script src="https://maxcdn.bootstrapcdn.com/bootstrap/4.0.0/js/bootstrap.min.js"></script>
<script src="https://sdk.amazonaws.com/js/aws-sdk-2.408.0.min.js"></script>
<script src="https://cdnjs.cloudflare.com/ajax/libs/Chart.js/2.4.0/Chart.min.js"></script>
</head>
- Now, we will define the body of the page with the h1, h2, and h3 headings, as shown in the following code block:
<body>
<h1>Family Bank Holdings</h1>
<h3>Date: <span id="date"></span></h3>
<div id="home">
<div id="hometext">
<h2>Who we are and what we do</h2>
- Next, we will define the actual body of the text as an h4 heading to highlight it, as shown in the following code block:
<h4><p>A wholly owned subsidiary of LiveRight, we are the nation's largest bank for SMB owners and cooperative societies, with more than 4500 branches spread across the nation, servicing more than 5 million customers and continuing to grow.
We offer a number of lending products to our customers including checking and savings accounts, lending, credit cards, deposits, insurance, IRA and more. Started in 1787 as a family owned business providing low interest loans for farmers struggling with poor harvests, LiveRight helped these farmers design long distance water channels from lakes in neighboring districts
to their lands. The initial success helped these farmers invest their wealth in LiveRight and later led to our cooperative range of products that allowed farmers to own a part of LiveRight.
In 1850 we moved our HeadQuarters to New York city to help build the economy of our nation by providing low interest lending products to small to medium business owners looking to start or expand their business.
From 2 branches then to 4500 branches today, the trust of our customers helped us grow to become the nation's largest SMB bank. </p>
</h4>
</div>
</div>
- Now, we will start the JavaScript section in the HTML to get the current date to be displayed, as shown in the following code block:
<script>
// get date
var today = new Date();
var dd = String(today.getDate()).padStart(2, '0');
var mm = String(today.getMonth() + 1).padStart(2, '0'); //January is 0!
var yyyy = today.getFullYear();
today = mm + '/' + dd + '/' + yyyy;
document.getElementById('date').innerHTML = today; //update the date
</script>
</body>
<style>
- Finally, we will declare the CSS styles (https://www.w3.org/Style/CSS/Overview.en.html) that we need for each of the sections. First, here is the style for the body of the web page:
body {
overflow: hidden;
position: absolute;
width: 100%;
height: 100%;
background: #404040;
top: 0;
margin: 0;
padding: 0;
-webkit-font-smoothing: antialiased;
}
- The following is the style for the background and the background text widgets, which are called home and hometext:
#home {
width: 100%;
height: 80%;
bottom: 0;
background-color: #ff8c00;
color: #fff;
margin: 0px;
padding: 0;
}
#hometext {
top: 20%;
margin: 10px;
padding: 0;
}
- Finally, we will define the styles for each of the headings and paragraphs in our web page:
h1 {
text-align: center;
color: #fff;
font-family: 'Lato', sans-serif;
}
h2 {
text-align: center;
color: #fff;
font-family: 'Lato', sans-serif;
}
h3 {
text-align: center;
color: #fff;
font-family: 'Lato', sans-serif;
}
h4 {
font-family: 'Lato', sans-serif;
}
p {
font-family: 'Lato', sans-serif;
}
</style>
</html>
- Now, we will execute the cells in the Prepare for Translation section. Execute the first cell to install the HTML parser we need for our solution, called Beautiful Soup (https://www.crummy.com/software/BeautifulSoup/bs4/doc/):
!pip install beautifulsoup4
- Next, run the following cell to load our English HTML page code into a variable so that we can parse it using Beautiful Soup:
html_doc = ''
input_htm = './input/aboutLRH.html'
with open(input_htm) as f:
content = f.readlines()
for i in content:
html_doc += i+' '
- Now, parse the HTML page:
from bs4 import BeautifulSoup
soup = BeautifulSoup(html_doc, 'html.parser')
- Let's define the list of HTML tags we are interested in and load the text content for those HTML tags into a dictionary:
tags = ['title','h1','h2','p']
x_dict = {}
for tag in tags:
x_dict[tag] = getattr(getattr(soup, tag),'string')
x_dict
- We will get the following response:
{'title': 'Live Well with LiveRight',
'h1': 'Family Bank Holdings',
'h2': 'Who we are and what we do',
'p': "A wholly owned subsidiary of LiveRight, we are the nation's largest bank for SMB owners and cooperative societies, with more than 4500 branches spread across the nation, servicing more than 5 million customers and continuing to grow. We offer a number of lending products to our customers including checking and savings accounts, lending, credit cards, deposits, insurance, IRA and more. Started in 1787 as a family owned business providing low interest loans for farmers struggling with poor harvests, LiveRight helped these farmers design long distance water channels from lakes in neighboring districts to their lands. The initial success helped these farmers invest their wealth in LiveRight and later led to our cooperative range of products that allowed farmers to own a part of LiveRight. In 1850 we moved our HeadQuarters to New York city to help build the economy of our nation by providing low interest lending products to small to medium business owners looking to start or expand their business. From 2 branches then to 4500 branches today, the trust of our customers helped us grow to become the nation's largest SMB bank. "}
- Now, we will execute the cells in the Translate to target languages section. In the first cell, we will import the boto3 library (https://boto3.amazonaws.com/v1/documentation/api/latest/index.html), the Python SDK for AWS services, create a handle for Amazon Translate, and then translate our web page into our target languages:
import boto3
translate = boto3.client(service_name='translate', region_name='us-east-1', use_ssl=True)
out_text = {}
languages = ['de','es','ta','hi']
for target_lang in languages:
out_dict = {}
for key in x_dict:
result = translate.translate_text(Text=x_dict[key],
SourceLanguageCode="en", TargetLanguageCode=target_lang)
out_dict[key] = result.get('TranslatedText')
out_text[target_lang] = out_dict
- Now, let's execute the cells in the Build webpages for translated text section. This section is split into four subsections – one for each target language. Execute the cells under German Webpage. The code assigns the HTML parser's output to a new variable, updates the HTML tag values with translated content from the preceding step, and then writes the complete HTML to an output HTML file for the language. For simplicity, the code from the four separate cells under this subsection is grouped like so:
web_de = soup
web_de.title.string = out_text['de']['title']
web_de.h1.string = out_text['de']['h1']
web_de.h2.string = out_text['de']['h2']
web_de.p.string = out_text['de']['p']
de_html = web_de.prettify()
with open('./output/aboutLRH_DE.html','w') as de_w:
de_w.write(de_html)
IFrame(src='./output/aboutLRH_DE.html', width=800, height=500)
- We will get the following output:

Figure 10.5 – The translated German web page
- Execute the cells under Spanish Webpage. The code assigns the HTML parser's output to a new variable, updates the HTML tag values with translated content from the preceding step, and then writes the complete HTML to an output HTML file for the language. For simplicity, the code from the four separate cells under this subsection is grouped, like so:
web_es = soup
web_es.title.string = out_text['es']['title']
web_es.h1.string = out_text['es']['h1']
web_es.h2.string = out_text['es']['h2']
web_es.p.string = out_text['es']['p']
es_html = web_es.prettify()
with open('./output/aboutLRH_ES.html','w') as es_w:
es_w.write(es_html)
IFrame(src='./output/aboutLRH_ES.html', width=800, height=500)
- We will get the following output:

Figure 10.6 – The translated Spanish web page
- Execute the cells under Hindi Webpage. The code assigns the HTML parser's output to a new variable, updates the HTML tag values with translated content from the preceding step, and then writes the complete HTML to an output HTML file for the language. For simplicity, the code from the four separate cells under this subsection is grouped, like so:
web_hi = soup
web_hi.title.string = out_text['hi']['title']
web_hi.h1.string = out_text['hi']['h1']
web_hi.h2.string = out_text['hi']['h2']
web_hi.p.string = out_text['hi']['p']
hi_html = web_hi.prettify()
with open('./output/aboutLRH_HI.html','w') as hi_w:
hi_w.write(hi_html)
IFrame(src='./output/aboutLRH_HI.html', width=800, height=500)
- We will get the following output:

Figure 10.7 – The translated Hindi web page
- Execute the cells under Tamil Webpage. The code assigns the HTML parser's output to a new variable, updates the HTML tag values with translated content from the preceding step, and then writes the complete HTML to an output HTML file for the language. For simplicity, the code from the four separate cells under this subsection is grouped, like so:
web_ta = soup
web_ta.title.string = out_text['ta']['title']
web_ta.h1.string = out_text['ta']['h1']
web_ta.h2.string = out_text['ta']['h2']
web_ta.p.string = out_text['ta']['p']
ta_html = web_ta.prettify()
with open('./output/aboutLRH_TA.html','w') as ta_w:
ta_w.write(ta_html)
IFrame(src='./output/aboutLRH_TA.html', width=800, height=500)
- We will get the following output:

Figure 10.8 – The translated Tamil web page
- In some instances, you may see that custom brand names or product terms specific to your organization may not be translated into the required context in your target language. In these cases, use Amazon Translate Custom Terminology to ensure Amazon Translate can identify the context for these unique words. For more details, you can refer to the following documentation: https://docs.aws.amazon.com/translate/latest/dg/how-custom-terminology.html.
And that concludes the solution build for this chapter. As we mentioned previously, you can upload your web pages to an Amazon S3 bucket (https://boto3.amazonaws.com/v1/documentation/api/latest/guide/s3-uploading-files.html) and use Amazon CloudFront (https://docs.aws.amazon.com/AmazonS3/latest/userguide/website-hosting-cloudfront-walkthrough.html) to distribute your website globally in minutes. Further with support for translating 2 million characters per month for the first 12 months free of charge, and only $15 for every 1 million characters after that, your translation costs are significantly minimized. For additional ideas on how you can use Amazon Translate for your needs, please refer to the Further reading section.
Summary
In this chapter, we learned how to build content localization for web pages quickly and in a highly cost-efficient way with Amazon Translate, an ML-based translation service that provides powerful machine translation models behind an API endpoint for ease of access. First, we reviewed a use case for our fictitious corporation, called LiveRight Holdings, which was looking to expand internationally and needed to launch its website in four different languages in 3 weeks. LiveRight did not have the time or funding to hire experienced translators to perform the website conversion manually. The director of IT at LiveRight hired you to devise a solution that's quick and cost-effective.
For this, you designed a solution using Amazon Translate that used a Python HTML parser to extract the relevant tag content from the English version of the HTML page, translate it into German, Spanish, Hindi, and Tamil, and then create new HTML pages with the translated content included. To execute the solution, we created an Amazon SageMaker Jupyter notebook instance, assigned the IAM permissions for Amazon Translate to the notebook instance, cloned the GitHub repository for this chapter, and then walked through the solution by executing the code blocks one cell at a time. Finally, we displayed the HTML pages containing the translated content in the notebook for reviewing purposes.
In the next chapter, we will look at an interesting use case, as well as an important application of NLP: building conversational interfaces using chatbots to work with a document's contents and provide this as a self-help tool for consumers. We will use LiveRight Holdings again to illustrate this use case, while specifically addressing the needs of the mortgage department officers who conduct homebuyer research for design product offerings. As we did in this chapter, we will introduce the use case, discuss how to design the architecture, establish the prerequisites, and walk through the various steps required to build the solution.
Further reading
To learn more about the topics that were covered in this chapter, take a look at the following resources:
- Translating your website or application automatically with Amazon Translate in your CI/CD pipeline, by Carlos Afonso (https://aws.amazon.com/blogs/machine-learning/translating-your-website-or-application-automatically-with-amazon-translate-in-your-ci-cd-pipeline/)
- Customizing your machine translation using Amazon Translate Active Custom Translation, by Watson Srivathsan and Xingyao Wang (https://aws.amazon.com/blogs/machine-learning/customizing-your-machine-translation-using-amazon-translate-active-custom-translation/)
- Translate Text Between Languages in the Cloud (https://aws.amazon.com/getting-started/hands-on/translate-text-between-languages-cloud/)
- Translate video captions and subtitles using Amazon Translate, by Siva Rajamani and Raju Penmatcha (https://aws.amazon.com/blogs/machine-learning/translate-video-captions-and-subtitles-using-amazon-translate/)
- The World Is Flat (https://www.amazon.com/World-Flat-History-Twenty-first-Century/dp/0374292884)