
In this section, we will show you a basic user interface to capture and save the panorama to the internal storage. Basically, the user will see a fullscreen of the camera preview image. When the user presses the Capture button, the application will capture the current scene and put the captured image on an overlay layer above the current view. Therefore, the user knows what they have just captured and can change the phone position to capture the next image.
The following is a screenshot of the application when the user opens it and after the user captures an image:
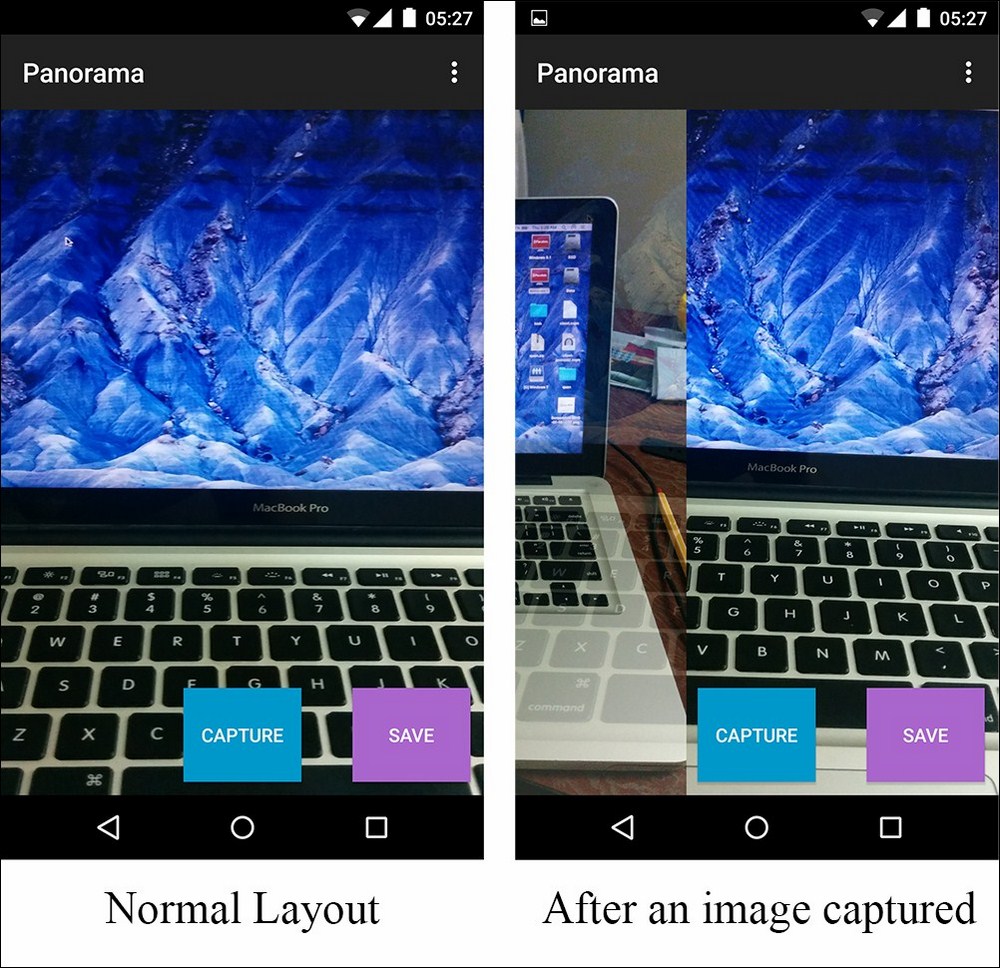
An example of the user interface before and after a user captures an image
First, we will create a new Android project with a blank activity in Android Studio. Then, we will edit the layout xml for MainActivity in app/src/main/res/layout/activity_main.xml as follows:
<RelativeLayout   xmlns:android="http://schemas.android.com/apk/res/android"
    xmlns:tools="http://schemas.android.com/tools"
    android:layout_width="match_parent"
    android:layout_height="match_parent"
    tools:context=".MainActivity">
    <SurfaceView
        android:id="@+id/surfaceView"
        android:layout_width="match_parent"
        android:layout_height="match_parent"
        />
    <SurfaceView
        android:id="@+id/surfaceViewOnTop"
        android:layout_width="match_parent"
        android:layout_height="match_parent"
        />
    <Button
        android:id="@+id/capture"
        android:text="Capture"
        android:layout_width="wrap_content"
        android:layout_height="70dp"
        android:layout_alignParentBottom="true"
        android:layout_centerHorizontal="true"
        android:layout_marginBottom="10dp"
        android:padding="10dp"
        android:textColor="#FFF"
        android:background="@android:color/holo_blue_dark"
        />
    <Button
        android:id="@+id/save"
        android:text="Save"
        android:layout_width="wrap_content"
        android:layout_height="70dp"
        android:padding="10dp"
        android:textColor="#FFF"
        android:background="@android:color/holo_purple"
        android:layout_marginRight="10dp"
        android:layout_alignTop="@+id/capture"
        android:layout_alignParentRight="true"
        android:layout_alignParentEnd="true" />
</RelativeLayout>
In this layout xml file, we have two SurfaceViews—one for the camera preview and one for the overlay layer. We also have two buttons—one for capturing the image and one for saving the panorama image to the internal storage.
In this section, we will implement the process to capture camera frames and view it on a SurfaceView with the ID surfaceView.
At the begin of the MainActivity class, we will create some objects to work with the layout:
public class MainActivity extends ActionBarActivity {
    private Button captureBtn, saveBtn; // used to interact with capture and save Button in UI
    private SurfaceView mSurfaceView, mSurfaceViewOnTop; // used to display the camera frame in UI
    private Camera mCam;
    private boolean isPreview; // Is the camera frame displaying?
    private boolean safeToTakePicture = true; // Is it safe to capture a picture?
In the preceding code, we created two buttons and two SurfaceViews to interact with the user interface. We also create a Camera object, mCam, to open the camera. In our implementation, we will open the camera and get the video frame in the Android approach. OpenCV also provides some other approaches to open the camera. However, we found that they may not work well on all Android devices, so we prefer using the camera with Android approach. In this chapter, we only need the Camera object from the Android API. The advantage of this approach is that you can expect it to work on almost any Android device. The disadvantage is that you have to do some conversion from camera byte array to Android Bitmap to display on the UI and to OpenCV Mat to do the image processing.
Note
If you want to experience OpenCV classes to interact with the camera, you may want to check Chapter 7, Gyroscopic Video Stabilization, of this book.
In the onCreate function, we set up these objects as follows:
@Override
protected void onCreate(Bundle savedInstanceState){
    super.onCreate(savedInstanceState);
    setContentView(R.layout.activity_main);

    isPreview = false;
    mSurfaceView = (SurfaceView)findViewById(R.id.surfaceView);
    mSurfaceView.getHolder().addCallback(mSurfaceCallback);

    mSurfaceViewOnTop = (SurfaceView)findViewById(R.id.surfaceViewOnTop);
    mSurfaceViewOnTop.setZOrderOnTop(true);    // necessary
    mSurfaceViewOnTop.getHolder().setFormat(PixelFormat.TRANSPARENT);

    captureBtn = (Button) findViewById(R.id.capture);
    captureBtn.setOnClickListener(captureOnClickListener);

    saveBtn = (Button) findViewById(R.id.save);
    saveBtn.setOnClickListener(saveOnClickListener);
}
First, we initialize isPreview to false and assign mSurfaceView to SurfaceView in the layout. Then, we get the holder of mSurfaceView and add a callback to it. The variable mSurfaceCallback is an instance of SurfaceHolder.Callback that we will create later. We also assign mSurfaceViewOnTop to the other SurfaceView in the layout, since we want this SurfaceView to be an overlay layer on the camera view. We need to set the Z order to be true and set the holder format to TRANSPARENT. Finally, we set up the capture and save buttons, and set the corresponding OnClickListener. In the next part, we will work on displaying the camera frame on the SurfaceView. So we will just create a basic OnClickListener as follows:
View.OnClickListener captureOnClickListener = new View.OnClickListener() {
    @Override
    public void onClick(View v) {
    }
};
View.OnClickListener saveOnClickListener = new View.OnClickListener() {
    @Override
    public void onClick(View v) {
    }
};As we said before, we will use the Android API to get the camera frame in Android. Currently, there are two versions of Camera API, android.hardware.Camera and android.hardware.camera2. We will use android.hardware.Camera because it supports most of the Android devices up to Android 4.4. In Android 5.0 and later, this API is deprecated and replaced by camera2. We can still use android.hardware.Camera on Android 5.0. If you want to target Android 5.0, we recommend you to try camera2 in your application.
In order to use the camera, we need to add the following lines to AndroidManifest.xml to gain the permissions to the camera. Besides, we also request the permission to write to storage as we will save the panorama image to internal storage.
<uses-feature android:name="android.hardware.camera" />
<uses-permission android:name="android.permission.CAMERA" />
<uses-permission android:name="android.permission.WRITE_EXTERNAL_STORAGE" />
We want to set the mSurfaceView to display the camera frame, so we will set up the camera parameters in the callback of mSurfaceView. We need to create the variable mSurfaceCallback as follows:
SurfaceHolder.Callback mSurfaceCallback = new SurfaceHolder.Callback(){
    @Override
    public void surfaceCreated(SurfaceHolder holder) {
        try {
            // Tell the camera to display the frame on this surfaceview
            mCam.setPreviewDisplay(holder);
        } catch (IOException e) {
            e.printStackTrace();
        }
    }
    @Override
    public void surfaceChanged(SurfaceHolder holder, int format, int width, int height) {
        // Get the default parameters for camera
        Camera.Parameters myParameters = mCam.getParameters();
        // Select the best preview size
        Camera.Size myBestSize = getBestPreviewSize( myParameters );
        if(myBestSize != null){
            // Set the preview Size
            myParameters.setPreviewSize(myBestSize.width, myBestSize.height);
            // Set the parameters to the camera
            mCam.setParameters(myParameters);
            // Rotate the display frame 90 degree to view in portrait mode
            mCam.setDisplayOrientation(90);
            // Start the preview
            mCam.startPreview();
            isPreview = true;
        }
    }
    @Override
    public void surfaceDestroyed(SurfaceHolder holder) {
    }
};
In this code, we call the setPreviewDisplay method in the surfaceCreated function to tell the camera to display the camera frame on mSurfaceView. After this, in the surfaceChanged function, we set the camera parameters, change the display orientation to 90 degrees and start the preview process. The function getBestPreviewSize is a function to get the preview size that has the biggest number of pixels. The getBestPreviewSize is simple, as follows:
private Camera.Size getBestPreviewSize(Camera.Parameters parameters){
    Camera.Size bestSize = null;
    List<Camera.Size> sizeList = parameters.getSupportedPreviewSizes();
    bestSize = sizeList.get(0);
    for(int i = 1; i < sizeList.size(); i++){
        if((sizeList.get(i).width * sizeList.get(i).height) >
                (bestSize.width * bestSize.height)){
            bestSize = sizeList.get(i);
        }
    }
    return bestSize;
}
Finally, we need to add some code to open the camera in onResume and release the camera in onPause:
@Override
protected void onResume() {
    super.onResume();
    mCam = Camera.open(0); // 0 for back camera
}
@Override
protected void onPause() {
    super.onPause();
    if(isPreview){
        mCam.stopPreview();
    }
    mCam.release();
    mCam = null;
    isPreview = false;
}
At this moment, we can install and run the application on a real device. The following figure shows a screenshot of our application on a Nexus 5 running Android 5.1.1:
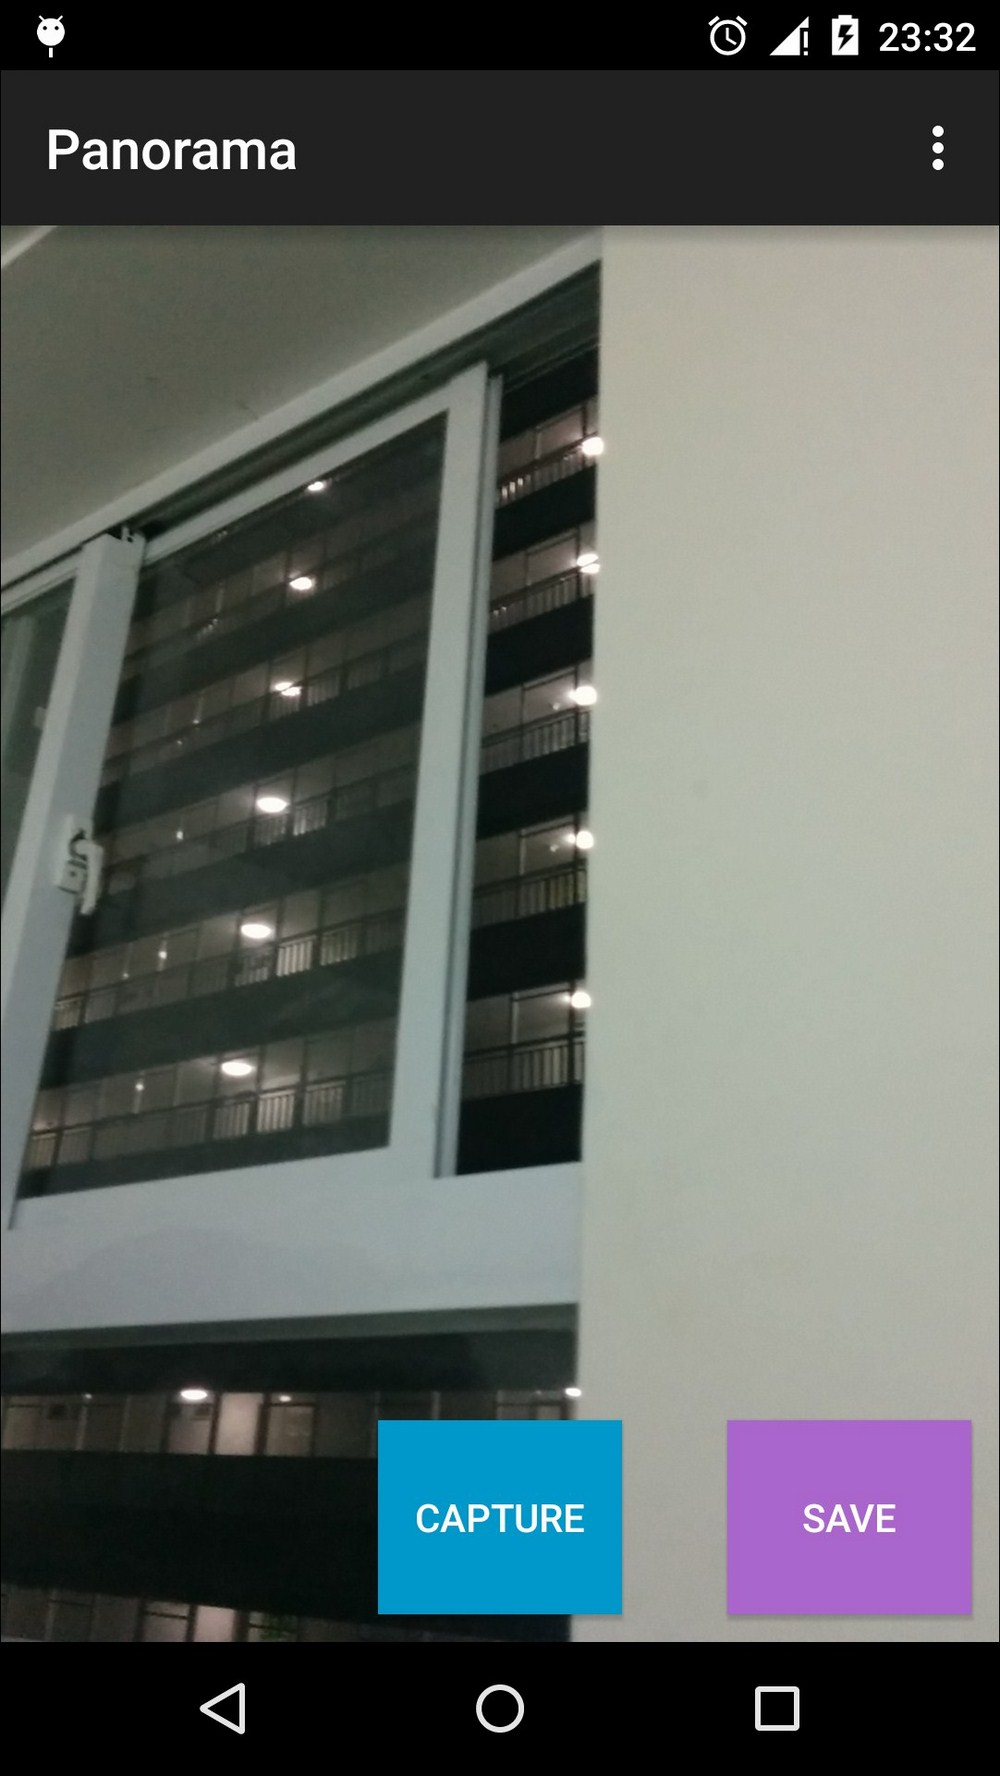
A screenshot of the application in Camera Preview mode on Nexus 5 running Android 5.1.1
In our application, we don't want the layout to rotate so we set the activity orientation to portrait mode. It's optional. If you want to do this, you can simply change your activity in AndroidManifest.xml as follows:
<activity
    android:screenOrientation="portrait"
    android:name=".MainActivity"
android:label="@string/app_name" >In this section, we will show you how to implement the OnClickListener of the Capture button. When the user clicks on the Capture button, we want the application to take a picture of the current scene. With the Camera API, we can use the takePicture function to capture a picture. The benefit of this function is that the resolution of the output image is very high. For example, when our application runs on Nexus 5, even though the previewing size is 1920x1080, the resolution of the captured image is 3264x2448. We change captureOnClickListener as follows:
View.OnClickListener captureOnClickListener = new View.OnClickListener() {
    @Override
    public void onClick(View v) {
        if(mCam != null && safeToTakePicture){
            // set the flag to false so we don't take two picture at a same time
            safeToTakePicture = false;
            mCam.takePicture(null, null, jpegCallback);
        }
    }
};
In the onClick function, we check whether the camera is initialized and the flag safeToTakePicture is true. Then, we set the flag to false so that we don't take two pictures at the same time. The takePicture function of the Camera instance requires three parameters. The first and second parameters are shutter call back and raw data call back respectively. These functions may be called differently on different devices so we don't want to use them and set them to null. The last parameter is the callback that is called when the camera saves the picture in the JPEG format.
Camera.PictureCallback jpegCallback = new Camera.PictureCallback() {
    public void onPictureTaken(byte[] data, Camera camera) {
        // decode the byte array to a bitmap
        Bitmap bitmap = BitmapFactory.decodeByteArray(data, 0, data.length);
        // Rotate the picture to fit portrait mode
        Matrix matrix = new Matrix();
        matrix.postRotate(90);
        bitmap = Bitmap.createBitmap(bitmap, 0, 0, bitmap.getWidth(), bitmap.getHeight(), matrix, false);

        // TODO: Save the image to a List to pass them to OpenCV method

        Canvas canvas = null;
        try {
            canvas = mSurfaceViewOnTop.getHolder().lockCanvas(null);
            synchronized (mSurfaceViewOnTop.getHolder()) {
                // Clear canvas
                canvas.drawColor(Color.TRANSPARENT, PorterDuff.Mode.CLEAR);

                // Scale the image to fit the SurfaceView
                float scale = 1.0f * mSurfaceView.getHeight() / bitmap.getHeight();
                Bitmap scaleImage = Bitmap.createScaledBitmap(bitmap, (int)(scale * bitmap.getWidth()), mSurfaceView.getHeight() , false);
                Paint paint = new Paint();
                // Set the opacity of the image
                paint.setAlpha(200);
                // Draw the image with an offset so we only see one third of image.
                canvas.drawBitmap(scaleImage, -scaleImage.getWidth() * 2 / 3, 0, paint);
            }
        } catch (Exception e) {
            e.printStackTrace();
        } finally {
            if (canvas != null) {
                mSurfaceViewOnTop.getHolder().unlockCanvasAndPost(canvas);
            }
        }
        // Start preview the camera again and set the take picture flag to true
        mCam.startPreview();
        safeToTakePicture = true;
    }
};
First, onPictureTaken provides a byte array of the captured image, so we would want to decode it to an instance of Bitmap. Because the camera sensor captured the image in landscape mode, we would want to apply a rotation matrix to obtain the image in the portrait mode. Then, we would want to save this image to pass a sequence of images to the OpenCV stitching module. Since this code needs the OpenCV library, we will implement this part later. After this, we will obtain the canvas of the overlay SurfaceView and try to draw the image on the screen. The following is a demonstration of the overlay layer on top of the previewing layer. Finally, we will start the preview process again and also set the safeToTakePicture flag to true.
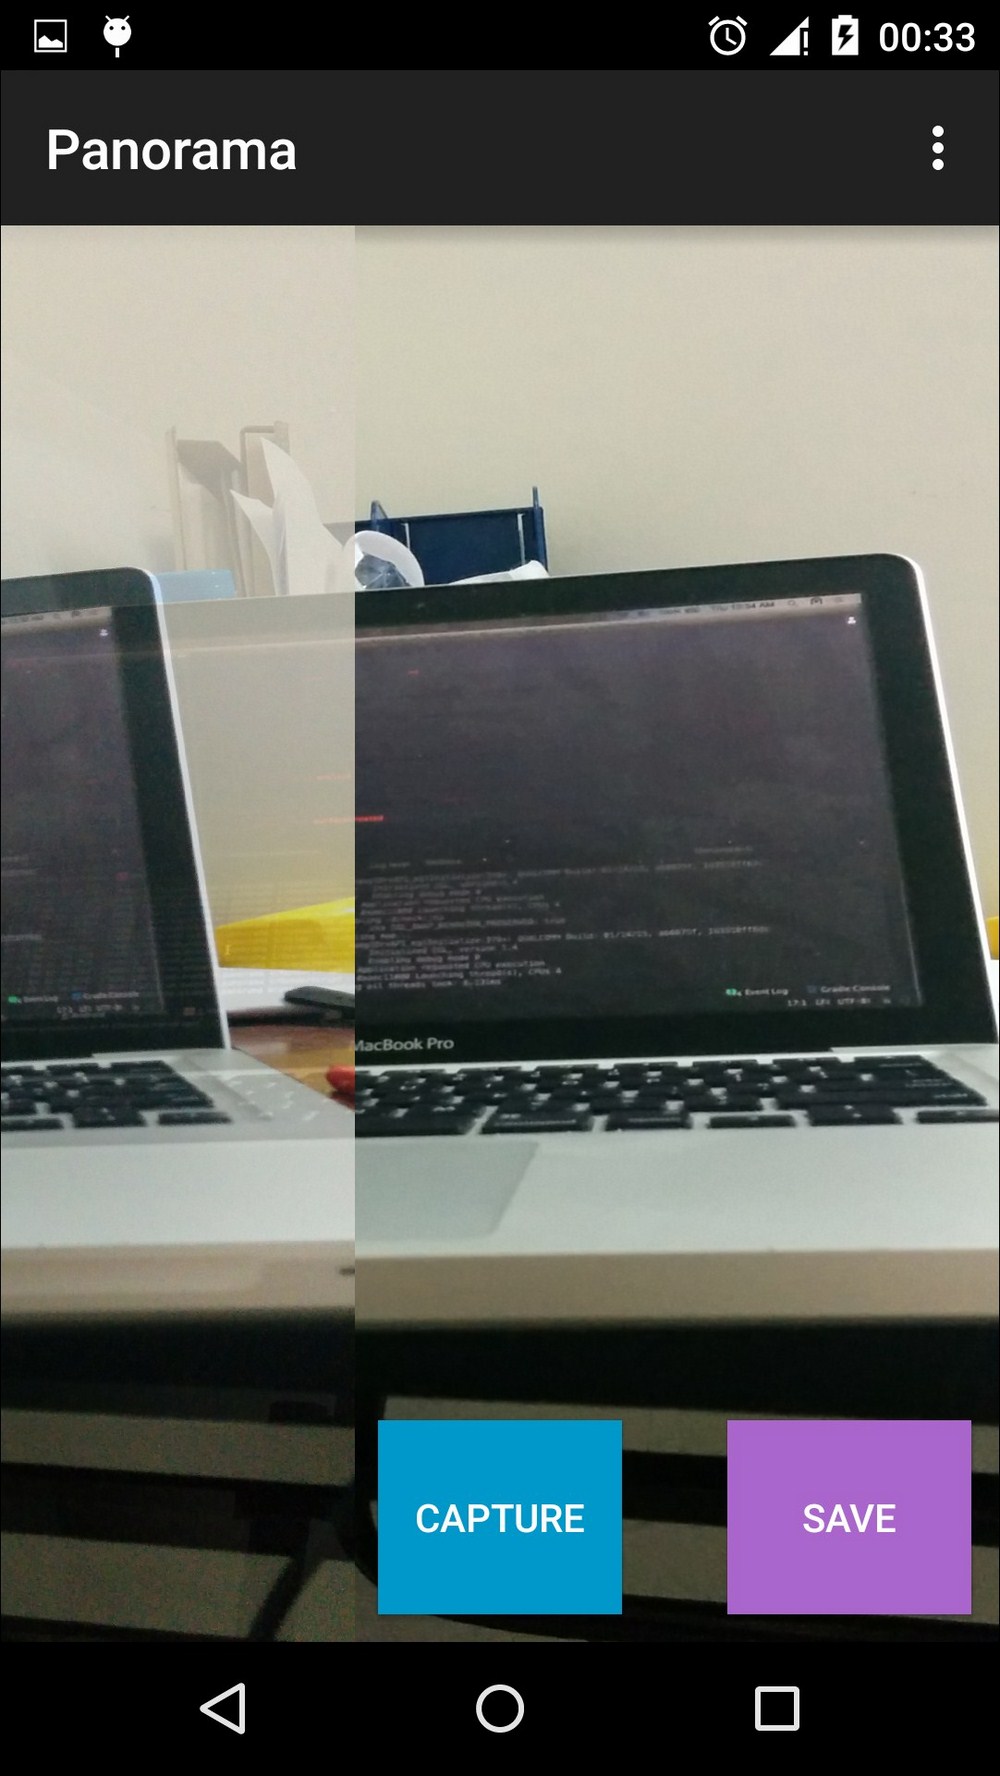
A screenshot of the application after the user captured an image on a Nexus 5 running Android 5.1.1
Currently, the Save button is fairly simple. We will assume that when the user clicks on the Save button, we will start a new thread to perform the image processing task:
View.OnClickListener saveOnClickListener = new View.OnClickListener() {
    @Override
    public void onClick(View v) {
        Thread thread = new Thread(imageProcessingRunnable);
        thread.start();
    }
};
In imageProcessingRunnable, we would want to show a processing dialog at the start of the process and close the dialog when everything is completed. In order to accomplish this, we will first create an instance of ProgressDialog:
ProgressDialog ringProgressDialog;
Then, imageProcessingRunnable is implemented as:
private Runnable imageProcessingRunnable = new Runnable() {
    @Override
    public void run() {
        showProcessingDialog();
        // TODO: implement OpenCV parts
        closeProcessingDialog();
    }
};
We will simply call showProcessingDialog to show the progressing dialog and call closeProcessingDialog to close the dialog. The steps in between are quite complex and requires lots of OpenCV functions, so we keep this part for a later section. The functions to show and close the progress dialog are as follows:
private void showProcessingDialog(){
    runOnUiThread(new Runnable() {
        @Override
        public void run() {
            mCam.stopPreview();
            ringProgressDialog = ProgressDialog.show(MainActivity.this, "", "Panorama", true);
            ringProgressDialog.setCancelable(false);
        }
    });
}
private void closeProcessingDialog(){
runOnUiThread(new Runnable() {
@Override
public void run() {
mCam.startPreview();
ringProgressDialog.dismiss();
}
});
}In showProcessingDialog, we will stop the camera preview to reduce unnecessary computation cost on the device, whereas in closeProcessingDialog, we start the camera preview again to allow the user to capture more panorama images. We must put these codes in runOnUiThread since these codes interact with the UI elements.
In the following section, we will show you how to implement the remaining parts of our application with OpenCV.