
We learned about playing ONI files but it was only a part of this topic. You can record ONI files from the device's outputs yourself too. We will now introduce an
openni::Recorder class that can be used for this purpose. This recipe is easy, as adding and starting openni::VideoStream involves nothing special.
Create a project in Visual Studio 2010 and prepare it for working with OpenNI using the Creating a project in Visual Studio 2010 recipe of Chapter 2, Open NI and C++.We don't need OpenGL in this recipe.
- Add the following lines above your source code (just below the
#includelines):char ReadLastCharOfLine() { int newChar = 0; int lastChar; fflush(stdout); do { lastChar = newChar; newChar = getchar(); } while ((newChar != ' ') && (newChar != EOF)); return (char)lastChar; } bool HandleStatus(Status status) { if (status == STATUS_OK) return true; printf("ERROR: #%d, %s", status, OpenNI::getExtendedError()); ReadLastCharOfLine(); return false; } - Then locate the following lines of code:
int _tmain(int argc, _TCHAR* argv[]) { - Write the following code snippet below the preceding lines of code:
  Status status = STATUS_OK;
  printf("Scanning machine for devices and loading "
      "modules/drivers ...
");

  status = OpenNI::initialize();
  if (!HandleStatus(status)) return 1;
  printf("Completed.
");

  Device device;
  printf("Opening first device ...
");
  status = device.open(ANY_DEVICE);
  if (!HandleStatus(status)) return 1;
  printf("%s Opened, Completed.
",
    device.getDeviceInfo().getName());

  printf("Checking if stream is supported ...
");
  if (!device.hasSensor(SENSOR_DEPTH))
  {
    printf("Stream not supported by this device.
");
    return 1;
  }

  printf("Asking device to create a depth stream ...
");
  VideoStream depthSensor;
  status = depthSensor.create(device, SENSOR_DEPTH);
  if (!HandleStatus(status)) return 1;

  printf("Starting stream ...
");
  status = depthSensor.start();
  if (!HandleStatus(status)) return 1;
  printf("Done.
");

  printf("Creating a recorder ...
");
  Recorder recorder;
  status = recorder.create("C:sample.oni");
  if (!HandleStatus(status)) return 1;
  printf("Done.
");
  printf("Attaching to depth sensor ...
");
  status = recorder.attach(depthSensor);
  if (!HandleStatus(status)) return 1;
  printf("Done.
");

  printf("Starting recorder ...
");
  status = recorder.start();
  if (!HandleStatus(status)) return 1;
  printf("Done. Now recording ...
");

  ReadLastCharOfLine();
  recorder.destroy();
  depthSensor.destroy();
  device.close();
  OpenNI::shutdown();
Step 1 only contains the definition of two of our basic functions, ReadLastCharOfLine() for waiting for user input and HandleStatus() for recognizing the error state and printing the error to the console. You can read more about these functions in previous chapters.
Our main code here is in step 2. As you can see, here we have the initializing process of OpenNI, as always; we then created depth by using openni::VideoStream and started it.
The difference in this recipe, when compared to older recipes, is where we defined a variable of type openni::Recorder with the name recorder using its
openni::Recorder::create() method. Please note that this method accepts an argument of type string that will be used to create a file to save data. We selected C:sample.oni as the desired name and address for our file.
  Recorder recorder;
  status = recorder.create("C:\sample.oni");
Then we usually need to start the recording process just as we did with openni::VideoStream. But without attaching recorder to the depth stream, it will save nothing. We need to use the openni::Recorder::attach() method before starting the recording process.
status = recorder.attach(depthSensor);
We need to repeat this line for each openni::VideoStream object that we want to store in the recorded file.
After we add all our
openni::VideoStream objects, we can start the recording process.
status = recorder.start();
Now we can either wait or use the output of openni::VideoStream objects to do something else. But because we wanted to make this recipe shorter and easier to understand, we decided to use the
ReadLastCharOfLine() function instead of using data and waiting for the user to press a key.
At last, as the user presses the Enter key, we will destroy the recorder and depthsensor objects, close the device, and then shut down OpenNI. We can then return 0 to end program execution.
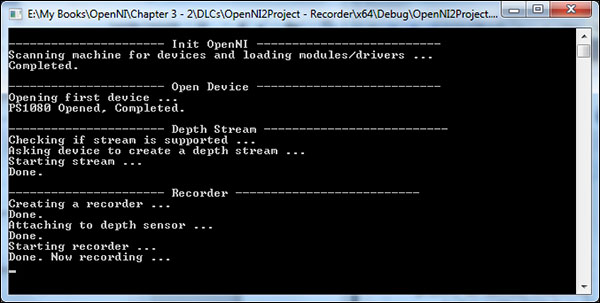
The output of this program is predictable. Here is a screenshot:
- The Opening an already recorded file (ONI file) instead of a device recipe of Chapter 2, Open NI and C++
- The Controlling the player when opening a device from file recipe