
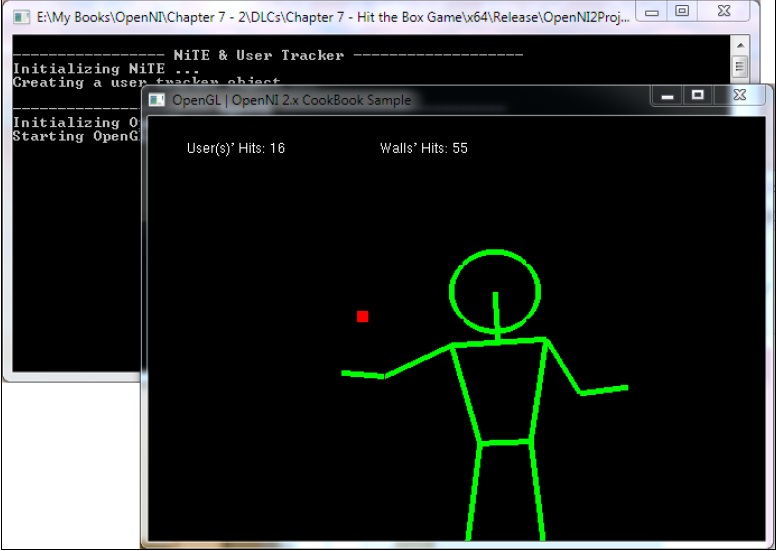
We will use the output of skeleton tracking on a simple game to show you how we can use this data to make the user a bigger part of the game than he was in old times. This pong-like game is the simplest game we could think of.
Unfortunately because of the number of lines of code, we removed the How to do it... section, but you can download the source code of this recipe from Packt Publishing's website.
Also, in the How it works... section that follows, you can read information about almost every line of code.
The gameplay is fairly simple; we have a pong-like ball that can interact with a user's skeleton. It is not a great game, but it's still a game, and it is fun enough as a mini-game from a personal perspective.
If you'll take a look at the code (the main file is OpenNI2Project.cpp), you can clearly see that we used two new #include lines. vector helps us to define arrays with dynamic-size behavior that we are going to use in our program to store skeleton lines, and sstream makes working with strings easier.
After these lines, we defined a structure named PongBall. This structure is going to be our main ball. While defining this structure, we used the following different fields:
PongBall::location: This is aPOINTFLOATvariable and contains the position of our ballPongBall::speed: This is anintegervariable indicating the speed of the movement of our ballPongBall::angle: This is afloatvariable and shows the direction of the movement of our ball. We will keep this in radiant
Also, we have defined a method named PongBall::init() that fills the location and angle variables with a random number:
  void init(int w, int h){
    srand(time(NULL));
    angle = (((float)rand() / RAND_MAX)
           * PI * 2);
    location.x = (((float)rand() / RAND_MAX)
           * (w - 40)) + 20;
    location.y = (((float)rand() / RAND_MAX)
           * (h - 40)) + 20;
  }
We then defined a global variable from this struct named mainBall. We are going to use this variable as a representation of our ball in the application/game.
PongBall mainBall;
Then we defined a class named Line so we can use it later for storing our lines' end points. Actually, each skeleton line or screen bounding box is a line.
In this class, we defined two fields named Line::a and Line::b. These are the locations of the start points and end points of our line.
We also defined a class constructor method with four parameters (X and Y for both end points) so we can easily create instances of this class:
  Line
    (float x1, float y1, float x2, float y2)
    : a (new POINTFLOAT), b (new POINTFLOAT)
  {
    a->x = x1;
    a->y = y1;
    b->x = x2;
    b->y = y2;
  }
As this class has two pointers (for each endpoints), we need to take care of them before destroying them to prevent a memory leak. So in the destructor of this class, we deleted both the variables:
  ~Line()
    {
    delete a;
    delete b;
    }
This class has only one method named Line::getAngle() that can be used for giving us the angle of segments between two points in a radiant using a simple mathematical calculation as follows:
  float getAngle()
  {
    return atan2(
        (float)a->y - b->y, a->x - b->x);
  }
Then in our main code, we have window_w and window_h for storing the size of the OpenGL window as always. After that, we have the uTracker variable with a nite::UserTracker type that is our user tracker object from NiTE. We also have a variable named lines from the type std::vector<Line*>, which simply means a dynamic array for pointers of the Line class. We are going to use it for storing active lines in a scene.
There are two more variables named wallScore and userScore that will be used for storing a user's and walls' hits:
int window_w = 640;
int window_h = 480;
nite::UserTracker uTracker;
std::vector<Line*> lines;
int wallScore = 0;
int userScore = 0;
As with any other recipe you have read until now, we have our two famous functions here too. ReadLastCharOfLine(), which is a function that reads a character from the user and waits for the user to press the Enter key, and HandleStatus(), which is responsible for checking the nite::Status object returned by other functions/methods.
After these two functions, we have gl_KeyboardCallback() that is responsible for handling key presses in the OpenGL window. In this example, we are going to check only if the pressed key was the Esc key so we can end the program:
void gl_KeyboardCallback(unsigned char key, int x, int y)
{
  if (key == 27) // ESC Key
  {
    uTracker.destroy();
    nite::NiTE::shutdown();
    exit(0);
  }
}
gl_IdleCallback() is the next function that has been defined in the source code. This function will be executed when OpenGL is idle and has nothing to do. In this function, we will request the re-rendering of a scene using the glutPostRedisplay() function of GLUT:
void gl_IdleCallback()
{
  glutPostRedisplay();
}
After these two functions, we defined three functions to enable drawing in the OpenGL window. The first one is a function named drawText() that we wrote for adding text to the OpenGL output. In the first line of this function, we changed the active color to white and then asked OpenGL to set the cursor to a specific pixel. Then we wrote each character from the string to the OpenGL buffer, one by one, using the glutBitmapCharacter() function and with the Helvetica font set to a size of 12pt:
void drawText(int x, int y, const char *string)
{
  glColor3f(255, 255, 255);
  glRasterPos2f(x, y);
  for (int i = 0; i < strlen(string); i++){
    glutBitmapCharacter(
     GLUT_BITMAP_HELVETICA_12, string[i]);
  }
}
The second function we defined is a function named drawLineBetweenJoints(). This function is going to draw a line between the two users' skeleton joints. To do this, we first converted the real-world position of these two joints to their positions on the screen using the nite::UserTracker::convertJointCoordinatesToDepth() method. Then we used the OpenGL functions to draw a line between these two positions. In the end, we also added this new line to the lines vector/array as follows:
void drawLineBetweenJoints(nite::Skeleton skel,
    nite::JointType a, nite::JointType b)
{
    float posX1, posY1, posX2, posY2;
    nite::Status status1 =
    uTracker.convertJointCoordinatesToDepth(
      skel.getJoint(a).getPosition().x,
      skel.getJoint(a).getPosition().y,
      skel.getJoint(a).getPosition().z,
      &posX1, &posY1);
    nite::Status status2 =
      uTracker.convertJointCoordinatesToDepth(
      skel.getJoint(b).getPosition().x,
      skel.getJoint(b).getPosition().y,
      skel.getJoint(b).getPosition().z,
      &posX2, &posY2);
    if (status1 == nite::STATUS_OK &&
      status2 == nite::STATUS_OK ){
      glBegin(GL_LINES);
      glVertex2f(posX1,posY1);
      glVertex2f(posX2,posY2);
      glEnd();
      lines.push_back(new Line(posX1, posY1, posX2, posY2));
    }
}
The third function is the drawCircle() function. We are going to use this function to show the position of the user's head. This function accepts three arguments, x and y of the center of the circle and the radius of the circle. Then we will try to find 100 points in the perimeter of this circle and draw a line joining one point to the other:
void drawCircle(float x, float y, float r){
  glBegin(GL_LINE_LOOP);
  for(int i = 0; i < 100; i++) {
        float angle = i*2*PI/100;
        glVertex2f(	x + (cos(angle) * r),
          y + (sin(angle) * r));
    }
  glEnd();
}
In our game, we also want to see if the ball is going to collide with the user's skeleton or walls. To calculate this, we defined a function named IsSegmentsColliding(). We also used another function named IsBetween() to check if a number is in the desired region or not. We are going to use this function in IsSegmentsColliding() later. IsBetween() is based on simple logic: our number must be smaller than the first bound and bigger than the second bound, or in reverse. This is because we are not sure which one is upper bound and which one is lower bound.
bool IsBetween (float x, float b1, float b2)
{
   return (	((x >= (b1 - 0.1f)) &&
       (x <= (b2 + 0.1f))) ||
      ((x >= (b2 - 0.1f)) &&
      (x <= (b1 + 0.1f))));
}
Please note the 0.1f number in the preceding code. As you may know, float variables are not very reliable for direct comparison because they have an error margin. So, we used this number as a tolerance.
In the IsSegmentsColliding() function, we need to find out if two lines cross each other. These two lines are each a product of two points, so they are a sum of four points, which is the same as the number of arguments for this function. After finding out if these two lines crossed each other, we need to make sure that this point is part of the two segments (because actually they are not a line but a segment):
bool IsSegmentsColliding(	POINTFLOAT lineA,
              POINTFLOAT lineB,
              POINTFLOAT line2A,
              POINTFLOAT line2B)
The first step is to calculate the place of collision using the following two formulas to see if these two lines have any collision at all:

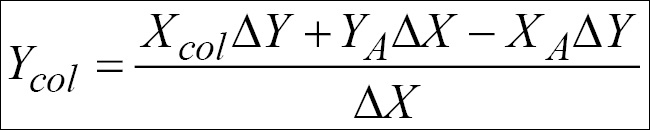
Tip
Read more about these mathematical formulas on Wikipedia (http://en.wikipedia.org/wiki/Line-line_intersection).
Before using these formulas, we need to first calculate the first line's Delta X and Delta Y and then the second line's Delta X and Delta Y:
  float deltaX1 = lineB.x - lineA.x;
  float deltaX2 = line2B.x - line2A.x;
  float deltaY1 = lineB.y - lineA.y;
  float deltaY2 = line2B.y - line2A.y;
Then we must check if both the lines are vertical lines and/or if they are parallel because we can't use the preceding formula for two parallel lines or two vertical lines (that are also parallel):
  if (abs(deltaX1) < 0.01f &&
    abs(deltaX2) < 0.01f) // Both are vertical lines
    return false;
  if (abs((deltaY1 / deltaX1) -
    (deltaY2 / deltaX2)) < 0.001f) // Two parallel line
    return false;
In the next step, we calculate the x value of the collision point:
  float xCol = (	(	(deltaX1 * deltaX2) *
            (line2A.y - lineA.y)) -
          (line2A.x * deltaY2 * deltaX1) +
          (lineA.x * deltaY1 * deltaX2)) /
         ((deltaY1 * deltaX2) - (deltaY2 * deltaX1));
Then we calculate the y value of this point. It is important to know that, to do so, we need to use the equation of one of these lines, and we can't do it with a vertical line. So the first thing to do is to check if the first line is a vertical line. If it is, we need to use the equation of the second line for calculation purposes. If it isn't, we can use the first one without a problem:
  float yCol = 0;
  if (deltaX1 < 0.01f) // L1 is a vertical line
    yCol = ((xCol * deltaY2) +
       (line2A.y * deltaX2) -
        (line2A.x * deltaY2)) / deltaX2;
  else // L1 is acceptable
    yCol = ((xCol * deltaY1) +
        (lineA.y * deltaX1) -
        (lineA.x * deltaY1)) / deltaX1;
After these two calculations, we have the position of impact. Yet we are not sure if this position is between the two points (is part of two segments or not), so we need to use the IsBetween() function to check if both x and y of the points are within the range of these two segments:
  return	IsBetween(xCol, lineA.x, lineB.x) &&
      IsBetween(yCol, lineA.y, lineB.y) &&
      IsBetween(xCol, line2A.x, line2B.x) &&
      IsBetween(yCol, line2A.y, line2B.y);
We also defined a function here to empty the lines array, named ClearLines():
void ClearLines(){
  for(int i = 0; i < lines.size(); ++i)
    delete lines[i];
  lines.clear();
}
In the preceding function, we first released the memory held by the Line objects and then removed them from the array by clearing the vector.
The next thing we need to do is to define a function for rendering a scene. As always, we defined our
gl_DisplayCallback() function. In this function, after requesting for a new frame from nite::UserTracker, we checked whether the size of the newly returned frame is the same as the older frames and whether it is the current size of the OpenGL window or not. If it is different, we will change the size of the OpenGL window and update the window_h and window_w variables:
    status = uTracker.readFrame(&usersFrame);
    if (status == nite::STATUS_OK && usersFrame.isValid())
    {
      VideoFrameRef depthFrame = usersFrame.getDepthFrame();
      if  (window_w != depthFrame.getWidth() ||
        window_h != depthFrame.getHeight())
      {
        window_w = depthFrame.getWidth();
        window_h = depthFrame.getHeight();
        glutReshapeWindow(window_w, window_h);
      }
The next step is to clear the OpenGL buffer and set up the OpenGL viewpoint. And after that, we can search for the recognized users in the screen. But just before doing this, we need to first clear the lines array using the
ClearLines() function that we defined before and then add walls to it:
      ClearLines();
      lines.push_back(new Line(0, 0, 0, window_h));
      lines.push_back(new Line(0, 0, window_w, 0));
      lines.push_back(new Line(0, window_h,
                  window_w, window_h));
      lines.push_back(new Line(window_w, 0,
                  window_w, window_h));
Then we can request for the list of users as follows:
      const nite::Array<nite::UserData>& users =
        usersFrame.getUsers();
Then, we can loop through this list and request to track a user's skeleton or draw the skeleton of users being tracked to the screen. But it is better to change the active color to something else and set the size of lines to 5 pixels:
      glColor3f( 0.f, 1.f, 0.f );
      glLineWidth(5.0);
When a new user is detected, we will request skeleton tracking and restart the game with the following code:
        if (users[i].isNew())
        {
          uTracker.startSkeletonTracking(
            users[i].getId());
          mainBall.init(window_w, window_h);
          wallScore = 0;
          userScore = 0;
        }
The next step is to check if the user is currently being tracked. If he/she is, we will try to draw a line between the related skeleton joints to give it some visual representation as follows:
       nite::Skeleton user_skel = users[i].getSkeleton();
        if (user_skel.getState() ==
          nite::SKELETON_TRACKED)
        {
         drawLineBetweenJoints(user_skel,
            nite::JOINT_LEFT_HAND, nite::JOINT_LEFT_ELBOW);
          ...
          drawLineBetweenJoints(user_skel,
            nite::JOINT_LEFT_HIP,
            nite::JOINT_LEFT_SHOULDER);
We also want to draw a circle in place of the user's head:
          float posX, posY;
          status =
          uTracker.convertJointCoordinatesToDepth(
            user_skel.getJoint(nite::JOINT_HEAD)
              .getPosition().x,
            user_skel.getJoint(nite::JOINT_HEAD)
             .getPosition().y,
            user_skel.getJoint(nite::JOINT_HEAD)
              .getPosition().z,
            &posX, &posY);
          if (status == nite::STATUS_OK){
            drawCircle(posX, posY,
              (1 - (user_skel.getJoint(nite::JOINT_HEAD)
               .getPosition().z / 5000)) * 35);
Then we need to take care of our ball, including moving it and checking for collision between it and the defined lines. To do so, we first need to know the next position of the ball. Calculating this position is possible with two simple mathematical functions:
      POINTFLOAT newPosition;
      newPosition.x = mainBall.speed *
        cos(mainBall.angle) + mainBall.location.x;
      newPosition.y = mainBall.speed *
        sin(mainBall.angle) + mainBall.location.y;
Then we loop through all the registered lines in the lines variable and check if the next movement of the ball will cross any of them. If so, we need to change the direction of the ball's movement depending on the angle of the line itself (you can read about specular reflection on the Web):
      for (int i = 0; i < lines.size(); ++i){
        if (IsSegmentsColliding(*(lines[i]->a),
                        *(lines[i]->b),
                        mainBall.location,
                      	 newPosition)){
          mainBall.angle = lines[i]->getAngle() -
                  (mainBall.angle –
                  lines[i]->getAngle());
We also increase the score of the wall or player(s) by one:
          if (i < 4)
            wallScore += 1;
         else
           userScore += 1;
Then we set the new location of the ball and draw it:
      mainBall.location.x +=
        mainBall.speed * cos(mainBall.angle);
      mainBall.location.y +=
        mainBall.speed * sin(mainBall.angle);
      glPointSize(10);
      glColor3f( 1.f, 0.f, 0.f );
      glBegin( GL_POINTS );
      glVertex2f(	mainBall.location.x,
            mainBall.location.y);
      glEnd();
At the end, we print the number of hits by user(s) or by walls to the output:
      std::ostringstream stringStream;
      stringStream << "User(s)' Hits: " << userScore;
      const std::string tmp = stringStream.str();
      drawText( 20, 20, tmp.c_str());
      stringStream.str("");
      stringStream << "Walls' Hits: " << wallScore;
      const std::string tmp2 = stringStream.str();
      drawText( 120, 20, tmp2.c_str());
In our main function, we performed the same steps as always, initializing NiTE, creating a user tracker, and registering GLUT functions. The only new lines in the _tmain() function, compared with other related recipes, are these lines:
  mainBall.init(120, 240);
  mainBall.speed = 5;
We used these lines to initialize the position of the ball the first time. We also defined a constant speed for the ball.
The output of our game-like experience is as follows:
- The Working sample for controlling the mouse by hand recipe in Chapter 6, NiTE and Hand Tracking
- The Detecting a user's pose recipe
- The Getting a user's skeleton joints and displaying their position in the depth map recipe