
In this recipe we will show you how to prepare a project in Visual Studio to start programming with OpenNI 2 and NiTE 2. Using NiTE 2 is optional but it will offer following features to you::
- The capability to track hands and recognize hand gestures
- The capability to recognize one or more users and track their movements
- The capability to recognize different parts of the user's body and extract his/her skeleton map and joint positions
Without NiTE, we can only use low-level data such as the output of different physical sensors of one or more devices.
Download and install the free version of Visual Studio 2010 Express Edition from the following link:
http://www.microsoft.com/visualstudio/eng/products/visual-studio-2010-express
Please note that by using Visual Studio 2010 C++ Express you can't compile 64-bit applications without Windows SDK. You can download Windows SDK from the following link:
http://go.microsoft.com/fwlink/?LinkID=191424
Also you can use Visual Studio 2012 Express for Windows Desktop, which supports C++, C#, VB.net, and compiling of both 32-bit and 64-bit applications. Visual Studio 2012 Express shares almost the same user interface as Visual Studio 2010 C++ Express and there should be no big problem when using this recipe. Use the following link for more information and download Visual Studio 2012 for Windows Desktop:
http://www.microsoft.com/visualstudio/eng/products/visual-studio-express-for-windows-desktop
We are using Visual Studio 2010 Ultimate Edition but there must be no notable difference in these steps for Visual Studio 2010 C++ Express or Visual Studio 2012 for Windows Desktop.
Also download and install OpenNI and, if needed, NiTE as shown in Chapter 1, Getting Started.
We are going to create a project in Visual Studio 2010 and configure our project to use OpenNI libraries and headers. First of all open Visual Studio 2010 and then follow the ensuing steps:
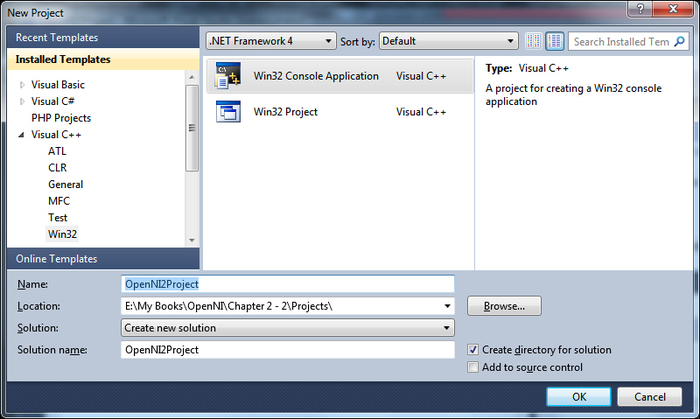
- From the File menu, select New, and then New Project.
- Select Visual C++ from the left panel and Win32 Console Application from the right panel.
- Enter a name in the Name field and click on OK.
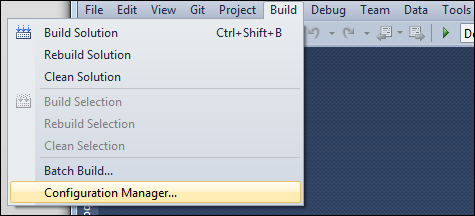
- Wait for the project creation process and after that create a 64-bit platform type for your project by clicking on the Build menu and selecting Configuration Manager.
.
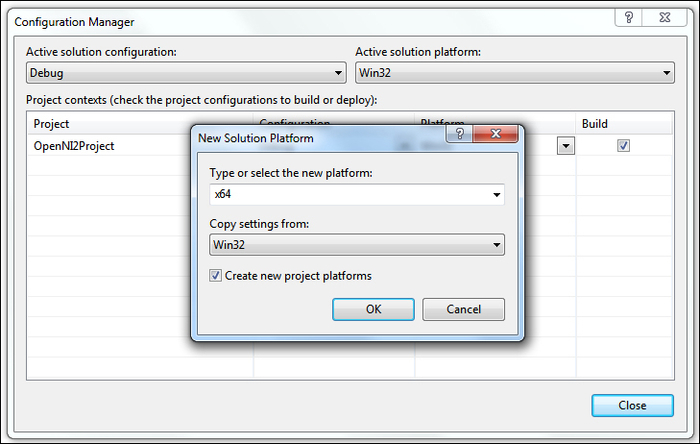
- From the Active solution platform dropdown, select New, and in the new dialog box select x64 from the top dropdown, Win32 from the bottom dropdown, and click on OK and Close.
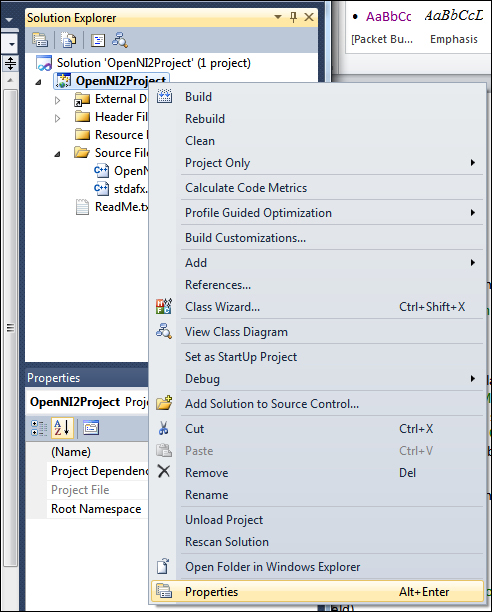
- Right-click on the project name from the Solution Explorer window, which is usually located at the top right, and select Properties.
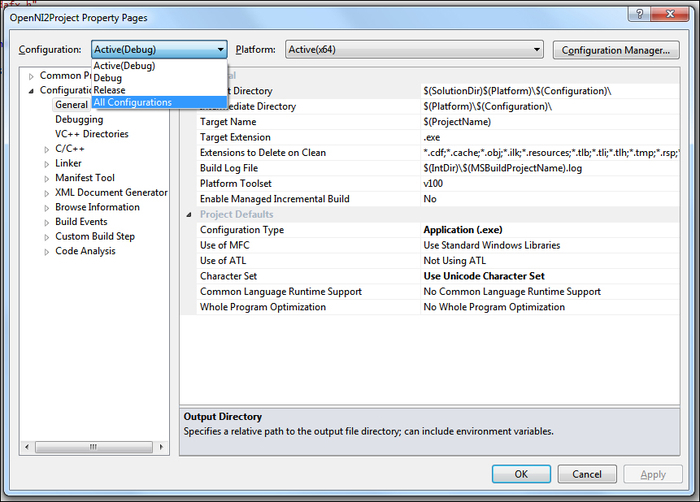
- Select All Configurations from the top-right dropdown (the Configuration dropdown) and Active(x64) or x64 from the top-right dropdown (Platform dropdown).
- Locate C/C++ and expand it.
- Select the General node, edit Additional Include Directories (using the down arrow to the right of this field), add
$(OPENNI2_INCLUDE64), and, if you want to use NiTE in your project, enter$(NITE2_INCLUDE64)too on a new line then click on OK.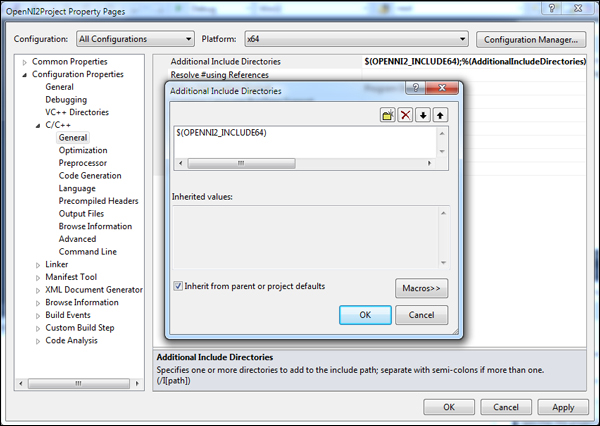
- Locate the Linker section and expand it.
- Select the General node, edit Additional Library Directories, then add
$(OPENNI2_LIB64), and, if you want to use NiTE in your project, enter$(NITE2_LIB64)too on a new line then click on OK.
- Select the Input node in the same section (Linker), edit Additional Dependencies, then add
OpenNI2.liband, if you want to use NiTE in your project, enterNiTE2.libtoo on a new line then click on OK.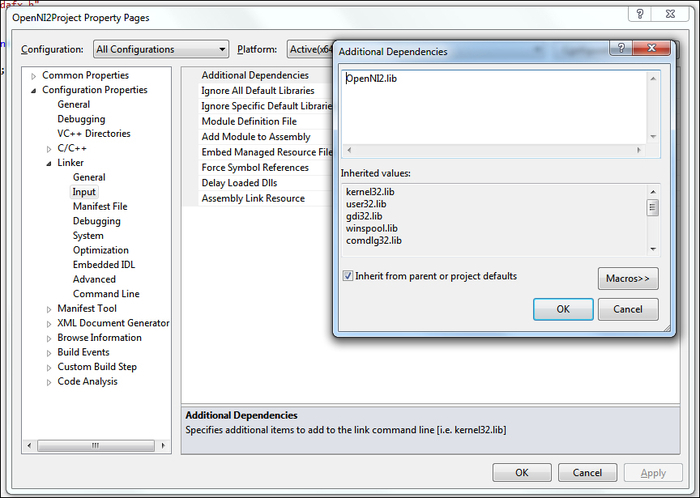
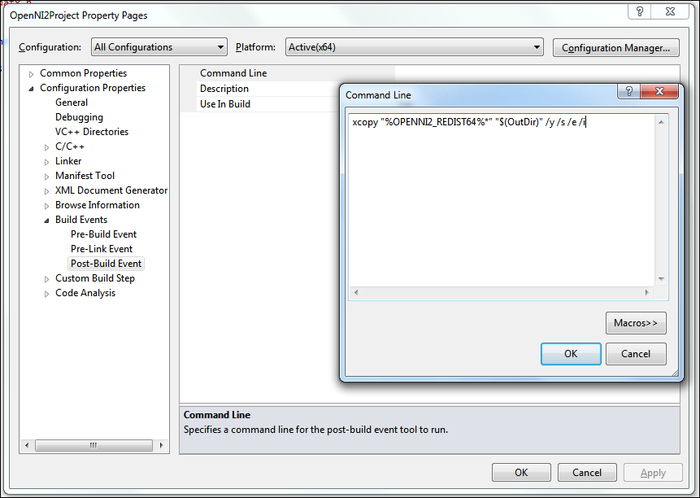
- Navigate to Build Events, expand it, select the Post-Build Event node, edit the Command Line field from the right panel, and enter:
xcopy "%OPENNI2_REDIST64%*" "$(OutDir)" /y /s /e /i /d
- And if you want to use NiTE2 in your project then enter the following line too:
xcopy "%NITE2_REDIST64%*" "$(OutDir)" /y /s /e /i /d
- Then click on OK and in the parent window click on Apply.
Tip
If you are using Visual Studio 2010 Express Edition and want to compile in 64-bit, you need to follow this step; otherwise, skip it:
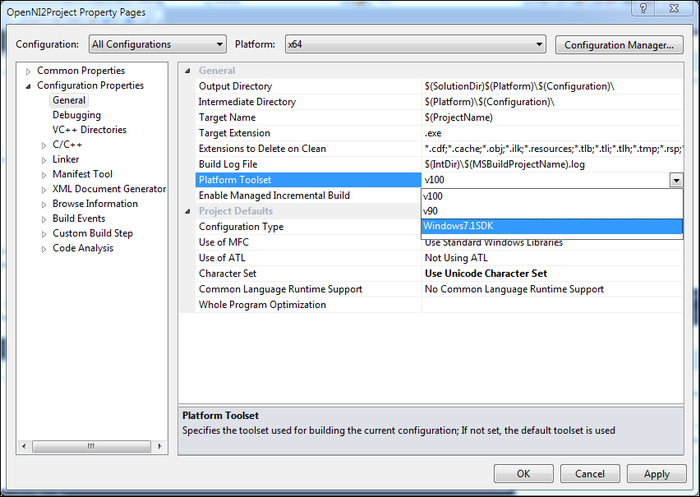
- First make sure you have Windows SDK installed, then navigate to the General category from the left panel, and edit Platform Toolset from the right panel
- Select Windows7.1SDK or any other version of SDK you have installed based on your operating system and apply the settings as shown in the following screenshot:
- Now we must set the options needed for a 32-bit platform in case we want to compile a 32-bit binary too (or if we only want to compile 32-bit binary). Select All Configurations from the top-right dropdown (the Configuration dropdown) and Win32 from the top-right dropdown (the Platform dropdown).

- Locate the C/C++ section and expand it.
- Select the General node, edit Additional Include Directories (using the down arrow on right of this field), then add
$(OPENNI2_INCLUDE), and, if you want to use NiTE in your project, enter$(NITE2_INCLUDE)too on a new line and then click on OK. - Locate the Linker section and expand it.
- Select the General node, edit Additional Library Directories, then add
$(OPENNI2_LIB), and, if you want to use NiTE in your project, enter$(NITE2_LIB)too on a new line and then click on OK. - Select Input node in the same section (Linker), edit Additional Dependencies, then add
OpenNI2.lib, and, if you want to use NiTE in your project, enterNiTE2.libtoo on a new line. Then click on OK. - Navigate to Build Events, expand it, select the Post-Build Event node, edit the Command field from the right panel, and enter:
xcopy "%OPENNI2_REDIST%*" "$(OutDir)" /y /s /e /i /d
- And if you want to use NiTE2 in your project, enter the following line too:
xcopy "%NITE2_REDIST%*" "$(OutDir)" /y /s /e /i /d
- Click on OK and then in the parent window click on Apply.
- Now we need to set some of settings that are going to be used for both platforms. So select the All Configurations option from the top-right dropdown (the Configuration dropdown) and All Platforms from the top-right dropdown (the Platform dropdown). Then select the Debugging node in the left panel and edit Working Directory from the right panel. Replace its value with
$(OutDir)and click on OK.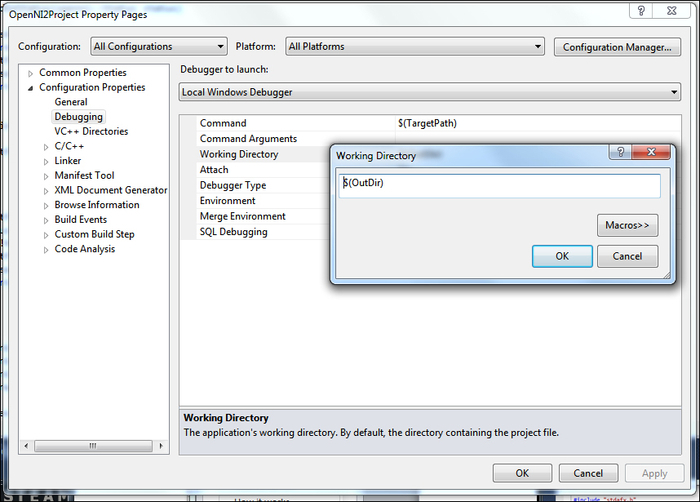
- We are done with the Project Property window, so you can close it by clicking on OK.
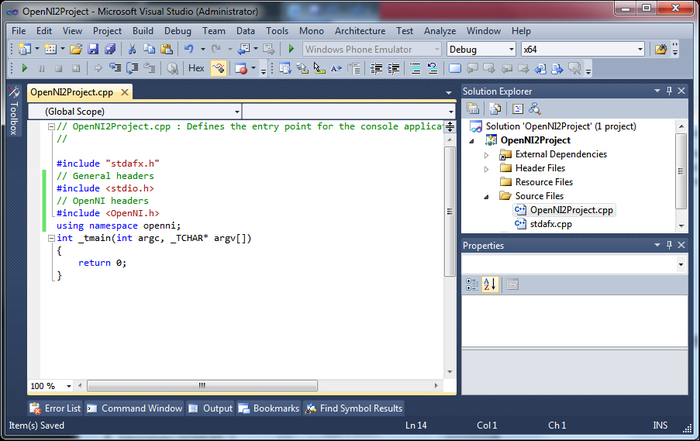
- Back in the main window of Visual Studio, we need to include OpenNI header files in our source code too; to do this, open the main source file of your project and enter these lines at the top of everything in the editor:
Note
Downloading the example code:
You can download the example code files for all Packt books you have purchased from your account at http://www.packtpub.com. If you purchased this book elsewhere, you can visit http://www.packtpub.com/support and register to have the files e-mailed directly to you.
// General headers
#include <stdio.h>
// OpenNI2 headers
#include <OpenNI.h>
using namespace openni;
- If you want to use NiTE2 in your project, you need to add these lines to the top of the main source file too:
// NiTE2 headers
#include <NiTE.h>
Build your project. This will tell you if any problem is found.
First of all we need to create a project so that we can start coding:
- Steps 1 to 3 are about making a new C++ project using Visual Studio; we used the Win32 Console application because we don't want to create a visual user interface and only want our application to be able to execute.
- Step 4 is about introducing a new configuration profile for our project and asking Visual Studio to use x64 compiler when this profile is active; we used x86 settings as default values for this new profile. You actually don't need it if you want to use a 32-bit version of OpenNI.
- Because we want to work with OpenNI framework and NiTE, we need to have access to their APIs, so we need to show Visual Studio how to use them; steps 8 to 12 and steps 17 to 21 are about introducing the needed libraries and header files to Visual Studio.
Note
Unlike the OpenNI 1.x and NiTE 1.x era when there was only one global version of OpenNI and NiTE on a system, now OpenNI 2.x and NiTE 2.x offer the possibility to have different versions of OpenNI and NiTE on the same system. You can even have one version of OpenNI 1.x along with the different versions of OpenNI 2.x working together for different applications. Actually this is because each application must have its own version of OpenNI libraries in OpenNI 2; so we don't need to worry about version compatibility any more. But currently we are the developers, so we need to copy a version of OpenNI 2.x in our project too.
- In steps 13 to 14 and 22 to 23 we asked the compiler to copy the needed OpenNI and NiTE libraries and files to our project's output library after the compiling process has finished successfully. This is so we can have our version of OpenNI next to the executable file of our project.
- Steps 27 and 28 ask the source editor to load OpenNI and NiTE header files so we can use their APIs in our code. The last line in step 27 lets us use OpenNI's API without writing
openni::before any class and object in that namespace (for example, we can writeStatusinstead ofopenni::Status).Note
Please note that steps 5 and 7 to 15 are for x64 compiling and steps 16 to 23 are needed only if you want to develop a 32-bit version of your software. But we highly recommend doing all the steps and then you can select the desired target CPU using the top solution platform dropdown. Note that you need to have the same version of OpenNI on your system before compiling.

You can use the OpenNI2Project - Empty Project and OpenNI2Project - Empty Project with NiTE projects as templates for starting. These projects are available in the Packt Publishing website for free download. Please note that when using these templates for writing different projects you can't import two or more of them into one solution; that's because they use the same GUID and you need to change their GUID to something unique before importing them in one solution.
- The OpenNI class and error handling recipe
- The Configuring Visual Studio 2010 to use OpenGL recipe in Chapter 3, Using Low-level Data