
Until now, we have used the data of the depth stream relatively without knowing its real-world units; in this recipe, however, we are going to show you how it is possible to convert depth data into millimetre units. This could be used for generating point cloud, calculating distance, and so on.
First we try to find the depth value of the center pixel in the depth frame and then use the openni::CoordinateConverter class to convert this value into a real-world millimetre unit.
Create a project in Visual Studio 2010 and prepare it for working with OpenNI using the Creating a project in Visual Studio 2010 recipe of Chapter 2, OpenNI and C++.
- Add the following lines at the top of your source code (just below the
#includelines):#include <conio.h>
- Copy the
ReadLastCharOfLine()andHandleStatus()functions here from the last recipe. - Then locate the following lines of code:
int _tmain(int argc, _TCHAR* argv[]) { - Write the following code snippet below the preceding lines of code:
  Status status = STATUS_OK;
  printf("Scanning machine for devices and loading "
      "modules/drivers ...
");
  status = OpenNI::initialize();
  if (!HandleStatus(status)) return 1;
  printf("Completed.
");

  printf("Opening first device ...
");
  Device device;
  status = device.open(ANY_DEVICE);
  if (!HandleStatus(status)) return 1;
  printf("%s Opened, Completed.
",
    device.getDeviceInfo().getName());

  printf("Checking if stream is supported ...
");
  if (!device.hasSensor(SENSOR_DEPTH))
  {
    printf("Stream not supported by this device.
");
    return 1;
  }
  VideoStream depthSensor;
  printf("Asking device to create a depth stream...
");
  status = depthSensor.create(device, SENSOR_DEPTH);
  if (!HandleStatus(status)) return 1;

  printf("Starting stream ...
");
  status = depthSensor.start();
  if (!HandleStatus(status)) return 1;
  printf("Done.
");

  printf("Press any key to exit ...
");
  while (true)
  {
    if (kbhit())
      break;
    VideoFrameRef newFrame;
    status = depthSensor.readFrame(&newFrame);
    if (status == STATUS_OK && newFrame.isValid())
    {
      DepthPixel* centerPixel =
        (DepthPixel*)((char*)newFrame.getData() +
        (newFrame.getHeight()  *
          newFrame.getStrideInBytes() / 2))
        + (newFrame.getWidth() / 2);
      float wX, wY ,wZ;
      status = CoordinateConverter::convertDepthToWorld(
        depthSensor,
        (float)(newFrame.getWidth() / 2),
        (float)(newFrame.getHeight() / 2),
        (float)(*centerPixel),
        &wX, &wY, &wZ);
      if (!HandleStatus(status)) return 1;
      printf("Center Pixel's distance is %gmm "
        "located at %gmmx%gmm
",
        wZ, wX, wY);
    }
    Sleep(100);
  }
  depthSensor.destroy();
  OpenNI::shutdown();
  return 0;
In the second step, we again defined the ReadLastCharOfLine() and HandleStatus() functions, as we did in all the earlier recipes, to handle user inputs and OpenNI errors. Also, we used conio.h as we had in the first step.
Our main code starts in step 4 where we begin with initializing OpenNI, opening the first acceptable device, creating an openni::VideoStream for the depth sensor, and starting it.
Now we need to read data and, as always, a while loop is a good idea for starting this operation. The first line of our while loop will check if any key is pressed. If so, we will exit the loop:
  while (true)
  {
    if (kbhit())
      break;
After that, we have code for reading a new frame from the depth sensor by calling openni::VideoStream::readFrame() and creating a pointer to the frame's center pixel value:
    VideoFrameRef newFrame;
    status = depthSensor.readFrame(&newFrame);
    if (status == STATUS_OK && newFrame.isValid())
    {
      DepthPixel* centerPixel =
        (DepthPixel*)((char*)newFrame.getData() +
        (newFrame.getHeight()  *
          newFrame.getStrideInBytes() / 2))
        + (newFrame.getWidth() / 2);
As you can see, for calculating the position of this pixel in the buffer, we used openni::VideoFrameRef::getHeight() / 2 and openni::VideoFrameRef::getWidth() / 2. Also, we used openni::VideoFrameRef::getStrideInBytes() for getting the number of bytes per row of pixels.
Now that we have the location and value of our preferred pixel, we can convert its data into a millimetre unit using the openni::CoordinateConverter::convertDepthToWorld() method. This method accepts a number of arguments, including the depth openni::VideoStream, the position of the pixel, the value of the pixel, and the two pointers to be filled by the calculated values. The return value of this method is of the type openni::Status and shows whether the operation ended successfully:
float wX, wY ,wZ;
status = CoordinateConverter::convertDepthToWorld(
depthSensor,
(float)(newFrame.getWidth() / 2),
(float)(newFrame.getHeight() / 2),
(float)(*centerPixel),
&wX, &wY, &wZ);
if (!HandleStatus(status)) return 1;
printf("Center Pixel's distance is %gmm "
"located at %gmmx%gmm
",
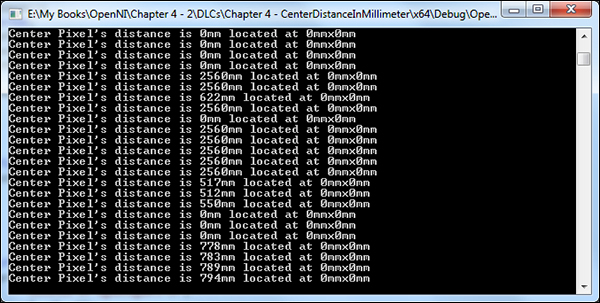
wZ, wX, wY);We already mentioned that the position of the center pixel is openni::VideoFrameRef::getHeight() / 2 and openni::VideoFrameRef::getWidth() / 2 and that the data of this pixel is stored in the centerPixel variable. We also defined three float variables named wX, wY, and wZ for storing the position of the requested pixel in the real-world environment. Please note that the values of wX and wY are relative to the center of the screen and so, in our example, they are both always 0.
In the end, we wait for 100 milliseconds and then start from the top of the loop again.
Sleep(100);
But if any key is pressed and the loop ends, we need to release all the resources before ending the process's execution:
  depthSensor.destroy();
  OpenNI::shutdown();
The following screenshot shows the output of this application:
It is possible to reverse the converting operation and convert the depth pixels to millimetre using the openni::CoordinateConverter::convertWorldToDepth() method. This method accepts almost the same arguments as its sibling but in a different order. An example follows:
      float dX, dY ,dZ;
      status = CoordinateConverter::convertWorldToDepth(
        depthSensor,
        wX, wY, wZ,
        &dX, &dY, &dZ);
if (!HandleStatus(status)) return 1;- The Reading and showing a frame from the depth sensor recipe in Chapter 3, Using Low-level Data