Glimpse is a very capable program for tasks such as digital drawing and painting. With time and practice, you’ll be able to create some impressive work.
In this chapter, we’ll touch on drawing using the tools offered in Glimpse. This chapter is a primer to acquaint beginners with some of the tools available and a little firsthand experience.
We’ll first take a closer look at the Pencil and Paintbrush tools and the various brush tips available.
The Pencil and Paintbrush tools
The MyPaint brush engine
Tutorial 20: Drawing a simple flower
Tutorial 21: Drawing a simple butterfly using symmetry painting
Tutorial 22: Drawing a pattern using symmetry painting
Chapter conclusion
The Pencil and Paintbrush Tools
The Pencil and Paintbrush tools in Glimpse were covered briefly in Chapter 3, but we’ll have another quick recap before proceeding to the upcoming tutorials.
Brush Tips

The Glimpse brush palette

A comparison of the results obtained from the Pencil, Paintbrush, and Airbrush Tools

A freehand stroke and a straight-line stroke
The Tool Options allows you to adjust the brush parameters, such as size aspect ratio, angle, spacing, hardness, and force. The Brush Dynamics allows you to apply aspects to the brush stroke (such as jitter or smooth stroke). For most drawing purposes, I recommend using the smooth stroke—it’s especially useful when using a mouse or a touch pad when drawing.
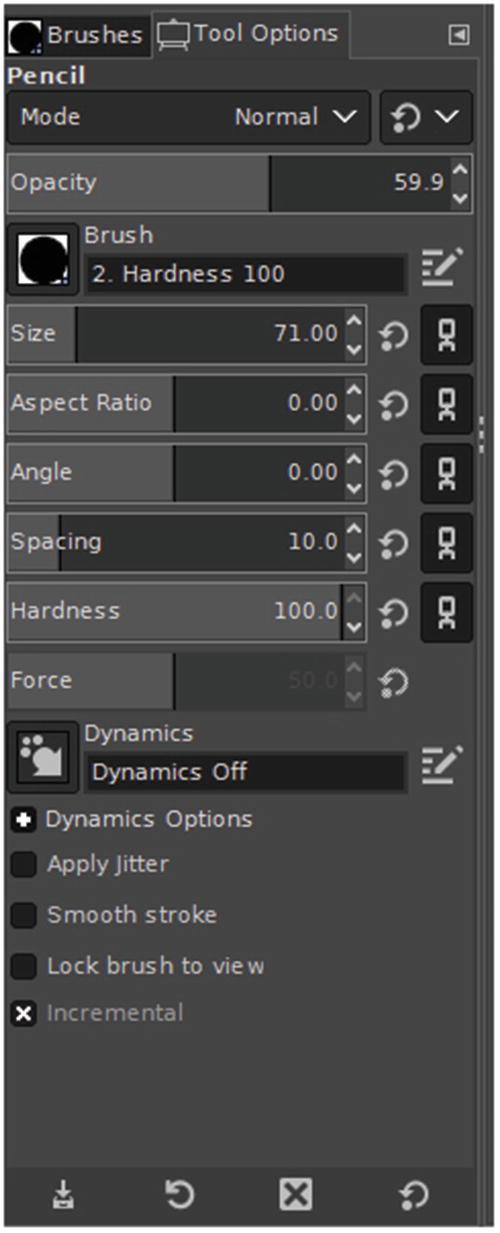
The Tool Options Panel
The MyPaint Brush Engine
MyPaint is an open source painting program, but the brush engine is now included in both the GNU Image Manipulation Program (on which Glimpse is based) and Glimpse.
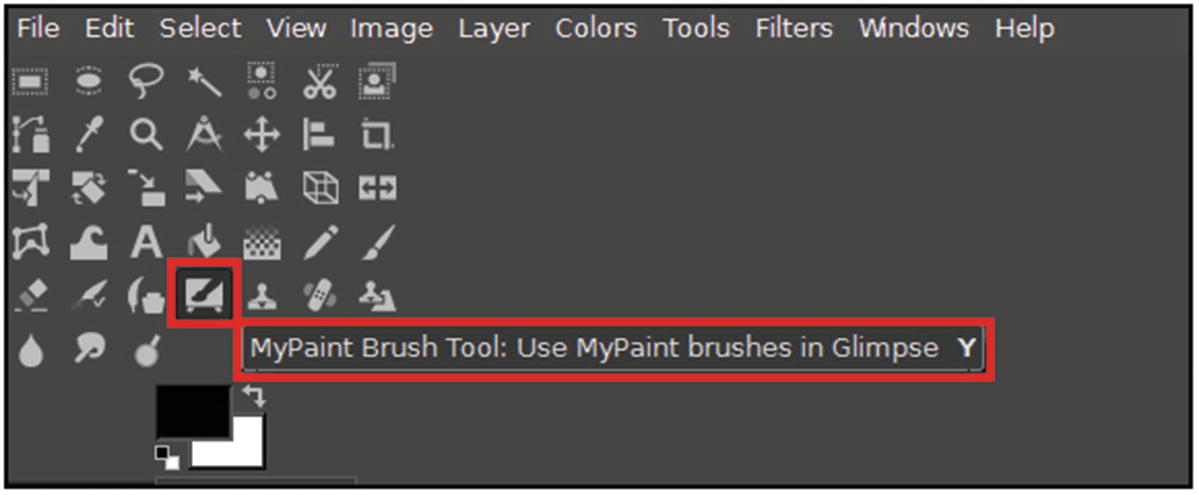
The MyPaint tools can be accessed as shown or from the Tools Menu

The MyPaint tools menu
Tutorial 20: Drawing a Simple Flower
- 1.
Create a new image (File ➤ New ➤ Create a New Image)—set the dimensions to 6" × 6" at 300 ppi.
- 2.
Create a new layer (Layer ➤ New Layer), and in the New Layer dialog, rename it Flower Petals, then press OK.
- 3.
Select the Pencil Tool (N)—choose the Pencil 03 brush, and change the size to 32 pixels.
- 4.
Draw an outline similar to that shown in Figure 8-7.

Draw an outline similar to the one shown
- 5.
Lower the brush tip size to 15 pixels, and draw a line dividing the flower petals similar to that shown in Figure 8-8.
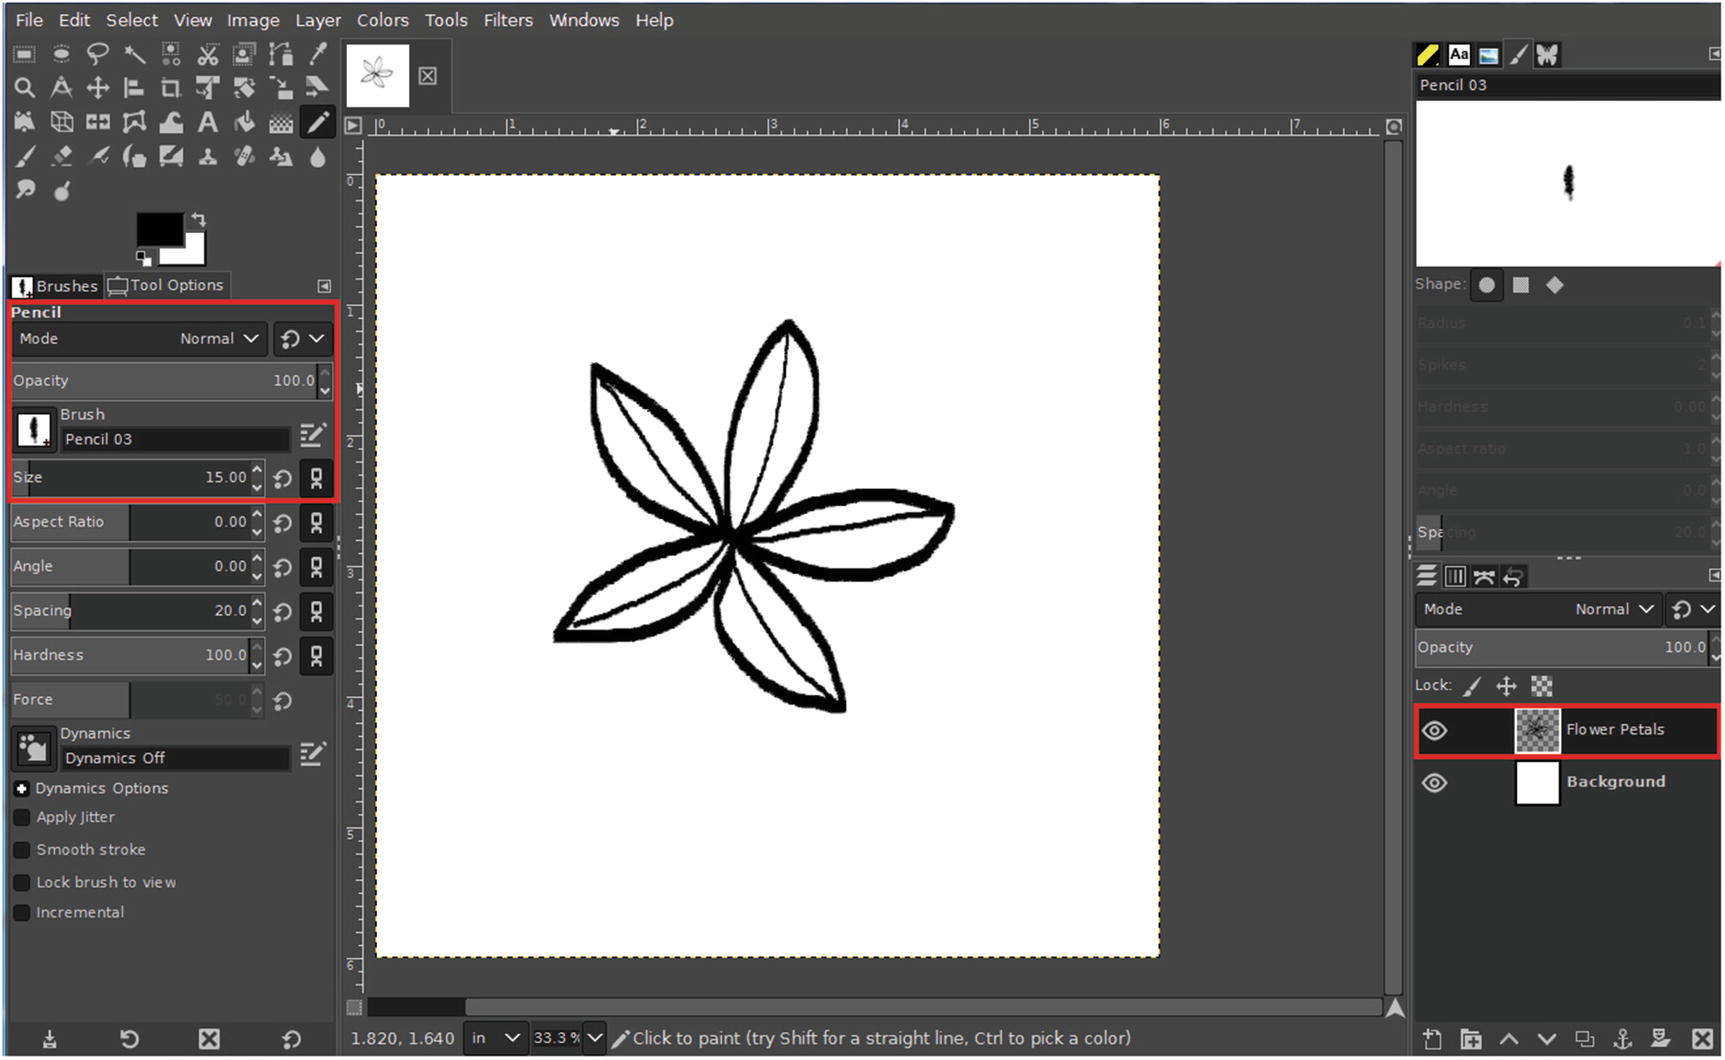
Draw lines dividing the flower petals similar to that shown
- 6.
Create a new layer (Layer ➤ New Layer), and in the New Layer dialog, change the mode to LCh Color—rename the layer Flower Petal Color, then press OK.
- 7.
Change the Pencil Tool brush tip to Chalk 02 and the brush size to 230 pixels.
- 8.
Using yellow as the active color, fill in the flower petals (it’s okay if it goes outside of the lines) as shown in Figure 8-9.

Apply yellow to the drawing as shown
- 9.
Create a new layer (Layer ➤ New Layer), and in the New Layer dialog (leave the mode to LCh Color), rename the layer Flower Center, then press OK.
- 10.
Change the foreground color to blue, then click a couple of times in the center of the flower as shown in Figure 8-10.

Apply the blue in the center as shown

The final result
Tutorial 21: Drawing a Simple Butterfly Using Symmetry Paint
This tutorial is a bit more involved than the previous one. However, this will introduce using Symmetry Paint to save time and effort.
- 1.
Open the .XCF file named Butterfly Drawing.
- 2.
Create a new layer (Layer ➤ New Layer), and in the New Layer dialog (the mode should be set to normal), rename the layer Butterfly Outline, then press OK.
- 3.
Launch the Symmetry Painting Dialog (Windows ➤ Dockable Dialogs ➤ Symmetry Painting).
- 4.
Click the downward arrow on the top right area and choose Mirror—after this selection is made, enable the Vertical Symmetry option (a vertical dividing line is automatically placed in the center of the canvas).
- 5.
Select the Pencil Tool (N)—choose the round brush (2. Hardness 100), and change the size to 5 pixels.
- 6.
On the left size, draw over the faint gray outline—as you work, your efforts will be duplicated on the right side (Figure 8-12).

When drawing on the left side over the gray pattern, the effort is duplicated on the right side
- 7.
When complete, the outline will look as the example shown in Figure 8-13.

The complete butterfly outline
- 8.
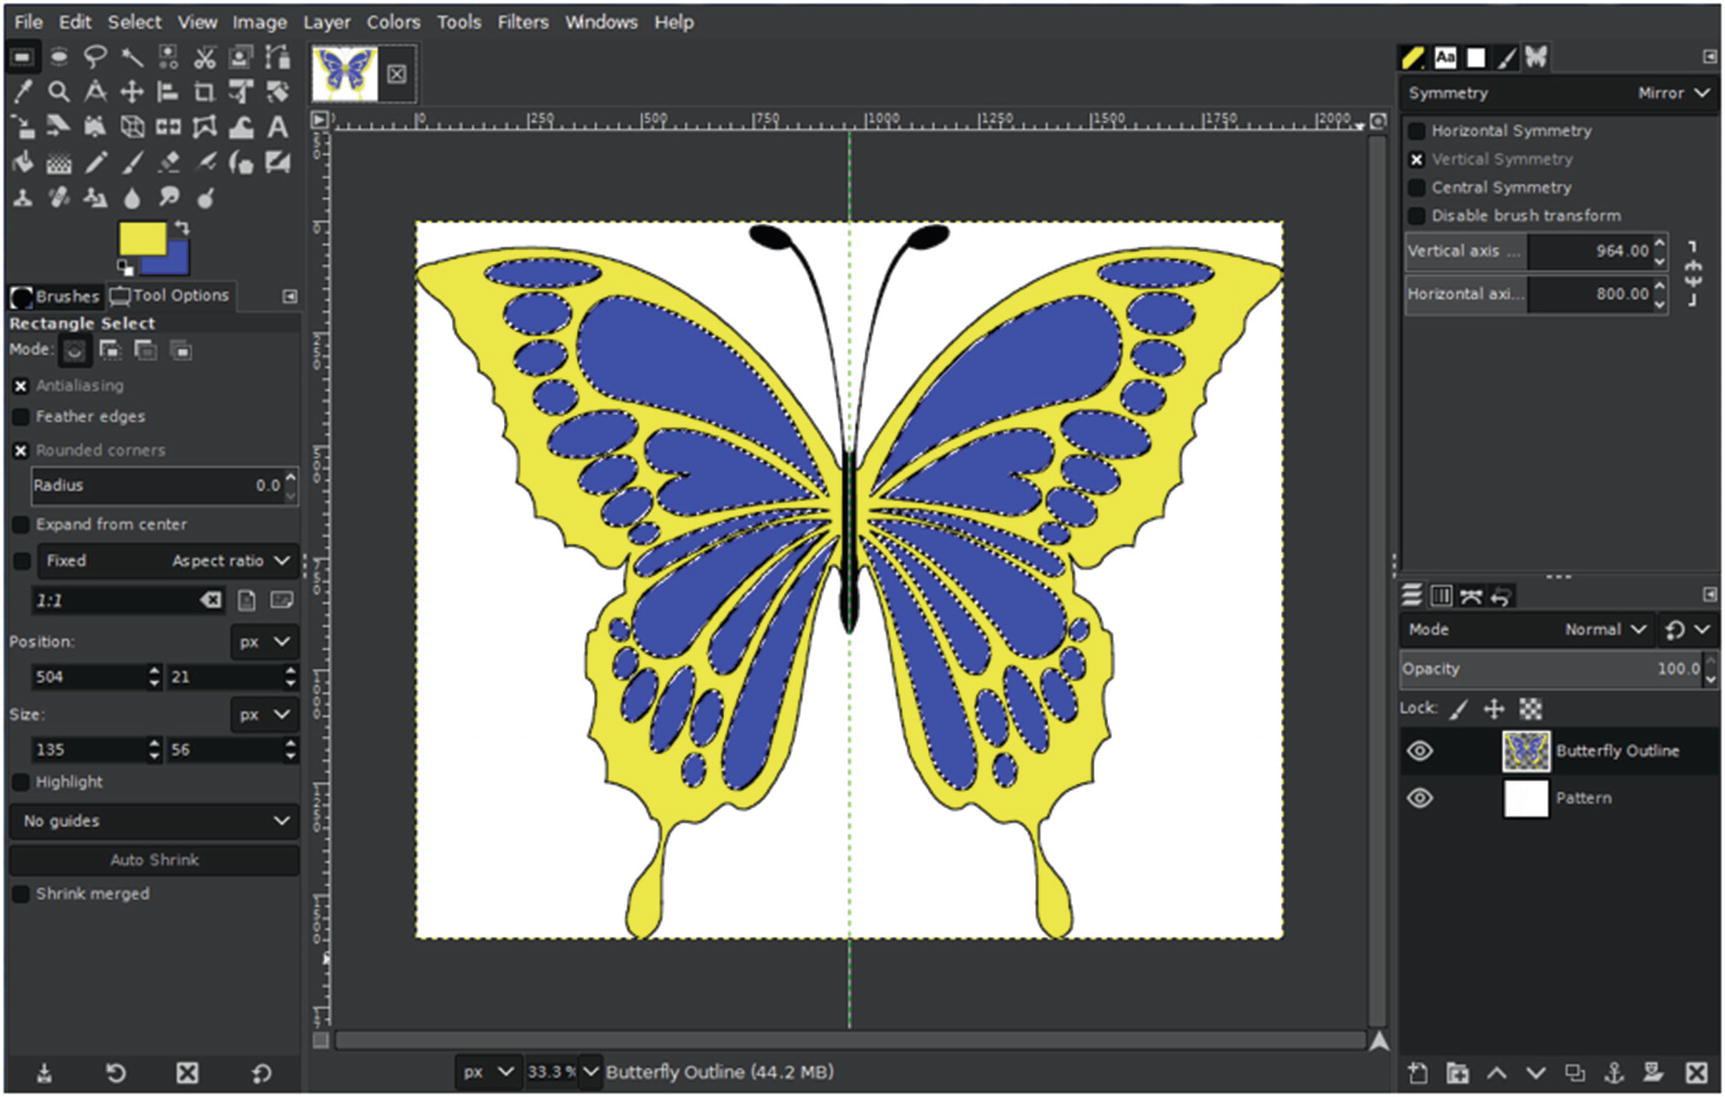
Now we’ll fill in the areas surrounding the outline with some color—set the foreground color to yellow (R-100, G-100, B-100).
- 9.
Select the Fuzzy Select Tool (U), then click just inside of the outline of the left wing—hold the Shift key and repeat on the right wing.
- 10.
Fill the selected areas with the foreground color (Edit ➤ Fill with FG Color).
- 11.
Deactivate the selection (Selection ➤ None)—the results should appear as shown in Figure 8-14.

Selected areas filled with yellow
- 12.
Change the foreground color to blue (R-0, G-0, B-100).
- 13.
Select the Bucket Fill Tool (Shift+B), then click in the white areas within the butterfly until they are all filled (Figure 8-15).
Using the Bucket Fill Tool, fill the white areas within the butterfly with blue
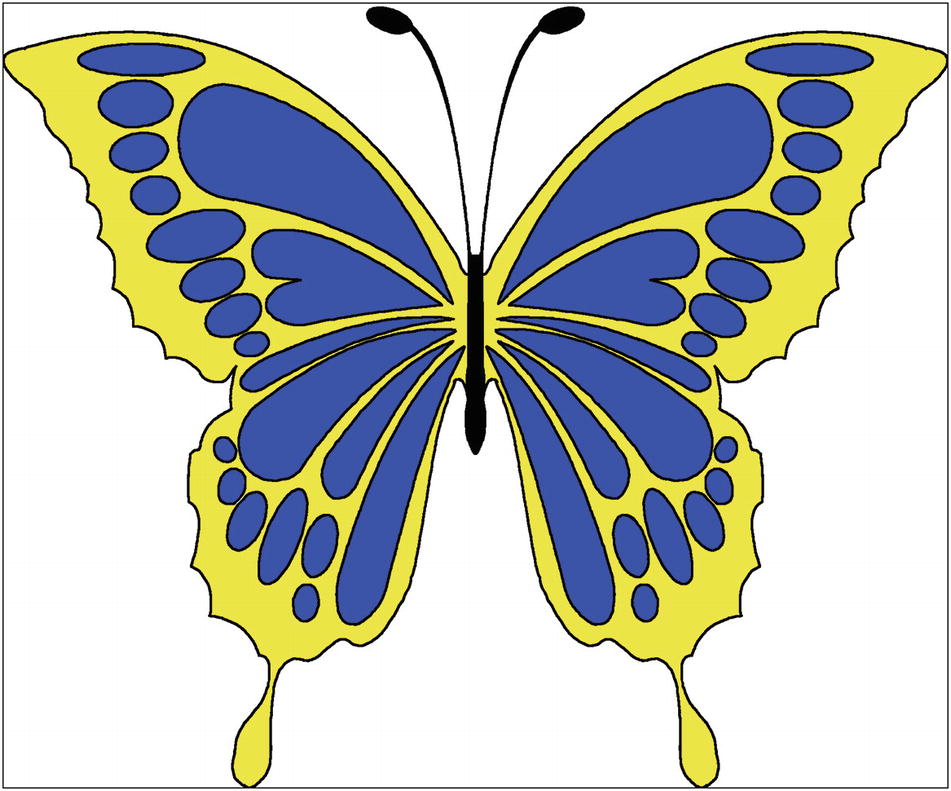
The final result
Tutorial 22: Drawing a Pattern Using Symmetry Paint
- 1.
Create a new image (File ➤ New ➤ Create a New Image)—set the dimensions to 6” × 6” at 300 ppi.
- 2.
Create a new layer (Layer ➤ New Layer), and in the New Layer dialog, rename it Pattern, then press OK.
- 3.
Launch the Symmetry Painting Dialog (Windows ➤ Dockable Dialogs ➤ Symmetry Painting).
- 4.
Click the downward arrow on the top right area and choose Mandala—after this selection is made, a vertical and horizontal dividing line is automatically placed in the center of the canvas.
- 5.
Select the Pencil Tool (N)—choose the hard, round brush tip (2. Hardness 100), and change the size to 10 pixels.
- 6.
Using Figure 8-17 as a reference, start drawing upward from the bottom of the upper left quadrant in the direction indicated by the numbers and red lines (note the effort will be duplicated in the remaining areas).
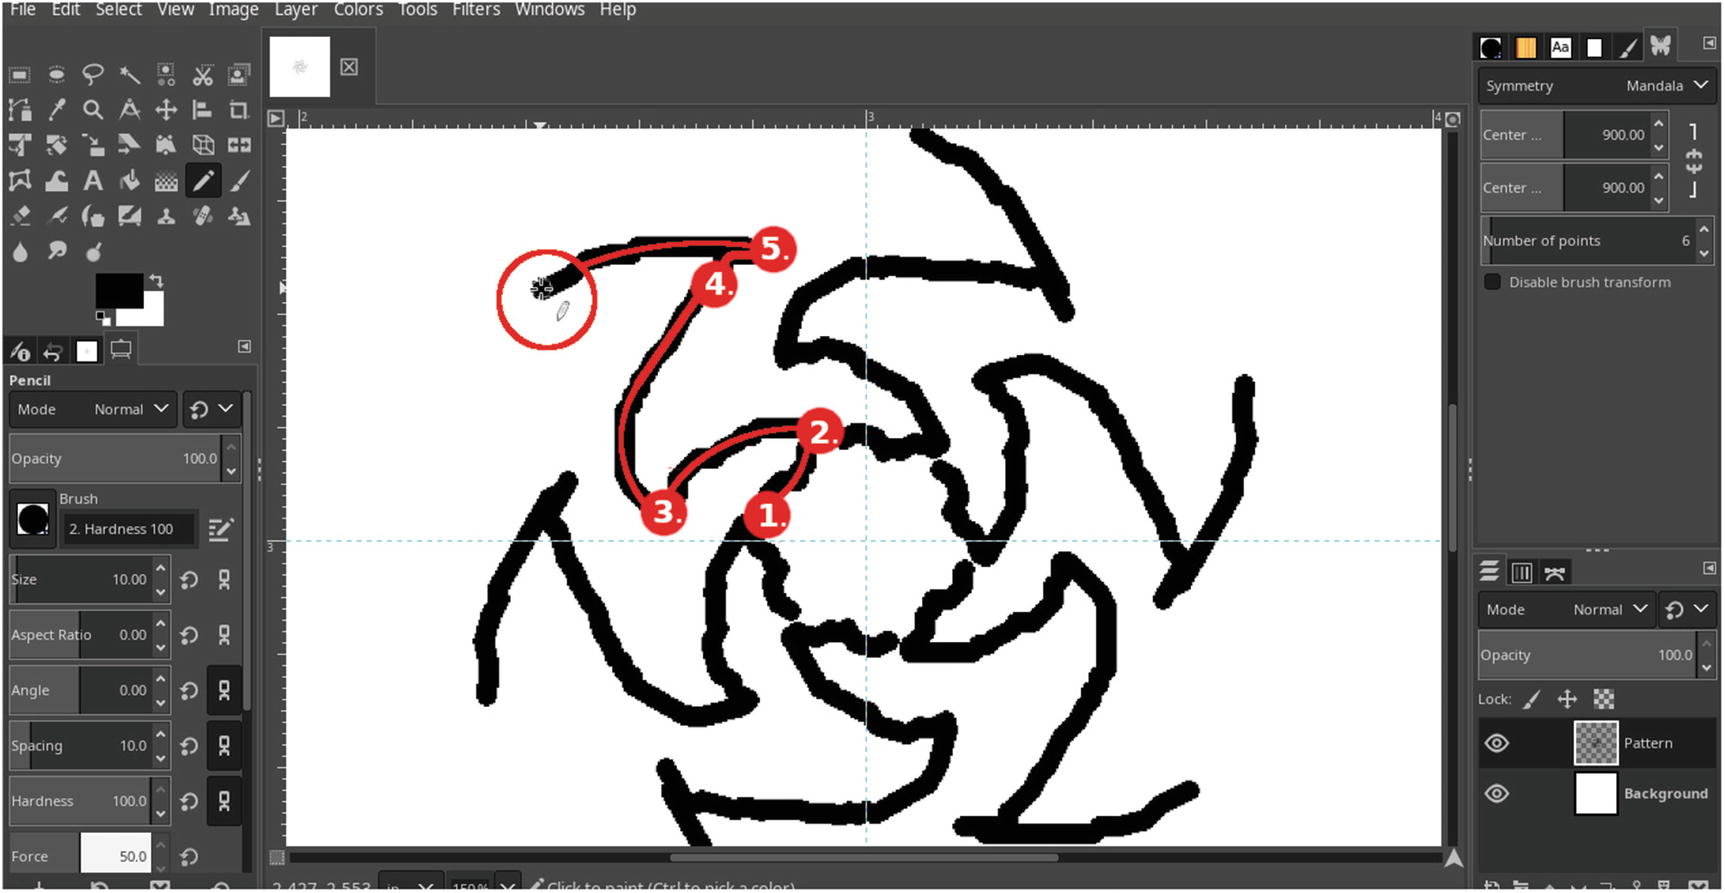
Draw a line as shown
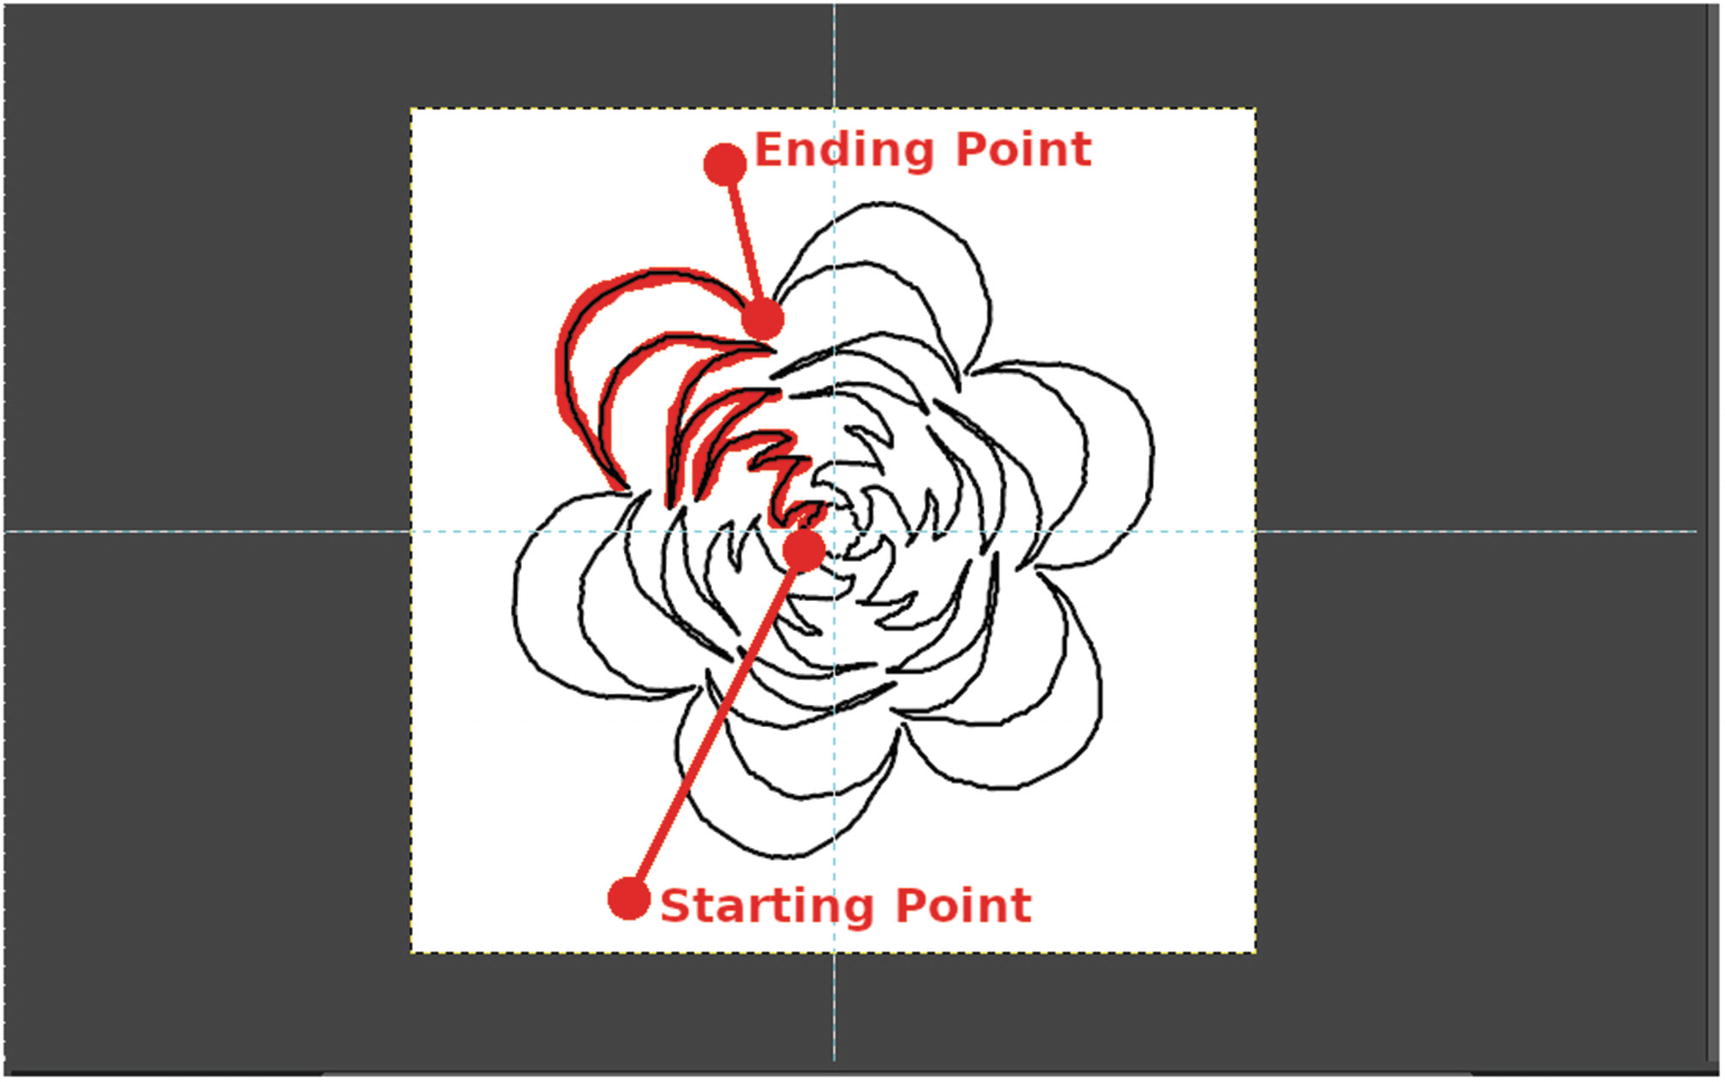
The complete pattern

The final result
Chapter Conclusion
In this chapter, there was a brief recap of the drawing, painting tools (specially, the Pencil and Paintbrush tools), and the tool options. We also created some work using the tools.
The Pencil and Paintbrush tools
The MyPaint brush engine
Drawing a simple flower
Drawing a simple butterfly using symmetry painting
Drawing a pattern using symmetry painting
In the next chapter, we’ll create some somewhat more advanced digital art using more of the features found in Glimpse.