In this chapter we’re going to go over the process of preparing your storage device to install an operating system for your Tinker Board.
Now that you have all of your materials from Chapter 2 and you have a better idea of exactly how the Tinker Board works, it’s time to get into the nitty-gritty aspects of working with the Tinker Board. To begin, we’re going to prepare your chosen storage solution to install an operating system (OS) and then go through the steps to download your chosen operating system’s disk image and install the OS on your storage device so that it can run on your Tinker Board.
Note
Many users will utilize a microSD card for their operating system if they are using the original Tinker Board, or even the Tinker Board S, so the following instructions will assume that is the case. If you are using the eMMC flash on the Tinker Board S, the steps will be the same unless otherwise noted.
Prepping the SD Card
The first step in loading an OS onto an SD card is to format the card so that it is ready to write the OS files without any glitches or data corruption. Formatting ensures that the storage does not have any remaining or proprietary files from previous use or from the factory. It’s especially important to format properly when prepping storage for an operating system, since it will have a direct connection to the stability and long-term health of the OS.
How do you format storage, though? There are built-in utilities within your desktop operating system, whether you are on Windows, macOS, or Linux. For SD cards, the SD Association provides the SD Card Formatter program, which is a specialized program for a full and complete reformat. It’s available for Windows and macOS, but not Linux. If you are on a Linux distribution, it may be worthwhile to run the SD Card Formatter in a Windows virtual machine (VM) .
Note
If you are using the eMMC on the Tinker Board S, then you do not need to fully reformat it, since it has a built-in bootloader that would be deleted if fully reformatted.
It takes a lot longer to format the card using the software, but you will know that the card is fully cleared and ready to take on an OS. This process mainly comes in handy when you’ve had an OS installed on the card previously and want to do a fresh install or install a completely different OS.
Installing SD Card Formatter
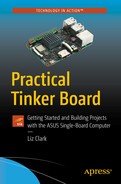
The SD Association’s SD Card Formatter software
Once you’ve selected your SD card, the program should also show the storage space available on the card. There is also an option at this point to label the drive, which will take effect after the formatting is finished. It’s best practice to name the drive after the OS that you are going to load onto it; such as TinkerOS or Android.
Next, you’ll select which type of format you want to proceed with. There are two options available, either quick format or overwrite format. For our purposes, we’ll choose overwrite format to prep the card because it initializes the file system and does a more in-depth erasure process than the quick format option. You can read more about the exact parameters of the different formatting protocols in the SD Association’s user manual2 for the SD Card Formatter software.
Again, this process takes much longer than the quick format or your built-in utility within your desktop OS, but the time spent on the format will be worth it for the stability that your eventual OS will have.
Once you have your drive and format type selected, click Format. This begins the format process. A progress bar will appear so you can monitor the percentage that has completed. Once it finishes, you’ll have a fully reformatted and blank SD card.
Downloading a Disk Image
There are many different operating systems available for the Tinker Board from the community and open source software projects. The first operating system that we’re going to use for the Tinker Board, though, will come directly from ASUS. Specifically, we’ll install TinkerOS, the Debian Linux distribution for the Tinker Board, and TinkerOS Android, an Android OS that will look familiar if you have an Android tablet or smart phone.
Note
The processes for downloading operating systems from other sources will be similar, but in this chapter we’ll look specifically at the download processes for operating systems directly from ASUS; mainly TinkerOS. There will be specific information later in the book for other operating systems that are not from ASUS that we’ll use for projects.
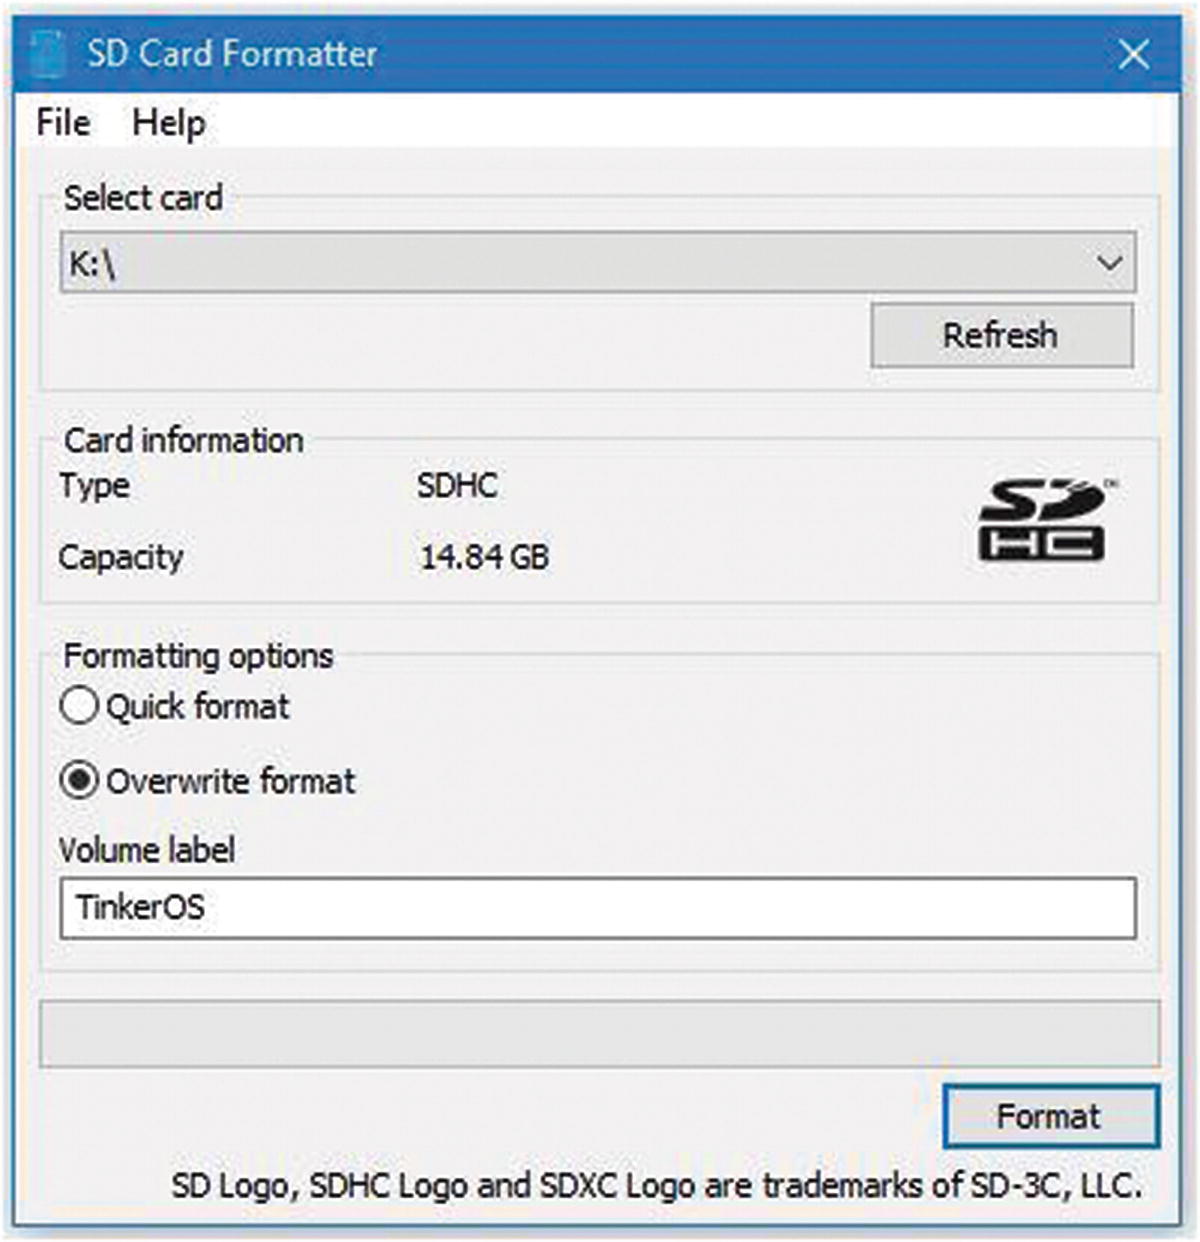
The ASUS Tinker Board web site

The ASUS Tinker Board Support page with downloads
The most recent downloadable release for the Tinker Board from ASUS will appear at the top of the page. But if you click See All Downloads, you’ll be able to see all of the releases, past and present, for the Android and TinkerOS distributions, as well as any additional software utilities or resources; such as schematics and CAD drawings of the boards.
You will always want to download the most recent non-beta release for the OS that you want to use. Of course, more experienced users may want to experiment with beta releases to test certain features.
Note
Tinker Board S uses the same installations as the original Tinker Board, beginning with TinkerOS version 2.0.4 and Android version 13.12.0.43.
When you’ve decided on an OS, click the Download button to the right of the title. A zipped folder will begin downloading. Inside the folder is an .img file, which is the packaged disk image file that contains what will eventually become your OS for the Tinker Board. To access this file, you’ll need to unzip the folder after the download finishes using your preferred utility and method.
Note
Not all disk images will be in the .img file format. Other formats, such as .iso, will work in the same way and are just different ways to package a disk image.
Writing an OS to Your Drive
The compressed disk image file can’t be copied directly onto your storage media, though, because it can’t be read by the Tinker Board in this format. It needs special software to write it to your drive so that it can be recognized and used by the Tinker Board.
To do this, we’ll use Etcher . There are many different pieces of software that can accomplish this task, but Etcher has a lot going for it. It’s open source, easy to use, and available for Windows, macOS, and Linux. You’ll download and install it from its web site.4
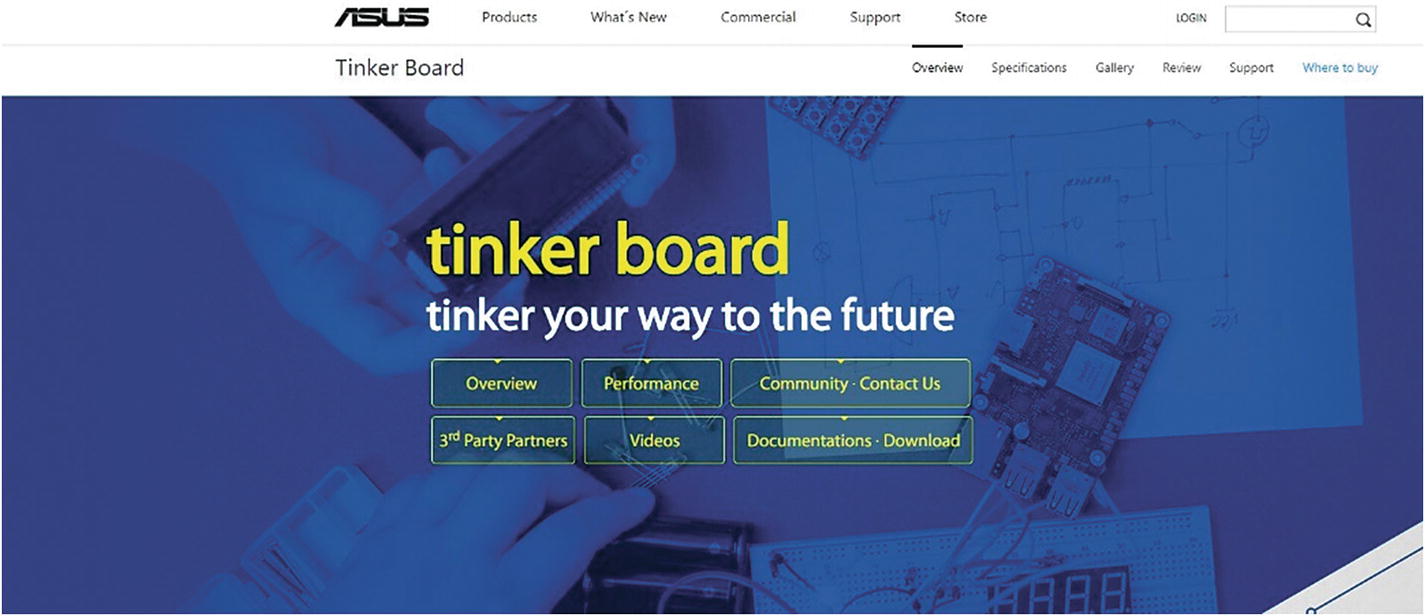
Etcher’s GUI
The next step is to select the drive that you want to use with your Tinker Board. This will be the SD card that you just formatted or other bootable media that has been prepped, such as the Tinker Board S itself to utilize the eMMC module.
When you select your drive, the label that you gave it during the formatting process may not show-up in Etcher . This is OK; just be sure to verify that it’s the correct drive by identifying the drive letter. When you’re sure that you’ve selected the correct disk image file and the correct drive, click “Flash!” and it will write the disk image onto the drive that you selected.
Note
This process erases everything that is on the selected drive; that is why it’s very important to verify that you’ve selected the correct one. The fact that it erases the drive does not eliminate the need to properly format the drive, with the exception of eMMC, before this process.
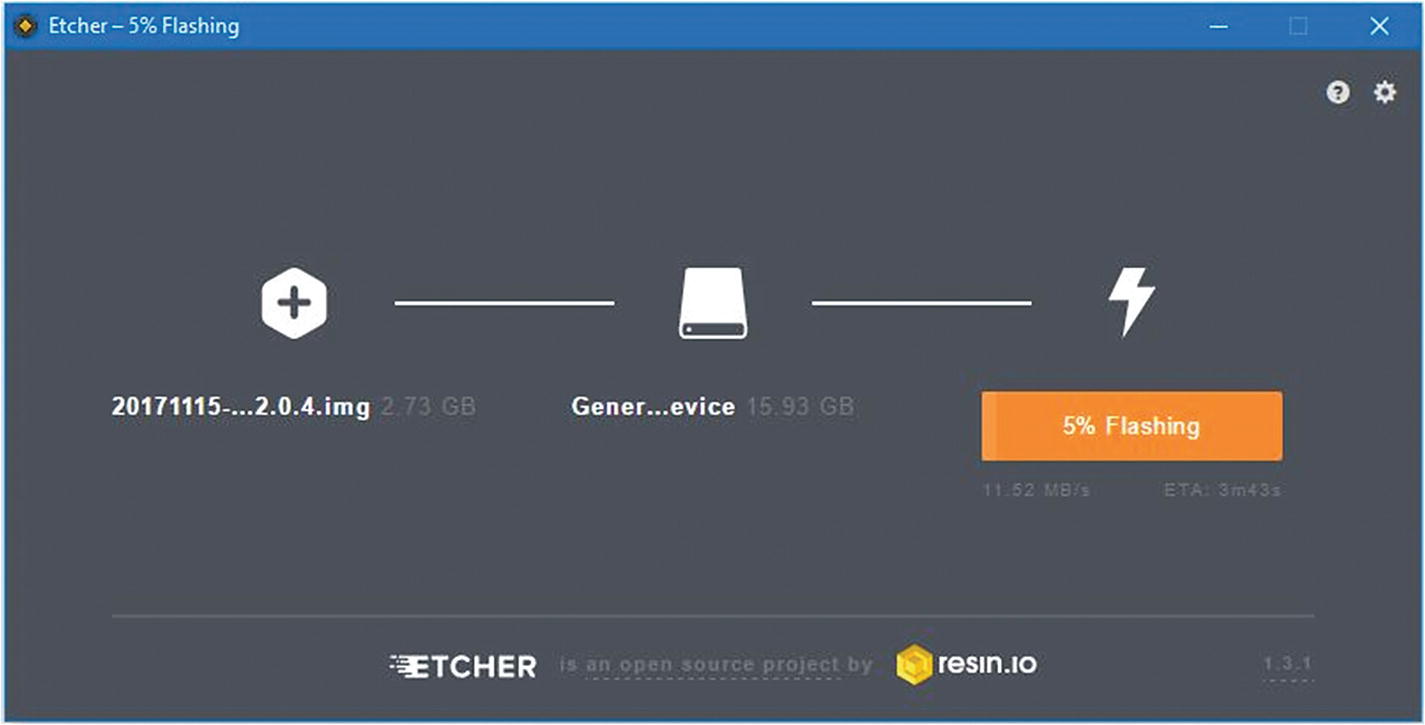
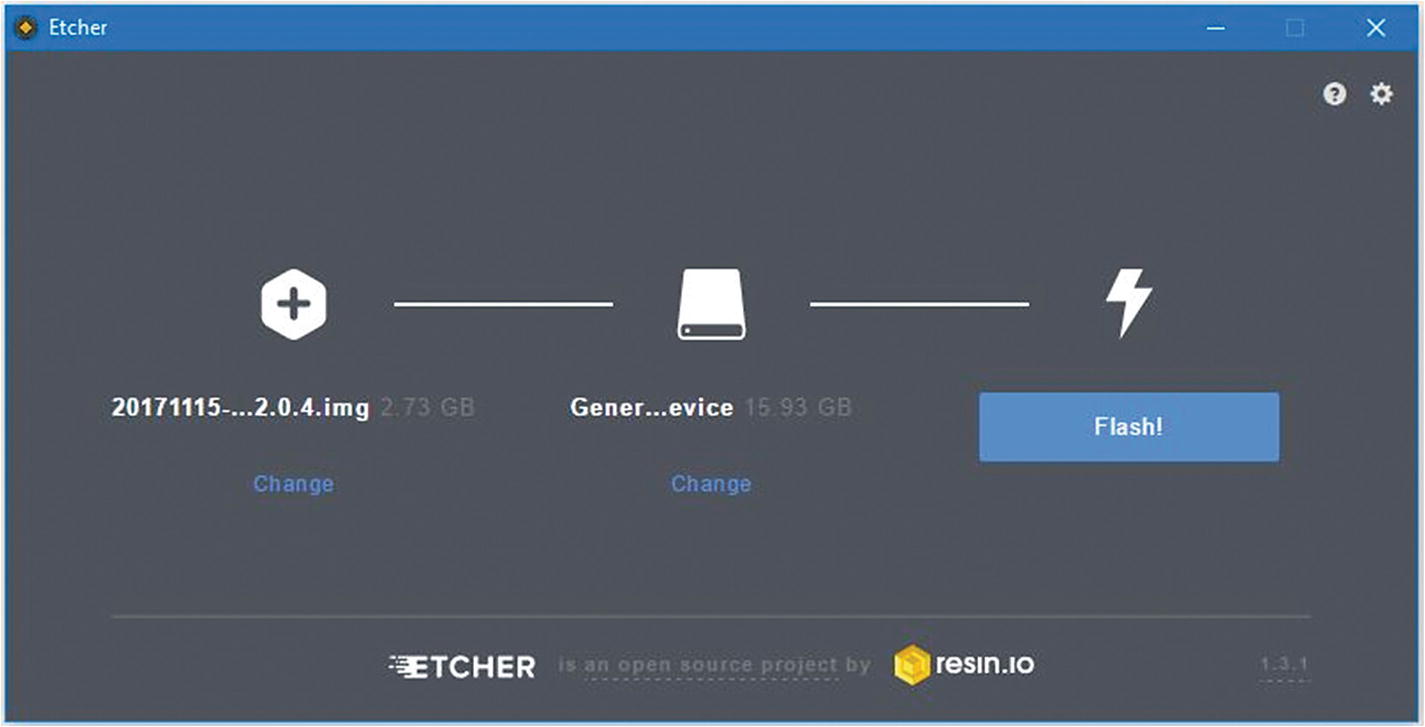
The information Etcher displays while it’s flashing the OS to your drive
When Etcher finishes, it will let you know that it is complete and ask if you want to flash the image again to another drive. If you don’t need to do that, then you can exit Etcher and we can move on to booting the Tinker Board with your drive.
Note
Etcher’s default setting is to eject the drive once the flashing process completes, so don’t panic if you don’t see your media after it finishes.
The First Boot
To boot up a new operating system with your Tinker Board for the first time, you’ll slot in your SD card and then power on the board with your preferred power method. Of course, if you’re using the eMMC module on the Tinker Board S, then you won’t need to attach any storage.
The first boot for any OS will more than likely take a bit longer than normal, since file systems are being built and other settings are being configured. But as soon as you see the desktop pop-up, you’ll know you’ve had a successful boot and it will finally be time to begin using your freshly installed operating system.
Booting from USB for TinkerOS
You currently have a ready-to-go OS installed and you could get started right now, but what about booting from a USB drive? This is currently possible for TinkerOS, so let’s give it a try.
The procedure I’m about to describe was made possible by research and documentation from the community surrounding the Tinker Board. A full thread for the discussion of this topic can be found on the official Tinker Board Forum (“Install TinkerOS to HDD,” 2017).5 At this time, you’ll still need to leave your imaged SD card (or eMMC for the Tinker Board S) mounted in the Tinker Board, since it is still seen as the boot device on a hardware level. Upon powering up, the SD card or eMMC will point to the USB device to boot and access the root partition after following these steps.
Note
This discussion assumes that you have experience with Linux. If you don’t, it’s recommended that you boot from an SD card for now (or eMMC) and go on to the next chapter on TinkerOS, which will orient you to a Debian Linux desktop environment.
Prepping Your USB Device
First, you’ll need to format your USB storage media, similar to the way you prepped the SD card or eMMC earlier. This erases everything on the drive, so be sure you’ve backed-up your files if your storage has been used before. When formatting your device, be sure to format it to exFAT formatting. Formatting your storage in this way will make things easier for your drive during the following steps.
Note
For USB storage, there isn’t standardized formatting software as there is for SD cards. The best practice with this storage is to use your built-in formatting tool within your desktop’s OS. But be sure to use a full format option rather than a quick or refresh format.
It’s also important to note that your USB device should have at least the same capacity as your SD card. If you use a USB device that is smaller than your SD card, you will run into issues when copying the root partition. As discussed in Chapter 2, one of the main reasons you would want to boot from a USB device is for the increased storage capacity; so it’s likely your USB storage is larger than your SD card, but that is something to keep in mind.
You’ll also want to keep your USB device’s speed in mind. If a drive is too slow, such as with an older mechanical drive, then you won’t be able to boot from it because the files will not load fast enough for TinkerOS. It’s recommended to use a flash-based USB device, such as a memory stick or SSD with a SATA to USB adapter cable.
There are a few ways to set up your TinkerOS install to boot from a USB device. The method we’re going to use takes advantage of the built-in disk duplication tools in Linux and is done directly in the TinkerOS environment using terminal commands.
The Terminal
First, we’re going to power-on the Tinker Board to boot into TinkerOS with the SD card or eMMC. You should find yourself in the desktop environment. Navigate to the terminal and open a new window. At this time, you should plug your freshly formatted and blank USB storage device into one of the USB ports.
Note
If you aren’t sure where the terminal is, please reference the next chapter, which provides an orientation and walkthrough of TinkerOS.
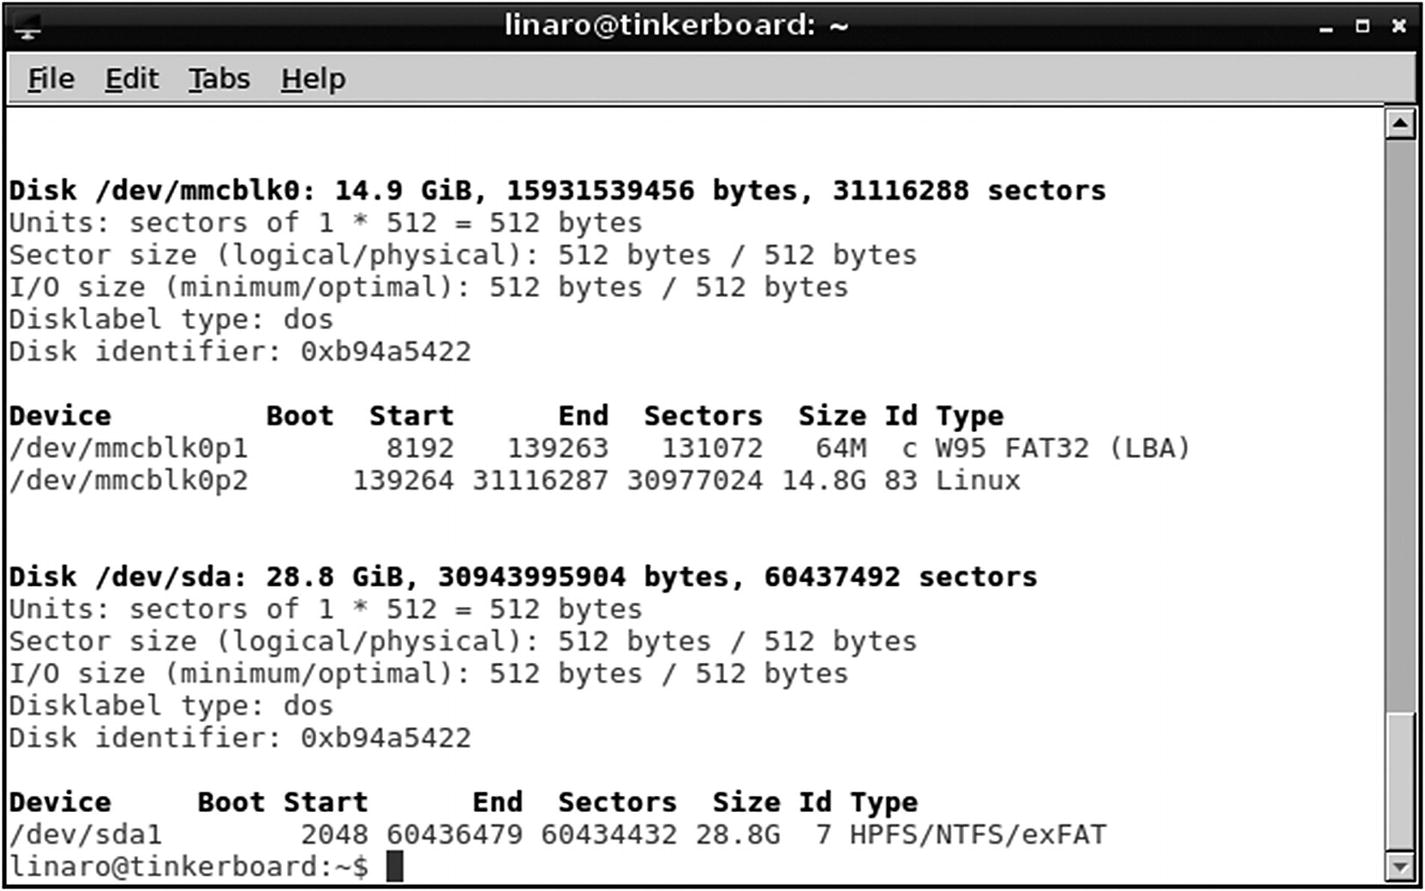
The disk list provided by fdisk
This duplicates the root partition only, so that the root and file system configuration that was set up on the first boot with the SD card is now also present on the USB device along with the entire file system. This process can take a while, and it may appear that your terminal has frozen, but it’s best to be patient and wait for the process to finish.
After the installation completes, it’s ready to use for the final, and most important, two steps in setting up the USB storage. We’re going to be editing two text files that are used by TinkerOS to determine the boot device so that it knows to boot from the USB device.
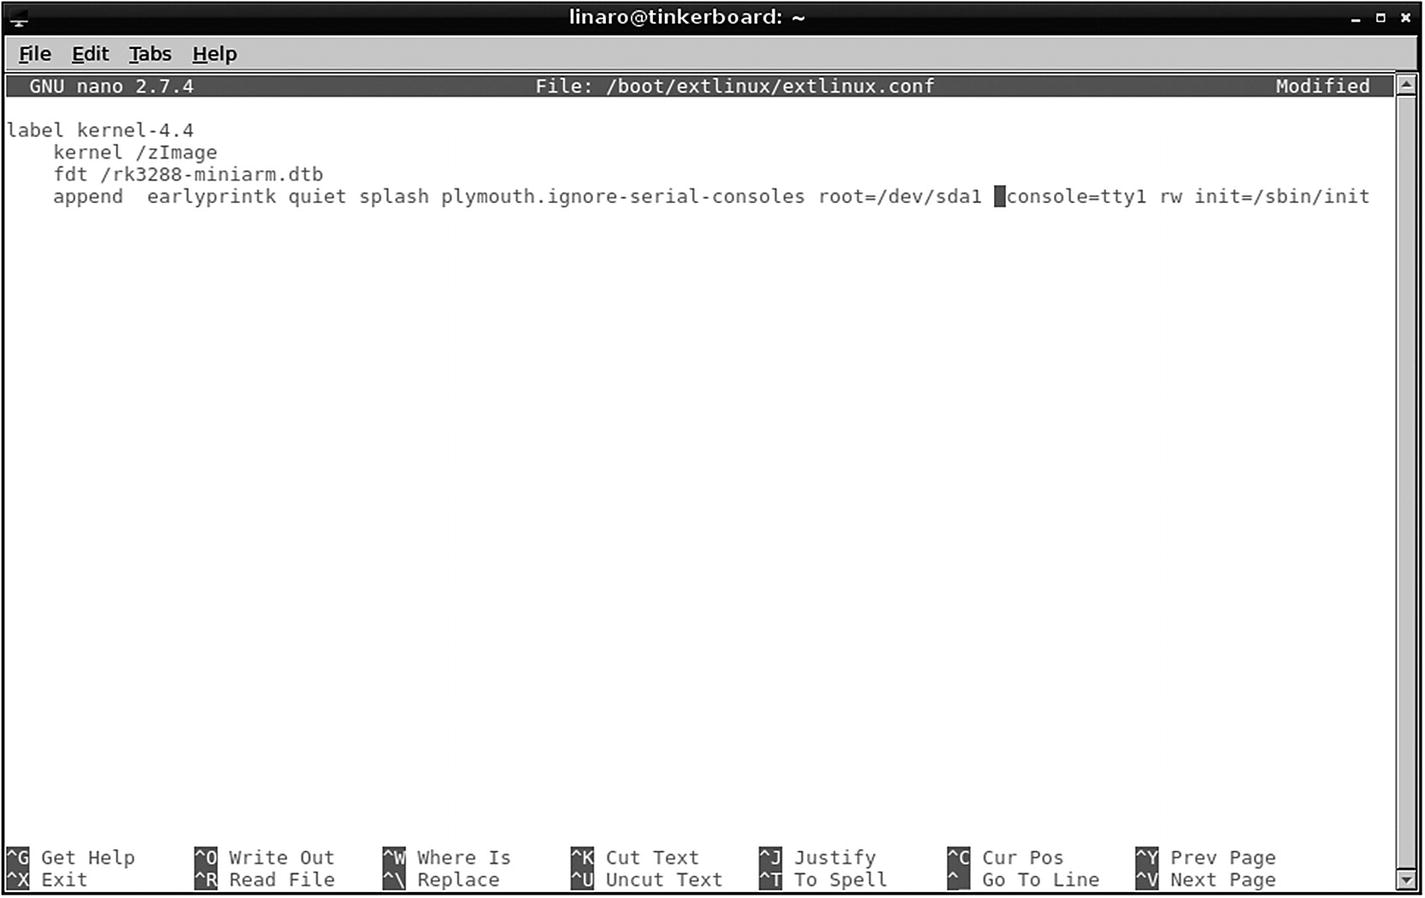
How the edited version of extlinux.conf should appear
The last file to edit is the fstab file . fstab is a configuration file that automatically mounts partitions. It also defines how the partitions are mounted. This is where we’ll tell TinkerOS to mount the USB device as a boot drive. To do this, enter sudo nano /etc/fstab into the terminal to access the file through the text editor.
Once inside the file, you’ll notice that there are very long strings of letters and numbers that have storage information to their right, such as boot designation and partition numbers. These are the SD card (or eMMC) and USB device’s UUID numbers. UUID numbers are unique numbers assigned by the Linux operating system to identify removable devices. We can use the terminal to see exactly which UUID number corresponds to each drive so that we don’t get confused.
This will list the drives with the more familiar labels that we’ve been referencing plus their UUID numbers. Now if we reference the fstab file at the same time, it makes a lot more sense as shown in Figure 3-8.
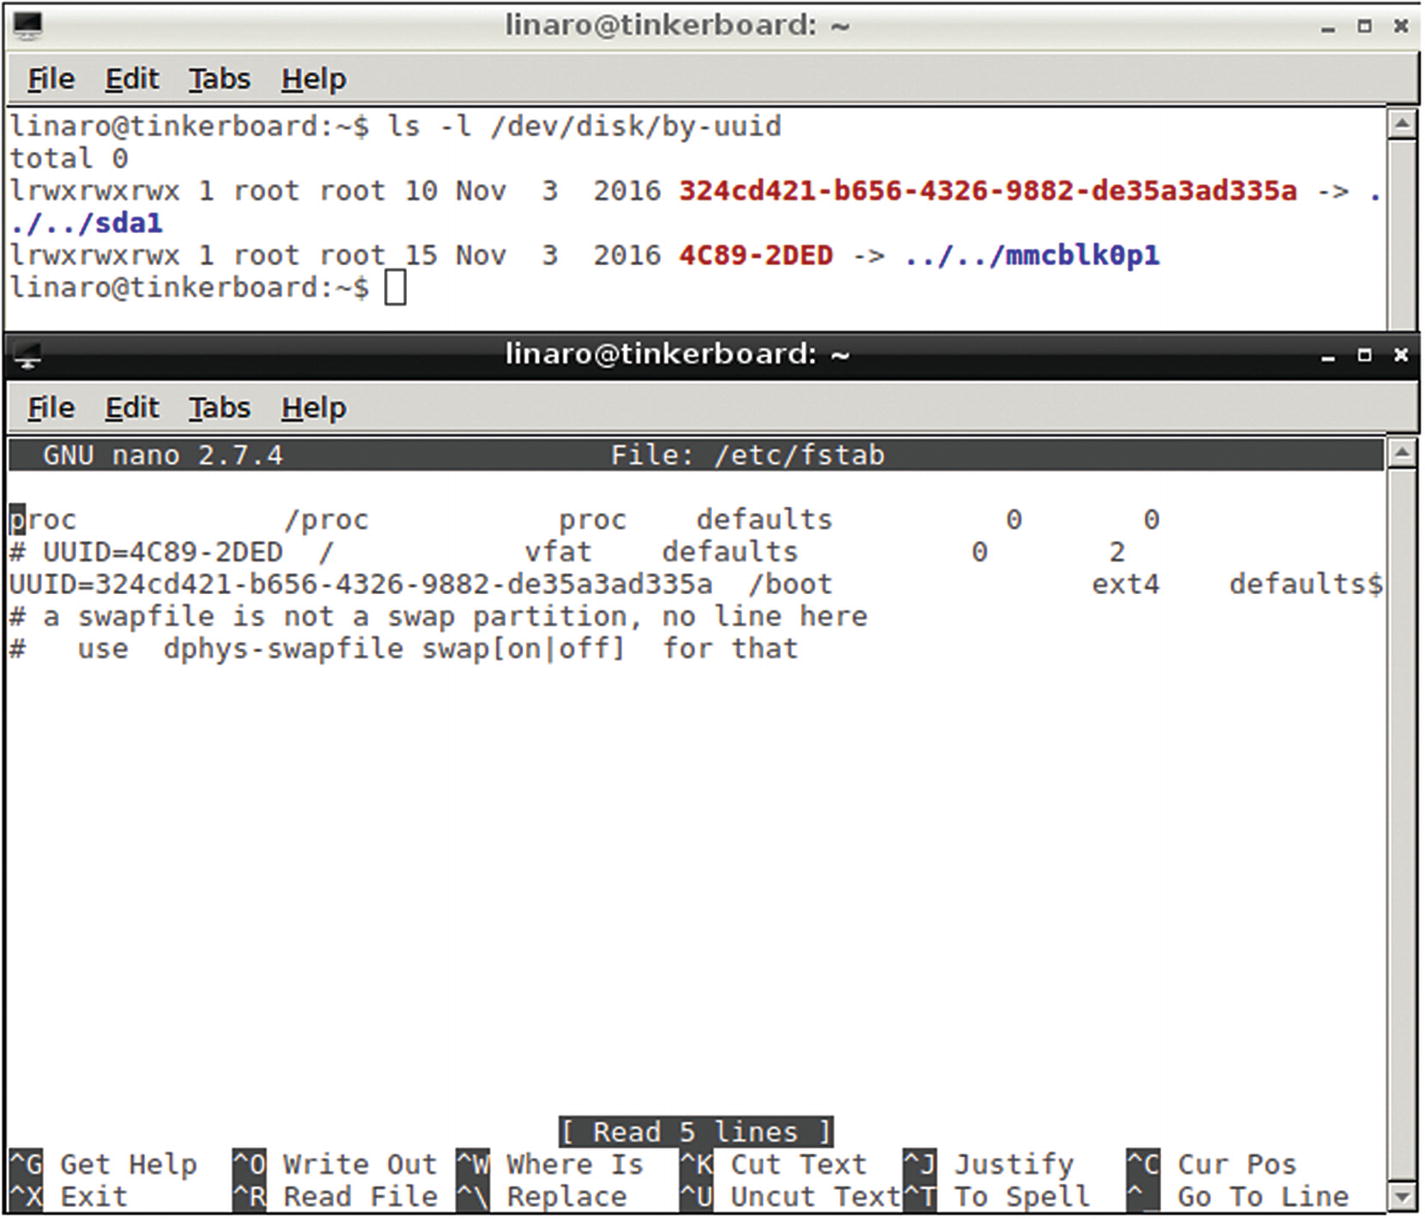
The attached drive’s UUID numbers side by side with the edited fstab file
With that, all of the steps have been completed to boot from the USB device, but we should test things out first. In the terminal type sudo reboot to reboot the system. Do not remove either the SD card or the USB device. If you boot into the desktop environment successfully after the reboot, then things are looking good.
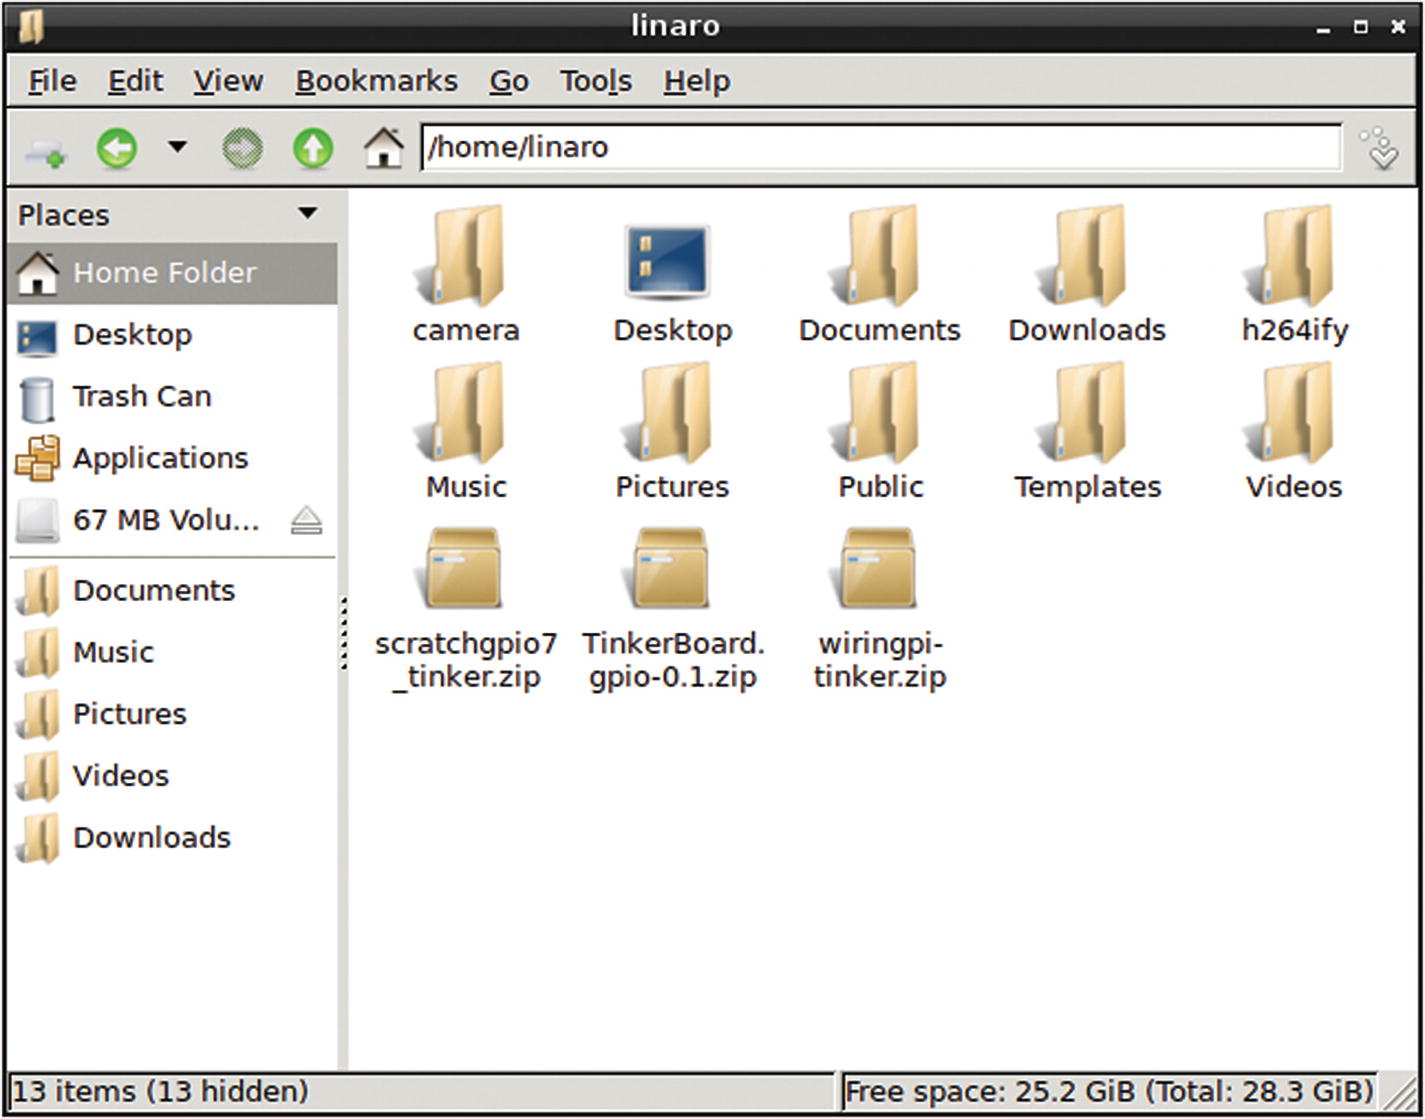
The file system GUI. You can see the system’s total space in the bottom-right corner to confirm that you are running TinkerOS on your USB device.
Note
If you receive a kernel panic or other error while doing that first reboot, it means that the Tinker Board can’t find the proper boot device that you pointed it to by editing extlinux.conf and fstab. This can be fixed by taking your SD card, or Tinker Board S for eMMC, and plugging it into a different computer running a Linux OS to edit the two files back to their original configuration. After this, you should be able to boot properly from the card, or eMMC, to begin troubleshooting what went wrong.
Conclusion
By following these steps for formatting your storage, downloading a disk image, and flashing that image to your SD card or eMMC you have an OS ready to use with your Tinker Board. You may even be running TinkerOS from a USB device.
This chapter will be referred to throughout the book as we explore other operating systems. But now that we have an operating system ready to go, let’s power up the Tinker Board and continue with our journey by looking in Chapter 4 at the Tinker Board’s software provided by ASUS.