
![]()
Implementing AlwaysOn Availability Groups
AlwaysOn Availability Groups provide a flexible option for achieving high availability, recovering from disasters, and scaling out read-only workloads. The technology synchronizes data at the database level, but health monitoring and quorum are provided by a Windows cluster.
This chapter demonstrates how to build and configure availability groups for both high availability (HA) and disaster recovery (DR). We also discuss aspects such as performance considerations and maintenance. We discuss using availability groups to scale out read-only workloads in Chapter 16.
![]() Note For the demonstrations in this chapter, we use a domain that contains a domain controller and a two-node cluster. These servers are in a site called Site1. A second site, called Site2, contains a third server. During the course of the chapter, we add this as a node to the cluster. The cluster has no shared storage for data and there is no AlwaysOn failover clustered instance. Each node has a stand-alone instance of SQL Server installed on it named ClusterNode1PrimaryReplica, ClusterNode2SyncHA, and ClusterNode3AsyncDR, respectively.
Note For the demonstrations in this chapter, we use a domain that contains a domain controller and a two-node cluster. These servers are in a site called Site1. A second site, called Site2, contains a third server. During the course of the chapter, we add this as a node to the cluster. The cluster has no shared storage for data and there is no AlwaysOn failover clustered instance. Each node has a stand-alone instance of SQL Server installed on it named ClusterNode1PrimaryReplica, ClusterNode2SyncHA, and ClusterNode3AsyncDR, respectively.
Implementing High Availability with AlwaysOn Availability Groups
Before implementing AlwaysOn Availability Groups, we first create three databases, which we will use during the demonstrations in this chapter. Two of the databases relate to the fictional application, App1, and the third database relates to the fictional application, App2. Each contains a single table, which we populate with data. Each database is configured with Recovery mode set to FULL. This is a hard requirement for a database to use AlwaysOn Availability Groups because data is synchronized via a log stream. The script in Listing 13-1 creates these databases.
The first step in configuring AlwaysOn Availability Groups is enabling this feature on the SQL Server service. To enable the feature from the GUI, we open SQL Server Configuration Manager, drill through SQL Server Services and select Properties from the context menu of the SQL Server service. When we do this, the service properties display and we navigate to the AlwaysOn High Availability tab, shown in Figure 13-1.

Figure 13-1. The AlwaysOn High Avaiability tab
On this tab, we check the Enable AlwaysOn Availability Groups box and ensure that the cluster name displayed in the Windows Failover Cluster Name box is correct. We then need to restart the SQL Server service. Because AlwaysOn Availability Groups uses stand-alone instances, which are installed locally on each cluster node, as opposed to a failover clustered instance, which spans multiple nodes, we need to repeat these steps for each stand-alone instance hosted on the cluster.
We can also use PowerShell to enable AlwaysOn Availability Groups. To do this, we use the PowerShell command in Listing 13-2. The script assumes that CLUSTERNODE1 is the name of the server and that PRIMARYREPLICA is the name of the SQL Server instance.
The next step is to take a full backup of all databases that will be part of the availability group. We create separate availability groups for App1 and App2, respectively, so to create an availability group for App1, we need to back up the Chapter13App1Customers and Chapter13App1Sales databases. We do this by running the script in Listing 13-3.
![]() Note Backups are discussed in Chapter 15.
Note Backups are discussed in Chapter 15.
Creating the Availability Group
You can create an availability group topology in SQL Server in several ways. It can be created manually, predominantly through dialog boxes, via T-SQL, or through a wizard. The following sections explore each of these options.
Using the New Availability Group Wizard
When the backups complete successfully, we invoke the New Availability Group wizard by drilling through AlwaysOn High Availability in Object Explorer and selecting the New Availability Group wizard from the context menu of the Availability Groups folder. The Introduction page of the wizard, displayed in Figure 13-2, now displays, giving us an overview of the steps that we need to undertake.

Figure 13-2. The Introduction page
On the Specify Name page (see Figure 13-3), we are prompted to enter a name for our availability group.

Figure 13-3. The Specify Name page
On the Select Databases page, we are prompted to select the database(s) that we wish to participate in the availability group, as illustrated in Figure 13-4. On this screen, notice that we cannot select the Chapter13App2Customers database, because we have not yet taken a full backup of the database.

Figure 13-4. The Select Database page
The Specify Replicas page consists of four tabs. We use the first tab, Replicas, to add the secondary replicas to the topology. Checking the Synchronous Commit option causes data to be committed on the secondary replica before it is committed on the primary replica. (This is also referred to as hardening the log on the secondary before the primary.) This means that, in the event of a failover, data loss is not possible, meaning that we can meet an SLA (service level agreement) with an RPO (recovery point objective) of 0 (zero). It also means that there is a performance impediment, however. If we choose not to check the option for Synchronous Commit, then the replica operates in Asynchronous Commit mode. This means that data is committed on the primary replica before being committed on the secondary replica. This stops us from suffering a performance impediment, but it also means that, in the event of failover, the RPO is nondeterministic. Performance considerations for synchronous replicas are discussed later in this chapter.
When we check the Automatic Failover option, the Synchronous Commit option is also selected automatically if we have not already selected it. This is because automatic failover is only possible in Synchronous Commit mode. We can set the Readable Secondary drop-down to No, Yes, or Read-intent. When we set it to No, the database is not accessible on replicas that are in a secondary role. When we set it to read-intent, the Availability Group Listener is able to redirect read-only workloads to this secondary replica, but only if the application has specified Application Intent=Read-only in the connection string. Setting it to Yes enables the listener to redirect read-only traffic, regardless of whether the Application Intent parameter is present in the application’s connection string. Although we can change the value of Readable Secondary through the GUI while at the same time configuring a replica for automatic failover without error, this is simply a quirk of the wizard. In fact, the replica is not accessible, since active secondaries are not supported when configured for automatic failover. The Replicas tab is illustrated in Figure 13-5.

Figure 13-5. The Replicas tab
![]() Note Using secondary replicas for read-only workloads is discussed in more depth in Chapter 16.
Note Using secondary replicas for read-only workloads is discussed in more depth in Chapter 16.
On the Endpoints tab of the Specify Replicas page, illustrated in Figure 13-6, we specify the port number for each endpoint. The default port is 5022, but we can specify a different port if we need to. On this tab, we also specify if data should be encrypted when it is sent between the endpoints. It is usually a good idea to check this option, and if we do, then AES (Advanced Encryption Standard) is used as the encryption algorithm.

Figure 13-6. The Endpoints tab
Optionally, you can also change the name of the endpoint that is created. Because only one database mirroring endpoint is allowed per instance, however, and because the default name is fairly descriptive, there is not always a reason to change it. Some DBAs choose to rename it to include the name of the instance, since this can simplify the management of multiple servers. This is a good idea if your enterprise has many availability group clusters.
The service account each instance uses is displayed for informational purposes. It simplifies security administration if you ensure that the same service account is used by both instances. If you fail to do this, you will need to grant each instance permissions to each service account. This means that instead of reducing the security footprint of each service account by using it for one instance only, you simply push the footprint up to the SQL Server level instead of the Operating System level.
The endpoint URL specifies the URL of the endpoint that availability groups will use to communicate. The format of the URL is [Transport Protocol]://[Path]:[Port]. The transport protocol for a database mirroring endpoint is always TCP (Transmission Control Protocol). The path can either be the fully qualified domain name (FQDN) of the server, the server name on its own, or an IP address, which is unique across the network. I recommend using the FQDN of the server, because this is always guaranteed to work. It is also the default value populated. The port should match the port number that you specify for the endpoint.
![]() Note Availability groups communicate with a database mirroring endpoint. Although database mirroring is deprecated, the endpoints are not.
Note Availability groups communicate with a database mirroring endpoint. Although database mirroring is deprecated, the endpoints are not.
On the Backup Preferences tab (see Figure 13-7), we can specify the replica on which automated backups will be taken. One of the big advantages of AlwaysOn Availability Groups is that when you use them, you can scale out maintenance tasks, such as backups, to secondary servers. Therefore, automated backups can seamlessly be directed to active secondaries. The possible options are Prefer Secondary, Secondary Only, Primary, or Any Replica. It is also possible to set priorities for each replica. When determining which replica to run the backup job against, SQL Server evaluates the backup priorities of each node and is more likely to choose the replica with the highest priority.

Figure 13-7. The Backup Preferences tab
Although the advantages of reducing IO on the primary replica are obvious, I, somewhat controversially, recommend against scaling automated backups to secondary replicas in many cases. This is especially the case when RTO (recovery time objective) is a priority for the application because of operational supportability issues. Imagine a scenario in which backups are being taken against a secondary replica and a user calls to say that they have accidently deleted all data from a critical table. You now need to restore a copy of the database and repopulate the table. The backup files, however, sit on the secondary replica. As a result, you need to copy the backup files over to the primary replica before you can begin to restore the database (or perform the restore over the network). This instantly increases your RTO.
Also, when configured to allow backups against multiple servers, SQL Server still only maintains the backup history on the instance where the backup was taken. This means that you may be scrambling between servers, trying to retrieve all of your backup files, not knowing where each one resides. This becomes even worse if one of the servers has a complete system outage. You can find yourself in a scenario in which you have a broken log chain.
The workaround for most of the issues that I just mentioned is to use a share on a file server and configure each instance to back up to the same share. The problem with this, however, is that by setting things up in this manner, you are now sending all of your backups across the network rather than backing them up locally. This can increase the duration of your backups as well as increase network traffic. The Backup Preferences tab is shown in Figure 13-7.
On the Listener tab, shown in Figure 13-8, we choose if we want to create an availability group listener or if we want to defer this task until later. If we choose to create the listener, then we need to specify the listener’s name, the port that it should listen on, and the IP address(es) that it should use. We specify one address for each subnet, in multi-subnet clusters. The details provided here are used to create the client access point resource in the availability group’s cluster role. You may notice that we have specified port 1433 for the listener, although our instance is also running on port 1433. This is a valid configuration, because the listener is configured on a different IP address than the SQL Server instance. It is also not mandatory to use the same port number, but it can be beneficial, if you are implementing AlwaysOn Availability Groups on an existing instance because applications that specify the port number to connect may need fewer application changes. Remember that the server name will still be different, however, because applications will be connecting to the virtual name of the listener, as opposed to the name of the physical serverinstance. In our example, applications connect to APP1LISTENPRIMARYREPLICA instead of CLUSTERNODE1PRIMARYREPLICA. Although connections via CLUSTERNODE1 are still permitted, they do not benefit from high availability or scale our reporting.

Figure 13-8. The Listener tab
![]() Tip If you do not have Create Computer Objects permission within the OU, then the listener’s VCO (virtual computer object) must be prestaged in AD and you must be assigned Full Control permissions on the object.
Tip If you do not have Create Computer Objects permission within the OU, then the listener’s VCO (virtual computer object) must be prestaged in AD and you must be assigned Full Control permissions on the object.
On the Select Initial Data Synchronization screen, shown in Figure 13-9, we choose how the initial data synchronization of the replicas is performed. If you choose Full, then each database that participates in the availability group is subject to a full backup, followed by a log backup. The backup files are backed up to a share, which you specify, before they are restored to the secondary servers. After the restore is complete, data synchronization, via log stream, commences.

Figure 13-9. The Select Data Synchronization page
If you have already backed up your databases and restored them onto the secondaries, then you can select the Join Only option. This starts the data synchronization, via log stream, on the databases within the availability group. Selecting Skip Initial Data Synchronization allows you to back up and restore the databases yourself after you complete the setup.
![]() Tip If your availability group will contain many databases, then it may be best to perform the backup/restore yourself. This is because the inbuilt utility will perform the actions sequentially, and therefore, it may take a long time to complete.
Tip If your availability group will contain many databases, then it may be best to perform the backup/restore yourself. This is because the inbuilt utility will perform the actions sequentially, and therefore, it may take a long time to complete.
On the Validation page, rules that may cause the setup to fail are checked, as illustrated in Figure 13-10. If any of the results come back as Failed, then you need to resolve them before you attempt to continue.
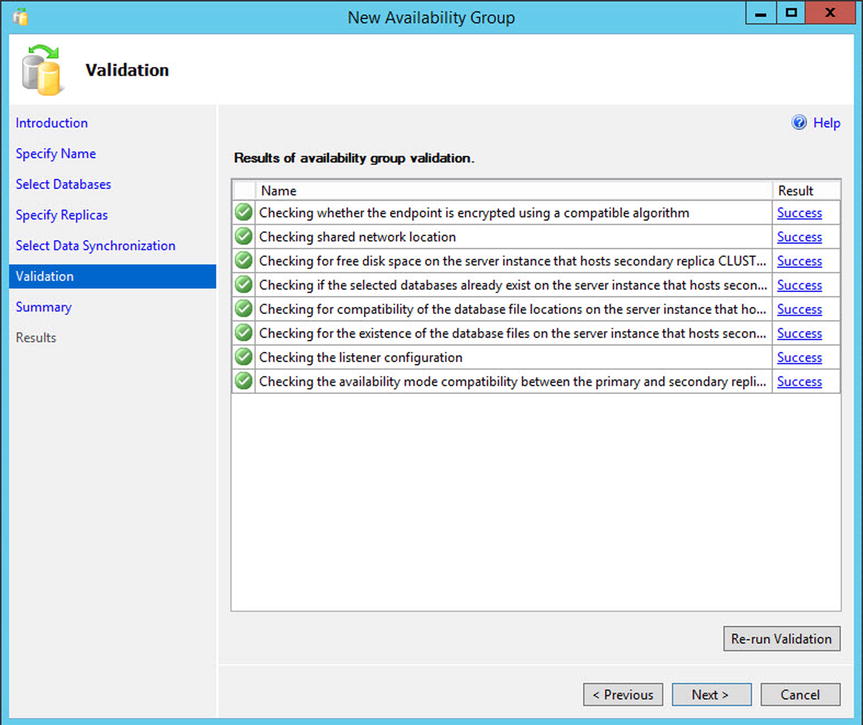
Figure 13-10. The Validation page
Once validation tests are complete and we move to the Summary page, we are presented with a list of the tasks that are to be carried out during the setup. This page is shown in Figure 13-11.

Figure 13-11. The Summary page
As setup progresses, the results of each configuration task display on the Results page, as shown in Figure 13-12. If any errors occur on this page, be sure to investigated them, but this does not necessarily mean that the entire availability group needs to be reconfigured. For example, if the creation of the availability group listener fails because the VCO had not been prestaged in AD, then you can re-create the listener without needing to re-create the entire availability group.

Figure 13-12. The Results page
As an alternative to using the New Availability Group wizard, you can perform the configuration of the availability group using the New Availability Group dialog box, followed by the Add Listener dialog box. This method of creating an availability group is examined later in this chapter.
Scripting the Availability Group
We can also script the activity by using the script in Listing 13-4. This script connects to both instances within the cluster, meaning that it can only be run in SQLCMD mode. First, the script creates a login for the service account on each instance. It then creates the TCP endpoint, assigns the connect permission to the service account, and starts the health trace for AlwaysOn Availability Groups (which we discuss later in this chapter). The script then creates the availability group on the primary and joins the secondary to the group. Next, we perform a full and log backup and a restore of each database that will participate in the availability group before we add the databases to the group. Note that the databases are backed up, restored, and added to the group in a serial manner. If you have many databases, then you may want to parallelize this process.
Creating the availability group via T-SQL gives you the most flexibility in terms of configuration. Table 13-1 contains a complete list of arguments, along with their explanation.
Table 13-1. The CREATE AVAIABILITY GROUP Arguments
|
Argument |
Description |
Acceptable Values |
|---|---|---|
|
AUTOMATED_BACKUP_PREFERENCE |
Defines where backups run from automated jobs should be taken. |
PRIMARY SECONDARY_ONLY SECONDARY NONE |
|
FAILURE_CONDITION_LEVEL |
Specifies how sensitive the failover will be. Further details in Table 13-2. |
1 through 5 |
|
HEALTH_CHECK_TIMEOUT |
Configures the amount of time, in milliseconds, that SQL Server has to return health check information to the cluster before the cluster assumes that the instance is not responding, which triggers a failover when FAILOVER_MODE is set to AUTOMATIC. |
15000ms through 4294967295ms |
|
DATABASE |
A comma-separated list of databases that will join the availability group. |
– |
|
REPLICA ON |
A comma-separated list of serverinstance names that will be replicas within the group. The following arguments in this table form the WITH clause of the REPLICA ON argument. |
– |
|
ENDPOINT_URL |
The URL of the TCP endpoint that the replica will use to communicate. |
– |
|
AVAILABILITY_MODE |
Determines if the replica operates in synchronous or asynchronous mode. |
SYNCHRONOUS_COMMIT ASYNCHRONOUS_COMMIT |
|
FAILOVER_MODE |
When the AVAILABILITY_MODE is set to synchronous, determines if automatic failover should be allowed. |
AUTOMATIC MANUAL |
|
BACKUP_PRIORITY |
Gives the replica a weight when SQL Server is deciding where an automated backup job should run. |
0 through 100 |
|
SECONDARY_ROLE |
Specifies properties that only apply to the replica when it is in a secondary role. ALLOW_CONNECTIONS specifies if the replica is readable, and if so, by all read_only connections or only those that specify read-intent in the connection string. READ_ONLY_ROUTING_URL specifies the URL for applications to connect to it, for read only operations, in the format: TCP://ServerName:Port. |
- |
|
PRIMARY_ROLE |
Specifies properties that only apply to the replica when it is in the primary role. ALLOW_CONNECTIONS can be configured as All to allow any connection, or Read_Write, to disallow read-only connections. READ_ONLY_ROUTING_LIST is a comma-separated list of serverinstance names that have been configured as read-only replicas. |
- |
|
SESSION_TIMEOUT |
Specifies how long replicas can survive without receiving a ping before they enter the DISCONNECTED state. |
5 to 2147483647 seconds |
The FAILOVER_CONDITION_LEVEL argument determines the group’s sensitivity to failover. Table 13-2 provides a description of each of the five levels.
Table 13-2. The FAILOVER_CONDITION_LEVEL Arguement
|
Level |
Failover Triggered By |
|---|---|
|
1 |
Instance down. AOAG lease expires. |
|
2 |
Conditions of level 1 plus: HEALTH_CHECK_TIMEOUT is exceeded. The replica has a state of FAILED. |
|
3 (Default) |
Conditions of level 2 plus: SQL Server experiences critical internal errors. |
|
4 |
Conditions of level 3 plus: SQL Server experiences moderate internal errors. |
|
5 |
Failover initialed on any qualifying condition. |
Using the New Availability Group Dialog Box
Now that we have successfully created our first availability group, let’s create a second availability group for App2. This time, we use the New Availability Group and Add Listener Dialog boxes. We begin this process by backing up the Chapter13App2Customers database. Just like when we created the App1 availability group, the databases are not selectable until we perform the backup. Unlike when we used the wizard, however, we have no way to make SQL Server perform the initial database synchronization for us. Therefore, we back up the database to the share that we created during the previous demonstration and then restore the backup, along with a transaction log backup, to the secondary instance. We do this by using the script in Listing 13-5, which must be run in SQLCMD mode for it to work. This is because it connects to both instances.
If we had not already created an availability group, then our next job would be to create a TCP endpoint so the instances could communicate. We would then need to create a login for the service account on each instance and grant it the connect permissions on the endpoints. Because we can only ever have one database mirroring endpoint per instance, however, we are not required to create a new one, and obviously we have no reason to grant the service account additional privileges. Therefore, we continue by creating the availability group. To do this, we drill through AlwaysOn High Availability in Object Explorer and select New Availability Group from the context menu of availability groups.
This causes the General tab of the New Availability Group dialog box to display, as illustrated in Figure 13-13. On this screen, we type the name of the availability group in the first field. Then we click the Add button under the Availability Databases window before we type the name of the database that we wish to add to the group. We then need to click the Add button under the Availability Replicas window before we type the serverinstance name of the secondary replica in the new row.

Figure 13-13. The New Availability Group dialog box
Now we can begin to set the replica properties. We discussed the Role, Availability Mode, Failover Mode, Readable Secondary, and Endpoint URL properties when we created the App1 availability group. The Connection In Primary Role property defines what connections can be made to the replica if the replica is in the primary role. You can configure this as either Allow All Connections, or allow Read/Write connections. When Read/Write is specified, applications using the Application Intent = Read only parameter in their connection string will not be able to connect to the replica.
The Session Timeout property sets how long the replicas can go without receiving a ping from one another before they enter the DISCONNECTED state and the session ends. Although it is possible to set this value to as low as 5 seconds, it is usually a good idea to keep the setting at or above 10 seconds, otherwise you run the risk of a false positive response, resulting in unnecessary failover. If a replica times out, it needs to be resynchronized, since transactions on the primary will no longer wait for the secondary, even if the secondary is running in Synchronous Commit mode.
![]() Note You may have noticed that we have configured the replica in Asynchronous Commit mode. This is for the benefit of a later demonstration. For HA, we would always configure Synchronous Commit mode, since otherwise, automatic failover is not possible.
Note You may have noticed that we have configured the replica in Asynchronous Commit mode. This is for the benefit of a later demonstration. For HA, we would always configure Synchronous Commit mode, since otherwise, automatic failover is not possible.
On the Backup Preferences tab of the dialog box, we define the preferred replica to use for automated backup jobs, as shown in Figure 13-14. Just like when using the wizard, we can specify Primary, or we can choose between enforcing and preferring backups to occur on a secondary replica. We can also configure a weight, between 0 and 100 for each replica, and use the Exclude Replica check box to avoid backups being taken on a specific node.

Figure 13-14. The Backup Preferences tab
Once we have created the availability group, we need to create the availability group listener. To do this, we select New Listener from the context menu of the App2 availability group, which should now be visible in Object Explorer. This invokes the New Availability Group Listener dialog box, which can be seen in Figure 13-15.

Figure 13-15. The New Availability Group Listener dialog box
In this dialog box, we start by entering the virtual name for the listener. We then define the port that it will listen on and the IP address that will be assigned to it. We are able to use the same port for both of the listeners, as well as the SQL Server instance, because all three use different IP addresses.
Performance Considerations for Synchronous Commit Mode
Unlike traditional clustering, Availability Group topology does not have any shared disk resources. Therefore, data must be replicated on two devices, which of course, has an overhead. This overhead varies depending on various aspects of your environment, such as network latency and disk performance, as well as the application profile. However, the script in Listing 13-6 runs some write-intensive tests against the Chapter13App2Customers database (which is in Asynchronous Commit mode) and then against the Chapter13App1Customers database (which is Synchronous Commit mode). This indicates the overhead that you can expect to witness.
![]() Tip It is important to remember that there is no overhead on read performance. Also, despite the overhead associated with writes, some of this is offset by distributing read-only workloads if you implement readable secondary replicas.
Tip It is important to remember that there is no overhead on read performance. Also, despite the overhead associated with writes, some of this is offset by distributing read-only workloads if you implement readable secondary replicas.
The relevant parts of the results of this query are displayed in Listing 13-7. You can see that the index rebuild was almost three times slower when the Availability Group was operating in Synchronous Commit mode, the insert was over six times slower, and the delete was also marginally slower. In productions environments in which I have implemented availability groups in Synchronous Commit mode, they have generally been around two times slower than in Asynchronous Commit mode.
Because of the performance challenges associated with Synchronous Commit mode, many DBAs decide to implement high availability and disaster recovery by using a three-node cluster, with two nodes in the primary data center and one node in the DR data center. Instead of having two synchronous replicas within the primary data center, however, they stretch the primary replica across a failover clustered instance and configure the cluster to only be able to host the instance on these two nodes, and not on the third node in the DR data center. This is important, because it means that we don’t need to implement SAN replication between the data centers. The DR node is synchronized using availability groups in Asynchronous Commit mode. If you combine an AlwaysOn failover clustered instance with AlwaysOn Availability Groups in this way, then automatic failover is not supported between the clustered instance and the replica. It can only be configured for manual failover. There is also no need for availability groups to fail over between the two nodes hosting the clustered instance, because this failover is managed by the cluster service. This configuration can prove to be a highly powerful and flexible way to achieve your continuity requirements.
Implementing Disaster Recovery with Availability Group
Now that we have successfully implemented high availability for the Chapter13App1Customers and Chapter13App1Sales databases through the App1 availability group, we need to implement disaster recovery for these databases. To do this, we first need to build out a new server in our second site and install a stand-alone instance of SQL Server. Because the cluster now spans two sites, we need to reconfigure it as a multi-subnet cluster. We also need to reconfigure the quorum model to remove its dependency on the shared storage, which we currently have for the quorum. Once this is complete, we are able to add the instance on the new node to our availability group. The following sections assume that you have already built out a third server with a SQL Server instance called CLUSTERNODE3ASYNCDR, and they demonstrate how to reconfigure the cluster as well as the availability group.
Configuring the Cluster
We need to perform several cluster configuration steps before we begin to alter our availability group. These include adding the new node, reconfiguring the quorum, and adding a new IP to the cluster’s client access point.
The first task in adding DR capability to our availability group is to add the third node to the cluster. To do this, we select Add Node from the context menu of nodes in Failover Cluster Manager. This causes the Add Node Wizard to be invoked. After passing through the Before You Begin page of this wizard, you are presented with the Select Servers page, which is illustrated in Figure 13-16. On this page, you need to enter the server name of the node that you plan to add to the cluster.

Figure 13-16. The Select Servers page
On the Validation Warning page, you are invited to run the Cluster Validation Wizard. You should always run this wizard in a production environment when making changes of this nature; otherwise, you will not be able to receive support from Microsoft for the cluster. Details of running the Cluster Validation wizard can be found in Chapter 12. Running the Cluster Validation wizard in our scenario is likely to throw up some warnings, which are detailed in Table 13-3.
Table 13-3. Cluster Validation Warnings
|
Warning |
Reason |
Resolution |
|---|---|---|
|
This resource does not have all the nodes of the cluster listed as Possible Owners. The clustered role that this resource is a member of will not be able to start on any node that is not listed as a Possible Owner. |
This warning has been displayed because we have not yet configured our availability group to use the new node. |
Configuring the availability group to use the new node is discussed later in this chapter. |
|
The RegisterAllProvidersIP property for network name ’Name: App1Listen’ is set to 1. For the current cluster configuration this value should be set to 0. |
Setting the RegisterAllProvidersIP to 1 will cause all IP addresses to be registered, regardless of whether they are online or not. When we created the Availability Group Listener through SSMS, this setting was automatically configured to allow clients to fail over faster, and this warning should always be ignored. If we had created the Listener through Failover Cluster Manager, the property would have been set to 0 by default. |
No resolution is required, but RegisterAllProvidersIP is discussed in more detail later in this chapter. |
On the Confirmation page, we are given a summary of the tasks that will be performed. On this page, we deselect the option to add eligible storage, since one of our aims is to remove the dependency on shared storage. The Confirmation page is displayed in Figure 13-17.

Figure 13-17. Confirmation page
On the Configure The Cluster page, the progress on the tasks displays until it is complete. The Summary page then displays, giving an overview of the actions and their success.
Our next step in configuring the cluster will be to modify the quorum. As mentioned earlier, we would like to remove our current dependency on shared storage. Therefore we need to make a choice. Since we now have three nodes in the cluster, one possibility is to remove the disk witness and form a node majority quorum. The issue with this is that one of our nodes is in a different location. Therefore, if we lose network connectivity between the two sites for an extended period, then we have no fault tolerance in our primary site. If one of the nodes goes down, we lose quorum and the cluster goes offline. On the other hand, if we have an additional witness in the primary location, then we are not maintaining best practice, since there are an even number of votes. Again, if we lose one voting member, we lose resilience.
Therefore, the approach that we take is to replace the disk witness with a file share witness, thus removing the shared disk dependency. We then remove the vote from the node in the DR site. This means that we have three voting members of the quorum, and all of them are within the same site. This mitigates the risk of an inter-site network issue causing loss of redundancy in our HA solution.
In order to invoke the Configure Cluster Quorum Wizard, we select Configure Cluster Quorum from the More Actions submenu within the context menu of our cluster in Failover Cluster Manager. After moving through the Before You Begin page of this wizard, you are asked to select the configuration that you wish to make on the Select Quorum Configuration Option page, which is shown in Figure 13-18. We select the Advanced Quorum Configuration option.

Figure 13-18. The Select Quorum Configuration Option page
On the Select Voting Configuration page, we choose to select nodes and remove the vote from CLUSTERNODE3. This is demonstrated in Figure 13-19.

Figure 13-19. The Select Voting Configuration page
On the Select Quorum Witness page, we choose the Configure A File Share Witness option, as shown in Figure 13-20.

Figure 13-20. The Select Quorum Witness page
On the Configure File Share Witness page, which is illustrated in Figure 13-21, we enter the UNC of the share that we will use for the quorum. This file share must reside outside of the cluster and must be an SMB file share on a machine running Windows Server.

Figure 13-21. The Configure File Share Witness page
![]() Tip Although many non-Windows–based NAS (network-attached storage) devices have support for SMB 3, I have experienced real-world implementations of a file share quorum on a NAS device work only intermittently, without resolution by either vendor.
Tip Although many non-Windows–based NAS (network-attached storage) devices have support for SMB 3, I have experienced real-world implementations of a file share quorum on a NAS device work only intermittently, without resolution by either vendor.
![]() Caution Remember that using a file share witness, with only two other voting nodes, can lead to a partition-in-time scenario. For more information, please refer to Chapter 11.
Caution Remember that using a file share witness, with only two other voting nodes, can lead to a partition-in-time scenario. For more information, please refer to Chapter 11.
On the Confirmation page of the wizard, you are given a summary of the configuration changes that will be made, as shown in Figure 13-22.

Figure 13-22. The Confirmation page
On the Configure Cluster Quorum Settings page, a progress bar displays. Once the configuration is complete, the Summary page appears. This page provides a summary of the configuration changes and a link to the report.
Our next task is to add a second IP address to the cluster’s client access point. We do not add an extra IP address for the Availability Group Listener yet. We perform this task in the “Configuring the Availability Group” section later in this chapter.
In order to add the second IP address, we select Properties from the context menu of Server Name in the Core Cluster Resources window of Failover Cluster Manager. On the General tab of the Cluster Properties dialog box, we add the IP address for administrative clients, following failover to DR, as illustrated in Figure 13-23.

Figure 13-23. The General tab
When we apply the change, we receive a warning saying that administrative clients will temporarily be disconnected from the cluster. This does not include any clients connected to our availability group. If we choose to proceed, we then navigate to the Dependencies tab of the dialog box and ensure that an OR dependency has been created between our two IP addresses, as shown in Figure 13-24.

Figure 13-24. The Dependencies tab
After this process is complete, the second IP address resource in the Cluster Core Resources group shows up as offline. This is normal. In the event of failover to the server in the second subnet, this IP address comes online, and the IP address of the subnet in the primary site goes offline. This is why the OR dependency (as opposed to an AND dependency) is critical. Without it, the Server Name resource could never be online.
Configuring the Availability Group
To configure the availability group, we first have to add the new node as a replica and configure its properties. We then add a new IP address to our listener for the second subnet. Finally, we look at improving the connection times for clients.
Adding and Configuring a Replica
In SQL Server Management Studio (SSMS), on the primary replica, we drill through Availability Groups | App1 and select Add Replica from the context menu of the Availability Replicas node. This causes the Add Replica To Availability Group wizard to be displayed. After passing through the Introduction page of the wizard, you see the Connect To Replicas page, as displayed in Figure 13-25. On this page, you are invited to connect to the other replicas in the availability group.

Figure 13-25. The Connect To Replicas page
On the Replicas tab of the Specify Replicas page, shown in Figure 13-26, we first use the Add Replica button to connect to the DR instance. After we have connected to the new replica, we specify the properties for that replica. In this case, we leave them as-is because it will be a DR replica. Therefore, we want it to be asynchronous and we do not want it to be readable.

Figure 13-26. The Replicas tab
On the Endpoints tab, shown in Figure 13-27, we ensure that the default settings are correct and acceptable.

Figure 13-27. The Endpoints tab
On the Backup Preferences tab, the option for specifying the preferred backup replica is read-only. We are, however, able to specifically exclude our new replica as a candidate for backups or change its backup priority. This page is displayed in Figure 13-28.
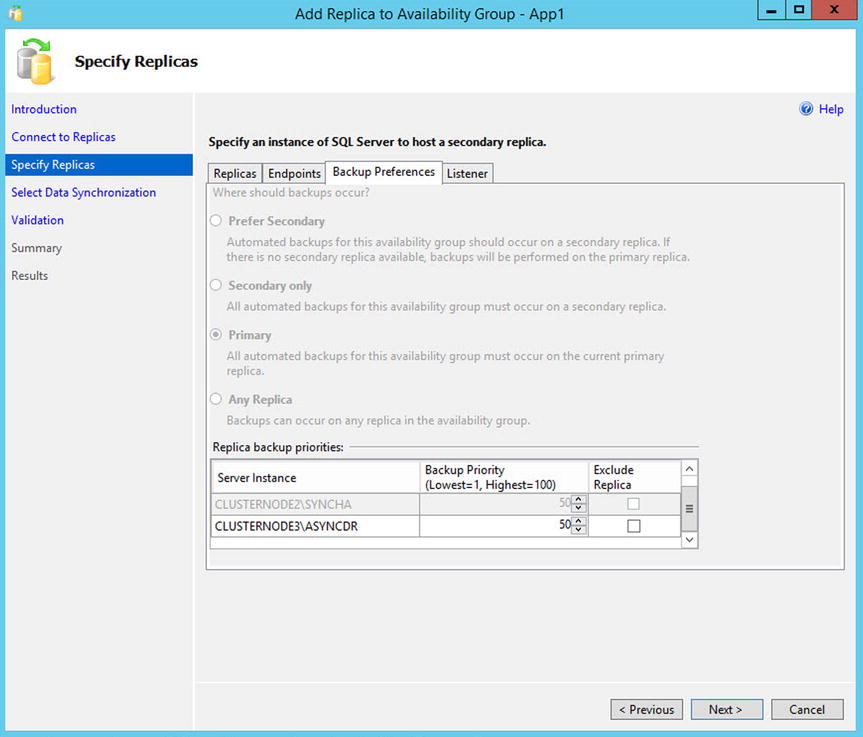
Figure 13-28. The Backup Preferences tab
On the Listener tab, illustrated in Figure 13-29, we can decide if we will create a new listener. This is a strange option, since SQL Server only allows us to create a single listener for an availability group, and we already have one. Therefore, we leave the default choice of Do Not Create An Availability Group Listener selected. It is possible to create a second listener, directly from Failover Cluster Manager, but you would only want a second listener for the same availability group in very rare, special cases, which we discuss later in this chapter.

Figure 13-29. The Listener tab
On the Select Data Synchronization page, we choose how we want to perform the initial synchronization of the replica. The options are the same as they were when we created the availability group, except that the file share will be prepopulated, assuming that we choose the Full synchronization when creating the availability group. This screen is shown in Figure 13-30.

Figure 13-30. The Select Data Synchronization page
On the Validation page, which is illustrated in Figure 13-31, we should review any warnings or errors and resolve them before continuing.

Figure 13-31. The Validation page
On the Summary page, displayed in Figure 13-32, we are presented with a summary of the configurations that will be carried out.
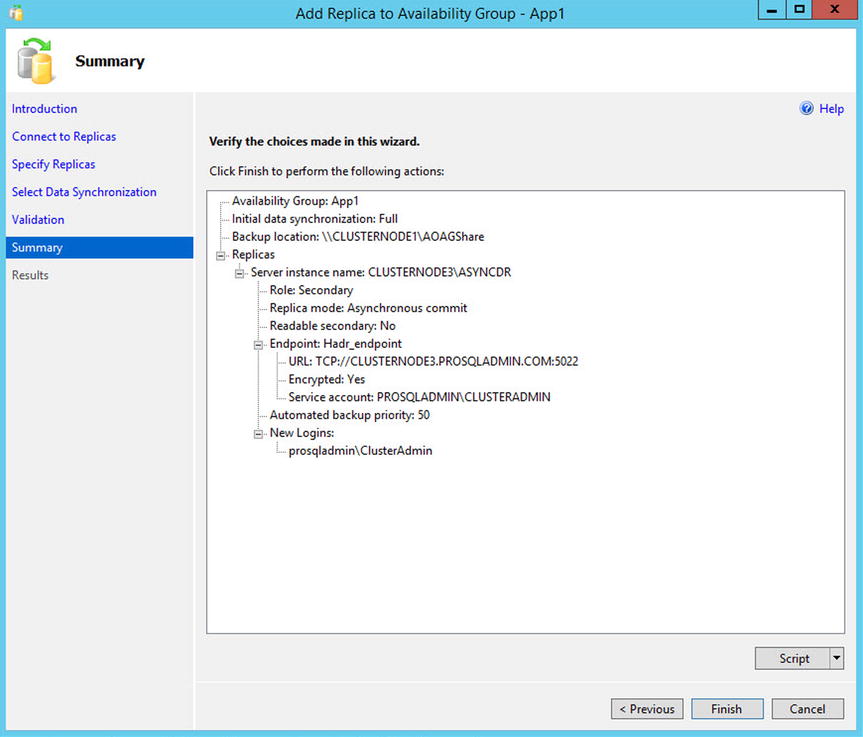
Figure 13-32. The Summary page
After the reconfiguration completes, our new replica is added to the cluster. We should then review the results and respond to any warnings or errors. We could also have used T-SQL to add the replica to the availability group. The script in Listing 13-8 performs the same actions just demonstrated. You must run this script in SQLCMD Mode since it connects to multiple instances.
Even though the replica has been added to the availability group and we are able to fail over to this replica, our clients are still not able to connect to it in the DR site using the Availability Group Listener. This is because we need to add an IP address resource, which resides in the second subnet. To do this, we can select Properties from the context menu of App1Listen in Object Explorer, which causes the Availability Group Listener Properties dialog box to be displayed, as in Figure 13-33. Here, we add the listener’s second IP address.

Figure 13-33. The Availability Group Listener Properties
We can also achieve this through T-SQL by running the script in Listing 13-9.
SQL Server now adds the IP address as a resource in the App1 role, and also configures the OR dependency on the Name resource. You can view this by running the dependency report against the Name resource in Failover Cluster Manager, as illustrated in Figure 13-34.

Figure 13-34. The dependency report
Clients using .NET 4 or higher are able to specify the new MultiSubnetFailover=True property in their connecting strings when connecting to an AlwaysOn Availability Group. This improves connection times by retrying TCP connections more aggressively. If clients are using older versions of .NET, however, then there is a high risk of their connections timing out.
There are two workarounds for this issue. The first is to set the RegisterAllProvidersIP property to 0. This is the recommended approach, but the problem with it is that failover to the DR site can take up to 15 minutes. This is because the IP address resource for the second subnet is offline until failover occurs. It can then take up to 15 minutes for the PTR record to be published. In order to reduce this risk, it is recommended that you also lower the HostRecordTTL. This property defines how often the resource records for the cluster name are published.
The script in Listing 13-10 demonstrates how to disable RegisterAllProvidersIP and then reduce the HostRecordTTL to 300 seconds.
The alternative workaround is to simply increase the time-out value for connections to 30 seconds. However, this solution accepts that a large volume of connections will take up to 30 seconds. This may not be acceptable to the business.
Managing AlwaysOn Availability Groups
Once the initial setup of your availability group is complete, you still need to perform administrative tasks. These include failing over the availability group, monitoring, and on rare occasions, adding additional listeners. These topics are discussed in the following sections.
Failover
If a replica is in Synchronous Commit mode and is configured for automatic failover, then the availability group automatically moves to a redundant replica in the event of an error condition being met on the primary replica. There are occasions, however, when you will want to manually fail over an availability group. This could be because of DR testing, proactive maintenance, or because you need to bring up an asynchronous replica following a failure of the primary replica or the primary data center.
If you wish to fail over a replica that is in Synchronous Commit mode, launch the Failover Availability Group wizard by selecting Failover from the context menu of your availability group in Object Explorer. After moving past the Introduction page, you find the Select New Primary Replica page (see Figure 13-35). On this page, check the box of the replica to which you want to fail over. Before doing so, however, review the Failover Readiness column to ensure that the replicas are synchronized and that no data loss will occur.

Figure 13-35. The Select New Primary Replica page
On the Connect To Replica page, illustrated in Figure 13-36, use the Connect button to establish a connection to the new primary replica.

Figure 13-36. The Connect To Replica page
On the Summary page, you are given details of the task to be performed, followed by a progress indicator on the Results page. Once the failover completes, check that all tasks were successful, and investigate any errors or warnings that you receive.
We can also used T-SQL to fail over the availability group. The command in Listing 13-11 achieves the same results. Make sure to run this script from the replica that will be the new primary replica. If you run it from the current primary replica, use SQLCMD mode and connect to the new primary within the script.
If your availability group is in Asynchronous Commit mode, then from a technical standpoint, you can fail over in a similar way to the way you can for a replica running in Synchronous Commit mode, except for the fact that you need to force the failover, thereby accepting the risk of data loss. You can force failover by using the command in Listing 13-12. You should run this script on the instance that will be the new primary. For it to work, the cluster must have quorum. If it doesn’t, then you need to force the cluster online before you force the availability group online.
From a process perspective, you should only ever do this if your primary site is completely unavailable. If this is not the case, first put the application into a safe state. This avoids any possibility of data loss. The way that I normally achieve this in a production environment is by performing the following steps:
- Disable logins.
- Change the mode of the replica to Synchronous Commit mode.
- Fail over.
- Change the replica back to Asynchronous Commit mode.
- Enable the logins.
You can perform these steps with the script in Listing 13-13. When run from the DR instance, this script places the databases in App1 into a safe state before failing over, and then it reconfigures the application to work under normal operations.
Synchronizing Uncontained Objects
Regardless of the method you use to fail over, assuming that all of the databases within the availability group are not contained, then you need to ensure that instance-level objects are synchronized. The most straightforward way to keep your instance-level objects synchronized is by implementing an SSIS package, which is scheduled to run on a periodic basis.
Whether you choose to schedule a SSIS package to execute, or you choose a different approach, such as a SQL Server Agent job that scripts and re-creates the objects on the secondary servers, these are the objects that you should consider synchronizing:
- Logins
- Credentials
- SQL Server Agent jobs
- Custom error messages
- Linked servers
- Server-level event notifications
- Stored procedures in Master
- Server-level triggers
- Encryption keys and certificates
![]() Note Details of how to create SSIS packages for administrative tasks, including synchronizing uncontained objects, are discussed in Chapter 21.
Note Details of how to create SSIS packages for administrative tasks, including synchronizing uncontained objects, are discussed in Chapter 21.
Monitoring
Once you have implemented availability groups, you need to monitor them and respond to any errors or warnings that could affect the availability of your data. If you have many availability groups implemented throughout the enterprise, then the only way to monitor them effectively and holistically is by using an enterprise monitoring tool, such as SOC (Systems Operations Center). If you only have a small number of availability groups, however, or if you are troubleshooting a specific issue, then SQL Server provides the AlwaysOn Dashboard and the AlwaysOn Health Trace. The following sections examine these two features.
The AlwaysOn Dashboard is an interactive report that allows you to view the health of your AlwaysOn environment and drill through, or roll up elements within the topology. You can invoke the report from the context menu of the Availability Groups folder in Object Explorer, or from the context menu of the availability group itself. Figure 13-37 shows the report that is generated from the context menu of the App1 availability group. You can see that currently, synchronization of both replicas is in a healthy state.

Figure 13-37. The availability group dashboard
The three possible synchronization states that a database can be in are SYNCHRONIZED, SYNCRONIZING, and NOT SYNCHRONIZING. A synchronous replica should be in the SYNCHRONIZED state, and any other state is unhealthy. An asynchronous replica, however, will never be in the SYNCHRONIZED state, and a state of SYNCHRONIZING is considered healthy. Regardless of the mode, NOT SYNCHRONIZING indicates that the replica is not connected.
![]() Note In addition to the synchronization states, a replica also has one of the following operational states: PENDING_FAILOVER, PENDING, ONLINE, OFFLINE, FAILED, FAILED_NO_QUORUM, and NULL (when the replica is disconnected). The operational state of a replica can be viewed using the sys.dm_hadr_availability_replica_states DMV, which we discussed in Chapter 17.
Note In addition to the synchronization states, a replica also has one of the following operational states: PENDING_FAILOVER, PENDING, ONLINE, OFFLINE, FAILED, FAILED_NO_QUORUM, and NULL (when the replica is disconnected). The operational state of a replica can be viewed using the sys.dm_hadr_availability_replica_states DMV, which we discussed in Chapter 17.
At the top right of the report, there are links to the failover wizard, which we discussed earlier in this chapter; the AlwaysOn Health events, which we discussed in the next section; and also a link to view cluster quorum information. The Cluster Quorum Information screen, which is invoked by this link, is displayed in Figure 13-38. You can also drill through each replica in the Availability Replicas window to see replica-specific details.

Figure 13-38. The Cluster Quorum Information screen
The AlwaysOn Health Trace is an Extended Events session, which is created when you create you first availability group. It can be located in SQL Server Management Studio, under Extended Events | Sessions, and via its context menu, you can view live data that is being captured, or you can enter the session’s properties to change the configuration of the events that are captured.
Drilling through the session exposes the session’s package, and from the context menu of the package, you can view previously captured events. Figure 13-39 shows that the latest event captured, was Database 5 (which, in our case, is Chapter13App1Customers), was waiting for the log to be hardened on the synchronous replica. Extended Events is discussed in detail in Chapter 19.

Figure 13-39. The target data
Adding Multiple Listeners
Usually, each availability group has a single Availability Group Listener, but there are some rare instances in which you may need to create multiple listeners for the same availability group. One scenario in which this may be required is if you have legacy applications with hard-coded connection strings. Here, you can create an extra listener with a client access point that matches the name of the hard-coded connection string.
As mentioned earlier in this chapter, it is not possible to create a second Availability Group Listener through SQL Server Management Studio, T-SQL, or even PowerShell. Instead, we must use Failover Cluster Manager. Here, we create a new Client Access Point resource within our App1 role. To do this, we select Add Resource from the context menu of the App1 role, and then select Client Access Point. This causes the New Resource Wizard to be invoked. The Client Access Point page of the wizard is illustrated in Figure 13-40. You can see that we have entered the DNS name for the client access point and specified an IP address from each subnet.

Figure 13-40. The Client Access Point page
On the Confirmation page, we are shown a summary of the configuration that will be performed. On the Configure Client Access Point page, we see a progress indicator, before we are finally shown a completion summary on the Summary page, which is illustrated in Figure 13-41.

Figure 13-41. The Confirmation page
Now we need to configure the Availability Group resource to be dependent upon the new client access point. To do this, we select Properties from the context menu of the App1 resource and then navigate to the Dependencies tab. Here, we add the new client access point as a dependency and configure an OR constraint between the two listeners, as illustrated in Figure 13-42. Once we apply this change, clients are able to connect using either of the two listener names.

Figure 13-42. The Dependencies tab
Other Administrative Considerations
When databases are made highly available with AlwaysOn Availability Groups, several limitations are imposed. One of the most restrictive of these is that databases cannot be placed in single_user mode or be made read only. This can have an impact when you need to safe-state your application for maintenance. This is why, in the Failover section of this chapter, we disabled the logins that have users mapped to the databases. If you must place your database in single-user mode, then you must first remove it from the availability group.
A database can be removed from an availability group by running the command in Listing 13-14. This command removes the Chapter13App1Customers database from the availability group.
There may also be occasions in which you want a database to remain in an availability group, but you wish to suspend data movement to other replicas. This is usually because the availability group is in Synchronous Commit mode and you have a period of high utilization, where you need a performance improvement. You can suspend the data movement to a database by using the command in Listing 13-15, which suspends data movement for the Chapter13App1Sales database and then resumes it.
![]() Caution If you suspend data movement, the transaction log on the primary replica continues to grow, and you are not able to truncate it until data movement resumes and the databases are synchronized.
Caution If you suspend data movement, the transaction log on the primary replica continues to grow, and you are not able to truncate it until data movement resumes and the databases are synchronized.
Another important consideration is the placement of database and log files. These files must be in the same location on each replica. This means that if you use named instances, it is a hard technical requirement that you change the default file locations for data and logs, because the default location includes the name of the instance. This is assuming, of course, that you do not use the same instance name on each node, which would defy many of the benefits of having a named instance.
Summary
AlwaysOn Availability Groups can be implemented with up to eight secondary replicas, combining both Synchronous and Asynchronous Commit modes. When implementing high availability with availability groups, you always use Synchronous Commit mode, because Asynchronous Commit mode does not support automatic failover. When implementing Synchronous Commit mode, however, you must be aware of the associated performance penalty caused by committing the transaction on the secondary replica before it is committed on the primary replica. For disaster recovery, you will normally choose to implement Asynchronous Commit mode.
The availability group can be created via the New Availability Group Wizard, though dialog boxes, through T-SQL, or even through PowerShell. If you create an availability group using dialog boxes, then some aspects, such as the endpoint and associated permissions, must be scripted using T-SQL or PowerShell.
If you implement disaster recovery with availability groups, then you need to configure a multi-subnet cluster. This does not mean that you must have SAN replication between the sites, however, since availability groups do not rely on shared storage. What you do need to do is add additional IP addresses for the administrative cluster access point and also for the Availability Group Listener. You also need to pay attention to the properties of the cluster that support client reconnection to ensure that clients do not experience a high number of timeouts.
Failover to a synchronous replica in the event of a failure of the primary replica is automatic. There are instances, however, in which you will also need to failover manually. This could be because of a disaster that requires failover to the DR site, or it could be for proactive maintenance. Although it is possible to failover to an asynchronous replica with the possibility of data loss, it is good practice to place the databases in a safe-state first. Because you cannot place a database in read only or single_user mode, if it is participating in an availability group, safe-stating usually consists of disabling the logins and then switching to Synchronous Commit mode before failover.
To monitor availability groups throughout the enterprise, you need to use a monitoring tool, such as Systems Operation Center. If you need to monitor a small number of availability groups or troubleshoot a specific issue, however, use one of the tools included with SQL Server, such as a dashboard for monitoring the health of the topology, and an extended events session, called the AlwaysOn Health Trace.
You should also consider other maintenance tasks. These include where to place database and log files, as they must have the same location on each replica, and removing a database from an availability group so that you can place it in single_user mode, for example. Changing to single_user mode may be due to a requirement to run DBCC CHECKDB in a repair mode, and suspend data movement. Suspending data movement allows you to remove the performance overhead during a period of high utilization, but be warned, it also causes the transaction log on the primary replica to grow, without an option to truncate it, until data movement has resumed and the databases are once again synchronized.