
CHAPTER 8
![]()
Message Flow: Routing and Filtering
Messages usually move in a system in a straight line, moving from one endpoint to the next. On occasion, however, a little bit of flexibility is required; a message might need to visit two different endpoints at the same time, or it might need to be conditionally sent to one and not another. The progression of messages through a system is like the progression of a steady stream; it takes skill and ingenuity (and care!) to safely route the flow.
In Spring Integration, a message router decides what channel or channels should receive the message next. This decision is based on the message's content and/or metadata contained in the message header. A message filter determines if the message should be passed to the output channel at all, again based on the message's content and/or metadata. A message splitter partitions an inbound message into several parts and sends the resultant messages out. An aggregator is the counterpart to the splitter; it combines multiple messages into a single message. A resequencer works like a splitter, but does not process the messages in any way; it simply releases the messages to downstream components in a particular order. These are the different components available for controlling message flows in Spring Integration. They will all be discussed in this chapter. This chapter will also discuss simplifying the configuration using a message handler chain.
Messaging is inherently stateless. Spring Integration lets you work with the allusion of state by propagating headers from endpoint to endpoint. This lets you make local decisions, to act in the integration flow with the knowledge of the state of any given message at any given time, but it does not afford you the big-picture view of a directed process. This is where a workflow steps in. Workflow and how to use a workflow engine with Spring Integration is the last topic in this chapter.
Message Flow Patterns
Message routing is simple: specific data will only go to particular endpoints based on the payload or metadata. For example, a stock market data feed system will typically handle a few dozen types of market instruments whose routes are negotiated in terms of market sector, equity type, and region. This is where a message router can be leveraged. Filtering provides a way to gate the flow of messages based on some condition, which can be very useful as well. This is similar to TCP/IP where firewalls can provide deep-packet inspection to selectively meter traffic.
Enterprise applications with many discrete datasets may need to process a large amount of information where sending an entire set of data to one location for processing is inefficient. Partitionable data can be efficiently processed by splitting it and processing the pieces.
Let's look at some of the common types of routing.
Router
Routing is one of the most common patterns in data processing today. Data at every level—protocol suites all the way up to full blown APIs—all provide a way to move data in different ways based on conditions. In Spring Integration, a router can do things like forward messages to multiple endpoints or determine which from among many is to receive a message.
Filter
A message filter complements a router in determining whether an incoming message is to be forwarded to a channel or not. The logic is simply stated as “forward, or don't forward” based on evaluative logic declared in configuration or custom code. Traditionally, filters are put between channels with a high message flow where the need to reduce the number of messages is necessary.
Splitter
A splitter is a component that takes a single message and breaks it into multiple individual messages. An example of where this might be useful is an order processing system where a single order contains many line items that describe products made by different companies. Identifying the line item and the corresponding vendor will allow the splitter to create an individual message for each company. Thus, using a splitter enables a seamless way to direct the orders to a specific vendor.
Aggregator
An aggregator component accepts multiple related messages and then assembles them into a single message. Its job is the inverse of the splitter, as it is common to find an aggregator downstream of a splitter. The aggregator uses a construct known as correlation strategy to determine related messages within a group. The process that gives indication of a complete group is known as the completion strategy. For example, through a common property (e.g. order ID), a completion condition may be identified that causes an aggregator to compile a new message. In this case, a delivery-ready message for a product order may only be created once all collaborating vendors have produced order-procurement messages in response to an order-request. The message sent by the aggregator may further the order down the pipeline. Spring Integration provides a number of strategies to achieve this efficiently and simply. In addition, you may also define your own.
Resequencer
A resequencer consumes many correlated messages and reassigns the order in which they are delivered. It is similar to the aggregator in that the messages consumed belong to some correlation group; however, it differs where message delivery is taken into consideration. While an aggregator combines messages to form a single message, a resequencer simply reorders messages to allow consistent consumption on the downstream message endpoint.
Message Flows Using Spring Integration
Let's look at how Spring Integration implements the common message flow patterns. Examples will be provided for each of the patterns. A known list of channels may be specified for a router where the incoming Message<T> may be passed. This means that the process flow may be changed conditionally, and it also means that a message may be forwarded to as many (or as few) channels as desired. The org.springframework.integration.router package provides several convenient router implementations, such as payload type–based routing PayloadTypeRouter and routing to a list of channels RecipientListRouter.
For example, imagine a processing pipeline in which investment instruments are routed depending on their type, such as stocks or bonds. When each instrument is finally processed, specific fields may get added that are relevant to that instrument type. The domain object that represents each investment is shown in Listing 8–1.
Listing 8–1. Investment Domain Object
package com.apress.prospringintegration.messageflow.domain;


public class MarketItem {


    String type;

    String symbol;

    String description;

    String price;

    String openPrice;


    public MarketItem() {

    }


    // setters and getters removed for brevity

}
For testing purposes, a utility class is created to generate a list of MarketItems that may be sent to the message channel. The class is shown in Listing 8–2.
Listing 8–2. Utility Class for Generating MarketItem Instances
package com.apress.prospringintegration.messageflow.domain;


import org.springframework.stereotype.Component;


import java.util.ArrayList;

import java.util.List;


@Component

public class MarketItemCreator {


    public List<MarketItem> getMarketItems() {

        List<MarketItem> marketItems = new ArrayList<MarketItem>();


        MarketItem marketItem = new MarketItem();

        marketItem.setSymbol("IBM");

        marketItem.setDescription("International Business Machines");

        marketItem.setOpenPrice("130.00");

        marketItem.setPrice("135.00");

        marketItem.setType("stock");

        marketItems.add(marketItem);
        marketItem = new MarketItem();

        marketItem.setSymbol("PBNDXX");

        marketItem.setDescription("A Par Bond");

        marketItem.setOpenPrice("50.00");

        marketItem.setPrice("55.00");

        marketItem.setType("bond");

        marketItems.add(marketItem);


        marketItem = new MarketItem();

        marketItem.setSymbol("MUFX");

        marketItem.setDescription("Mutual Bonds");

        marketItem.setOpenPrice("50.00");

        marketItem.setPrice("55.00");

        marketItem.setType("bond");

        marketItems.add(marketItem);


        marketItem = new MarketItem();

        marketItem.setSymbol("stock");

        marketItem.setDescription("Intel Corp.");

        marketItem.setOpenPrice("130.00");

        marketItem.setPrice("135.00");

        marketItem.setType("stock");

        marketItems.add(marketItem);


        return marketItems;

    }

}
The router element makes defining a router as simple as specifying an input channel and a router implementation bean. As with other Spring Integration components, routing can be implemented directly using Spring Integration's annotation support with a @Router annotated method on any plain old Java object (POJO). This annotation expects the evaluation result of either a string for the channel name, a collection of names of MessageChannels, or a single MessageChannel. An example of a custom router component is shown in Listing 8–3. The message will be passed to the message channel with the name matching the MarketItem property type.
Listing 8–3. Implementing a Router using @Router
package com.apress.prospringintegration.messageflow.router;


import com.apress.prospringintegration.messageflow.domain.MarketItem;

import org.springframework.integration.annotation.Router;

import org.springframework.stereotype.Component;


@Component

public class MarketItemTypeRouter {


    @Router

    public String route(MarketItem item) {


        String channelId = item.getType();

        return channelId;

    }

}
The Spring configuration for the router example is shown in Listing 8–4. The router determines the outbound message destination based on the router component marketItemTypeRouter.
Listing 8–4. Spring Configuration for router-item-type.xml
<?xml version="1.0" encoding="UTF-8"?>

<beans xmlns="http://www.springframework.org/schema/beans"

       xmlns:xsi="http://www.w3.org/2001/XMLSchema-instance"

       xmlns:int="http://www.springframework.org/schema/integration"

       xmlns:context="http://www.springframework.org/schema/context"

       xsi:schemaLocation="http://www.springframework.org/schema/beans

          http://www.springframework.org/schema/beans/spring-beans-3.0.xsd

    http://www.springframework.org/schema/integration

    http://www.springframework.org/schema/integration/spring-integration-2.0.xsd

    http://www.springframework.org/schema/context

    http://www.springframework.org/schema/context/spring-context-3.0.xsd">


  <context:component-scan

      base-package="com.apress.prospringintegration.messageflow.router"/>

  <context:component-scan

      base-package="com.apress.prospringintegration.messageflow.domain"/>


  <int:channel id="marketItemChannel"/>


  <int:channel id="stock"/>

  <int:channel id="bond"/>


  <int:router input-channel="marketItemChannel" ref="marketItemTypeRouter"/>


  <int:service-activator input-channel="stock" ref="stockRegistrar"/>


  <int:service-activator input-channel="bond" ref="bondRegistrar"/>


</beans>
MarketItem message payloads with type stock will be sent to the service activator stockRegistrar and message payloads with the type bond will be sent to the service activator bondRegistrar. The two service activators shown in Listings 8–5 and 8–6 simply log the MarketItemdescription.
Listing 8–5. Service Activator for Type Stock
package com.apress.prospringintegration.messageflow.domain;


import com.apress.prospringintegration.messageflow.domain.MarketItem;

import org.springframework.integration.annotation.ServiceActivator;

import org.springframework.stereotype.Component;


@Component

public class StockRegistrar {


    @ServiceActivator

    public void registerStock(MarketItem item) {

        System.out.println("Registering stock: " + item.getDescription());

    }

}
Listing 8–6. Service Activator for Type Bond
package com.apress.prospringintegration.messageflow.domain;


import com.apress.prospringintegration.messageflow.domain.MarketItem;

import org.springframework.integration.annotation.ServiceActivator;

import org.springframework.stereotype.Component;


@Component

public class BondRegistrar {


    @ServiceActivator

    public void registerBond(MarketItem item) {

        System.out.println("Registering bond: " + item.getDescription());

    }

}
This example router may be run with the main class shown in Listing 8–7. The main class creates the Spring context and obtains a reference to the message channel marketItemChannel and the MarketItemCreator utility class used for creating a sample set of MarketItems. The messages are sent to the channel and routed based on the type property.
Listing 8–7. Main Class for Router Example
package com.apress.prospringintegration.messageflow.router;


import com.apress.prospringintegration.messageflow.domain.MarketItem;

import com.apress.prospringintegration.messageflow.domain.MarketItemCreator;

import org.springframework.context.ApplicationContext;

import org.springframework.context.support.ClassPathXmlApplicationContext;

import org.springframework.integration.MessageChannel;

import org.springframework.integration.support.MessageBuilder;


public class MainItemTypeRouter {

    public static void main(String[] args) throws Exception {

        ApplicationContext context =

                new ClassPathXmlApplicationContext("router-item-type.xml");


        MessageChannel channel =

                context.getBean("marketItemChannel", MessageChannel.class);

        MarketItemCreator marketItemCreator =

                context.getBean("marketItemCreator", MarketItemCreator.class);


        for (MarketItem marketItem : marketItemCreator.getMarketItems()) {

            channel.send(MessageBuilder.withPayload(marketItem).build());

        }

    }

}
A router may also be defined through a SpEL expression that will evaluate to either a collection of channel names or a single one, like so:
<router input-channel="marketItemChannel" expression="payload.getType()"/>
These samples present two possibilities for providing content-based routing. Both methods are very powerful ways to expose routing to your application because they keep routing logic to a minimum. The first example uses a @Router annotated method on an ordinary POJO that expects a MarketItem instance. The MarketItem.type property value is used to determine the destination channel name, thus stock or bond.
The second router exposes an expression-based router, which utilizes a SpEL evaluation to compute the destination channel name. In this way, you need not provide code for simple references that can be evaluated with SpEL for the next step, whether it is a message channel or endpoint.
Dynamic Expression–Based Routing
Instead of standard routing using a @Router annotation or any one of the common implementations defined in the org.springframework.integration.router package, you may optionally specify a resource bundle–based router expression through the expression element. This enables dynamic routing that can be configured simply by modifying a property value in the resource bundle or properties file. Expression routing requires defining a bean of the typeorg.springframework.integration.expression.ReloadableResourceBundleExpressionSource. This bean exposes a resource bundle to your component for property extraction and requires two properties to be set: the basename that will hold reference to the expression, and cacheSeconds that defines how often to reload the resource for updates so that expressions can be modified. TheReloadableResourceBundleExpressionSource instance is define using Java configuration, as shown in Listing 8–8.
Listing 8–8. Java Configuration for Dynamic Router
package com.apress.prospringintegration.messageflow.router;


import org.springframework.context.annotation.Bean;

import org.springframework.context.annotation.Configuration;

import org.springframework.integration.expression.ReloadableResourceBundleExpressionSource;


@Configuration

public class RouterConfiguration {


    @Bean

    public ReloadableResourceBundleExpressionSource reloadableRouteExpressions() {

        ReloadableResourceBundleExpressionSource reloadableRouteExpressions =

                new ReloadableResourceBundleExpressionSource();

        reloadableRouteExpressions.setBasename("router-expressions");

        reloadableRouteExpressions.setCacheSeconds(10);

        return reloadableRouteExpressions;

    }

}
The Spring configuration for using a dynamic expression–based router is shown in Listing 8–9. This configuration is identical to the previous example in Listing 8–4 except for the additional expression element.
Listing 8–9. Spring Configuration for Router Using Resources-Based Expression (router-dynamic.xml)
<?xml version="1.0" encoding="UTF-8"?>

<beans xmlns="http://www.springframework.org/schema/beans"

       xmlns:xsi="http://www.w3.org/2001/XMLSchema-instance"
       xmlns:int="http://www.springframework.org/schema/integration"

       xmlns:context="http://www.springframework.org/schema/context"

       xsi:schemaLocation="http://www.springframework.org/schema/beans

          http://www.springframework.org/schema/beans/spring-beans-3.0.xsd

    http://www.springframework.org/schema/context

    http://www.springframework.org/schema/context/spring-context-3.0.xsd

    http://www.springframework.org/schema/integration

    http://www.springframework.org/schema/integration/spring-integration-2.0.xsd">


  <context:component-scan

      base-package="com.apress.prospringintegration.messageflow.router"/>

  <context:component-scan

      base-package="com.apress.prospringintegration.messageflow.domain"/>


  <int:channel id="marketItemChannel"/>


  <int:channel id="stock"/>

  <int:channel id="bond"/>


  <int:router input-channel="marketItemChannel">

    <int:expression key="route-list" source="reloadableRouteExpressions"/>

  </int:router>


  <int:service-activator input-channel="stock" ref="stockRegistrar"/>


  <int:service-activator input-channel="bond" ref="bondRegistrar"/>


</beans>
![]() Note The
Note The expression subelement is defined as an element decorator and can be applied to any router, aggregator, filter, or splitter elements.
When defining a router for use with resource bundles, the actual property key must be specified through the key attribute of the expression element. This will be used to identify the expression that will get evaluated to produce a channel name. To define the resource bundle, one or more name/value pairs are needed that identify the desired expressions. Since you declared property basename called router-expressions, you will need to create a file called router-expressions.properties, as shown in Listing 8–10, and place it on the classpath.
Listing 8–10. Expression Indicating Destination Channel Based on ITEM_TYPE Header Attribute router-expresions.properties
route-list=headers.ITEM_TYPE
The example in Listing 8–10 will route the message based on the header ITEM_TYPE. The main class for this example is shown in Listing 8–11. This main class is similar to the previous example in Listing 8–7 except that MarketItem type is copied to the header ITEM_TYPE to properly route the message. What is significant about this example is that the routing rule may be changed dynamically by simple modifying the properties file.
Listing 8–11. Main Class for Dynamic Expression–Based Routing
package com.apress.prospringintegration.messageflow.router;


import com.apress.prospringintegration.messageflow.domain.MarketItem;

import com.apress.prospringintegration.messageflow.domain.MarketItemCreator;

import org.springframework.context.ApplicationContext;

import org.springframework.context.support.ClassPathXmlApplicationContext;

import org.springframework.integration.MessageChannel;

import org.springframework.integration.support.MessageBuilder;


public class MainDynamicRouter {

    public static void main(String[] args) throws Exception {

        ApplicationContext context =

                new ClassPathXmlApplicationContext("router-dynamic.xml");


        MessageChannel channel =

                context.getBean("marketItemChannel", MessageChannel.class);

        MarketItemCreator marketItemCreator =

                context.getBean("marketItemCreator", MarketItemCreator.class);


        for (MarketItem marketItem : marketItemCreator.getMarketItems()) {

            channel.send(MessageBuilder.withPayload(marketItem)

                    .setHeader("ITEM_TYPE", marketItem.getType()).build());

        }

    }


}
Recipient-List Router
The recipient-list router forwards messages to a known or inferred collection of recipient channels. The recipient-list router may be configured using the recipient-list-router namespace element supported by Spring Integration. For example, you may want a recipient-list router that forwards MarketItems to one channel for database persistence, and another to the stock channel for dissemination to downstream clients listening for market data updates of a particular kind. In the Spring configuration shown in Listing 8–12, all messages will go to the bondRegistrar service activator representing a persistence endpoint, but only the messages with the type stock will go to the stockRegistrar service activator.
Listing 8–12. Spring Configuration for Recipient-List Router (router-recipientlist.xml)
<?xml version="1.0" encoding="UTF-8"?>

<beans xmlns="http://www.springframework.org/schema/beans"

       xmlns:xsi="http://www.w3.org/2001/XMLSchema-instance"

       xmlns:int="http://www.springframework.org/schema/integration"

       xmlns:context="http://www.springframework.org/schema/context"

       xsi:schemaLocation="http://www.springframework.org/schema/beans

    http://www.springframework.org/schema/beans/spring-beans-3.0.xsd

    http://www.springframework.org/schema/integration

    http://www.springframework.org/schema/integration/spring-integration-2.0.xsd

    http://www.springframework.org/schema/context

    http://www.springframework.org/schema/context/spring-context.xsd">
  <context:component-scan

      base-package="com.apress.prospringintegration.messageflow.router"/>

  <context:component-scan

      base-package="com.apress.prospringintegration.messageflow.domain"/>


  <int:channel id="marketItemChannel"/>


  <int:channel id="stockChannel"/>

  <int:channel id="persist"/>


  <int:recipient-list-router input-channel="marketItemChannel">

    <int:recipient channel="stockChannel"

                   selector-expression="payload.type.equals('stock')"/>

    <int:recipient channel="persist"/>

  </int:recipient-list-router>


  <int:service-activator input-channel="stockChannel" ref="stockRegistrar"/>


  <int:service-activator input-channel="persist" ref="bondRegistrar"/>


</beans>
Note that the selector-expression will default to true should the expression be un-evaluable or undefined. That is, if payload.type does not exist in the message being evaluated, then the expression will default to true. Messages will always get sent to adeclared outbound channel.
The recipient-list router may be run using the same main class as the dynamic router. Change the referenced Spring configuration file to router-recipientlist.xml. Only the MarketItem with the type stock will go to the stockRegistrar. All MarketItems will go to the bondRegistrar.he bondRegistrar.
Filters
Filters are used to regulate the type of message traffic going to downstream components and have such benefits as limiting bandwidth consumption. Spring Integration enables filtering using the org.springframework.integration.core.MessageSelector interface that exposes a single method called accept. This method evaluates to a boolean based on the implementation code. Returning true will forward the message to the output channel. Returning false will cause the message to be dropped. In the example shown in Listing 8–13, a simple MarketItemFilter filter is defined to only accept stock type of MarketItem with the type stock.
Listing 8–13. Implementation of the Filter Using MessageSelector
package com.apress.prospringintegration.messageflow.filter;


import com.apress.prospringintegration.messageflow.domain.MarketItem;

import org.springframework.integration.Message;

import org.springframework.integration.core.MessageSelector;

import org.springframework.stereotype.Component;


@Component

public class MessageSelectorStockItemFilter implements MessageSelector {
    @Override

    public boolean accept(Message<?> message) {

        MarketItem item = (MarketItem) message.getPayload();

        return (item != null && item.getType().equals("stock"));

    }

}
The Spring configuration for the MessageSelector example is shown in Listing 8–14. This filter may be used to allow only the MarketItem message with the type stock to be forwarded to the stockRegistrar service activator.
Listing 8–14. Spring Configuration for a MessageSelector Type Filter(filter-selector.xml)
<?xml version="1.0" encoding="UTF-8"?>

<beans xmlns="http://www.springframework.org/schema/beans"

       xmlns:xsi="http://www.w3.org/2001/XMLSchema-instance"

       xmlns:int="http://www.springframework.org/schema/integration"

       xmlns:context="http://www.springframework.org/schema/context"

       xsi:schemaLocation="http://www.springframework.org/schema/beans

    http://www.springframework.org/schema/beans/spring-beans-3.0.xsd

    http://www.springframework.org/schema/integration

    http://www.springframework.org/schema/integration/spring-integration-2.0.xsd

    http://www.springframework.org/schema/context

    http://www.springframework.org/schema/context/spring-context-3.0.xsd">


  <context:component-scan

      base-package="com.apress.prospringintegration.messageflow.filter"/>

  <context:component-scan

      base-package="com.apress.prospringintegration.messageflow.domain"/>


  <int:filter ref="messageSelectorStockItemFilter"

              input-channel="marketItemChannel"

              output-channel="filteredItemsChannel"/>


  <int:channel id="filteredItemsChannel"/>


  <int:service-activator input-channel="filteredItemsChannel" ref="stockRegistrar"/>


</beans>
The message selector filter example may be run with the main class shown in Listing 8–15. The main class creates the Spring context and obtains a reference to the message channel marketItemChannel and the MarketItemCreator utility class used to create a sample set of MarketItems. The messages are sent to the channel and filtered based on the type property. Only MarketItems with the type stock will be allowed through.
Listing 8–15. Main Class for MessageSelector Filter
package com.apress.prospringintegration.messageflow.filter;


import com.apress.prospringintegration.messageflow.domain.MarketItem;

import com.apress.prospringintegration.messageflow.domain.MarketItemCreator;

import org.springframework.context.ApplicationContext;

import org.springframework.context.support.ClassPathXmlApplicationContext;

import org.springframework.integration.MessageChannel;
import org.springframework.integration.support.MessageBuilder;


public class MainMessageSelectorItemFilter {

    public static void main(String[] args) throws Exception {

        ApplicationContext context =

                new ClassPathXmlApplicationContext("filter-selector.xml");


        MessageChannel channel =

                context.getBean("marketItemChannel", MessageChannel.class);

        MarketItemCreator marketItemCreator =

                context.getBean("marketItemCreator", MarketItemCreator.class);


        for (MarketItem marketItem : marketItemCreator.getMarketItems()) {

            channel.send(MessageBuilder.withPayload(marketItem).build());

        }

    }

}
Spring Integration also supports a @Filter annotation to support message filters. The @Filter annotation expects a method that evaluates a boolean return type and accepts one of the following, similar to the other Spring Integration strategic interfaces:
- An argument type of parameterized message.
- The type expected within the payload.
- Some parameterized header variant, as shown in Listing 8–16.
The example POJO shown in Listing 8–16 exposes the @Filter annotated filtering method. When using both a MessageSelector and @Filter annotated method in the same class, the MessageSelectoraccept method will take precedence. It is recommended that @Filter method exist within a separate class.
Listing 8–16. Implementing a Filter Using @Filter Annotation
package com.apress.prospringintegration.messageflow.filter;


import com.apress.prospringintegration.messageflow.domain.MarketItem;

import org.springframework.integration.annotation.Filter;

import org.springframework.integration.annotation.Header;

import org.springframework.stereotype.Component;


@Component

public class MarketItemFilter {


    @Filter

    public boolean acceptViaHeader(@Header("ITEM_TYPE") String itemType) {

        return itemType.equals("stock");

    }

}
The Spring configuration file using the annotated filter is shown in Listing 8–17. The header ITEM_TYPE must be set to stock for the message to be forwarded through the filter.
Listing 8–17. Alternate Filter Declaration Using the Annotated Filter Class (filter-item.xml)
<?xml version="1.0" encoding="UTF-8"?>

<beans xmlns="http://www.springframework.org/schema/beans"

       xmlns:xsi="http://www.w3.org/2001/XMLSchema-instance"

       xmlns:int="http://www.springframework.org/schema/integration"

       xmlns:context="http://www.springframework.org/schema/context"

       xsi:schemaLocation="http://www.springframework.org/schema/beans

          http://www.springframework.org/schema/beans/spring-beans-3.0.xsd

    http://www.springframework.org/schema/integration

    http://www.springframework.org/schema/integration/spring-integration-2.0.xsd

    http://www.springframework.org/schema/context

    http://www.springframework.org/schema/context/spring-context-3.0.xsd">


  <context:component-scan

      base-package="com.apress.prospringintegration.messageflow.filter"/>

  <context:component-scan

      base-package="com.apress.prospringintegration.messageflow.domain"/>


  <int:filter ref="marketItemFilter"

              input-channel="marketItemChannel"

              output-channel="filteredItemsChannel"/>


  <int:channel id="filteredItemsChannel"/>


  <int:service-activator ref="stockRegistrar" input-channel="filteredItemsChannel"/>


</beans>
The main class for this example is shown in Listing 8–18. This main class is similar to the previous example in Listing 8–15 except that MarketItem type is copied to the header ITEM_TYPE to properly route the message. Again, only MarketItems with the type stock will be allowed through.
Listing 8–18. Main Class for Annotated Filter Class
package com.apress.prospringintegration.messageflow.filter;


import com.apress.prospringintegration.messageflow.domain.MarketItem;

import com.apress.prospringintegration.messageflow.domain.MarketItemCreator;

import org.springframework.context.ApplicationContext;

import org.springframework.context.support.ClassPathXmlApplicationContext;

import org.springframework.integration.MessageChannel;

import org.springframework.integration.support.MessageBuilder;


public class MainItemFilter {

    public static void main(String[] args) throws Exception {

        ApplicationContext context = new ClassPathXmlApplicationContext("filter-item.xml");


        MessageChannel channel =

                context.getBean("marketItemChannel", MessageChannel.class);

        MarketItemCreator marketItemCreator =

                context.getBean("marketItemCreator", MarketItemCreator.class);


        for (MarketItem marketItem : marketItemCreator.getMarketItems()) {
            channel.send(MessageBuilder.withPayload(marketItem)

                    .setHeader("ITEM_TYPE", marketItem.getType()).build());

        }

    }

}
Filtering logic containing complex lookups often lend themselves to Java implementations. However, in the case of simple evaluations as in the examples thus far, you may opt for a more streamlined approach of using SpEL expressions to define the evaluation logic. By using the expression attribute of the filter element, you can control through SpEL expressions how payloads and/or headers are interpreted to produce a Boolean result that filters your messages. An example using SpEL is shown in Listing 8–19.
Listing 8–19. Message Filtering Using Spring Expressions (filter-expression.xml)
<?xml version="1.0" encoding="UTF-8"?>

<beans xmlns="http://www.springframework.org/schema/beans"

       xmlns:xsi="http://www.w3.org/2001/XMLSchema-instance"

       xmlns:int="http://www.springframework.org/schema/integration"

       xmlns:context="http://www.springframework.org/schema/context"

       xsi:schemaLocation="http://www.springframework.org/schema/beans

    http://www.springframework.org/schema/beans/spring-beans-3.0.xsd

    http://www.springframework.org/schema/integration

    http://www.springframework.org/schema/integration/spring-integration-2.0.xsd

    http://www.springframework.org/schema/context

    http://www.springframework.org/schema/context/spring-context-3.0.xsd">


  <context:component-scan

      base-package="com.apress.prospringintegration.messageflow.filter"/>

  <context:component-scan

      base-package="com.apress.prospringintegration.messageflow.domain"/>


  <int:channel id="filteredItemsChannel"/>


  <int:filter input-channel="marketItemChannel"

              output-channel="filteredItemsChannel"

              expression="headers.containsKey('ITEM_TYPE') and

 headers.ITEM_TYPE.equals('stock')"

              throw-exception-on-rejection="false" />


  <int:service-activator input-channel="filteredItemsChannel" ref="stockRegistrar" />


</beans>
Listing 8–19 evaluates the header ITEM_TYPE by first checking that the ITEM_TYPE header is available. If the check was not performed and the ITEM_TYPE header was absent, then SpEL would have thrown an unsightly exception message in the middle of operation. This makes it important for SpEL expressions to be verified for their effectiveness. Limit ambiguity by restricting expressions to only the simplest terms possible—header evaluation and/or simple POJO or String payload evaluation.
The Spring expression filter example may be run using the same main class as the annotated filter example. Change the reference Spring configuration file to filter-expression.xml. Again, only MarketItems with the type stock will be allowed through.
Dynamic Filtering
In addition to being easier to manage, Spring Integration enables the expression element within filter that enables using filtering expressions to dynamically control filtering through resource bundles. Also, this allows configuration of filter logic to be defined in a properties file. An administrator may change the filtering logic without taking down the whole system.
As with the router, dynamic filtering uses an instance of ReloadableResourceBundleExpressionSource. This example will be configured in the exact same way as the router example. Thus, the filtering decision logic is configured using properties files or other resource bundle implementations. The Spring configuration for a dynamic filter is shown in Listing 8–20.
Listing 8–20. Spring Configuration for Reloadable Resource (Expression)-Based Filter (filter-dynamic.xml)
<?xml version="1.0" encoding="UTF-8"?>

<beans xmlns="http://www.springframework.org/schema/beans"

       xmlns:xsi="http://www.w3.org/2001/XMLSchema-instance"

       xmlns:int="http://www.springframework.org/schema/integration"

       xmlns:context="http://www.springframework.org/schema/context"

       xsi:schemaLocation="http://www.springframework.org/schema/beans

          http://www.springframework.org/schema/beans/spring-beans-3.0.xsd

    http://www.springframework.org/schema/context

    http://www.springframework.org/schema/context/spring-context-3.0.xsd

    http://www.springframework.org/schema/integration

    http://www.springframework.org/schema/integration/spring-integration-2.0.xsd">


  <context:component-scan

      base-package="com.apress.prospringintegration.messageflow.filter"/>

  <context:component-scan

      base-package="com.apress.prospringintegration.messageflow.domain"/>


  <!--  Spel resource defined filtering (Dynamic Filtering)-->

  <int:filter input-channel="marketItemChannel"

              output-channel="filteredItemsChannel">

    <int:expression key="filter.byType" source="filterRules"/>

  </int:filter>


  <int:channel id="filteredItemsChannel"/>

  <int:service-activator ref="stockRegistrar"

                         input-channel="filteredItemsChannel"/>


</beans>
The properties file using the dynamic filter is shown in Listing 8–21. The filter will only allow a message with the header ITEM_TYPE set to stock to be forwarded.
Listing 8–21. Expression-Based Filtration via Resource Bundle filter-rules.properties
filter.byType= headers.containsKey('ITEM_TYPE') and headers.ITEM_TYPE.equals('stock')
The Spring dynamic filter example may be run using the same main class as the annotated filter example. Change the reference Spring configuration file to filter-dynamic.xml. Again, only MarketItems with the type stock will be allowed through.
Splitter
It is often useful to divide large payloads into separate messages with separate processing flows. In Spring Integration, this is accomplished by using a splitter component. A splitter takes an input message and splits the message into multiple messages based on custom implementation code. The resultant messages are forwarded to the output channel of the splitter component. For some common cases, Spring Integration comes with splitters that require no customization. One example is a splitter that allows splitting a message based on a SpEL expression, thus enabling a very powerful expression-based splitter.
An application of a splitter could be to handle an incoming message with multiple properties where each of the properties needs to be processed by different downstream components. The configuration of this example is shown in Listing 8–22.
Listing 8–22. Configuration of Message Splitter (splitter.xml)
<?xml version="1.0" encoding="UTF-8"?>

<beans xmlns="http://www.springframework.org/schema/beans"

       xmlns:xsi="http://www.w3.org/2001/XMLSchema-instance"

       xmlns:int="http://www.springframework.org/schema/integration"

       xmlns:context="http://www.springframework.org/schema/context"

       xsi:schemaLocation="http://www.springframework.org/schema/beans

    http://www.springframework.org/schema/beans/spring-beans-3.0.xsd

    http://www.springframework.org/schema/context

    http://www.springframework.org/schema/context/spring-context-3.0.xsd

    http://www.springframework.org/schema/integration

    http://www.springframework.org/schema/integration/spring-integration-2.0.xsd">


  <context:component-scan

      base-package="com.apress.prospringintegration.messageflow.splitter"/>

  <context:component-scan

      base-package="com.apress.prospringintegration.messageflow.domain"/>


  <int:channel id="marketDataInputChannel"/>


  <int:channel id="marketDataSplitterChannel"/>


  <int:splitter input-channel="marketDataInputChannel"

                ref="marketDataSplitter"

                output-channel="marketDataSplitterChannel"/>


  <int:service-activator input-channel="marketDataSplitterChannel"

                         ref="marketDataServiceActivator"/>


</beans>
The configuration file is similar to previous examples except for the addition of the splitter element. The splitter leverages the base class org.springframework.integration.splitter.AbstractMessageSplitter and handles the housekeeping tasks of generating appropriate message header values for CORRELATION_ID, SEQUENCE_SIZE, and SEQUENCE_NUMBER. The CORRELATION_ID is a unique ID for all downstream messages that originated from the same message before the splitter. The SEQUENCE_SIZE is the total number of messages after the splitter and the SEQUENCE_NUMBER is the index of the individual messages after the splitter. These header values are essential when attempting to recompose or aggregate the original message; this will be discussed in more detail later in this chapter.
The Java code is similar to the routers and filters, except that the return type of the method annotated by the @Splitter annotation is of type java.util.Collection<Field>. The incoming message with MarketItem as a payload will be split into a collection of messages with the individual Field instances as the payload. An example of a splitter implementation is shown in Listing 8–23.
Listing 8–23. Implementing a Splitter by the @Splitter Method Annotation
package com.apress.prospringintegration.messageflow.splitter;


import com.apress.prospringintegration.messageflow.domain.Field;

import com.apress.prospringintegration.messageflow.domain.FieldDescriptor;

import com.apress.prospringintegration.messageflow.domain.MarketItem;

import org.springframework.integration.annotation.Splitter;

import org.springframework.stereotype.Component;


import java.util.ArrayList;

import java.util.Collection;

import java.util.List;


@Component

public class MarketDataSplitter {

    /* Splitter that produces individual fields for aggregation */

    @Splitter

    public Collection<Field> splitItem(MarketItem marketItem) {

        List<Field> messages = new ArrayList<Field>();


        Field field = new Field(FieldDescriptor.SYMBOL, marketItem.getSymbol());

        messages.add(field);


        field = new Field(FieldDescriptor.DESC, marketItem.getDescription());

        messages.add(field);


        field = new Field(FieldDescriptor.PRICE, marketItem.getPrice());

        messages.add(field);


        field = new Field(FieldDescriptor.OPEN_PRICE, marketItem.getOpenPrice());

        messages.add(field);


        field = new Field(FieldDescriptor.TYPE, marketItem.getType());

        messages.add(field);


        return messages;

    }

}
The MarketDataSplitter implementation breaks the incoming MarketItem object into individual Field instances based on the MarketItem properties. The Field domain class is shown in Listing 8–24. The Field class maintains a FieldDescriptor, shown in Listing 8–25, which is an enum representing each of the MarketItem properties. The Field class also contains the actual property value. The MarketDataSplitter.split method creates a collection of individual messages for each of the MarketItem properties.
Listing 8–24. Example Data Model for Demonstrating Splitter
package com.apress.prospringintegration.messageflow.domain;


public class Field implements Serializable {

    private static final long serialVersionUID = 1L;


    FieldDescriptor fieldDescriptor;

    String value;


    public Field() {

    }


    public Field(FieldDescriptor fd, String value) {

        this.fieldDescriptor = fd;

        this.value = value;

    }


    // setters and getters removed for brevity


}
Listing 8–25. Example Data Model Enum for Demonstrating Splitter
package com.apress.prospringintegration.messageflow.domain;


public enum FieldDescriptor {


    TYPE(1),

    SYMBOL(2),

    DESC(4),

    OPEN_PRICE(8),

    PRICE(16),

    ALL(1 + 2 + 4 + 8 + 16);


    private final int fieldId;


    FieldDescriptor(int id) {

        this.fieldId = id;

    }


    public int fieldId() {

        return fieldId;

    }


}
To demonstrate how the splitter works, a service activator is created that logs the individual Field instance and header values, as shown in Listing 8–26. This service activator is wired to consume the outbound messages from the splitter.
Listing 8–26. Produces Text Feedback Upon Successful Message Splitting
package com.apress.prospringintegration.messageflow.splitter;


import com.apress.prospringintegration.messageflow.domain.Field;

import org.springframework.integration.annotation.Headers;

import org.springframework.integration.annotation.ServiceActivator;

import org.springframework.stereotype.Component;


import java.text.MessageFormat;

import java.util.Map;


@Component

public class MarketDataServiceActivator {

    @ServiceActivator

    public void handleField(Field dataField, @Headers Map<String, Object> headerMap) {


        System.out.println(MessageFormat

                .format("{0}:{1}", dataField.getFieldDescriptor().toString(),

                        dataField.getValue()));


        for (String key : headerMap.keySet()) {

            Object value = headerMap.get(key);

            System.out.println(MessageFormat

                    .format("header {0}:{1}", key, value));

        }

    }


}
In order to run the example splitter, a main class is created, as shown in Listing 8–27. The main class creates the Spring context and obtains a reference to the message channel marketDataInputChannel and the utility class MarketItemCreator. The MarketItemCreator creates a collection of MarketItem instances and sends them as a message payload to the channel marketDataInputChannel.
Listing 8–27. Running the Splitter Workflow
package com.apress.prospringintegration.messageflow.splitter;


import com.apress.prospringintegration.messageflow.domain.MarketItem;

import com.apress.prospringintegration.messageflow.domain.MarketItemCreator;

import org.springframework.context.ApplicationContext;

import org.springframework.context.support.ClassPathXmlApplicationContext;

import org.springframework.integration.MessageChannel;

import org.springframework.integration.support.MessageBuilder;


public class MainMarketDataSplitter {

    public static void main(String[] args) throws Exception {

        ApplicationContext context =

                new ClassPathXmlApplicationContext("splitter.xml");


        MessageChannel channel =

                context.getBean("marketDataInputChannel", MessageChannel.class);

        MarketItemCreator marketItemCreator =
                context.getBean("marketItemCreator", MarketItemCreator.class);


        for (MarketItem marketItem : marketItemCreator.getMarketItems()) {

            channel.send(MessageBuilder.withPayload(marketItem).build());

        }

    }

}
A message payload is passed in as a MarketItem to the method splitItem. The method must return a collection, an array of type T or a Message<T>; in this case, Collection<Field> is returned. Spring Integration sends each Field instance in the collection as message payload to the output channel marketDataSplitterChannel. Often, messages are split so that the individual pieces can be forwarded to processing that is more focused. Because the individual messages are more manageable, the processing requirements are lowered. This is true in many architectures. For example, map/reduce solution tasks are split, processed in parallel, and then combined or reduced. The fork/join constructs in a BPM system allows control flow to proceed in parallel so that the total work product can be achieved in less time.
In this case, you are breaking a MarketItem into individual properties. The next step will be to reconstruct the complete MarketItem from the Field messages being sent. A separate component is required to help construct this final object: an aggregator that will gather (or aggregate) messages into a single message.
Aggregator
An aggregator is the inverse of a splitter: it combines any number of messages into one and sends it to the output channel. An aggregator collects a series of messages (based on a specified correlation between the messages) and publishes a single message to the components downstream.
Suppose that you are about to receive a series of messages with different information about a product, but you do not know the order in which the messages will come and when they will come. In addition, some of the message data is volatile (such as price). This is similar to a market feed system where the data of known products is always changing, thus maintaining an up-to-date snapshot for use in purchasing is of utmost importance. The purchaser can't bid until she's satisfied with a price. An aggregator facilitates this scenario by enabling the piecemeal construction of the datasets.
A common aggregation strategy concern is how to determine when all aggregates are received and when to commence the aggregation process. Spring Integration provides a few common methods to determine how many messages to read before aggregating the results. By default, the Spring Integration aggregator uses the class org.springframework.integration.aggregator.SequenceSizeReleaseStrategy that simply determines completion based on the total number of message received with the same CORRELATION_ID and unique SEQUENCE_NUMBER versus the SEQUENCE_SIZE message header. The default header value is provided by the splitter, although there is nothing preventing you from creating the header values yourself to determine how many messages the aggregator should look for and the index of the message relative to the expected total count (e.g., 3 of 22).
The next concern is how message groups are identified. There are many techniques available for Spring Integration to use to correlate incoming messages. Spring Integration provides a default correlation strategy usingorg.springframework.integration.aggregator.HeaderAttributeCorrelationStrategy. This correlation strategy uses the value of the header CORRELATION_ID to determine if the messages are part of the same group.
In the splitter example, the MarketItem object was split into the individual properties represented by the Field object. You would now like to take the individual Field messages and reunite them back into the MarketItem object. In this example, you will use the default release strategy and the default correlation strategy. The only custom logic is a POJO with an @Aggregator annotated method expecting a collection of Message<Field> objects. The aggregator method needs to combine the individual Field objects and return a MarketItem instance for further processing downstream. The Spring configuration for the aggregation example is shown in Listing 8–28. It is the same as the splitter example with the additional downstream aggregator.
Listing 8–28. Configuration of an Aggregator Downstream from a Splitter (aggregator.xml)
<?xml version="1.0" encoding="UTF-8"?>

<beans xmlns="http://www.springframework.org/schema/beans"

       xmlns:xsi="http://www.w3.org/2001/XMLSchema-instance"

       xmlns:int="http://www.springframework.org/schema/integration"

       xmlns:context="http://www.springframework.org/schema/context"

       xsi:schemaLocation="http://www.springframework.org/schema/beans

    http://www.springframework.org/schema/beans/spring-beans-3.0.xsd

    http://www.springframework.org/schema/context

    http://www.springframework.org/schema/context/spring-context-3.0.xsd

    http://www.springframework.org/schema/integration

    http://www.springframework.org/schema/integration/spring-integration-2.0.xsd">


  <context:component-scan

      base-package="com.apress.prospringintegration.messageflow.splitter"/>

  <context:component-scan

      base-package="com.apress.prospringintegration.messageflow.aggregator"/>

  <context:component-scan

      base-package="com.apress.prospringintegration.messageflow.domain"/>


  <int:channel id="marketDataInputChannel"/>


  <int:channel id="marketDataSplitterChannel"/>


  <int:channel id="marketDataAggregatorChannel"/>


  <int:splitter input-channel="marketDataInputChannel" ref="marketDataSplitter"

                output-channel="marketDataSplitterChannel"/>


  <int:service-activator input-channel="marketDataSplitterChannel"

                         output-channel="marketDataAggregatorChannel"

                         ref="marketFieldServiceActivator"/>


  <int:aggregator input-channel="marketDataAggregatorChannel"

                  output-channel="marketDataOutputChannel"

                  ref="marketDataAggregator"/>


  <int:service-activator input-channel="marketDataOutputChannel"

                         ref="marketItemServiceActivator"/>


</beans>
The service activator used in the splitter example is modified to return a Field object for the downstream aggregation. The modified service activator is shown in Listing 8–29.
Listing 8–29. Service Activator Modified to Return Field Object
package com.apress.prospringintegration.messageflow.aggregator;


import com.apress.prospringintegration.messageflow.domain.Field;
import org.springframework.integration.annotation.Headers;

import org.springframework.integration.annotation.ServiceActivator;

import org.springframework.stereotype.Component;


import java.text.MessageFormat;

import java.util.Map;


@Component

public class MarketFieldServiceActivator {

    @ServiceActivator

    public Field handleField(Field dataField, @Headers Map<String, Object> headerMap) {


        System.out.println(MessageFormat

                .format("{0}:{1}", dataField.getFieldDescriptor().toString(),

                        dataField.getValue()));


        for (String key : headerMap.keySet()) {

            Object value = headerMap.get(key);

            System.out.println(MessageFormat

                    .format("header {0}:{1}", key, value));

        }


        return dataField;

    }

}
The implementation for MarketItemFieldsAggregator is shown in Listing 8–30. The handleFieldData method takes the collection of Field objects that are used to set the properties of a new MarketItem instance. The MarketItem instance with the properties from the aggregated messages is returned by the handleFieldData method and sent to the output channel.
Listing 8–30. Implementing an Aggregator using @Aggregator
package com.apress.prospringintegration.messageflow.aggregator;


import com.apress.prospringintegration.messageflow.domain.Field;

import com.apress.prospringintegration.messageflow.domain.FieldDescriptor;

import com.apress.prospringintegration.messageflow.domain.MarketItem;

import org.springframework.integration.annotation.Aggregator;

import org.springframework.stereotype.Component;


import java.util.List;


@Component

public class MarketDataAggregator {


    @Aggregator

    public MarketItem handleFieldData(List<Field> fields) {

        MarketItem marketItem = new MarketItem();


        for (Field field : fields) {

            if (field.getFieldDescriptor().equals(FieldDescriptor.TYPE)) {

                marketItem.setType(field.getValue());

            } else if (field.getFieldDescriptor().equals(FieldDescriptor.SYMBOL)) {
                marketItem.setSymbol(field.getValue());

            } else if (field.getFieldDescriptor().equals(FieldDescriptor.PRICE)) {

                marketItem.setPrice(field.getValue());

            } else if (field.getFieldDescriptor().equals(FieldDescriptor.OPEN_PRICE)) {

                marketItem.setOpenPrice(field.getValue());

            } else if (field.getFieldDescriptor().equals(FieldDescriptor.DESC)) {

                marketItem.setDescription(field.getValue());

            }

        }


        return marketItem;

    }

}
The service activator MarketItemServiceActivator (shown in Listing 8–31) is place at the end of the message flow to see that the MarketItem instance contains all of the aggregated Field messages. The publishItem method simply logs all of the property values.
Listing 8–31. Allows Visualization of Aggregation Products
package com.apress.prospringintegration.messageflow.aggregator;


import com.apress.prospringintegration.messageflow.domain.MarketItem;

import org.springframework.integration.annotation.ServiceActivator;

import org.springframework.stereotype.Component;


import java.text.MessageFormat;


@Component

public class MarketItemServiceActivator {


    @ServiceActivator

    public void publishItem(MarketItem m) {

        System.out.println(MessageFormat.format("Aggregated on:
" +

                "Symbol: {0}
" +

                "Type: {1}
" +

                "Desc: {2}
" +

                "Price: {3}
",

                m.getSymbol(), m.getType(), m.getDescription(), m.getPrice()));

    }


}
The main class for running the aggregator example is shown in Listing 8–32. The main class is identical to the splitter example except for referring to the aggregator.xml Spring configuration file. The Spring configuration file has the addition aggregator element wired to the MarketItemServiceActivator service activator to see the aggregated MarketItem instance.
Listing 8–32. Executing the Aggregator Example
package com.apress.prospringintegration.messageflow.aggregator;


import com.apress.prospringintegration.messageflow.domain.MarketItem;

import com.apress.prospringintegration.messageflow.domain.MarketItemCreator;

import org.springframework.context.ApplicationContext;
import org.springframework.context.support.ClassPathXmlApplicationContext;

import org.springframework.integration.MessageChannel;

import org.springframework.integration.support.MessageBuilder;


public class MainMarketDataAggregator {

    public static void main(String[] args) throws Exception {

        ApplicationContext context =

                new ClassPathXmlApplicationContext("aggregator.xml");


        MessageChannel channel =

                context.getBean("marketDataInputChannel", MessageChannel.class);

        MarketItemCreator marketItemCreator =
                context.getBean("marketItemCreator", MarketItemCreator.class);


        for (MarketItem marketItem : marketItemCreator.getMarketItems()) {

            channel.send(MessageBuilder.withPayload(marketItem).build());

        }

    }

}
Maintaining MessageGroup State
Aggregators bear the responsibility for holding a reference to every un-released message within a message group in memory. This is the behavior when using the default org.springframework.integration.store.MessageGroupStore implementation org.springframework.integration.store.SimpleMessageStore. SimpleMessageStore uses a java.util.Map implementation to store messages. Spring Integration also provides the org.springframework.integration.jdbc.JdbcMessageStore that allows persisting message data in relational databases. Since the messages are maintain in a database, they are not lost if, for whatever reason, the Spring Integration application were to go down. In addition, the integration process could be spread across several instances since the state is maintained in an external database. This will be discussed in more detail in Chapter 16.
![]() Note All message payloads using the
Note All message payloads using the JdbcMessageStore must implement the interface Serializable.
The aggregator example may be modified to use the JdbcMessageStore, as shown in Listing 8–33.
Listing 8–33. Enabling Enhanced MessageGroup for Persistence Aggregator (jdbc.xml)
<?xml version="1.0" encoding="UTF-8"?>

<beans xmlns="http://www.springframework.org/schema/beans"

       xmlns:xsi="http://www.w3.org/2001/XMLSchema-instance"

       xmlns:int="http://www.springframework.org/schema/integration"

       xmlns:context="http://www.springframework.org/schema/context"

       xmlns:jdbc="http://www.springframework.org/schema/jdbc"

       xsi:schemaLocation="http://www.springframework.org/schema/beans

          http://www.springframework.org/schema/beans/spring-beans-3.0.xsd

    http://www.springframework.org/schema/context
    http://www.springframework.org/schema/context/spring-context-3.0.xsd

    http://www.springframework.org/schema/integration

    http://www.springframework.org/schema/integration/spring-integration-2.0.xsd

    http://www.springframework.org/schema/jdbc

    http://www.springframework.org/schema/jdbc/spring-jdbc-3.0.xsd">


  <context:component-scan

      base-package="com.apress.prospringintegration.messageflow.splitter"/>

  <context:component-scan

      base-package="com.apress.prospringintegration.messageflow.aggregator"/>

  <context:component-scan

      base-package="com.apress.prospringintegration.messageflow.domain"/>

  <context:component-scan

      base-package="com.apress.prospringintegration.messageflow.messagegroup"/>


  <int:channel id="marketDataInputChannel"/>


  <int:channel id="marketDataSplitterChannel"/>


  <int:channel id="marketDataAggregatorChannel"/>


  <int:splitter input-channel="marketDataInputChannel" ref="marketDataSplitter"

                output-channel="marketDataSplitterChannel"/>


  <int:service-activator input-channel="marketDataSplitterChannel"

                         output-channel="marketDataAggregatorChannel"

                         ref="marketFieldServiceActivator"/>


  <int:aggregator input-channel="marketDataAggregatorChannel"

                  output-channel="marketDataOutputChannel"

                  ref="marketDataAggregator"

                  message-store="jdbcMessageGroupStore"/>


  <int:service-activator input-channel="marketDataOutputChannel"

                         ref="marketItemServiceActivator"/>


  <jdbc:embedded-database id="dataSource" type="H2">

    <jdbc:script

        location="classpath:org/springframework/integration/jdbc/schema-h2.sql"/>

  </jdbc:embedded-database>


</beans>
The database is initialized by providing a schema setup script to jdbc:script element for the data source. In this example, the H2 database is used in the embedded mode for simplicity. The setup scripts are available in the org.springframework.integration.jdbc package. There are a number of schemas available for most database vendors including MySql, Oracle, Sybase, and Postgres. The message group store is configured using Java configuration, as shown in Listing 8–34. The main class for the previous aggregator example may be used to run this example; simply change the Spring configuration file to aggregator-jdbc.xml.
Listing 8–34. Java Configuration for Messsage Group Store
package com.apress.prospringintegration.messageflow.messagegroup;


import org.springframework.beans.factory.annotation.Autowired;

import org.springframework.context.annotation.Bean;

import org.springframework.context.annotation.Configuration;

import org.springframework.integration.jdbc.JdbcMessageStore;


import javax.sql.DataSource;


@Configuration

public class MessageGroupStoreConfiguration {


    @Autowired

    private DataSource dataSource;


    @Bean

    public JdbcMessageStore jdbcMessageGroupStore() {

        JdbcMessageStore jdbcMessageGroupStore = new JdbcMessageStore(dataSource);

        return jdbcMessageGroupStore;

    }

}
Customizing Aggregation Release Strategy
Aggregation algorithms compute the condition when all the messages are present; in other words, if the all the attributes of a product such as current price, producer, and name are available, this signals that the message group is ready for aggregation. Spring Integration exposes this functionality through the org.springframework.integration.ReleaseStrategy interface that contains the canRelease method. It is used to determine when the aggregation process code can proceed. In most use cases, when defining a custom release strategy, it is not necessary to override the canRelease method directly. Instead, you can implement a @ReleaseStrategy annotated method in any POJO to return true when the aggregation can take place.
An example of a custom release strategy is shown in Listing 8–35. The release strategy method takes a collection of Field instances and checks if all properties are present. When this condition is met, the method returns true. The custom logic uses a bitmask approach.
Listing 8–35. Implementing a Release Strategy using @Release
package com.apress.prospringintegration.messageflow.aggregator;


import com.apress.prospringintegration.messageflow.domain.Field;

import com.apress.prospringintegration.messageflow.domain.FieldDescriptor;

import org.springframework.integration.annotation.ReleaseStrategy;

import org.springframework.stereotype.Component;


import java.util.List;


/**

 * Completion Strategy Bean for determining whether all fields are present

 */

@Component
public class MarketItemFieldCompletion {

    /**

     * Determines whether all fields are present.

     */

    @ReleaseStrategy

    public boolean isFieldComplete(List<Field> fields) {

        int fieldComplete = 0;

        for (Field f : fields) {

            fieldComplete = fieldComplete + f.getFieldDescriptor().fieldId();

        }

        return fieldComplete == (FieldDescriptor.ALL.fieldId());

    }

}
The Spring configuration file for the custom release strategy is identical to the first aggregator example with the addition of the release-strategy element being set to the marketItemFieldCompletion component, as shown in Listing 8–36. Again, this example may be run using the aggregator main class and pointing to the aggregator-release.xml Spring configuration file.
Listing 8–36. Adding a Release-Strategy Element to an Aggregator (aggregator-release.xml)
<?xml version="1.0" encoding="UTF-8"?>

<beans xmlns="http://www.springframework.org/schema/beans"

       xmlns:xsi="http://www.w3.org/2001/XMLSchema-instance"

       xmlns:int="http://www.springframework.org/schema/integration"

       xmlns:context="http://www.springframework.org/schema/context"

       xsi:schemaLocation="http://www.springframework.org/schema/beans

          http://www.springframework.org/schema/beans/spring-beans-3.0.xsd

    http://www.springframework.org/schema/context

    http://www.springframework.org/schema/context/spring-context-3.0.xsd

    http://www.springframework.org/schema/integration

    http://www.springframework.org/schema/integration/spring-integration-2.0.xsd">


  <context:component-scan

      base-package="com.apress.prospringintegration.messageflow.splitter"/>

  <context:component-scan

      base-package="com.apress.prospringintegration.messageflow.aggregator"/>

  <context:component-scan

      base-package="com.apress.prospringintegration.messageflow.domain"/>


  <int:channel id="marketDataInputChannel"/>


  <int:channel id="marketDataSplitterChannel"/>


  <int:channel id="marketDataAggregatorChannel"/>


  <int:splitter input-channel="marketDataInputChannel" ref="marketDataSplitter"

                output-channel="marketDataSplitterChannel"/>


  <int:service-activator input-channel="marketDataSplitterChannel"

                         output-channel="marketDataAggregatorChannel"

                         ref="marketFieldServiceActivator"/>


  <int:aggregator input-channel="marketDataAggregatorChannel"
                  output-channel="marketDataOutputChannel"

                  ref="marketDataAggregator"

                  release-strategy="marketItemFieldCompletion"/>


  <int:service-activator input-channel="marketDataOutputChannel"

                         ref="marketItemServiceActivator"/>


</beans>
Resequencer
Sometimes part of a process chain will take an inordinate amount of time to complete message delivery while other related messages moving through a different part of the process will finish quickly. In order to guarantee that delivery of messages is in a particular order, perhaps because of some business rule such as in an auction house or stock-market bid system where message order is important, a resequencer may be used to insure that messages order is preserved.
A resequencer provides a way to insure that messages remain in sequence as determined by the value of the message header SEQUENCE_NUMBER. When out-of-sequence messages are encountered, they are held in a MessageGroupStore until a message is received that fulfills the sequence. A resequencer may go a step further and hold all messages until the entire sequence is fulfilled. Either way, Spring Integration exposes resequencing strategies in one simple configuration element, the resequencer. In addition, a release strategy may be specified through the release-partial-sequence attribute that, when set to true, will send the messages as soon as they are available. The default value is false, which means that the messages are sent only after all have arrived. In addition, messages that linger too long may be dropped thanks to the discard-channel attribute.
Here's a simple example that sends an out-of-sequence set of messages with the payload Bid. Bid is a simple domain object shown in Listing 8–37. This class has two properties: a date and int value for the sequence order.
Listing 8–37. Bid Domain Class
package com.apress.prospringintegration.messageflow.resequencer;


import java.util.Date;


public class Bid {

    Date time;

    int order;


    public Bid() {

    }


    public Bid(Date time, int order) {

        this.time = time;

        this.order = order;

    }


    public Date getTime() {

        return time;

    }


    public void setTime(Date time) {

        this.time = time;
    }


    public int getOrder() {

        return order;

    }


    public void setOrder(int order) {

        this.order = order;

    }

}
A component class shown in Listing 8–38 is created to generate the Bid instance and publish to the message channel inboundChannel. The Bid instances are created with a descending order value. Messages are then sent to the message channel inboundChannel setting the message header SEQUENCE_NUMBER to the order value and the SEQUENCE_SIZE to the total number of Bid instances. The date property is set before the message is sent and a one second delay is added after each message is sent.
Listing 8–38. Component Class that Generates Out-of-Sequence Bid Instances
package com.apress.prospringintegration.messageflow.resequencer;


import org.springframework.beans.factory.annotation.Autowired;

import org.springframework.beans.factory.annotation.Qualifier;

import org.springframework.beans.factory.annotation.Value;

import org.springframework.integration.Message;

import org.springframework.integration.MessageChannel;

import org.springframework.integration.core.MessagingTemplate;

import org.springframework.integration.support.MessageBuilder;

import org.springframework.stereotype.Component;


import java.util.ArrayList;

import java.util.Calendar;

import java.util.Date;

import java.util.List;


@Component

public class SimpleSendingClient {


    @Autowired

    @Qualifier("inboundChannel")

    private MessageChannel channel;


    public void kickOff() {

        List<Bid> bids = getBids();

        for (Bid b : bids) {

            b.setTime(new Date());

            Message<Bid> message = MessageBuilder.withPayload(b)

                    .setCorrelationId("BID").setSequenceNumber(b.getOrder())

                    .setSequenceSize(bids.size()).build();

            channel.send(message);

            try {

                Thread.sleep(1000);

            } catch (InterruptedException e) {
                // do nothing

            }

        }

    }


    /**

     * Generate a list of bids with some time inbetween bids

     */

    public List<Bid> getBids() {

        List<Bid> bids = new ArrayList<Bid>();

        for(int order = 5; order > 0; order--) {

            Bid bid = new Bid();

            bid.setOrder(order);

            bids.add(bid);

        }

        return bids;

    }

}
The Spring configuration for the resequencer example is shown in Listing 8–39. The resequencer is using a default setting where all messages must arrive before being sent to the output channel in the correct order.
Listing 8–39. Configuring a Resequencer (resequencer.xml)
<?xml version="1.0" encoding="UTF-8"?>

<beans xmlns="http://www.springframework.org/schema/beans"

       xmlns:xsi="http://www.w3.org/2001/XMLSchema-instance"

       xmlns:int="http://www.springframework.org/schema/integration"

       xmlns:context="http://www.springframework.org/schema/context"

       xsi:schemaLocation="http://www.springframework.org/schema/beans

    http://www.springframework.org/schema/beans/spring-beans-3.0.xsd

    http://www.springframework.org/schema/context

    http://www.springframework.org/schema/context/spring-context-3.0.xsd

    http://www.springframework.org/schema/integration

    http://www.springframework.org/schema/integration/spring-integration-2.0.xsd">


  <context:component-scan

      base-package="com.apress.prospringintegration.messageflow.resequencer"/>


  <int:channel id="inboundChannel"/>


  <int:resequencer input-channel="inboundChannel" output-channel="outboundChannel"/>


  <int:channel id="outboundChannel"/>


  <int:service-activator input-channel="outboundChannel" ref="bidListener"/>


</beans>
The main class for the resequencer example is shown in Listing 8–40. The main class will create the Spring context and obtain a reference for the simpleSendingClient. The method kickOff will be called, causing the out-of-sequence messages to be sent with a one-second delay between each send. The resequencer will wait for all messages to arrive, and then send them out in the correct order.
Listing 8–40. Main Class for Resequencer Example
package com.apress.prospringintegration.messageflow.resequencer;


import org.springframework.context.ApplicationContext;

import org.springframework.context.support.ClassPathXmlApplicationContext;


public class MainResequencer {

    public static void main(String[] args) throws Exception {


        ApplicationContext context =

                new ClassPathXmlApplicationContext("resequencer.xml");


        SimpleSendingClient simple =

                context.getBean("simpleSendingClient", SimpleSendingClient.class);

        simple.kickOff();

    }

}
Message Handler Chain
A org.springframework.integration.handler.MesssageHandlerChain is an implementation of MessageHandler that can be configured as a single endpoint while delegating a chain of other handlers such as filters, transformers, etc. This can simplify configuration when a set of handlers needs to be connected in a linear fashion. The MessageHandlerChain is configured through in Spring XML using the chain element.
The aggregator example may be rewritten using the MessageHandlerChain, as shown in Listing 8–41. The Spring configuration file will work identically to the one in Listing 8–28. There is no need to create the intermediate message channel since Spring Integration will create anonymous channel for you.
Listing 8–41. Aggregator Example using MessageHandlerChain (aggregator-chain.xml)
<?xml version="1.0" encoding="UTF-8"?>

<beans xmlns="http://www.springframework.org/schema/beans"

       xmlns:xsi="http://www.w3.org/2001/XMLSchema-instance"

       xmlns:int="http://www.springframework.org/schema/integration"

       xmlns:context="http://www.springframework.org/schema/context"

       xsi:schemaLocation="http://www.springframework.org/schema/beans

          http://www.springframework.org/schema/beans/spring-beans-3.0.xsd

    http://www.springframework.org/schema/context

    http://www.springframework.org/schema/context/spring-context-3.0.xsd

    http://www.springframework.org/schema/integration

    http://www.springframework.org/schema/integration/spring-integration-2.0.xsd">


  <context:component-scan

      base-package="com.apress.prospringintegration.messageflow.splitter"/>

  <context:component-scan

      base-package="com.apress.prospringintegration.messageflow.aggregator"/>

  <context:component-scan

      base-package="com.apress.prospringintegration.messageflow.domain"/>


  <int:channel id="marketDataInputChannel"/>
  <int:chain input-channel="marketDataInputChannel">

    <int:splitter ref="marketDataSplitter"/>

    <int:service-activator ref="marketFieldServiceActivator"/>

    <int:aggregator ref="marketDataAggregator"/>

    <int:service-activator ref="marketItemServiceActivator"/>

  </int:chain>


</beans>
Message Bridge
A message bridge is simply an endpoint that connects two message channels or two channel adapters together. For a PollableChannel or a SubscribableChannel adapter, the message bridge provides a polling configuration.
For example, the previous example in Listing 8–41 for the aggregator using the MessageHandlerChain may be rewritten as shown in Listing 8–42. An intermediate message channel bridgeChannel is added between the message channel marketDataInputChannel and the MessageHandlerChain. The message bridge connects the message channels marketDataInputChannel and bridgeChannel.
Listing 8–42. Aggregator Example Using Message Bridge
<?xml version="1.0" encoding="UTF-8"?>

<beans xmlns="http://www.springframework.org/schema/beans"

       xmlns:xsi="http://www.w3.org/2001/XMLSchema-instance"

       xmlns:int="http://www.springframework.org/schema/integration"

       xmlns:context="http://www.springframework.org/schema/context"

       xsi:schemaLocation="http://www.springframework.org/schema/beans

          http://www.springframework.org/schema/beans/spring-beans-3.0.xsd

    http://www.springframework.org/schema/context

    http://www.springframework.org/schema/context/spring-context-3.0.xsd

    http://www.springframework.org/schema/integration

    http://www.springframework.org/schema/integration/spring-integration-2.0.xsd">


  <context:component-scan

      base-package="com.apress.prospringintegration.messageflow.splitter"/>

  <context:component-scan

      base-package="com.apress.prospringintegration.messageflow.aggregator"/>

  <context:component-scan

      base-package="com.apress.prospringintegration.messageflow.domain"/>


  <int:channel id="marketDataInputChannel"/>


  <int:channel id="bridgeChannel"/>


  <int:bridge input-channel="marketDataInputChannel" output-channel="bridgeChannel"/>


  <int:chain input-channel="bridgeChannel">

    <int:splitter ref="marketDataSplitter"/>

    <int:service-activator ref="marketFieldServiceActivator"/>

    <int:aggregator ref="marketDataAggregator"/>

    <int:service-activator ref="marketItemServiceActivator"/>

  </int:chain>


</beans>
Workflow
Messaging is inherently stateless. Messages pass through endpoints and Spring Integration needs to infer where to send the message next. Spring Integration can provide the appearance of state because it has a bird's eye view of the entire integration; from that vantage point, it's easy to manipulate the various exchanges to propagate state, be it message payloads or headers. However, in truth, there is no real state. As soon as a message has left an endpoint, the endpoint will forget that the message ever passed through it. Similarly, while it is clear to you, the implementer, that the series of steps that a message must negotiate to achieve a larger goal make up a larger process, each endpoint is oblivious to this larger process—to any process state.
Messaging is a very quick, easy way to describe processes without any intrinsic state. However, sometimes an architecture requires process state. One scenario that begs for workflow is if you want to enlist multiple system actors over possibly long periods of time. Coordinating system and human actors can be daunting; without a proper workflow system, it would fall on you, the developer, to build out these state machines. Another common motivation behind workflow adaptation is ability to audit; a workflow guards system and process state. You can query it for information on workflow processes both in-flight and completed. You can ask it questions like “How many of our customer fulfillment processes have been 100 percent completed?” or “How many users have been converted from leads into two year subscriptions in our marketing campaigns?” These answers can't be obtained from stateless messaging processes.
A business is only as good as its processes. Often, businesses will thread together the contributions of multiple resources (people, automated computer processes, and so forth) to achieve a greater result. These individual contributions by people and automatic services are most efficient when single-focused and, ideally, reused. The simplest example of this might be a conveyor belt in a car factory. A product enters the line at the beginning of the conveyer belt and is worked on by any number of individuals or machines until finally the output of the work reaches the end of the line, at which point the job is done. One machine paints the chassis; another machine lowers the engine into the car. A person attaches the chairs and another person installs the radio. These people and machines do their work without worrying about what is going to happen to the car next.
Another process—to take the car example even further—is that of a car dealership. It takes a number of people to get you into a new car! It starts when you enter the car dealership. A sales representative walks with you, showing off models and answering questions. Finally, your eye catches the glimmer of a silver Porsche. This is it! No need to carry on searching. The next part of the process begins.
You enter an office where somebody starts prompting you for information to purchase the vehicle. There are three conditions: you have cash on hand, you require a loan, or you already have a loan from another bank. If you have cash on hand, you give it to them and wait an hour for them to count it (because Porsches are not cheap). Perhaps you have a check from the bank, in which case you give them that. Alternatively, you begin the process of applying for a loan with the dealership. Eventually, the pecuniary details are sorted, credit scores checked, driver's license and insurance verified, and you begin signing paperwork, lots of paperwork. If you have already paid for the car, the dealership draws up the paperwork to ensure proper title and registration. If you are establishing a loan with the dealership, you fill out that paperwork, work on registration, and so on.
Eventually, someone gives you the keys and the relevant paperwork and you are done. Or so you think. You make a break for the door, itching to see how fast you can get the car to 65 (the maximum speed limit on your area freeway, conditions permitting, of course). At the door, you are all but assaulted with one last packet of brochures and business cards and a branded pen and the good wishes of the grinning sales representatives. You shrug them off and break for the car, jumping into the sporty convertible's driver's seat. As you leave, you turn the music up and speed off into the horizon.
Eventually you will remember that you left your wife at the dealership, but for now, the fruit of all that bureaucracy is too sweet to ignore.
The process of buying a car may seem like it takes forever, and indeed, it does take a long time. However, the process is efficient in that all actions that could be completed at the same time are being completed at the same time—by multiple workers. Further, because each actor in the process knows her part, each individual step is as efficient as possible. No need for every worker to wear many poorly fitted hats, as they say. Instead, resources can focus on optimizing their specific functions. It is crucial to be able to orchestrate a process like this in the enterprise.
You can extrapolate here, too. These examples are relatively small, though, and perhaps the inefficiencies of the worst-case scenario for the process are tolerable. The inefficiencies are overwhelmingly untenable in even slightly larger business processes, though! For example, imagine the new-hire process at a large company. Beyond the initial process of interviewing and a background security check, there is the provisioning that is required to get the new employee installed. The IT department needs to repurpose a laptop, image it, and install an operating system. Somebody needs to create a user account for that employee and ensure that LDAP and e-mail are accessible. Somebody needs to ready a security card so that the employee can use the elevator or enter the building. Somebody needs to make sure the employee's desk station or office is clean and that remnants from the previous occupant are gone. Somebody needs to get forms for the health insurance or benefits, and somebody needs to give the new employee a walk around the office and introduce the staff.
Imagine having only one person to do all of that for each employee. In a bigger company, this process would soon become overwhelming! Indeed, many of the tasks mentioned themselves require several steps to achieve the goal. Thus, the main process—integrating a new employee in the company—has multiple subprocesses. If many people perform all the tasks concurrently, however, the process becomes manageable. Additionally, not all people are suited to doing all of those tasks. A little specialization makes for a lot of efficiency.
Thus, processes, and the understanding of those processes, are crucial to a business. It is from this revelation that the study of business management emerged. Business Process Management (BPM) originally described how to best orchestrate technology and people to the betterment of the business, but it was a business person's preoccupation, not a technologist's. As it became apparent that businesses were already leveraging technology, the next hurdle was to codify the notion of a business process. How could software systems know—and react to—what the immovable enterprises and unbending market forces demanded? BPM provides the answer. It describes, in higher-level diagrams, the flow a given process takes from start to finish. These diagrams are useful both to the business analyst and to the programmer because they describe two sides of the same coin: to the business analyst, a functioning strategy, and to the programmer, a way of tracking all the details of an otherwise complex process that enlists much of the company's technologies. Once a process is codified, it can be reused and reapplied in the same way a programmer reuses a class in Java.
Software Processes
Thus, the unit of work—that which is required to achieve a quantifiable goal—for a business is rarely a single request/response. Even the simplest of processes in a business requires at least a few steps. This is true not only in business but in your users' use cases. Short of simple read-only scenarios such as looking at a web page for the news, most meaningful processes require multiple steps. Think through the sign-up process of your typical web application. It begins with a user visiting a site and filling out a form. The user completes the form and submits the finalized data, after satisfying validation. If you think about it, however, this is just the beginning of the work for this very simple process. Typically, to avoid spam, a verification e-mail is sent to the user. When the user reads the e-mail, she clicks on the verification link, confirming both her intentions as a registrant and that she is not a robot. This tells the server that the user is a valid user, so it sends a welcome e-mail. That's four steps with two different roles! This involved process, when translated into an activity diagram, is shown in Figure 8–1. The two roles (user and system) are shown as swim lanes. Rounded shapes inside the swim lanes are states. Process flows from one state to another, following the path of the connecting lines.
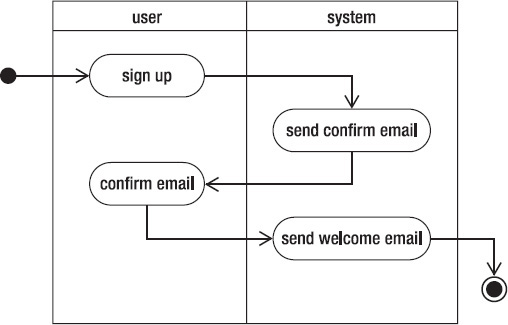
Figure 8–1. Activity Diagram for Sign-up Process
For such a simple process, it might be tempting to keep track of the state of the process in the domain model. After all, some of the state, such as the sign-up date, can certainly be regarded as business data belonging to model entities. Such a date is valuable for revenue recognition. The date when the welcome e-mail was sent is probably not very important, though. The situation will escalate if you send out more e-mail. If you build other kinds of processes involving the user, management of the user's state within those processes will become a burden on your system and will complicate the schema.
A workflow system extricates that process state from the domain and into a separate layer called a business process. A workflow system also typically models which agents in the system do what work, providing work lists for different agents in the system.
A workflow engine lets you model the process in a higher-level form, roughly corresponding in code to what a UML activity diagram can describe. Because a workflow is high-level, specifying how a business process is leveraged as an executable component of a system is a dizzyingly vast task. In industry, there are standards for the language used to model a business process as well as the model of the engine that is used to run the business process. Additionally, there are standards specifying interoperability, how endpoints are mapped to the agents being orchestrated by the process, and much more. All this can quickly become overwhelming.
Let's look at some of these standards in Table 8–1.
Table 8–1. Some of the Myriad, Significant Standards Surrounding BPM
| Standard Name | Standards Group | Description |
| WS-BPEL (BPEL) | OASIS | A language that, when deployed to a BPEL container, describes the execution of a process. It interfaces with the outside world via the invocation of external web services. This language describes the runtime behavior of a process. It has several flaws, not the least of which is the reliance on web service technology and the lack of work list support. |
| WS-BPEL (BPEL 2.0) | OASIS | This is largely an upgrade to its predecessor, clarifying the behavior at runtime of certain elements and adding more expressive elements to the language. |
| WS-BPEL for People (BPEL4People) | OASIS | The main feature common to traditional workflow systems is the ability to support work lists for actors in a process. BPEL had no such support, as it did not support human tasks (that is, wait states for people). This specification addresses that exact shortcoming. |
| Business Process Modeling Notation (BPMN) | Originally BPMI, then OMG, as the two organizations merged | This provides a set of diagramming notations that describe a business process. This notation is akin to UML's activity diagram, though the specification also describes (informally) how the notations relate to runtime languages such as BPEL. The notation is sometimes ambiguous, however, and one of the formidable challenges facing BPM vendors is creating a drawing tool that can take a round-trip to BPEL and back, providing seamless authoring. |
| XML Process Definition Language | Workflow Management Coalition (WfMC) | This one describes the interchange of diagrams between modeling tools, especially how elements are displayed and the semantics of those elements to the target notation. |
| Business Process Modeling Notation 2 (BPMN 2) | OMG | BPMN 2 rectifies the discrepancies between BPEL and BPMN 1.0: that BPMN 1.0 could only be used to draw—and not execute—business processes, and that BPMN could be used to create process definitions that BPEL could not execute. BPMN 2 specifies both the diagramming notations as well as the runtime execution semantics. The specification went final January 2011. |
As you can see, there are some problems. Some of these standards are ill suited to real business needs, even once the busywork is surmounted. Some of the workflow engines lack adequate support for work lists, essentially making the processes useless for anything that models human interaction—a typical requirement.
Introducing Activiti, an Apache 2 Licensed BPMN 2 Engine
A few viable implementations offer compelling alternatives. One is Alfresco'sActiviti (www.activiti.org) project, a popular open source (Apache 2 licensed) BPMN 2 implementation. There are alternative open source workflow engines (e.g., Enhydra Shark or OpenWFE) and proprietary engines from Tibco, IBM, Oracle, WebMethods, and so forth. In our opinion, Activiti is powerful enough for easily 80 percent of the situations you are likely to encounter and can at least facilitate solutions for another 10 percent.
Activiti enjoys the best integration with Spring of any workflow engine because SpringSource engineers contribute to the project and because the Spring Integration and Activiti teams have worked to build solid integration. The Activiti/Spring integration story has many facets. The SpringSource and the Activiti teams ensure that Activiti BPMN 2 processes could reference Spring beans (as opposed to classes configured using the Activiti configuration XML). The Activiti Process Engine can be configured entirely in Spring's IoC container: there is a Spring bean factory to configure the engine, transactions can be handled using Spring's PlatformTransactionManager hierarchy, etc. The Spring Integration support is currently in the Spring Integration sandbox and is tentatively scheduled for the Spring Integration 2.1 release. The adapters are working and complete, but there is no namespace support yet. The basic setup is not likely to change even if the classes do in the final release. Thus, upgrading should just be a matter of updating the configuration to reflect the new code.
Exploring the nuances of BPMN 2 is out of the scope of this chapter (indeed, you could fill a whole book with it!). Let's take a look at a simple “Hello, World!” process definition in Activiti's BPMN 2 implementation in Listing 8–43 to understand some of BPMN's finer points.
Listing 8–43. Activiti “Hello, World!” Example (hello.bpmn20.xml)
<?xml version="1.0" encoding="UTF-8"?>

<definitions id="definitions"

             xmlns="http://www.omg.org/spec/BPMN/20100524/MODEL"

             xmlns:xsi="http://www.w3.org/2001/XMLSchema-instance"

             xmlns:activiti="http://activiti.org/bpmn"

             typeLanguage="http://www.w3.org/2001/XMLSchema"

             expressionLanguage="http://www.w3.org/1999/XPath"

             targetNamespace="http://www.activiti.org/bpmn2.0">


  <process id="hello">


    <startEvent id="start"/>


    <sequenceFlow id="sf1" sourceRef="start" targetRef="helloScriptTask"/>


    <scriptTask id="helloScriptTask" name="Execute script" scriptFormat="groovy">

      <script>

        println 'hello ' + customerId + '!'

      </script>

    </scriptTask>


    <sequenceFlow id="sf2" sourceRef="helloScriptTask" targetRef="end"/>


    <endEvent id="end"/>


  </process>


  </definitions>
There's a lot going on here, but don't be alarmed. Let's dissect it element by element. Right off the bat, you will notice that the file is XML, and that the large swath of text at the top merely serves to import other XML definitions. The next element is the process element, which wraps a single process definition. You will see that the sequenceFlow elements inside the process definition seem to serve only to string together the other elements in the XML file, very much like channel elements do in Spring Integration. This leaves only three real elements of substance left: startEvent, scriptTask, and endEvent. The startEvent and endEvent elements are perfunctory; they provide a way to reference the beginning and end of the process. They are little more than waypoints on your journey and can be reused as-is for most process definitions. The last element is the scriptTask. The scriptTask element lets developers embed scripts and run them. In this case, you use the Groovy scripting language to print a message to standard out, “hello,” followed by the process variable customerId, followed by an exclamation mark.
When you start a business process, you may pass in process variables. These process variables may be accessed from the process definition. This is very similar to accessing message headers from within Spring Integration. The process variables provide a way to differentiate one process instance from another. A process instance then has variables local to its execution and can start and stop execution, but it always follows the sample's general steps laid out by its definition. In a way, this relationship is very similar to that of a method invocation and the definition of that method in the class. As you can see here, process variables are available inside the process definition as well as from Java code that interacts with the org.activiti.engine.runtime.ProcessInstance classes.
With the analysis complete, let's look at it again from afar. The file essentially defines three elements:
startEventscriptTaskendEvent
Each element corresponds to the notion of a state or an execution in workflow. At runtime, the states are executed one after another according to the sequence established by the sequenceFlow element. Many different elements are used in this fashion. They provide many different behaviors including complex routing (conditionals, switch, for-each), concurrency, forking, joining, and sequences. In many ways, this will seem familiar to users of Spring Integration.
The XML definition above is a process definition. When Activiti reads the process definition, it will store the process definition as rows in database tables. When starting a new business process, you are, in essence, patterning a new object graph from the template definition. This new object graph is a runtime reflection of the steps in the process definition that tracks the data and state specific to a single use of a business process. The XML definition is the process definition, and the same series of steps defined in the XML, when executed at runtime, is the process instance. A process definition is like a template of the process, and the instance is an object graph created with that template as its basis but with instance-specific data.
Configuring Activiti with Spring
Activitiships with fantastic Spring support. Let's configure a working Activiti process engine first. This step is not Spring Integration-specific but is helpful in understanding how the Spring Integration support actually works. The central class in Activiti is the org.activiti.engine.ProcessEngine. You can obtain references to all the other services you will need to work with Activiti from this central interface. The ProcessEngine may be configured in a number of different ways, but you will use the Spring-specific factory bean. To obtain Activiti and the corresponding Spring support, add the following Maven dependencies to your pom.xml file, as shown in Listing 8–44.
Listing 8–44. Activiti Maven Dependencies
     <dependency>

       <groupId>org.activiti</groupId>

       <artifactId>activiti-engine</artifactId>

       <version>5.2</version>

     </dependency>

     <dependency>

       <groupId>org.activiti</groupId>

       <artifactId>activiti-spring</artifactId>

       <version>5.2</version>

     </dependency>
These declarations bring in the core engine as well as the Spring-specific support. To configure Activiti, you need to configure a data source and transaction management. Activiti stores its process state in a database and uses the Apache MyBatis project to handle persistence. Most of the following configuration is old hat, so it will not be covered here. For your configuration, you are using one of Activiti's supported databases, H2, because it's easy to configure. The MySQL and PostgreSQL databases are also supported, with more support on its way. The Java configuration is shown in Listing 8–45.
Listing 8–45. Java Configuration for Activiti
package com.apress.prospringintegration.messageflow.workflow;


import org.activiti.spring.ProcessEngineFactoryBean;

import org.activiti.spring.SpringProcessEngineConfiguration;

import org.apache.commons.logging.Log;

import org.apache.commons.logging.LogFactory;

import org.springframework.beans.factory.annotation.Value;

import org.springframework.context.annotation.Bean;

import org.springframework.jdbc.datasource.DataSourceTransactionManager;

import org.springframework.jdbc.datasource.TransactionAwareDataSourceProxy;


import javax.annotation.PostConstruct;

import javax.sql.DataSource;


/**

 * configuration that is common to all of your workflow examples

 */

public class ActivitiProcessEngineConfiguration {


    private Log log = LogFactory.getLog(getClass());


    @Value("#{dataSource}")

    private DataSource dataSource;


    @PostConstruct

    public void setup() {

        log.debug("starting up " + getClass().getName());

    }


    private String getDatabaseSchemaUpdate() {

        return SpringProcessEngineConfiguration.DB_SCHEMA_UPDATE_TRUE;

    }
    @Bean

    public ProcessEngineFactoryBeanprocessEngine() {

        ProcessEngineFactoryBeanprocessEngineFactoryBean =

                new ProcessEngineFactoryBean();


        SpringProcessEngineConfiguration configuration =

                new SpringProcessEngineConfiguration();

        configuration.setTransactionManager(dataSourceTransactionManager());

        configuration.setDatabaseType("h2");

        configuration.setJobExecutorActivate(false);

        configuration.setDataSource(targetDataSource());

        configuration.setDatabaseSchemaUpdate(getDatabaseSchemaUpdate());

        processEngineFactoryBean.setProcessEngineConfiguration(configuration);

        return processEngineFactoryBean;

    }


    @Bean

    public DataSource targetDataSource() {

        TransactionAwareDataSourceProxy transactionAwareDataSourceProxy =

                new TransactionAwareDataSourceProxy();

        transactionAwareDataSourceProxy.setTargetDataSource(dataSource);

        return transactionAwareDataSourceProxy;

    }


    @Bean

    public DataSourceTransactionManager dataSourceTransactionManager() {

        DataSourceTransactionManager dataSourceTransactionManager =

                new DataSourceTransactionManager();

        dataSourceTransactionManager.setDataSource(this.targetDataSource());

        return dataSourceTransactionManager;

    }

}
The only interesting object is the ProcessEngineFactoryBean, which is highlighted. The majority of the configuration options, such as dataSource and transactionManagement, are obvious. The getDatabaseSchemaUpdate property tells Activiti if it should attempt to install the various tables on startup if the database doesn't already have them. Naturally, this is something you should consider varying based on your environment—leave it on in development, off in production, etc.
The configuration is enough to be able to run the BPMN 2 process that you declared earlier. Let's build a simple example, as shown in Listing 8–46.
Listing 8–46. Simple Activiti Example
package com.apress.prospringintegration.messageflow.workflow;


import org.activiti.engine.ProcessEngine;

import org.activiti.engine.RepositoryService;

import org.activiti.engine.repository.DeploymentBuilder;

import org.activiti.engine.runtime.ProcessInstance;

import org.apache.commons.logging.Log;

import org.apache.commons.logging.LogFactory;

import org.springframework.context.support.ClassPathXmlApplicationContext;
import java.util.HashMap;

import java.util.Map;


/**

 * Simple client to exercise your

 */

public class WorkflowMainClient {


    static private Log log = LogFactory.getLog(WorkflowMainClient.class);


    static void deployProcessDefinitions(ProcessEngine processEngine,

                                         String... processDefinitionNames)

            throws Exception {

        RepositoryService repositoryService = processEngine.getRepositoryService();

        for (String processDefinitionName : processDefinitionNames) {

            DeploymentBuilder deployment = repositoryService.createDeployment()

                    .addClasspathResource(processDefinitionName);

            deployment.deploy();

        }

    }


    public static void main(String[] ars) throws Exception {

        ClassPathXmlApplicationContext classPathXmlApplicationContext =

                new ClassPathXmlApplicationContext("workflow-gateway.xml");

        classPathXmlApplicationContext.start();


        ProcessEngine processEngine =

                classPathXmlApplicationContext.getBean(ProcessEngine.class);


        deployProcessDefinitions(processEngine,

                "processes/hello.bpmn20.xml", "processes/gateway.bpmn20.xml");


        Map<String, Object> processVariables = new HashMap<String, Object>();

        processVariables.put("customerId", 2);


        ProcessInstance pi = processEngine.getRuntimeService()

                .startProcessInstanceByKey("sigateway", processVariables);


        log.debug("the process instance has been started: PI ID # " + pi.getId());


        Thread.sleep(1000 * 20);

        log.debug("waited 20s");

    }

}
The code instantiates the XML file that in turn picks up the Java configuration defined previously. In the configuration, you could have specified one property on the ProcessEngineFactoryBean—configuration.setDeploymentResources. This property expects an array of Spring org.springframework.io.Resource instances that reference the process definition XML files. Each time Activiti starts up, it parses the definitions and then attempts to install the definitions into the database as a new version if the files conflict with existing versions or the definitions don't already exist in the database. If nothing has changed, Activiti simply leaves the definitions alone. This feature is powerful; it implies that you can deploy a process definition, run it a few times, stop the code, update the definition, and redeploy—and all the existing process definitions will still continue to work until they have completed. The latest version of the definition is used by default unless you explicitly specify the older version. There is no need to worry too much about process migration or long lived processes in flight that need to be updated. If you do not specify the deploymentResources property in the ProcessEngineFactoryBean, then you need to deploy the process definition manually, as you have here in the deployProcessDefinitions method where you use the ProcessEngine'sRepositoryService reference to create a deployment object and then deploy that object.
In the client, you create a Map with String keys and Object values to specify the process variables. The process variables are available in the process definition by the key. Remember, process variables are serialized in the database, and while there are some intelligent strategies in play to serialize all the basic primitive Java types as well as serializable objects, you should stick with primitive values. This means that instead of storing a whole object, you might consider simply storing its ID. This strategy has the same benefits in Activiti as it does in Spring Integration where it is called the claim-check pattern: it is faster to run, messages are lighter, and you don't face the brittleness of transporting and deserializing objects across different environments and clients.
Next, you use the ProcessEngine to get a reference to the RuntimeService, and then use that to start the process instance, using the ID value you specified in the process element in the process definition XML, “hello.” This spawns a process instance and makes those process variables available to the steps inside the ProcessInstance. The startProcessInstanceByKey method blocks as it executes the steps in the process, one by one, until it completes. This is true, with one exception: wait-states.
Wait-states are exactly what their name implies: breaks in the action or pauses. There are a few particularly important uses for wait-states. One is to model human interactions when a process reaches a point when a person has to do the work. Another is to model automatic system process that might take a while or whose duration is unknown and whose eventual conclusion is the signal that the process can continue. It is in this last case—long running, automatic processes of indeterminate duration—that the Spring Integration gateway lives.
The Spring Integration Inbound Activiti Gateway
The Spring Integration gateway is declared in Spring as a regular bean but implements the Activiti machinery required so that it can be used in Activiti as a wait-state. This lets it enjoy all the properties as any other built-in wait-state in Activiti. Once the process enters Spring Integration Activiti gateway, the enclosing transaction is committed and the process stops. In the previous Activiti example, the call to startProcessInstanceByKey would return at this point. The process is not finished, however. It's simply sleeping. To move it forward, it has to be signaled. Signaling an Activiti process instance causes it to wake up and proceed executing. Once the process instance is executing again, it will keep executing until it reaches another wait-state or until the process is finished. The Spring Integration gateway takes advantage of this setup and sends a message to Spring Integration when the wait-state is entered. As this is a gateway, Spring Integration sends a response.
From the Spring Integration perspective, the request from Activiti is an inbound message. The inbound message has a header (ActivitiConstants.WELL_KNOWN_EXECUTION_ID_HEADER_KEY) that carries the execution ID (the ID that Activiti needs in order to know which process instance to signal). Implementers are free to do with the inbound message what they like—use adapters, hook into all the various Spring Integration endpoints, etc. The only requirement is that a reply message carrying the execution ID be sent on the reply channel configured on the gateway. It doesn't matter when or by whom the reply is sent, so long as that reply message has the execution ID header. From the Spring Integration perspective, the reply is an outbound message.
Let's update the Spring configuration to use the Activiti gateway. First, add something like the configuration class shown in Listing 8–47.
Listing 8–47. Java Configuration for Activiti Gateway
package com.apress.prospringintegration.messageflow.workflow;


import org.activiti.engine.ProcessEngine;

import org.springframework.beans.factory.annotation.Value;

import org.springframework.context.annotation.Bean;

import org.springframework.context.annotation.Configuration;

import org.springframework.integration.MessageChannel;

import org.springframework.integration.activiti.gateway.AsyncActivityBehaviorMessagingGateway;


/**

 * Activiti gateway configuration

 */

@Configuration

@SuppressWarnings("unused")

public class ActivitiGatewayConfiguration extends ActivitiProcessEngineConfiguration {


    // inbound: from Activiti TO Spring Integration

    @Value("#{request}")

    private MessageChannel request;


    // outbound: from Spring Integration TO Activiti

    @Value("#{response}")

    private MessageChannel response;


    @Bean

    public AsyncActivityBehaviorMessagingGateway gateway() throws Exception {


        ProcessEngine engine = processEngine().getObject();


        AsyncActivityBehaviorMessagingGateway gateway =

                new AsyncActivityBehaviorMessagingGateway();

        gateway.setForwardProcessVariablesAsMessageHeaders(true);

        gateway.setProcessEngine(engine);

        gateway.setUpdateProcessVariablesFromReplyMessageHeaders(true);

        gateway.setRequestChannel(request);

        gateway.setReplyChannel(response);

        return gateway;


    }


}
In the configuration, you inject two channels— request and response— declared in the XML and then use them to set up an instance of AsyncActivityBehaviorMessagingGateway. The gateway requires a reference to the ProcessEngine you configured previously. The gateway also has one more feature you will see reflected here: it can conveniently propagate process variables as message headers on the request message and propagate messages as process variables on the reply message. To enable both of these behaviors, set the updateProcessVariablesFromReplyMessageHeaders and forwardProcessVariablesAsMessageHeaders headers to true.
Next, you need to configure the Spring Integration channels and have Spring Integration do something with the data. In this example, you will simply have the request come into Spring Integration, visit a simple service-activator endpoint, and send a reply on the response channel. There's no need to even show the service activator here; assume it's a class with a method annotated with @ServiceActivator that takes a message with a header under the key ActivitiConstants.WELL_KNOWN_EXECUTION_ID_HEADER_KEY and returns a message with that same header and value. The Spring configuration is shown in Listing 8–48.
Listing 8–48. Spring Configuration for Activiti Gateway (workflow-gateway.xml)
<?xml version="1.0" encoding="UTF-8"?>

<beans xmlns="http://www.springframework.org/schema/beans"

       xmlns:xsi="http://www.w3.org/2001/XMLSchema-instance"

       xmlns:int="http://www.springframework.org/schema/integration"

       xmlns:context="http://www.springframework.org/schema/context"

       xmlns:jdbc="http://www.springframework.org/schema/jdbc"

       xsi:schemaLocation="http://www.springframework.org/schema/beans

    http://www.springframework.org/schema/beans/spring-beans-3.0.xsd

    http://www.springframework.org/schema/integration

    http://www.springframework.org/schema/integration/spring-integration.xsd

    http://www.springframework.org/schema/context

    http://www.springframework.org/schema/context/spring-context-3.0.xsd

    http://www.springframework.org/schema/jdbc

    http://www.springframework.org/schema/jdbc/spring-jdbc.xsd">


  <context:component-scan

      base-package="com.apress.prospringintegration.messageflow.workflow"/>


  <context:property-placeholder location="workflow.properties"/>


  <int:channel id="request">

    <int:queue capacity="10"/>

  </int:channel>


  <int:service-activator input-channel="request"

                         output-channel="response"

                         ref="loggingServiceActivator">

    <int:poller fixed-rate="1000"/>

  </int:service-activator>


  <int:channel id="response"/>


  <jdbc:embedded-database id="dataSource" type="H2"/>


</beans>
The final piece of the puzzle is the BPMN process definition that employs this gateway, as shown in Listing 8–49.
Listing 8–49. BPMN Process Definition for Activiti Gateway (gateway.bpmn20.xml)
<?xml version="1.0" encoding="UTF-8"?>

<definitions id="definitions"

             xmlns="http://www.omg.org/spec/BPMN/20100524/MODEL"

             xmlns:xsi="http://www.w3.org/2001/XMLSchema-instance"

             xmlns:activiti="http://activiti.org/bpmn"

             typeLanguage="http://www.w3.org/2001/XMLSchema"
             expressionLanguage="http://www.w3.org/1999/XPath"

             targetNamespace="http://www.activiti.org/bpmn2.0">


  <process id="sigateway">


    <startEvent id="start"/>


    <sequenceFlow id="sf1" sourceRef="start" targetRef="gw"/>


    <serviceTask id="gw" name="Spring Integration Gateway"

                 activiti:delegateExpression="#{gateway}"/>


    <sequenceFlow id="sf2" sourceRef="gw" targetRef="script"/>


    <scriptTask id="script" name="Execute script" scriptFormat="groovy">

      <script>

        println '...finishing the script task.'

      </script>

    </scriptTask>


    <sequenceFlow id="sf3" sourceRef="script" targetRef="end"/>


    <endEvent id="end"/>


  </process>


</definitions>
Did you catch the change? A bit underwhelming, right? The only real difference between this and the first example is that you employ a generic BPMN serviceTask element and use the Activiti specific attribute (activity:delegateExpression) to employ the gateway bean from Spring. That's it! You can run this in exactly the same way as you did before. Therefore, the sequence of events is as follows:
- The process starts.
- The process enters the
startEvent. - The process moves immediately to the
serviceTaskwhere Activiti invokes your gateway, sending a request message with anexecutionIDin it. After the request message is sent, the process stops. From the invoker's perspective,startProcessInstanceByKeyreturns. - In Spring Integration, the request message enters through the Activiti gateway, travels on the request channel, passes through the
service-activatorand then travels on theresponsechannel back to the Activiti gateway. - In Activiti, the
serviceTaskstarts up again, and execution proceeds. - The
scriptTaskis executed. - Then, the
endEventis reached and the process ultimately terminates.
The result is service orchestration and a clean decoupling of concerns: Activiti takes care of making sure that things happen when they are supposed to, Spring Integration does the heavy lifting, and Activiti guards the process state. You have no doubt already put your business logic in Spring and in Spring Integration, and Spring Integration is a great vehicle to connect Activiti to other systems. Suppose you have a business process that requires notifications (you could use Spring Integration to send e-mail or ping people on Google Talk chat with almost effortless ease!), or communication with another system (you could use Spring Integration to invoke web services).
Summary
In this chapter, you learned that there are several components available for controlling message flows in Spring Integration: message routers determine which downstream channel or channels should receive the message next or at all; message filters decide if the message should be passed to the output channel or not; message splitters break a message into several messages to be processed independently; the message aggregator combines several messages into a single message; and resequencers release messages in a specific order. You have looked at message chain handlers that simplify configuration for a linear sequence of endpoints and message bridges that connect two message channels or adapters. Finally, you've contemplated the times when state must be maintained in an integration, potentially requiring a workflow, and you have explored how Spring Integration may be used with a workflow engine.