
Chapter 11
Managing and Configuring Apps
WHAT’S IN THIS CHAPTER?
- Understanding the SharePoint 2013 App Model
- Setting up a SharePoint environment for working with apps
- Managing and Monitoring SharePoint 2013 apps
CODE DOWNLOADS FOR THIS CHAPTER
The wrox.com code downloads for this chapter are found at www.wrox.com/remtitle.cgi?isbn=1118495810 on the Download Code tab. The code for this chapter is divided into the following major examples:
- SampleHighTrustApp.zip
- HelloWorldApp.zip
SharePoint 2013 introduces the Cloud App Model, a new development model for adding and extending SharePoint capability. This chapter refers to this new model as the App Model or just apps.
Developers are encouraged to build their solutions using this new model for a few key reasons. First, more companies are utilizing cloud functionality, creating the need for a robust model designed to handle the challenges of both on-premises SharePoint deployments and those in SharePoint Online. Sandbox solutions were an attempt to provide this capability but they are not robust enough, as discussed in Chapter 10. Second, we need a model that does not require installing and running code from the SharePoint server, which can negatively affect performance and upgradability. Finally, we need a model that is flexible enough to enable developers to write their applications in any language they choose, not just .NET. Let’s take a deeper look at each of these reasons.
Companies are utilizing capabilities and resources that reside in the public cloud or the private cloud. The authors work with many companies that have implemented SharePoint as a private cloud, and many more have begun to utilize SharePoint Online to host their SharePoint intranets. The cloud’s locked-down environment makes deploying code more difficult, as developers don’t have access to Central Administration, and it limits the type of customizations that can be deployed because the cloud environment may be a shared, or multi-tenant, environment. A more robust app model is needed to support these very different environments.
Developing and deploying custom solutions to SharePoint enhances the functionality and adoption of the collaboration platform, but it can affect overall performance and the ease of upgrading to a new version. SharePoint has matured as an application development platform with each new release. The SharePoint 2003 application development platform was somewhat limited: Developers could build and install Web Parts to the Web Part Gallery, and deploy web applications into SharePoint’s layouts folder. SharePoint 2007 was significantly more robust with the introduction of solution packages, Features, control delegates, and a strongly supported developer infrastructure. This development capability was largely designed with on-premises implementations of SharePoint Server in mind. SharePoint 2010 built upon these capabilities but also added capabilities for less pervasive solutions through client technologies such as REST APIs and client-side object models. SharePoint 2010 also introduced sandbox solutions, a new development model designed for a multi-tenant, hosted infrastructure such as the one used in Office 365 and SharePoint Online. With each new release, the SharePoint platform has made it easier and more developer-friendly to create and deliver custom solutions. Unfortunately, each solution adds complexity and requires testing when upgrading to the next version is considered. Clearly, we need a model that doesn’t impact performance and upgradability.
Developers want the flexibility to write their customizations in the language they know and understand, which is fundamentally based on web standards. Historically, SharePoint development was done using .NET, and .NET developers needed to learn new APIs and the SharePoint development process, which differed from their usual .NET development process. Because SharePoint is a web application, composed of multiple websites, the language preference for a large part of the developer community would be HTML and JavaScript.
The new SharePoint 2013 App Model is designed to overcome each of these challenges and limitations. It provides an architecture that enables customizations to run in isolation so that they don’t affect other apps or applications. SharePoint apps effectively have a zero deployment footprint on a SharePoint farm. Yes, you read that right; developer code is not deployed to the SharePoint server. Apps can leverage SharePoint application components such as lists, libraries, and workflows. The apps themselves can be hosted within the SharePoint farm (as long as there’s no server code), or they can be cloud hosted in Windows Azure or privately hosted elsewhere in the cloud. Because apps don’t physically deploy any assets to the SharePoint servers, they eliminate a significant challenge to adding new customizations to multi-tenant cloud environments such as Office 365. Apps can be written using the standards of the Web, HTML, and JavaScript, or developers can choose PHP, Java, or .NET. For the first time, this new model unifies the development process for on-premise or cloud-hosted applications.
This chapter introduces the SharePoint 2013 administrator to the configuration and management of apps. Because apps will typically not be created by administrators, details about writing them are not included. Instead, this chapter covers the app architecture in detail, including the different hosting options for apps and app permissions. You will also walk through an example that demonstrates how to set up an app-enabled SharePoint environment. Finally, you will learn about managing and monitoring apps in SharePoint 2013.
UNDERSTANDING THE SHAREPOINT 2013 APP
A brief review of the three different development models illustrates the significant differences of the new App Model. Application code built using the new App Model runs predominantly on the client’s browser, on application servers, or in a company’s data center. This is very different from the full-trust farm solution and sandbox solution covered in Chapter 10.
The farm solution has the longest tenure. This model’s code is usually hosted by the SharePoint farm, runs predominantly in the SharePoint host process with full farm privileges, and may access resources anywhere in the farm. This solution also requires farm administrator permissions to deploy. Because these applications run in a highly privileged security context across the farm, this model does not lend itself to multi-tenant scenarios such as SharePoint Online. The sandbox solution is designed for multi-tenant hosts.
The sandbox solution runs in a less-privileged process on the SharePoint server and only accesses resources in the site collection where it is installed, and deployment requires only site collection administrator privileges. While sandbox solutions allowed server-side code to execute, the reduced set of APIs limited functionality, and the sandbox architecture reduced performance versus full trust code. In many cases, developers would use sandbox solutions to deploy HTML/Javascript applications rather than to deploy server-side code. Unfortunately, in SharePoint 2010, there were few tools for governance, security, and management of these types of solutions.
With SharePoint apps, logic is not deployed to the SharePoint server, and instead lives predominantly on hosted application servers or on the client devices connecting to SharePoint. The following sections discuss the App Model architecture, the App Marketplace and Catalog, hosting options, and app security in more detail.
ARCHITECTURE
SharePoint apps are available from two locations. First, Microsoft hosts and governs a public Office Store, where any developer is able to publish and sell his or her app for general use by any SharePoint user. Publishing an app is as simple as uploading a file to a SharePoint library. Second, a private corporate app catalog can be hosted on SharePoint 2013 on-premises or online, and owned by the company hosting on-premises SharePoint 2013 or the online tenant. Company personnel or licensed tenants will be able to acquire and install these apps for personal or corporate use.
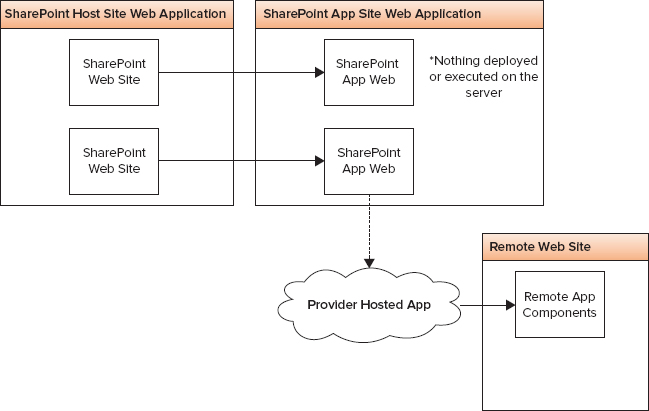
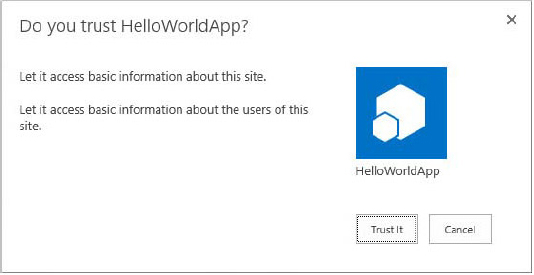
The App Model enables end users to install apps into their SharePoint sites. As part of the installation process and prior to being installed, the app will request certain permissions from the site on which it is being installed; this site is known as the host site or host web. If the user has the permissions requested by the app, it can be successfully installed. Note that the functional components of the app, whether they are SharePoint components or externally hosted components, are not deployed to the host web. External components and functionality are deployed to external servers, although the host web does contain a limited set of UI elements that give users access to the app’s other components.
Once installed, the app is created in its own isolated SharePoint website known as the app site or app web. The app web is created in the same site collection as the host web unless it is installed with tenant scope. In that scenario, the app web is in the site collection of the corporate app catalog.
The app web can contain all kinds of different SharePoint components as long as they don’t require that code be run on the SharePoint server itself. Lists, libraries, workflows, and web pages can all be created within the app web. Combined with the JavaScript client-side object model and the SharePoint REST data APIs, a large variety of applications can be built. The following section provides more details about the app marketplaces, the different app hosting options, and app security.
SharePoint 2013 App Marketplaces
SharePoint apps can be obtained from the public Office Store or from the private corporate app catalog. This chapter refers to these locations collectively as the App Marketplace. Much like an app store for a mobile phone or tablet operating system, all marketplace apps are reviewed prior to being approved for sale and download. Publishing an app to the Office Store makes the app publically available; therefore, it can be obtained by any SharePoint user. To publish an app to the Office Store, the developer must first register with the Microsoft Seller Dashboard, as described at http://msdn.microsoft.com/en-us/library/jj220034(v=office.15).aspx.
Apps published to an organization’s private app catalog are available for company-only use, and accessible to corporate users with appropriate permissions. As mentioned in the preceding section, a private app catalog is a dedicated site collection in a SharePoint 2013 web application, which makes it easier for the web application administrator or tenant administrator to control permissions to the catalog. Apps are uploaded to the catalog just like uploading a file, and the app is expected to pass a series of validation checks before being admitted to the catalog. Users with permission to access the app catalog (granted through standard SharePoint permissions) can then browse and install apps to their sites.
Apps can be installed and deployed by any user who has Manage Web Site and Create Subsite permissions. These permissions are available to site owners by default, and are typically granted to others by providing the specific user with the Full Control permission level or placing them in the Site Owners group.
SharePoint 2013 provides a full licensing platform for apps. The licensing model enables administrators to govern how and where apps are installed on their platform. Developers can also benefit from the licensing model, as they are permitted to provide evaluation and trial apps to the marketplace and determine who has installed them. Details about configuring web application app catalogs and managing app licenses are provided later in the “Managing SharePoint 2013 Apps” section.
SharePoint 2013 App Hosting Options
The goal of the SharePoint 2013 App Model is to enable the developer ecosystem to extend SharePoint’s capabilities and functionality, and provide a single development model for both on-premise and cloud deployments without adversely affecting farm performance and future upgrades. To achieve this goal, different hosting models are available to provide developers and software vendors with the flexibility to choose where the components of their app would be hosted and how they would execute. Developers can now build their solutions using the tools and platforms they are most comfortable working with, and engage with the SharePoint platform using standard web tools and protocols such as JavaScript and REST.
The App Model utilizes two broad approaches to hosting apps: SharePoint-hosted and cloud-hosted. SharePoint-hosted apps include only SharePoint components, and they are installed in the corporate-owned SharePoint Online tenant or the on-premises SharePoint farm. Cloud-hosted apps include at least one remote component and may also include SharePoint-hosted components. The cloud-hosted model is further divided into two categories, ultimately resulting in three different approaches and three different types of apps that can be deployed to a SharePoint site: SharePoint-hosted apps, provider-hosted apps, and auto-hosted apps. All of these apps have the same options available to them in terms of how they interact with the SharePoint platform. They differ in how they’re deployed, what web server services the web page requests, and how the apps authenticate to the host site. The following sections discuss each of the models in more detail.
SharePoint-Hosted Apps
These apps are installed on a SharePoint 2013 website called the host web. The app resources are hosted on the app web, a website typically in the same site collection as that of the host web. This approach enables you to reuse common SharePoint artifacts, such as lists and Web Parts. For example, Figure 11-1 shows a website’s Site Contents page, which indicates that a new SharePoint-hosted app called Customer Billing and Time Tracking has just been installed. The resources for the app, such as lists, content types, workflows, and pages, are deployed to the app web, which resides in a special isolated domain. The app web may also have links and connections to a remote website or application, as in the provider-hosted model discussed next.
The app cannot directly provision any files or SharePoint-related artifacts such as lists and libraries to the host web. However, apps can provide a special type of Web Part, known as an app part, to the host web. An app part exists as an HTML iframe, and the app part could host a web page for the app. In addition, SharePoint apps can deliver tools known as custom actions, which typically manifest themselves as buttons on the Ribbon.
When the app is provisioned, SharePoint creates a unique domain name for it. This unique DNS domain name is created by combining a static prefix that is defined by the farm administrator with a randomly generated ID. SharePoint then deploys the app web to this unique domain where all of the resources associated with a SharePoint-hosted app will be deployed and requested. To better illustrate this unique domain name, consider the Customer Billing and Time Tracking app that is deployed to the Contoso Sales website with the following URL:
https://www.contoso.com/sites/Sales
The Customer Billing app will be deployed to the newly created website with this URL:
https://app-4523a34b45def.contoso-apps.com/sites/Sales/CustomerBilling
Fortunately, users will access the app through links in the host site, so they won’t need to worry about remembering this URL. In general, the dynamically created URL has the format:
https:// AppPrefix - AppID . AppDomain / HostWeb / AppName
where each of the parameters in the URL is defined as follows:
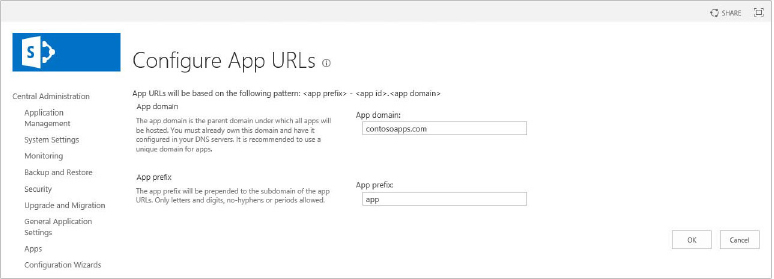
- AppPrefix — This prefix is any string set by the farm administrator in central administration. The default string is "default". It is set to app in the example.
- AppID — This represents a hexadecimal number generated internally when the app is installed. It is set to c4523a34b45def in the example.
- AppDomain — This string is configured by the farm administrator in Central Administration. The recommendation is to have a separate domain compared to the SharePoint web application. It is set to contoso-apps.com in the example.
- HostWeb — This is the relative URL of the parent host web, which in this case is sites/Sales.
- AppName — This is the value of the Name attribute assigned to the app when it is registered.
This is just an overview of how this unique name is created. The actual steps for configuring the app domain are discussed in the section “Setting Up an App Enabled SharePoint Environment.”
One benefit of SharePoint-hosted apps not available to the other hosting options is the capability for a developer to leverage SharePoint application components from within the app web. That is, developers can provision lists, workflows, and other SharePoint components within their app and leverage them as part of the app’s solution.
Provider-Hosted Apps
Provider-hosted apps are very similar to SharePoint-hosted apps. The key difference is that some app components reside outside of the SharePoint farm. When a provider-hosted app is provisioned, a trust is set up between the external components on a remote host and the SharePoint farm. This allows the external components to communicate and leverage the SharePoint components, as well as utilize resources and services that reside on the remote site.
A key advantage of this model is that the app’s components can live on any platform and hardware, which provides the flexibility to use any hosting service. For example, the app can be hosted on Windows Azure or any remote web platform, including non-Microsoft platforms. This model can be deployed using cloud-based remote components or on-premise remote components. The remote components interact with SharePoint via the client-side object model or through web services. The app and its remote components must be authenticated and authorized just like any SharePoint user.
The app model can use different authentication and authorization approaches, but developers are encouraged to use the Open Authentication (OAuth) standard. Typically, provider-hosted apps use OAuth to access SharePoint components, inside both the host web and the app web. For on-premise implementations, there is an option to bypass OAuth and set up what is known as a high-trust app using the Server-to-Server protocol. The security mechanism for permission requests, OAuth, and Server-to-Server authentication are topics covered in more detail in the “App Model Security” section.
Provider-hosted apps can also be considered hybrid apps, as they can technically leverage everything that SharePoint-hosted apps deliver, plus their own custom remote-platform capabilities.
Auto-Hosted Apps
Auto-hosted apps are essentially provider-hosted apps that are hosted in Windows Azure. Developers who construct an auto-hosted app can define what type of remote platform resources the app will require, such as SQL Server databases, Azure websites, and Azure app webs. When site users install an auto-hosted app to their SharePoint site, the required components are automatically created within their Windows Azure account.
App Model Security
App permissions are broken down into permission requests and request scopes. Additionally, SharePoint 2013 has a set of app authorization policies that determine whether the app should be authorized to act on behalf of the user, the app and the user, or just the app.
When developers create an app in Visual Studio 2012, one file in particular provides all the details relevant to the app; this file is known as the app manifest. The app manifest includes a section, denoted by the AppPermissionRequest element, dedicated to the types of permissions the app requires of the host web.
Each AppPermissionRequest denotes a permission that the app needs to have on the host web. This element contains a permission request scope, which provides a URI describing what object(s) the app requires permission to in the SharePoint object hierarchy. For SharePoint content, four permission request scopes are supported, as described in Table 11-1.
TABLE 11-1 SharePoint App Permission Request Scopes
| SCOPE URI | DESCRIPTION |
| Site Collection http://sharepoint/content/sitecollection |
Includes all objects in the site collection to which the app is being installed, including subsites, lists, and files within each site. |
| Website http://sharepoint/content/sitecollection/web |
Includes all the objects in the website to which the app is being installed, including subsites, lists, and files within the site. |
| List http://sharepoint/content/sitecollection/web/list |
Includes all the lists in the current SharePoint website to which the app is being installed. It includes all items within the lists. |
| Tenancy http://sharepoint/content/tenant |
Includes all the objects in the tenant to which the app is being installed. |
In addition to the permission request scope, an AppPermissionRequest needs to specify what rights the app requires for the given scope. For the preceding permission request scopes, SharePoint supports the following rights:
- Read
- Write
- Manage
- FullControl
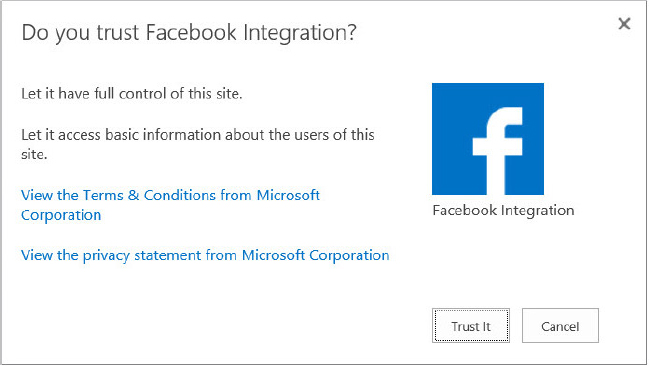
These rights are equivalent to the similarly named SharePoint permission levels. When users install a SharePoint app into their site, SharePoint interrogates the app manifest and asks the user to grant the app the appropriate permissions. Provided the user installing the app has the required permissions, the app will be provisioned.
High-Trust Apps
SharePoint 2013 uses OAuth to authorize remote provider-hosted applications to access SharePoint 2013 data on behalf of a user from a provider-hosted app. In order to authorize cloud apps to connect to data, SharePoint must receive what is referred to as an OAuth token from Windows Azure Access Control Services (ACS). This token is used as an app identity provider. As of this writing, this use case only applies to apps in an Office 365 environment, which is not pertinent to SharePoint administrators with on-premise deployments.
For on-premises scenarios, it is possible for apps to authenticate to SharePoint without using OAuth. This can be accomplished by setting up a server-to-server trust and creating a high-trust app environment. High-trust apps should not be confused with full trust permission or any other permission set used within the SharePoint environment. High-trust apps simply refer to apps that are responsible for creating the user portion of the access token. This effectively means that a high-trust app can assert any user identity it chooses, and instead of using OAuth the app authenticates to SharePoint just like any user.
This is a useful scenario for organizations that want to position the app model as the primary solution for SharePoint customizations. Enterprise developers can build and construct apps for SharePoint with platform and technology independence. High-trust on-premises apps provide a framework for flexible extensions to the SharePoint platform while maintaining farm and process isolation between the customizations and the core SharePoint environment.
The steps for configuring a high-trust app environment are dependent upon SharePoint being configured to support the App Model. Both of these configurations are covered in the very next section.
SETTING UP AN APP-ENABLED SHAREPOINT ENVIRONMENT
Many of the exercises remaining in this chapter require a SharePoint 2013 app file. You can read through the process without actually installing and managing an app, or the administrator can download the file from the book’s collateral website.
This section provides a detailed, step-by-step walk-through demonstrating how to set up a SharePoint 2013 farm to support apps. These steps assume that SharePoint 2013 is already installed and configured as discussed in Chapter 3, “Installing and Configuring SharePoint.”
The steps require the following:
- The user account performing the configuration must be a member of the Farm Administrators group.
- The SharePoint Timer Service and SharePoint Administrator Services must be running.
- The web application must be configured for claims-based authentication.
A high-level summary of the steps is as follows:
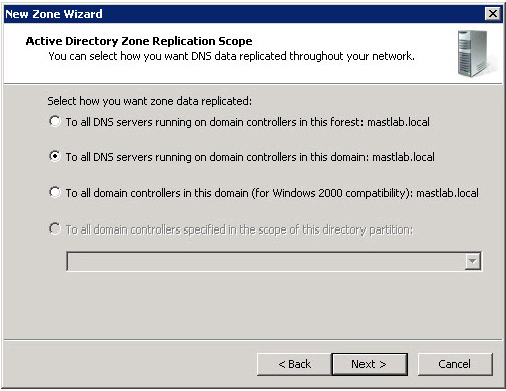
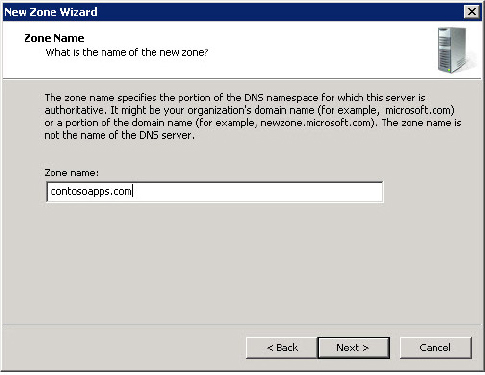
Configuring a Forward Lookup Zone in DNS
The first step in configuring an app is to configure the app’s isolation, which essentially involves creating a unique DNS hostname. All apps must be created in the default intranet zone. Keep in mind that the app domain must have the same private and public DNS accessibility as the SharePoint web application hosting the app. If the app domain is only accessible from the intranet but the web application can be accessed from the Internet, any attempt to access the app from the Internet will return a 404 Page Not Found error.
In the following steps, DNS Manager is used to create a forward lookup zone and enable app isolation:
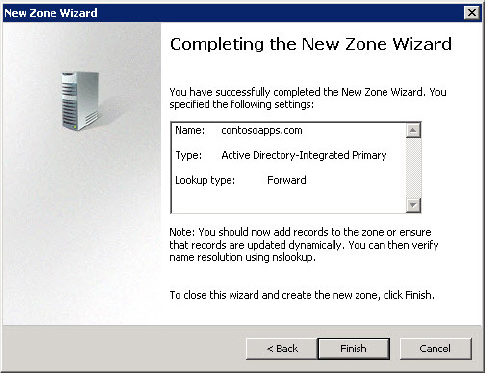
The forward lookup zone (and domain name) has now been configured. You can use the ping command to confirm that requests are being appropriately routed.
Configuring SSL for the App Domain (Optional)
Once the domain host name is set up and configured in DNS, SSL should also be set up. In this scenario, the app domain is a unique root domain separate from other SharePoint site domains. Therefore, a new wildcard SSL certificate should be created to support HTTPS (i.e., *.contosoapps.com). Because each installed app will have its own subdomain, the wildcard certificate is required. Without a wildcard certificate, individual certificates for every app that was installed would be required. This is very difficult to manage for an environment with many apps, and it would be expensive if the organization requires commercial server certificates.
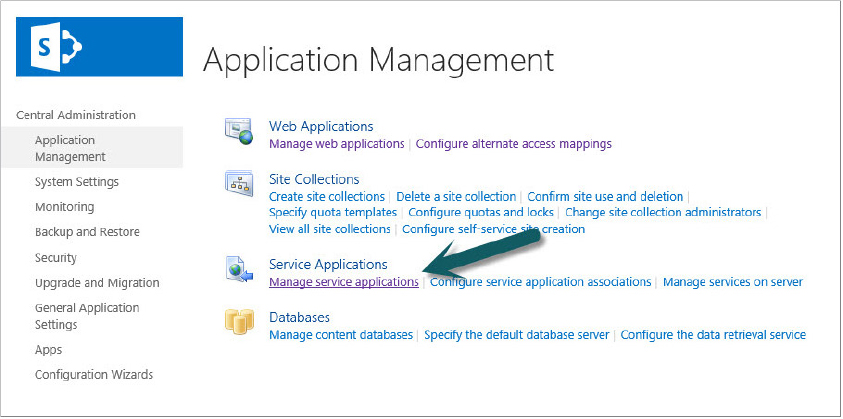
Configuring the Service Applications
Prior to configuring the specific app settings, additional configuration is necessary on the service applications that the apps will utilize. The Subscription Settings service establishes subdomains for apps. The App Management service predominantly serves the role of providing app permissions. Both of these service applications need to be configured and started. Additionally, because SharePoint 2013 leverages some of the multi-tenancy features to create subdomains for apps, you must configure the default tenant name.
These steps are all executed using the SharePoint Windows PowerShell Administrator Console. The user executing these steps should have the following memberships:
- securityadmin inside the SQL Server instance that will contain the databases for the security applications
- If the databases have been pre-created, the db_owner fixed database role on the App Management and Subscription Service databases
- The Administrators group on the SharePoint server from which the Windows PowerShell cmdlets are being executed
Configuring and Starting the Service Applications
The following PowerShell command gets and starts the two necessary service instances:
Get-SPServiceInstance | where{$_.GetType().Name -eq "AppManagementServiceInstance"
  -or $_.GetType().Name -eq "SPSubscriptionSettingsServiceInstance"}
  | Start-SPServiceInstance
Creating Application Pools for the Service Applications
Once the services are started, the service applications need to be configured to use an application pool in IIS. For security reasons, these app pools need to run as the farm account. The following steps configure the application pool.
$account = Get-SPManagedAccount "domainfarm_account"$apSub = New-SPServiceApplicationPool -Name SettingsServiceAppPool -Account
$account
$apApp = New-SPServiceApplicationPool -Name AppServiceAppPool -Account
$accountNotice the use of the $account variable. The two application pools are stored in variables so they can be passed into cmdlets in the next step.
$subSvc = New-SPSubscriptionSettingsServiceApplication
  –ApplicationPool $apSub –Name SettingsServiceApp
  –DatabaseName <SettingsServiceDB>
$subSvcProxy = New-SPSubscriptionSettingsServiceApplicationProxy
  –ServiceApplication $subSvc
$appSvc = New-SPAppManagementServiceApplication -ApplicationPool $apApp
  -Name AppServiceApp -DatabaseName <AppServiceDB>
$appSvcProxy = New-SPAppManagementServiceApplicationProxy -ServiceApplication
$appSvc
In the preceding code, $apSub and $appSvc are variables from previous steps in the configuration. SettingsServiceDB and AppServiceDB should be either the names of pre-created service application databases, or appropriate names for databases that will be created by SharePoint. The service applications are now created and running.
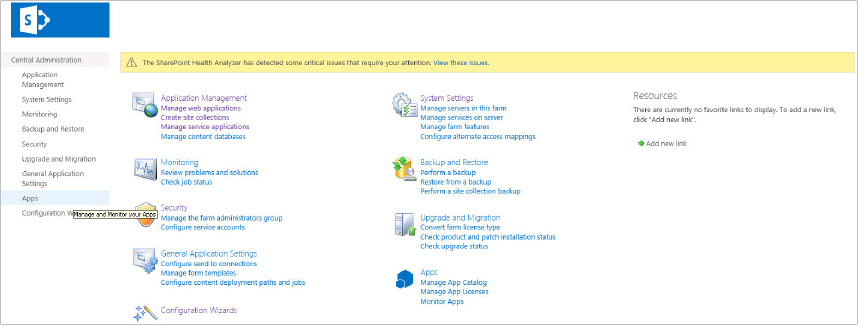
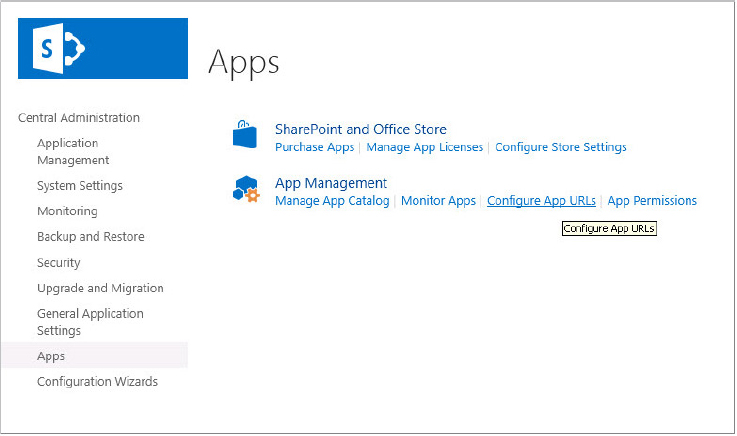
Configuring App URLs
This section outlines the steps for setting up a single tenant configuration for apps. The instructions are outlined for doing this through both Central Administration and the PowerShell Administrator Console.
Via Central Administration
Via the SharePoint PowerShell Administrative Console
Execute the PowerShell cmdlets:
Set-SPAppDomain <isolated app domain>
Set-SPAppSiteSubscriptionName -Name "app prefix" -Confirm:$false
where <isolated app domain> is the DNS host name configured for the isolated app domain, and "app prefix" is the app prefix for provisioned app URLs.
The SharePoint farm is now configured to support apps.
Setting Up a High-Trust App Environment
High-trust apps are provider-hosted apps that utilize server-to-server authentication rather than OAuth. In this deployment model, the app and SharePoint create a trust using a shared certificate rather than using OAuth tokens. This model is not compatible with Office 365 deployments at the time of this writing. Office 365 would require a SharePoint-Hosted or Auto-Hosted deployment model.
The current process for setting up a High-Trust App environment is as follows:
The following sections describe these steps in detail.
Configuring Dependent SharePoint 2013 Services
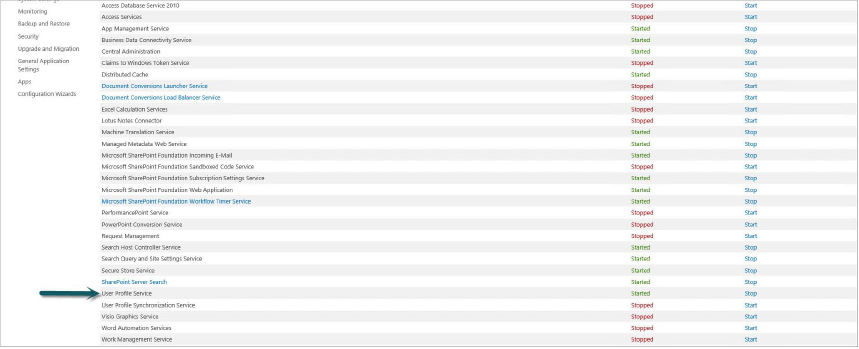
High-trust apps require that both the App Management and User Profile Services are set up and configured. Configuring the App Management Service was detailed previously in the section “Setting Up an App-Enabled SharePoint Environment.” Configuring the User Profile Service is detailed in Chapter 14, “Configuring User Profiles and Social Computing.” In the following steps, you verify that these services have been started and are properly configured.
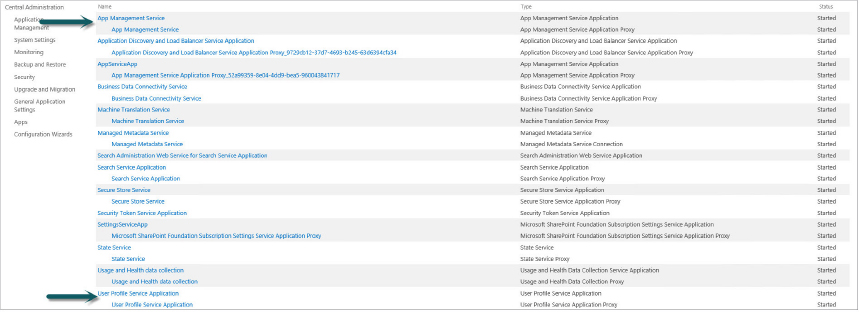
- User Profile Service Application
- App Management Service
The dependent SharePoint service applications are now configured.
Configuring SharePoint 2013 to Trust the Provider-Hosted App
SharePoint needs to establish a trust with the Provider-Hosted App. This involves generating or obtaining an issuer ID for the app, getting a certificate file from the app developer, and then performing several configuration scripts using the SharePoint Windows PowerShell Management Shell. These steps are required for each Provider-Hosted App installed into a SharePoint environment.
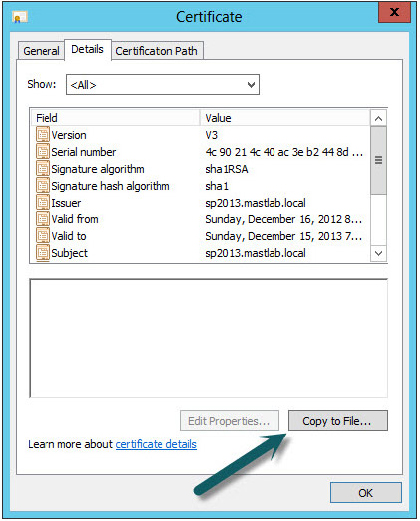
Every High-Trust App must be installed and associated with an “issuer.” An issuer is defined by the combination of an issuer ID (a GUID) and a public certificate. The certificate is generally purchased from a commercial security vendor, and it is provided along with the app by the developer. This certificate and the issuer ID are tightly coupled, meaning that if you create another certificate you must also create a new issuer ID. For the sake of demonstration, these steps are provided below, but typically they will be provided to the administrator by the app developer.
First, you will create a locally signed certificate.
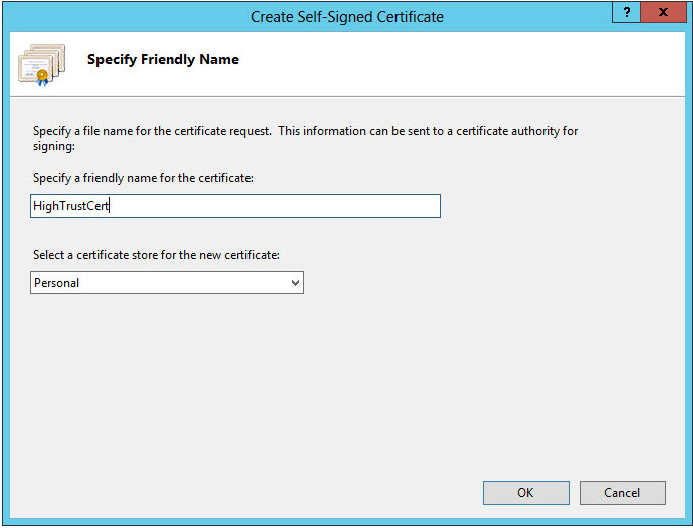
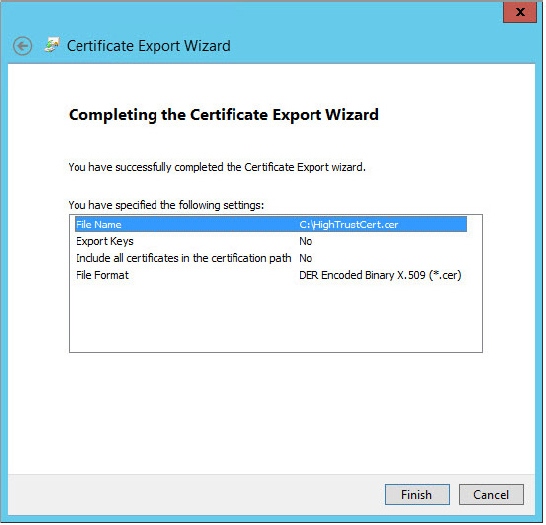
$appCertPath = "c:HighTrustCert.cer"
$issuerId = [System.Guid]::New Guid().ToString().ToLower()
$spurl ="https://<host site URL>"
$spweb = Get-SPWeb $spurl
$realm = Get-SPAuthenticationRealm -ServiceContext $spweb.Site
$certificate = Get-PfxCertificate $appCertPath
$fullAppIdentifier = $issuerId + '@' + $realm
New-SPTrustedSecurityTokenIssuer -Name "<unique name>" -Certificate $certificate
   -RegisteredIssuerName $fullAppIdentifier
$appPrincipal = Register-SPAppPrincipal -NameIdentifier $fullAppIdentifier
   -Site $spweb -DisplayName "<unique display name>"
The script in the preceding code listing does the following things:
Apps require HTTPS to be configured for successful OAuth negotiation. For development environments, you can allow the OAuth process to occur using HTTP. This can be enabled using the following PowerShell scripts.
$serviceConfig = Get-SPSecurityTokenServiceConfig
$serviceConfig.AllowOAuthOverHTTP = $true
$serviceConfig.Update()
Ensuring the Provider-Hosted App Is Correctly Configured
The Provider-Hosted App must also be configured to be a part of the server-to-server trust, which requires changes to the app’s web.config and appmanifest files. This is accomplished in the steps that follow.
- IssuerId — the issuer ID was created when the app was registered. This can be determined using the GetSPTrustedSecurityTokenIssuer cmdlet, and locating the NameId property in the results. The issuer ID will be a string of characters in front of the “@” symbol.
- ClientSigningCertificatePath — represents the location of the .pfx file that is used to create the trust between the app and SharePoint.
- ClientSigningCertificatePassword — the password used to sign the .pfx certificate.
The appSettings node in the app’s web.config file should resemble the following:
<appSettings>
<add key="ClientId" value="4a7dcab1-308e-409c-a84c-4fb027e4e73f" />
<add key="ClientSecret" value="GGO+5/JqzFsNgK+CKrpj+cRXTkeSPRFQR9/DXVylbOA=" />
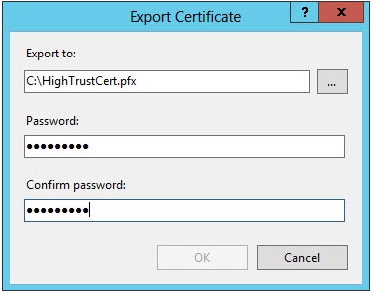
<add key="ClientSigningCertificatePath" value="C:HighTrustCert.pfx" />
<add key="ClientSigningCertificatePassword" value="p@ssw0rd1" />
<add key="IssuerId" value="d26f0f19-bf88-4e68-9d0f-7e3509536e1a" />
</appSettings>Inside the appmanifest.xml file, update the ClientId to be a wildcard value *. This provides an additional level of security for app developers in the other app deployment models.
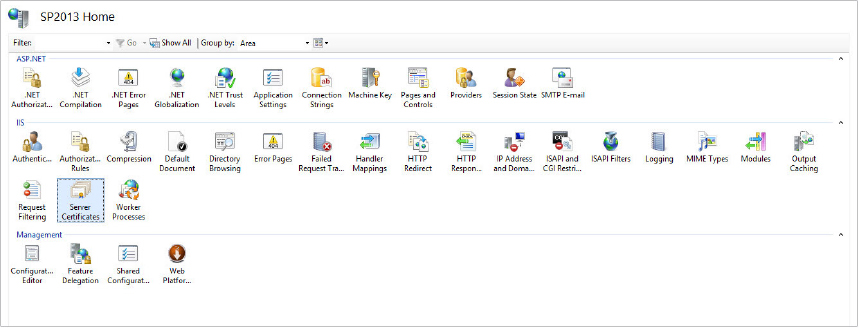
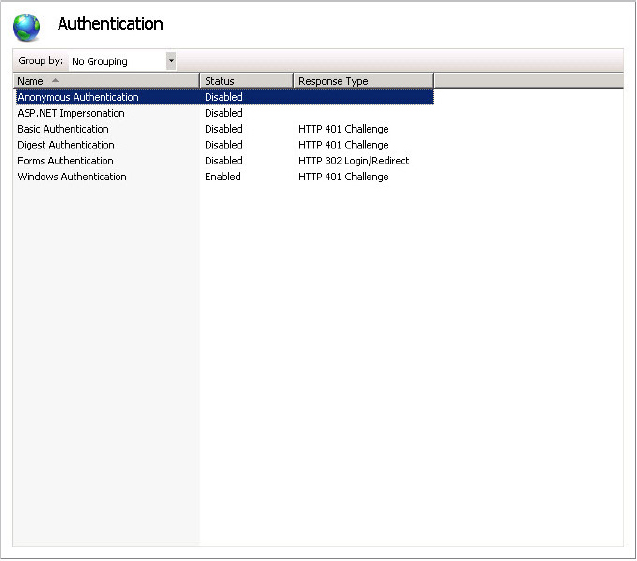
Lastly, deploy the Provider-Hosted App files to an IIS website that is configured with Windows Authentication enabled, and anonymous authentication disabled, as shown in Figure 11-18.
The high-trust app configuration is now complete.
MANAGING SHAREPOINT 2013 APPS
SharePoint 2013 delivers a great deal of functionality and flexibility through the new app model. Many administrators will view these new capabilities as a double-edged sword: while it will be great for their users to take advantage of and extend their SharePoint investment, it could easily become an administrative nightmare for the administrators.
Fortunately, SharePoint includes a number of capabilities directly geared toward the management and governance of apps. These tools include corporate App Catalogs, specific app licensing management capabilities, and multiple methods for adding and removing apps to SharePoint sites.
This section describes the methods and location for interacting with these tools. Specifically, this section covers:
- App Catalogs
- Adding and Removing Apps from SharePoint Sites
- Monitoring SharePoint App Usage
- Monitoring and Managing SharePoint App Licenses
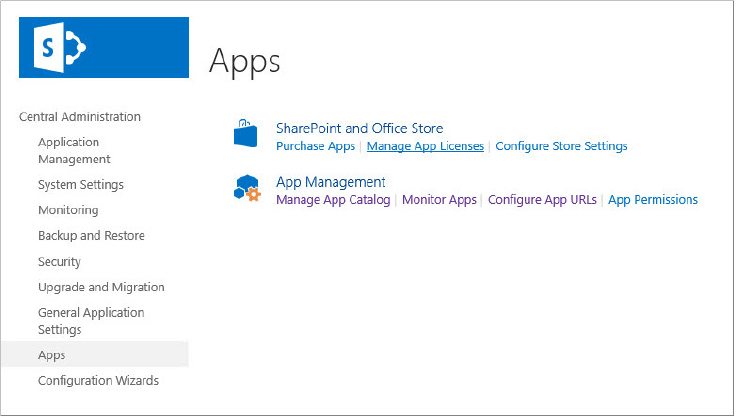
Configuring an App Catalog
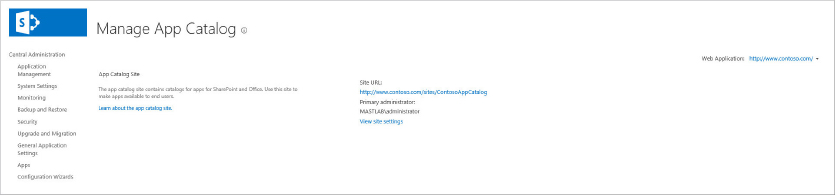
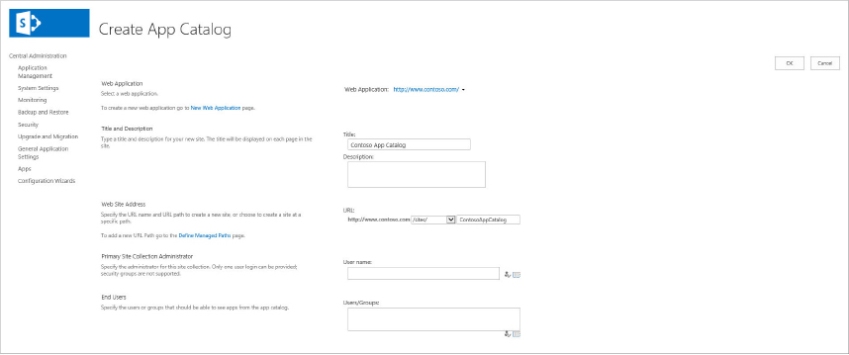
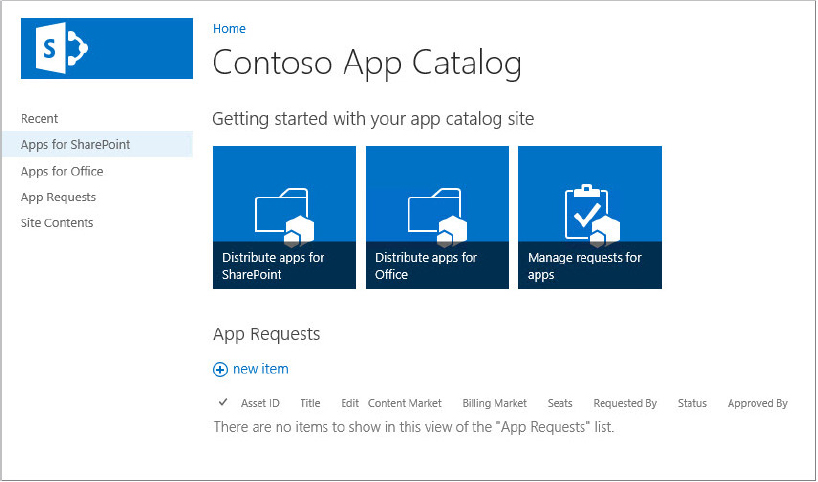
SharePoint 2013 provides an App Catalog that stores an organization’s apps for internal use. Administrators can license apps from the online marketplace and directly from third-party developers. Once purchased, the app is installed directly into their farm and made available in the App Catalog. The App Catalog is scoped to a web application and resides in its own site collection within the web application. Because each web application can have an App Catalog website, a farm can have more than one App Catalog. Administrators can control which users have access to which apps through standard permissions, and can control which apps are available. An App Catalog is created from Central Administration by a person who is a member of the Farm Administrators group.
The following steps explain how to configure an App Catalog:
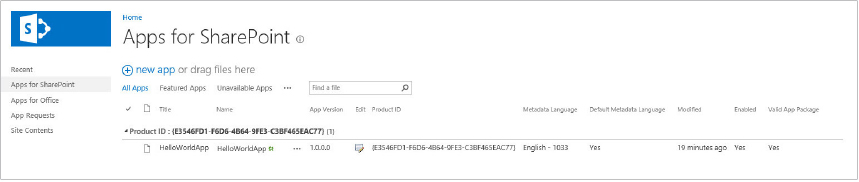
Managing Apps in the App Catalog
Once an App Catalog has been created, apps can be added and removed from the catalog. This allows users that have access to the App Catalog to install a specific or limited set of apps into their SharePoint sites.
To add an app to an App Catalog:
Adding an App to a SharePoint Site
There are several ways to add apps to SharePoint sites:
- Using the list of SharePoint apps available to the current site
- Using the App Catalog associated with the SharePoint farm
- Downloading from the SharePoint Store (App Marketplace)
- Using Windows PowerShell
In all cases, the user installing the app must be a member of the Site Owners group prior to installing an app.
Adding an App from the Site’s Available App List
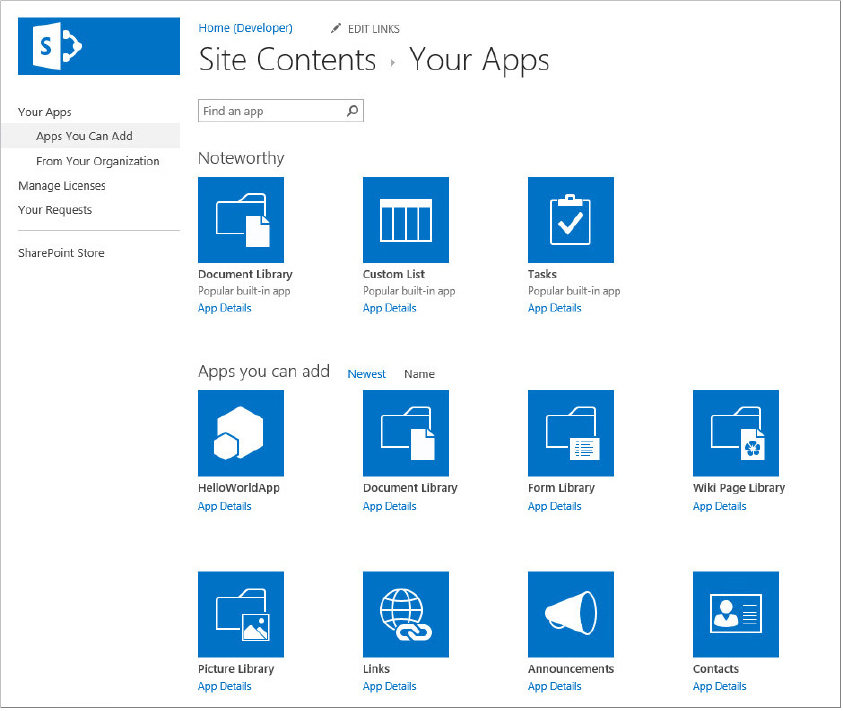
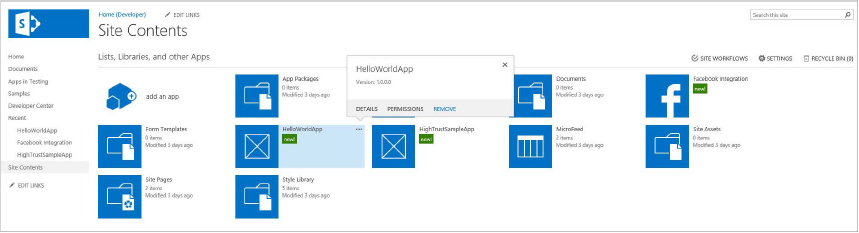
The app is now available in the Apps section of the Site Content list.
Adding an App from the App Catalog
The app is now available in the Apps section of the Site Content list.
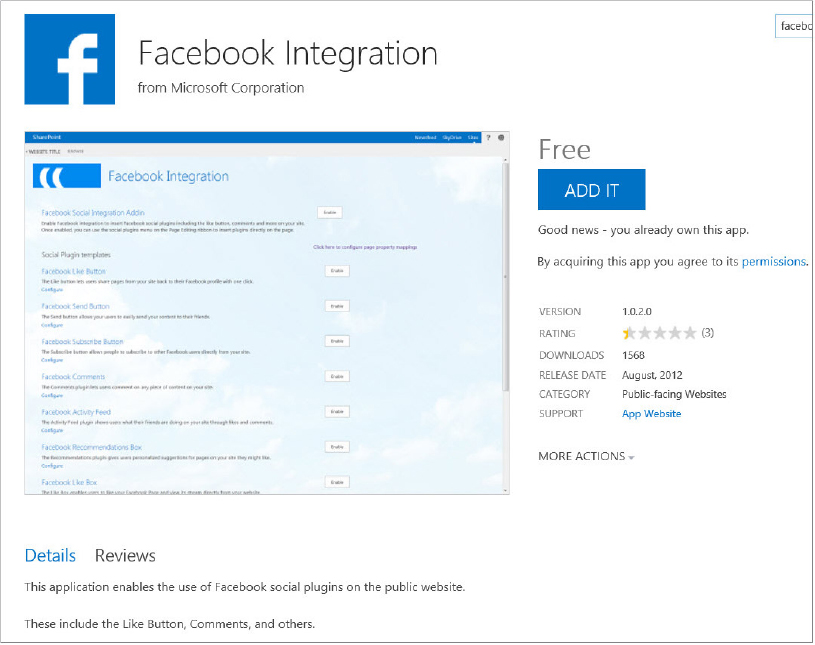
Adding an App from the SharePoint Store

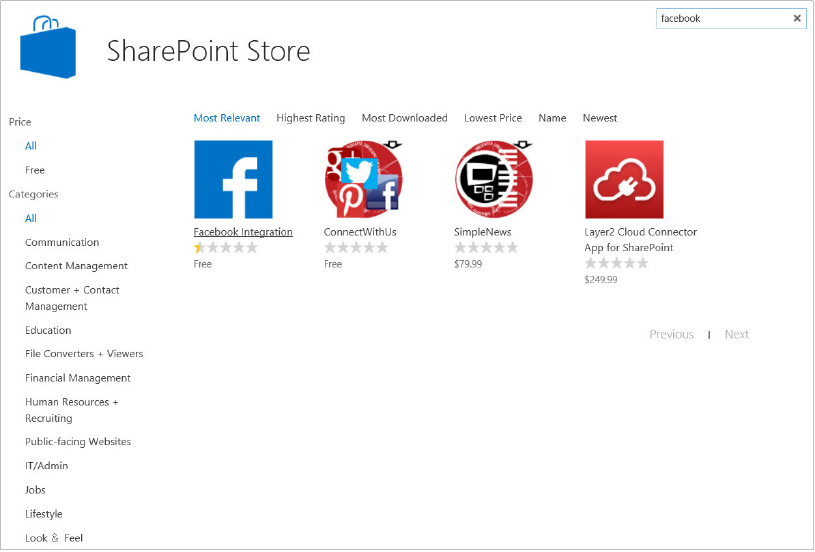
Adding an App via Windows PowerShell
To use the following steps, in addition to being a site owner on the site to which the app should be added, the user must have permission to execute SharePoint PowerShell cmdlets:
$spapp = Import-SPAppPackage -Path Path to app -Site URL -Source Sourcewhere:
- -Path provides the fully qualified path to the app file on the file system
- -Site provides the URL of the site collection to which the app should be imported
- -Source is one of the following: SharePoint Store, App Catalog, or SharePointService.
When asked to confirm the action, type Y.
Install-SPApp -Web URL -Identity $spappwhere:
- -Web provides the URL of the SharePoint website where the app should be installed
- -Identity is the variable in which the imported app was stored
Removing an App from a SharePoint Site
One of the great parts of the App Model is that users can deploy apps to their site, try them out, and, if they aren’t what they are looking for, simply remove them from their site. Apps can be removed from a SharePoint website via the SharePoint user interface or Windows PowerShell. This section describes the steps for both of these approaches. A user must have the Manage Web Site permissions in order to uninstall an app.
Via the SharePoint Interface
Via Windows PowerShell
In addition to having Manage Web Site permissions on the site from which the app should be removed, the user account must also have permissions to execute SharePoint PowerShell cmdlets:
$appToRemove = Get-SPAppInstance -Web <URL> | where {$_.Title -eq '<APP_TITLE>'}
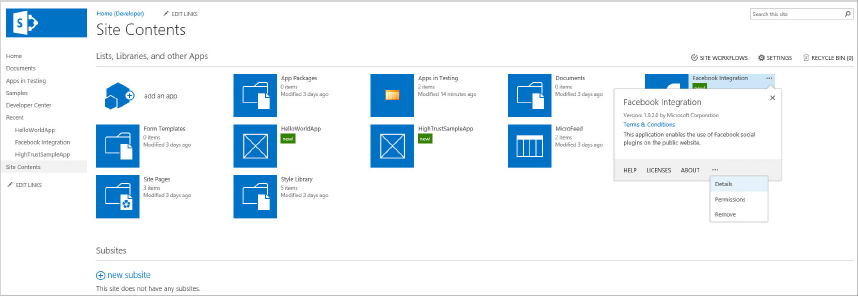
Uninstall-SPAppInstance -Identity $appToRemoveThe preceding code retrieves the app to remove at the URL provided in <URL> and the Title given in <APP_TITLE>. When found, a reference to the app is stored in the $appToRemove variable, and the app is uninstalled using the Uninstall-SPAppInstance cmdlet. SharePoint lists the available apps that have been installed to a SharePoint site on the Site Contents page. Installed apps can be found alongside lists and libraries; clicking on the app tile or link will launch the app, and clicking on the ellipsis (...) provides management options.
Monitoring SharePoint Apps
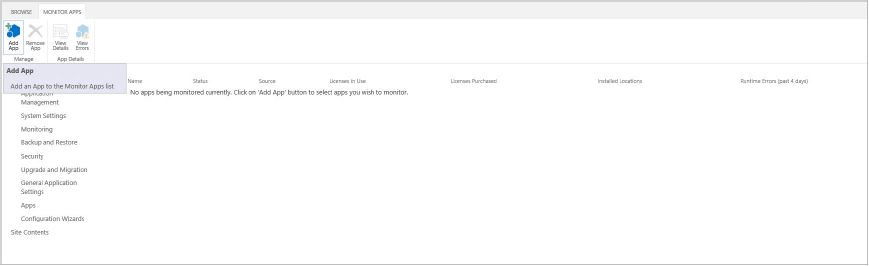
SharePoint provides facilities through Central Administration that enable you to discover and monitor important details about app usage inside their environment. You can monitor app details such as status, licenses in use, licenses purchased, install locations, and runtime errors.
The following sections demonstrate how to perform common tasks related to monitoring SharePoint 2013 apps.
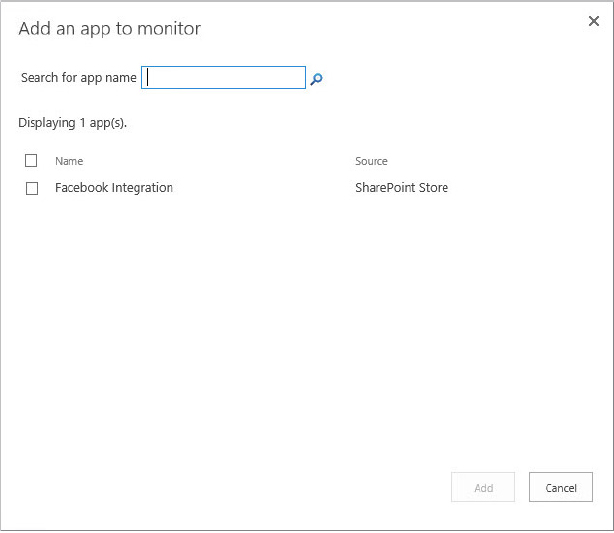
Adding an App to the Monitor List
Removing an App from the Monitor List
Monitoring App Usage from Central Administration
After apps have been added to the Monitor Apps page, you can view error and usage details associated with that app in multiple ways. The following steps describe how to view the app details via Central Administration:
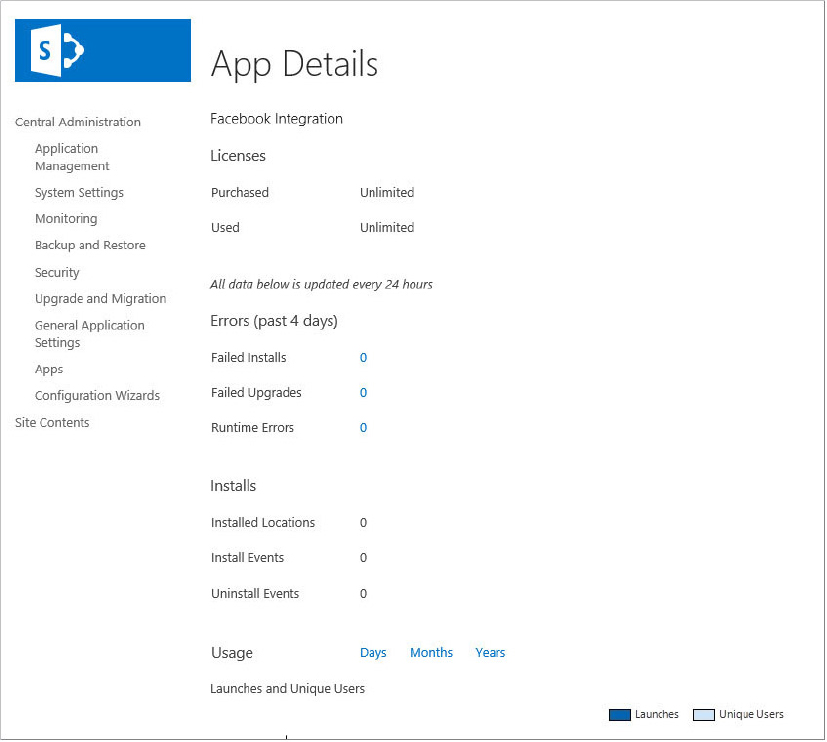
Monitoring App Errors from Central Administration
App runtime errors are also reported on the Monitor Apps page in Central Administration. Use the following steps to discover them:
Monitoring App Usage in a SharePoint Site
Apps are automatically monitored at the site level in SharePoint 2013. This means that it is possible to view the App Monitoring Details of an individual app within an individual site. These details can be viewed with the following steps:
Monitoring and Managing App Licenses
Of course, SharePoint 2013 apps support a licensing model. Developers of apps are responsible for supporting and delivering the licensing model through their own code, although administrators can manage and monitor these licenses. SharePoint 2013 is not responsible for enforcing licensing. Licenses can be transferred up to three times between SharePoint farms.
SharePoint administrators can track the number of users for each license through Central Administration’s Manage App Licenses page. They can also add and remove user licenses as well as add additional users to manage licenses.
Viewing App License Details
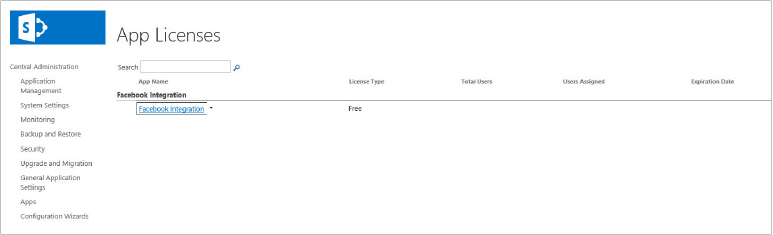
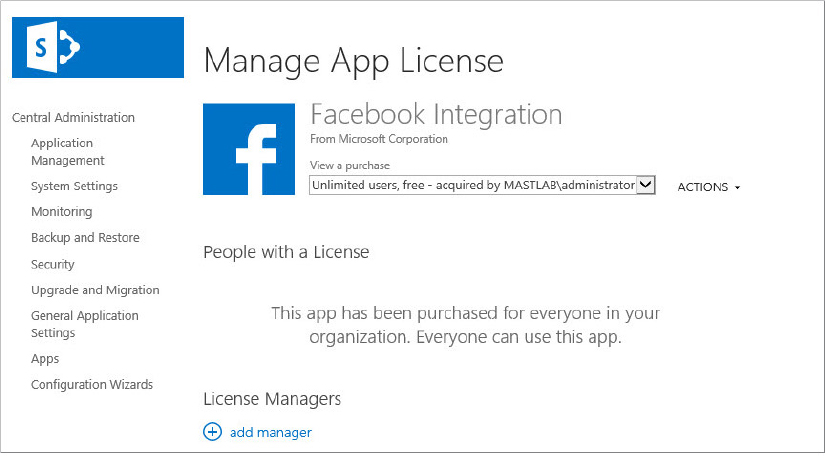
The app details include the following information:
- Number of licenses available for users
- License type
- App purchaser name
In the People with a License section, the number of available licenses and a list of the people who currently have licenses for this app are shown. In the License Managers section, all app managers are listed.
Adding Users to an App License
The list of user names at the bottom of the page, as well as the number of licenses, should be updated.
Purchasing More Licenses for an App
Adding a License Manager
SUMMARY
As you have seen in this chapter, the new SharePoint 2013 App Model enables users to embrace customizations and extensions to the SharePoint platform. It provides this capability to extend SharePoint functionality while reducing any potential negative impact of these customizations to the farm’s health and operations. Administrators who familiarize themselves with the terms and concepts of the new model, and the various hosting options, will be able to configure and manage a farm effectively. Although full-trust farm solutions and sandbox solutions may still be used, the new App Model is the recommended approach for creating and delivering custom solutions.