
Chapter 18
Working with SharePoint Designer
WHAT’S IN THIS CHAPTER
- Introduction to SharePoint Designer
- New features of SharePoint Designer 2013
- Compatibility with SharePoint 2010
- The SharePoint Server 2013 Workflow platform
- Enabling SharePoint Designer restrictions
- SharePoint’s new look and feel
- Site management with SharePoint Designer
- Branding with SharePoint Designer
- Creating and Managing Workflows in SharePoint Designer
In order to learn and work with SharePoint Designer (SPD), you first have to be willing to accept change. SharePoint Designer is synonymous with the word change and for a good reason: Each new version has undergone major changes, and SharePoint Designer 2013 continues this pattern.
In order to understand the direction in which SPD is headed, however, it’s helpful to know something about its past. Back in the early days of SharePoint 2003, users didn’t have an officially branded version of Designer that they could use to customize SharePoint. Instead, SharePoint users had to take advantage of the tools currently available, using Microsoft FrontPage to edit SharePoint 2003 sites.
At the time this seemed like a good idea and there was much rejoicing throughout the land. It wasn’t until organizations started trying to upgrade to SharePoint 2007 that they saw the error of their ways. FrontPage had so drastically changed the code of SharePoint 2003 sites that in many cases upgrading the site to SharePoint 2007 was impossible.
With SharePoint 2007, Microsoft attempted to make a peace offering to the SharePoint community, releasing SharePoint Designer 2007 as the official product to use to customize SharePoint 2007 sites. Not only was it free, but as an added bonus SharePoint 2007 provided power users and information workers with the capability to create workflows and sophisticated no-code solutions that were previously possible only with code written by trained developers.
However, because SharePoint 2007 marked the first official version of SharePoint Designer, it had some shortcomings, odd bugs, and governance issues. These eventually led most administrators to lovingly refer to SharePoint Designer as “SharePoint Destroyer.”
SharePoint 2010 also offered a new version of SharePoint Designer. Changes to this version required SharePoint Designer to be attached to an online SharePoint site before you could do anything; the Office Ribbon was added; and, as a gift to SharePoint administrators, options were added to control who could use SharePoint Designer and how much control they had with the product.
SharePoint 2013 also provides a new version of SharePoint Designer, and again change is the key word, as Microsoft has clearly shaken things up quite a bit with this newest release: At the time of this writing, SharePoint Designer 2013 has no Design View. For those of you who are new to SharePoint Designer, the Design View was a handy window that enabled you to see, in real time, what the changes you were making to your SharePoint site would look like in SharePoint — without having to go through the tedious process of checking in and approving your changes first. Microsoft’s decision to remove Design View has caused a fair amount of heated drama in the SharePoint community, as many users are understandably upset to lose this useful time-saving feature, which for some users represents the only reason to use SharePoint Designer. Of course, Microsoft hopes that removing Design View will result in a faster and more stable version of the product, but there is no doubt that it will take some getting used to.
Now that you have a sense of SharePoint Designer’s history, it’s time to look at where it is headed. This chapter provides a high-level overview of the features, changes, and capabilities of SharePoint Designer 2013. It takes you on a tour of its user interface, and includes examples demonstrating how to perform many common tasks.
INTRODUCTION TO SHAREPOINT DESIGNER 2013
One would assume that with a name like SharePoint Designer it would be a tool to design SharePoint sites, and, as described in the preceding section, that is exactly the use for which it was originally intended. Although SharePoint Designer 2013 is still a tool for designing SharePoint sites, it has been definitely enhanced to do much more. One could easily say that SharePoint Designer has become the go-to tool for SharePoint information workers more than people who work as SharePoint branders, aka the people who make it pretty for a living.
In fact, Microsoft provides the following official list of new features, which highlights just how focused SharePoint Designer 2013 is on “no-code solutions”:
- 2013 Workflows — New, more advanced workflows are built off of .NET 4 and Windows Azure, while still maintaining the capability to create SharePoint 2010 workflows.
- Visual Designer — Workflows still have a visual interface that enables users to create workflows based on Visio and by using drag and drop.
- Packaging — You can now package your workflows to move to different farms or sites, similar to how solution packages work in SharePoint.
- Web Services — Rest services can now be called from within SharePoint 2013 workflows.
And much, much more. ...
Of course, just as there is more to SharePoint than websites there is more to SharePoint Designer than workflows. You can also use SharePoint Designer 2013 to manage or create forms, create and manage data sources from within SharePoint or from external sources, and interact with external content types and line-of-business systems. The following sections get you started.
Requirements for Using SPD 2013
Luckily, one important thing hasn’t changed since SharePoint Designer 2007/2010: SharePoint Designer 2013 is 100% free. When you consider all the features you get with this full-fledged product, SharePoint Designer is indeed very attractive freeware. You can download SharePoint Designer 2013 at the following location:
http://www.microsoft.com/en-us/download/details.aspx?id=35491
Following are the necessary prerequisites for installing and using SharePoint Designer 2013:
- Supported operating systems — Windows Server 2008 R2, Windows Server 2012, Windows 7, and Windows 8. with .NET 4.0 Framework or higher installed.
- Computer and processor — Other than the supported operating systems, Microsoft has not released any system requirements for SharePoint Designer 2013; but the SharePoint Designer client itself is not very hardware intensive and any machine built in the last five years should be able to run the software without issues.
Note that in order to install SharePoint Designer 2013, .NET Framework 4 or later must be installed on the computer on which you are installing SharePoint Designer. Not to worry, though, as the .NET Framework will install on any OS from Windows XP SP3 to Windows Server 2012, and it is available in both 32-bit and 64-bit versions. You can download the .NET Framework here:
http://www.microsoft.com/en-us/download/details.aspx?id=17851
In terms of compatibility, SharePoint Designer 2013 is backwardly compatible; that is, you can use it to open both SharePoint 2010 sites and SharePoint 2013 sites. You can also open SharePoint 2013 sites with SharePoint Designer 2010, but you lose all of the new features and functionality.
While on the subject of compatibility it is important to note that the version of Office you have installed on your computer determines which version of SharePoint Designer you must install. Technically, SharePoint Designer is an Office product (and even has the same interface), so the version installed must match. For instance, if you have the 64-bit version of Office 2010 installed, you must download and use the 64-bit version of SharePoint Designer 2013. Likewise, if you have the 32-bit version of Office 2007 installed, you must use the 32-bit version of SharePoint Designer.
If you have the luxury of choosing, it is recommended that you use SharePoint Designer 2013 along with Office 2013 to safeguard against any compatibility issues. In addition, when in doubt, it is generally a safe bet to go with the 32-bit version of Office and SharePoint Designer 2013. Microsoft has echoed this message as well. The 64-bit version is available if you must use it, but at the end of the day you will find better compatibility with add-ins and other components if you are using 32-bit.
The version of Office you are using is not the only factor limiting which version of SharePoint Designer 2013 you install. If you have previous versions of SharePoint Designer installed, the version of SharePoint Designer 2013 you download must match as well. For example, if you previously downloaded and installed the 32-bit version of SharePoint Designer 2007 and SharePoint Designer 2010 and don’t even have Office installed, you must download the 32-bit version of SharePoint Designer 2013 to match your earlier versions of the product. Otherwise, you must uninstall the previous versions of the product before you can install the 64-bit version of SharePoint Designer 2013.
Integrating SP 2013 and SPD 2013
There are two main issues to confront when integrating SharePoint and SharePoint Designer: authentication and system resources. Both will be considered in this section.
The computer on which you will run SharePoint Designer is not your only consideration before installing it. You also need to consider the SharePoint server to which you plan to connect. Along with ensuring that the SharePoint site and the SharePoint web application allow the use of SharePoint Designer (discussed shortly), you need to determine which authentication method is used by the SharePoint site.
Although this is not fully documented, previous versions of SharePoint Designer work best when connecting to a SharePoint site that uses Windows NTLM authentication. Changing the authentication method to Basic authentication caused odd bugs when you used external content types and tried to use other more advanced features of SharePoint Designer.
In SharePoint Designer 2010, it was not at all uncommon for things to work just fine until you came across a weird error that resulted in wasted time chasing down the source, thinking it was an issue with SharePoint Designer only to discover that the site was using Basic authentication. In fact, at the time of this writing, if your SharePoint site only uses Basic authentication, SharePoint Designer 2013 will not even connect to the SharePoint site. However, sometimes a site is required to use Forms-Based authentication or Basic authentication, so how should you deal with this compatibility issue?
Whenever you plan to use a form of authentication other than NTLM on a web application, the widely accepted workaround is to first create the web application in the default zone using NTLM authentication and then extend the site into another zone using your authentication method of choice. This enables you to connect SharePoint Designer to the fully qualified domain name of the default zone and work without issues.
The last issue in terms of compatibility is system resources. In this regard, SharePoint is smarter than it is sometimes given credit for because it knows when system resources are getting low on the machine that it is running on. Instead of just letting the machine lock up, taking down SharePoint and making your users angry, SharePoint can terminate the functionality of capabilities that it determines are not mission critical. As you might have guessed, one of these capabilities is SharePoint Designer. For example, when the memory usage of the server on which SharePoint is running exceeds 95%, opening SharePoint Designer will result in the not very descriptive error: “The Server could not complete your request.”
Although this message can result in you blaming your SharePoint Designer woes on your computer, yourself, the server, or your cat, the cause is actually quite simple: Your SharePoint server is out of RAM. Therefore, before you start using SharePoint Designer 2013, make sure your SharePoint server is adequately equipped to do what you require, especially when it comes to the new SharePoint workflow platform, which is covered shortly.
SPD 2013 and SPD 2010 Interoperability
During our walk down SharePoint memory lane earlier in this chapter, it was mentioned that you couldn’t open SharePoint 2010 sites with SharePoint Designer 2007, and likewise you couldn’t open SharePoint 2007 sites with SharePoint Designer 2010. Thankfully that trend is now over! With SharePoint Designer 2013, you can open a SharePoint 2010 site and manage it as if you were using SharePoint Designer 2010.
Of course, this means you won’t be able to take advantage of SharePoint Designer 2013 features with your SharePoint 2010 sites; but if you are doing something such as trying to add a new subsite to a SharePoint 2010 site, and the functionality hasn’t changed between the two products, SharePoint Designer 2013 will let you do that.
Likewise, you have the option to open SharePoint 2013 sites with SharePoint Designer 2010, but this is not recommended and could corrupt your sites. Similarly, before you entertain the idea of using SharePoint Designer 2010 to brand your SharePoint 2013 sites in order to use the Design View, be aware that this doesn’t work. The SharePoint Designer 2010 Design View cannot handle SharePoint 2013 master pages, and you will just get errors.
In short, you should match your version of SharePoint to the same version of SharePoint Designer, although you won’t be entirely locked out of the gate if you try to use another version.
SharePoint Server 2013 Workflow Platform
Continuing with the theme of change, perhaps one of the biggest changes with SharePoint Designer 2013 is that this is the first version of the product to require that certain software be installed and configured on the SharePoint server before the full feature set of SharePoint Designer becomes available.
The SharePoint 2013 Workflow Platform is a new service that uses a powerful and robust workflow engine. It’s built on Windows Azure workflow, which is built on Windows workflow and the .NET Framework. If you don’t install and configure the SharePoint 2013 Workflow platform, SharePoint 2013 includes the installation of the same SharePoint 2010 Workflow platform that was included with SharePoint 2010. This provides a level of backward compatibility so that all the workflows you created in SharePoint 2010 can be moved over to SharePoint 2013. It also enables you to create workflows based on SharePoint 2010 in SharePoint 2013 without all of the options that you would have with a SharePoint 2013 workflow.
Because this is a book that focuses on SharePoint administration, it explains the process of installing and configuring the SharePoint 2013 Workflow platform because these are tasks for which you, as the SharePoint administrator, will be responsible to ensure that it is fully and correctly implemented. This in turn ensures that your power users and information workers have the full set of tools they need to create the most robust workflows possible.
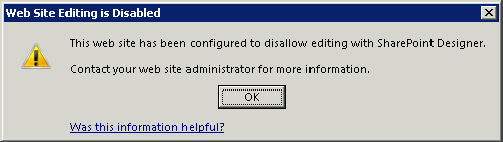
Enabling SharePoint Designer Restrictions
Given that SharePoint Designer is a very powerful tool, as a SharePoint administrator you may not want all your users to have so much control at their fingertips.
This capability is one of the few things that has not changed in SharePoint Designer 2013; you can still limit its use just as you could with SharePoint 2010. For those of you who are new to the product, this section describes how to restrict who can use SharePoint Designer.
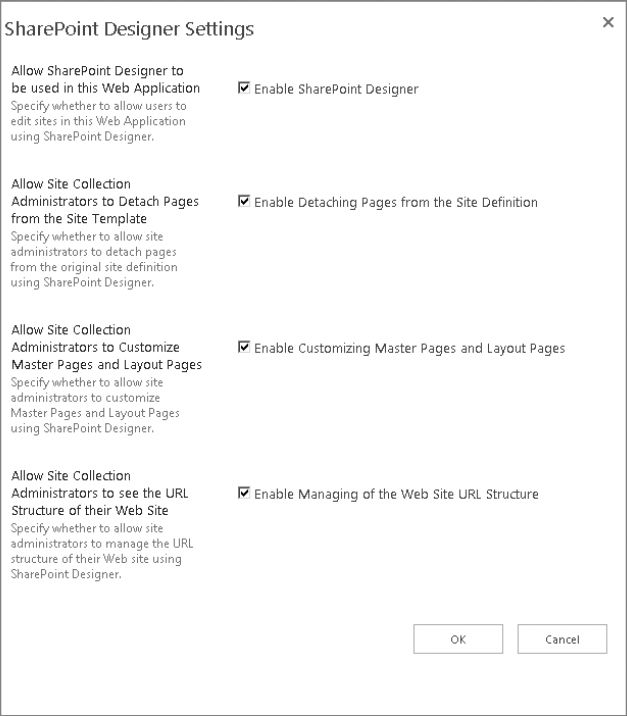
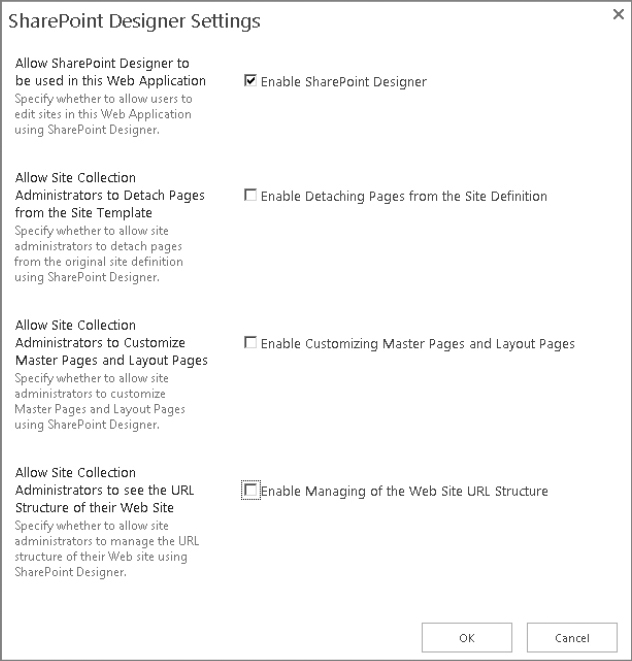
The following options are available to limit how SharePoint Designer is used in an organization:
- Enable SharePoint Designer — Determines whether SharePoint Designer can be used at all
- Enable Detaching Pages from the Site Definition — Allows edited pages to be customized and detached from the site definition
- Enable Customizing Master Pages and Layout Pages — Removes the Master Page link from the Navigation pane and prevents the ability to update master pages and layout pages
- Enable Managing of the Web Site URL Structure — Removes the All Files link from the Navigation pane
These options enable an organization to control SPD 2013 at whatever level is deemed appropriate. SharePoint 2013 allows access to SPD to be controlled at two different levels:
- Central Administration — Accessed from Manage Web Applications. A drop-down menu specific to SharePoint Designer can be found under the General Settings menu. It enables farm administrators to control SPD at the web application level. Disabling the options here prevents site collection administrators from enabling the functionality.
- Site Collection — Accessed from the Site Collection Administration section in Site Settings, this option enables site collection administrators to control SPD access for designers and site owners.
Updating SPD permissions
The following example walks you through the process of updating the SPD settings from Central Administration:
OVERVIEW OF THE NEW USER INTERFACE
Installation of SharePoint Designer is a very easy process. Once you have downloaded the version of SharePoint Designer that is applicable for your environment, be it the 32-bit version or the 64-bit version, just double-click the SharePoint Designer executable to begin the installation process.
If the installer determines that .NET Framework 4 is not installed, you are prompted to download and install it before continuing with the installation of SharePoint Designer. The installer then asks whether you want to do a default install (Install Now) or a custom install (Customize). For most purposes, selecting Install Now will be fine.
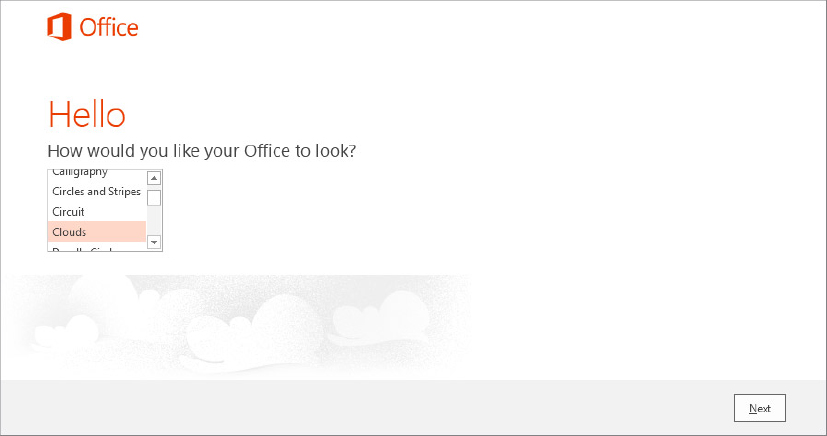
When the installer finishes you can open SharePoint Designer by clicking Start ⇒ All Programs ⇒ SharePoint ⇒ SharePoint Designer 2013. You will notice immediately another change in SharePoint Designer. The logo has the new design of Office 2013 (recall that technically SharePoint Designer is a part of the Office 2013 suite); and unlike previous versions, SharePoint Designer is now much more closely integrated with the Office ecosystem. When SharePoint Designer 2013 starts up for the first time, you are asked a serious of questions about how to configure it. The first thing you need to specify is how updates should be handled. You have three options:
- Use recommended settings — This option instructs Windows Update to download and install new updates for SharePoint Designer 2013 and to offer optional software and Microsoft diagnostic software.
- Install important updates only — This is a less intrusive option that tells Windows Update to download only those updates that patch possible security threats.
- Ask me later — This turns off all automatic downloading for SharePoint Designer 2013, but you can still change this setting later in the options menu.
Next, SharePoint Designer 2013 gives you the option to customize its appearance a little by selecting from several built-in themes (see Figure 18-6).
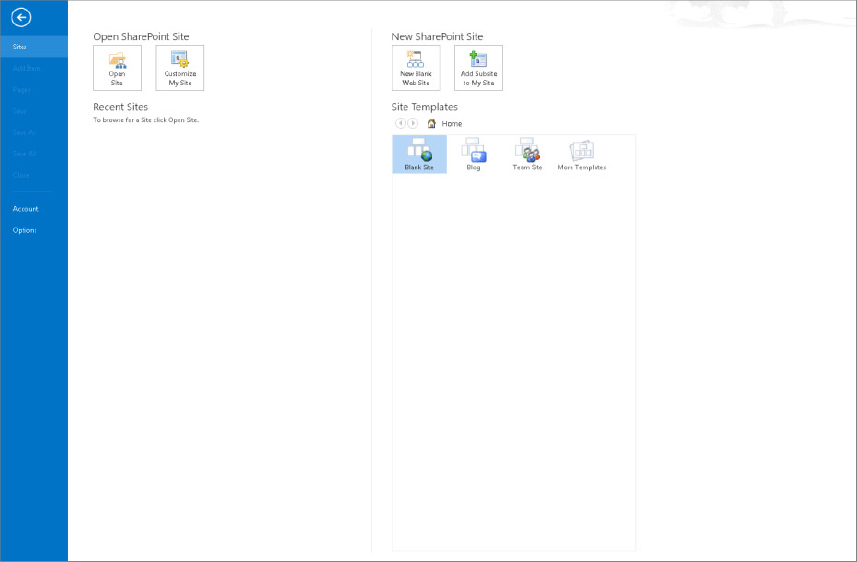
After selecting a theme, you will be in the actual “lobby area” of SharePoint Designer 2013. From a functional standpoint, nothing has changed since SharePoint Designer 2010: The first screen that opens is referred to as the Sites place. This screen is divided into four self-explanatory areas: Open SharePoint Site, New SharePoint Site, Recent Sites, and Site Templates.
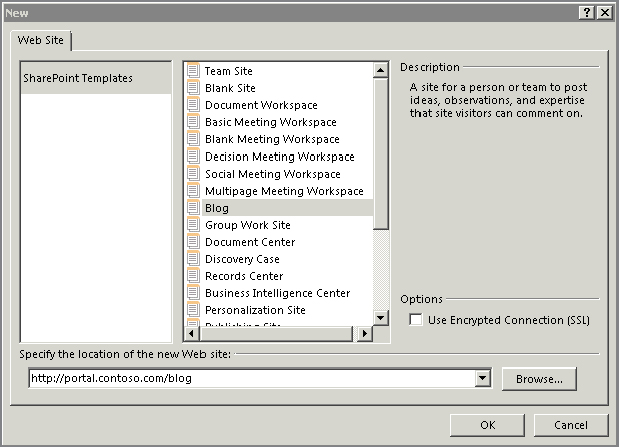
In the Site Templates section, shown in Figure 18-7, by default you’ll see three options: Blank Site, Blog, and Team Site. Clicking one of these templates will open a dialog that enables you to create a new site once you specify a URL. If you want to create a new site based on a template that isn’t specified, you can click the More Templates button and type in the URL of a site that has more options. For example, typing in the URL for a site created using the Enterprise Wiki template would enable you to choose from additional templates such as Enterprise Wiki, Publishing Site, and others.
Because this is the first time you’ve opened SharePoint Designer, the Recent Sites area will be blank. You need to click the Open Site button. When the Open Site dialog appears, you can type in the address of your site or subsite in the format of “http://portal.contoso.com” or “http://portal.contoso.com/subsite,” and then click Open.
What has changed, however, is that SharePoint Designer 2013 now has the look of the new Windows 8 user interface. In fact, as you work with SharePoint 2013, you will notice that the entire product has the look and feel of the Windows 8 UI, including fonts, logos, color schemes, and icons.
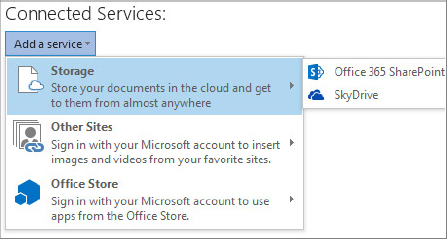
The first area that you should focus your attention on is the Account tab, located in the lower left corner. By selecting this link you will see just how integrated SharePoint Designer 2013 is with Office 2013. Along with the capability to select a theme when you first install SharePoint Designer 2013, you can change the account you are logged in with and add connected services. Connected services enable you to add things such as your Office 365 account or SkyDrive account, which can then be used, for example, to access files and images that are saved on those accounts and import them into the SharePoint site that you are customizing with SharePoint Designer 2013. To add a service, follow these steps:
MANAGING SHAREPOINT SITES WITH SHAREPOINT DESIGNER
At this point, you have installed SharePoint Designer and configured it to work with your SharePoint Server, and you are finally connected to your SharePoint site collection. Now the only thing left to do is get to work. One of SharePoint Designer’s least talked about features is its ability to manage (for the most part) your SharePoint site collections and subsites.
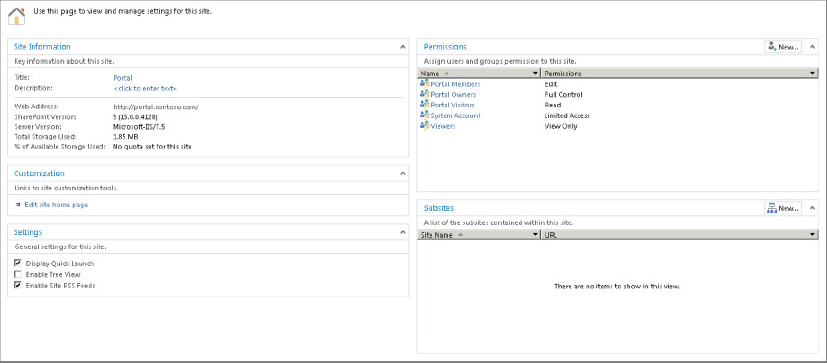
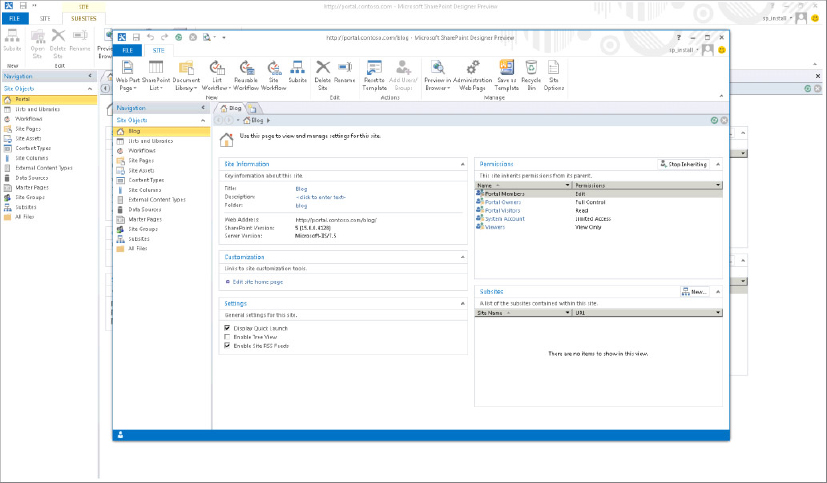
After connecting to your SharePoint site collection, you are brought to the Site Information page. From here you can get a high-level overview of the site. For instance, you can quickly determine the total storage used and what percentage of available storage is used if you have a quota set on your site collection. You can also quickly add users or groups to your site under the Permissions pane, create subsites in the Subsites pane, and enable various settings in the Settings pane.
Granted, these are all things you can do from within the SharePoint site, but not without a lot of clicking through different screens. SharePoint Designer provides you with quick, one-stop access to all the settings from within this one page, as shown in Figure 18-9.
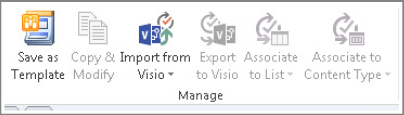
Unchanged from SPD 2010 is access to the Ribbon user interface. As with other Windows products, the available Ribbon options vary according to where your mouse is clicked in SharePoint Designer 2013. For example, if you click the Manage area of the Ribbon inside the Site Information pane (see Figure 18-10), you will see icons for Preview in Browser, Administration Web Page, Save as Template, Recycle Bin, and Site Options.
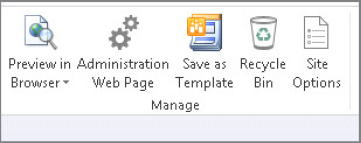
Clicking any of the options doesn’t do anything in SharePoint Designer but instead opens your web browser and takes you to the corresponding section of your SharePoint site for administrating these settings. This may not be as handy as controlling these features from within SharePoint Designer but it does provide you with quick access to all these options.
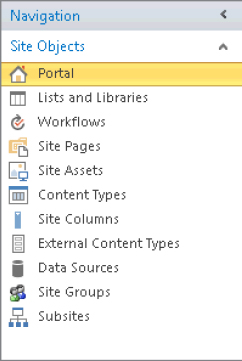
The Navigation Pane
On the left-hand side of SharePoint Designer 2013 is the Navigation pane, shown in Figure 18-11, which provides access to the different areas of its functionality. From here you can browse the content of your site by selecting the All Files site object, start down your branding path by selecting the Master Pages site object, or manage and create workflows by selecting the Workflows site object all just as you did in SPD 2010.
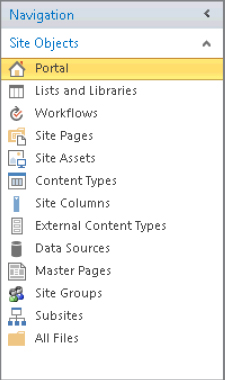
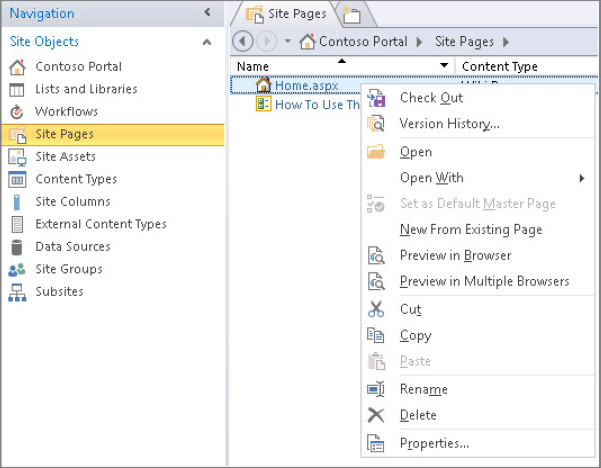
It is from the Navigation pane that you access SharePoint and work with SharePoint Designer. The list of site objects is self-explanatory, and by exploring each site object you can discover how to manage all aspects of your SharePoint site. Pay close attention to the Ribbon as you click each site object, as the available options vary according to what you have clicked. For example, from the List and Libraries area, the Ribbon will give you the option to create a new document library.
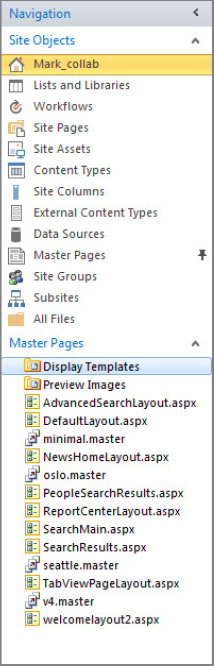
Note also that as you hover over each site object, a pushpin appears on the right. By selecting the pushpin you can pin the site object, marking it as a favorite, which causes the contents of that site object to be displayed in the Navigation pane for quick access. For example, if you find yourself frequently browsing over to the Master Pages section to manage them, you can pin the area for quick and easy access (see Figure 18-12). Note that you can only pin one area at a time.
Creating Subsites with SharePoint Designer 2013
The following steps describe how to create a new subsite with SharePoint Designer 2013:
BRANDING WITH SHAREPOINT DESIGNER 2013
In general, branding refers to the process of using a combination of colors, fonts, and logos for company or product brand recognition. Consider Coca-Cola, for example. Even when you see a sign that doesn’t include the words “Coca-Cola,” if it uses that iconic red and white or includes writing using the Cola-Cola font, you will recognize it as Cola-Cola. That, in a nutshell, is branding. Branding in SharePoint serves a similar purpose. It uses colors, logos, fonts, and layout to create a unique and consistent appearance for your company’s site.
From SharePoint’s first release, users have sought ways to customize its look and feel to better suit their needs. It is both human nature and good business sense to distinguish a site’s appearance. Although there is nothing wrong with SharePoint’s look and feel out of the box, the skill of personalizing it is in high demand, as companies want a collaboration tool that shares its colors and logos, and meets the usability needs of its users.
With the loss of Design View in SharePoint Designer 2013, the state of SharePoint branding and SPD’s role in branding is currently in a state of flux. However, it’s not all gloom and doom. Although Microsoft may have closed the door on one feature, they have opened another with a new feature that will drastically change the way you brand in SharePoint 2013: the capability to map a network drive to your master page gallery via WebDAV. This section covers the basics of SharePoint branding as it relates to SharePoint Designer. For a deep dive into branding, please check out Chapter 12, which is entirely focused on all things branding in SharePoint.
In previous versions of SharePoint, the only supported way to customize your master pages was with SharePoint Designer. Now, however, you can map a network drive to your master page gallery and edit your SharePoint site directly with the design software of your choice. This means you can brand your SharePoint site using something as basic as Notepad or as advanced as professional designer software such as Adobe’s Dreamweaver, which does have a design view and does work with SharePoint 2013.
Versioning
At this point you may be wondering why you should use SharePoint Designer for branding if SharePoint 2013 enables the use of other products, including those dedicated to that purpose. That’s easy to answer: SharePoint Designer is a fully functional and capable design tool that is also free, whereas tools like Dreamweaver are most definitely not. SharePoint Designer is also built from the ground up with SharePoint, and only SharePoint, in mind. Using it, you can still manage and upload all your code and branding assets; analyze CSS properties, including the capability to change CSS from within SPD; add ASP.NET controls; create new content types for your page layouts; and quickly and efficiently manage versioning by checking in or overriding check-outs. In fact, SharePoint Designer is probably the best way to quickly upload and check in a large number of assets — including images and code, such as master pages and CSS files — without having to check in each item separately.
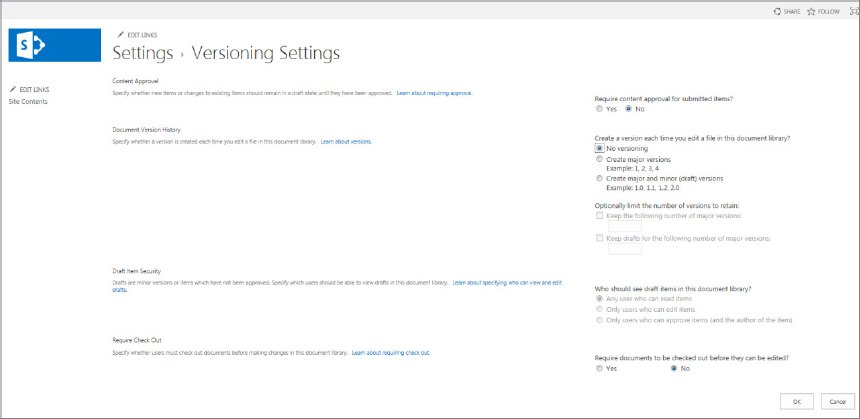
Typically, when you are branding you are likely working with a site that has the SharePoint publishing feature activated, and when the publishing feature is activated the version controls are usually activated as well. Under most circumstances, versioning is a good thing, requiring users to check out a file before editing it so that multiple users can’t make changes at the same time. Of course, it also requires that pages be checked back in before the changes are reflected on your SharePoint site. Versioning is also useful when files should be approved by someone else in your team, which can be great for quality assurance and content deployment. Indeed, these versioning controls are an absolute must when it comes to branding on a production SharePoint site.
Conversely, versioning can be a hassle when you are branding on a test or deployment site, especially now that Design View is no longer available and you cannot see what your changes will look like in real time without first checking in your page each time. Therefore, before you get any further using SharePoint Designer 2013, this section demonstrates how versioning can be turned off so that as soon as you save your site, you can refresh your browser to see any changes.
For the purpose of this example, you will be making these changes on a site created with the Publishing Portal template, which has the SharePoint Server Publishing Infrastructure site collection feature and the SharePoint Server Publishing site feature activated by default.
Now you will no longer be prompted to check in and check out your custom CSS page each time you make a change or load a new image.
Doing this for your master pages is very similar, but the library that contains your master pages is located in Site Settings under the Web Designer Galleries section and is opened by clicking the master pages and page layouts.
In SharePoint 2013, versioning is not turned on by default for the master page gallery, so if you want to enable it you would just repeat the preceding steps but check the box requiring that documents be checked out before editing. As mentioned earlier, turning off the versioning requirement is not recommended for your production farm, but it can save you time on your test farm.
SharePoint Master Pages
Master pages provide the shell of your website, containing your HTML, pointers to your CSS, ASP.NET controls, and your navigation. Master pages enable you to provide a consistent look and feel to all your SharePoint pages. With a master page you can do a little or a lot. You can tweak certain things or totally change the entire structure of your SharePoint site.
Without master pages, SharePoint could not be the massive enterprise collaboration tool that it currently is. Master pages make it possible for every page in your site or site collection to maintain the same look and feel, regardless of whether you have a small site collection with a few subsites and pages or a massive 200GB site collection with hundreds of unique sites. SharePoint Designer provides the capability to customize master pages, enabling you to make a change only once and have it replicated to every appropriate page in your site.
Editing the Master Page
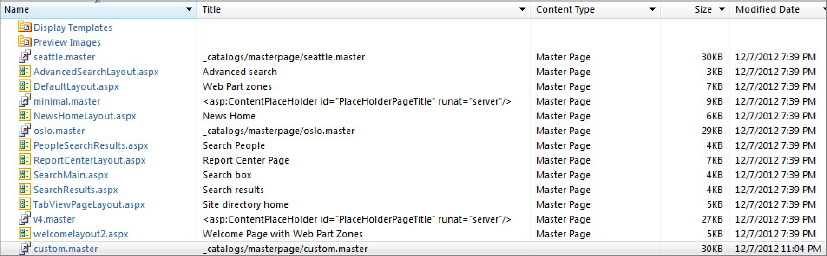
One of the best pieces of advice when it comes to SharePoint branding is to never ever edit SharePoint default files. Whether it’s an image file in the SharePoint root or hive, the main CSS file that SharePoint uses, or the master pages that ship with SharePoint, making changes to these files directly can be disastrous.
You never know when an update for SharePoint may overwrite one of the files you have customized or a mistake in your file prevents your site from loading at all. In scenarios such as these you will be very happy that you are using and can point SharePoint to a customized file that you have created — one that is based off of one of SharePoint’s default files. Fortunately, when using SharePoint Designer, it is very easy to do just that:
Now, if for any reason your customized master page ever causes issues, you can tell SharePoint to use one of the default master pages and regain functionality while you troubleshoot your customized master page.
The following example demonstrates how to edit a master page to make a simple change to your site collection. To illustrate the steps involved, it uses a site collection created with the Team Site template.
The new Team Site template in SharePoint 2013 is very different from what you may be used to with SharePoint 2007 or SharePoint 2010. It makes heavy use of the Windows 8 user interface and is similar in style to what you have seen in SharePoint 2013. Something that you may have noticed at the top of the page is a blue bar that stretches across much of the screen and contains the word SharePoint. You are going to change the color of this bar.
<div id="suiteBarLeft"><div id="suiteBarLeft" style="background-color:gray;">Now all the pages in this site will have a gray bar, rather than blue. Granted, this is a very simple change to the master page but it illustrates how changes are made. Now you have the ability to make changes to other facets of your SharePoint site.
Page Layouts
Page layouts are a part of publishing templates. They enable power users and administrators to create web page-quality layouts for their pages with greater ease and flexibility than text layouts, which are what you must use when publishing features are not activated. Page layouts are also extendable, and you can create your own page layouts in SharePoint designer for even more customization. Page layouts are generally used for an Internet-facing portal, an extranet portal, or a heavily branded SharePoint farm.
It is page layouts that truly enable SharePoint to provide an enterprise with a full-featured content management system, making it possible for content authors to create new articles and pages from within SharePoint that all adhere to one common look and feel.
The out-of-the-box page layouts are a good starting point, but you can also create your own page layouts and make changes to the default layouts. This is where page layouts really start to show their power. This section walks through an example that demonstrates how to make changes to the Blank Web Part page layout. The Blank Web Part page layout contains a page content section and eight zones to which you can add a Web Part. You will remove one of these Web Part zones to constrain users to a total of seven Web Part zones.
In order to follow along with the example, you need to create a site collection based on a publishing template, which is available only with SharePoint Server 2013 Standard and Enterprise Editions. For the purpose of this example, the site collection http://portal.contoso.com/sites/branding will be created from the Publishing Portal Site template.
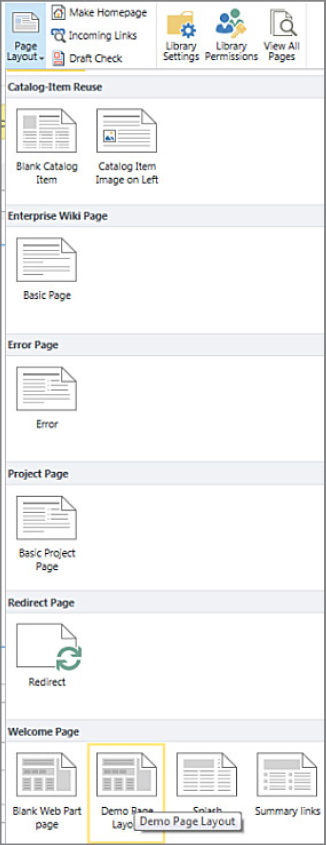
You will now see that you have a page content area with seven Web Part zones. Go through step 10 again and select the Blank Web Part page to see how your page layout differs.
Of course, customizing page layouts isn’t limited to removing items; you can add them as well and even create your own page layouts based on the content types of the default page layouts.
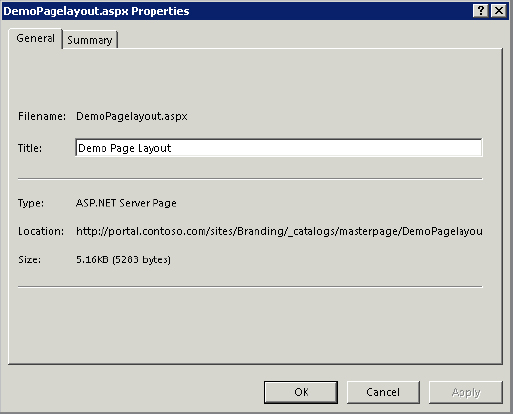
If you go back into the DemoPageLayout.aspx file you just created and edit in advanced mode, you will notice an Insert tab in your Ribbon. Located here are various controls that you can add to your own page layouts, including HTML form controls or navigation controls such as a menu. Simply select the control you want to insert and the required code will be inserted into your page layout.
IMPLEMENTING WORKFLOWS WITH SHAREPOINT DESIGNER 2013
When you think about what companies use SharePoint for, obviously collaboration comes to mind, along with file sharing and for some even a content management system. However, in companies all over the world, one of SharePoint’s most useful and powerful features is the capability to automate business tasks with workflows. Workflows are the heart and soul of SharePoint for many organizations, enabling users to accomplish numerous tasks, such as travel request approvals, help desk submissions, and even payroll applications.
In keeping with the theme of change discussed earlier, SharePoint Designer 2013 workflows now include functionality specifically for Windows Azure Workflow, a change that greatly increases the robustness and feature set of workflows in SharePoint 2013. Indeed, when you consider the large number of new features related to workflows, it’s clear that Microsoft has given them a lot of attention in SharePoint Designer 2013. This section takes a deeper look at these new features.
Recall that when you first install SharePoint, the workflow engine included with SharePoint 2010 is also installed. When you install and integrate the new workflow engine for SharePoint 2013 workflows, you now have full compatibility between SharePoint 2010 workflows and SharePoint 2013 workflows. This is important, as many organizations will have numerous SharePoint 2010 workflows that they want to move over to SharePoint 2013 without having to rewrite them. To be clear, when you install SharePoint 2013, you get the 2010 engine, which may help with compatibility issues. However, if you want the 2013, you can install it by executing the steps suggested earlier.
With SharePoint Designer 2013, the tools available to you when you begin to write your workflows greatly transcend those available previously, enabling you to do things that were only possible for developers using Visual Studio in SharePoint 2010. Workflows are now stage-based, meaning they no longer have to execute steps one right after the other. You can now jump to any stage in your workflow. Loops are also available and variables have been enhanced to support arrays.
Also enhanced is the capability to make web service calls from within SharePoint Designer, including better support for web services such as REST, SOAP, and HTTP. You can also package your workflows in SharePoint Designer 2013 to deploy to a remote farm without having to use Visual Studio to create a solution; and using what is one of the biggest improvements over SharePoint Designer 2010, you can now cut, copy, and paste your code in the text-based designer!
Of course, for some code junkies of the world, SharePoint Designer will not meet all their requirements, and the next step for them is to write their workflows in Visual Studio. If this describes you, I recommend taking a look at the following link to read about the differences and similarities governing what you can do with workflows between SharePoint Designer 2013 and Visual Studio: http://msdn.microsoft.com/en-us/library/sharepoint/jj163199(v=office.15).aspx#bkm_Comparing.
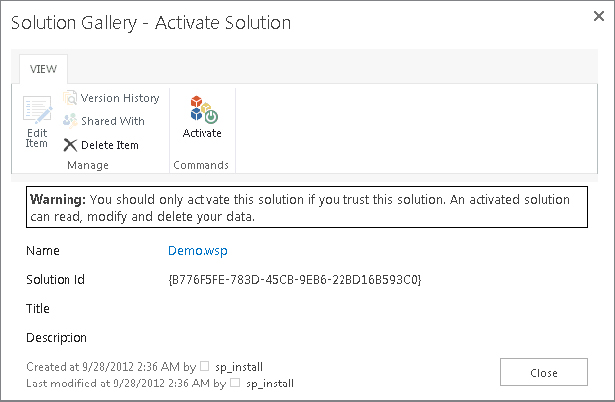
As noted earlier, you can now save workflows created in SharePoint Designer as a template that bundles the workflow as a .wsp package, which you can then deploy as a solution in a remote farm. With SharePoint Designer 2010 it was possible to do this with a reusable workflow, but now you have the same feature for your List and Site workflows as well. Please note that in order for this example to work, you need to have installed and configured the SharePoint 2013 Workflow platform covered previously in this chapter.
Of course, this example only scratches the surface of workflows and how you can use SharePoint Designer to create and manage them. To learn more about workflows, please see Chapter 16, which covers them in detail.
SUMMARY
SharePoint Designer is a full-featured management suite for SharePoint whose features and capabilities extend far beyond editing your SharePoint pages. With SharePoint Designer 2013, you can create no-code solutions that previously could only be created with programs such as Visual Studio. In addition, you can create branding that previously could only be accomplished with full-fledged design software such as Adobe Dreamweaver, quickly and efficiently manage your SharePoint sites, and even design solutions that utilize your external line-of-business applications.
Like SharePoint itself, SharePoint Designer is a robust piece of software that serves multiple purposes. Entire books have been written about SharePoint Designer 2007 and 2010, and SharePoint Designer 2013 will be no exception. Obviously, one chapter can only provide a high-level overview of SharePoint Designer 2013, but hopefully from an administrator’s point of view you now have some insight into its power, and it has piqued your curiosity enough to get you started.