18. Using Other Planning and Management Tools
There is much to be said about properly setting up your QuickBooks file and recording transactions correctly. However, for this chapter I wanted to share with you some lesser known features that can truly help you manage your business and work more efficiently with QuickBooks.
Planning and Budgeting
Like most business owners I have met, you probably know where your money will be spent each month, yet you might not see the value in writing it down. There is an old saying that is very appropriate here: “When you fail to plan, you plan to fail.” This saying couldn’t be truer than when it comes to watching your business financials.
QuickBooks makes the task of creating and tracking a financial budget for your business easy. Just follow a few steps and in no time you can print useful reports that track actual financial performance and compare it to your original budget.
Create a Budget
The first step is to set up a budget. Follow these steps to begin using this feature in QuickBooks:
1. From the menu bar, select Company, Planning & Budgeting, Set Up Budgets. The Create New Budget dialog box displays, as shown in Figure 18.1.
Figure 18.1. Create a Profit and Loss or Balance Sheet budget easily with QuickBooks.
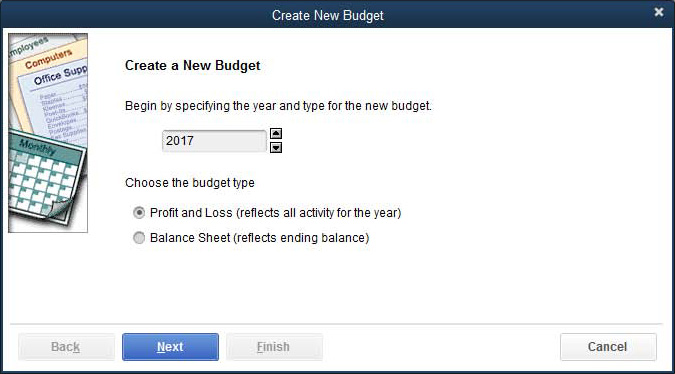
2. Select the year you want to create the budget for.
3. Choose the budget type:
• Profit and Loss
• Balance Sheet
Note
If you have previously created a budget, click the Create New Budget button in the Set Up Budgets dialog box (see Figure 18.4).
4. Click Next. Select from the following choices, as shown in Figure 18.2:
Figure 18.2. Choose the type of budget to create.
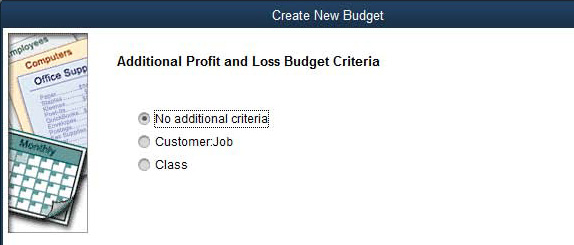
• No Additional Criteria—If you want a simple budget, use this format. I recommend you start with this choice.
• Customer:Job—You can create a budget for your customers or jobs here, but a better method might be to use a QuickBooks estimate. For more information, see “Using QuickBooks Estimates,” p. xxx.
• Class—If you are using classes (department tracking), you might want to select the Class budget report. For more information on classes, see “Class,” p. xxx.
5. Click Next.
6. Choose how you want to create a budget from the choices displayed in Figure 18.3.
Figure 18.3. Choose from two methods for creating the new budget.
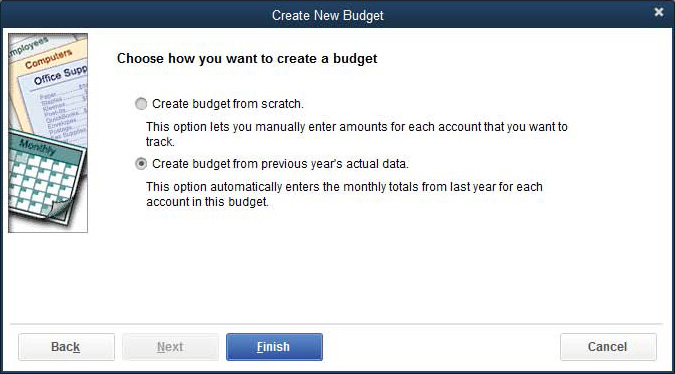
• Create Budget from Scratch—You will manually enter the budget amounts. This method requires the most effort on your part.
• Create a Budget from Previous Year’s Actual Data—The budget is created using the prior year’s data, allowing you to modify the budgeted amounts as needed. I recommend starting with this option.
7. Click Finish. QuickBooks creates the new budget. In Figure 18.4, a new budget has been created using actual revenue and expenses from the prior year.
Figure 18.4. QuickBooks can create the budget quickly using actual information from the prior year.
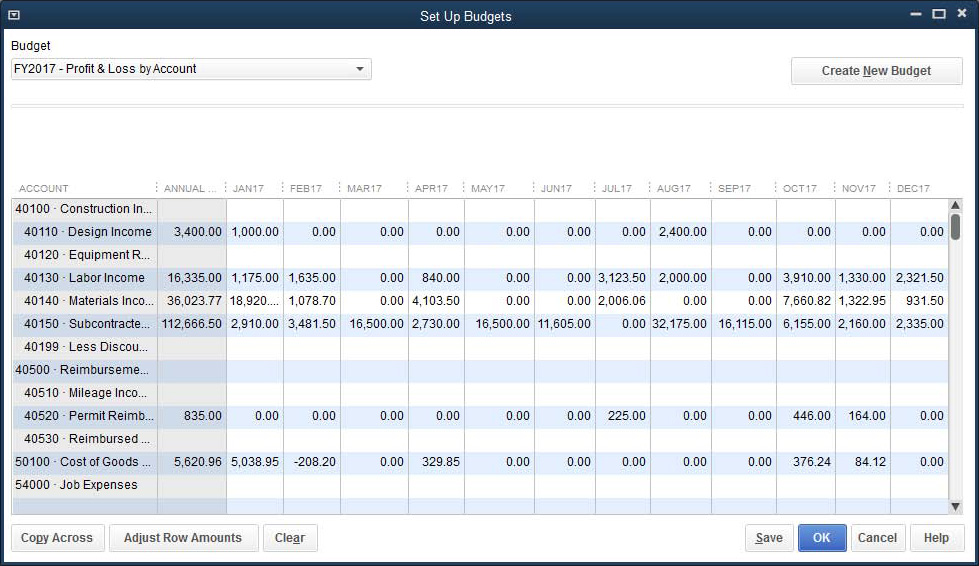
8. Click Save. To close the newly created budget, click OK.
Edit a Budget
Budgets can be edited at any time to accommodate changes in your business. Additionally, if you created the budget using last year’s actual numbers, you can follow these steps to revise the budget information:
1. From the menu bar, select Company, Planning & Budgeting, Set Up Budgets, your previously saved budget displays.
2. To view a different budget, click the drop-down list to select the desired budget.
3. To create a new budget, click Create New Budget and follow the steps listed in the previous section.
4. With your cursor, click in any cell to change the amount budgeted for that category and month.
5. (Optional) With your cursor in a specific cell, click Copy Across and QuickBooks copies that amount to all the columns to right of your current cursor position.
6. (Optional) With your cursor in a specific cell, click Adjust Row Amounts. You can choose to increase or decrease by a specific percentage or dollar amount. See Figure 18.5. You can choose to update the following:
Figure 18.5. Use the Adjust Row Amounts dialog box to quickly change your budget amounts.
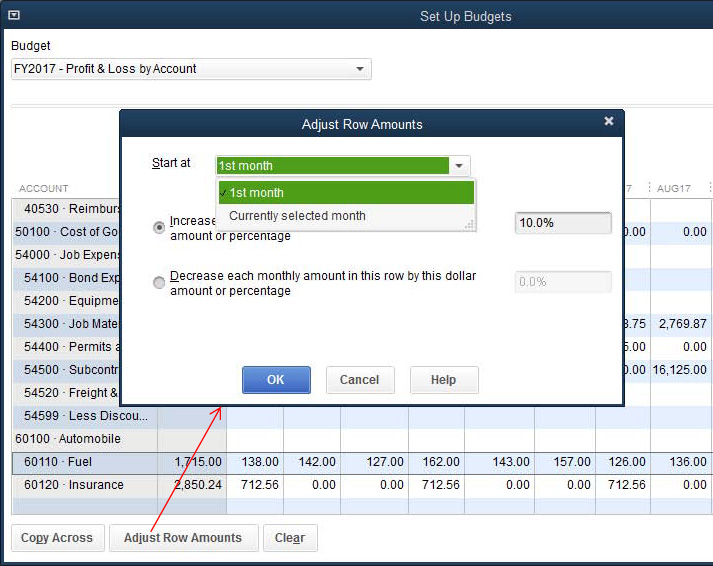
• 1st Month—Update budget amounts beginning with the first month in the year.
• Currently Selected Month—Update budget amounts beginning with the currently selected month.
Caution
If you select Clear and then choose Yes, QuickBooks removes all the budgeted amounts for the currently displayed budget.
7. Click OK to close the Adjust Row Amounts dialog box. QuickBooks calculates new budget amounts depending on your selections in step 6.
8. (Optional) Click Clear and answer Yes or No to the warning message about clearing this page of the budget.
9. Click Save to save your changes as you work.
10. To close the budget, click the X in the top-right corner. You might be asked if you want to record your budget changes. Choose from Yes, No, or Cancel.
Print Budget Reports
You now have a budget prepared. So let’s see how your current year is progressing by viewing the budget reports included with QuickBooks. From the menu bar, select Reports, Budgets & Forecasts where you will find these reports:
• Budget Overview
• Budget vs. Actual
• Profit & Loss Budget Performance
• Budget vs. Actual Graph
• Forecast Overview (available only in Premier or Enterprise)
• Forecast vs. Actual (available only in Premier or Enterprise)
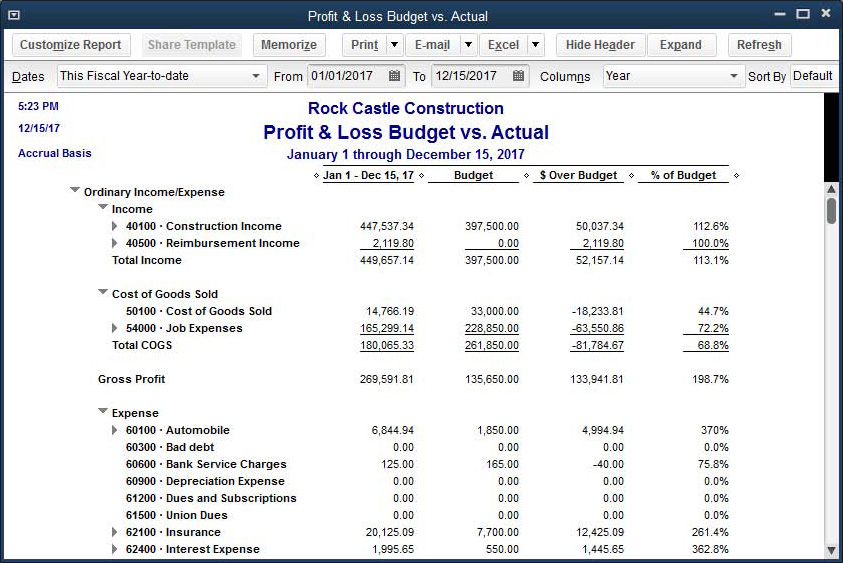
Figure 18.6 shows a Profit & Loss Budget vs. Actual report.
Figure 18.6. This report can be displayed for many time periods, including day, month, and year.
To display a budget report, follow these steps:
1. From the menu bar, select Reports, Budgets & Forecasts, and choose a report.
2. In the drop-down list, select the year’s budget you want to review.
3. Click Next.
4. If the report offers multiple layout options, select the layout of your choice and click Next.
5. Click Finish to prepare the report.
You can also modify the information displayed on this report. Click Customize Report to modify these settings:
• Report Date Range—Settings that determine the dates included in the budget details.
• Report Basis—Accrual or cash basis.
• Columns and Rows—Settings that determine what data is included in the budget.
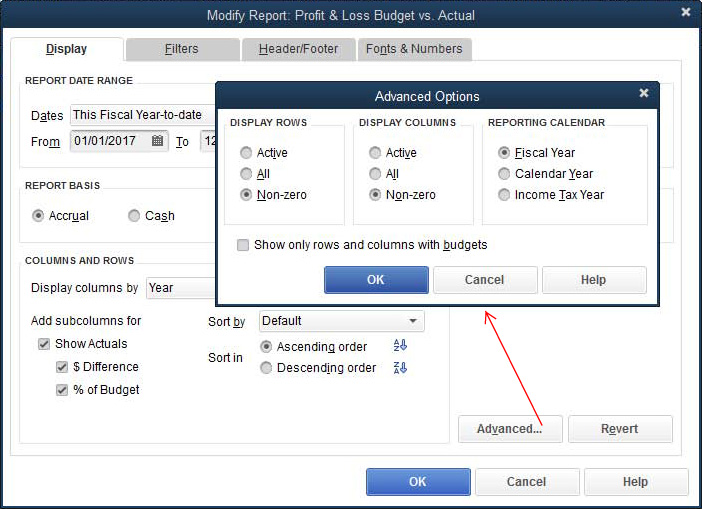
(Optional) Click the Advanced button and choose to Display only Nonzero rows or columns. You may also want to click the Show Only Rows and Columns with Budgets checkbox. See Figure 18.7.
Figure 18.7. Modify the information displayed in the Budget vs. Actual report.
Delete a Budget
If you find it necessary to delete a budget and start over, follow these steps:
1. From the menu bar, select Company, Planning & Budgeting, Set Up Budgets. Your previously saved budget displays in the Set Up Budgets dialog box.
2. From the menu bar, select Edit, Delete Budget.
QuickBooks Loan Manager
Use the Loan Manager in QuickBooks to track loans you have created in QuickBooks. The Loan Manager helps you track all your loans in one convenient location.
With the Loan Manager you can
• View payment schedules
• Set up loan payments
• Analyze different loan payoff scenarios
Information to Collect
Before adding a loan to the Loan Manager, you should have the following information about your loans available. This information is usually included on your original finance documents:
• Origination Date
• Payment Amount
• Payment Term
• Escrow Amount (if any)
• Interest Rate
Getting QuickBooks Ready
Before setting up a loan in the Loan Manager in QuickBooks, you need to set up the following:
• Create a Loan Payable Account—Usually a long-term liability account. This account displays the balance owed on the loan.
• Create an Expense Account—To record the interest paid on the loan.
• (Optional) Create an Escrow Account—Create an escrow account if required for your specific loan reporting needs.
• Create a Vendor Record—This is the person or institution to which you’ll make payments.
If you have previously been using these QuickBooks accounts, make sure the balances in these accounts are up to date and agree with your lending institution’s balances for the loan. Most businesses use a single interest expense account for all loans.
Setting Up a New Loan
To use QuickBooks to track your loan payment, follow these steps:
1. From the menu bar, select Banking, Loan Manager.
2. Click Add a Loan and complete the information as displayed in Figure 18.8.
Figure 18.8. Complete the account information for the loan.
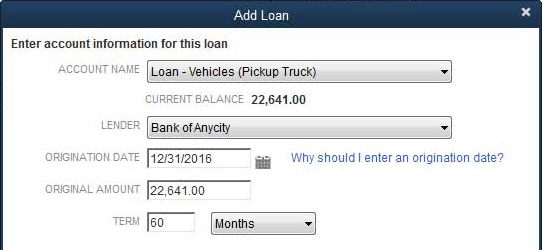
3. In the Account Name drop-down list, select the long-term liability account for the loan.
4. In the Lender drop-down list, select the payee.
5. Enter the loan Origination Date.
6. In the Terms drop-down list, select Weeks, Months, or Years. Click Next.
7. Enter the Due Date of Next Payment, Payment Amount, and optionally, Next Payment.
8. Select the Payment Period.
9. (Optional) Choose Yes or No to making an escrow payment and complete the fields for Escrow Payment Amount and Escrow Payment Account.
10. (Optional) Select the box to be alerted 10 days before the payment is due. Click Next.
11. Enter the Interest Rate and select a Compounding Period.
12. Choose a bank account from the Payment Account drop-down list.
13. Choose the Interest Expense Account and the account for Fees and Charges.
14. Click Finish. QuickBooks displays information in the Loan Manager about the newly created loan. See Figure 18.9.
Figure 18.9. Use the Loan Manager to track long-term loan details.

Setting Up a Loan Payment
To set up a payment for the loan, follow these steps:
1. Select the loan from the list and click the Set Up Payment button. The Set Up Payment dialog box displays as shown in Figure 18.10.
Figure 18.10. The Loan Manager can create the payment for the loan.
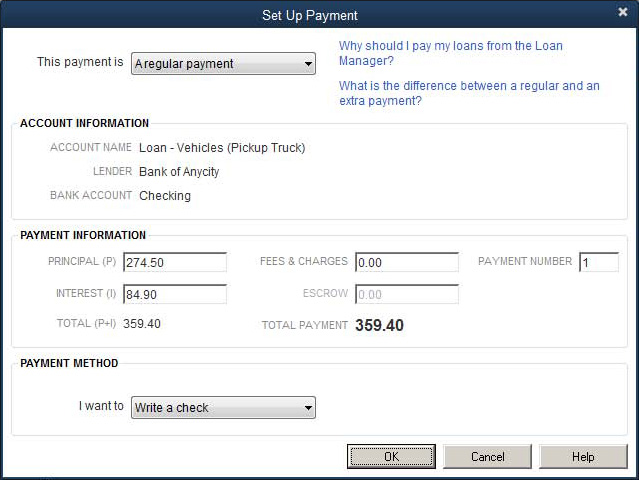
2. In the This Payment Is drop-down list, select one of the following options: A Regular Payment or An Extra Payment.
3. View the Account Information and Payment Information. Modify the Payment Information if necessary.
4. Select a Payment Method choosing between Write a Check or Enter a Bill.
5. Click OK and QuickBooks prepares a check or bill with the correct payment information.
Additionally from the Loan Manager, you can do the following:
• Edit the loan details or remove the loan.
• View summary information about the loan.
• View the payment schedule by payment number.
• Access contact information for the vendor, as set up with the original vendor record.
• Print the details of the loan.
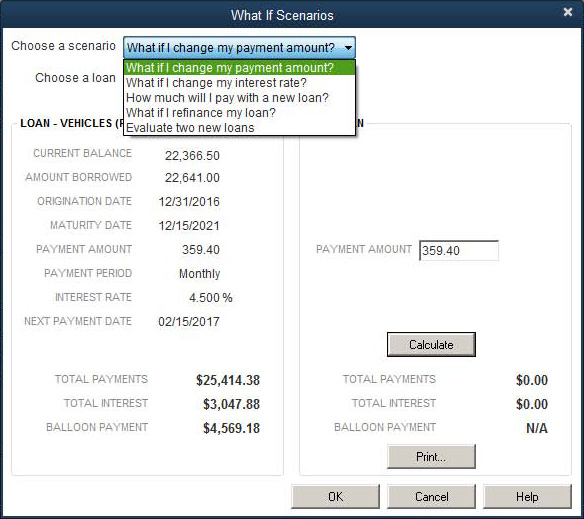
• View multiple What If Scenarios, as shown in Figure 18.11.
Figure 18.11. Use the QuickBooks Loan Manager to analyze different loan payoff scenarios.
Using the Year-End Guide
QuickBooks offers a ready-made Year-End Guide and checklist to help with your year-end tasks, as shown in Figure 18.12. Keep track of your progress as you get your file ready for your accountant or for tax time.
Figure 18.12. Use the Year-End Guide to help prepare your file for tax time.
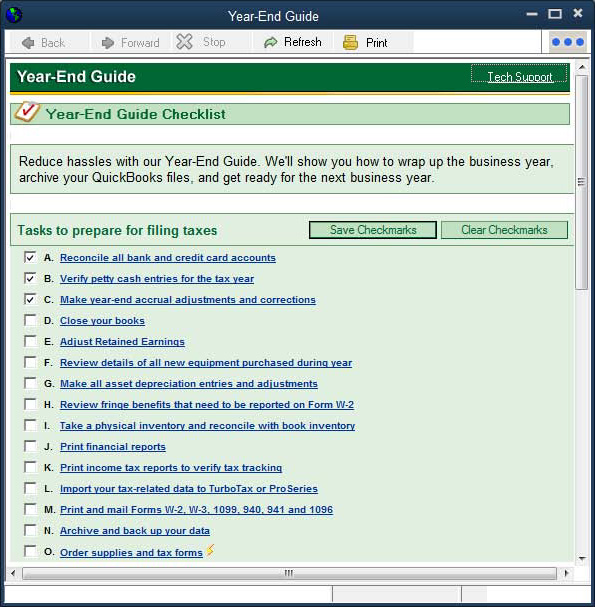
From the menu bar, select Help, Year-End Guide. Each task offers a link to more detailed help information. (Optional) Click the Save Checkmarks button so you can keep track of completed tasks.
Synchronizing QuickBooks Lists with Microsoft Outlook
If you use Microsoft Outlook to manage contact information, you can synchronize your contact data with QuickBooks. The information that can be synchronized includes the following:
• Customer and Job contact information
Note
If you delete a contact in Outlook, that name is not deleted in QuickBooks.
Note
If you need help backing up your Outlook Contacts, from the QuickBooks Help search box on the icon bar, type back up Outlook data and select to search Help. Follow the appropriate links for more detailed information.
• Vendor contact information
• Other Names list contact information
To begin synchronizing your QuickBooks lists with Microsoft Outlook, follow these steps:
1. Before proceeding with this task, make sure you have a backup of your QuickBooks data and your Outlook contacts.
2. If you have previously installed the Contact Sync tool, you will be prompted to synchronize your contacts.
3. If you have not previously installed the free Contact Sync tool, from the menu bar, select File, Utilities, Synchronize Contacts. The Synchronize Contacts message displays. Select OK to be directed to the website (Internet connection required) to download the tool.
4. Before proceeding with the install, close Outlook. Click the file that was downloaded and follow the instructions to install.
5. After installing, open Outlook. The Contact Sync Setup Assistant displays. See Figure 18.13.
Figure 18.13. Setup of the QuickBooks Contact Sync is easy with step-by-step instructions.

Tip
If you want to have your QuickBooks contacts in a unique folder separate from your other contacts, create the new contact folder in Outlook and select the folder in step 7.
6. Click Get Started and review the Begin Setup information. Click Setup.
7. QuickBooks Contact Sync displays the available Outlook Folder. If more than one is detected, select the appropriate folder. Click Next.
8. Select from Customer, Jobs, and Vendors to Synchronize. Click Next.
9. (Optional) Select to exclude from synchronization Outlook contacts marked as Personal or Private in Outlook. Click Next.
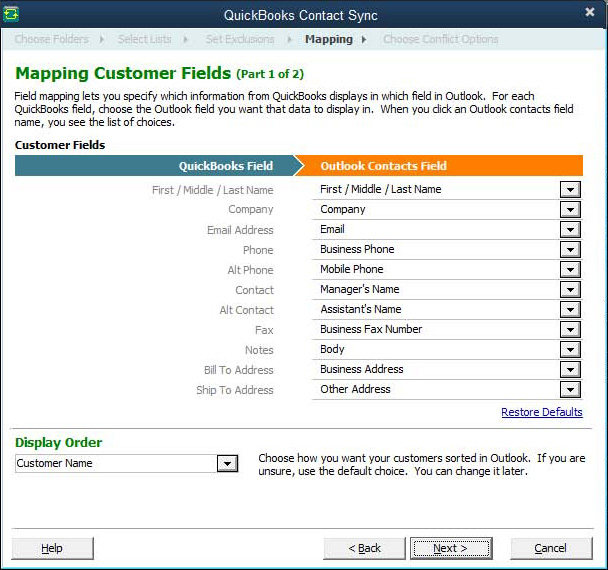
10. Review the defaults in the Mapping Fields window, as shown in Figure 18.14. Modify as needed or select Restore Defaults. Click Next.
Figure 18.14. Modify the default mapping of fields from Outlook to QuickBooks.
11. If you selected to import Jobs or Vendors, complete the same information as detailed in step 10. Click Next.
12. Set an option for resolving any conflicts. Choices include
• Let Me Decide Each Case
• Outlook Data Wins
• QuickBooks Data Wins
13. Click Save. Click Sync Now.
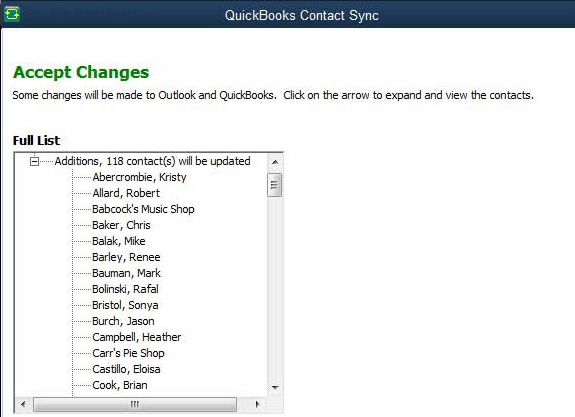
14. QuickBooks displays a Contact Overview Complete. If you selected the Let Me Decide Each Case in step 12, click Next to review the list of contacts to be imported.
15. Click to Accept the changes, which is not shown in Figure 18.15, and import the contacts. QuickBooks displays a progress bar.
Figure 18.15. Review the contacts to be imported, if you selected the option in step 12 to Let Me Decide Each Case.
16. Click Accept. QuickBooks displays a Synchronization Complete Message, click OK to close.
17. You can now view your contacts in Outlook, or your Outlook contacts in QuickBooks. See Figure 18.16.
Figure 18.16. QuickBooks and Outlook will update with changes to contact details.

The tool automatically installs in Outlook a QuickBooks Add-Ins tab (Outlook 2010) or a QuickBooks Toolbar (Outlook 2007 and earlier). From the Add-Ins you can change your synchronizing settings or Synchronize Contacts.
Using the QuickBooks Timer
The QuickBooks Timer is a separate program that can run on its own without QuickBooks. Time recorded with the QuickBooks Timer can be added to customer invoices when you do Time and Expense invoicing.
→ For more information, see “Time and Expense Invoicing,” p. xxx.
Features of the QuickBooks Timer include the following:
• Track time spend on a task using a clock timer, or enter the time after you have done the work.
• Track time without having access to the QuickBooks data.
• Give a copy of the QuickBooks Timer program to people whom you want to track time, such as employees or subcontractors.
The basic workflow for using the QuickBooks Timer requires some manual processes, so be sure it is the right solution for you. The process includes the following four steps:
1. Once installed, the administrator of the QuickBooks file exports the current list of Service Items, Customers and Jobs, Vendors, and Employees.
2. The timekeepers receive this file via email or on a removable storage device like a USB flash drive. The lists are imported into each individual QuickBooks timer file.
3. The timekeepers track their time on their own computer and then when completed export the time to a file attached to an email or USB storage device.
4. The QuickBooks file administrator receives the file(s) and imports the time.
Each time the customers, jobs, vendor, employees, or service list items change, a new export file must be sent and imported by each timekeeper.
Note
You can also download the program from the Intuit support website http://support.quickbooks.intuit.com if you did not install your QuickBooks software from a CD-ROM. On the support website, type QuickBooks Timer into the search box. Scroll and click the link for Install the QuickBooks Timer instructions. Included in the instructions is a link to download the file. Click the setup.exe file and follow the install instructions on the screen.
Installing the QuickBooks Timer
The QuickBooks Timer install file is located on the program CD-ROM if you ordered a CD or is a free download online. To install it from a CD, follow these steps:
1. Insert the QuickBooks CD-ROM into the computer.
2. Exit the QuickBooks startup if it displays.
3. Click the Microsoft Windows Start button and select Run.
4. Enter D:QBTimer (where D: is your CD-ROM drive). Click OK.
5. Double-click the Setup file.
6. Follow the Timer installation instructions.
You can create a CD-ROM with the same install file and provide this CD to other timekeepers who might or might not have access to QuickBooks.
Tip
Time format can be in decimal (10.20) or minutes (10:12). Log in to the QuickBooks data as the Admin user and then from the menu bar, select Edit, Preferences, General, Company Preferences tab.
Note
If you downloaded your QuickBooks program, you will not have a CD to install the Timer from. Follow these directions to download and install the free QuickBooks Timer:
Visit the www.quickbooks.com/support website and in the search field type: HOW13261. This will direct you to the appropriate Knowledge Base article with links and instructions for downloading the free QuickBooks Pro Timer that works with all windows versions of QuickBooks.
Tracking Time with the Timer
Timekeepers can track time using the QuickBooks Timer even if they do not have access to the QuickBooks data file. However, to be current with the list of customers, jobs, or service items, the QuickBooks Administrator should frequently export the lists as detailed in the previous section.
To begin tracking time using the QuickBooks Timer, follow these steps:
1. Launch the QuickBooks Timer. If you recently installed the timer, you can launch it by clicking the Start button in Windows, All Programs, QuickBooks Timer, QuickBooks Pro Timer.
2. In the QuickBooks Pro Timer window, click New Activity.
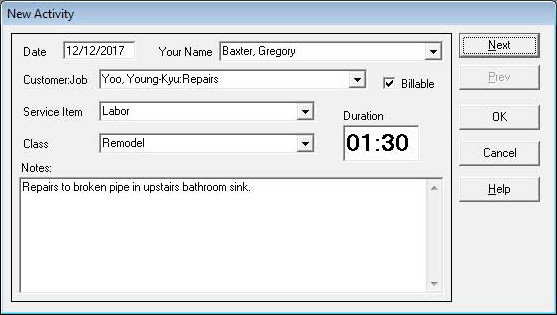
3. Select the Date, Your Name (timekeeper), Customer:Job, Service Item, optionally Class, and then enter an optional Note as displayed in Figure 18.17.
Figure 18.17. Enter your time after the service is performed, or click OK to start a “stopwatch” type of timer for the activity.
4. (Optional) Select Billable if this item will be included on a customer’s invoice.
5. Click OK. The Timer shows the current activity. Click Start.
6. The QuickBooks Timer now begins a stopwatch type of timer. If instead you are entering your time after the service is performed, enter the time in the Duration field.
7. Click Edit at any time you need to change the time recorded.
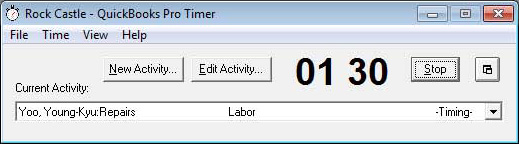
8. Click Stop to stop the timer and Resume to begin timing again. See Figure 18.18.
Figure 18.18. You can choose to use a stopwatch timer to track activities.
9. Click Stop when you are done with the selected task.
Exporting Timer Activities
If you are not entering your time directly into the QuickBooks file, the file administrator will need you to export your timer activities so that they can be imported into the QuickBooks file. When you are instructed by the QuickBooks administrator to export the Timer activities, follow these steps:
1. From the QuickBooks Timer file menu, select Export Time Activities. Click Continue.
2. Select the date you will be exporting activities through. Click OK.
3. Provide a filename and accept the default location for storing the exported lists, or browse to select a location of your choosing. The file will have the extension of .IIF (Intuit Interchange Format). Remember this location because you will need to attach this file to an email or copy it to a removable storage device such as a USB flash drive. Click Save.
4. Click OK to close the Data Exported Successfully message.
Each timekeeper needs to provide this saved file to the QuickBooks administrator for importing into the QuickBooks file.
Tip
You can set a preference to have all time activities marked as billable. From the menu bar, select Edit, Preferences, Time and Expenses on the Company Preferences tab.
You would mark a time activity as billable only if your company wants to include line detail on a customer’s invoice for the employee’s or vendor’s time activities. This is referred to as Time & Expense or Cost Plus billing.
Note
The next time you import timer activities, QuickBooks remembers where the lists were stored.
Importing Timer Activities into QuickBooks
One of the features of using this free timer program is that the user does not need to have QuickBooks installed.
When you want the timer activities included in your QuickBooks data file, you need to import the Exported Timer Activities. Ask each of your timekeepers to follow the instructions listed previously for exporting their timer activities.
To import the Timer Activities received from your timekeepers, follow these steps:
1. Receive your timekeepers’ individual QuickBooks Timer Exported Lists files. The files will have an extension of .IIF (Intuit Interchange Format).
2. Launch QuickBooks. From the menu bar, select File, Utilities, Import, Timer Activities.
3. Click OK to the Import Activities from Timer message.
4. Browse to the location where you stored the Exported Timer Activities from your timekeepers.
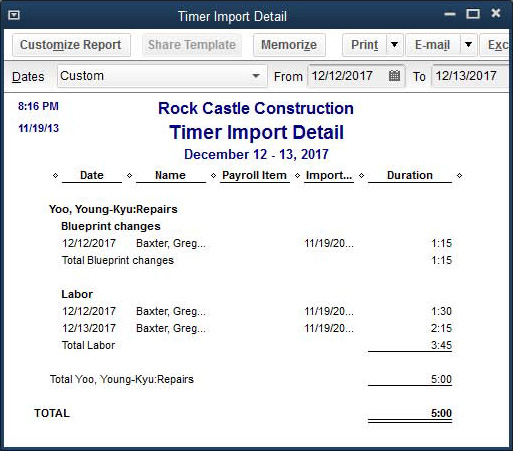
5. Select the file. Click Open. QuickBooks displays the QB Pro Timer Import Summary. Click View Report (see Figure 18.19) to see a listing of the time activities imported. See Figure 18.20.
Figure 18.19. View a summary of the imported timer activities.
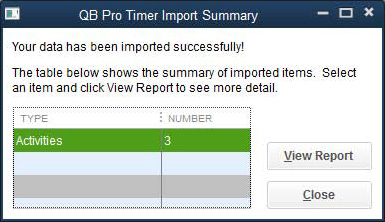
Figure 18.20. Details of the imported timer activities.
You can now include these imported timer activities on customer invoices, or issue vendor checks or employee checks using the timer activity totals.