
Chapter 3: Starting Work with OutSystems
In this chapter, we'll see how OutSystems offers a free account option. This means we can learn how to develop projects, test our code, and even make small personal applications for free!
In order to start enjoying all the OutSystems features, we need to purchase an environment and register.
In this chapter, we will learn how to scale our application according to our needs. We will also learn what OutSystems platform capabilities and features are, and what we have to gain by adopting it.
OutSystems offers a set of solutions with simple mechanisms for registering and downloading tools. Let's look at them in more detail!
This chapter will cover the following main topics:
- OutSystems pricing and editions
- Setting up our Personal Environment
- Installing OutSystems IDEs
- Opening and starting Service Studio
- Opening and starting Integration Studio
Let's get started!
OutSystems pricing and editions
The first thing to do is identify the best solution for our business needs regarding the available OutSystems editions. There are currently four different editions, and each edition can be customized in different ways:
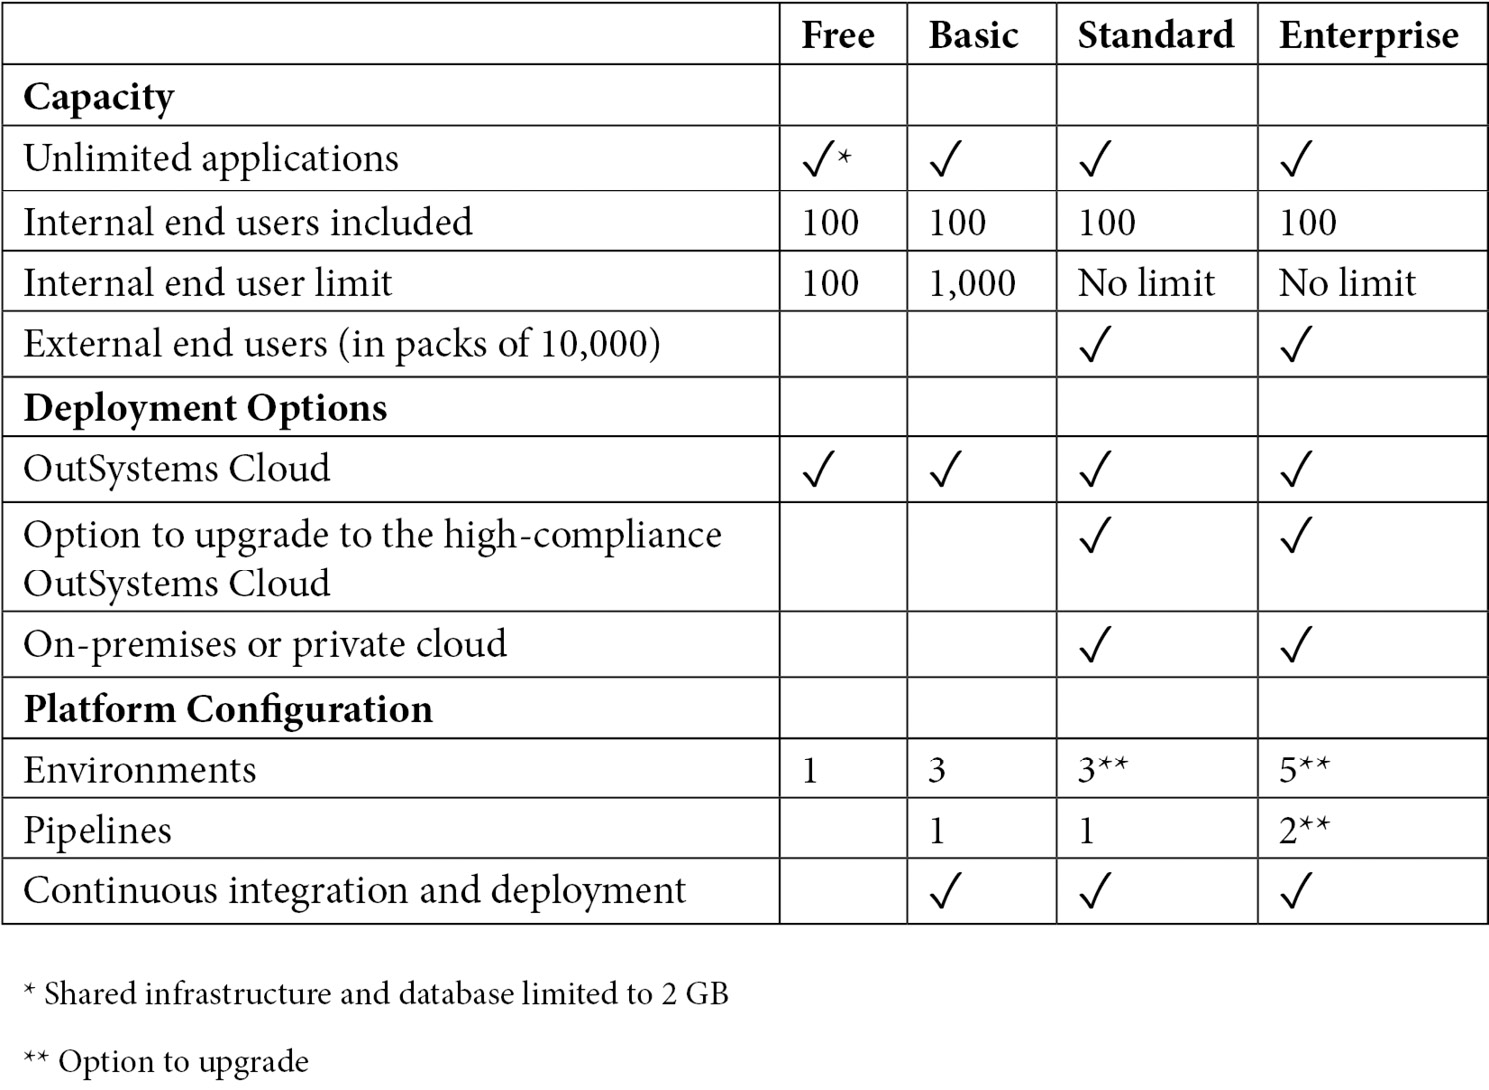
Figure 3.1 – OutSystems editions, and features
For the most up-to-date details on OutSystems pricing and editions, refer to the OutSystems website:
https://www.outsystems.com/pricing-and-editions/
To begin working through the developments in this book, we will use the free version.
This version allows us to learn for free, and OutSystems itself encourages us to use it to test our code before progressing to the paid versions. It's also extremely simple to set up our free Personal Environment, as we'll see now!
Setting up our Personal Environment
To set up our Personal Environment (that is, the free OutSystems version), we must follow some simple steps:
- To start, we must go to the OutSystems website (www.outsystems.com) and click on the Start Free button:

Figure 3.2 – The OutSystems home page
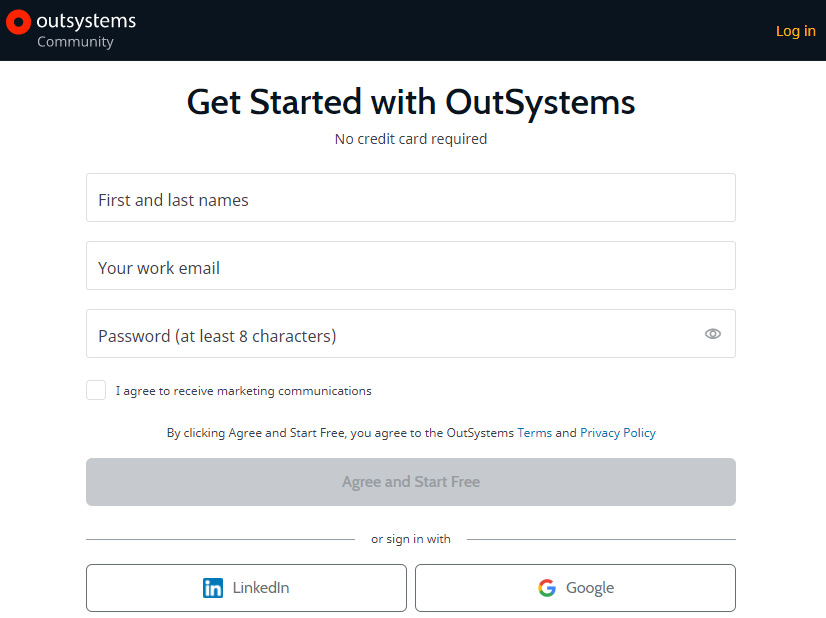
Figure 3.3 – The OutSystems registration form
After submitting your details, an activation email will be sent to the provided email address.
- To continue the process, we need to open the email just received from OutSystems and click on the CLICK ME! button. We are then redirected to the creation page for our Personal Environment, where we set our password. After setting it, click on the CREATE YOUR CLOUD ENVIRONMENT button:
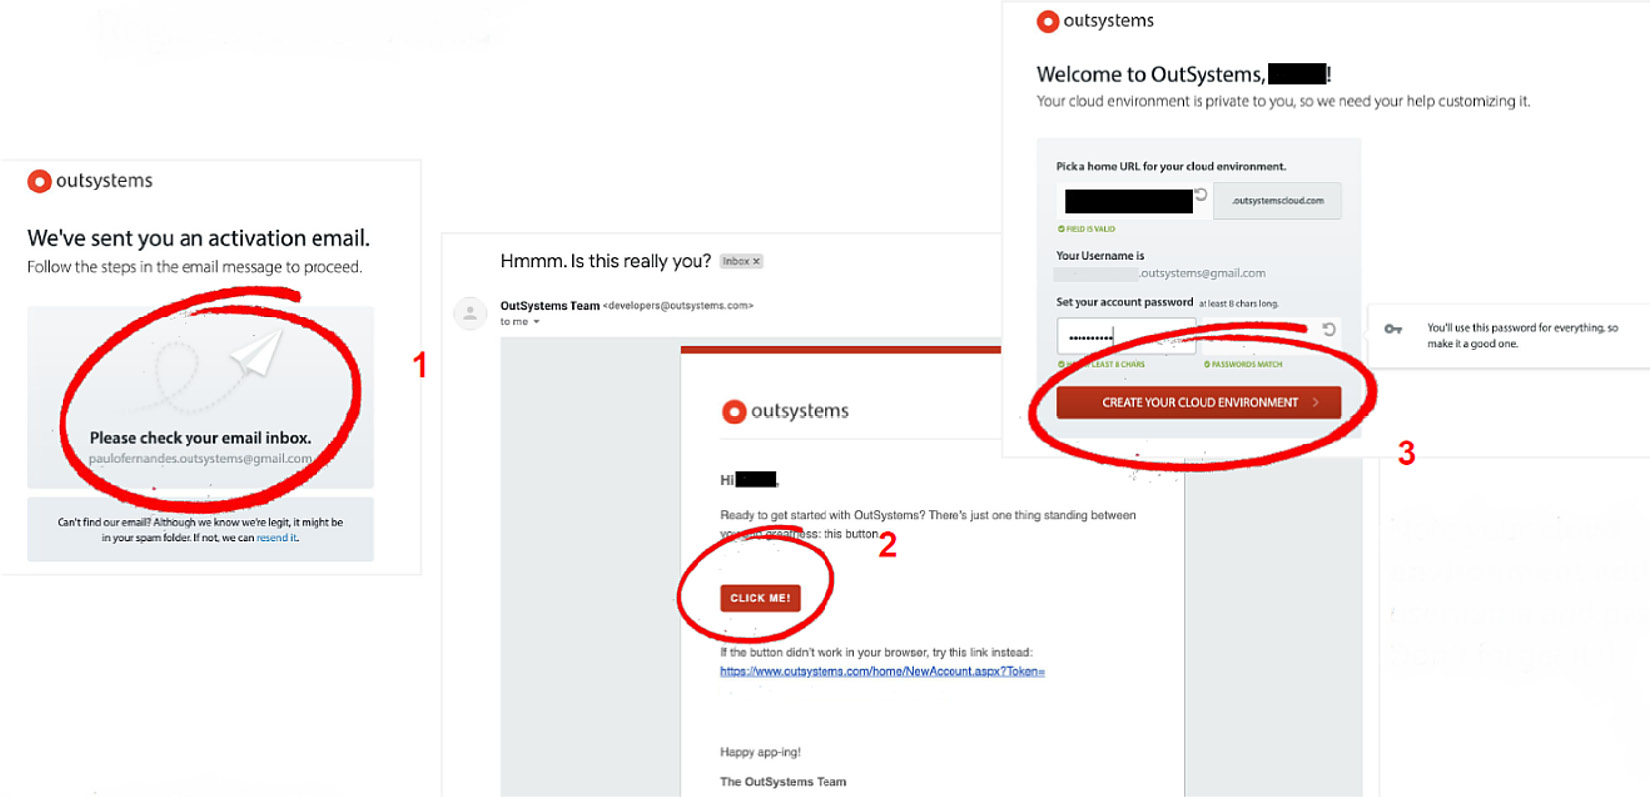
Figure 3.4 – The OutSystems registration steps
Tip
Make a note of the cloud environment address, username, and password. You will need this in the next steps to connect to the cloud environment through the OutSystems tools.
- After this process, our Personal Environment is ready. We just need to answer some questions from OutSystems and then click on the CONTINUE button:
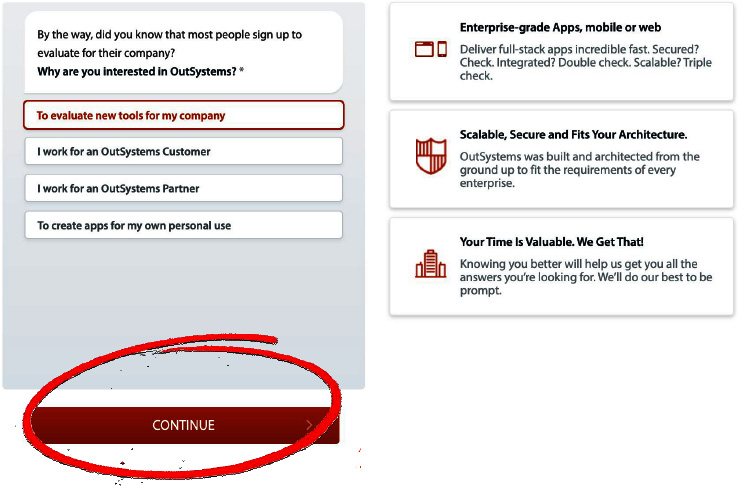
Figure 3.5 – Finalization of the registration process
Now that we have our Personal Environment, we need to set up the tools to develop our applications in it.
Installing OutSystems IDEs
In order for us to develop applications, we need tools. OutSystems makes these tools available to us free of charge, we just download and install them and we can connect to the desired environment. So let's see how!
The first step is to download the required integrated development environments (IDEs) and install them on our computer. This is similar to the process of setting up our Personal Environment:
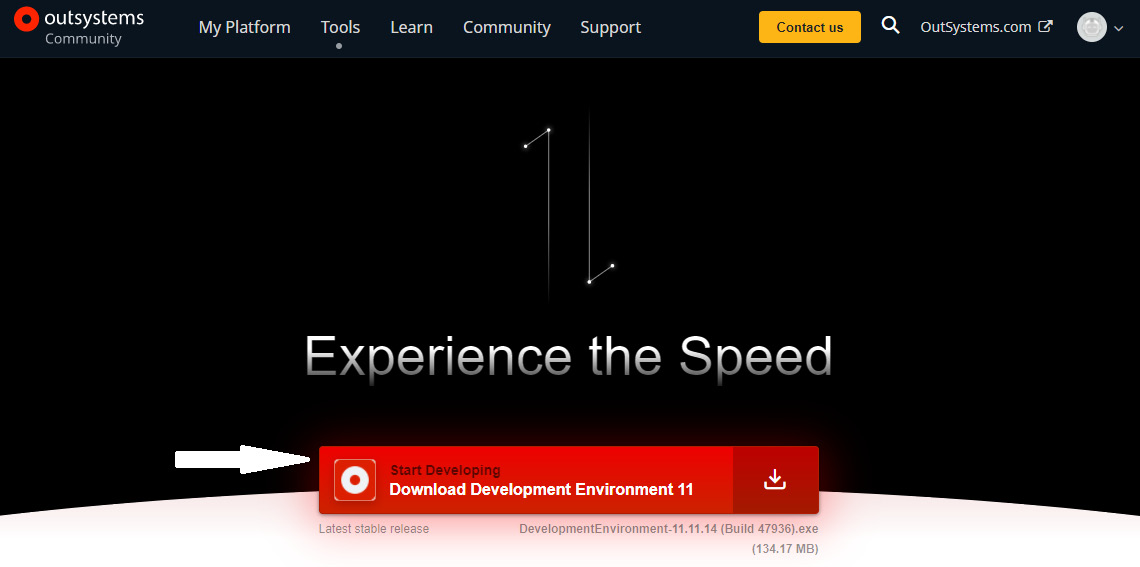
Figure 3.6 – The OutSystems Tools screen
You can download the development tools directly through this link: https://www.outsystems.com/downloads/.
After downloading the package, we must run it, press the INSTALL button (1) and, if we want, launch the tutorial at the end of the installation (2):

Figure 3.7 – The OutSystems popup for the development tools installation
Now we have our Personal Environment and the necessary tools set up to develop our applications. So now let's open our tools and start our work!
Opening and starting Service Studio
The main tool for developing OutSystems applications is Service Studio, a very easy-to-understand IDE completely oriented toward the visual development paradigm.
Shall we start our adventure? Okay!
- In the Windows Search field, type Service Studio:
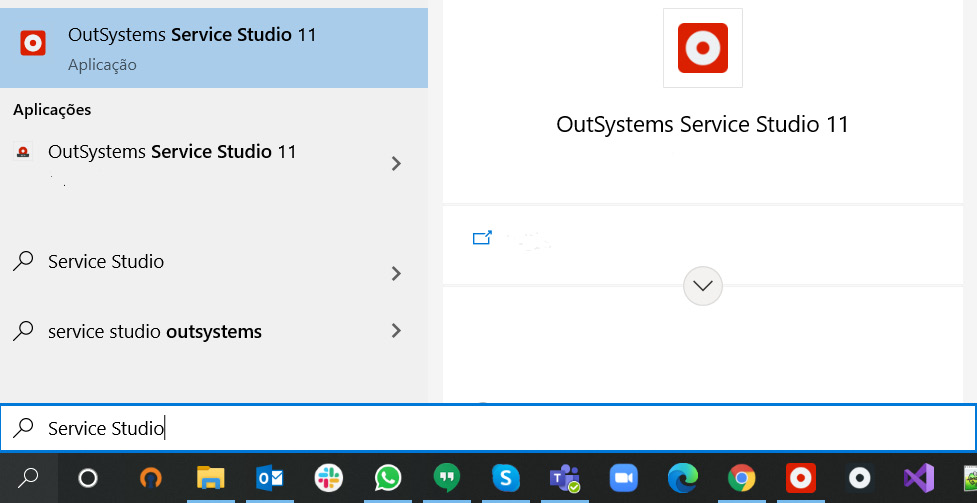
Figure 3.8 – Opening Service Studio
- Then, open the application by clicking on the OutSystems Service Studio 11 icon.
Tip
We can add a shortcut for Service Studio to the taskbar by right-clicking on the application icon and selecting Pin to taskbar.
- After opening the application, enter your user credentials and the URL of your Personal Environment (that is, the details we advised you to make a note of in the previous section), and then click Log in:

Figure 3.9 – Connecting to our Personal Environment in Service Studio
After successfully connecting, we will see an overview of all the existing applications in our Personal Environment, with access to all of the functionalities that Service Studio provides:
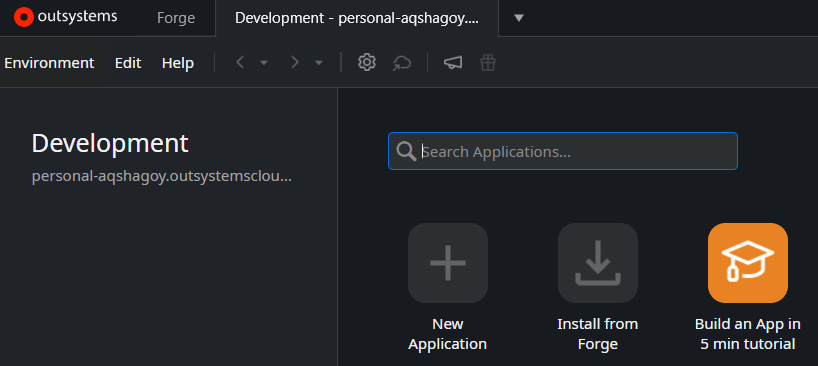
Figure 3.10 – Service Studio environment overview
We've already figured out how we can start Service Studio and create OutSystems applications (but this is something we'll start doing in the next chapter).
But what if we want to extend our platform with external database connections or create our C#/.NET code? For that, we have to learn how to open and start the second IDE from OutSystems: Integration Studio!
Opening and starting Integration Studio
OutSystems provides a tool that allows us to extend the platform with custom C#/.NET code and to carry out more complicated and non-standard integrations. It doesn't offer as many features as Service Studio, but it manages to be as powerful nonetheless.
To start Integration Studio, follow these steps:
- Just like we did to open Service Studio, in the Windows Search field, type Integration Studio:
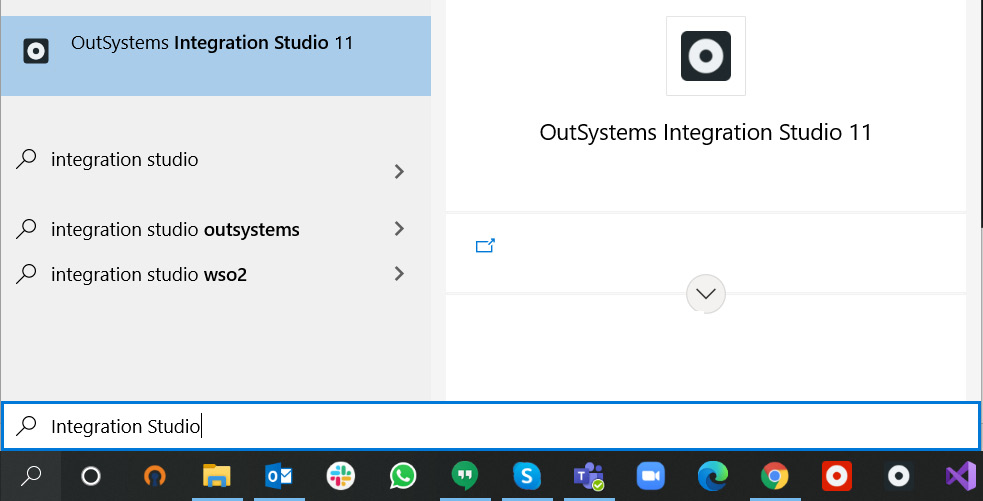
Figure 3.11 – Opening Integration Studio
- Then, open the application by clicking on the OutSystems Integration Studio 11 icon.
Tip
We can add a shortcut for Integration Studio to the taskbar by right-clicking on the application icon and selecting Pin to taskbar.
- After opening the application, enter your user credentials and the URL of your Personal Environment (yes, the same URL as before), and then click the Connect button:
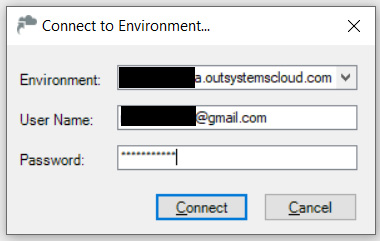
Figure 3.12 – Connecting to our Personal Environment in Integration Studio
After successfully connecting, we will find an empty main screen where we can start creating our extensions, custom code, and connections to external databases:
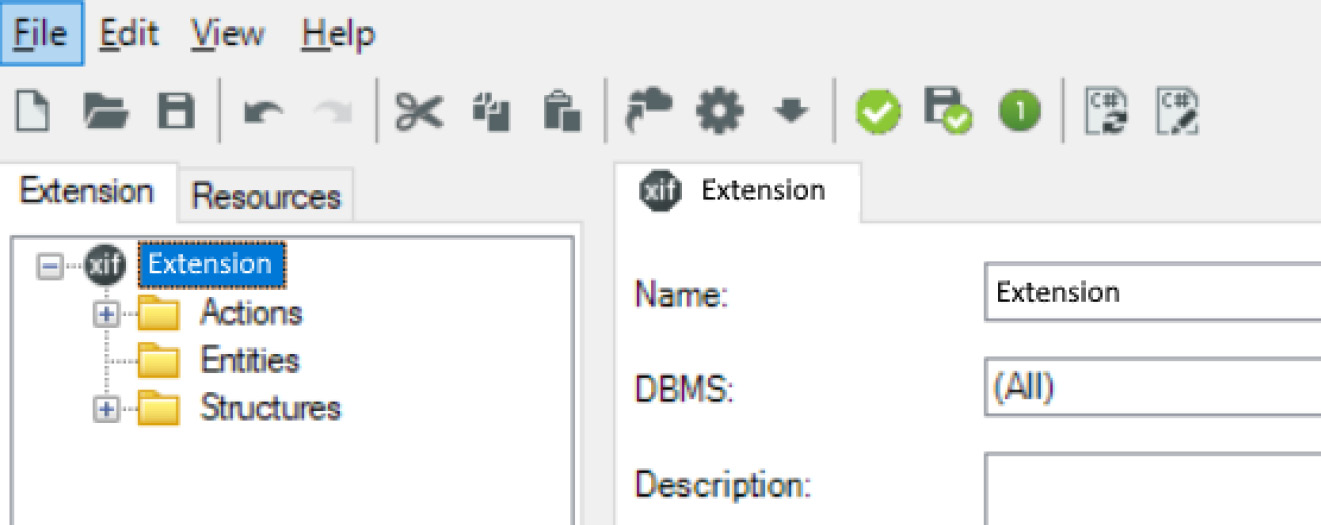
Figure 3.13 – The Integration Studio main screen
From here, we can start creating our code, such as C# native code abstractions or database integrations. In the end, everything we create here is available for consumption in Service Studio as dependencies.
Summary
We have now learned all the necessary steps to start creating our applications: registering to set up a Personal Environment, installing the OutSystems development tools, and connecting both of these parts.
From this moment on, we will learn everything that is necessary to develop state-of-the-art applications, making the most of the features provided by the development tools and by the OutSystems platform itself.
In the next chapter, we will learn the fundamentals for correctly developing our applications – that is, the types of modules that exist, when we should use them, and how we should use them.
We will also learn about naming conventions and how to apply this concepts in OutSystems software development.
Now, let's roll up our sleeves and get to work!