
Hour 19 Dynamic Web Templates
What You’ll Learn in This Hour:
![]() How to create a Dynamic Web Template
How to create a Dynamic Web Template
![]() How to create a new page from a Dynamic Web Template
How to create a new page from a Dynamic Web Template
![]() How to apply a Dynamic Web Template to an existing page
How to apply a Dynamic Web Template to an existing page
![]() How to edit a Dynamic Web Template and the files created from it
How to edit a Dynamic Web Template and the files created from it
Introduction
Most websites consist of more than a single page. The whole idea behind creating the World Wide Web was the ability to make numerous documents available and then link them together rather than presenting them all at the same time. But this causes a problem: If you have a website with multiple pages and you want to make a design change to all these pages, you have to update each page individually. If your site has only a few pages this is not a problem, but what if it has tens or even hundreds of pages?
In the past, updating large sites was a daunting task because each page contained all the styling information. As a result, webmasters rarely updated designs and sites quickly became outdated. The introduction of CSS (Cascading Style Sheets) solved many of these problems because the designer could now put the styling code in a separate document and modify this file for sitewide changes. This was a huge step forward and paved the way for a whole new generation of site models, including blogs.
But wouldn’t it be great if you could take that principle one step further and set your site up so that one file controlled not just the styles but also the common elements of all the pages such as headers, footers, and main menus? This question is already been answered in the form of Dynamic Web Templates (commonly known as DWTs).
A Dynamic Web Template is a special type of file built using HTML (Hypertext Markup Language) and CSS to define which areas of a page a developer may edit and which areas are off limits to regular page building. After a DWT exists, you can use it to build new pages in which all you have to do is input new content in the predefined areas without having to worry about all the common elements present in every page. More importantly, when you have multiple pages built using a DWT you can change the composition and layout of all the pages by making changes to only the DWT file. In other words, using DWTs makes global alterations to a website a snap.
In this hour, you will learn how to build a DWT and create new pages based on it. You will also learn how to make changes to the DWT and its children, and how to apply a DWT to an existing page. The most important lesson of this hour is that using DWTs wisely can have a huge positive impact on your workload and make updating multipage websites nearly as easy as editing a single page.
Dynamic Web Templates
When you design a website, you should always consider the following question: “How do I make sure it is easy to update the look and functionality of every page within the site?” Depending on the scale of the project and the kind of content you are presenting, the answer to this question can be very different:
![]() If you are creating a small-scale site with only a few pages (fewer than 10) and multiple different layouts and designs, you can go with straightforward HTML pages with one or several style sheets attached.
If you are creating a small-scale site with only a few pages (fewer than 10) and multiple different layouts and designs, you can go with straightforward HTML pages with one or several style sheets attached.
![]() If your site is (or could become) larger and you have one or two layouts to implement sitewide, creating pages based on DWTs is an effective solution.
If your site is (or could become) larger and you have one or two layouts to implement sitewide, creating pages based on DWTs is an effective solution.
![]() If your site has a high number of pages or constantly updated dynamic content (think a news site, forum, or blog), the best solution is to use a Content Management System (CMS) that generates pages dynamically with server-side script and a database—this option is for advanced users only.
If your site has a high number of pages or constantly updated dynamic content (think a news site, forum, or blog), the best solution is to use a Content Management System (CMS) that generates pages dynamically with server-side script and a database—this option is for advanced users only.
For the large majority of sites, the second option is the best choice because it makes for easy page construction and quick sitewide design changes.
How Dynamic Web Templates Work
Now that you have created a DWT, let’s take a closer look at how it works. Looking at the page in Code view, you see that it looks pretty much the same as the original file with the exception of a few new lines of commented-out code. The new elements tell Expression Web 2 that a specific Dynamic Web Template controls the page. The elements are commented out because they are not HTML code but rather custom script designed specifically to work with Expression Web 2. As a result, they have no actual function when a browser displays the page and like other commented content the code is ignored completely., But when the application opens the page they link the DWT and its children together.
At the very top of the page, just below the <html> tag, is the following line of code:
<!-- #BeginTemplate ″../mykippleMaster.dwt″ -->
This code tells Expression Web 2 that a DWT controls the content below and where that DWT is located. If you look at the top of the View pane, you can see that there is a new line directly underneath the Quick Tag Selector that displays the hyperlink to the DWT as well.
Farther down in the document are several code segments that tell Expression Web 2 which areas are locked and which areas are editable. When you create a DWT from scratch, you get a standard HTML page with two editable regions: doctitle and body. As the names suggest, the doctitle region holds the <title> tag in the head portion of the page and the body region holds the body of the page. The same thing happened when you converted the default.html page to a DWT: Expression inserted the doctitle region into your page at the end of the <head> tag.
Beginning and end codes that are commented out because they are not HTML define the editable regions. For example, the doctitle editable region looks like this in Code view:
<!-- #BeginEditable ″doctitle″ -->
<title></title>
<!-- #EndEditable -->
Expression Web 2 considers anything within these two code snippets editable. Because code that is invisible to browsers defines the editable regions, you can choose how much you want to micromanage the content within them. The two editable regions you inserted in the mykippleMaster.dwt page serve as good examples of this.
If you select the heading region in Design view and look at the code, you see that the editable region is contained within the h1 tags:
</h1>
<!--´#BeginEditable´″doctitle″´-->
<title></title>
<!--´#EndEditable´-->
</h1>
That means whatever content you place inside the editable region will be styled with the h1 style. As a result, when building a page based on this DWT, the designer cannot change the style of this content. Expression Web 2 placed the editable region inside the <h1> tags because you placed the cursor inside the h1 area before inserting it.
In contrast, Expression Web 2 places the content region on the outside of the style tags:
<!--´#BeginEditable´″content″´-->
<p> </p>
<!--´#EndEditable´-->
As a result, the content within the region is not yet styled and the designer can apply other tags and styles at will.
Understanding the difference between these two methods of inserting editable regions means that the designer of the DWT has almost unlimited control of the output that comes from pages created with the template.
Creating a Dynamic Web Template
To get a firmer grasp on what a Dynamic Web Template is and how it works, you are going to build a DWT for the MyKipple.com website based on the default.html page.
![]()
Before you begin, replace the current default.html, kippleStyles.css, and layout.css files in your site with the new ones found in the lesson files for this hour. The new files include more styling and a version of the pure CSS drop-down menu from Hour 18, “Building a Functional Menu,” designed specifically for this site. All the changes to the files are based on the lessons you have already completed. If you take a closer look at the code in the kippleStyles.css file, you will see that you can recognize most, if not all, of the different styling elements.
1. With the new default.html page open in Design view, click File, Save As on the menu bar. In the Save As dialog, change the file type to Dynamic Web Template (.dwt) and name the new file mykippleMaster.dwt. This creates a new DWT.
2. With the mykippleMaster.dwt page open in Split view, delete all the text content in the #content div (see Figure 19.1). You can do this by highlighting the text and deleting it in Design view, or by highlighting all the content between the beginning and end <div id=”content”> tags and deleting it in Code view. Make sure you leave the #wrapper, #header, #menu, #content, and #footer divs intact.
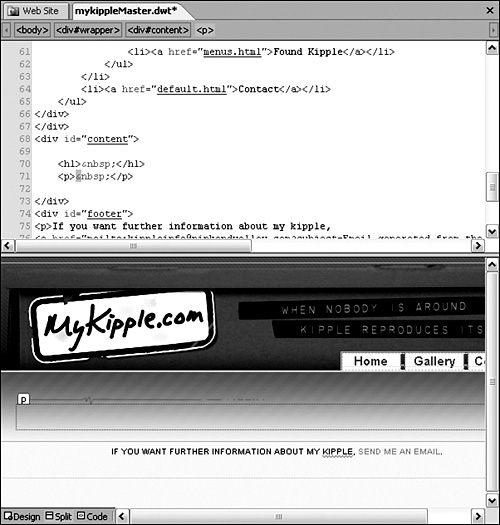
3. Place the cursor on the first line inside the #content div and use the Style drop-down menu from the Common toolbar to set the style of the line to Heading 1 (h1). Press Enter to create a new paragraph underneath (see Figure 19.2).
4. Place the cursor inside the first line (h1) and from the menu bar select Format, Dynamic Web Templates, Manage Editable Regions (see Figure 19.3).
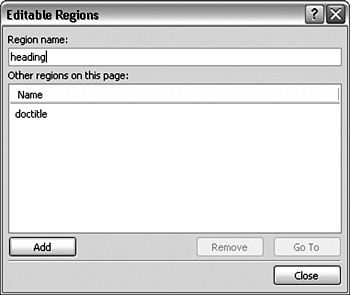
5. The Editable Regions dialog lets you add and remove editable regions within your DWT. Under Region Name, enter heading and click the Add button (see Figure 19.3). This creates a new editable region called heading. Click Close to apply the changes.
Figure 19.1 After deleting the content within the #content div, you should still see the #header, #menu, #content, and #footer divs in Design view.
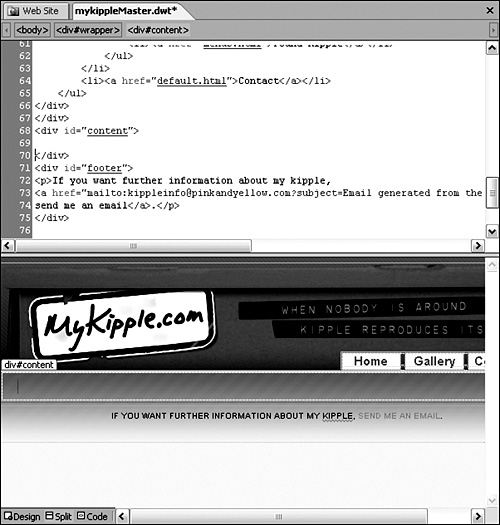
Figure 19.2 Add two empty text lines in the #content div—the first one with the h1 style and the second one with the p style.
6. Place your cursor inside the paragraph on the next line and click the <p> tag in the Quick Tag Selector to select the entire line, including the tags. From the menu bar, select Format, Dynamic Web Template, Manage Editable Regions to open the Editable Regions dialog again.
Figure 19.3 The Editable Region dialog lets you add and remove editable regions.
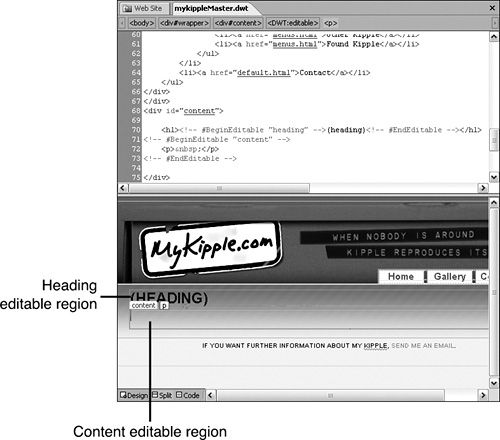
7. Create a new editable region called content and click Close to apply the changes. You now have two regions within the page, outlined in orange in Design view (see Figure 19.4).
Figure 19.4 The Editable Regions heading and content are inserted into the DWT.
Try it Yourself
Create a New Page from a Dynamic Web Template
When you have a DWT, creating new pages for your project becomes much easier. The DWT contains all the common elements that all pages should feature, and all you have to do is insert the page-specific content. And because HTML is the basis for the DWT, all the CSS styling you attach to the DWT is available in your new page.
1. To create a new page from a DWT, select File, New, Create from Dynamic Web Template from the menu bar.
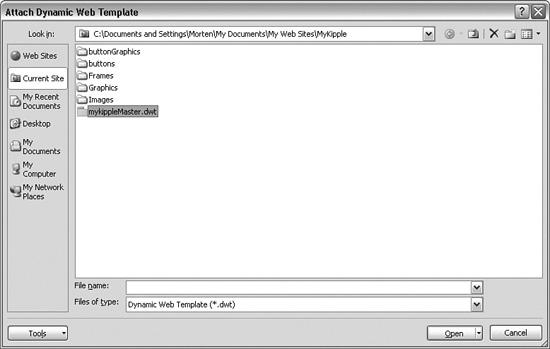
2. When you create a page from a DWT, the Attach Dynamic Template dialog opens. Select the mykippleMaster.dwt file and click Open (see Figure 19.5). An information box opens to report that a number of files updated—his refers to the content of the DWT populating the new file.
Figure 19.5 Select the DWT you want to base your page on in the Attach Dynamic Template dialog.
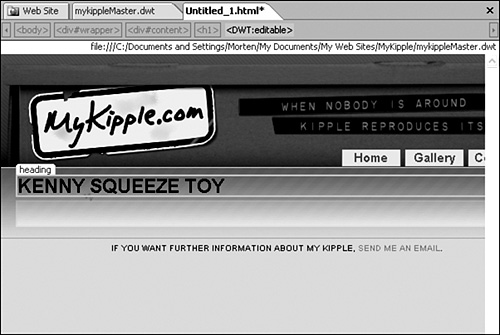
3. With the new page open in Design view, you now have only two clickable areas in the page: the heading and the content. If you move your cursor anywhere else, all you get is a stop sign. Place your cursor in the heading area and enter Kenny Squeeze Toy (see Figure 19.6). Note that Expression Web 2 automatically applies the h1 style. If you press Enter to create a new line, a warning pops up to tell you that you can’t make the change because a Dynamic Web Template is locking the code.
Figure 19.6 With the DWT attached to the new page, you can make changes only to the editable regions. The template locks the rest of the page.
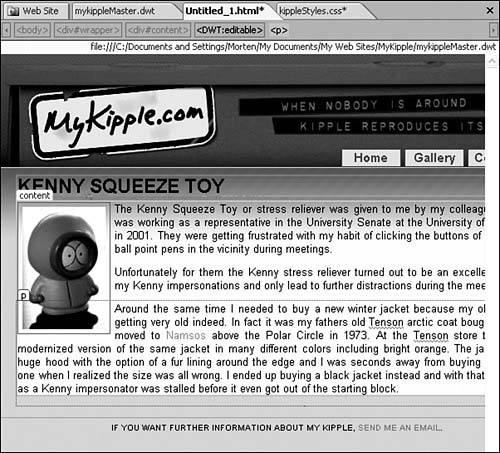
4. Place your cursor in the content region and insert content of your choice. Because this region is not contained within a tag, it is not constrained in the same way the heading region is, so you can add several paragraphs, images, or any other HTML content as you place and style it using the styles and classes in the attached style sheet (see Figure 19.7).
Figure 19.7 The content created inside the regions can be styled with any of the styles available in the attached style sheet as well as new styles.
5. When you finish inserting content in the page, press Ctrl+S to save the file. In the Save As dialog, create a new folder called Kipple and save the page in this folder under the name Kenny.html.
By previewing the new page in your browser, you see that although all you did was insert the heading and main content, the page looks and works just like the default.html page. That is because all the common components are the same.
Understanding Dynamic Web Templates
The preceding example should give you a good idea of what happens when you create a new page from a DWT. When you attach a DWT to a new page, what really happens is that Expression Web 2 takes the code content from the DWT and places it in your new page. But unlike a “normal” page, the application knows that only the editable regions within the page should be available for changes, so it looks for the editable regions and blocks all the other content. After inserting content in the editable regions, the result is the same as any other HTML page except that the code contains the commented-out code calls for the editable regions. But because they are commented out, the browser ignores them.
Updating Your Site by Editing the Dynamic Web Template
The reason the editable regions code remains in the page is to give you the ability to change the DWT and by doing so to change all the pages created from it.
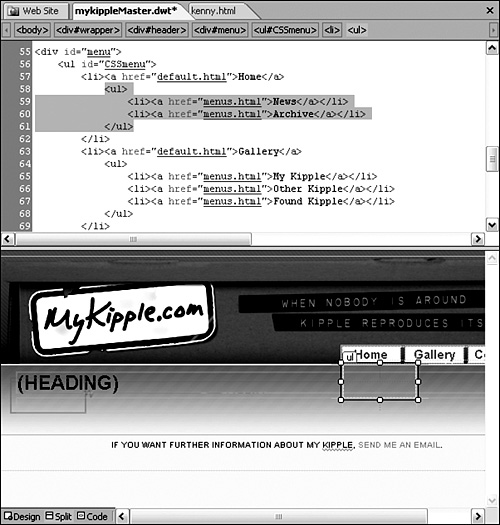
1. Open the mykippleMaster.dwt page in Split view. Click any of the three menu buttons to highlight the menu code in Code view.
2. Create a new submenu under the Home button by creating a new <ul> tag in Code view. Create two subcategories named News and Archive (see Figure 19.8).
Figure 19.8 It is usually easier to edit lists in Code view than Design view because you have more control of how the different elements relate to one another.
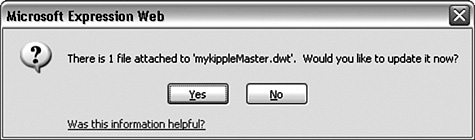
3. Save the mykippleMaster.dwt page. An information dialog opens to tell you that there is one page attached to mykippleMaster.dwt and asking whether you want to update it now (see Figure 19.9). Click Yes. Expression Web 2 now updates all the files built based on the DWT.
Figure 19.9 When you make changes to a DWT, Expression Web 2 asks whether you want to update the pages built based on the DWT.
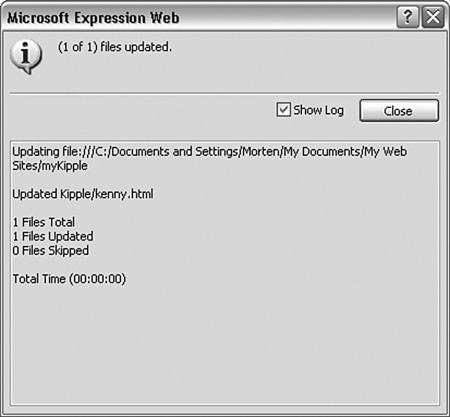
4. When it finishes, another information dialog opens to tell you how many pages Expression Web 2 updated. If you check the Log box, the dialog expands to provide a more detailed log of the update process including a list of what pages the application updated (see Figure 19.10).
Figure 19.10 After updating the files connected to the DWT, Expression Web 2 opens an information dialog telling you how many files were updated and if any files were skipped.
If you test the Kenny.html page in your browser, you see that the Home button on the menu bar now has a drop-down submenu even though you didn’t make any changes to the page (see Figure 19.11).
This example showcases the true power of DWTs: By making a website where a DWT is the basis for all the pages, you can make consistent changes to the common content in every page by editing just one page.
Figure 19.11 By changing the DWT and updating the files it attaches to, you change the contents of all the pages in the site without ever opening them.

Try it Yourself
Attach a Dynamic Web Template to an Existing Page
Sometimes you want to add the new DWT designs to old pages that you already built. Your initial hunch might be to copy-and-paste the contents from this page into a new one, but that is not necessary. Just as you attached a DWT to a new page, you can also attach a DWT to an existing page. In Hour 9, “Get Boxed In Part 1: Using Tables for Content,” you created a page called myWallet.html that contained a table listing the contents of my wallet. Now you want this page to match the rest of the pages in the MyKipple site.
1. Open the myWallet.html file in Design view. From the menu bar, select Format, Dynamic Web Template, Attach Dynamic Web Template . In the Attach Dynamic Web Template dialog, select mykippleMaster.dwt.
2. A warning appears telling you that content outside of the <html> tag will be deleted and that if you want to preserve it, you need to move it into an editable region or into the <head> tag. This warning is to alert designers who have attached code, such as a script, outside of the main content of the page. If that is the case, you can click No and move the script. For most situations this is not necessary, so click Yes.
3. Because you did not create the myWallet.html page using the DWT, there are no editable regions defined within the page. Instead of just erasing the content not already defined in the page, Expression Web 2 makes an educated guess as to what content you want where and lets you correct its choices. When there are no matching editable regions or there is another conflict, the Match Editable Regions dialog opens (see Figure 19.13).
Figure 19.13 When the regions in the current page don’t match the editable regions, Expression Web 2 lets you match them manually.
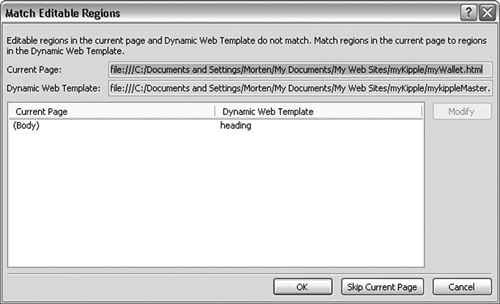
From here you can tell Expression Web 2 what content should go in what region. In this example, the <body> tag contains only one block of content and Expression Web 2 is guessing that it should go in the heading region. To change this, select the list item by clicking it and clicking the Modify button.
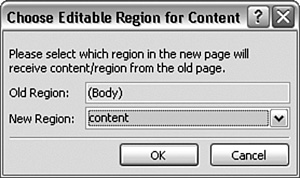
4. When you click the Modify button, the Choose Editable Region for Content dialog appears. There you can define which new region should receive the content from the old region. Use the New Region drop-down menu to select the content region for the <body> content (see Figure 19.14). Click OK twice to attach the DWT.
Figure 19.14 The Choose Editable Region for Content dialog lets you pick which editable region to put different content from the old page in.
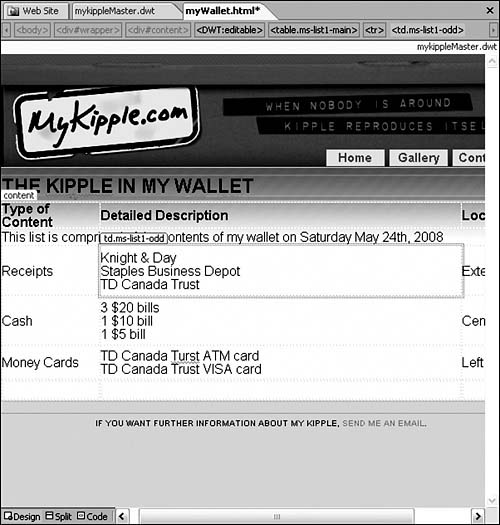
As you can see, the conversion to the new look is not flawless. You now have two headings and the in-page styles from the original document have disappeared. But after some tidying up, the page will look the way it should (see Figure 19.15). Now if you make any changes to the DWT, the myWallet.html page changes automatically, too.
Figure 19.15 With some tidying up, the myWallet.html page fits in nicely with the new design.
Editable Regions Outside the Body
As mentioned in the beginning of this hour, Expression Web 2 inserts an editable region called doctitle by default in all pages attached to a DWT because the application assumes (as it should) that every page has its own distinctive title. Because the <title> tag is contained within an editable region by default, you can edit it as you normally would either through the Page Properties dialog or directly in Code view.
Using the same technique, you can also predefine other head content (editable or locked) for your pages. Moreover you can use the editable content area in the DWT to give the page predefined common properties that you or other designers can edit, add to, or replace when building new pages.
Try it Yourself
Create Common Editable Keywords for All Pages
To make a page easier to find for people who search the World Wide Web using search engines, it should always contain keywords as well as a description that describes the page and its contents.
1. With the mykippleMaster.dwt page open in Split view, right-click in Design view and select Page Properties from the drop-down menu. This opens the Page Properties dialog.
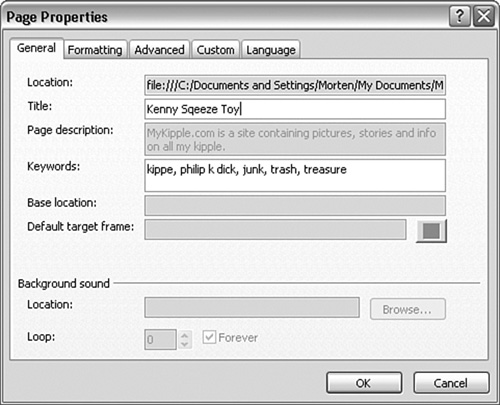
2. In the Title area, enter MyKipple.com. In the Page Description area, enter a short description that is common to all the pages. In the Keywords area insert the keywords kipple, philip k dick, junk, trash, treasure (see Figure 19.16). Click OK to apply the changes.
Figure 19.16 Inserting content in the Page Properties dialog is an easy way of creating the header code.

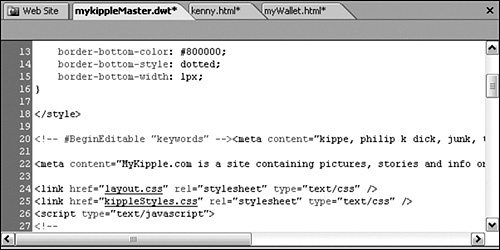
3. Toward the top of the page in Code view (most likely line 20) are two new lines of code that start with <meta content=”…. These lines define the keywords and description for the page. In this example, you want the keywords to be editable but not the description. To do so, place your cursor at the beginning of the first line in Code view containing the keywords and manually add the following line of code: <!-- #BeginEditable “keywords” --> (see Figure 19.17).
Figure 19.17 You have to manually add the editable regions outside of the <body> tag in Code view.
4. Press the End key or use the mouse to place the cursor at the end of the line. Add the following line of code after the last tag: <!-- #EndEditable -->.
5. Save the DWT and click Yes when asked whether you want to update the attached pages.
After applying the changes, open the Kenny.html page, right-click, and select Page Properties from the context menu. In the Page Properties dialog, you see that the Title and Keywords areas are editable but the Description and other areas are grayed out (see Figure 19.18). It is also important to note that even though the Keywords section remains editable, Expression Web 2 still inserts the words you added in the DWT. After the application creates the new page, you can edit, add to, or delete those words without the changes affecting the DWT or the other pages.
Figure 19.18 The Description meta tag was not defined as an editable region in the DWT and is therefore inaccessible in the Page Properties dialog of the pages created with this DWT.
![]()
You can insert and edit only the editable regions in the DWT that are outside the <body> tag in Code view. If you highlight code outside of the <body> tag and use the Manage Editable Regions dialog to add a new editable region, Expression Web 2 places the new region inside the <body> tag and wraps all the content. There is also no support for this particular code set in IntelliSense, so you have to write all the code. On the upside, there are only two variations of the editable region code: the begin editable region code (<!-- #BeginEditable “region-Name” -->) and the end editable region code (<!-- #EndEditable -->). If you can’t remember these two code segments, scroll down further in the document, copy the code from a different editable region, paste it where you want the editable region, and change the region name.
Editing Content Outside the Editable Regions in Individual Pages
Although I do not recommend it, you can manually change the content outside of the editable regions in individual pages. While in Design view, the only selectable areas are the editable regions. But if you switch to Code view, you can modify the code manually.
In a page created from a DWT, Expression Web 2 highlights all the code defined by the DWT in yellow in Code view. The highlighting tells you exactly which areas the template controls externally and which areas are open for editing. Nevertheless you can place your cursor anywhere within the code and make all the changes you want. But if you make changes to the highlighted code, Expression Web 2 tells you that you are now changing code defined by the DWT.
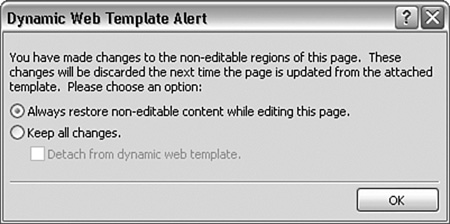
When you save the file or switch back to Design view after changing the code outside the editable regions in Code view, Expression Web 2 displays an alert dialog with a warning that the changes you have made are in the code defined by the DWT (see Figure 19.19). The Dynamic Web Template Alert dialog gives you two options: either restore the noneditable content (in other words discard any changes made to the code defined by the DWT) or keep the changes. If you choose the latter, you have the additional option of detaching the page from the DWT.
Figure 19.19 If you change code inserted by the DWT in your page, Expression Web 2 gives you a warning and asks you to explicitly verify that these changes are intentional.
The ability to change the code in individual pages comes with a strong warning because if, later, you choose to make changes to the DWT and update the files attached to it, you permanently erase the changes you made in the individual page code.
If an area within a page will require individualization for each page, it is always advisable to place this area within an editable region and place the default content in the DWT. That way, if you do nothing to the code, it remains the same across every page, but you retain the ability to change the individual pages if you choose to do so. The most obvious example of this would be if you wanted to change menu options in some of but not every page. To do so, simply place the menu list items within an editable region called menu and you now have the ability to change the menu in individual pages if necessary without making those changes sitewide.
Summary
One of the major challenges for web designers and developers is tackling the task of sitewide design updates. If the site’s creators do not design it with this in mind, updating it could easily become a large and difficult task.
In this hour, you learned about Dynamic Web Templates and you saw how you can use them to create sites that are easy to expand and update. The Dynamic Web Template is a great tool if all your site’s pages have common elements and only certain portions of the page have unique content.
The Dynamic Web Template function inside Expression Web 2 works by linking the DWT to the files it is attached to either because they were built based on the DWT or because the DWT was attached later. These pages contain small segments of code that define editable regions that are accessible to the designer or whoever is creating or editing the page. Likewise all the content outside of the editable regions is off limits and no one can edit it without going directly into the code. This is to ensure that when a developer updates the site by changing the DWT, none of the individual page content gets lost in the process.
After a DWT exists and creators have based a number of pages on it, a change in the DWT spreads through all the other pages, making the new changes sitewide. Rather than having to make changes to all the content in every page, you just change the DWT and Expression Web 2 asks whether you want to update the other pages automatically.
By defining editable (and noneditable) regions within the layout, you can micro-manage the contents, both visual and nonvisual, of your pages. In addition, within the editable regions, you can add predefined content for insertion into every page and can edit the individual pages later.
A website designed using DWTs makes life easier for not only the designer but also for the client. In many cases, a client asks to have a site designed where she can add or edit the pages herself. By creating a Dynamic Web Template and building all the pages based on it, the client receives a set of pages where she can edit only the informational content of the site and can’t accidentally damage or destroy design elements such as menus and so forth. This makes for a far less intimidating end-user experience because the pages have clearly marked and named regions that the client can edit using principles familiar to anyone who has worked with a word processing application.
Q&A
Q. I removed one of the editable regions from my Dynamic Web Template, and when I told Expression Web 2 to update the attached pages, the Match Editable Regions dialog popped up. What do I do?
A. If you remove or rename an editable region, Expression Web 2 asks you where to place the content that used to be in that region. Whether you removed or renamed the region, you have to explicitly tell the program where to place the temporarily orphaned content. If the region has been removed and no new region has been created to take the content, select the item from the list, click Modify and change the New Region setting to None. If you create a new region or rename the old one, change the New Region attribute to the correct region. This situation occurs because all the files that have the DWT attached have code segments calling for the old regions, and you have to redefine the code segments for the page to work properly inside Expression Web 2.
Q. Can I open and use a DWT created in Expression Web 2 in a different web authoring application?
A. Yes, as long as they support DWTs you can open your DWT and make changes to both the template itself and its children from other web authoring applications.
Workshop
The Workshop has quiz questions and exercises to help you put to use what you just learned. If you get stuck, the answers to the quiz questions are in the next section. But try to answer the questions first. Otherwise you’ll only be cheating yourself.
Quiz
1. What is the main benefit of using a Dynamic Web Template to design your web site?
2. What happens if you manually change the code outside of the editable regions in a page generated using a Dynamic Web Template?
Answers
1. By using a Dynamic Web Template as the basis for all the pages in your web site you are effectively placing all the controls of the look and functionality of your site in one file so that when you want to make site-wide changes to the layout, design or functionality of your site you can make those changes in one file and see them implemented throughout all the pages.
2. If you change the code outside of the editable regions the page will work with the new code just like any other HTML page. The major concern with doing this is that if you update the page using the DWT, all the changes made outside the editable regions will be deleted and replaced by the original code in the DWT. Therefore if you are planning on having custom code that differs from page to page you should create an editable region to contain this code so that it won’t be deleted when the site is updated.
Exercise
In the mykippleMaster.dwt file, change the Description meta tag to an editable region so that you can have individual descriptions for each page.
The MyKipple project contains a number of pages that you have already built. Using what you have learned in this hour, attach the mykippleMaster.dwt template to all the pages you have created so far and give them all individual titles, keywords, and descriptions.