
Chapter 11
Managing Search Availability at the List and Site Level for Site Administrators
SharePoint Search has always been one of the most powerful features of the product, enabling users to find information to which they have permissions no matter which site it has been stored on. However, you might not always want them to be able to do this; at times you might want to ensure that some areas of your site collection are removed from the SharePoint index. In this lesson, we look at search settings for both your site and individual lists, and in particular at how to remove lists and even the entire site from search results. You also see how to exclude Web Part pages from appearing within the search results.
The procedure for excluding items from search results is essentially the same for libraries and lists: it is done from the Settings menu for each item. It can be a useful feature when you are using lists for things like lookup values (or the new relationships feature in SharePoint lists) and do not want to return such items using search. For example, you might have a list of ZIP codes or states that are used in several lists using a lookup column. Removing lists of value and data from search results can improve the experience of the user by making results more relevant.
You will find the Search setting in the General Settings category reached from then, Advanced Settings link in the settings for lists and document libraries. It is a simple radio button option with only a Yes or No setting. The options available are the same for both lists and libraries; Figure 11.1 shows the search setting.

In addition to showing the option for search removal, you might also notice in Figure 11.1 the option to remove Offline Client Availability. This is the option to connect the list or library to a Microsoft Office offline client, for example, SharePoint Workspace 2010. This option is briefly discussed later in the lesson, as there is little point in hiding content from search when it can be found with tools like SharePoint Workspace. When you are removing lists and libraries from SharePoint Search, it can also be appropriate to set this option to No. This is particularly useful, again, in the use of lookup values that are meaningless to users except in the context of a list or library.
In addition to removing lists and libraries from search, it is also possible to remove entire sites from the Search index. When excluding a site from SharePoint search, you also have the option to remove Web Parts from the indexing process.
Figure 11.2 shows the options available to you for restricting site collection search. You can find the search removal options this way:
1. Click Site Actions.
2. Select Site Settings.
3. Within the Site Administration group, click Search and Offline Availability.
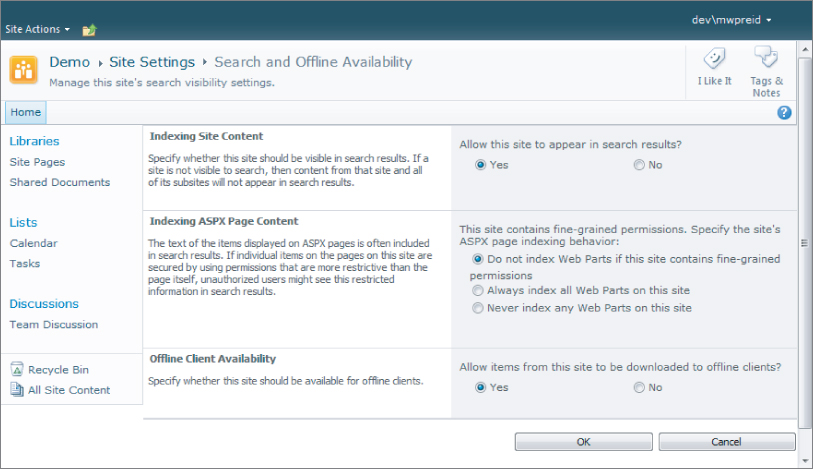
The options available for removing a site from search are:
- Indexing Site Content: This permits you to allow or disallow searching of the site and all its subsites. If you set this option to No, everything in the site collection, including subsites, will be ignored by the SharePoint Crawl and Index process. Setting this option to No removes the site collection content from search.
- Indexing ASPX Page Content: Content in an ASPX page, including content displayed within Web Parts on the page, can be indexed and returned by SharePoint Search. These options by default do not index Web Parts if the site contains fine-tuned permissions. The additional options are:
- Always Index All Web Parts on This Site
- Never Index Web Parts on the Site
If the Web Parts are individually secured, users with access to the page itself may find information from the Web Parts returned by SharePoint Search. However, security trimming ensures they cannot access the Web Parts. Security trimming allows SharePoint to control who has access to objects and items based on the permissions the user has been given in the environment.
In this Try It exercise, you will remove several SharePoint objects from the search results, including the site itself. You might have to wait a few minutes to see the results of your actions in the search results page. If you have incremental crawl schedules, the results should be available immediately after the next crawl takes place. If you are using a development server, simply run a new incremental crawl after the Try It to see the results.
Lesson Requirements
To perform this lesson, you will need the following:
- A SharePoint team site containing at least one document library and at least one standard SharePoint list.
- A site collection administrator permission. For this example, I have created a document library called Lesson 11 Search.
Hint
To see the effect of the change in search settings, it is useful to run a search before changing any of the options. For these examples, I ran an incremental crawl immediately after changing the settings. Hopefully you have crawls scheduled; if not, you will have to wait until your administrator runs the next crawl to see the changes.
Step-by-Step
To remove a document library from Search, you begin from within the document library:
1. Click the Library tab.
2. In the ribbon Settings group, select Library Settings.
3. Click Advanced Settings.
4. Scroll to Search Settings and change the default Search radio button (Allow Items from This Document Library to Appear in Search Results) to No.
5. Click OK to save the changes.
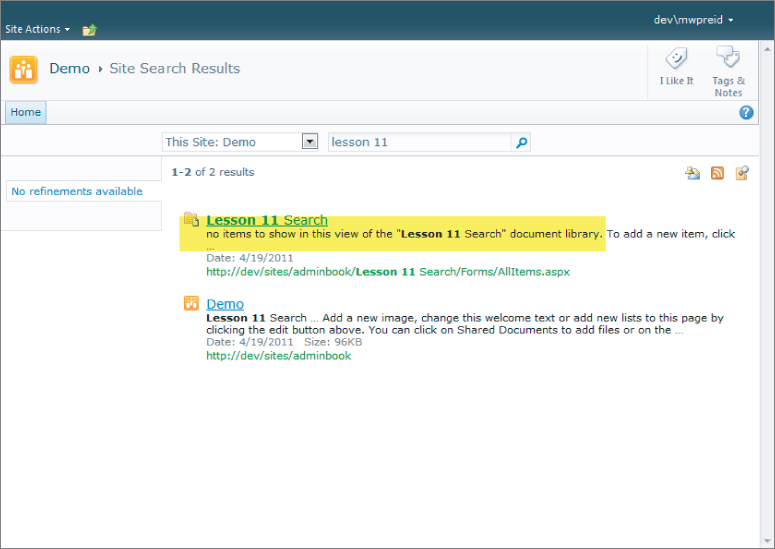
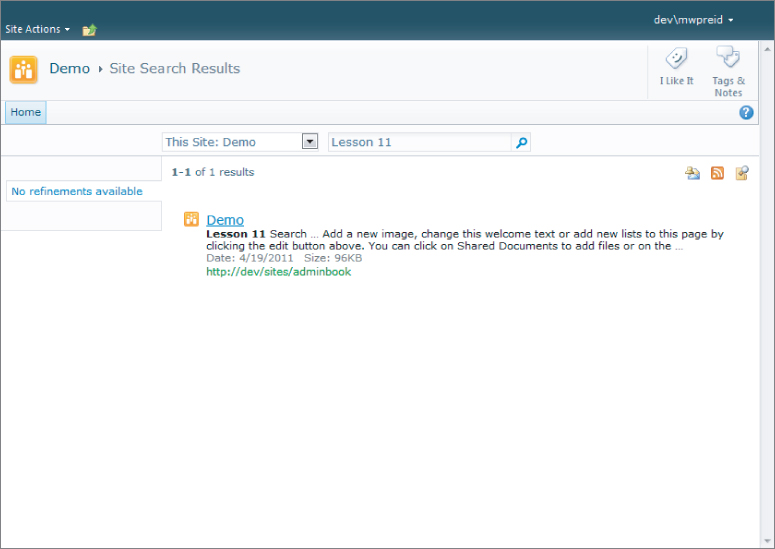
Figure 11.3 shows the search results before the library is removed. Figure 11.4 shows the results after the Search setting is set to No, removing the library from the results.
Also note that once you turn off searching, various options become unavailable within the search drop-down list for the site. The item removed from the search scopes drop-down list will be the contextual search for the document library or list. The removal of the contextual search makes sense, of course, as you have removed this content from the SharePoint Index.
Figure 11.5 shows the search scopes drop-down after the option to search the library is removed.
If you do not see the search scopes drop-down list on your site, you might need to enable custom search scopes, as they are not enabled by default. Refer to Lesson 9 for instructions on how to do this.
To remove a SharePoint list from Search, follow these steps:
1. Click the Tasks list in Quick Launch to open it.
2. On the List Tools tab click List
3. Click the List Settings icon in the ribbon's Settings group.
4. In the General Settings group, click Advanced Settings.
5. Scroll to Search Category and change the default for Allow Items from This List to Appear in Search Results? from Yes to No.
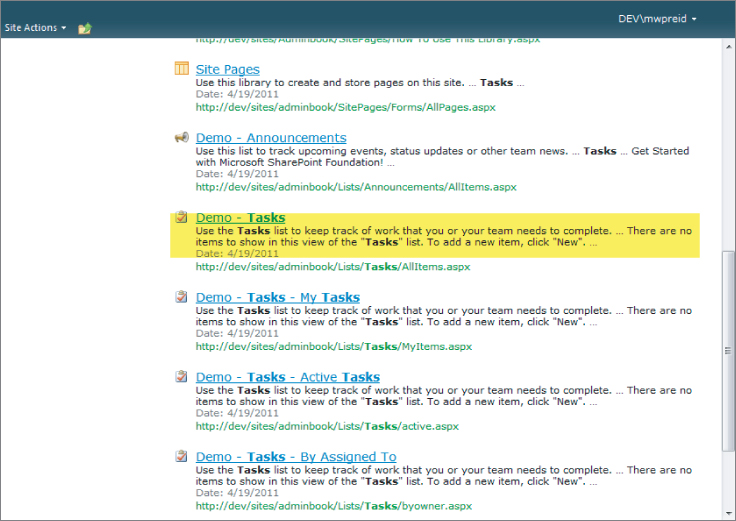
Figures 11.6 and 11.7 show the Search Results screen before and after the preceding changes, respectively. Note that in Figure 11.7 the Tasks list result is no longer available within the search results.

Just as in the previous example, the Search drop-down on the site has been changed to reflect the removal of the Tasks list.
To remove your site and its subsites from SharePoint Search, follow these steps:
1. Click Site Actions.
2. Select Site Settings.
3. Click Search and Offline Availability in the Site Administration category.
4. Change the selection of the radio button, Indexing Site Content, to No.
5. Click OK to save your changes.
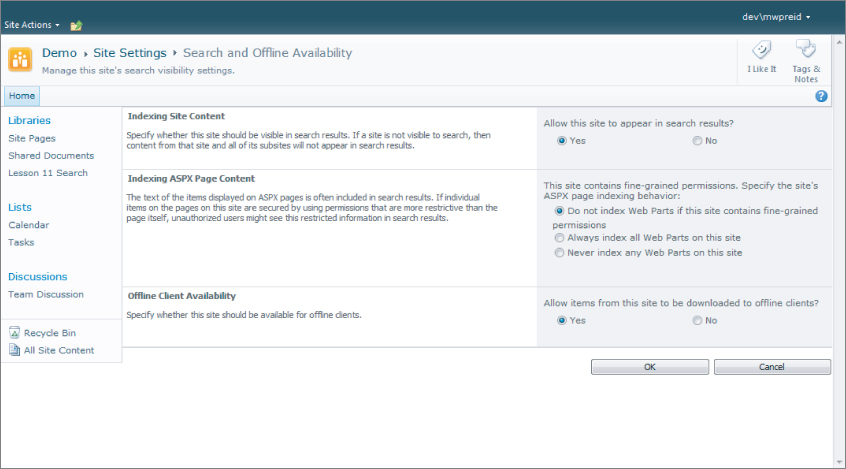
Using the same screen you can also change the defaults for indexing your ASPX pages, and change the availability of your site to office clients. Figure 11.8 shows the options available on the Search and Offline Availability form.
After you have changed the search settings for the site collection, you need to either run a crawl or wait until after the next scheduled crawl to see the effects of your changes. Figure 11.9 shows the results of turning of site collection search.

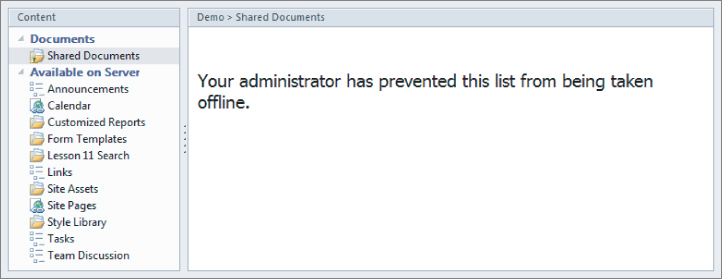
As previously mentioned, the site collection also contains an option to deny access to some areas, such as SharePoint Workspace, to offline clients. Setting this option to No can result in an error being sent to offline clients trying to connect to the list or library. Figure 11.10 shows SharePoint Workspace when trying to connect to the Shared Documents library in the Lesson 11 site when this feature is enabled.
Although not directly related to Search in a strict sense, it is a useful feature to understand for working on information security and availability.
In this lesson, we examined Search and the ways in which you can use the administrative features of SharePoint to remove lists, libraries, and even entire sites from SharePoint search results. The overall objective of removing items is to improve the search experience of SharePoint users: to make information relevant and to reduce the amount of content returned. This helps to reduce clutter within the results making it easier for users to find what they need.
Please select Lesson 11 on the DVD or visit www.wrox.com/go/sp2010-24 to view the video that accompanies this lesson.