
Chapter 16
Using Hold and Discovery
Using the Hold and Discovery (technically known as eDiscovery in the SharePoint world) allows you to find documents you don't want deleted and setting “holds” on them to ensure they won't be. A hold overrides every attempt to delete a record by any user no matter what his administrative rights.
Unlike other content management features such as retention policies and record declaration, holds and discovery are usually going to be used on an ad hoc basis rather than as part of an ongoing content management strategy. You use it when you get sued. Well, at least that's the most likely motivation. Discovery is a legal term meaning that a side in a legal action gets a chance to review the evidence that the other side will be using against it in court. For corporations, that translates into orders not to delete any information that might be relevant to the case, and “Oops, I didn't know those files were in that folder when I deleted it” doesn't really cut it in court.
There are other scenarios in which it is useful to find a group of related items and make sure they don't get deleted, but legal reasons are the most common.
In the Try It section we will discuss in detail how to activate features and work through all the settings and options. In this section we will discuss the options available for searching records and finding them. The discovery functionality uses SharePoint search-and-query syntax (rules for writing commands to help find stuff) to locate documents. Figure 16.1 shows the section of the discovery page related to searching. As you can see, it requires you to enter the name of a site to search and some keywords for finding documents. We will visit it again in more detail in the Try It section.

It is important to remember that discovery relies on a functional search service and an up-to-date crawl of the data. A crawl is a scheduled operation that finds all of the content and places it into an index to be available for searching. Content cannot be found via search (or “discovery”) until it has been crawled and placed into an index.
There are two things to remember about this search feature:
- The search is scoped to the site collection, but you can narrow the scope to a subsite by entering the URL of the subsite in the text box, as shown in Figure 16.1. You cannot expand the scope of the search to find items outside of the site collection, however. For that, you will have to perform searches on each site collection individually. The search functionality related to discovery is more restrictive than the Enterprise Search feature of SharePoint 2010.
- The search will run with elevated privileges so every document can be discovered. Enterprise Search shows you only content that you have rights to see. Your elevated privileges here don't give you the rights to open a document, just to apply holds to it.
Here are five key points that offer some examples of what you can use in the search box to help find content:
1. To find files that contain a list of ALL the words you type, type the words with spaces in between. To find files that contain both apple and orange, type: apple orange.
2. To find files that match exact phrases, enclose the phrase in double quotes. To find a file with the title Budget Projections type Budget Projections. This way you will not find files just because they contain the word budget or projections.
3. To include document properties, use the property name and a colon, like this: Title:Sales Proposal.
4. You can exclude keywords or properties by using a hyphen. For example, to exclude the year 2010, you would type: -2010.
5. Remember that attachments to list items are not included in search results.
When an item is placed into a hold, it cannot be edited or deleted for any reason, regardless of user rights.
Intuitively, one finds a document and places a “hold” on it. This is how the interface appears to work for the end user as well. However, under the covers, SharePoint handles the concept of applying holds differently. A document is not modified to be associated with a hold status. In fact, once you activate the Hold and eDiscovery feature, a list is created that you can add different holds to. The list is hidden and not visible in the normal interface. Each hold that you execute creates a new corresponding list. When you find documents as part of a discovery, you are actually applying the results to a created hold list, as opposed to marking the document directly. A document can be part of several holds at once. It is not editable until it is removed from every hold list where its name appears. By naming multiple holds you give yourself a lot of flexibility in performing discovery and putting holds on your content. The interface for the Hold and eDiscovery feature does not require you to interface with these hold lists directly. It is mentioned here just for explanation.
In this walkthrough, you will learn how to activate the Hold and eDiscovery feature. In addition, we will use the feature to find documents based on a criteria and place holds on them to prevent deletion.
Lesson Requirements
To complete this Try It exercise, you need the following:
- A SharePoint site with SharePoint Server 2010 installed. The Hold and eDiscovery feature is part of the SharePoint standard license. It is not available on SharePoint Foundation.
- The SharePoint search service must be installed and running for the discovery features to work.
Hints
Hold and eDiscovery is a site-level feature. Until the feature is activated, many of the links and pages displayed here will not be available. The walkthrough shows you how to activate the feature.
Step-by-Step
1. Activate the Hold and eDiscovery feature by going to the Manage Site Features section under the Site Actions heading on the Site Settings page. Activating this feature will activate the links, pages, and actions for Hold and eDiscovery. Figure 16.2 shows the Hold and eDiscovery feature listing.
After activating the feature, you will see an entirely new heading in the Site Settings page, as shown in Figure 16.3.

2. On the Site Settings page, click the link in the Hold and eDiscovery section titled Discover and Hold Content. Figure 16.4 shows the Search and Add to Hold page this link opens.

I do not have a lot of content on my machine but I am going to look for a particular file called draft tracks.xlsx and place a hold on it. Find some content on your environment that you can discover via search for the example. I could just type “draft” but this would give me every document with the word draft in it. I am going to type the full filename inside double quotes, so that I only get the one file I want. See Figure 16.5, which shows how to fill out the search criteria section of the form. Click Preview Results and verify that you have the items you want in the result set. If you don't see any results, make sure the document is actually in your site and that the search service is operational.

3. In the Local Hold and Export section on the Search and Add to Hold page, you can choose whether you want the results to be held in place where they are or moved to some other preconfigured place, usually a Record Center site (Record Center sites are covered in Lesson 37). Choose to hold the records in place with the radio button titled “Keep in place and add to hold directly”. This is a new feature in SharePoint 2010. Previously, your only option was to move the records somewhere else. Figure 16.6 shows this section of the page with the correct option selected.

4. Select the hold to place these records under. You can use the link titled Add a New Hold… to add a hold on the spot if you haven't created any yet. If you have created a hold previously, the holds will be available to choose in the drop-down control. It is important to remember that the hold does not exert any special power. It is merely a container that links the results of any given discovery under one banner and prevents the items added to the hold from being deleted. Figure 16.7 shows this section of the page.

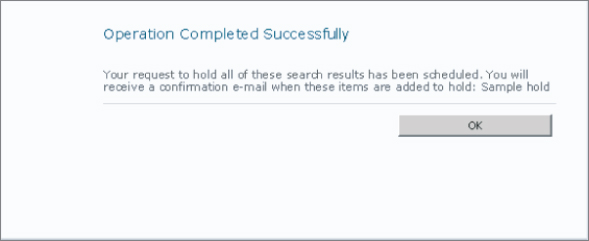
5. Finally, click the Add Results to Hold button. This is the button that actually takes the files and applies holds to them. You will see the dialog box shown in Figure 16.8. Notice it says the holds have been scheduled. Holds are applied not instantly, but rather as part of a timer job. A timer job is an operation that runs in the background on a schedule and performs various operations. In this case, the holds will only apply after the timer job completes.
6. When you return to the Site Settings page, click the Holds link in the Hold and eDiscovery section of the page shows the holds you have created. This is the source for the drop-down control you saw in Step 4 if you created a hold.
7. Return to the Site Settings page and click the Hold Reports link in the Hold and eDiscovery section of the page. The Hold Reports library is the other link created by the Hold and eDiscovery feature. This library will be populated from a timer job that runs in the background. The report is in the form of an Excel library and shows the items that exist under a given hold. The default for this job is daily, so do not expect to see a report right away if you are testing this functionality.
Please select Lesson 16 on the DVD or visit www.wrox.com/go/sp2010-24 to view the video that accompanies this lesson.