
Chapter 21
Setting Branding Options in Publishing Sites
People either love or hate the branding and look-and-feel of SharePoint out-of-the-box. Many people, particularly those who are using SharePoint for public-facing Internet sites, extensively redesign the interface; others don't change the interface. I don't recommend extensive changes to SharePoint sites for internal use. In my experience, intranet users are happy with the out-of-the-box styling. However, SharePoint does provide you with many ways to brand sites to meet the highest standards on the Web, and many SharePoint sites have been rebranded so much you cannot recognize them as SharePoint.
Core to the development of branding a SharePoint site is the master page. A master page looks after things like navigation (global and context) and the general look and feel of your sites. Master pages are used with page layouts, which manage the content of your pages. Master pages and page layouts are combined to produce most SharePoint pages on your site.
The actual content on your page, together with its look and feel, is controlled by another web authoring technology, Cascading Style Sheets (CSS). In SharePoint, a major CSS sheet is the corev4.css file, which is applied to almost every site you create — unless of course you override it with your own CSS file or override individual CSS styles! SharePoint CSS files can range in size from thousands of lines to only a few styles.
When branding SharePoint, it is important that you do not edit or change the supplied master pages or style sheets. Always make a copy of a file and work using the copy. When working with master pages do not remove any of the existing placeholders. Placeholders are blocks of code that are replaced at run time with content (for example, the title of your site). If you remove placeholders the master page may break; it is best practice to hide the placeholders you do not require. A full list of the default placeholders is available from http://msdn.microsoft.com/en-us/library/ee539981.aspx.
Master Page Gallery
You can view the master pages in a site collection by looking in the master page gallery within the site settings, where you will also find the page layouts. Figure 21.1 shows the master page gallery for a publishing portal.

You can check which master page a publishing site is using by checking the site settings. Publishing portals use the nightandday.master and most other SharePoint sites use a master page called v4master.master. Another master page used on search pages is minimal.master. The odd thing about this master page is that it has no navigation.
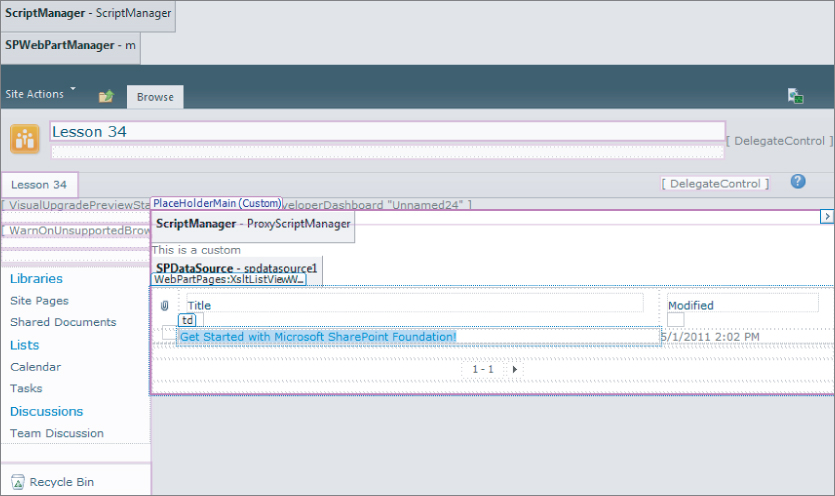
Those familiar with SharePoint 2007 should know that this minimal master page is not the same as the one used as a starting point for branding. Figure 21.2 shows a custom page in SharePoint Designer 2010 with a master page attached. Everything except the center of the page is controlled by the master page, in this case v4master.master.
The following master pages are available with SharePoint 2010:
- default.master: Used by SharePoint sites that are still running in MOSS 2007 interface mode, meaning sites that have not been visually upgraded to the SharePoint 2010 user interface.
- v4master.master: Default master page for SharePoint 2010 team sites.
- minimal.master: Master page used by the search pages in SharePoint. It is also used by Office web applications. This master page contains no navigation.
- simple.master: Used by log-in and error pages in SharePoint. This page cannot be customized but you can replace it with a custom page of your own.
- nightandday.master: Master page used by publishing portals.
There are a number of additional master pages, such as application.master that you do not use when customizing a SharePoint site. The master page gallery is a little like a publishing site in that content must be checked out before it can be edited, checked back in when edits are complete, and then published and approved.
Setting Master Pages
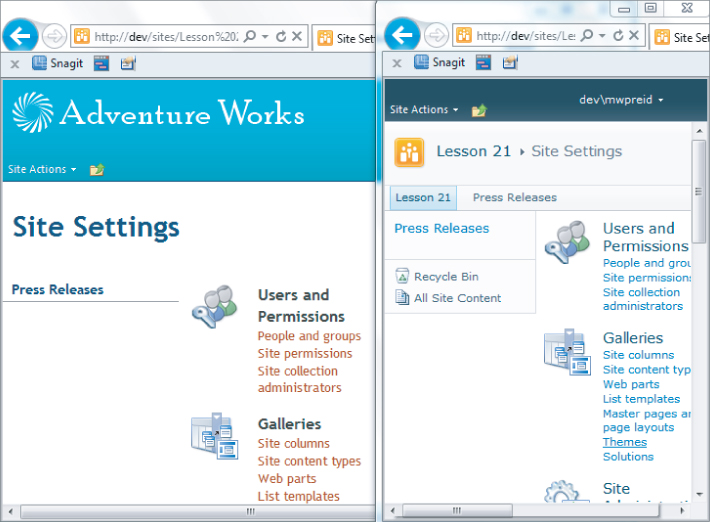
You can of course change the master page for your site in the SharePoint interface using the Site Settings menu. This gives you limited options for changing the master page used by the site and its subsites. Site Settings also enable you to change the CSS file used by the site and the subsites. For example, within a publishing site the site collection will use nightandday.master while the system pages and views use v4master.master. Figure 21.3 shows the same publishing site using two different out-of-the-box master pages to demonstrate the changes that can be made. Even this simple example demonstrates the power of a master page to change the entire look and feel of a SharePoint site.
When you set the master page you also have the option of using the same page for all subsites within the site collection. For example, in a publishing portal the top-level site uses nightandday.master. Subsites use v4master.master. In the master page settings under the Site Settings menu, it is possible to simply click a check box labeled Reset All Sub Sites To Inherit This Site Master Page Setting to make subsites use the same master page as opposed to v4master.master, which is used by default.
Just as you can switch master pages at the site and subsite levels, you can also make changes to the style sheets used on your sites. In the site settings, you can control the following:
- Alternate CSS URL: Enter the URL to your own alternative CSS file.
- Use Default CSS: Use the site's default CSS file.
- Inherit Alternative URL: Use the same alternative CSS file as the site's parent.
After you have created a new CSS file, you can use the settings to associate your master page with the site and subsites if required. In a publishing site, the normal practice is to store the CSS file in the site collection style library. The CSS settings enable you to browse your site structure to locate any files required. SharePoint Designer makes it fairly easy to work with SharePoint CSS and gives you direct access to the styles used on every element of a SharePoint page. Two more useful tools for working with CSS and SharePoint are the IE Developer Toolbar and, for Firefox users, Firebug. Firebug tends to be the tool of choice for identifying CSS elements used on a web page. A good resource for learning about the various CSS styles on a SharePoint page is http://erikswenson.blogspot.com/2010/01/sharepoint-2010-base-css-classes.html. This site provides a breakdown of each style and tells you where in the interface it is applied.
When you are going to work with CSS on your sites, it is best practice to enable publishing features if they are not already enabled. This way, you have a ready-made directory structure for saving files. For example, you will have a style library where you can create additional folders to meet your requirements.
Branding System Pages
Just as you can change the appearance of SharePoint site pages, you can also change the look of the pages used by the system. The option to view and change the CSS used by the system and applications is also available within the master page settings for the site in the System Master Page section. You are offered the same options as for the site master.
Themes
A discussion of branding would not be complete without a few words about SharePoint themes, which also enable you to change the look and feel of a site. You may have already noticed the Change Site Theme link on the team site homepage, which will open the Theme Settings page. Themes are generally an end-user tool, and with SharePoint 2010 a fair amount of customization can be achieved by site owners using the built-in themes.
Themes are available in the Look and Feel category of your Site Settings and here you can inherit the theme used by the parent site, select an existing theme, or create your own custom theme. You create custom themes using an Office client, either Microsoft Word or PowerPoint. You can apply your custom theme to the site you are currently working on and include the subsites if you want. Themes differ from master pages in that they mainly deal with cosmetic options like link color. Master pages, on the other hand, give you total control over virtually everything on the page. Changing a theme is straightforward thanks to the Site Settings menu. To view themes, perform these steps:
1. Click Site Actions.
2. Click Site Settings.
3. In the Look and Feel section, click Site Theme.
In the Site Theme form you can view the current theme being used and select any of the other themes supplied. A nice feature is the ability to preview the selected theme before applying it to the site. Simply click the Preview button at the bottom of the screen to see how your changes would look within the site. You can also create new themes using Microsoft PowerPoint 2010 and upload them to the Themes Gallery. A new tool for creating themes that is still in beta is available at http://connect.microsoft.com/themebuilder.
In this exercise, you apply a custom master page and style sheet, set inheritance options, and set master pages for system pages.
Lesson Requirements
To complete this Try It exercise, you need the following:
- Custom master page
- Custom style sheet
- SharePoint Designer 2010
- Site collection administrator permissions
- SharePoint publishing site
- Starter master pages downloaded from http://startermasterpages.codeplex.com/ (This set of pages can be used to replace the minimal master pages available with SharePoint 2007, and has been made available by Randy Drisgill. Save the extracted master pages to a local folder on your PC.)
Step-by-Step
To begin the process you need to add the downloaded starter master pages to the master page gallery. To upload the files, follow these steps:
1. Click Site Actions.
2. Click Site Settings.
3. In the Galleries category click Master Pages and Page Layouts.
4. Click Documents tab on the Ribbon.
5. Click Upload Document.
6. Select the first starter master page you would like to upload.
7. Click OK to upload.
At this point, you are required to complete some details before the upload can complete. This is because the master page gallery is under source control and you will have to check in, publish, and approve any files placed into this area. Figure 21.4 shows the Upload dialog.
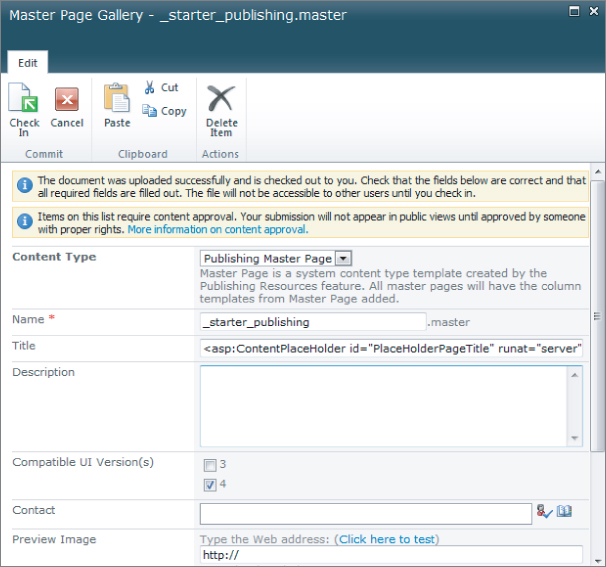
8. Use the drop-down menu to change the content type to Publishing Master Page.
9. Remove the underscores from the master page name so that it is starterpublishing.master.
10. Accept the remaining defaults and click the Check In button.
11. Locate the new master page in the gallery and open its context menu.
12. Select Publish a Major Version.
13. Click OK.
14. Return to the file and reopen the context menu.
15. Select Approve/Reject.
16. Click the Approved radio button.
17. Click OK to approve the master page.
After the master page has been uploaded, checked in, and approved, it is ready for use on the site. To use the master page on the site, continue as follows:
1. Click Site Actions.
2. Click Site Settings.
3. Click Master Page in the Look and Feel category.
4. Use the drop-down list to change the site master page to starterpublishing.master.
5. Scroll to the bottom of the screen and click OK.
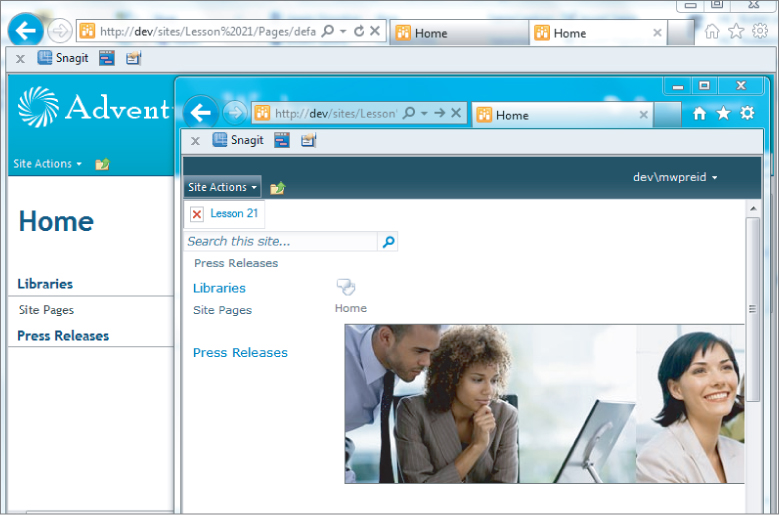
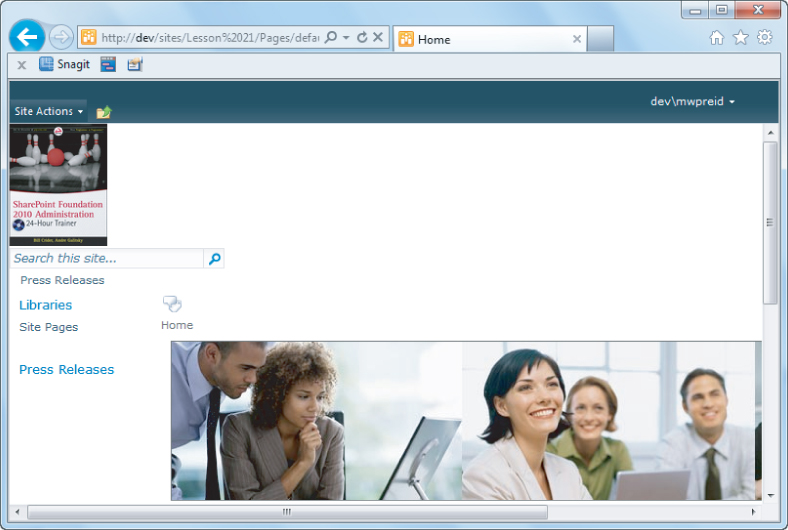
Figure 21.5 shows the effect of this change on the homepage of your publishing site. The same site is displayed in the background using the original master page; notice the broken image displayed in the upper left-hand corner of the new page.
To edit the master page, return to the master page gallery and do the following:
1. Select the starterpublishing.master file.
2. Select Edit in Microsoft SharePoint Designer from the context menu.
3. Click OK to check the file out.
4. Click OK in response to the Open Document dialog. The master page should now open within SharePoint Designer for editing.
5. Click the missing logo placeholder. In the page code, view the following fragment of code should be highlighted:
  <SharePoint:SPLinkButton runat="server"
NavigateUrl="∼sitecollection/">
<SharePoint:SiteLogoImage
LogoImageUrl="/Style Library/sitename/logo.png" runat="server"/>
</SharePoint:SPLinkButton>
Note the line LogoImageUrl=”/Style Library/sitename/logo.png” runat=”server”/>. This is a placeholder for an image named logo.png located within the style library of your site. At the moment this image doesn't exist.
6. Select any image file and upload it to your site's style library. For this example I downloaded the cover image for this book from wrox.com and renamed it trainer.jpg. Replace the preceding line with the following line, replacing the image file name with your own image's name:
LogoImageUrl="/Sites/Lesson 21/Style Library/Images/trainer.jpg"
7. Save the changes to the master page and return to the master page gallery, where you will find the master page marked as a draft.
8. Use the file's context menu to check the file in as a major version (publish).
9. Use the context menu again to approve the file for use. This will change the file status from Draft to Approved.
10. Click Site Actions.
11. Click Site Settings.
12. Click Master Page.
13. Change the site's master page to starterpublishing.master.
14. Click OK to save the changes.
Figure 21.6 shows the site's homepage using the new custom master page.
Bear in mind that this is a very crude example used to demonstrate a single change. Branding a full SharePoint site is complex and involves a number of different web authoring skills including SharePoint administration. On a large scale it is not something to be undertaken lightly. The next CSS example makes use of the ability to use an alternate CSS file, and again makes a major change to the SharePoint site. Again this is to demonstrate the ability of CSS to change the site, so it is a simple example. You are going to change the background color of the title bar on the page, or rather you are going to add the CSS instruction that will do it for you.
This is a simple change of background color to reset the title bar to orange. Before continuing, you need to make a few changes to SharePoint Designer to enable yourself to look at a master page and see which CSS styles are applied to any given element. Changes to SharePoint Designer 2010 make this process fairly easy. To continue with the v4master.master page open, do the following:
1. Click the View tab.
2. Click the task panes.
3. Select CSS Properties, and close all other task panes.
4. In the CSS Properties task pane click the Summary button. This shows all active CSS properties.
5. To check the CSS applied to a particular element on the screen, click the element on the page. CSS properties will dynamically change to show the individual CSS code for each of the elements you select.
6. Click the blue header on the master page. The control name appears in the top-left corner of the element: SharePoint:SPRibbon. To get the correct element that has been styled, click the solid line at the top of the blue title row.
7. In the CSS Property task pane, note the CSS properties displayed, including the background color, #21374c. Click in the background color cell, and use the drop-down list to select a new color.
Your title background row should reflect the new color chosen. Behind the scenes, SharePoint Designer 2010 has rewritten the CSS style for you. The new style is shown in the following code; in this case, the background color is yellow:
body #s4-ribbonrow{
      min-height: 43px;
/* [ReplaceColor(themeColor:"Dark2",themeShade:"0.9")] */;
      background-color: #FFFF00;
      overflow-y: hidden;
}
There are also some fairly simple ways to change areas of your site without using master pages or CSS. For example, in Site Settings you can change the title, icon, and description used in your site. This is a common approach for sites that require their own logos; the main drawback is that you have to make the changes on all your sites if you are storing the image file locally in the site structure. In the earlier example in which you added an image to the master page, you could also have uploaded it to the style library for your site and referenced it in the Site Settings area if a logo is required for a single site. However, it is possible to save the image to each of your front-end web servers — in the _Layouts folder, for example. It is then available to each site using the correct image file URL.
Please select Lesson 21 on the DVD or visit www.wrox.com/go/sp2010-24 to view the video that accompanies this lesson.