Using the Toolbox to Add Controls
Experimenting is the best way of learning how to use a new computer application. No matter how well the product's documentation—or a book such as this—describes a process, no substitute exists for trying the methods. This axiom holds true whether you are designing a form or writing program code. The Microsoft programmers who created Access cleverly designed the user interface for creating custom forms so that the interface is intuitive and flexible. After you complete the examples in this chapter, you probably will agree that this statement is true.
The examples in this chapter use the Personnel Actions table that you created in Chapter 4, "Working with Access Databases and Tables," and two queries: qryPersonnelActions (which you create in the next section) and qryPersonnelActionsSubform (which you created in Chapter 12, "Creating and Using Forms"). The data dictionary needed to create the Personnel Actions table appears in Appendix C.
◂◂ See Creating the Personnel Actions Table
◂◂ See Changing the Source of Data for the Subform and Sorting the Subform Data
Creating the Query on Which to Base the Main Form
The Personnel Actions table identifies employees only by their ID numbers, located in the paID field. As before, you need to display the employee's name and title on the form to avoid entering records for the wrong person. To obtain the employee's name and title data for the form, you need to create a one-to-many query that joins the Employees table, which has only one entry per employee, with the Personnel Actions table, which can have many entries for one employee.
Note
In the form you created in Chapter 12, you used the Form Wizard to specify the tables from which you wanted to display data on the form. When you create a multitable form from scratch, you need to create a query as a data source for the form. The query joins the data from the tables into a unified source for use by the form.
To create the Personnel Actions query that serves as the data source for your main form, follow these steps:
1. | Alternatively, you can bypass the Show Table dialog step by clicking the Table button of the Database window and then selecting Personnel Actions in the table list. When you click the New Query button with a table selected, the table is added automatically to the new query. |
2. | Double-click the Employees table in the table list, and then click Close. The field list windows for the Personnel Actions and Employees tables appear in the upper pane of the Query Design window. |
3. | Choose View, Table Names to add the Tables row to your Query Design grid. (If the Table Names command already has a check mark next to it, you don't need to choose it.) |
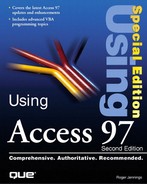
4. | If you defined relationships for the Personnel Action table as described in Chapter 4, "Working with Access Databases and Tables," the upper pane of the query window appears as shown in Figure 13.5. The line connecting the two tables indicates that a many-to-one relationship exists between the paID field in the Personnel Action table and the EmployeeID field of the Employees table. Figure 13.5. The upper pane of the Query Design window for the Personnel Actions query.
If you didn't define any relationships, the join line won't appear. In this case, you need to drag the paID field from the Personnel Actions field list to the EmployeeID field of the Employees field list to create a join between these two fields. |
5. | Click the * field of the Personnel Actions table, drag it to the first column of the Query Design grid, and drop it in the Personnel Actions column. This adds all of the fields to the Personnel Actions table to your query. |
6. | Click the LastName field of the Employees table, drag it to the Query grid, and drop it in the second column. |
7. | From the Employees table, click and drag the FirstName, Title, HireDate, Extension, Notes, ReportsTo, and Photo fields. Drop them in columns 3, 4, 5, 6, 7, 8, and 9 of the Query grid, respectively, as shown in Figure 13.6. Figure 13.6. The Query grid for the Personnel Actions query.
|
8. | To simplify finding an employee, click the Sort row of the LastName column and select an Ascending sort. |
9. | Close the new query. Click Yes when the message box asks if you want to save the query. |
10. |


Figure 13.7. The Save As dialog for the Personnel Actions query.

Now that you've created the query that will provide a unified record source for the main form, you're ready to begin creating your custom multitable form.
Creating a Blank Form with a Header and Footer
When you create a form without using the Form Wizard, Access provides a default blank form to which you add controls that you choose from the Toolbox. To create a blank form with which to experiment with Access controls, perform the following steps:
1. | |
2. | |
3. | Access creates a new blank form with the default title Form1. Click the Maximize button to expand the form to fill the document window. |
4. | |
5. | Choose View, Form Header/Footer. The blank form appears as shown in Figure 13.8. If the grid doesn't appear on the form, choose View, Grid. The default width of blank forms is 5 inches. The default height of the Form Header and Footer sections is 0.25 inch, and the height of the Detail section is 2 inches. |
6. | To adjust the height of the Detail section of the form, place the mouse pointer on the top line of the Form Footer bar. The mouse pointer becomes a double-headed arrow with a line between the heads. Hold down the left mouse button and drag the bar to create a height of about 3.5 inches, measured by the left vertical ruler. The active surface of the form, which is gray with the default 24×24 grid dots, expands vertically as you move the Form Footer bar, as shown in Figure 13.9. |
7. | Minimize the Form Footer section by dragging the bottom margin of the form to the bottom of the Form Footer bar. |
8. | Drag the right margin of the form to 6 inches as measured by the horizontal ruler at the top of the form. |
Figure 13.8. Access's default blank form with Form Header and Form Footer sections added.

Figure 13.9. Expanding the Detail section of the blank form.

You are using the blank form to create a form similar to the frmPersonnelActions form that you created in Chapter 12, "Creating and Using Forms."
Adding a Label to the Form Header
The label is the simplest control in the Toolbox to use. Labels are unbound and static, and they display only the text you enter. Static means that the label retains the value you originally assigned as long as the form is displayed. To add a label to the Form Header section, complete the following steps:
1. | |
2. | Locate the crosshair at the upper-left of the Form Header section. Press and hold down the left mouse button while you drag the crosshair to the position for the lower-right corner of the label (see Figure 13.10). As you drag the crosshair, the outline of the container for the label follows your movement. The number of lines and characters that the text box can display in the currently selected font is shown in the status bar. Figure 13.10. Adding a label control to the Form Header.
|
3. | If you move the crosshair beyond the bottom of the Form Header section, the Form Header bar expands to accommodate the size of the label after you release the left mouse button. When the label is the size you want, release the mouse button. |
4. | The mouse pointer becomes the text editing caret inside the outline of the label. Enter Personnel Action Entry as the text for the label, and then click anywhere outside the label to finish its creation. If you don't type at least one text character in a label after creating it, the box disappears the next time you click the mouse. |

◂◂ See Selecting, Moving, and Sizing a Single Control
You use the basic process described in the preceding steps to add most of the other types of controls to a form. (Some Toolbox buttons, such as the graph and command buttons, launch a Control Wizard to help you create the control if the Control Wizards button is activated.) After you add the control, you use the anchor and sizing handles described in Chapter 12, "Creating and Using Forms," to move the control to the desired position and to size the control to accommodate the content. The location of the anchor handle determines the Left (horizontal) and Top (vertical) properties of the control. The sizing handles establish the control's Width and Height properties.
Formatting Text and Adjusting Text Control Sizes
When a control is selected that accepts text as the value, the typeface and font size combo boxes appear on the toolbar. To format the text that appears in a label or text box, complete the following steps:
1. | Click the Personnel Action Entry label you created in the preceding section to select the label. |
2. | Double-click the label (or click the Properties button on the toolbar) to display the Properties window. (You don't actually need to use the Properties window to make these formatting changes. You open the Properties window to learn about how the changes you make to a control with toolbar buttons and menu commands affect the control's properties.) |
3. | |
4. | |
5. | |
6. | The size of the label you created isn't large enough to display the larger font. To adjust the size of the label to accommodate the content of the label, click the Size to Fit button—if you added it to the Toolbox—or choose Format, Size, To Fit. Access resizes the label's text box to display the entire label; if necessary, Access also increases the size of the Form Header section. |
Note
The two sizing commands (Size, To Grid and Size, To Fit) work slightly differently, depending on whether one or more controls are selected. If one or more controls are selected when you execute one of the sizing commands, the command is applied to the selected control(s). If no controls are selected, the chosen sizing command applies as the default to all objects you subsequently create, move, or resize.
When you change the properties of a control, the new values are reflected in the Properties window for the control, as shown in Figure 13.11. If you move or resize the label, you see the label's Left, Top, Width, and Height values change in the Properties window. You usually use the Properties window to actually change the characteristics of a control only if a toolbar button or menu choice isn't available.
You can choose different fonts and the bold, italic, and underline attributes (or a combination) for any label or caption for a control. You can assign the text content of list boxes and combo boxes to a typeface or size other than the default, but this practice is uncommon in Windows applications.
Figure 13.11. The form title label and its Properties window.

Creating Bound, Multiline, and Calculated Text Boxes
Access uses the following four basic kinds of text boxes:
Single-line text boxes usually are bound to controls on the form or to fields in a table or query.
Multiline text boxes usually are bound to Memo field types and include a vertical scroll bar to allow access to text that doesn't fit within the dimensions of the box.
Calculated text boxes obtain values from expressions that begin with = (equal sign) and are usually a single line. If you include a field value, such as [paScheduledDate], in the expression for a calculated text box, the text box is bound to that field. Otherwise, calculated text boxes are unbound. You cannot edit the value of a calculated text box.
Unbound text boxes can be used to supply values—such as limiting dates—to Access VBA procedures. An unbound text box that doesn't contain a calculation expression can be edited.
The following sections show you how to create the first three types of text boxes.
Adding a Text Box Bound to a Field. The most common text box used in Access forms is the single-line bound text box that comprises the majority of the controls of the frmPersonnelActions form you created in Chapter 12. To add a text box that is bound to a field of the form's data source with the field list window, complete the following steps:
1. | |
2. | Click the paID field in the field list window. Hold down the mouse button and drag the field to the upper-left corner of the form's Detail section. When you move the mouse pointer to the active area of the form, the pointer becomes a field symbol, but no crosshair appears. The position of the field symbol indicates the upper-left corner of the text box, not the label, so drop the symbol in the approximate position of the text box anchor handle, as shown in Figure 13.12. Figure 13.12. Adding a text box control that is bound to the paID field.
|
3. | Drag the text box by the anchor handle closer to the ID label, and decrease the box's width. |
4. | |
5. | Choose File, Save, and then type the name frmPersonnelActionsEntry in the Form Name text box of the Save As dialog. Click OK. |

Note
When Access creates a text label that is associated with a form control, it uses the bound object's name as the value for the text label. If the form control is bound to a table object, such as a field, that has a Caption property (and the Caption property isn't blank), then Access uses the value of the Caption property as the default value for the text label of the bound form control. When you created the Personnel Actions table in Chapter 4, "Working with Access Databases and Tables," you set the Caption property for each field name. The paID field has a Caption property set to ID, so the label for the text box bound to the paID field is also ID.
Steps 3 and 4 in the preceding example are included to show how to make minor design adjustments to controls that improve the appearance of forms. Step 5 was included because you've already put some effort into this sample form (which you'll continue to experiment with and eventually complete in the following sections). Furthermore, it's good working practice to save your documents frequently.
Adding a Multiline Text Box with Scroll Bars. Although you can use a conventional text box to display comments or other text fields with lengthy content, you must then scroll the caret through the text box to read the content. Multiline text boxes allow you to display long strings of text as a series of lines whose width is determined by the width of the multiline text box. To create a multiline text box, perform the following steps:
1. | Click and drag paComments from the field list window to about the middle of the Detail section and drop it there. |
2. | |
3. | |
4. | Open the drop-down list for the Scroll Bars property, and choose Vertical to add a vertical scroll bar to the Comments text box. |
5. | If you plan to print the form, change the Can Grow and Can Shrink properties from No to Yes (for the height of the printed version of the form to vary with the number of lines of text in the box). The Can Grow and Can Shrink properties don't affect the appearance of the form in run mode. |
Figure 13.13. Adding the multiline paComments text box.

Note
The vertical scroll bar of a multiline text box is visible only in the form's run mode, and then only when the multiline text box has the focus (when the caret is within the text box).
Creating a Calculated Text Box. You can display the result of all valid Access expressions in a calculated text box. An expression must begin with = and may use Access functions to return values. As mentioned in the introduction to this section, you can use calculated text boxes to display calculations based on the values of fields. To create a calculated text box that displays the current date and time, complete the following steps:
1. | |
2. | Edit the label of the new text box to read Date/Time:, and relocate the label so that it is adjacent to the text box. |
3. | Type =Now() in the text box to display the current date and time from your computer's clock. (In Design view, the form displays the calculation formula; it displays the actual date and time only in Form view.) |
4. | Adjust the length of the text box to accommodate the number of characters—20—in the default DD/MM/YY HH:MM:SS PM format used for dates and times. The entry appears as shown in the Date/Time text box of Figure 13.14. You add the other two text boxes in the following section. |
Figure 13.14. Creating and formatting a calculated text box to display the date and time.

Formatting Values. You can use the Format property you learned about in Chapter 4 to determine how dates, times, and numbers are displayed in a text box on a form. To format a date entry, perform the following steps:
1. | |
2. | Edit the label to read Date: and enter =Date() in the text box. |
3. | |
4. | Click the Format property and open the drop-down list. Select Long Date from the list. |
A Format property applied to a bound text box on a form or report overrides the format assigned to the field in the table design that supplies the value to the text box.
Note
When you display a form in run mode, the value displayed in the Date/Time text box is the time that you open the form. To update the time, choose Records, Refresh. The refreshing process that occurs at an interval determined by the Refresh Interval property of the Multiuser Options (the default value is 15 seconds) doesn't update unbound text boxes.
Using the Clipboard with Controls. You can use the Windows Clipboard to easily make copies of controls and their properties. As an example, create a copy of one of the Date/Time controls using the Clipboard by performing the following steps:
1. | Select the unbound control and its label by clicking the field text box of the second date text box you added in the preceding section. Both the label and the text box are selected, as indicated by the selection handles on both controls. |
2. | |
3. | |
4. | Click the Format property in the Properties window for the copied control, and select Short Date from the drop-down list. |
5. | |
6. | Delete the two Date text boxes and labels. To do so, enclose both with a selection boundary created by dragging the mouse pointer across the text boxes from the upper-left to the lower-right corner. Then press Delete. (You only need the Date/Time text box in the Form Header section for this form.) |
7. |
Figure 13.15. The form title and text boxes displayed in Form view.

Text boxes (and their associated labels) are the most commonly used control objects on Access forms.
Changing the Default View and Obtaining Help for Properties
A form that fills Access's Design window might not necessarily fill the window in run mode. Run mode may allow the beginning of a second copy of the form to appear. The second copy is created because the Default View property has a value of Continuous Forms. (In Access 2.0, the default property value for Default view was Continuous Forms; in Access 95 and 97, the default value of Default view is Single Form—your test form won't show the second form at the bottom of the screen.) Forms have the following three Default View property values from which you can choose:
Single Form displays one record at a time in one form.
Continuous Forms displays multiple records, each record having a copy of the Detail section of the form. You can use the vertical scroll bar or the record selection buttons to select which record to display. Continuous Forms view is the default value for subforms created by the Form Wizard.
Datasheet displays the form fields arranged in rows and columns.
To change the Default View property of the form, complete the following steps:
1. | |
2. | Choose Edit, Select Form. |
3. | |
4. | Click the Default View property to open the list. |
5. | Select the value you want for this property for the current form. For this exercise, select Single Form (the default) from the list. |
6. | While Default view is selected, press F1. The Help window for the Default View property appears. This Help window also explains how the Default view and Views Allowed properties relate to each other. The vertical scroll bar disappears from the form in run mode if a single form fits within its MDI child window. |
![]() You can verify your changes to the Default View property by clicking the Form View button to review the form's appearance.
You can verify your changes to the Default View property by clicking the Form View button to review the form's appearance.
Adding Option Groups, Binding Controls, and Locking Tools
Option buttons, toggle buttons, and check boxes can return only Yes/No (-1/0 or True/False) values when used by themselves on a form. Here, their use as bound controls is limited to providing values to Yes/No fields in a table. When you place any of these controls within an option group, the buttons or check boxes can return a number you specify for the Option Value property of the control.
The capability of assigning numbers to the Option Value property allows you to use one of the preceding three controls inside an option group frame for assigning values to the paRating field of the Personnel Actions table. Option buttons are most commonly employed in Windows applications to select one value from a limited number of values.
Caution
Placing check boxes within option groups violates the Windows user interface design guidelines. According to the guidelines, a group of check boxes provides multiple additive choices. Thus, if you have more than one check box in a group, any or all of the check boxes can be marked. Use the shape control to create a frame around check boxes. Only option buttons and toggle buttons should be used in option groups.
By default, all controls you add with the Toolbox are unbound controls. You can bind a control to a field by choosing the control you want to use and then clicking the field name in the Field List window to which you want the control bound. Another way of binding a control is to create an unbound control with a tool and then type the name of a field in the Control Source property text box (reach the Control Source text box by clicking the Data tab in the Properties window for the control).
Access 97 offers two means of creating an option group: using the Option Group Wizard or manually adding option buttons or toggle buttons to the option group. The following two sections describe these methods.
Using the Option Group Wizard. The Option Group Wizard is one of three Control Wizards that take you step by step through the creation of complex controls. To create an option group for the paRating field of the Personnel Actions table with the Option Group Wizard, follow these steps:
1. | |
2. | Figure 13.16. The opening dialog of the Option Group Wizard.
|
3. | Type five of the nine ratings in the Label Names datasheet: Excellent, Good, Acceptable, Fair, and Poor (see Figure 13.16). Click the Next button to display the second dialog of the Option Group Wizard, shown in Figure 13.17. Tip You can create accelerator keys in the captions of your option buttons by placing an ampersand (&) before the letter to be used as an accelerator key. Thereafter, pressing Alt in combination with that letter key selects the option when your form is in run mode. Figure 13.17. Choosing a default value for the options group.
|
4. | The second dialog lets you set an optional default value for the option group. Select the option named Yes, the Default Choice Is, and then open the drop-down list. Select Good, as shown in Figure 13.17, and then click Next. If you need to, you can always return to the prior step by clicking Back. |
5. | The third dialog of the Option Group Wizard provides for the assignment of option values to each option button of the group. Type 9, 7, 5, 3, and 1 in the five text boxes, as illustrated by Figure 13.18, and then click the Next button. Figure 13.18. Assigning the numeric Option Value property to the option buttons.
The domain integrity rule for the paRating field provides for nine different ratings. Nine option buttons, however, occupy too much space on a form. Thus, only five of the nine ratings are provided here. In the section "Creating an Option Group Manually" later in this chapter, you add to this form a drop-down combo list with all nine ratings. |
6. | The fourth Option Group Wizard dialog enables you to bind the option frame to a field of a table or a column of a query that acts as the Record Source of the bound form. Select the paRating column of the qryPersonnelActions query to which your form is bound (see Figure 13.19). Click Next to continue with the next stage of the wizard. Figure 13.19. Binding the option group to a column of the form's Record Source.
|
7. | The fifth dialog lets you determine the style of the option group, as well as the type of controls (option buttons, check boxes, or toggle buttons) to add to the option group. You can preview the appearance of your option group and button style choices in the Sample pane. For this example, accept the defaults, Option Buttons and Etched (see Figure 13.20). Figure 13.20. Selecting a style for the option group and determining the type of button to add.
The sunken and raised styles of option groups, option buttons, and check boxes are applicable only to control objects on forms with a Back Color property other than white. Light gray is used to aid in the three-dimensional simulation, and neither option buttons nor check boxes have a Back Color property. Thus, option buttons and check boxes with special effects are best suited for light gray backgrounds (Back Color = 12632256). |
8. | The last dialog provides a text box for entering the value of the Caption property of the label for the option group. Type Rating, as shown in Figure 13.21, and then click Finish to let the wizard complete its work. Your completed Rating option group appears as shown in Figure 13.22. Figure 13.21. Assigning the value of the Caption property for the option group's label.
Figure 13.22. The option group created by the Option Group Wizard.
|


To test your new bound option group, add a text box that is bound to the paRating column of the query underlying the form. Figure 13.23 shows the option group in Form view with the space between the buttons closed up, the bold attribute applied to the option group label, and the Rating text box added. Click the option buttons to display the rating value in the text box.
Figure 13.23. The new option group in Form view with a text box for the Rating field added to show the effect of selecting different options.

Creating an Option Group Manually. Although the Option Group Wizard does a good job of creating option groups, it's useful to know how to create a bound option group on your own. To bind an option group frame to the paRating field of the Personnel Actions query without taking advantage of the Control Wizard, complete the following steps:
1. | |
2. | |
3. | Hold down the mouse button and drag the field pointer to a position to the right of the Rating option group you created in the preceding section. Then release the mouse button to create an option group of the default size. When you create a bound option group by dragging a field from the Field List window, the option group name is automatically assigned to the Caption property of the associated label. |
4. | Resize the option group frame so that it is the same size as the other Rating option group. Apply the bold attribute to the option group's label. |
Option buttons, toggle buttons, and check boxes within bound frames inherit many of their properties, such as Control Source, from the frame. The option frame provides the binding of these tools when they are inside of a frame. Therefore, you don't use the field list with these controls. Adding multiple copies of a control is easier if you double-click the tool's button in the Toolbox to lock the tool on. (Click the tool at any time to unlock it.) To add five option buttons to assign values to the paRating field, perform the following steps:
1. | |
2. | Using the crosshair as a reference to the upper-left corner of an imaginary rectangle that surrounds the option button, drop the option button at the appropriate location in the option group frame. When the option button symbol enters the option group frame, the button, frame, and contents appear in reverse video as shown in Figure 13.24. Figure 13.24. Manually adding a second option button to an option frame.
|
3. | Repeat step 2 four times to include a total of five Rating option buttons inside of the Rating option group frame. The labels of the buttons are assigned numbers in the sequence in which they were added. |
4. | |
5. | Edit the labels to read the following from top to bottom: Excellent, Good, Acceptable, Fair, and Poor, corresponding to the option values of 9, 7, 5, 3, and 1, respectively. |
6. | Double-click the option button at the top to display its Properties window. Click the Data tab, and then replace 1 with 9 as the Option Value in the Data Properties list. A default Option Value is assigned in sequence from 1 to the number of buttons in the frame. |
7. | Repeat step 6 for the four remaining buttons, replacing the default values 2, 3, 4, and 5 with 7, 5, 3, and 1, respectively. No two buttons in an option frame can have the same value. |
8. | Figure 13.25. The option group frame and option buttons displayed in Form view.
|
9. | Using the record selection buttons, choose a record to edit. If you previously assigned ratings with odd-numbered values, the option button that corresponds to the value is selected. |
10. | Click the option buttons in sequence to verify that the proper numeric values appear in the Rating text box. |
11. | |
12. | You won't need either of the Rating option group boxes currently on the form, so delete both. The drop-down lists and combo boxes you learn about in the following sections are a better control type to use than an option group for the relatively large number of choices available in the ratings field. Option groups are best for choosing one of only three or four choices. |


If you have a Yes/No field in the table, you can use a single option button bound to a field (not inside an option frame) to create the Yes/No values for the user.
Note
If you add a button or a check box within a frame with the Field List drag-and-drop method, the button is independently bound to the selected field rather than to the field through the option frame. In this case, the button's Properties window doesn't include the Option Value property, and the button assigns Yes/No values to the field.
An independently bound button inside an option frame doesn't follow the rules of the option frame; you can choose this button and another button simultaneously.
Adding independently bound buttons within option frames results in the assignment of inconsistent values to fields.
Using the Clipboard to Copy Controls to Another Form
Access's capability of copying controls and their properties to the Windows Clipboard allows you to create controls on one form and copy them to another. If you use a standard header style, you can copy the controls in the header of a previously designed form to a new form and edit the content as necessary. The form that contains the controls to be copied need not be in the same database as the destination form in which the copy is pasted. You can create a library of standard controls in a dedicated form that is used only for holding standard controls.
The Time/Date calculated text box is a candidate to add to the frmPersonnelActions form you created in Chapter 12, "Creating and Using Forms." You may want to add a Time/Date text box to the Form Header or Detail section of all your transaction forms. To add the Time/Date control to the frmPersonnelActions form, perform the following steps:
1. | |
2. | |
3. | |
4. | |
5. | Position the mouse pointer over the copied option group so that the pointer becomes a hand symbol. |
6. | Hold down the mouse button and drag the option group to the position shown in Figure 13.26, and then release the mouse button. Figure 13.26. Copying the Date/Time calculated field to the frmPersonnelActions form by using the Clipboard.
|
7. | Figure 13.27. The Date/Time text box displayed in Form view.
|
8. |


Troubleshooting Tip
I've copied a control to another form, but when I attempt to use the form, I get an error message whenever that control gets the focus.
When you copy a control to a form that uses a data source that is different from the one used to create the original control, you need to change the Control Source property to correspond with the field to which the new control is to be bound. Changing the Control Source property doesn't change the Status Bar Text, Validation Rule, or Validation Text properties for the new control source. You must enter the appropriate values manually.
Using List Boxes and Combo Boxes
List boxes and combo boxes both serve the same basic purpose by enabling you to pick a value from a list, rather than type the value in a text box. These two kinds of list boxes are especially useful when you need to enter a code that represents the name of a person, firm, or product. You don't need to refer to a paper list of the codes and names to make the entry. The differences between list boxes and combo boxes are shown in the following list:
List boxes don't need to be opened to display their content; the portion of the list that fits within the size of the list box you assign is visible at all times. Your choice is limited to values included in the list.
Drop-down combo boxes and drop-down lists consume less space than list boxes in the form, but you must open these controls to select a value. Combo boxes in Access are drop-down lists plus a text box, not traditional combo boxes that display the list at all times. You can allow the user to enter a value in the text box element of the drop-down combo list or limit the selection to just the members in the drop-down list. If you limit the choice to members of the drop-down list (sometimes called a pick list), the user can still use the edit box to type the beginning of the list value—Access searches for a matching entry. This feature reduces the time needed to locate a choice in a long list.
Drop-down lists and combo boxes are two of the most powerful controls that Microsoft programmers developed for Access. The data source for these controls may be a table, a query, a list of values you supply, or the names of Access VBA functions. The boxes may have as many columns as you need to display the data for making the correct choice.
Adding a Combo Box with a Table or Query as the Data Source. In the majority of cases, you bind the drop-down list or combo box to a field so that the choice updates the value of this field. Two-column controls are most commonly used. The first column contains the code that updates the value of the field to which the control is bound, and the second column contains the name associated with the code. An example of where a limit-to-list, multiple-column, drop-down list is most useful is the assignment of supervisor and manager employee ID numbers to the paInitiatedBy and paApprovedBy fields in the frmPersonnelActionsEntry form. The Combo Box Wizard is used to add the paInitiatedBy drop-down list, and then you employ manual methods to add the paApprovedBy drop-down list in the two sections that follow.
Using the Combo Box Wizard. Designing combo boxes is a more complex process than creating an option group, so you're likely to use the Combo Box Wizard for most of the combo boxes you add to forms. Follow these steps to use the Combo Box Wizard to create the paInitiatedBy drop-down list that lets you select from a list of Northwind Traders' employees:
1. | |
2. | |
3. | |
4. | |
5. | Drag the paInitiatedBy field to a position at the top and extreme right-hand edge of the Detail section of the form, opposite the paID field (look ahead to Figure 13.34). The first Combo Box Wizard dialog appears. |
6. | You want the combo box to look up values in the Employees table, so accept the default option button and then click Next (see Figure 13.28). Your selection specifies Table/Query as the value of the Record Source property of the combo box. The second Combo Box Wizard dialog appears. Figure 13.28. Selecting the source of list values in the opening dialog of the Combo Box Wizard.
|
7. | Select Employees from the list of tables in the list (see Figure 13.29). Click Next to reach the third dialog. Figure 13.29. Selecting the Record Source property of the combo box.
|
8. | You need the EmployeeID and LastName fields of the Employees table for your combo box. EmployeeID serves as the bound field, and your combo box displays the LastName field. EmployeeID is selected in the Available Fields list by default, so click the > button to move EmployeeID to the Selected Fields list. LastName is selected automatically, so click the > button again to move LastName to the Selected Fields list. Your Combo Box Wizard dialog appears as shown in Figure 13.30. This selection specifies the SQL SELECT query that serves as the value of the Row Source property and populates the combo box's list. Click Next to reach the fourth dialog. |
9. | The fourth dialog (see Figure 13.31) displays the value list for the combo box. Access has successfully determined that the EmployeeID field is the key field of the Employees table and has assumed (correctly) that the EmployeeID field is the bound field for the combo box. The Hide key column check box is selected by default; this option causes Access to hide the bound column of the combo box. The result is that, although you've selected two columns for the combo box, only one column (the LastName field) is displayed in the combo box's list. The EmployeeID column is hidden and used only to supply the data value for the paInitiatedBy field. Resize the LastName column by dragging the right edge of the column leftward—you want the column wide enough to display everyone's last name but not any wider than absolutely necessary. Click Next to continue to the fifth Combo Box Wizard dialog. |
10. | Your combo box supplies the EmployeeID value corresponding to the name you select to the paInitiatedBy field. You previously specified that the Control Source property is paInitiatedBy when you dragged the field symbol to the form in step 5. The Combo Box Wizard uses your prior selection as the default value of the Control Source property (see Figure 13.32), so accept the default value by clicking the Next button to display the sixth and final dialog. Figure 13.30. Selecting the fields of the table with which to populate the combo box.
Figure 13.31. Selecting the column width for the combo box and a hidden key field column.
Figure 13.32. Assigning the Control Source property value.
|
11. | The last dialog lets you edit the label associated with the combo box (see Figure 13.33). Type Initiated By: and click Finish to add the combo box to your form. Your combo box in Design mode appears as shown in Figure 13.34. Figure 13.33. The final Combo Box Wizard dialog allows you to edit the control's label.
|
12. | Click the Form View button on the toolbar to test your combo box (see Figure 13.35). Change the Initiated By value to another person, such as Mr. Fuller, the Vice President of Sales, and then move the record pointer to make the change permanent. Return to the original record, and open the combo box to verify that the combo box is bound to the paInitiatedBy field. Figure 13.34. The new combo box in Design mode.
Figure 13.35. The Initiated By combo box in run mode.
|


Adding a Combo Box Manually. As mentioned previously in this chapter, it is good practice to create control objects manually so that you learn the properties associated with each control. To substitute a two-column combo box that you create yourself for the paApprovedBy text box in the frmPersonnelActionsEntry form, complete the following steps:
1. | |
2. | |
3. | |
4. | |
5. | Double-click the combo box to display the Properties window, and then click the Data tab. |
6. | The source of the data for the combo box is the Employees table, so the default value of the Row Source Type property, Table/Query, is correct. Place the caret in the Row Source property box, open the list, and select Employees as the value of the Row Source property. |
7. | When you choose the name of a table or query as the Row Source property, all fields of the table or columns of the query are included automatically as combo box columns. The first two columns of the Employees table provide EmployeeID to be assigned as the value of the paApprovedBy field and LastName to identify the supervisor. Click the Format tab in the Properties window, and type 2 as the Column count to create a two-column combo box. |
8. | The default width of each column of the combo box is 1 inch. The EmployeeID column can be less than 1 inch wide because it consists of only one digit. In the Column Width box, type 0.2 as the width of the first column followed by a semicolon (or comma) separator, and type 0.8 as the width of the second column. Access adds inch units (") for you. |
9. | Click the Data tab to return to the data properties. The first column of the Employees table—EmployeeID—contains the value to assign to the paApprovedBy field, so the default value of the Bound Column property—column 1—is correct. You can choose any column by its number (in left-to-right sequence) as the value to be assigned to the field to which the combo box is bound. |
10. | Only an employee included in the Employees table can initiate or approve a Personnel Action, so open the Limit to List drop-down list and select Yes. (If you want to allow the user to add a value not included in the list, accept the default No value. Adding a user-defined value is not applicable in this case.) The Personnel Actions form appears as shown in Figure 13.36. Figure 13.36. Setting the values of the data properties of the combo box.
|
11. | Figure 13.37. The Approved By multiple-column combo box in Form view.
Notice that the EmployeeID field value appears in the text element of the combo box rather than the LastName field value, as in the Initiated By combo box. If the bound column appears in the list element, the value of the bound column appears in the text element. |
12. | To display only the name of the supervisor or manager in the list and text boxes, return to Design mode and change the value of the Column Widths property (on the Format tab of the Properties window) of the first column to 0 from 0.2 inches. This action causes only the second column to appear in the text box and list elements of the combo box, making the two combo boxes of your form consistent. As an example, if the fourth column of the table or query is the column you want to display in the combo box, type three zero-width columns preceding the width you want for the column that you want to display (0,0,0, and 1). |


List and combo boxes are a boon to developers because Access does all of the work. Users who, in early versions of Clipper or later versions of dBASE, wrote the code necessary to create a pop-up window that contains a drop-down list, will appreciate the ease of creating a combo box in Access.
Using the Query Builder to Populate a Combo Box. If the Row Source Type property for a combo box is Table/Query, you can substitute a SQL statement for a named table or query as the value of the Row Source property. In the case of queries, the advantage of the substitution is that this process prevents the list of queries in the Database window from becoming cluttered with named queries used to create a multitude of combo boxes. For either tables or queries, you can choose only the fields or columns you want for the text box, eliminating the need to hide columns. In addition, you can specify a sort order for the list element of your combo box.
To invoke Access 97's Query Builder to create a SQL statement for populating the Approved By combo box, follow these steps:
1. | |
2. | Select the Row Source property, and click the Build button (...) to launch the Query Builder. You previously selected the Employees table as the value of the Row Source property, so the message box shown in Figure 13.38 appears. Click Yes to confirm the replacement and open the Query Builder window. Figure 13.38. Confirming you want to build a Row Source query based on the Employees table.
|
3. | The Query Builder's window is identical in most respects to the Query Design window, but its title and behavior differ. The Employees table automatically appears in the upper pane. Drag the EmployeeID and LastName fields to columns 1 and 2 of the Query Design grid. |
4. | You want an ascending sort on the LastName field, so select Ascending in the Sort list box. Your query design appears as shown in Figure 13.39. |
5. | Click the Close window button to close the Query Builder. The message box shown in Figure 13.40 appears for confirmation of your change to the Row Source property value, instead of asking if you want to save your query. Click Yes and the SQL statement derived from the graphical QBE design appears as the value of the Row Source property. |
6. | SQL statements, especially those created by Access, have a tendency to be lengthy. With the caret in the Row Source property text box, press Shift+F2 to display the SQL statement in the Zoom box, as shown in Figure 13.41. In this case, the field name prefix is applied in each field reference, although it is really only necessary in the FROM clause because just one table is involved in the query. |

Switch to Form view to test the effect of adding the sort (the ORDER BY clause) to the query. Writing your own SQL statements to fill combo boxes with values is discussed in Chapter 23, "Working with Structured Query Language."
Figure 13.39. The design of the query to create the SQL statement for the Approved By combo box.

Figure 13.40. Confirming your change to the Row Source property value.

Figure 13.41. The new SQL statement for the Approved By combo box's Row Source property displayed in the Zoom box.

Creating a Combo Box with a List of Static Values. Another application for list boxes and combo boxes is picking values from a static list of options that you create. A drop-down list to choose a Rating value saves space in a form compared with the equivalent control created with option buttons within an option frame. As you design more complex forms, you find that display "real estate" becomes increasingly valuable.
The option frame you added to the frmPersonnelActionsEntry form provides a choice of only five of the possible 10 ratings. To add a drop-down list with the Combo Box Wizard to allow entry of all possible values, perform the following steps:
1. | |
2. | |
3. | Select the I Will Type in the Values That I Want option, and then click Next to reach the second dialog. |
4. | The Rating combo box requires two columns: the first column contains the allowable values of paRating, 0–9, and the second column contains the corresponding description of each rating code. Enter 2 as the number of columns. |
5. | Access assigns Row Source property values in column-row sequence; you enter each of the values for the columns in the first row, and then do the same for the remaining rows. Type 9 Excellent, 8 Very Good, 7 Good, 6 Average, 5 Acceptable, 4 Marginal, 3 Fair, 2 Sub-par, 1 Poor, 0 Terminated, as shown in Figure 13.42 (don't type the commas). Click Next to reach the third dialog. Figure 13.42. Entering Static values in the Combo Box Wizard's datasheet.
|
6. | Set the widths of the columns you want by dragging the edge of each column header button to the left, as shown in Figure 13.43. If you don't want the rating number to appear, drag the left edge of column 1 fully to the left to reduce its width to 0. When you've adjusted the column widths, click Next to reach the fourth dialog. |
7. | Select Col1, the rating number code, as the bound column for your value list—that is, the column containing the value you want to store or use later (see Figure 13.44); this column must contain unique values. Click Next to reach the fifth dialog. Figure 13.43. Setting the column widths of the combo box.
Figure 13.44. Choosing a column to bind to a field of a table or a column of a query.
|
8. | Accept the default value (the paRating field) in this dialog by clicking Next to go to the final dialog of the Combo Box Wizard. |
9. | Type Rating: as the label for the new combo box control, and click Finish to complete the combo box specification and return to design mode. |
10. | Open the Properties window for the combo box, then click the Data tab in the Properties window. Set Limit to List to Yes to convert the drop-down combo to a drop-down list. The frmPersonnelActionsEntry form's Data properties appear as shown in Figure 13.45. Notice that Access has added commas after the numbers, semicolons between the row entries, and quotation marks to surround the text values in the Row Source property. You use this format when you enter list values manually. |
11. |


Another opportunity to use a static-value combo box is as a substitute for the Type text box. Several kinds of performance reviews exist: Quarterly, Yearly, Bonus, Salary, Commission, and so on, each represented by an initial letter code.
Figure 13.45. The data properties for the value list combo box.

Figure 13.46. The Rating static-value combo box opened in Form view.

Note
![]()
![]() You can improve the appearance of columns of labels and associated text, list, and combo boxes by right-aligning the text of the labels and left-aligning the text of the boxes. Select all of the labels in a column with the mouse, and click the Align Right button on the toolbar. Then select all of the boxes and click the Align Left button.
You can improve the appearance of columns of labels and associated text, list, and combo boxes by right-aligning the text of the labels and left-aligning the text of the boxes. Select all of the labels in a column with the mouse, and click the Align Right button on the toolbar. Then select all of the boxes and click the Align Left button.
Creating a Combo Box to Find Specific Records
The Combo Box Wizard in Access 97 includes a third type of combo list box that you can create—a combo list that locates a record on the form based on a value you select from the list. You can use this type of combo box, for example, to create a Find Last Name box on the frmPersonnelActionsEntry form that contains a drop-down list of all last names from the Employees table. Thus, you can quickly find Personnel Actions records for those employees.
To create a combo box that finds records on the form based on a value you select in the combo box, follow these steps:
1. | |
2. | |
3. | Click the Find a Record on My Form Based On the Value I Selected in My Combo Box option. Click Next to reach the second dialog. |
4. | Scroll the Available Fields list until the LastName field is visible. Click to select this field, and then click the > button to move it to the Selected Fields list. Click Next to reach the third dialog. Note When creating a combo box to find records, select only one field. The combo box won't work for finding records if you select more than one field for the combo box's lists. |
5. | The Combo Box Wizard now displays a list of the field values from the column you just selected. Double-click the right edge of the LastName column to get the best column-width fit for the data values in the column, and then click Next to go to the fourth and final step of the wizard. |
6. | Type Zoom to: as the label for the new combo box, and then click Finish to complete the new combo box control. Your form should appear as shown in Figure 13.47. |
7. |
When you create this type of combo box, the Combo Box Wizard automatically creates an Access VBA event procedure for the After Update property of the combo box (refer to the Property window in Figure 13.47). An event procedure is a VBA procedure that Access executes automatically whenever a particular event occurs—in this case, updating the combo box. Chapter 26, "Writing Visual Basic for Applications Code," describes how to write Access VBA code and Chapter 28, "Responding to Events with VBA 5.0" describes how to write event-handling procedures.
To view the event procedure code that the wizard created for your new combo box, open the Properties window for the Zoom to: combo box, click the Events tab in the window, select the After Update property text box, and then click .... Access opens the Code Builder window shown in Figure 13.49. After you've looked at the code, click the Close window button to close the Code Builder window and return to design mode.
Figure 13.47. The new combo box that will find a record on the form based on a value selected in the combo box.

Figure 13.48. The combo box for finding a record on the form in Form view.

To use a combo box of this type, select a value from the list. As soon as you select the new value, Access updates the combo box's text box, which then invokes the Access VBA code for the After Update event procedure. The VBA code in the After Update procedure finds the first record in the form's record set with a matching value and displays it. You can only use this type of combo box to find the first matching record in a record set.
Figure 13.49. The Module window for the After Update event property of the locating combo box.

Because the field on the form is based on the LastName column of the form's underlying query, you'll see an entry in the list for each and every last name entry in the record set produced by the qryPersonnelActions query. If, let's say, more than one Personnel Action record exists for Steve Buchanan, then Buchanan appears in the combo list as many times as there are records for him. To display a unique list of last names to be located on the form, change the Row Source property to obtain the LastName field values for the combo box list through a SQL statement based on a query from the Employees table.
To change the Row Source property, follow the procedure you learned earlier in the "Using the Query Builder to Populate a Combo Box" section: Open the Properties window of the Zoom To combo box, click the Data tab, select the Row Source text box, and then open the Query Builder. Change the query so that it uses the Employees table, as shown in Figure 13.50. You should also change the Limit to List property value to Yes.
Figure 13.50. The Query Builder window for the new combo box, showing the Employees table selected as the new Row Source property value for the combo box.

Creating a Tab Control
The Tab control is an important addition to Access 97's Toolbox. With the Tab control, you can easily create multipage forms in a tabbed dialog, similar to the tabbed pages you've seen in the Properties window, in the Options dialog, and elsewhere in Access. The Tab control is a relatively easy and very efficient alternative to creating multipage forms with the Page Break control. You can use the Tab control to conserve space on-screen, and to show information from one or more tables. This section shows you how to add a Tab control to a form. You also learn to set the important properties of the Tab control as a whole, as well as the properties of individual pages of the Tab control.
To add a Tab control to the frmPersonnelActionsEntry form, follow these steps:
1. | |
2. | |
3. | Click and drag on the surface of the Detail section of the form to create the new tab control near the bottom center of the form (see Figure 13.51). Figure 13.51. A new Tab control showing the default two pages and default page captions.
|

Access creates the new Tab control when you release the mouse button, as shown in Figure 13.51. By default, Access creates a Tab control with two pages. Each page's tab displays the name of the page combined with a sequential number corresponding to the number of controls you placed on your form in this work session. The next few sections describe how to change the page tab's caption, add or delete pages in the Tab control, add controls to the pages, and set the page and Tab control properties.
Adding Tab Control Pages. Depending on the data you want to display and how you want to organize that data, you may want to include more than two pages in your Tab control. To add a page to a tab control, follow these steps:
1. | Click the tab of the page you want the new page inserted in front of. Access brings the page you select to the front of the Tab control. |
2. | Using the right mouse button, click the edge of the Tab control (the blank space along the top of the tab rows is easiest). Access displays the pop-up menu shown in Figure 13.52. |
3. |

Changing the Page Order. Because Access adds new pages to a Tab control in front of the currently selected page, it isn't possible to add a new page at the end of the existing tab pages. As a result, if you want the new Tab control page to appear as the last page in the Tab control, you'll need to change the order of pages in the Tab control. You may also want to change the order of Tab control pages as you work with and test your forms—in general, you should place the most frequently used (or most important) page at the front of the Tab control. To change the order of pages in a Tab control, follow these steps:
1. | Using the right mouse button, click the edge of the Tab control. Access displays the Tab control's pop-up menu (refer to Figure 13.52). |
2. | |
3. | In the Page Order list, select the page whose position you want to change. |
4. | Click the Move Up or Move Down buttons, as appropriate, until the page is in the position you want. |
5. |

Deleting a Tab Control Page. At some point, you may decide that you don't want or need a page in a Tab control. The frmPersonnelActionsEntry form only needs two pages in its Tab control. If you added a page to the Tab control by following the steps at the beginning of this section, you can delete a page from the Tab control by following this procedure:
1. | Click the page tab of the page you want to delete; Access brings that page to the front of the Tab control. |
2. | Right-click the edge of the Tab control; Access displays the Tab control's pop-up menu (refer to Figure 13.52). |
3. | Choose Delete Page; Access deletes the currently selected Tab control page. |
Setting the Tab Control's Properties. Two sets of properties govern the appearance and behavior of a tab control. A set of properties exists for the entire Tab control, and a separate set of properties exists for each page in the Tab control. The following list summarizes the important properties of the Tab control and its pages; the remaining property settings for the Tab control and its pages are similar to those you've seen for other controls (height, width, color, and so on):
Caption. This text property controls the text that appears on the page's tab and applies to individual Tab control pages only. If this property is blank (the default), then the page's Name property is displayed on the page's tab.
MultiRow. This Yes/No property applies to the Tab control as a whole and controls whether the Tab control can display more than one row of tabs. (The Options dialog, reached by choosing Tools, Options, is an example of a multirow tabbed dialog.) The default setting is No; in this case, if there are more tabs than fit in the width of the Tab control, Access displays a scroll button in the Tab control. If you change this property to Yes and there are more page tabs than will fit in the width of the Tab control, Access displays multiple rows of tabs.
Picture. You can display an icon in any or all of the page tabs in a Tab control using this property, which applies to pages only. You can use any of Access's built-in icons or insert any bitmapped (.bmp) graphic file as the page's tab icon.
Style. The Style property applies to the Tab control as a whole and controls the style in which the Tab control's page tabs are displayed. The default setting, Tabs, produces the standard page tabs you're accustomed to seeing in the Properties window and in various dialogs in Access and Windows. Two other settings are available: Buttons and None. The Buttons setting causes the page tabs to display as command buttons in a row across the top of the Tab control. The None setting causes the Tab control to omit the page tabs altogether. Use the None setting if you want to control which page of the Tab control has the focus with command buttons or option buttons located outside of the Tab control. However, using command buttons external to the Tab control to change pages requires writing Access VBA program code. You should use the default Tabs setting unless you have a very specific reason for doing otherwise—using the Tabs setting ensures that the appearance of your Tab controls is consistent with other portions of the Access user-interface. Using this setting also saves you the effort of writing VBA program code.
TabFixedHeight and TabFixedWidth. These two properties, which apply to the Tab control as a whole, govern the height and width of the page tabs in the control, respectively. The default setting for these properties is 0. When these properties are set to 0, the Tab control sizes the page tabs to accommodate the size of the Caption for the page. If you want all of the page tabs to have the same height or width, enter a value (in inches or centimeters, depending on your specific version of Access) in the corresponding property text box.
![]() To display the Properties window for the entire Tab control, right-click the edge of the Tab control, and select Properties from the resulting pop-up menu (refer to Figure 13.52). Alternatively, click the edge of the Tab control to select it (clicking the blank area to the right of the page tabs is easiest), and then click the Properties button on the toolbar to display the Properties window.
To display the Properties window for the entire Tab control, right-click the edge of the Tab control, and select Properties from the resulting pop-up menu (refer to Figure 13.52). Alternatively, click the edge of the Tab control to select it (clicking the blank area to the right of the page tabs is easiest), and then click the Properties button on the toolbar to display the Properties window.
![]() To display the Properties window for an individual page in the Tab control, click the page's tab to select it, and then click the Properties button on the toolbar to display the page's Properties window.
To display the Properties window for an individual page in the Tab control, click the page's tab to select it, and then click the Properties button on the toolbar to display the page's Properties window.
The Tab control in the frmPersonnelActionsEntry form uses one page to display company information about an employee: the employee's job title, supervisor, company telephone extension, hire date, and photo. The second Tab control page displays a history of that employee's personnel actions. Follow these steps to set the Caption property for the frmPersonnelActionsEntry form's Tab control:
1. | |
2. | |
3. | Click the Format tab, if necessary, to display the Format properties for the Tab control page. |
4. | Type Company Info in the Caption property's text box. |
5. | Click the second page of the Tab control to select it; the contents of the Property dialog change to show the properties of the second Tab control page. |
6. | Type History in the Caption property text box for the second page of the Tab control, and close the Properties window. |
Figure 13.54 shows the Tab control with both page captions set and the first page of the Tab control selected. Notice that the sizing handles visible in the Tab control are inside of the control—this position indicates that the page, not the entire control, is currently selected. When the entire Tab control is selected, the sizing handles appear at the edge of the Tab control.
Figure 13.54. Setting the Caption property of a page in the Tab control.

Placing Other Controls on Tab Pages. You can place any of Access's 16 other types of controls on the pages of a Tab control—labels, text boxes, list boxes, even subforms. To add a control of any type to a Tab control's page, follow this procedure:
1. | In Design view, click the page tab you want to add the control to; Access selects the page and brings it to the front of the Tab control. |
2. | Add the desired control to the Tab control's page using the techniques presented earlier in this chapter for creating controls on the Detail or Header/Footer sections of a form. Alternatively, you can copy controls from the same or another form and paste them into the Tab control's pages by using the same techniques you learned for copying and pasting controls on a form's Detail and Header/Footer sections. You cannot drag controls from the form's Detail or Header/Footer sections onto the Tab control's page. |
As you proceed with the examples in this chapter and complete the frmPersonnelActionsEntry form, you'll place various bound and unbound controls on the pages of the Tab control.
Changing One Control Type to Another
If you made a mistake in selecting the type of control in earlier versions of Access, you would have to delete the control and start over. Access 97 allows you to "morph" a control of one type to become a control of a compatible type. You can change an option button to a check box, for example, or you can change a toggle button to an option button. You can't, however, change a text box to an object frame or other control with a different field data type. To change a control to a different type, follow these steps:
1. | In the form's Design view, select the control whose type you want to change. |
2. | Choose Format, Change To to see a submenu of form control types. Only the submenu choices for control types that are compatible with the selected control are enabled. |
3. | Select the control type you want from the submenu. Access changes the control type. |