SCENARIO 27
Making a Rainy Day Sunny
How to “bring the sun” to any shoot.
GEAR NEEDED:
- Camera + Trigger
- Medium to long focal length lens (50mm or higher recommended)
- Off-camera flash
- 2 Full CTO (color temperature orange) gels
- Light stand
- 2 Umbrellas (optional, but probably a good idea)
- Second off-camera flash and light stand (optional)
GOAL IMAGE
I work in weddings in the Northeast, and it rains like hell all the time. I envy people in California who get 300+ days of sunshine. For me, it feels like we get 300+ of rain (or at least clouds). It’s super depressing. I have a vitamin D lamp for the winter. I call it my happy lamp.
OK, back to photography. The point is that the threat of rain is very real on any given wedding day. My couples dread their bright and vibrant wedding day being turned into doom and gloom. I tell them not to worry because “I bring the sun.” I love having the confidence to know I can give them beautifully bright and sunny-looking images no matter what the weather.
The key to this shot is being able to find a place outside with an overhang. Warning: You will likely get wet. You want to place your subject(s) just at the edge of the overhang so that the natural light is hitting their faces, without them getting wet. This means you need to be out in the rain. So grab an umbrella for yourself, and another one for your light, which will also be out in the rain.

FIGURE 27.1
SHOT WITH A PROFOTO B1 BEHIND THEM ON CAMERA RIGHT WITH A CTO GEL.
CANON 1DX, CANON 85MM 1.2, ISO 320, APERTURE 5.6, SHUTTER 1/160
Step by Step
- Position your subjects: Place your subjects just at the edge of the overhang so that the natural light is hitting their faces (without them getting wet!). Ideally the background behind your subjects is a bright and has foliage and depth.
- Position the “sun” backlight: This is the light that will have the two CTO gels on it. Try to place it at least 20 feet away from your subject and behind trees or bushes that’ll break up the light and make it look more natural. Don’t point it directly at your subjects, but place it in a way that allows the light to pass across their backs.
- Set the camera exposure: Get an exposure for the natural light on your subjects’ faces. Ideally the exposure will also create a bright background that’s as evenly exposed as their faces. If that’s not the case, consider moving your position to a spot where you can have a background that has the same amount of light on it as the light hitting your subjects’ faces.
- Set the white balance: Auto white balance would work in this case because the light hitting the faces is natural. Alternatively, dial in your Kelvin temperature according to the natural light hitting your subjects’ faces.
- Set the back flash: Turn on just your back flash and use TTL to get a power setting. Flip to manual, keeping the same power setting, and adjust until you like how powerful the “sun” looks. You can also use a light meter or start on mid-high manual power and adjust to taste.
- Make adjustments: Once you have a solid image, feel free to change your exposure, white balance, or flash settings. Be sure to only change one thing at a time so you don’t get too far away from what was working originally and you can’t get back. Your goal is to balance the natural light with your flash so that it looks like the sun is lighting the background and hitting the back of your subjects.
OPTIONAL: Use another off-camera flash with a soft modifier to light your subjects’ faces if you don’t like the existing light pattern or you need more light.
Shot by Shot
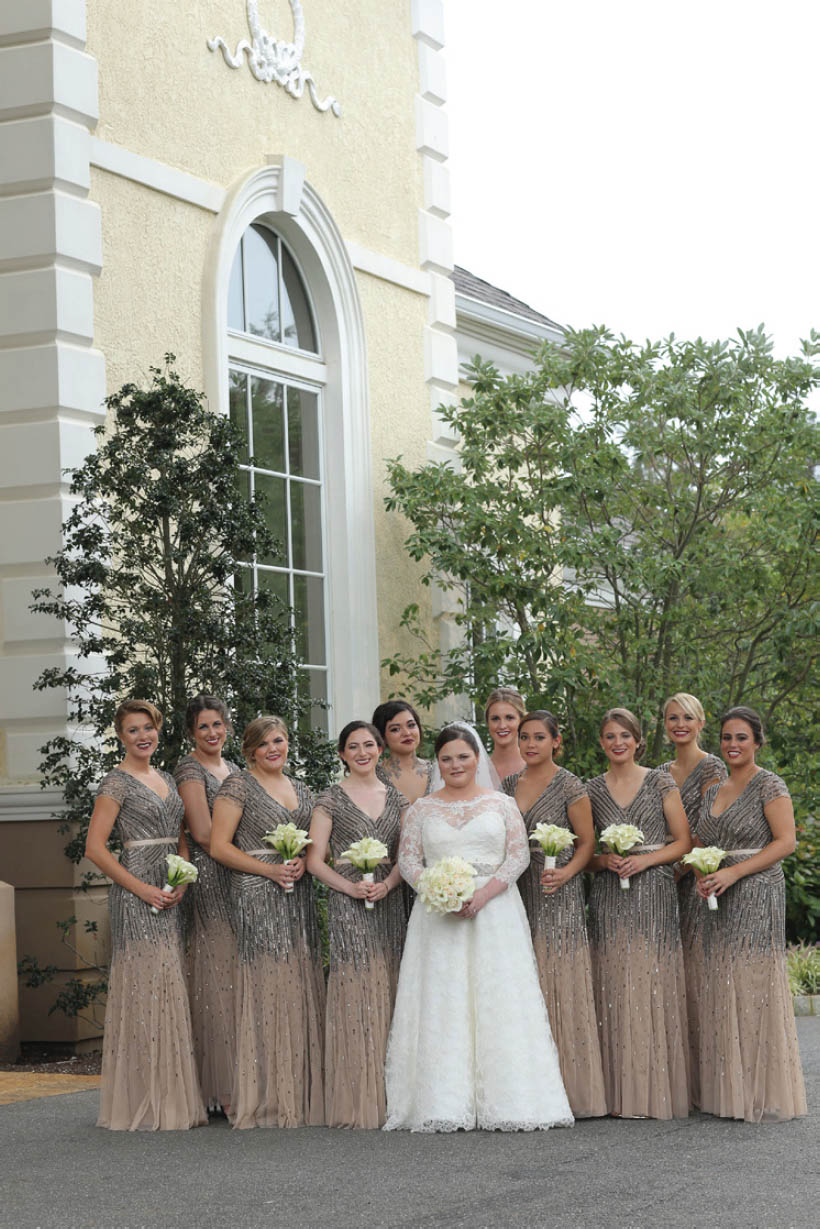
FIGURE 27.2
NATURAL LIGHT.
CANON 1DX, CANON 85MM 1.2, ISO 320, APERTURE 5.6, SHUTTER 1/160

FIGURE 27.3
SHOT WITH A PROFOTO B1 AND CTO GEL BACKFLASH.
CANON 1DX, CANON 85MM 1.2, ISO 320, APERTURE 5.6, SHUTTER 1/160

FIGURE 27.4
LIGHTING DIAGRAM.
Potential Problems
The most difficult part of this scenario in my opinion is finding the perfect spot. You need to have some kind of greenery (or something) in the background for the flash to hit so it looks like it’s the sun hitting the background. In addition, you want to have the light hitting your subjects’ faces match the light that’s hitting your background. On a naturally sunny day, the light is usually fairly even on your subjects and the background, so you need to find a way to mimic that.
Move your subjects closer or farther away from the edge of the overhang until the light on their faces matches the light on the background. If there’s not enough light on their faces and they can’t move forward without starting to get wet, consider using a second flash with a soft modifier to add a bit more light to their faces.
Practical Uses
Depending on how large of an overhang you can find, it can be used for individuals, couples, and large groups. The best part is that once you have your light set, you can move people all around and switch from groups to individuals in a heartbeat. The light is spread around so far behind them that a little movement throughout the session shouldn’t affect your photo too much.

FIGURE 27.5
THIS METHOD IS A SET-IT-AND-FORGET-IT SYSTEM, SO AFTER YOU’VE DIALED IT IN, IT’S EASY TO WALK AROUND AND GET DIFFERENT SHOTS THAT YOU NEED WITHOUT CHANGING YOUR SETTINGS.