
Creating a New Project
Providing Project Information
Setting File Properties
Setting Local Calendar Information
Project Definition Review Exercise
 Learning Objectives for This Chapter
Start a new project from scratch or from a template
Create a new project from an Excel workbook
Provide project information, such as project start and default scheduling constraint
Identify and update file properties
Set up a project calendar
Project definition is the process of documenting the key scope parameters of the project. Within Microsoft Project 2019, project definition involves defining details about the developing project plan, such as the start (or finish) date of the project and the available dates and times for project work.
5.1 Creating a New Project
Creating a new blank project
Creating a new project based on an existing project
Creating a project based on an existing project template
Creating a new project from an Excel workbook
Creating a new project from a SharePoint tasks list
Blank Project
- 1.
Open Microsoft Project 2019 and, from the introductory screen, select Blank Project. Alternatively, if Microsoft Project is already open, from the File tab, select New and then click Blank Project.

Microsoft Project introductory screen (blank project circled in black)
- 2.
From the File tab, select Options to see the Project Options dialog box.
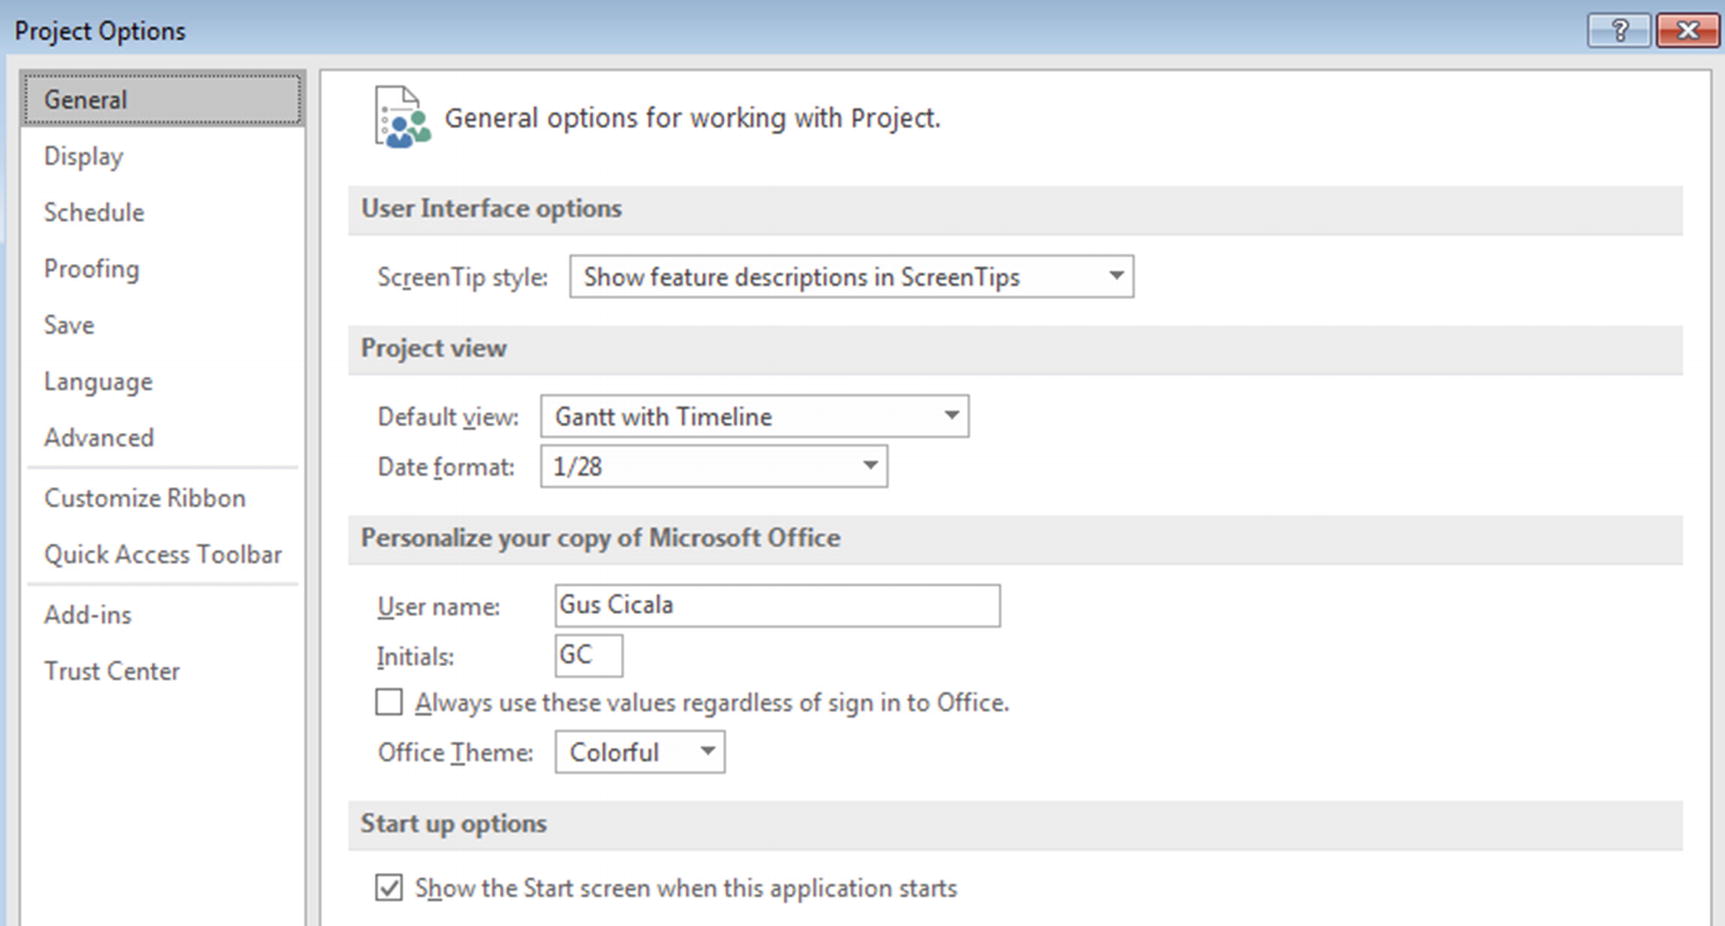
Project Options dialog box
- 3.In the sidebar, click Save. Your screen will resemble the following.
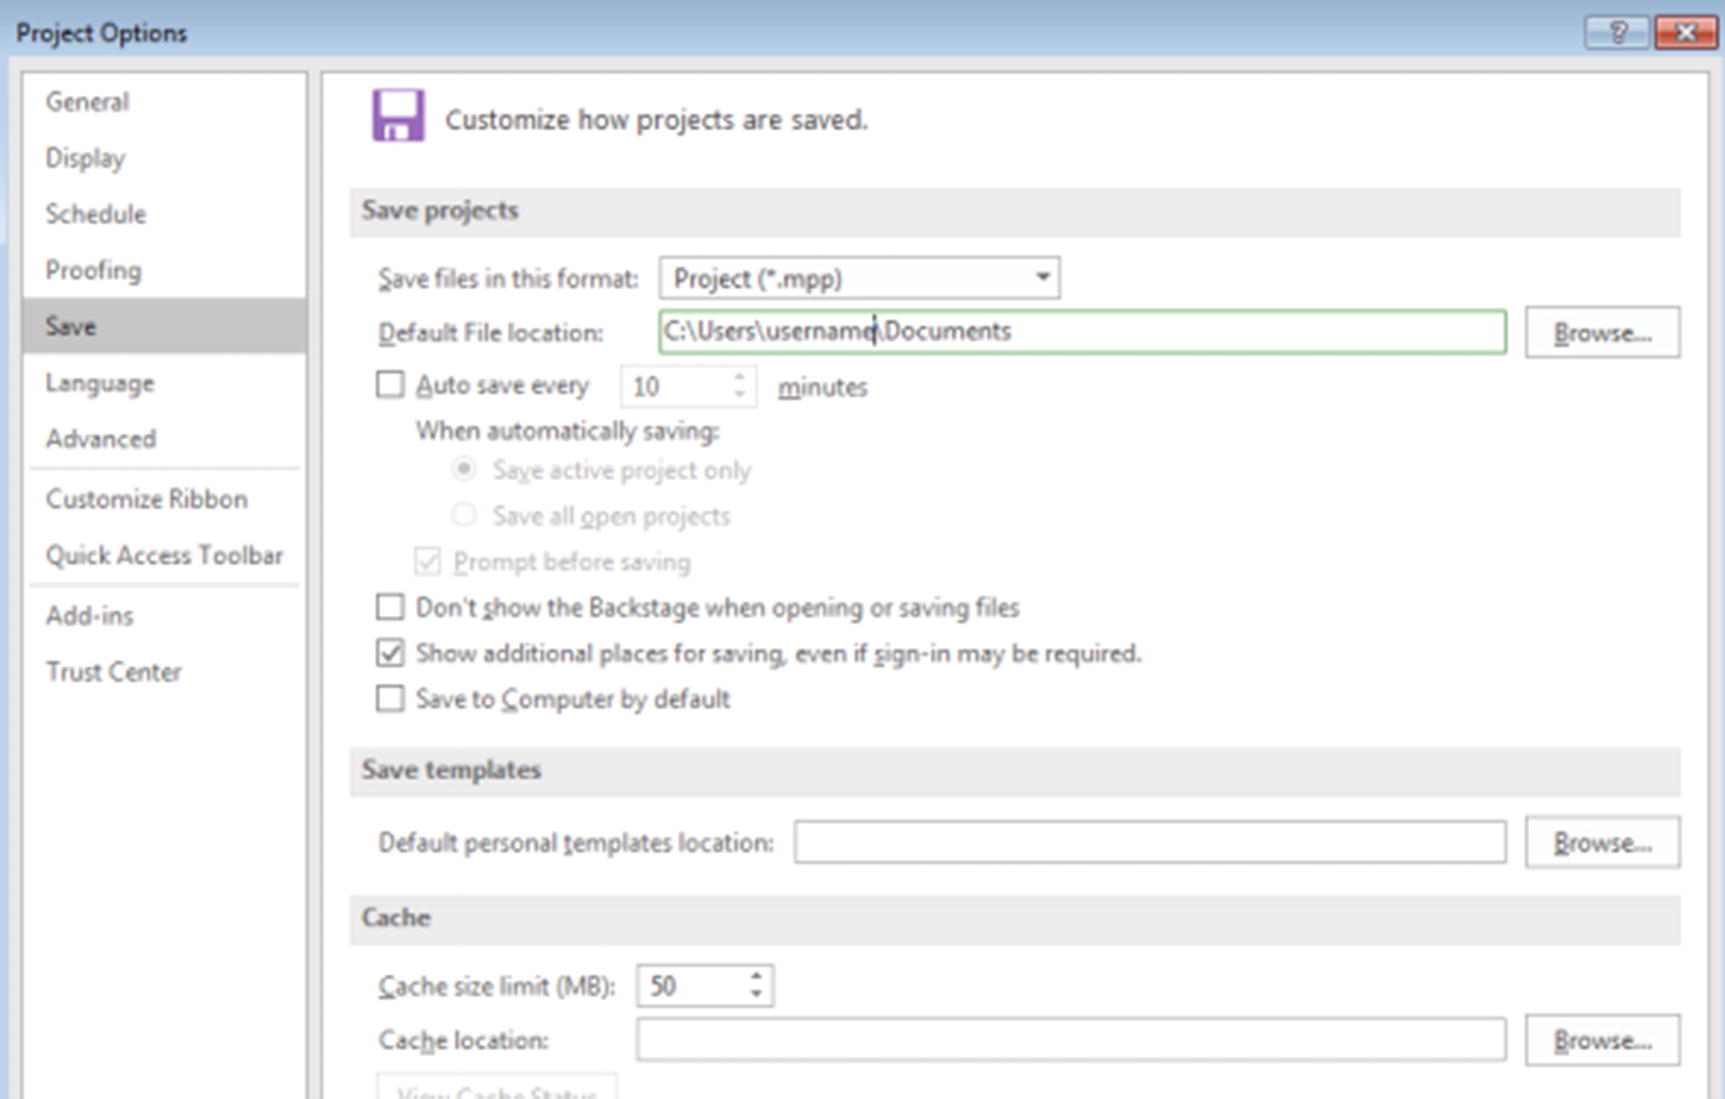 Figure 5-3
Save tab in Project Options dialog box
- 4.
By default, Microsoft Project 2019 saves local project files in the ∗.mpp format. If you prefer a different format, click the down arrow in the first dropdown box to see other available options.
- 5.
Another item you can change is where files are stored. To do so, use the Browse button by the Default File location field and select where you would like project files to be stored by default. For the purposes of this course, browse to your exercise directory. Click OK.
- 6.
From the File menu, click Save and save your project to your exercise directory as SampleProject.mpp.
New from Existing Project
![]() This exercise uses the file Navigation.mpp. You do not need to open this file prior to beginning this exercise.
This exercise uses the file Navigation.mpp. You do not need to open this file prior to beginning this exercise.
- 1.To do so, from the initial Microsoft Project 2019 page, click New from existing project. Alternatively, if Microsoft Project is already open, from the File tab, select New and then click New from existing project. Either way, you will see the New from Existing Project dialog box.
 Figure 5-4
New from Existing Project dialog box
- 2.Select Navigation.mpp and click Open. Navigation.mpp will open in Microsoft Project.
 Figure 5-5
Navigation.mpp before saving as a new project
- 3.From the File menu, click Save to see the Save As dialog box, and save your project as Navigation2.mpp. Notice the new project name at the top of your screen.
 Figure 5-6
After changing to Navigation2.mpp
- 4.
Close Navigation2.mpp.
Project Templates
- 1.To do so, click File:New and select one of the existing templates.
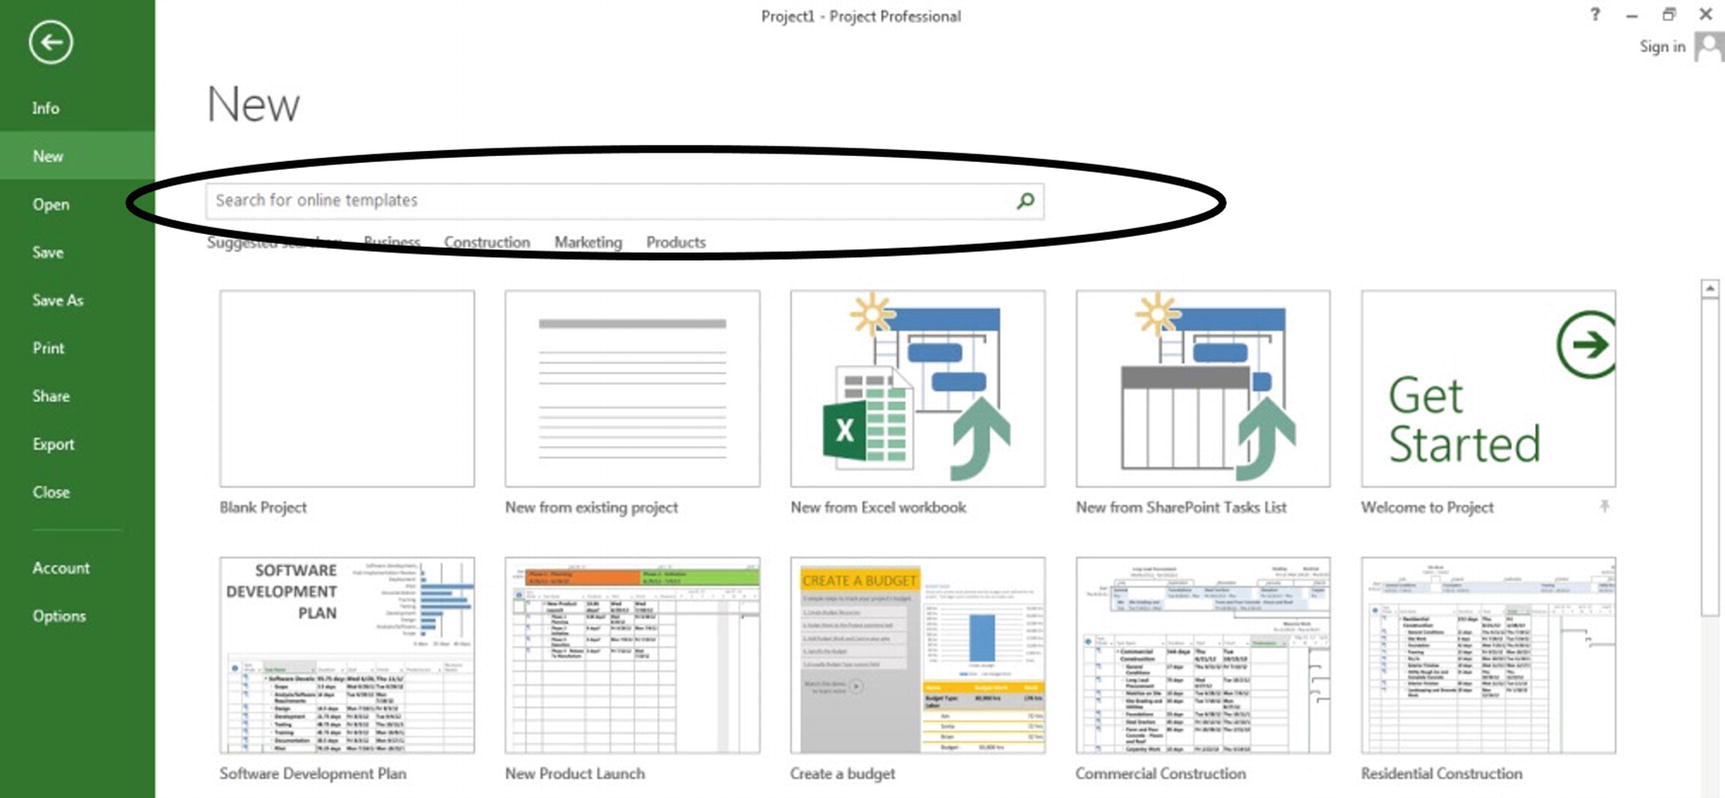 Figure 5-7
Select a template or search for online templates
- 2.
If you don’t see a template that meets your needs, use the search bar toward the top of the screen (circled in black in the preceding figure) to find additional templates online.
Excel Workbooks
- 1.To do so, select New from Excel workbook from the Microsoft Project introductory page, or access this selection from the File:New menu.
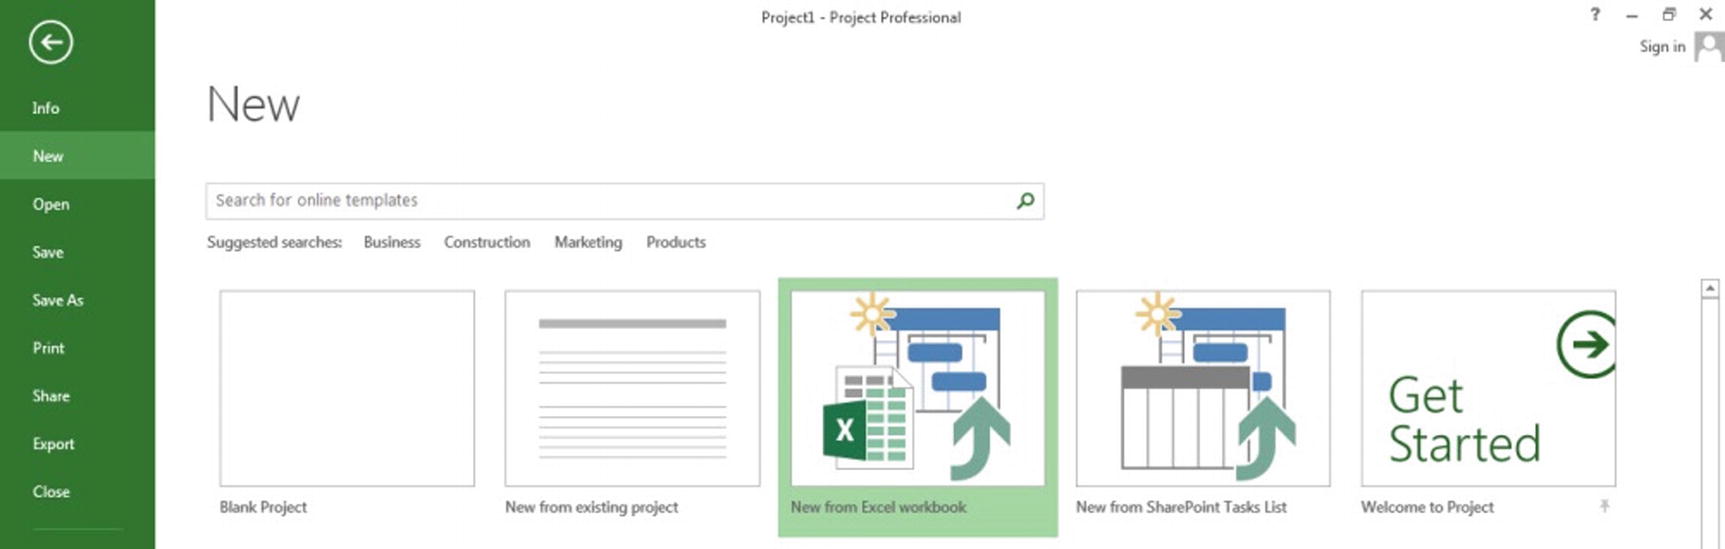 Figure 5-8
New from Excel workbook
- 2.In the Open dialog box, navigate to the Excel file which your new project is to be based on. For this example, navigate to TaskList.xlsx and click Open. You will see the first screen of the Import Wizard.
 Figure 5-9
Excel Import Wizard
- 3.Click Next, ensure New Map is selected, and click Next again. Your screen will resemble the following.
 Figure 5-10
Excel Import Wizard – Import Mode
- 4.Select As a new project and click Next again to see the following screen.
 Figure 5-11
Excel Import Wizard – Map Options
- 5.For this example, we’ll be importing only tasks, so select Tasks in the first section and deselect Import includes headers in the second section. Click Next to see the Import Wizard – Task Mapping dialog box.
 Figure 5-12
Excel Import Wizard – Task Mapping
- 6.
In the Task Mapping dialog box, in the Source worksheet name section, select Sheet1.
- 7.
Because you are importing a simple list of tasks, in the Verify or edit how you want to map the data section, under To: Microsoft Project Field, use the dropdown arrow to select Name.
- 8.Click Finish. Your screen will resemble the following.
 Figure 5-13
Imported project
- 9.
Your Excel task list has now become a project. Close your new project without saving it.
SharePoint Tasks List
- 1.To do so, select New from SharePoint Tasks List from the Microsoft Project introductory page, or access this selection from the File:New menu. You will see the Import from SharePoint Site dialog box.
 Figure 5-14
Import from SharePoint Site dialog box
- 2.
Enter the SharePoint site’s URL, click Check Address to confirm the URL is entered accurately, and in the Tasks List section, select the name of the SharePoint tasks list you’d like to base your project upon.
- 3.Click OK. Your SharePoint tasks list has now become a project.
 Figure 5-15
Tasks list imported to Project
- 4.
Close your new project without saving it.
5.2 Providing Project Information
The Project Information dialog box is where Microsoft Project 2019 allows you to set the scheduling and calendar methods to be used on your project. This information is necessary to allow the scheduling engine of Microsoft Project 2019 to do its job. When you create a new project from scratch, the Project Information dialog box can be automatically activated.
- 1.
From Project:Properties, click the Project Information icon [
 ] to access the Project Information dialog box for SampleProject.mpp.

Project Information dialog box
You can automate the launch of this dialog box when creating a new project by navigating to File:Options, selecting Advanced in the sidebar, and selecting the Prompt for project info for new projects checkbox from the General section.
- 2.
Change the value entered in the Start date: field to today’s date. The default is the date that the project is created. New tasks will use the start date specified here if no predecessors or constraints exist.
- 1.
Project Start Date (default) – This option indicates that the project is scheduled from the start date. When it is selected, the Finish date field is automatically deactivated; you cannot enter a finish date and must instead allow Microsoft Project to calculate it.
- 2.
Project Finish Date – This option indicates that the project is scheduled from the finish date. When this option is selected, the Start date field is automatically deactivated; you must allow Microsoft Project to calculate the start date. Though building a schedule back to front is a reasonable behavior, many people find it difficult, so the best practice may be to begin by scheduling from a start date and change to finish date scheduling later in the process.
The recommended approach we will follow in this course is to schedule projects from a selected start date. Microsoft Project 2019 does not permit you to set both a start and finish date at the project level, but you can set a targeted finish date at the task level when you set task constraints, which is covered in a later lesson.
If you choose to use the backward scheduling technique, select Project Finish Date from the Schedule from dropdown list. Then, instead of selecting a project start date, select a project finish date from the dropdown calendar.
The Status date field enables you to specify the date that Microsoft Project 2019 should use to perform earned value calculations, identify the complete-through date in the Update Project dialog box, and place progress lines on the Gantt Chart. If you leave the status date as “NA” (default), Microsoft Project uses the current date as the status date.
The Calendar field indicates the calendar you want to use as the base calendar for your project. The base calendar specifies when project work is possible.
Calendar | Description |
|---|---|
Standard | The Standard calendar is the base calendar that is used as the default for project, resource, and task calendars. It reflects a traditional work schedule: Monday through Friday, 8:00 A.M. to 5:00 P.M., with an hour off for break. |
24-Hours | The 24-Hours calendar does not allow for any non-working time in the project schedule. The 24-Hours calendar is ideal for when tasks and resources are scheduled for different shifts around the clock or when certain material resources (e.g., computer equipment, machinery) can work on tasks continuously. |
Night Shift | The Night Shift calendar reflects the “graveyard shift” schedule of Monday night through Saturday morning, 11:00 P.M. to 8:00 A.M., with an hour of non-working time for break. |
When connected to Project Server, base calendars must be defined at the enterprise level (i.e., in Project Server) by the Project Server administrator to maintain consistency across all enterprise projects. The Project Server administrator can define as many base calendars as needed for enterprise projects.
There is an option to allow individual projects to use their own local base calendars, rather than a consistent set of enterprise calendars, but it must be activated by the Project Server administrator.
The Priority field indicates the order in which tasks will be delayed when you level the resources across multiple projects. Microsoft Project 2019 enables you to assign a priority number between 0 and 1000 to a project. By entering “1000” in this field, you are designating the current project as having the highest priority of all of your projects. In practical terms, that means its schedule will be unaffected if you level resources across projects.
5.3 Setting File Properties
The calendar and scheduling method are properties of the project that are necessary for the scheduling engine of Microsoft Project 2019 to do its job. But you also can provide information about the project file, such as a title that can be different from the file name. This information is then available to include in the project plan itself or in headers and footers of printed information.
General tab – Provides information on the file that stores the project plan
Summary tab – Provides fields to further describe the project
Statistics tab – Provides statistics about your work on the project file
Contents tab – Provides current project schedule statistics
Custom tab – Provides additional properties you can add to the file
The File Properties dialog box cannot be automated like the Project Information dialog box. Users have to remember to open it to provide or modify information about the file.
- 1.Now that you have chosen start date scheduling and set the start date for your project, select Advanced Properties, which is found under File:Info:Project Information. You will be presented with the following screen (note the Summary tab is selected by default).
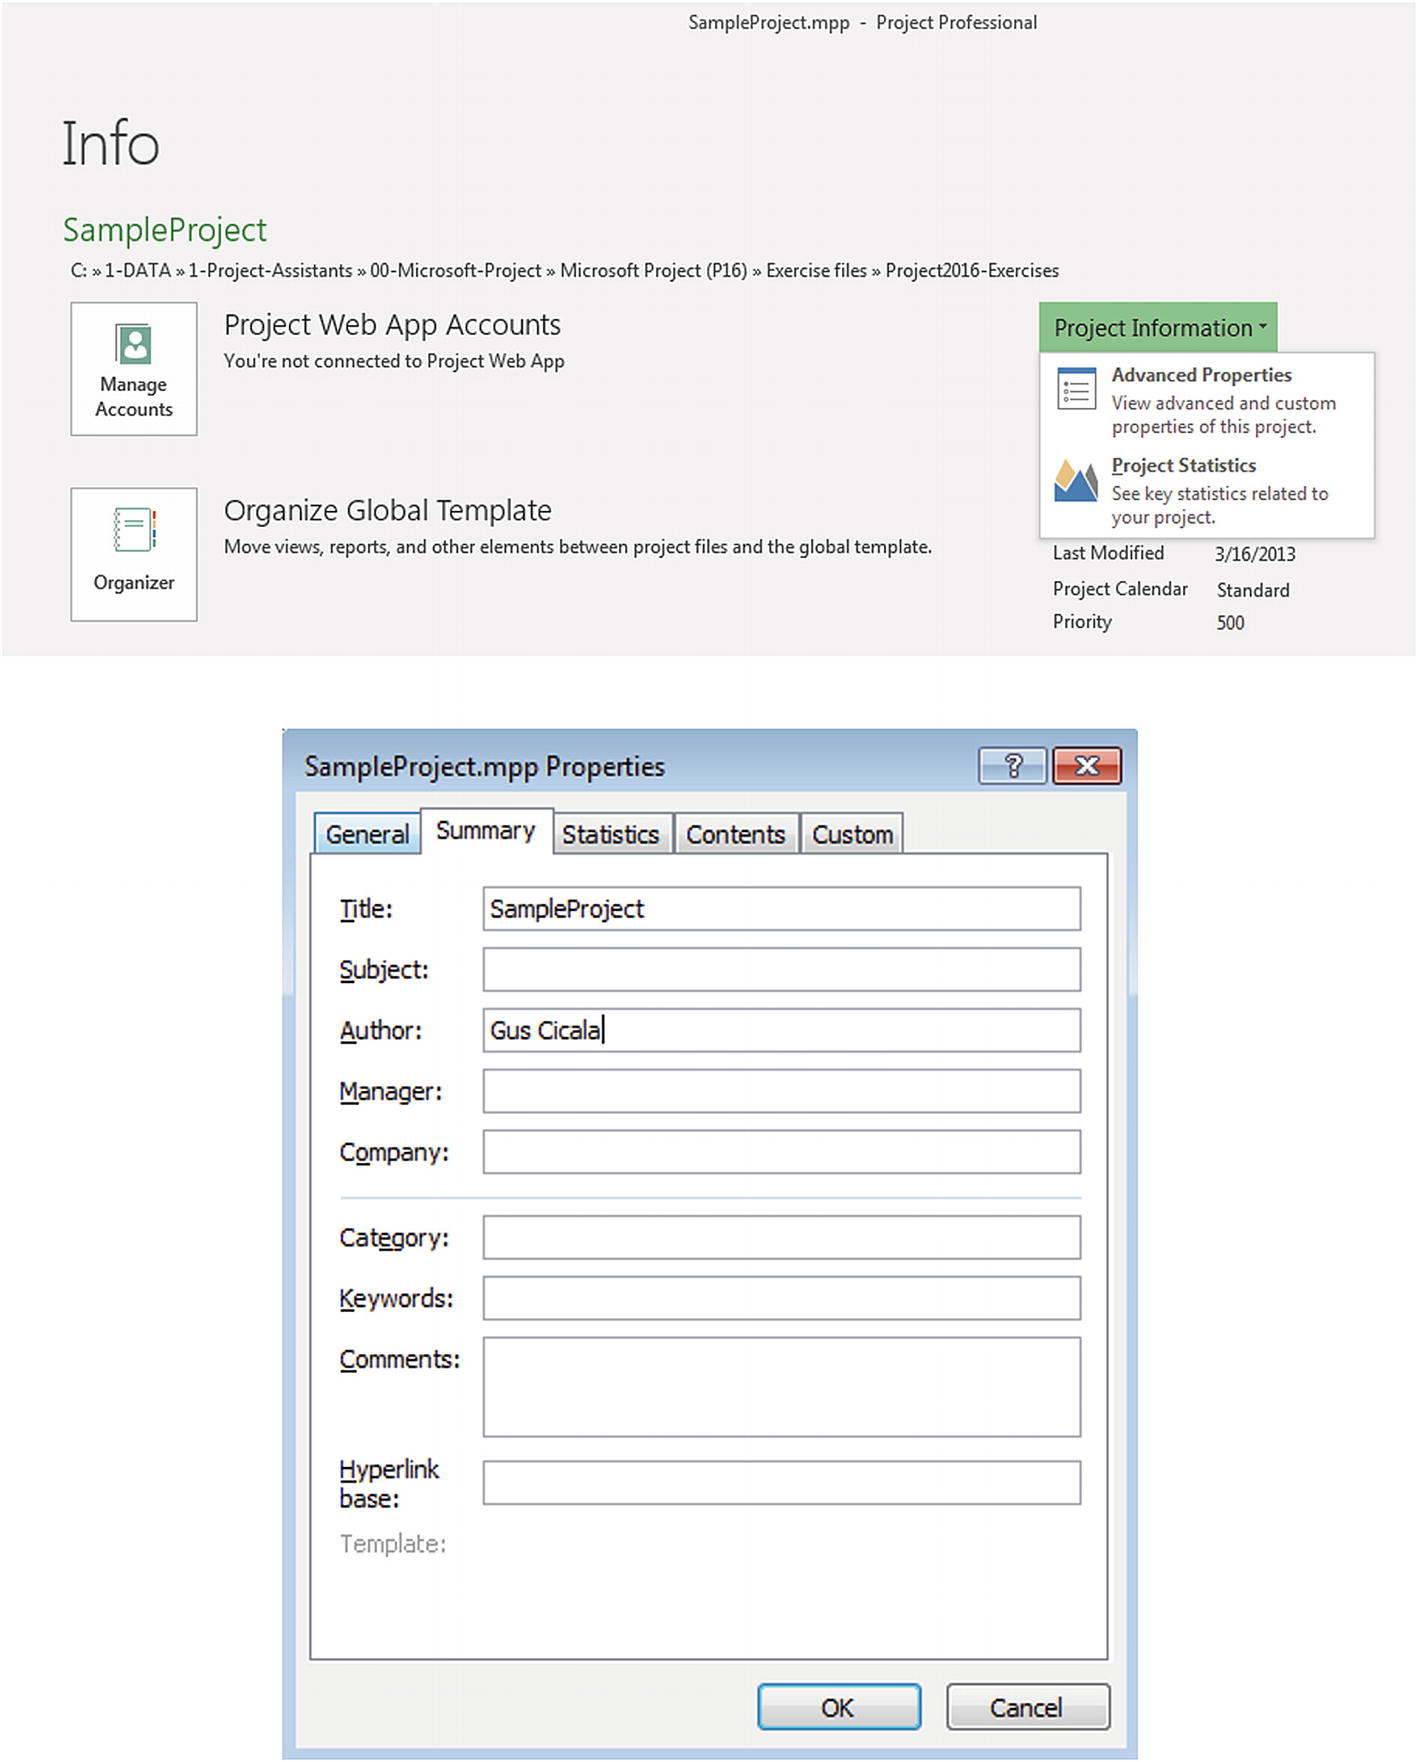 Figure 5-17
The Advance Properties dropdown and the Properties dialog box
- 2.
In the Title field, overwrite SampleProject.mpp with Office Relocation Project. This will appear as the Project Summary Task (Task ID 0).
- 3.
In the Author and Manager fields, key in your name.
- 4.
In the Company field, key in the name of your company.
- 5.
In the Comments field, key in “This is the preliminary plan for moving the local office.”
The information in the upper portion of the tab—(project) title, subject, author, (project) manager, and company name—can then be included in reports as header or footer text. The Subject, Category, and Keywords fields are most often used to enhance search capability. The free-form text box for additional comments will appear as a task note associated with the project summary task (title). The hyperlink base can be used to enter the file path to the directory where your project files are located, but it need not be filled in.
The Save preview picture option allows a thumbnail view of the project Gantt Chart to appear in the lower left-hand corner of selected directory views. It is generally not needed.
Your screen will resemble the following. Figure 5-18
Updated project properties
- 6.
Click OK.
Although we provided a user-friendly title for the project, making it appear in the Gantt Chart can be confusing since Microsoft Project itself does not use the term “title.” To view the title of your project in the Gantt Chart:
- 7.From File:Options, select Advanced in the sidebar. Scroll down to Display options for this project and check Show project summary task, as shown in the following figure.
 Figure 5-19
Showing the project summary task (Task 0)
- 8.Click the OK button. The title you entered in the File Properties dialog box will be shown as Task 0 in the Task Name field. If no title is entered, the file name is used by default. You can enter your own text in the project summary task name as well, and it will change the title. Your screen will resemble the following.
 Figure 5-20
Gantt Chart showing project title (Task 0)
- 9.Along with the title, the row 0 of Task Name contains a Note icon [
 ] in the Indicator [
 ] column. Place your mouse pointer over the Note icon to read it. Your screen will resemble the following.
 Figure 5-21
Task note attached to the project summary task [title]
These notes are intended as internal reminders for the project manager and are not visible by default except through Microsoft Project. They can also be read by navigating to Task:Properties and selecting the Information [
 ] icon.
 - 10.
Save your project.
5.4 Setting Local Calendar Information
Calendar Options
In addition to the project calendar, Microsoft Project 2019 also has calendar options—such as default start time and hours per day—that are used to assign dates to tasks when no date or time is specified. For example, if the first task is scheduled using the project start time, the task will be scheduled to start at the default start time of 8:00 AM unless otherwise specified. If changes are made to the default calendar options, the base calendar should be updated with those changes. If the calendar options and the base calendar do not display the same basic information, tasks and resource assignments may conflict.
- 1.From File:Options, select Schedule from the Project Options dialog box. Your screen will resemble the following.
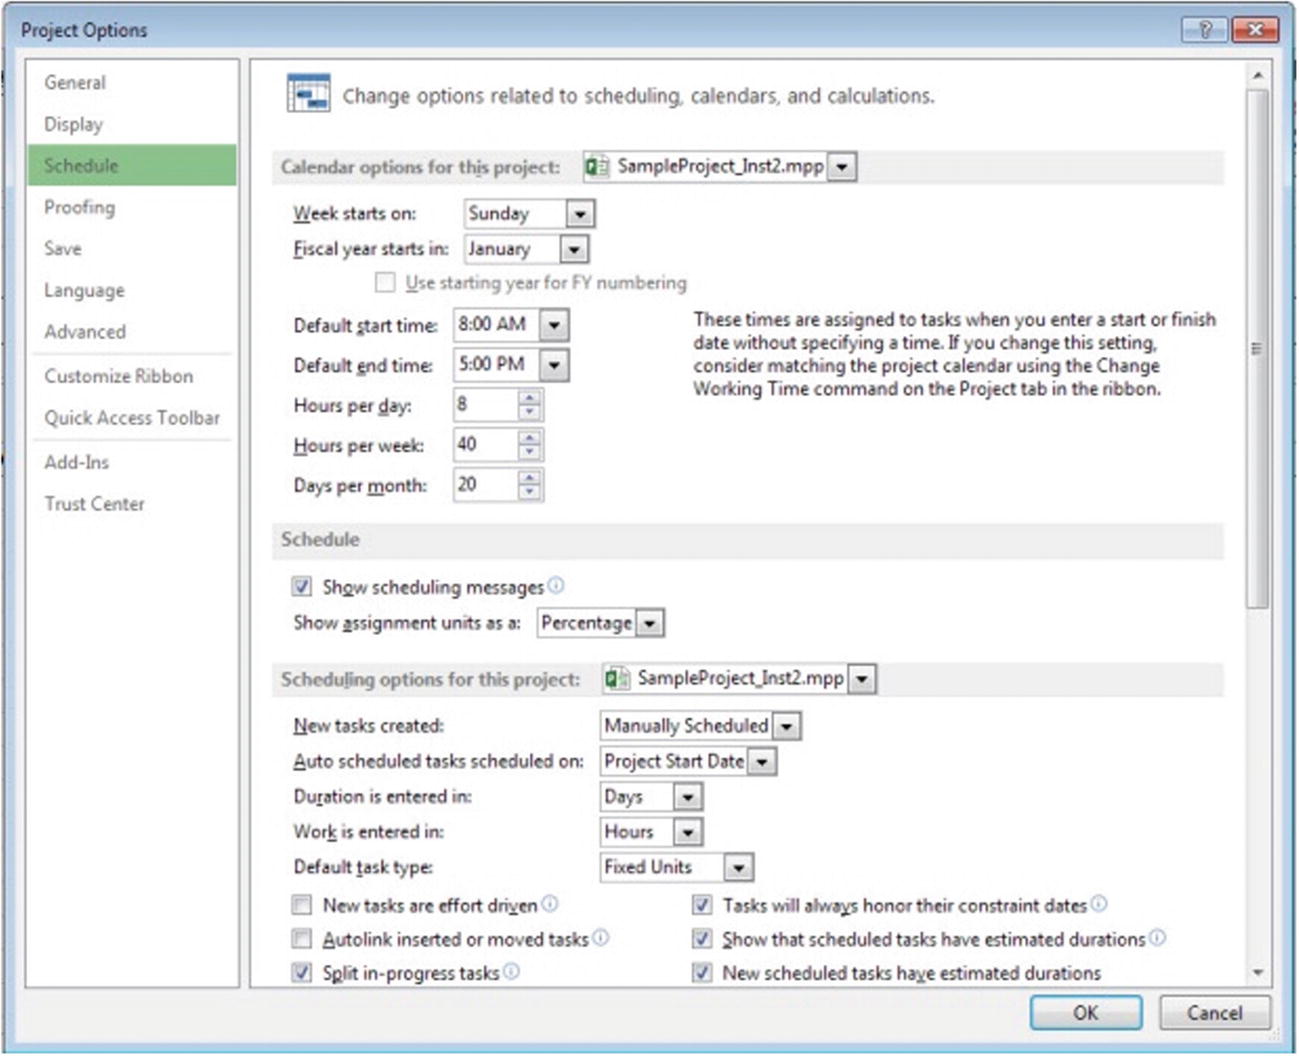 Figure 5-22
Schedule under Project Options
The Hours per day, Hours per week, and Days per month values are essentially conversion factors which allow Microsoft Project to accept durations in values other than days and still create an accurate schedule.
- 2.
Click Cancel.
Adding a Holiday to the Project Base Calendar
Before you begin adding tasks and resources to your project, it is important to make sure the project base calendar includes information such as company holidays and other non-working times.
When you turn your project into an enterprise project by publishing it to Project Server, you will have to use an enterprise base calendar created by the Project Server administrator. The administrator will then presumably add any company holidays to the enterprise standard calendar.
- 1.From Project:Properties, click the Change Working Time icon [
 ]. You will be presented with the following dialog box.
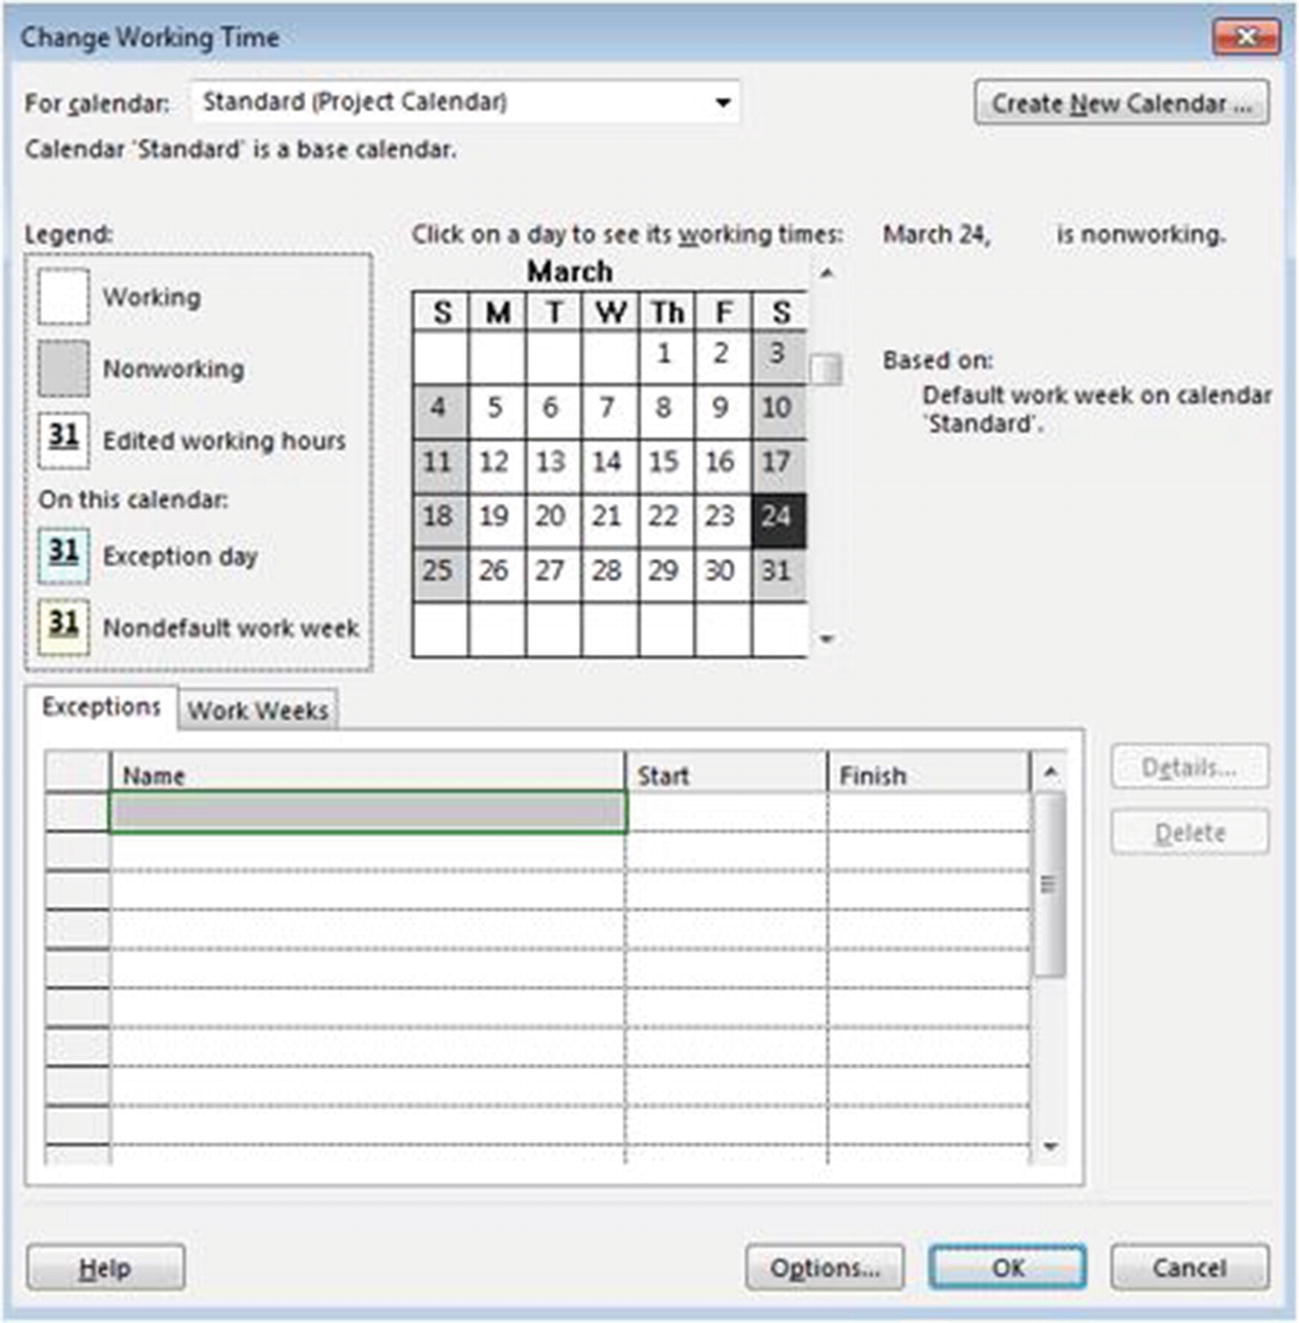 Figure 5-23
Change Working Time dialog box
- 2.Click the appropriate date for the second Monday of your project. On the Exceptions tab, enter “Project management day” in the first row and press Tab. The following example uses March 25 as the exception.
 Figure 5-24
New holiday added
If Project Management Day were to be an annual holiday, the Details… button would allow you to set a recurrence pattern for this exception to the standard calendar. Clicking Details… leads to the following dialog box.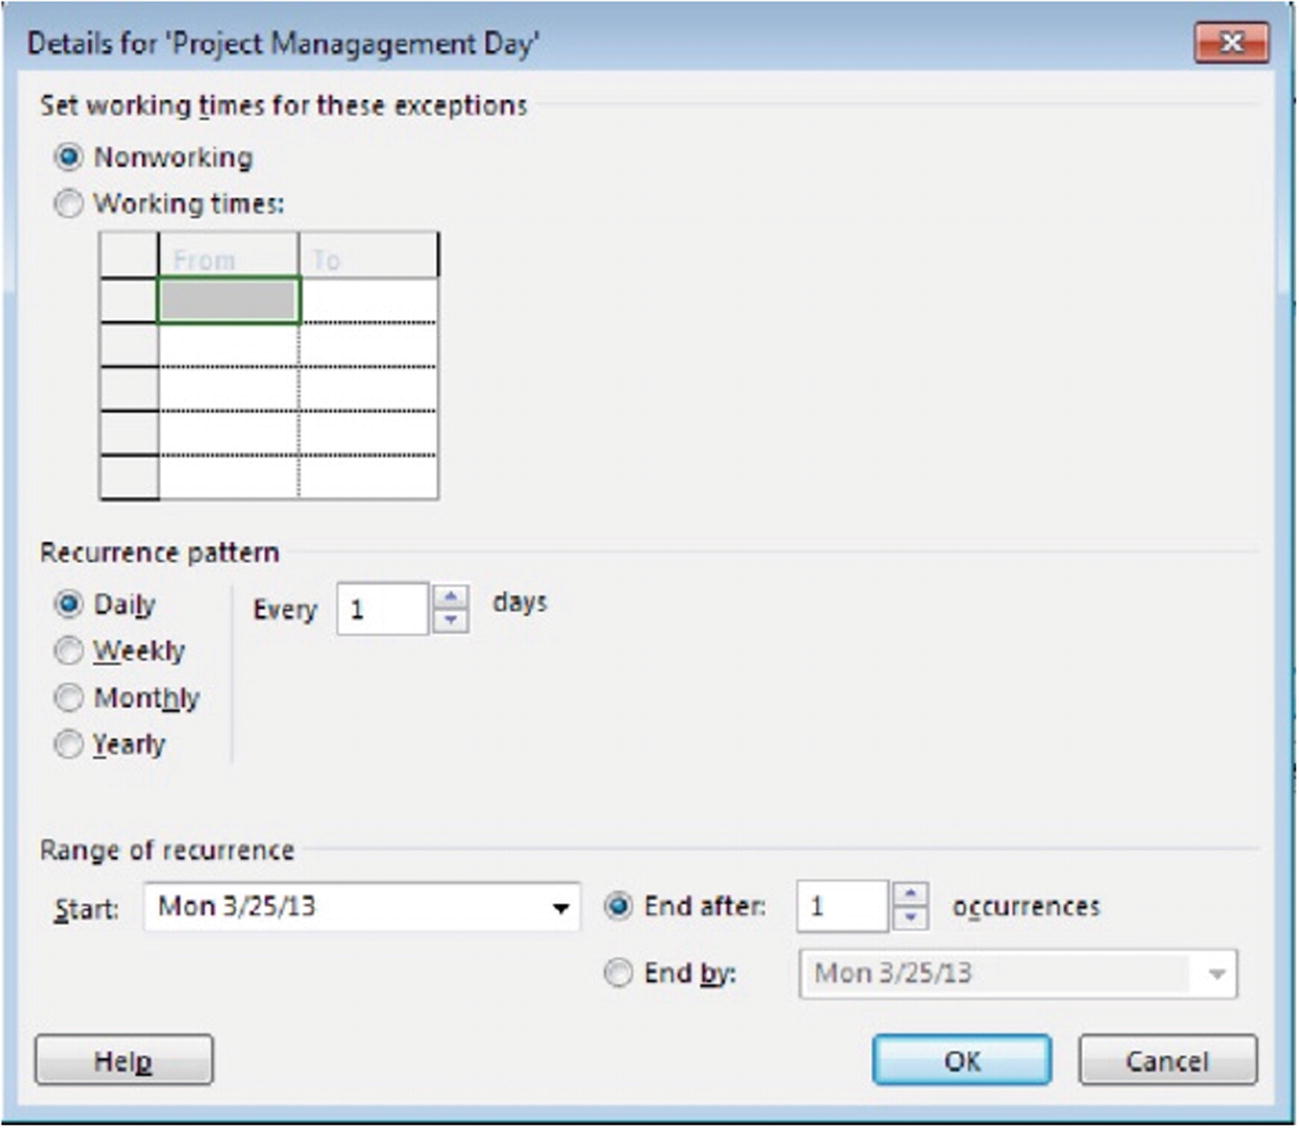 Figure 5-25
Exception Details
- 3.
Click Cancel to close the Details dialog box. Then, click OK in the Change Working Time dialog box. Save and close your project.
5.5 Project Definition Review Exercise
- 1.
Open Microsoft Project 2019 without connecting to Project Server.
- 2.
From File:New, select Blank Project.
- 3.
Ensure that you are scheduling from the project start date and make the project start date “June 3.”
- 4.
Enter a project title of “Implement Microsoft Project 2019.”
- 5.
Identify yourself as the author and project manager.
- 6.
Mark the following days as holidays in the standard calendar: Independence Day (July 4 of the current year), Labor Day (September 2 of the current year), Thanksgiving (November 28 and 29 of the current year), and Christmas (December 25 of the current year).
- 7.
Save your project as DefinitionReview.mpp.
 End of Chapter Quiz Questions
- 1.
How can you change the default location where files are saved?
______________________________________________________________________________________________________________________
- 2.
Fill in the blank: You can create new projects based on existing Excel ________ lists.
- 3.
Fill in the blank: The ________ __________ dialog box is where Microsoft Project 2019 allows you to set the scheduling and calendar methods to be used on your project.
- 4.
Fill in the blank: The ________ ________ field indicates the scheduling method that Microsoft Project 2019 will apply to your project plan.
- 5.Which of the following is not an option in the Schedule form field?
- a.
Project Start Date
- b.
Project Finish Date
- c.
Current Date
- d.
None of the above
- a.
- 6.
What does the Status date field enable?

- 7.
What are the three predefined calendars available in Microsoft Project 2019 when using the Computer Profile?
_______________, _______________, and _______________
- 8.How many base calendars can the Project Server administrator define?
- a.
1
- b.
2
- c.
3
- d.
As many as needed for enterprise projects
- a.
- 9.
Fill in the blank: The ________ field indicates the order in which tasks will be delayed when you level the resources across multiple projects.
- 10.
Before you begin adding tasks and resources to your project, it is important to make sure the project base calendar includes what information?
______________________________________________________________________________________________________________________
- 11.
Fill in the blank: In order to set the project working time and non-working time, you use ________ ________ ________ feature.
- 12.
What is the Exceptions tab used for in the Change Working Time dialog box?
___________________________________________________________