
Manipulating Movies and Capturing Video
In previous chapters, you tackled input from the mouse, keyboard, and makey makey, but those inputs were all button presses. What about other inputs, like video from your webcam? Fortunately, processing has code libraries that can help you add video and more to your projects.
This project introduces you to libraries in Processing and shows you how to incorporate video and movies into a sketch. You’ll perform some simple movie modifications, capture live video from a webcam, and create a photo booth program in Processing.
The world of video manipulation is ahead, so buckle up. Our first stop is the library!
WHAT IS A LIBRARY?
A library is a collection of prewritten code. One function in a library might be hundreds of lines long, but since someone already wrote it, all you have to do is call it. Anyone can write a library for any programming language, and you’ll find many Processing libraries on the Web. For your introduction to libraries, I’ll show you Processing’s Video library.
Adding Libraries to Processing
Depending on your version of Processing, you may need to install the Video library. Click Sketch ![]() Import Library. . .
Import Library. . . ![]() Add Library. . . to open the Library Manager, which lists several libraries you can add to Processing. Scroll down until you see the Video library. If it has a button labeled Remove, you’re in good shape. Otherwise, select the Video library, and click the Install button that appears.
Add Library. . . to open the Library Manager, which lists several libraries you can add to Processing. Scroll down until you see the Video library. If it has a button labeled Remove, you’re in good shape. Otherwise, select the Video library, and click the Install button that appears.
NOTE
The Loop sketch is actually an example provided with the Video library in some versions of Processing. You can find this and many other great examples to play around with by clicking File ![]() Examples. . . in the main window.
Examples. . . in the main window.
Using Libraries in Your Sketch
You can learn how to use a library by exploring an example program from Processing. Go to http://www.nostarch.com/sparkfunprocessing/, download the resource files for this book, and open the Loop.pde file in the Project 10 folder.
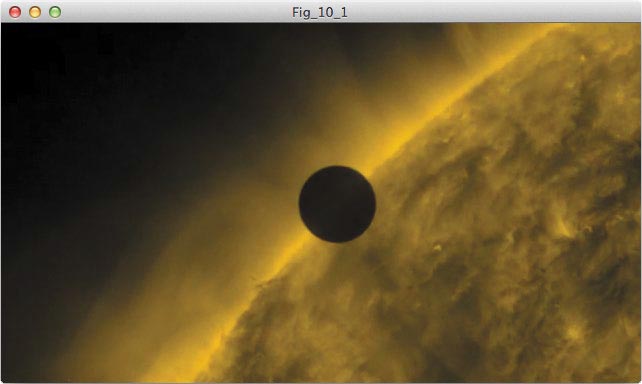
With the Loop sketch open, click Run to make sure it works with your current computer settings and your version of Processing. You should see a planet traverse the sun over and over, until you close the window or stop the sketch. The video should look like Figure 10-1.
FIGURE 10-1: A screenshot from the Loop video
The Loop sketch in your code window should look like this:
❶ import processing.video.*;
❷ Movie movie;
void setup()
{
size(640,360);
background(o);
//load and play the video in a loop
❸ movie = new Movie(this,”transit.mov”);
❹ movie.loop();
}
❺ void movieEvent(Movie m)
{
m.read();
}
void draw()
{
//if (movie.available() == true)
//{
//movie.read();
//}
❻image(movie,0,0,width,height);
}
When you want to use a library, you must first add it to you sketch. At ❶, the import keyword tells Processing to include tl specified library in your project so you can use its functions and variables. The asterisk just tells Processing to load all classes tl are associated with that library—in this case, the Movie class a Capture class. The next part of the sketch creates a Movie object named movie ❷, which looks similar to how you created PImag objects in Project 6. In the setup() code, you’ll find the usual size() and background() functions as well.
After the sketch window is defined, we instantiate the movie object ❸. Instances of the Video library’s Movie class have two param-eters: the sketch you’re working with (given by the this keyword) and the name of the movie file you want to play (entered as a string). In sentence form, this statement could read, “Add a new movie to this program, and place the transit.mov file in it.” The keyword this always refers to the sketch that you are working with currently.
Calling Library Functions
As an instance of the Movie class, the movie object has functions from that class that you can use. When calling functions that belong to an object, we have to tell Processing which function we wan run, and which object should run it.
As you saw in “Processing Objects” on page 111, class functions are available to all objects of that class. The function loop () ❹ is part of the Movie class, which means that we can call it on the movie object.
Many libraries also have event functions. For example, the sketch calls a movieEvent() function ❺, which reads the next once it becomes available and then displays it every time the image () function ❻ draws a new frame to the sketch window. To keep sketch tidy, it’s typically a good practice to use event functions.
If your sketch uses only a single video, however, you may to just run a video in your draw() loop, as in Listing 10-1:
LISTING 10-1: Running a video in the draw() loop
import processing.video.*;
Movie movie;
void setup()
{
size(640,360);
background(0);
//load and play the video in a loop
movie = new Movie(this,”transit.mov”);
movie.loop();
}
void draw()
{
❶ if (movie.available() == true)
{
movie.read();
}
image(movie,0,0,width,height);
}
Here, I’ve uncommented the if() statement ❶ Inside the draw() loop and deleted the movieEvent() function.
This code should function Identically to the version with the event function in place. If your future projects have multiple videos, use an event function to help Processing run your sketch efficiently, but for now, let’s focus on using the if() statement.
Modify your Loop sketch to use the if() statement, keep it open in Processing, and save it as a new project to avoid losing your work. In the next section, I’ll teach you to add your own video. Let’s get hacking!
ADDING YOUR OWN VIDEOS TO A SKETCH
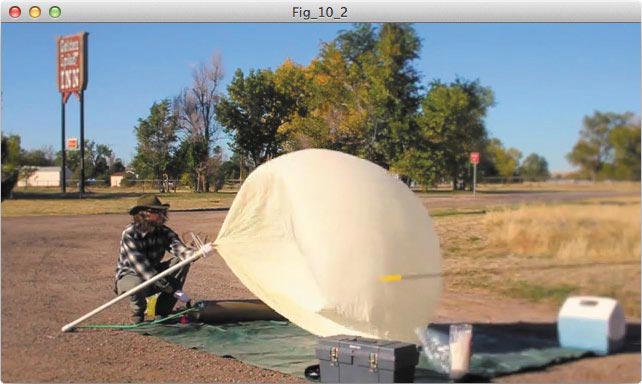
To add a video to a Processing sketch, the file must be in a common video format like .mov, .mp4, or .avi. For this example, I’ll use a video about launching high-altitude balloons by one of SparkFun’s friends, Dave Stillman. Figure 10-2 shows a frame of the balloon inflating.
FIGURE 10-2: Let’s process this video of inflating a weather balloon!
To use the same video, go to http://www.nostarch.com/sparkfunprocessing/ and download the source files for this book; you should find dave.mp4 in the Project 10 folder. You could also follow along with a video file from your computer. If you do use your own video, name the file something simple and descriptive.
Note the resolution of your video to help you decide the size of your sketch. (The video dave.mp4 is in standard definition at a resolution of 640x360 pixels.) Then, add your video to your sketch folder as you would an image: click Sketch ![]() Add File. . . and select your video file.
Add File. . . and select your video file.
In your modified Loop sketch from Listing 10-1, change the filename when you instantiate the movie object to match the video you’ll use. For example, I changed that line to read:
movie = new Movie(this,”dave.mp4”);
Click the Run button. Your video should load at the same size as the planet video. Pretty cool, huh? Now let’s explore what we can do with this video!
APPLYING TINTS AND FILTERS
Once your video and library are in place, you can think of the video as an image and modify it as such. In Project 6, we explored image processing and focused on modifying images with the tint() and filter() functions. Since you’ll display videos with the image() function, you can use the same functions to add effects to your videos, too.
In your modified Loop sketch from Listing 10-1, create a second image() call that displays the movie object, and add tint() functions as follows:
void draw()
{
if(movie.available() == true)
{
movie.read();
}
❶ noTint();
image(movie,0,0,width/2,height/2);
❷ tint(255,0,0);
image(movie,width/2,0,width/2,height/2);
}
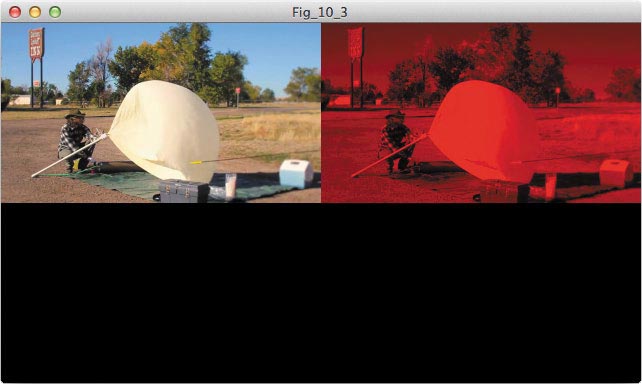
There will be two videos: one in the top-left quadrant and another in the top-right quadrant of the sketch window, as shown by the coordinates of these image() calls. To keep one copy of the video as is, call noTint() ❶ before its image() function. Otherwise, place your tint() function ❷ above the image() functions you want to color. Click Run, and both copies of the video should play simultaneously, as shown in Figure 10-3.
FIGURE 10-3: Tinting a video
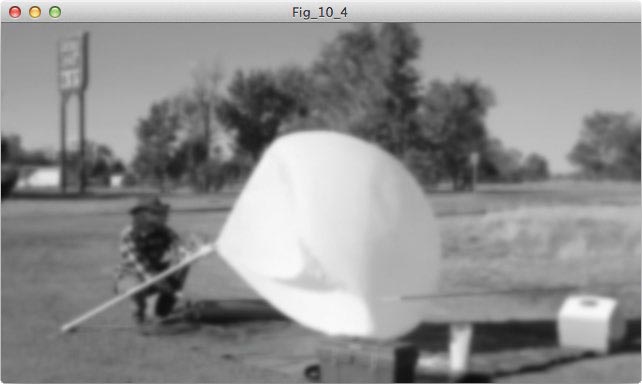
Having multiple videos open in Processing is a great way to play with and compare different tints, but you can also apply filters to your videos. Change your draw() loop to display one copy of your video, remove the tint() functions, and add some filters, like so:
void draw()
{
if(movie.available() == true)
{
movie.read();
}
image(movie,0,0,width,height);
❶ filter(GRAY);
❷ filter(BLUR,2);
}
Use any filters you like; I’ve used GRAY ❶ and BLUR ❷ to add some old-timey character to the balloon launch video, as shown in Figure 10-4.
FIGURE 10-4: Dave’s balloon video, with GRAY and BLUR filters applied
INTRODUCING FOR() LOOPS AND ARRAYS
Now let’s briefly explore two new programming elements that will help you capture video and create this project’s photo booth program.
When you want to run the same code over and over, use a for() loop. Here is the basic structure:
for(int ❶x = 0; ❷x < 100; ❸x += 10)
{
point(x,10);
}
A for() loop has its own set of curly brackets, and you place the code you want to iterate inside them. Inside the parentheses, you tell the for() loop how many times to run. First, create a local count variable (in this case, x) and initialize it with a starting value ❶. Then, set a boundary ❷. This example tells the loop to run as long as x is less than 100. Finally, give the loop a value to increment the count variable by ❸; here, we increment x by 10.
This for() loop plots a series of points, and at each one, x increments by a value of 10. I elaborated on that concept in this simple sketch:
void setup()
{
size(250,250);
}
{
strokeWeight(10);
for(int x = 0; x < 255; x += 10)
{
stroke(random(255),random(255),random(255));
point(x,height/2);
}
}
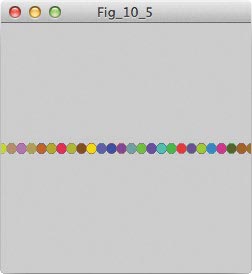
This sketch draws a point every 10 pixels and gives each point a random fill color. Start a blank sketch, add this program to it, and click Run to see the result plotted in Figure 10-5.
FIGURE 10-5: Circles drawn with a for() loop and random color
The for() loop is useful for simplifying and condensing code, and it’s particularly handy for populating arrays. An array is nothing more than a list of elements that your program can reference, add to, or remove from. Here’s a simple array:
int[] ages = {30,30,5,2};
To create an array, first specify what kind of data will be in it; this array contains elements of type int. Then, place a set of square brackets, [], after the data type to tell Processing you’re making an array. The brackets are followed by the name of the array; this array is called ages, and it contains the ages of my family members, in years. My wife and I are both 30, and my sons are 5 and 2. The values stored in an array must be bound by curly brackets.
To use a value from an array, call the array name and place the index (position in the array) of the value you want inside a set of square brackets:
int derekAge = ages[0];
This example fetches the first element from the age array (at index 0), which is my age, and stores it in the variable derekAge. This is great if your array already contains values, but what if you want to store values instead? Just reverse the order:
int derekAge = 30;
ages[0] = derekAge;
This will add the value of derekAge (30) to the ages array at index 0.
Arrays can help you store data in order, and they can store anything from integers (as shown here) to strings or floats. In the photo booth project, you’ll actually use a for() loop to populate a string array with different camera settings available to your computer. You’ll then reference what camera setting you want by its index.
Here’s a simple sketch that counts up to 100 using a for() loop and populates an array with all of the count values:
❶ int[] numberLine;
void setup()
{
❷ numberLine = new int[100];
❸ for(int i = 0; i < 100;
{
numberLine[i] = i;
println(numberLine);
}
}
void draw()
{
;
}
This sketch creates an uninitialized integer array called numberLine ❶. The setup() function instantiates the numberLine array like an object by defining it as a new integer array of size 100 ❷. Notice that numberLine is created differently from the ages array; numberLine starts out empty, which is why we have to specify a size. Next, we use a for() loop to increment the integer i 100 times. On each iteration, the loop adds the value of i to the numberLine array and prints the current list of values to the console ❸.
In the next section, we’ll use both arrays and for() loops to help set up your webcam in Processing.
CAPTURING VIDEO
We’ll explore other ways to customize movies in “Taking It Further” on page 182, but you don’t have to limit yourself to existing movies. With a little prep work, Processing can capture live video!
First, make sure your webcam works. Open your favorite video recording software now and check whether you can actually record with the camera you intend to use with Processing. When you know the webcam can capture video, you can move on to the sketch.
Modifying the setup() Function
Instead of opening a new example sketch, we’ll continue modifying the Loop sketch from Listing 10-1. Before the setup() function, we’ll add a Capture object to the existing sketch, and inside, we’ll replace one of the Movie objects in the side-by-side comparison shown back in Figure 10-3 with that Capture object:
Movie movie;
❶ Capture cam;
void setup()
{
❷ String[] cameras = Capture.list();
println(“Available cameras:”);
❸ for(int i = 0; i < cameras.length; i++)
{
println(cameras[i]);
}
size(640,360);
background(0);
//load and play the video in a loop
movie = new Movie(this,”dave.mp4”);
❹ cam = new Capture(this,cameras[0]);
movie.loop();
❺ cam.start();
frameRate(l20);
}
First, create an object of the Capture data type ❶ for your webcam video. You can name this anything except the name of a video object you’ve already loaded; I named it cam. Once your Capture object is named, let’s add code to your setup() function to let Processing access your webcam.
Capturing your webcam feed does make instantiating the cam object a little tricky. The webcam may have multiple settings or may be hooked up to a specific port that we need to find. For example, my webcam has a number of frame rates and resolution settings that I can choose from as individual “cameras” in Processing.
You can create a list of these settings with some code in your setup() function. First, save a list of the available cameras as a string array called cameras ❷. Once we have our camera list, we can print it out to the console line by line ❸. We run the loop once for each entry in the cameras array by starting a count value i at 0 and incrementing it (i++) until we reach the end of the list.
Even though you don’t have the camera list yet, instantiate your Capture object ❹ to cameras[0] next. I always select cameras[0] to start with because it’s the first element in your array of cameras, and that should be your camera’s standard setting.
Finally, call the cam.start() function ❺ to start capturing video from the camera. I bumped up my frameRate() to 120 frames per second as well, but that’s optional.
Click the Run button, and you should see your list of camera settings in the console window, though your live video will not show up yet because we haven’t added the cam data to the draw() loop. If you want to change to a different setting, you can do so by changing cameras[0] to the number of the entry you want in the list, counting from 0. Once you can see your list in the console, you can select which settings you want and, if you are using multiple cameras, which camera.
For example, here are a few of the camera options that print out in my Processing console:
❶ name=WebCam SC-13HDL11624N,size=640x480,fps=5
name=WebCam SC-13HDL11624N,size=640x480,fps=30
name=WebCam SC-13HDL11624N,size=160x120,fps=5
❷ name=WebCam SC-13HDL11624N,size=160x120,fps=30
If you want to change your settings, you can select a different camera by counting up from 0 as you move through the list. In my case cameras[0] is at ❶. If I wanted to change to a smaller frame size and more frames per second, I could use cameras[3], which is at ❷.
Displaying Live Capture
Now that your setup code is ready, let’s display the live video in your sketch. Change your draw() loop as follows to show both a movie and a live feed:
void draw()
{
❶ if((movie.available() == true) && (cam.available() == true))
{
movie.read();
cam.read();
}
❷ image(cam,width/2,height/4,width/2,height/2);
image(movie,0,height/4,width/2,height/2);
}
First, change your original if() statement into a compound if() statement ❶. This version checks that both your movie and camera are available, and assuming they are, it reads the frame from both of them. Next, change one of the image() functions to use the cam data ❷ instead of both having the movie data.
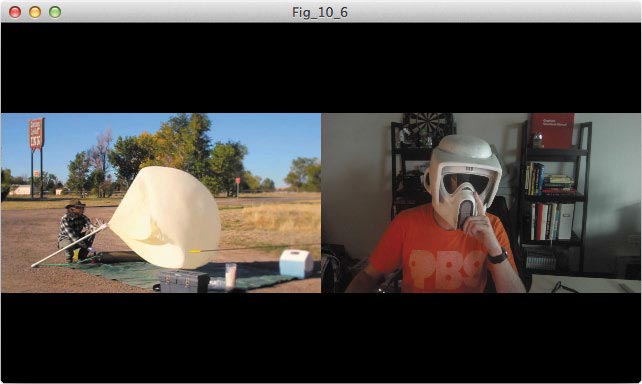
Click Run, and your webcam should play your movie and display live video, as in Figure 10-6.
FIGURE 10-6: This sketch window shows the balloon launch movie on the left and a camera capture of me on a Saturday morning on the right.
Video in any format is tough for Processing to work with, and it may take extra time to load and display, so be patient.
Since you are using the image() function to display the frames of your live video, you can again treat it like an image and apply filters and tints to it. Play around until you feel comfortable with applying these effects to live video; they will help you add some pizzazz to your photo booth in the next project!
CREATING A PHOTO BOOTH
Now that we’ve explored Movie and Capture objects in Processing, let’s combine the two and create a photo booth! Open a new sketch to start this project from scratch, and save it as myPhotoBooth.pde. Then, click Sketch ![]() Import Library. . .
Import Library. . . ![]() Video to add the Video library to your project. This should automatically populate the top of your sketch with an import line:
Video to add the Video library to your project. This should automatically populate the top of your sketch with an import line:
import processing.video.*;
After importing the library, you can create library objects. You just need a Capture object:
Capture cam;
I called my Capture object cam.
Adding the setup() Function
Next, add the following setup() function to your sketch:
void setup()
{
❶ String[] cameras = Capture.list();
❷ println(“Available cameras:”);
❸ for(int i = 0; i < cameras.length; i++)
{
println(cameras[i]);
}
❹ size(l280,1024);
❺ cam = new Capture(this,cameras[30]);
❻ cam.start();
}
First, create the list of available camera options. Create a string array called cameras ❶ and fill it with the output of Capture.list() ❷. Use Capture rather than cam because you have not instantiated your cam object yet. Then, use a for() loop ❸ to print out each camera in the list.
NOTE
If you find a camera setting that you really like, you can skip this step and just hardcode your camera selection when you initiate your Capture object.
Next, set the sketch size to your webcam’s resolution ❹; for example, my webcam has a resolution of 1280×1024 pixels. Then instantiate cam ❺ as a Capture object.
When you instantiate the cam object, select a camera setting from the list you printed. I chose option 30, but you may have more or fewer options, so check your camera list in the console before you choose. A safe bet is to always start with option 0 and then play around with different settings once everything works.
Finally, start your movie and your capture feed ❻.
Creating the draw() Loop
Now let’s create the draw() loop and display some video!
void draw()
{
❶ if(cam.available() == true)
{
cam.read();
}
image(cam,0,0,width,height);
❷ if(second()%10 == 0)
{
❸ cam.stop();
❹ saveFrame();
❺ delay(1000);
cam.start();
}
}
Start by checking if the cam capture is available ❶ . When the condition inside the if() statement returns true, Processing reads a frame from each object, then displays the cam frame as an image.
Photo booths snap pictures at timed intervals, so let’s have Processing take a photo every 10 seconds. Our if() statement ❷ checks whether the output of the second() function is divisible by 10 with the modulo function. Written as a percent sign (%), the modulo function returns the remainder of a division; for example, 100%10 = 0, and 5%2 = 1. So the condition second()%10 == 0 checks whether the number of seconds passed is divisible by 10.
When the condition is true, call the pause() function from the Capture class on cam to pause the video ❸. You can use pause() to freeze the live webcam feed.
Once you pause the capture, call a function called saveFrame() ❹. This function saves the frame currently displayed in your sketch as an image in your sketch folder, and labels each image by frame number. Finally, delay ❺ for 1 second (1,000 milliseconds) to let the photo booth participants view their photo, and then restart the capture feed. Figure 10-7 is a series of photos taken using this project!
FIGURE 10-7: A series of photo booth images. This is the last time I leave my laptop alone at the office.

We’ve only scratched the surface of Processing’s Video library, and there are a bunch of other functions (not to mention other libraries!) that you can put to good use in your sketches. Visit the Processing website (https://processing.org/reference/libraries/) to learn more.
One way to take this project further is to turn your photo booth into a time-lapse program. You could make the photo booth take a photo every hour, and track the weather over the course of the day or even take time-lapse footage of your kitchen to see how often your refrigerator is opened.
For an extended use of the Video library, try creating a multimedia presentation. If you want to give a movie a certain aesthetic, you can record your own file and then use Processing to add filters and tints to your video as you did in this project. You could also create a video collage with different videos playing all at the same time. Try to re-create the video grid from the Brady Bunch opening credits! (Check out this YouTube clip if you’re not familiar with the Brady Bunch: https://www.youtube.com/watch?v=K5StTXQofqs/.) You can use the code for my Warhol-inspired image from Project 6 (see page 116), and add the Video library to it.
If you’re feeling very confident in your programming skills, take a look at OpenCV for Processing, a library with a focus on computer vision. Computer vision (CV) essentially adds eyes to your computer to track objects or faces, or even determine what something is by its shape.
In the next project, you’ll explore how to use data from the world around you with Arduino and the serial communication library!