How can you make a bunch of square bricks look round or oval? And how do you make them look like a dinosaur or the face of your favorite uncle? The trick lies in the way that you combine them, and that’s the idea behind sculpting with LEGO bricks.
LEGO sculpting is different from other forms of building in that your primary goal is to re-create a specific shape or shapes, like a globe, the head of a large-scale minifig, an animal, or even part of a building or vehicle, as realistically as possible.
In this chapter you’ll learn how to sculpt a basic sphere (a ball-shaped object) like the one shown in Figure 7-1. Once you’ve mastered that technique, I’ll show you how you might use these “curved” shapes when sculpting other natural shapes.
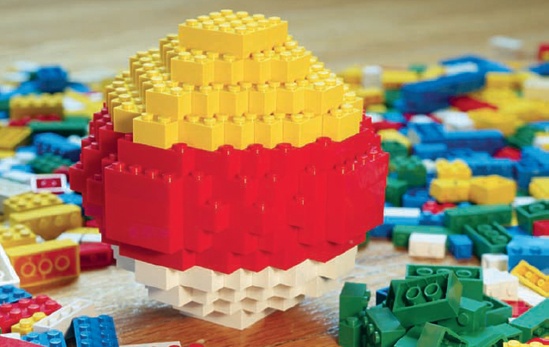
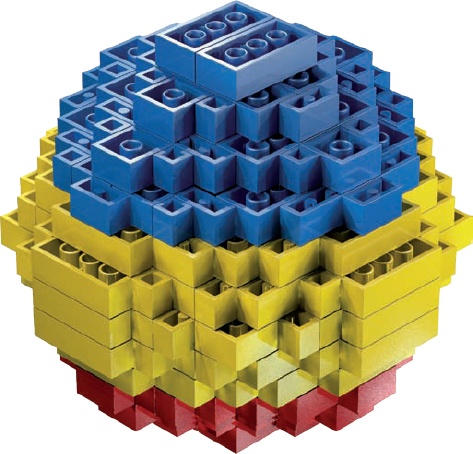
Figure 7-1. This sphere is modeled in three colors. The following instructions illustrate a slightly different color scheme. You can use any combination you like, be it just one color for the whole sphere or different colors for each layer.
Let’s build a very basic sphere using only standard bricks—no plates, slopes, or other special elements—like the one shown in Figure 7-2. The method for producing a sphere is the same whether you’re building one the size of a softball or one as big as a basketball.
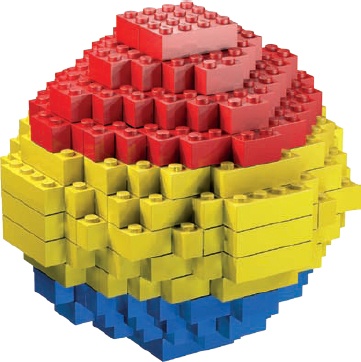
Figure 7-2. The goal: This simple sphere contains only 220 bricks, but you can use the same basic technique to make much larger ones.
The roundness of a LEGO globe or ball depends mostly on how big you build it and how many small plates you add to the mixture of parts. The larger your model, the more rounded it’s likely to appear, and you can use plates to fill in some of the square corners to add to its roundness. The sphere we’ll build isn’t very big (or very smooth), but it’s made from only 220 basic bricks. No matter how big or small your LEGO collection, you probably already have the pieces you need to build it right now!
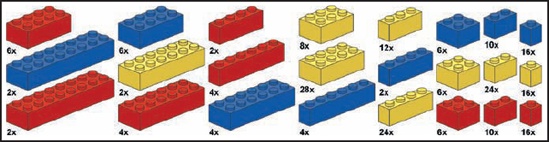
The sphere in Figure 7-2 uses only full-height bricks, which, as you can see, produces a somewhat blocky-looking sphere. But no matter—our goal isn’t to create a perfectly smooth ball but rather to demonstrate the technique. The Bill of Materials for this project is shown in Figure 7-3.
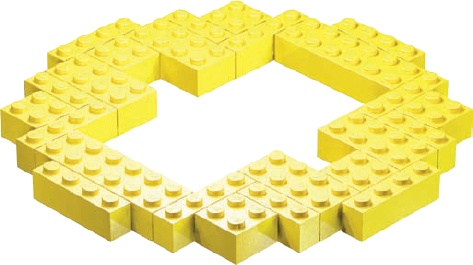
One of the most common ways to build a sphere is to divide the build into two parts: the top and bottom halves of the model. You start at the middle, work up to the top, and then go back to the middle and build down to the bottom. Figure 7-4 shows what I mean about starting your build in the middle.
Start building at the center of the sphere, laying down a jagged ring of bricks at the widest point of the model. Then begin the second layer using the stagger technique we learned in Chapter 2, setting one layer of bricks back from the front edge of the previous layer to produce a stair-step pattern.
I’ve added just one more layer in Figure 7-5 and, as you can see, the sphere begins to evolve very slowly at first. It doesn’t look like much right now; in fact, the second layer isn’t that different from the first. But if you look carefully at the bottom of the figure you can see that some studs from the first layer aren’t covered by the second layer. By staggering the build you’ve begun the sculpting process.

In Step 3 (Figure 7-6), you add a third layer, again exposing studs from the previous layer.

Figure 7-6. Step 3. Each layer requires fewer bricks and continues to recede from the layer beneath it.
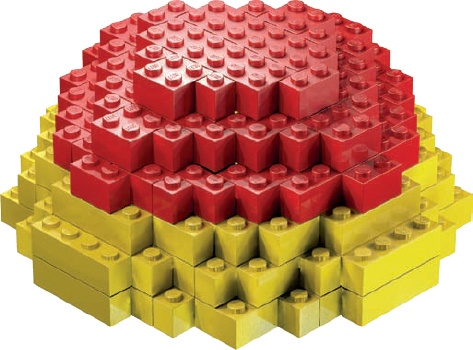
The model still doesn’t look much like a sphere at this stage, but keep staggering the layers as you build to create the appearance of a rounded shape, as you’ll see in the next three steps (Figure 7-7 through Figure 7-9).

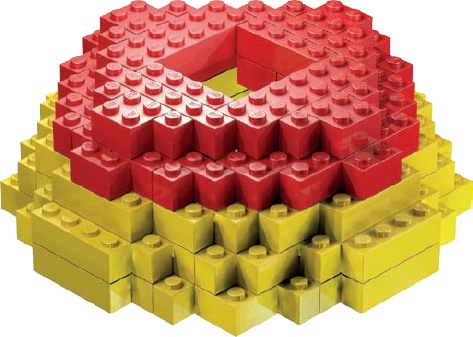
Figure 7-8. Step 5. Although the sphere is made up entirely of standard rectangular bricks, it is beginning to look a bit more rounded.
When you reach the last layer of the top half of the sphere, cap it off with just two 2×4 bricks, as shown in Figure 7-10.

In Step 8 you simply rotate the top half of the sphere 180 degrees until it looks like Figure 7-11. This is called a rotation step. You’re now looking at the bottom of the first layer that you built in Step 1.
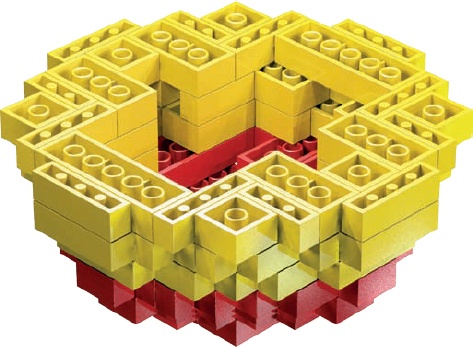
Figure 7-11. Step 8. Before you start the second half of the model, turn the top half over so that the tubes are facing up.
Build the bottom half of the sphere on top of this flipped top half. That works well for a small sphere, like this one, but if you’re building a larger sphere, like a globe of Earth or a life-sized soccer ball, you might try building the top and bottom halves separately from each other. Once each half is complete, you can set the upper half on the lower half and carefully press the two together.
In the next five steps (Figure 7-12 through Figure 7-16), we basically repeat the earlier steps, just upside down.

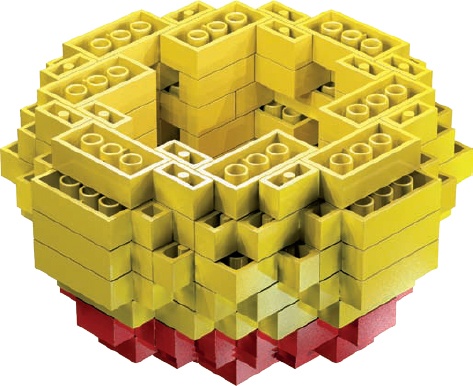
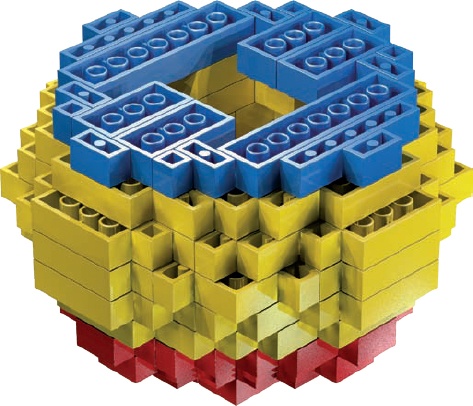
Figure 7-14. Step 11. Place layers carefully on a model like this. Your staggering gives the sphere its shape.


Add the final two pieces in Step 14 (Figure 7-17).
Now here’s something interesting: Compare the two 2×4s on the top of the sphere (Figure 7-10) with the two on the bottom (Figure 7-17). Exactly the same, right? Now compare them with the flat areas on the “sides” of the sphere, as shown in Figure 7-18.

Figure 7-18. Comparing the size of the top layer with the smallest areas on the sides of the sphere will help you get a sense of just how “round” you’ve made your sculpture.
Two 2×4s are almost the same size as those flat areas along the sphere’s middle, which confirms that your sphere is the right size and shape. Their equivalent size helps to give the sphere its rounded appearance even though it’s built entirely of blocky bricks.
You’ve learned how to sculpt a simple sphere using the stagger technique, but what if you want to sculpt an animal, a statue, a cartoon character, or even an extraterrestrial born in your imagination? How about sculpting the famous Great Sphinx of Giza, like the model in Figure 7-19?
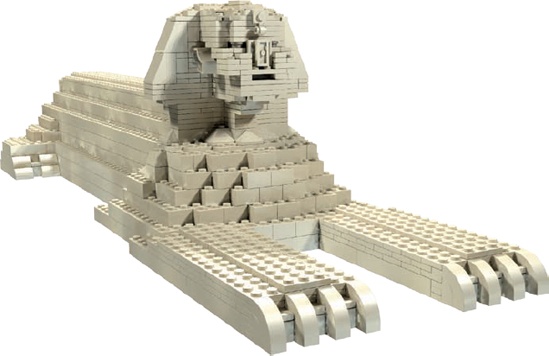
As with the Empire State Building example in Chapter 6, the first thing I did in preparation for building the Sphinx was search the Internet for pictures of the real-life Sphinx. I didn’t use design grids to plan its construction; instead, I began to build and modified my work as things progressed. (You could use grids to help plot your design, if you like.) Besides the fact that it’s famous, I selected the Sphinx because it’s relatively simple to build with LEGO pieces and it’s just one color (tan), so I could concentrate on the shape as I built rather than on color selection. In contrast, a sculpture of a knight riding a horse would have been much harder to build, due to the larger number of shapes, curves, and angles.
Remember that when building from real life it helps to identify a unique feature of the object you’re using for inspiration. In the case of the Sphinx, most people recognize its humanlike head with a pharaoh’s headdress. I chose this as my starting point, built the head until it looked correct, and then created a body to match. You might choose another identifying characteristic, like its body (a form based on a lion at rest), and work upward from there.
When building the head, I first looked at the angles that make up the headdress because the headdress is such a strong feature.
The sides of the headdress slope at about 55 degrees, which is close enough to the 65-degree standard LEGO slope. After selecting my pieces, including slopes, I began to build.
Figure 7-20 shows the Sphinx’s head starting to take shape. As the sides of the head began to rise, I built outward to capture the entire face. I couldn’t build a flat face because sculptures need to look right when viewed from all sides.
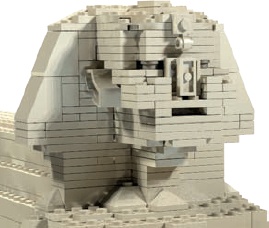
Figure 7-21 shows the head rotated 90 degrees to show the face coming to life. The face isn’t perfect, but this is a relatively small model, and trying to duplicate every detail is very difficult.
The real-life Sphinx has several unique features, each of which presents its own building challenges. Here’s how I chose to tackle these challenges.

The nose is missing on the real-life Sphinx, and I wanted to capture this interesting quirk. Figure 7-22 shows how I accomplished this: I used plates with their undersides facing outward to give the impression of uneven stone where the nose was once attached to the statue.
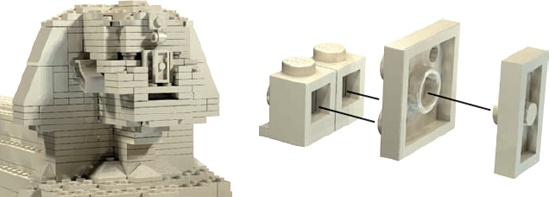
Figure 7-22. Note the unique ways each piece connects to the others. The three pieces on the right join together to become the nose, as shown at left.
This design takes advantage of the unique geometry of LEGO studs and tubes. The offset plate (at the far right in Figure 7-22) fits perfectly into the tube of the 2×2 plate next to it. The plate, in turn, fits snugly into the open sides of the headlight bricks.
The ears are another example of how you can build with rotated LEGO elements. For example, Figure 7-23 shows a 2×2 macaroni brick with its underside facing away from the side of the head. The curved shape of this element helps add character to the face of my Sphinx model.

The Sphinx’s large paws are mostly rectangular but do have some curved toes at the end. To create these curves, I tucked a 1×2 half arch under a 1×3×2 half arch (Figure 7-24) to represent each toe. As you can see, the smaller of the two parts nests perfectly under the larger half arch, creating a less blocky appearance.
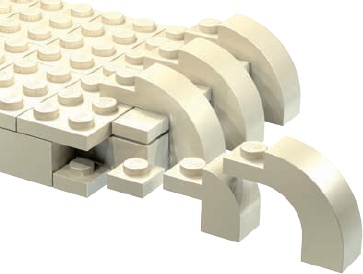
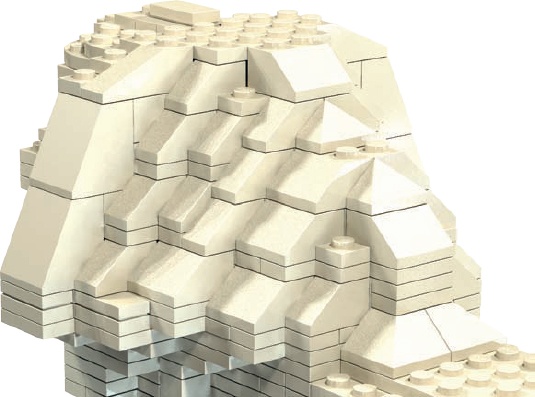
Figure 7-25 shows the way the headdress blends into the body. I didn’t get the look I wanted on my first attempt, and you may not either when you work on your own sculptures. Don’t be afraid to take parts off a model, move them, or swap in new parts until you have sculpted the shape you want.
There will be times when you’ll want to start building a model from the bottom up, like when you’re creating buildings.
For my Sphinx model, I chose to do the opposite: I built the head first to make sure my replica looked the part, and then I built a body to match the head. With the head complete, it was easiest to work on the shoulders next, then the back, and finally the legs. When building down from the neck, I found it easier to make the body match the scale to which I had built the head. Since I wasn’t too concerned with building a perfect representation of the real-life Sphinx, I didn’t need to work out the exact scale, like we did for the train station in Chapter 3.
As I built the lower body and legs (see Figure 7-26), I returned to the pictures of the Sphinx I found on the Internet. Images of real-life objects, buildings, vehicles, and so on can be enormously beneficial when you’re building LEGO models. If you have a chance to see the real thing that you wish to build, take photographs. Capture the subject in a wide shot and get close-ups of details and features that you want to replicate. This research technique is used by Master Builders who work for the LEGO Group. Why not use it to make your work more realistic and natural?
Figure 7-26 shows the completed Sphinx model. Notice that I decided to leave some areas of the model uneven; not every edge is perfectly square. This was my attempt to evoke the erosion of the actual Sphinx.
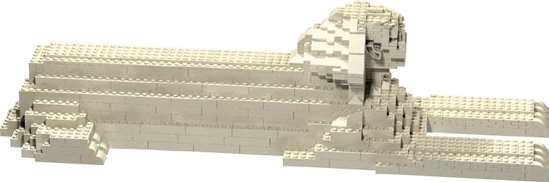
When sculpting real-life objects, remember to look for edges that can be rounded by either staggering bricks (as in the sphere) or by using slopes. Also keep in mind that things like faces, statues, or mountains may not be completely symmetrical; one side or another may be shaped slightly differently than the others. Reproduce some of that organic quality to add depth to your creations. As you’ve seen, I built the Sphinx using trial and error, focusing on its overall look and feel rather than strictly following a blueprint. On the other hand, the sphere required careful planning to produce a precise shape. You’ll probably find that you’ll use a bit of both techniques to build sculptures, depending on your subject. In the end, the way that you sculpt and your results will reflect your vision of each model. It’s up to you to decide whether your model is a successful build.