
154 Tivoli Business Systems Manager Version 2.1: End-to-End Business Impact Management
6.2 Prerequisite software components installation
We will not cover in detail the installation and customization of all the software
components required to run IBM Tivoli Business Systems Manager. However, we
provide information that we consider to be important for successful
implementation. The components discussed are:
? 6.2.1, “Operating system: Windows 2000 Server” on page 154
? 6.2.2, “MKS Toolkit for Systems Administrators Version 7.5 or 8.0” on
page 155
? 6.2.3, “Windows Resource Kit” on page 155
? 6.2.4, “JDBC Driver: Microsoft SQL 2000 Driver for JDBC” on page 155
? 6.2.5, “Microsoft IIS” on page 155
? 6.2.6, “Microsoft SQL Server” on page 156
6.2.1 Operating system: Windows 2000 Server
After installing the operating system following either standard or customized
procedures, upgrade the OS to Service Pack 2.
It is advisable to complete the following tasks to ensure smooth implementation
of IBM Tivoli Business Systems Manager on this system.
? The Administrator user ID must have a non-blank password. Ideally the
password never expires. Experience has shown that certain services,
processes, or SQL Agent jobs have to run under a local Administrator
account. For example, FTP requires a valid user ID with non-blank password
and appropriate access authorities.
? If the IBM Tivoli Business Systems Manager servers are installed as
members of existing domains, setup security must be considered carefully
prior to installation. Consult your NT domain administrator, and consider at
least three levels of security:
– Communication between IBM Tivoli Business Systems Manager servers
IIS Option
Pack
Not applicable Microsoft Internet
Information Server (IIS)
Version 5.0
Microsoft Internet
Information Server (IIS)
Version 5.0
Software
component
SQL database server -
ibmtiv5
Console and
propagation server -
ibmtiv3
History and HMS server -
ibmtiv6
Chapter 6. Base services implementation 155
– Users within the same domain to IBM Tivoli Business Systems Manager
– Users from outside the domain to IBM Tivoli Business Systems Manager
? If IBM Tivoli Business Systems Manager servers are installed in their own
domain the same considerations should be addressed, keeping in mind that
the intercommunication between these servers would not cause as much
difficulty as above.
? Installing the IBM Tivoli Business Systems Manager servers as standalone
servers in the same named workgroup is the most simple setup.
6.2.2 MKS Toolkit for Systems Administrators Version 7.5 or 8.0
Follow the installation steps supplied with the product. The installed components
must be in the Windows system path.
6.2.3 Windows Resource Kit
Follow the installation steps supplied with the product, keeping in mind that the
installed components must be in the Windows system path.
For Windows 2000 Resource Kit, you also have to install the support tools and
IBM Object REXX for Windows Version 2.1.
6.2.4 JDBC Driver: Microsoft SQL 2000 Driver for JDBC
This is available without charge if you are running Microsoft SQL 2000 Server
Standard or Enterprise Edition. It can be obtained from
http://www.microsoft.com/sql/downloads/default.asp
After download, just run setup.exe as with any Windows application. To complete
the installation, simply follow the instructions.
Be sure to make note of the installation path. (It is your decision whether to keep
any version-related information in the installation path.) This path name will be
required during the IBM Tivoli Business Systems Manager Console service
installation. The Server.properties file will have to be updated with this path name
under the TivoliManagerConsoleServer directory.
6.2.5 Microsoft IIS
Follow the installation steps supplied with either of these products:
? Microsoft IIS Version 4.0 with Windows NT 4.0 Option Pack
? Microsoft IIS Version 5.0 with Windows 2000

156 Tivoli Business Systems Manager Version 2.1: End-to-End Business Impact Management
6.2.6 Microsoft SQL Server
Proceed with this installation only after all other prerequisite software has been
installed and the server has been rebooted successfully.
We are presenting only our experiences from building our system in the lab with
Microsoft SQL 2000 Server Enterprise Edition, which are meant to supplement
the detailed tasks documented in
IBM Tivoli Business Systems Manager:
Installation and Configuration Guide
, GC32-0800. Installations of other types of
SQL servers could also benefit from the information here in addition to the actual
tasks in the installation and configuration guide.
The four steps for installing SQL server must be completed in this sequence:
1. “Microsoft SQL 2000 Server Enterprise Edition installation” on page 156
2. “Changing SQL Server authentication password” on page 169
3. “Applying Microsoft SQL 2000 Server Service Pack 2” on page 172
4. “Updating SQL Server Client-Side Options” on page 172
Microsoft SQL 2000 Server Enterprise Edition installation
Exit all other Windows programs before proceeding with this setup. Do not
re-install SQL server over an installed version. Uninstall the previous version and
reboot the system before continuing with this installation.
It is important to complete all the dialogs as instructed. You can use the Back
button to navigate backward to make any changes during installation, but it is
better to cancel the installation process and re-start it than to try to fix the setup
after an incomplete installation.
These are step-by-step instructions for our SQL server installation:
1. Log on to the SQL database server as Administrator.
2. Run setupsql.exe from the following directory: <drive:mssql>x86setup
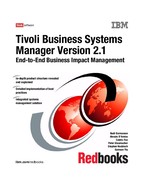
3. The setup dialog begins with the InstallShield to guide you through
installation. The welcome dialog is shown in Figure 6-1 on page 157.
Note: <drive:mssql> is the drive letter of the CD-ROM or the path to an
installation directory on a hard drive where the Microsoft SQL 2000 Server
software resides.
158 Tivoli Business Systems Manager Version 2.1: End-to-End Business Impact Management
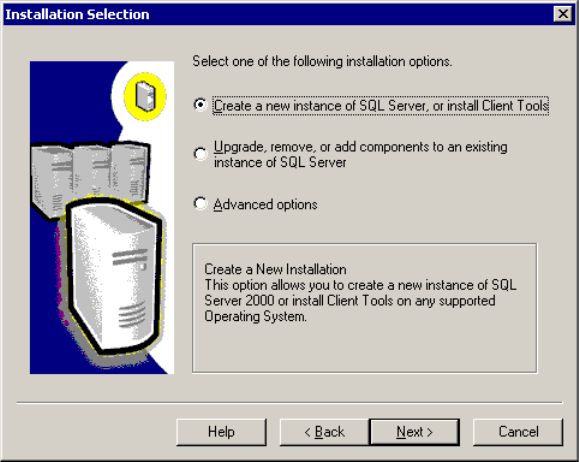
5. In the Installation Selection dialog shown in Figure 6-3, select Create a new
instance of SQL Server, or install Client Tools and click Next for the User
Information dialog.
Figure 6-3 Installation Selection dialog
6. In the User Information dialog shown in Figure 6-4 on page 159, fill out the
Name and Company fields with your information and click Next for the
Software License Agreement dialog.
..................Content has been hidden....................
You can't read the all page of ebook, please click here login for view all page.