
23. Using SkyDrive and the Word Web App
In this chapter, you find out how to access and manage your SkyDrive storage in various ways and how to use it both within Microsoft Word and outside of it. Also in this chapter, you are introduced to the Word Web App, a free streamlined version of Word that SkyDrive users can work with whether or not they own the full version of Word.
Understanding SkyDrive
SkyDrive is a cloud-based storage space. Each user has his or her own storage area, where they can store private files, share files with certain specific others, or make files publicly available.
As you’ve seen in your work with Word throughout this book, SkyDrive is your default save location for Word and other Office apps. Using SkyDrive as your main document storage area has several consequences:
• You can access your files from any computer, whether or not it has Word installed on it.
• You can share your work with other people without having to send them separate copies of it.
• Your files are available only when Internet access is available
You can get around that last drawback by installing the SkyDrive for Windows app on your PC, which automatically mirrors the content of your SkyDrive on your PC and keeps the copy in sync with the SkyDrive’s actual content.
There are several ways to access your SkyDrive. You can
• Access your SkyDrive space on the Web via http://www.skydrive.com
• Use the SkyDrive for Windows desktop app.
• Use the Windows 8 SkyDrive app on a PC or tablet that has Windows 8 installed
• Use the SkyDrive links within Word when saving or opening files
• Use the SkyDrive app on a Windows Phone
Logging In to the SkyDrive Web Interface
Some SkyDrive management activities can only be performed via the SkyDrive web interface, so you should know how to access it. To get started, point your browser to http://www.skydrive.com. (The page redirects to the server where Microsoft is hosting SkyDrive at the moment. As of this writing, it is https://skydrive.live.com; by the time you read this, though, it might have changed.)
If you already have a Microsoft account and your computer is set up to automatically log you in to it, your SkyDrive’s content appears automatically. If you do not already have a Microsoft account, go to the SkyDrive website and follow the prompts to sign up for a Microsoft account there.
Figure 23.1 shows an example, but you might have different files and folders than shown. From this interface, you can click folders and files to open them, or use the buttons on the toolbar at the top of the window to perform other actions. You learn more about those actions later in this chapter. Figure 23.1 shows the default file view, which is called Tiles; it is similar to the tile view you see on the Start screen in Windows 8. You can click the Folders view button in the upper-right corner of the screen to see the files and folders in a view that’s similar to File Explorer in Windows, as shown in Figure 23.2.

Figure 23.1. The SkyDrive web interface in Tiles view.

Figure 23.2. The SkyDrive web interface in Folders view.
Working with SkyDrive for Windows
You can get around the drawback of not being able to access your SkyDrive files offline by installing the SkyDrive for Windows app on your PC, which automatically mirrors the content of your SkyDrive on your PC and keeps the copy in sync with the SkyDrive’s actual content. If you are ever disconnected from the Internet, it allows you to work on local copies of your files, and then it automatically uploads the updates to your SkyDrive the next time Internet connectivity is available. The SkyDrive for Windows app also places a shortcut to your locally mirrored copies of your SkyDrive content on the Favorites list in File Explorer (or Windows Explorer), so you can easily access them with one click.
To get SkyDrive for Windows, open the SkyDrive web interface, as described in the preceding section, and then in the navigation pane at the left, click the Get SkyDrive Apps hyperlink. From there, find and follow the link for the Windows desktop apps. Click Download Now and follow the prompts to complete the installation. (I’m being intentionally vague about the steps here because by the time you read this, they might have changed; Microsoft updates its websites frequently.)
After SkyDrive for Windows has been installed, you see a SkyDrive shortcut in the Favorites list in File Explorer (Windows 8) or Windows Explorer (Windows 7). This shortcut points to a folder on your hard drive: C:UsersusernameSkyDrive. This folder is a staging area for your online SkyDrive and is automatically synchronized with it. Figure 23.3 shows my SkyDrive folder on my hard drive, for example. Notice that each icon has a green check mark on it, indicating that it has been synchronized. In other words, the copies on my SkyDrive are identical to these copies on my local machine. When the copies are out of sync because an update hasn’t occurred yet, a pair of blue arrows appears on the icon to indicate a sync is scheduled or in process. If there is a problem with a sync (such as Internet unavailability), a red X symbol appears on the icon to indicate that, as shown in Figure 23.4.

Figure 23.3. SkyDrive for Windows provides an automatically updated local staging area for your SkyDrive’s content.

Figure 23.4. When a file cannot be updated, a red X appears on its icon.
Saving and Opening Files from Your SkyDrive Within Word
As you saw in Chapter 1, “Creating and Saving Documents,” you can save and open files on your SkyDrive from within Word. When you choose Save As from the File menu, the default save location is your SkyDrive. You can click Browse to browse your SkyDrive’s content, or you can click one of the folder names under Recent Folders to access one of the folders within your SkyDrive (see Figure 23.5).

Figure 23.5. Within Word, you can access your SkyDrive via the Save As or Open command.
Using the Windows 8 SkyDrive App
If you are running Windows 8, you can access the Windows 8 SkyDrive app from the Start screen. It’s a tablet-style app optimized for touchscreens, like the other new Windows 8 style applications. Access it from the Start screen; Figure 23.6 points out its tile there.
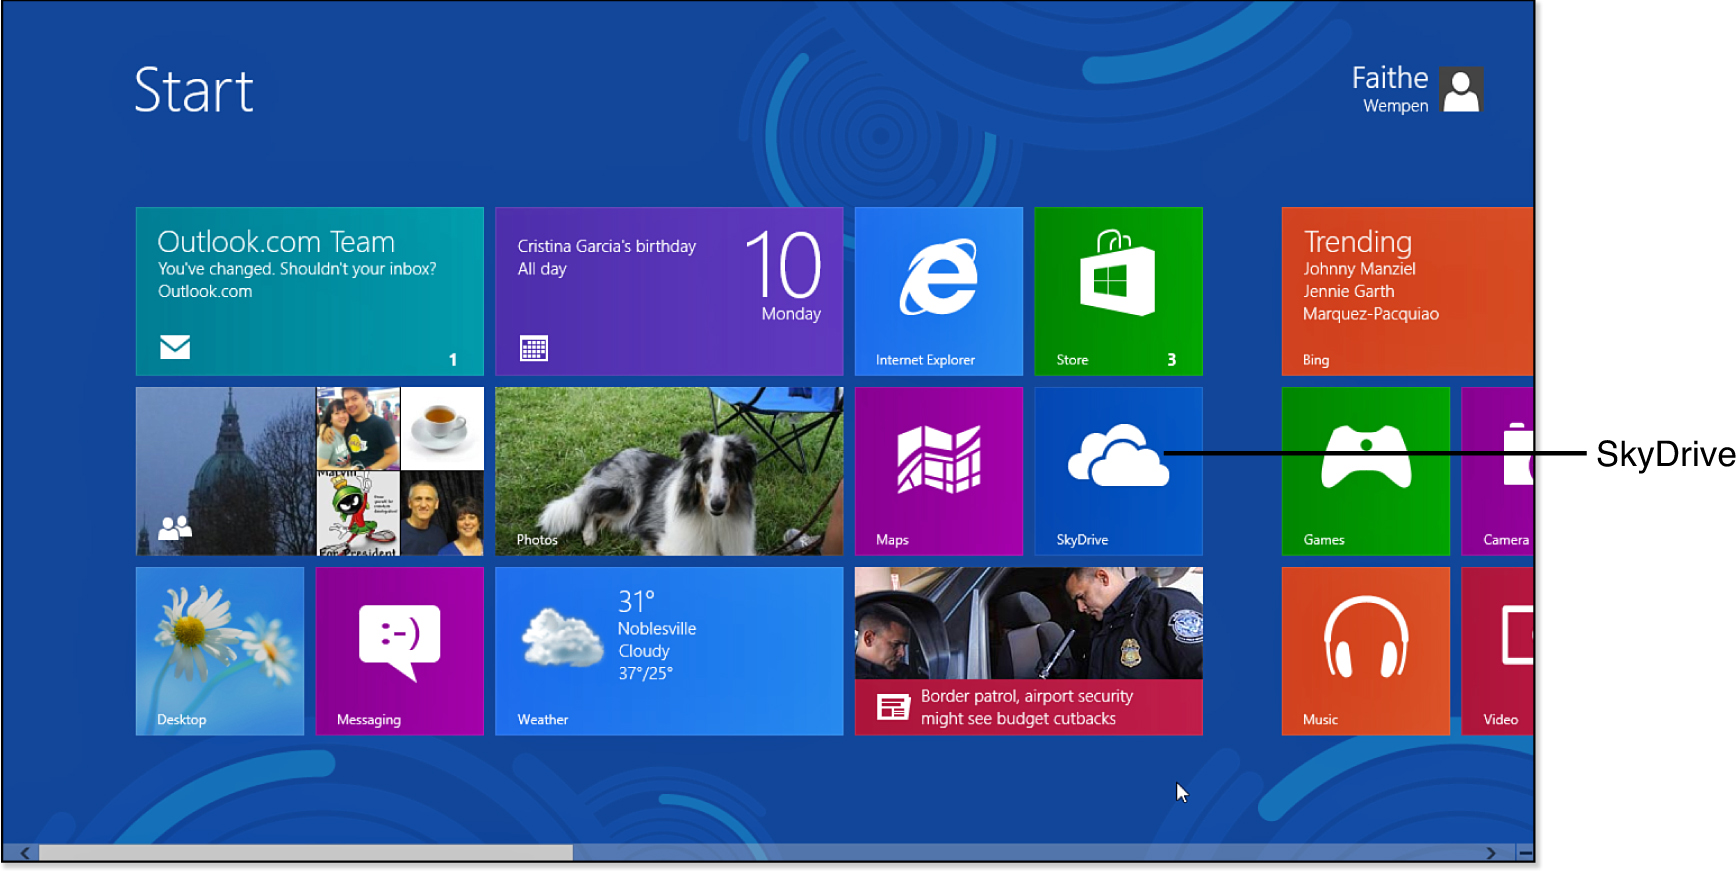
Figure 23.6. Select the SkyDrive app from the Start screen in Windows 8.
Within the SkyDrive app, you see your SkyDrive folders listed to the left, with picture previews of the folders’ content if available. To the right of the folders, you see tiles for any files that are stored at the top level of your SkyDrive’s organizational system, not in any particular folder. Right-click to open a command bar at the bottom of the screen, and choose commands from it to work with your content. Figure 23.7 shows the command bar open. Using the commands on the command bar, you can do all the basic file management tasks from the Windows 8 SkyDrive app, such as uploading and downloading, creating new folders, deleting, renaming, and moving. To access those last three commands, right-click the file or folder you want to perform one of those actions on to select it. From the command bar, choose Manage. A submenu appears containing the Rename, Delete, and Move commands.
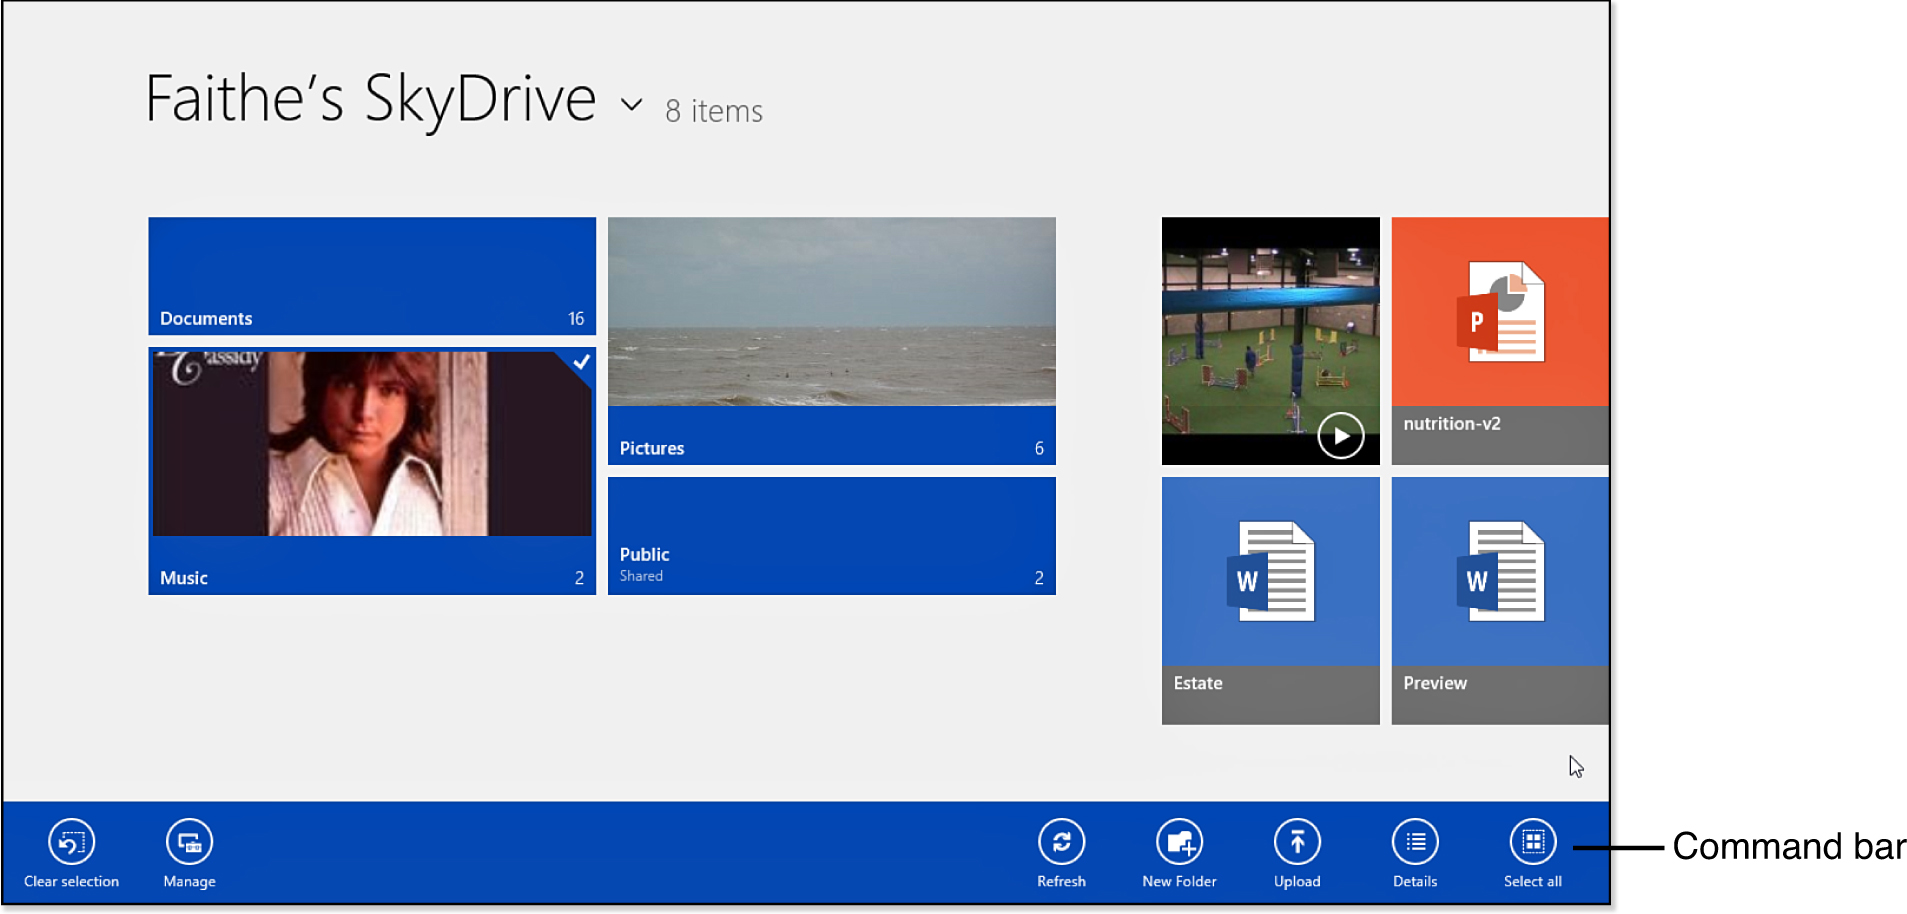
Figure 23.7. Right-click in the Windows 8 SkyDrive app to open a command bar.
When you click a file or folder, it opens. If it’s a file, it opens in its default program. You can choose some other program in which to open the file. To do so, click Open With on the command bar, and then select the desired app from the menu that appears. Figure 23.8 shows an example for a Word document. To select a file or folder, right-click it.

Figure 23.8. Click Open With and then choose the desired app with which to open the file.
Managing Files on Your SkyDrive
In the following sections, you find out how to perform basic file management activities on your SkyDrive, including uploading and downloading, copy, moving, deleting, and renaming files.
Uploading a File to Your SkyDrive
Uploading means transferring a file from your local hard drive, or some other local location, to your SkyDrive. The procedure for placing a file on your SkyDrive depends on which interface you are using.
SkyDrive.com
Follow these steps to upload a file via the web-based interface:
1. Display the folder in which you want to place the file.
2. Click the Upload button in the toolbar.
3. Select the file to upload.
4. Click Open.
SkyDrive for Windows Desktop
Follow these steps to upload a file via the SkyDrive for Windows application:
1. In File Explorer (or Windows Explorer), select the file.
2. Press Ctrl+C to copy the file to the Clipboard.
3. In the Favorites bar, click SkyDrive.
4. Navigate to the desired folder on your SkyDrive.
5. Press Ctrl+V to paste the file.
Word 2013
You learned how to upload (save) files to your SkyDrive via the Word 2013 interface in Chapter 1. Here’s a quick reminder:
1. Choose File, Save As.
2. Click Browse.
3. Navigate to the desired folder on your SkyDrive.
4. Type a filename in the File name box.
5. Click Save.
Windows 8 SkyDrive App
Follow these steps to upload a file via the Windows 8 SkyDrive app:
1. Display the folder in which you want to place the file.
2. Right-click to display the command bar.
3. Click Upload.
4. Select the file to upload.
5. Click Add to SkyDrive.
Downloading a File from Your SkyDrive
Downloading means copying a file from your SkyDrive to a local drive, such as your hard drive. The following sections summarize how to download from each of the four SkyDrive interfaces previously discussed.
SkyDrive.com
Follow these steps to download a file from the SkyDrive web-based interface:
1. Click the check mark next to a file’s name to select it.
2. Click the Download button in the toolbar.
3. If prompted by your browser to open or save, click Save.
4. If prompted for a save location, choose it and click Save. (Some browsers do not prompt for a save location; they save all downloads to a default location, such as the Downloads folder.)
SkyDrive for Windows Desktop
Follow these steps to download a file from the SkyDrive for Windows desktop application:
1. In File Explorer (or Windows Explorer), click SkyDrive in the Favorites list.
2. Select the file to be downloaded.
3. Press Ctrl+C to copy the file to the Clipboard.
4. Navigate to a local folder location.
5. Press Ctrl+V to paste the file.
You can also alternatively use any of the other methods of copying and pasting, such as right-clicking and choosing the commands from the shortcut menu.
Word 2013
You can’t directly download a file to your hard drive from the Word 2013 application, but you can open the file in Word and then use Save As to save it to your local drives. Follow these steps to do so:
1. Choose File, Open. SkyDrive is selected by default as the location.
2. Click Browse.
3. Select the file on your SkyDrive.
4. Click Open.
5. Choose File, Save As.
6. Click Computer and then click Browse.
7. Navigate to a local folder location.
8. Click Save.
Windows 8 SkyDrive App
Follow these steps to download a file from the Windows 8 SkyDrive app:
1. Right-click the file to select it.
2. Click Download.
3. Navigate to a local folder location.
4. Click Choose This Folder.
5. Click OK.
Renaming a File or Folder
One way to rename a file is to save it with a different name and then delete the original. However, it’s much easier to directly rename a file with the Rename command. The following steps explain how to rename a file or folder on your SkyDrive in various interfaces.
SkyDrive.com
Follow these steps to rename a file from the SkyDrive web-based interface:
1. Click the check mark next to a file’s name to select it.
2. Click the Manage button on the toolbar.
3. Click Rename.
4. Type the new name and press Enter.
SkyDrive for Windows Desktop
Follow these steps to rename a file from the SkyDrive for Windows Desktop app:
1. In File Explorer (or Windows Explorer), click the file you want to rename.
2. Click the Home tab, and select Rename.
3. Type the new name and press Enter.
Word 2013
You can rename a file on your SkyDrive from any dialog box in Word in which you save or open files. For example, here’s how to do it from the Open dialog box:
1. Choose File, Open. SkyDrive is the default location.
2. Click Browse.
3. Right-click the file on your SkyDrive.
4. Choose Rename.
5. Type the new name and press Enter.
Windows 8 SkyDrive App
Follow these steps to rename a file from the Windows 8 SkyDrive app:
1. Right-click the file to select it.
2. Click Manage.
3. Click Rename.
4. Type the new name and press Enter.

Moving or Copying a File or Folder
Moving and copying, in the context of this section, refer to moving or copying within SkyDrive itself, from one folder to another, and not into or out of the SkyDrive (which would be considered uploading or downloading, respectively, and which were covered earlier in this chapter). The following sections cover how to move or copy files within the different interfaces available.
SkyDrive.com
Follow these steps to move or copy a file from the SkyDrive web-based interface:
1. Click the check mark next to a file or folder’s name to select it.
2. Click the Manage button on the toolbar.
3. Click Move to, or click Copy to.
4. Click the desired folder in the dialog box.
5. Click Move, or click Copy.
SkyDrive for Windows Desktop
Follow these steps to move or copy a file from the SkyDrive for Windows application:
1. In File Explorer (or Windows Explorer), click the file or folder you want to move.
2. To move, press Ctrl+X or click the Home tab, and select Cut. Or, to copy, press Ctrl+C or click the Home tab, and select Copy.
3. Navigate to the folder where you want to move or copy the file or folder.
4. Press Ctrl+V or click the Home tab, and select Paste.
Word 2013
You can move or copy a file on your SkyDrive from any dialog box in Word in which you save or open files. For example, here’s how to do it from the Open page in Backstage view:
1. Choose File, Open. SkyDrive is the default location.
2. Click Browse.
3. Right-click the file or folder on your SkyDrive and click either Cut or Copy, or use the shortcut keys Ctrl+X to cut or Ctrl+C to copy.
4. Navigate to the folder where you want to move the file.
5. Right-click an empty area and choose Paste, or press Ctrl+V.
Windows 8 SkyDrive App
Follow these steps to move a file from the Windows 8 SkyDrive app:
1. Right-click the file or folder to select it.
2. Click Manage.
3. Click Move.
4. Navigate to the folder where you want to move the file or folder.
5. Click Move Here.
You cannot copy files or folders from within this app.
Deleting a File or Folder
Deleting a file or folder removes it. A Recycle Bin is available for retrieving deleted files on your SkyDrive, but it is accessible only from the web interface. However, if you delete a file from SkyDrive for Windows, the local copy of the file is sent to your local Recycle Bin and you can restore it from there back to the local SkyDrive mirror folder.
SkyDrive.com
Follow these steps to delete a file from the SkyDrive web-based interface:
1. Click the check mark next to a file or folder’s name to select it.
2. Click the Manage button.
3. Click Delete.
To restore a deleted file, use the online Recycle Bin, as follows:
1. Click Recycle Bin at the bottom of the navigation pane at the left in the SkyDrive web interface window.
2. Click the check mark next to a file or folder’s name to select it.
3. Click Restore.
SkyDrive for Windows Desktop
Deleting a file from SkyDrive for Windows is the same as deleting a file from File Explorer (or Windows Explorer):
1. In File Explorer (or Windows Explorer), click the file or folder you want to delete.
2. Press the Delete key, or click the Home tab, and select Delete.
Restoring a deleted file is the same as doing it from local drives. That’s because the location you work with for SkyDrive for Windows is actually a local folder on your PC. Here’s how:
1. Open the Recycle Bin from your Windows desktop.
2. Click the file to restore.
3. Click Restore the Selected Items.
Word 2013
You can delete a file on your SkyDrive from any dialog box in Word in which you save or open files. For example, here’s how to do it from the Open dialog box:
1. Choose File, Open. SkyDrive is the default location.
2. Click Browse.
3. Click the file or folder on your SkyDrive.
4. Press the Delete key.
To immediately restore a deletion, press Ctrl+Z.
Otherwise, use the Web interface or SkyDrive for Windows to restore the file.
Windows 8 SkyDrive App
Follow these steps to delete a file from the Windows 8 SkyDrive app:
1. Right-click the file or folder to select it.
2. Click Manage.
3. Click Delete.
4. Click Delete to confirm.
You cannot restore deleted files or folders in this app.
Sharing SkyDrive Files
You can easily share your SkyDrive files with other people. There are a variety of ways to do so. You can send email, post a link to Facebook, or create a hyperlink that you can then share with others any way you like (such as pasting it into the HTML for a web page or pasting it into an instant message program).
Sharing is configured primarily through the web interface; the other interfaces aren’t designed for doing it. However, in some cases you can access a command in another interface that will automatically open the web interface and start the sharing process.
SkyDrive.com
Follow these steps to share the link to a file from the SkyDrive web-based interface via email:
1. Click the check mark next to a file or folder’s name to select it.
2. Click the Share button.
3. Click Send Email.
4. In the To box, type the email address of the recipient.
5. (Optional) Type a personal message.
6. Mark or clear the Recipients can edit check box as desired.
7. Mark or clear the Require Everyone Who Accesses This to Sign In check box as desired.
![]() Note
Note
If you mark the check box in step 7, only people with a Windows account have access.
8. Click Share.
You can also get a hyperlink that you can share in any way you like, such as via instant messaging or a web page. Here’s how to generate a share link:
1. Click the check mark next to a file or folder’s name to select it.
2. Click the Share button.
4. Click the Create button in either the View Only or View and Edit section.
Or
Click the Make Public button.
5. Press Ctrl+C to copy the code.
6. Click Done.
7. Click in the application in which you want to share the link, and press Ctrl+V to paste it there.
SkyDrive for Windows Desktop
You can begin a sharing operation from SkyDrive for Windows, but it quickly turns into the web method by opening the web interface. In File Explorer (or Windows Explorer), right-click the file or folder you want to share, point to SkyDrive, and click Share. The web interface opens. From that point, the process is the same as in the previous section (starting at step 3).
Word 2013
You can begin sharing a file on your SkyDrive from any dialog box in Word in which you save or open files. However, as with SkyDrive for Windows, the procedure quickly turns into the web-based procedure:
1. Choose File, Open.
2. Click Browse.
3. Right-click the file or folder on your SkyDrive that you want to share, point to SkyDrive, and click Share.
The web interface opens. From this point, follow the steps in the Skydrive.com section above, starting at step 3.
Windows 8 SkyDrive App
You can’t set the sharing for a file or folder via the Windows 8 SkyDrive app; use the web interface when you need to do this.
Using the Word Web App
Office Web Apps are web-based versions of the familiar tools from Microsoft Office, including Word, Outlook, Excel, and PowerPoint. They are free to anyone who has a Microsoft account (and you can get one for free). If you sign in to Windows 8 with an online-enabled account, you already have a Microsoft account; you can use the same email address and password as what you signed up for with Windows 8. In this book, we are primarily considered with the Word Web App.
Office Web Apps do not have the complete feature set of their corresponding standalone applications, but they are more than adequate for casual on-the-go writing and editing, and for some people the Office Web tools are all they need most of the time.
SkyDrive is tightly integrated with the Office Web Apps interface; when you create or edit files using Office Web Apps, you do so by starting from the SkyDrive interface.
To get started with Office Web Apps, go to http://office.microsoft.com/en-us/web-apps. You are prompted to log in to your Microsoft account (unless you are set up to automatically log in to it), and if you don’t have one, you’re prompted to create one.
Editing an Existing File Using the Word Web App
When you click a Word document in your SkyDrive’s file listing in the web interface, the document automatically opens in the Microsoft Word Web App. At first, it seems like there’s not much you can do here. However, this is not the full Word Web App that you are seeing at this point. If you click Edit Document, a menu appears, as shown in Figure 23.9. From here, you can choose where you want to edit the document. If you choose Edit in Word Web App, additional tools become available in the browser window, as shown in Figure 23.10. The tabs and tools should seem familiar; they are a subset of those available in the full version of Word.
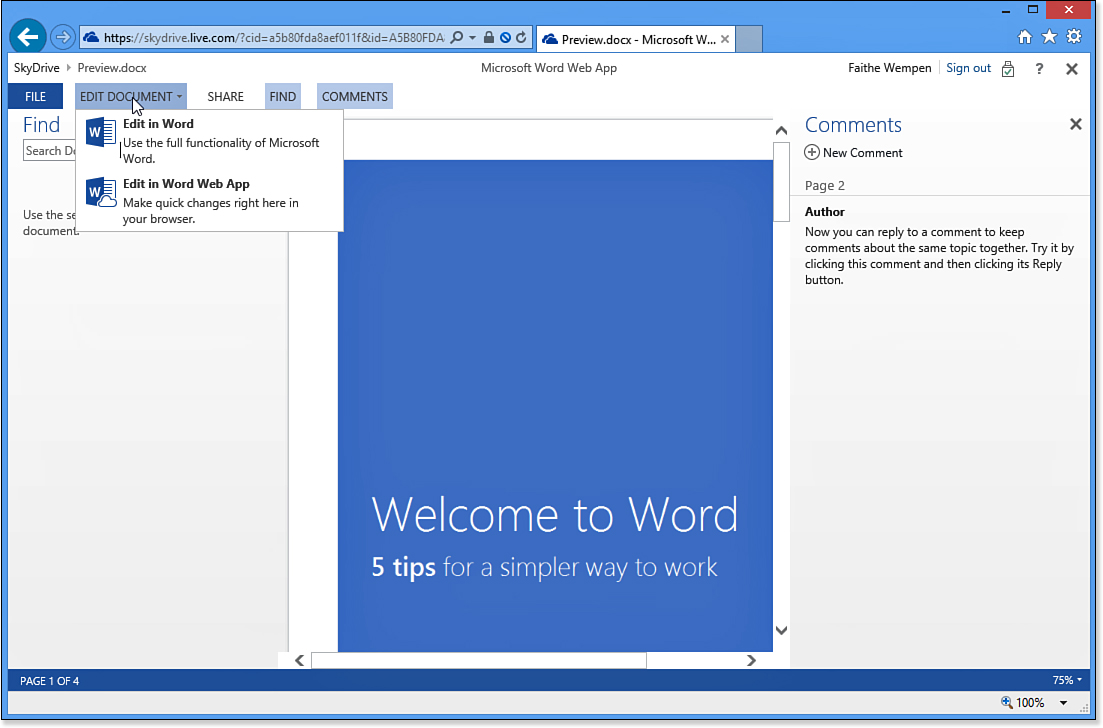
Figure 23.9. Click Edit Document and then click the application you want to use to edit the document (for example, Word Web App).

Figure 23.10. Edit the document using the Word Web App.
At any point, if you need to use a Word feature that isn’t present in the Word Web App, you can click Open in Word to switch to the full version of Word, provided the PC you are working with has it installed. (Obviously that feature isn’t available when you are working on a PC that lacks Word.)
To return to your SkyDrive’s file listing, click the SkyDrive hyperlink in the upper-left corner of the window.
Starting a New Document Using the Word Web App
When you are working on your own computer, you’ll probably want to use Word to create new documents. However, when you are using someone else’s PC who doesn’t have Word, you can still create Word documents via the Word Web App.
To create a new Word document via the Word Web App, follow these steps:
1. Log in to your SkyDrive via the web interface.
2. On the toolbar, click Create. A menu appears.
3. Click Word Document. A New Microsoft Word Document dialog box appears, as shown in Figure 23.11.

Figure 23.11. Name the new document before you begin to work on it.
4. Type a name for the new document and click Create. The Word Web App interface opens, ready for you to type your new document.
5. When you are finished working on the document, click File, Save to save your work, or click the Save button on the Quick Access toolbar.
6. Return to your SkyDrive file listing by clicking SkyDrive in the top-left corner of the window, or sign out and close the browser window.