In this chapter you will make costume elements for the character you have sculpted. You will be making a formfitting superhero costume as well as some accessories to complete the look. To do this, you will use the ZBrush retopology tools introduced in Chapter 8, as well as an external polygon modeler, in this case Maya, a tool that's familiar to most 3D modelers. You will also use Photoshop, the industrystandard image-editing program. You can use the techniques in this chapter to create any kind of costume from superhero to solider to barbarian warrior, or even a regular guy in a shirt and pants. The choice is yours. What is important is to understand how to combine ZBrush with Maya to create costumes built directly from the base sculpture.

Be sure to check the DVD for a video of the full costume process to assist in your understanding of this workflow, which includes some stages that aren't demonstrated in the book. Some of the techniques in this chapter will require an understanding of how to lay out very simple UV coordinates. For more information on this process, please see the preceding chapter in this book on texture mapping or Eric Keller's excellent Mastering Maya 2009 (Sybex, 2009). I also show alternate approaches to creating the same effects, so if you prefer not to lay out UVs, you can still use many of the techniques in this chapter.
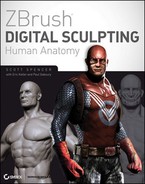
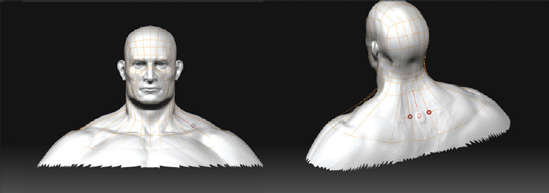
Figure 10.1 shows the final figure you'll complete in this chapter.

The approach you will take in this chapter is to use the ZBrush retopology tools to create a costume piece such as a shirt. You will generate a mesh that conforms to the surface of the sculpture and then give it a thickness so it is more than a two-dimensional shell. Once you have created this model, you will import it as a subtool and begin to sculpt the appropriate drapery and folds that would occur on that part of the body. By starting with a projected mesh, you will retain the anatomical form you sculpted so that you are creating only the sense of fabric over these forms. It's a huge time-saver and keeps you from having to resculpt muscle form to show through the clothing.
You will start by making the classic superhero mask. This is a cowl that drapes over the shoulders with openings for the eyes, mouth, and ears.
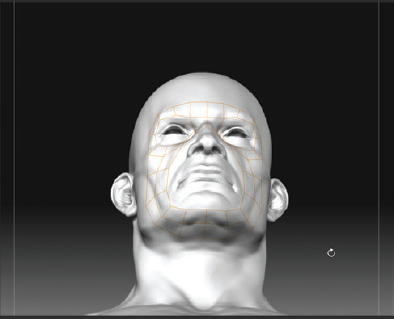
You will create the hood base mesh using the ZBrush topology tools much in the same way you used them to remesh the figure in Chapter 8. Prepare your mesh as discussed in that chapter. You will begin by drawing topology over the head of the figure. I have hidden the body in this chapter's images to simplify this process.
With the mesh linked to a ZSphere and ready for remeshing, you will start drawing the actual edges of the new mesh. The approach will be similar to the way you created an animation mesh in Chapter 8. The difference is that here you have less emphasis on animation topology. However, if your model is intended for animation, you may want to consider your edge layout for the costume as carefully as for the body. For more information on edge layout and topology, see Chapter 8.
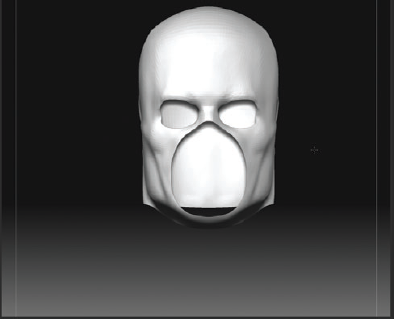
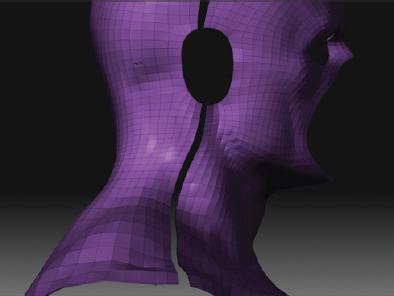
Start by creating a loop of edges around the eyes, as shown in Figure 10.2. Consider this a kind of "bandit mask" shape. Make sure X symmetry is on by pressing the X hotkey, and start from the center of the head working out.
As you work, you will want to check the resulting mesh often. To do this, press the A key to preview the adaptive skin. You may remember this same hotkey from Chapter 1 where you used it to preview a ZSphere model. With the topology tools, pressing A displays the polygon mesh that will result from your current network of faces (Figure 10.3). Since you will want to capture the surface detail of the sculpture, turn on Projection under Tool → Projection. You will also want to raise the Adaptive Skin resolution, under Tool → Adaptive Skin, to 5 (Figure 10.4). This will ensure that the projected mesh is dense enough to capture the surface forms. Remember to check the mesh often as you work by pressing the A key. This will save time and effort by helping you catch any errors in the mesh as they occur.
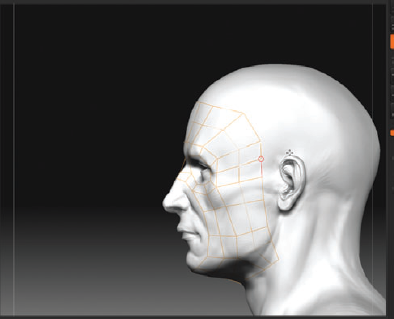
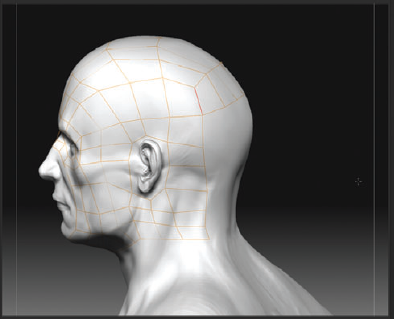
Continue the edges down the cheek and under the chin, as shown in Figure 10.5. Next, continue to expand the loops from the underside of the chin around the sides of the face to the top of the head (Figure 10.6). This will create a row of long rectangular faces. Subdivide these long faces by cutting a new edge through them (Figure 10.7). To do this, simply click an edge to start the cut, and move to the next edge; you will see a short yellow line. This is a visual cue that you can place an edge here. Cut a new edge down the length from the top of the head to the underside of the chin. Press the A key to check the mesh so far (Figure 10.8).
Cut a new edge from the corner of the eye to the top of the ear, as shown in Figure 10.9. Continue two more faces, which extend back over the ear. Press the W key to switch to move mode. You can now drag points on the surface. Pull the points around the perimeter of the ear. Continue a row of faces up to the top of the head (Figure 10.10).
Continue a network of faces around the ear. You want to maintain a hole for the ear. Move the points apart to keep them from sealing over. You may also add an odd point on the edge to prevent the mesh from sealing in this area. The Max Strip Distance slider controls how many polygon edges will define a hole in the mesh. This slider is located under the Tool → Topology menu. With this number set to 4, the hole here will not be closed automatically by ZBrush.
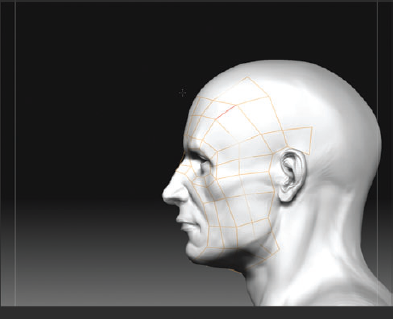
Continue the mesh up the sides of the head, as shown in Figure 10.11. Remember to check your progress often by pressing the A key (Figure 10.12).
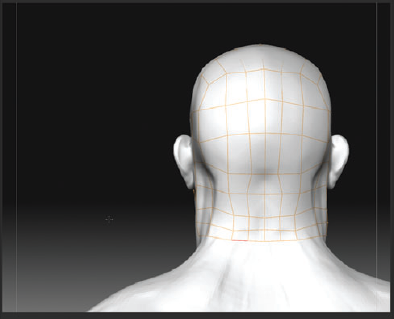
Move to the back of the head, and continue the mesh down, as shown in Figure 10.13.
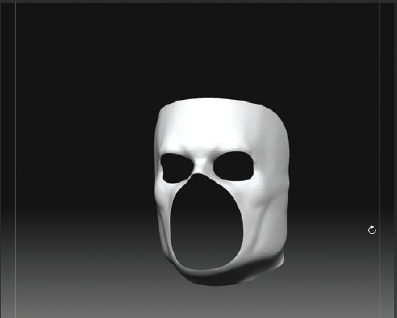
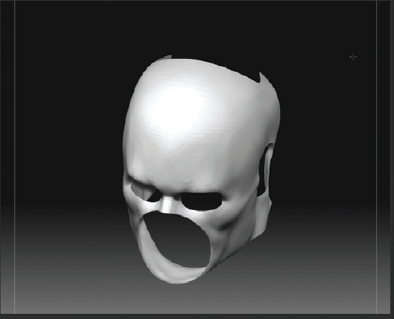
At this point, the head is complete (Figure 10.14). Check your projection with the A key to make sure there are no problem areas (Figure 10.15). You will now continue the mask down over the shoulders. Figure 10.16 shows the mesh extended down to the collarbones. Remember that you want to drape the mask over the shoulders, so be sure to extend it down far enough to look natural.
Cut a new edge along this string of long faces to help increase the detail in the shoulder area (Figure 10.17). Figure 10.18 shows the final projection of the mask. Save your work at this time. Notice that it captures the sculpted form of the parts of the head that it covers but has no thickness. You will correct this in the following stage.
Note
When saving a file in which you are building topology, save it like any other ZTool. When you load it later, to continue working after drawing it on the canvas and entering edit mode, select Tool → Topology, deselect Edit Topology, and then select it again to activate topology editing.


The topology lines are complete, and when you preview the mesh, it looks good. The next step is to create a model of the mask from this edge layout that can be loaded as a subtool and sculpted. Although it is possible to generate a mesh with thickness using the ZBrush Topology tool, you cannot have thickness and also capture the surface forms of the sculpt. The following tutorial is a useful trick for having the best of both worlds:
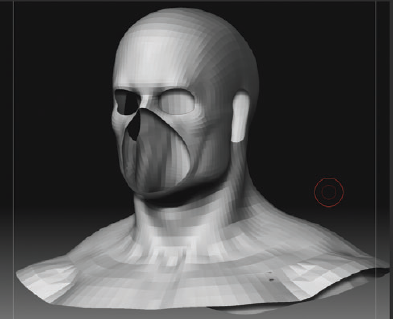
At this stage, you could generate a mask mesh with thickness by turning off Projection and setting Skin Thickness on the Topology menu to a value greater than 0. If you enter these settings and preview the mesh, you will see it does create a new skin with thickness, but does not capture any of the surface form. Since the mask is a formfitting costume element, you will want to capture the surface form as well as have a thickness.
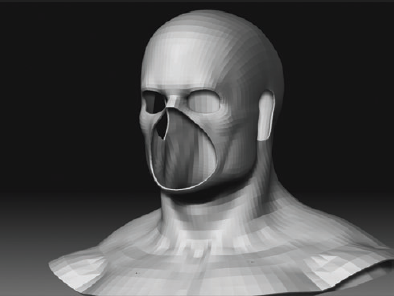
Select a resolution that maintains as much of the surface form as possible without being too dense. In this case, I set the skin density to 3 since it maintains the form while also being a low-enough polygon count to make dividing and sculpting the mesh possible (Figure 10.19). The density you set here will be the lowest subdivision level of your resulting mesh, so try to strike a balance between surface detail and workability.
Select Tool → Adaptive Skin → Make Adaptive Skin. This will create a new tool in the Tool menu prefixed with Skin_ (Figure 10.20). This will be the polygon mesh generated from your topology network. Select this ZTool, and save it separately.
You will notice that this tool has no thickness. It is a paper-thin mask. You will want to give the mask some thickness for a more realistic appearance. By adding a thickness to the mask, you will get nicer shadows and highlights at the edge where it meets the skin.
To create a thickness, you will use a tool under the Morph Target menu called MorphDiff. You may recall that a morph target stores a copy of the current mesh in memory. MorphDiff creates a new mesh based on the difference between a model and its stored morph target. Select Tool → MorphTarget → Store MT. You may need to click Del MT to delete any stored data first.
You now want to offset the mesh from its original volume. To do this, open the Tool → Deformation menu, and increase the Inflate slider by 7 (Figure 10.21). A useful trick to help see how much the mesh is offset is to store a snapshot on the canvas by pressing Shift+S before inflating. You will then be able to see the original position as well as the new position and judge whether the thickness is acceptable (Figure 10.22). When you are done, clear the snapshot by pressing Ctrl+N.
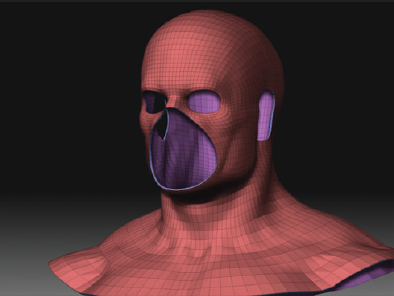
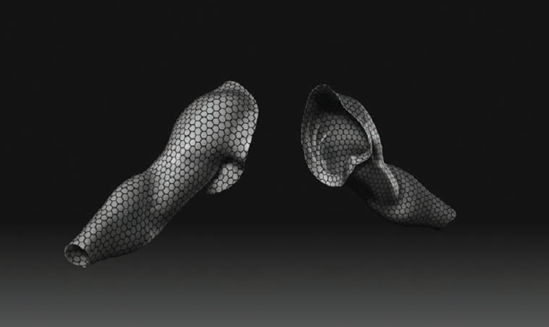
You have now inflated the entire mask just enough to offset the shell from its original position stored in the morph target. Select Tool → Morph Target → CreateDiff to generate a new ZTool based on the difference between the stored morph target and the inflated shell. You will now have a new tool listed in the Tool palette, whose name begins with MorphDiff_. Figure 10.23 shows the MorphDiff_mask, which retains surface detail and also has a thickness. This mesh is also polygrouped so that the inner shell, the thickness, and the outer surface are all easily isolated by pressing Shift+Ctrl-click (Figure 10.24). This will make sculpting and manipulating the mask much easier as you move into the detailing phase.


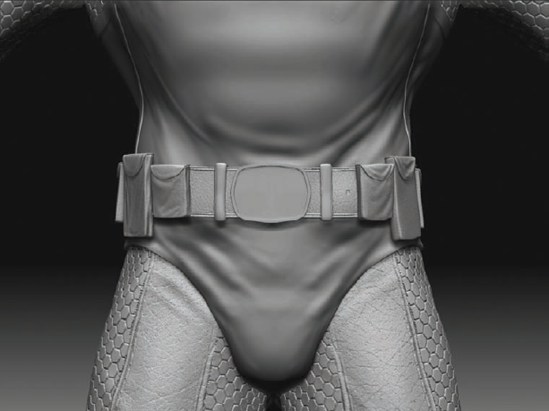
You have now seen how to use the ZBrush topology tools to create a costume element. The shirt and pants are created in much the same way using the topology tools directly on the sculpture. You can see this process in action in videos included on the DVD. Also on the DVD you will find videos showing how to use Maya to generate accessories like the gloves and belt illustrated in Figure 10.25.
Once you have finished making the meshes for your costume elements, it's time to focus on sculpting them. Most of these articles of clothing are formfitting, so the idea will be to create stress wrinkles where the cloth is compressing or stretched across forms. You will begin by looking at the mask.
To begin, you will load the costume meshes into the ZTool. The easiest way to do this is to use Subtool Master, whose option Multi Append will load multiple ZTools and obj files from the disk into your current ZTool as subtools. This function is an incredible time-saver when you need to combine multiple models into a single subtool stack. For this tutorial, you can follow along with your own ZTools or load the parts directly from the DVD. I have also included a ZTool with all costume meshes preloaded called 000_HeroWithCostumeMeshes.Zztl.
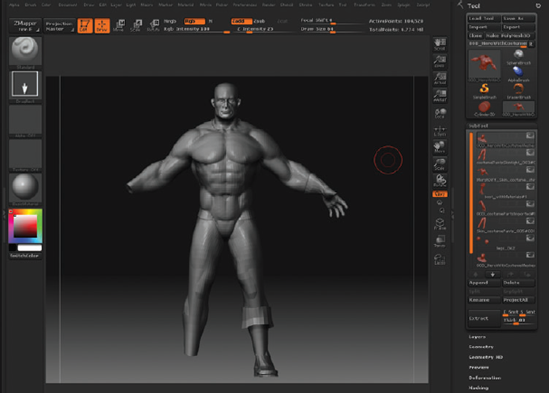
Begin by loading the hero body ZTool. Draw the model on the canvas, and enter edit mode. Select ZPlugin → Subtool Master to load Subtool Master.
From the Subtool Master menu, click the Multi Append button (Figure 10.26). This will open a file0 browser. Go to the location where you saved your costume meshes, or load the sample ones off the DVD. You can select multiple files by Ctrl-clicking them in the menu. Click OK to import the selected files as subtools (Figure 10.27). You can mirror parts such as the gloves and boots later.
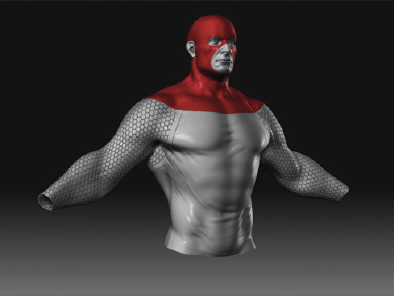
Select the Mask subtool, making it active. You can also choose to hide the other tools at this time. I have kept the head and eyes visible to assist in sculpting the mask (Figure 10.28).
The first detail you will add is a seam running the length of the mask. This trick involves a creative use of an undocumented ZBrush feature, which was first demonstrated to me by Brandon Lawless at Gentle Giant Studios.
When the model is in PolyFrame mode and you have the Lasso tool selected, Ctrl+Shiftclicking an edge will hide a ring of edges. By using this technique you can isolate a ring of edges running the entire midsection of the mask ZTool. Mask this ring, and then inflate it to create what appears to be a seam in the fabric.
This can be a tricky approach as you start to get into the higher subdivision levels because of the difficulty of clicking an edge between two points. It may take some patience. See the associated video on the DVD for the process in action. You will also start from the lower subdivision levels and work your way up to simplify the process.
Hide all other subtools but the mask. At subdivision level 1, turn on frame mode with Shift+F, and make sure that lasso selection mode is on by clicking the Lasso icon on the right-side dock. You may also find it useful to polygroup the entire head by selecting Tools → Polygroups → Group Visible. If the head belongs to multiple polygroups, it is possible that clicking will simply select groups rather than the edge ring. This will clean up the polygroups; because you will be adding more as you progress, starting with just one can simplify the process.
Lastly, you will want to turn on double-sided render by selecting Tool → Display Properties and clicking the Double button. This will allow you to see any internal polygons that might be facing away from the camera view.
Ctrl+Shift-click an edge between two points above the ear, as shown in Figure 10.29. Notice in the image that the crosshair of the cursor lies between the points when the button is clicked. This will hide the edge ring. Repeat the process for a ring of faces beneath the ear extending to the shoulder, as shown in Figure 10.30.
Now invert the selection so that only the edge rings are visible by Ctrl+Shift-dragging the background. This will invert the visible selection, as shown in Figure 10.31. Polygroup these separately from the rest of the head by selecting Tool → Polygroups → Group Visible. They will now display a different color. Ctrl+Shift-click the background to show the entire head again. You will now add a subdivision level with Ctrl+D.
At the next subdivision level, the edge ring you selected will have two strips of poly edges (Figure 10.32). Isolate the polygroup by pressing Ctrl+Shift-click, and then use the same process to hide one of the poly strips. Be sure to do this for the strip at the top of the head as well as the shoulder. Once the strip is isolated, polygroup it, and show the entire mesh again. You will now see three separate polygroup colors on the mesh. There is the head (in green in this image) and two colored strips for the edge rings (here, yellow and purple), as shown in Figure 10.33. To simplify the process, hide one of the edge rings for the seam, and polygroup the remaining two polygroups by selecting Tool → Polygroups → Group Visible. This will reduce the number of polygroups to 2.
The process is repeated for the next subdivision level. Divide the mesh with Ctrl+D, and isolate the strip polygroup. Again, it is now two strips of faces instead of one. Hide one strip, and polygroup the remaining faces. Repeat this process until level 4 or 5. This will allow you to polygroup the finest possible line of polygons to use as a seam. The higher the subdivision levels, the thinner and more realistic this seam line will appear. At some point, you will run out of subdivision levels, or the mesh will become so fine you can no longer hide rings with this technique.
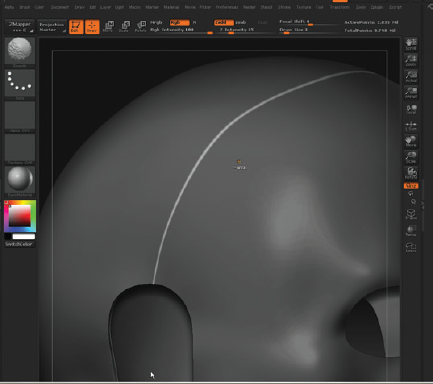
To create the seam, select and mask the edge ring at the highest subdivision level. Reveal all of the mesh, and invert the mask so only the single strip of polygons is unmasked (Figure 10.34). Select Tool → Deformation → Inflate, and set the slider to −4 to inflate the seam into the head.
Clear the mask, and save your work. Figure 10.35 shows the completed seam.


At this stage, you are ready to start sculpting the wrinkles and buckles of the mask fabric. You will do this using the Standard brush with Lazy Mouse turned on and the Morph brush as a blender.
Before you do this, you will store a morph target at the highest subdivision level. This will allow you to use the Morph brush as a blender or eraser on the detail you are about to sculpt. Store a morph target by selecting Tool → Morph Target → Store MT. At this stage, save your ZTool.
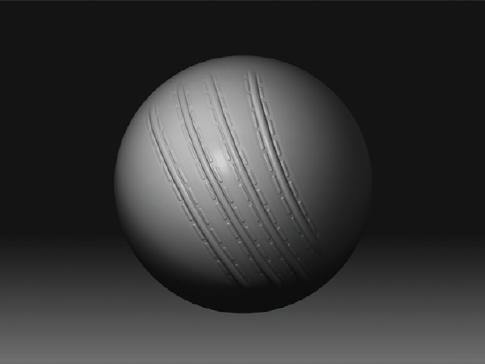
Select the Standard brush and Alpha 01. Turn on Lazy Mouse in the Stroke menu, or use the L hotkey. Stroke along the surface, creating striations in the fabric in areas of stretching or compression. In Figure 10.36 you can see I have added stretch marks to the shoulders as well as the chest. Feel free to go overboard at this point. You will use the Morph brush to reduce the number of marks and blend them into the surface. Rotate to the back of the head, and add compression wrinkles to the base of the skull (Figure 10.37). Another area that is prime for these kinds of wrinkles is under the chin (Figure 10.38). Use the Standard brush with ZSub to cut wrinkles here.
Make sure to create small hash marks along the seam from the front to back. These will help give the impression of the fabric bunched where it is joined (Figure 10.39).
Select the Morph brush, and set the intensity to 8. Stroke along the surface to blend back the previous marks made by the Standard brush. You will see how the Morph brush acts as a blender when set to a lower intensity. If you need to erase a mark completely, set the ZIntensity to 100. This is superior to using Smooth, since the Smooth brush would destroy the seam detail. Because you stored the morph target after making the seam, the Morph brush will not disturb this element at all. Figure 10.40 shows the Morph brush used to erase details at the neck and jawline. Notice that the seam remains intact.
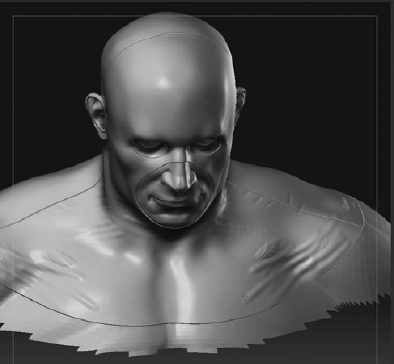
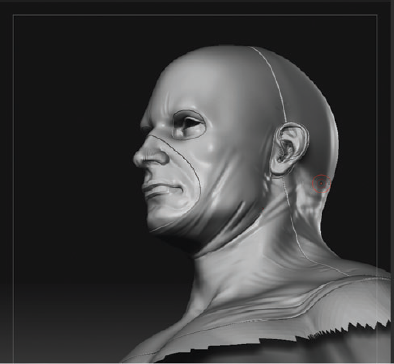
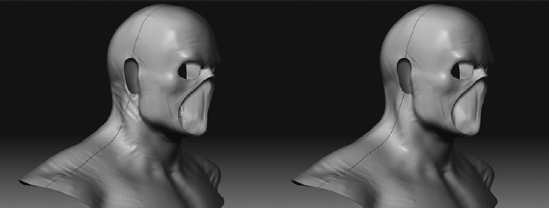
Use the Move brush to create a furrowed brow on the mask. Use the Standard brush to add forehead wrinkles so an expression is apparent beneath the mask (Figure 10.41). Make sure to work this area with X symmetry off; otherwise, the forehead will look perfectly symmetrical and highly unnatural.
Add cheek striations; also add bunched-up fabric in areas of high movement, such as beneath the chin, the jaw, the back of the skull, and the shoulders. Figure 10.42 shows the final mask.


You will now work on the shirt. The process will involve many of the same techniques we used to create the mask, especially for isolating edge rings to help create surface details.
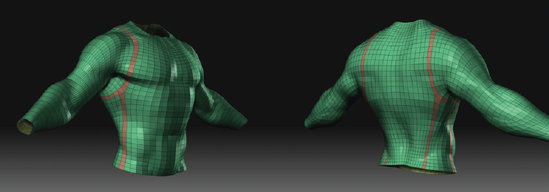
Select the Shirt subtool. You will isolate a seam line the same way on the shirt as you did for the hood. Figure 10.43 shows the loops isolated for the shirt panels. I want to give the impression the sleeves are separate material from the shirt. You will use Inflate to add a raised border instead of a recessed seam line.
Divide the shirt to level 5 or 6 depending on the limitations of your machine. Hide everything but the polygrouped loops. Mask them by Ctrl-clicking the background. Ctrl+Shift and drag a marquee off the model to reveal all geometry again, and invert the mask so the polygroup strips are unmasked (Figure 10.44).
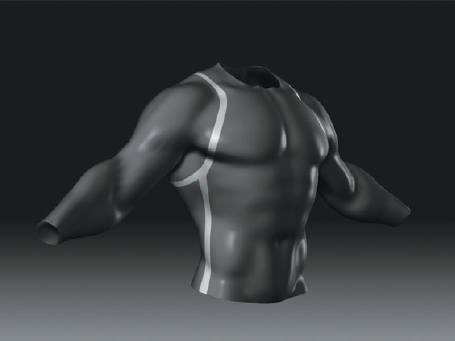
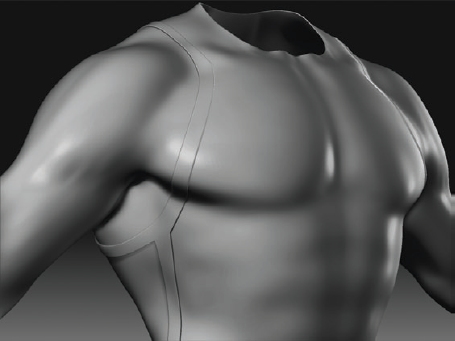
You will now inflate the strips using Tool → Deformation → Inflate. Set the slider to 5 to create the raised borders. The strips will now be offset from the surface, as shown in Figure 10.45. Clear the mask, and save your ZTool.
You will now move on to sculpting the stretching and compression of the fabric. Make sure to store a morph target as you did on the mask before you begin.
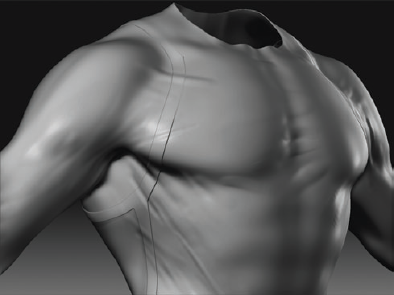
Use the Standard brush with Alpha 01 to sketch in stretch marks across the raised forms of the chest. Be sure to alternate between ZAdd and ZSub as you work (Figure 10.46).
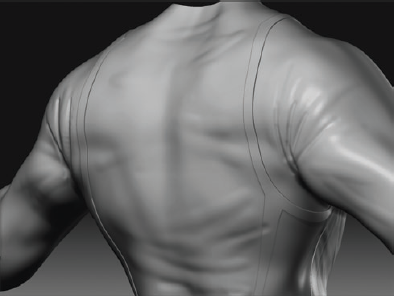
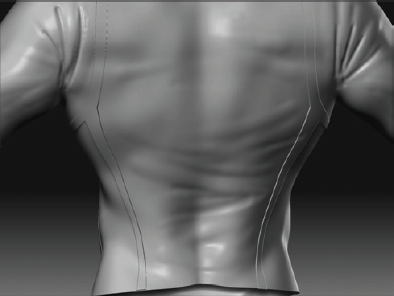
Rotate to the back and add a web of compression wrinkles radiating from the back of the armpit, as shown in Figure 10.47. You will also want to create a sense of fabric stretched across the muscles of the back. In Figure 10.48 I have used a zigzag pattern of strokes to create the sense of fabric settling against the muscles of the lower back and compressing toward the waist.
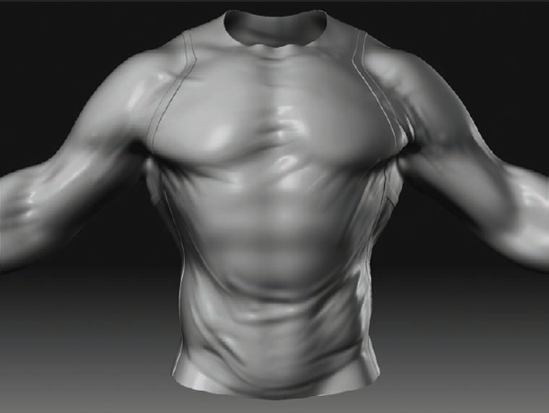
From the front view, use the same brush to create wrinkles that flow from the shoul-ders down the front of the shirt. Notice how the definition of the muscle forms is filled in by the fabric stretched between them. I also add tension lines beneath the Pectoralis muscles (Figure 10.49).
You have created some wrinkles and folds in the fabric of the shirt. You will now add a different kind of surface detail. I want to give the sleeves the impression of being made of a different material with a fine repeating texture. In this case, you will make a honeycomb texture that stretches over the sleeves. To do this, you will need to make use of the UV coordinates of the mesh.
UVs on the shirt have been laid out flat in Maya. The shirt is available on the DVD as an obj file as well as a ZTool. For more information on UVs, please see Chapter 9 as well as Eric Keller's exceptional guide to Maya, Mastering Maya 2009 (Sybex, 2009). I have imported the UVs into the shirt ZTool on the DVD so you won't have to manually lay them out for this tutorial.
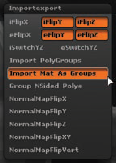
You will now import the new UVs into the model. Go to Preferences ImportExport, and turn on Import Mat As Groups (Figure 10.50). Step down to level 1. Import the
shirtUV.objfile into the current shirt ZTool by selecting Tool → Import and browsing to the file on the DVD. This will import the new UVs into the model but leave the higher subdivision levels and sculpted details intact.Enter frame mode by pressing Shift+F. You will notice there are new polygroups now (Figure 10.51). These groups correspond to the sleeves; the front, back, and side panes of the shirt; and the raised borders. This is because I assigned different materials to the mesh in Maya for areas I wanted to polygroup separately. See the boot video on the DVD for a demonstration of this process. These new polygroups will assist you in isolating the different parts of the shirt to detail them.
Step up to the highest subdivision level, and hide all parts of the mesh except for the sleeves (Figure 10.52).
Since the UVs are laid out flat, you can view a texture that can be tiled on the surface of the model. You will create a honeycomb texture for the shirtsleeves using a single PSD that can be tiled.
Select Texture → Import, and browse to
honeycomb.psdon the DVD. Load this texture into the Texture Map palette under the Tool menu. The honeycomb texture will now appear on the sleeves (Figure 10.53). You will now mask the geometry based on this color texture.Note
The honeycomb texture is a free alpha that was made available on
ZBrushCentral.comby the user Polaris. ZBrushCentral is a great source for user-generated content like this. Also be sure to checkZBrush.comfor an extensive library of alphas, texture, and materials!To mask the sleeves, select Tool → Masking, and click Mask By Intensity. This will create a mask on the surface of the ZTool based on the color intensity of the texture. Turn off the texture by selecting the Texture Off in the Texture Map sub-palette. (Figure 10.54). The mask will remain on the surface of the ZTool.
You will now inflate the honeycomb texture on the surface of the shirt mesh.
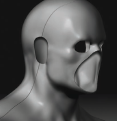
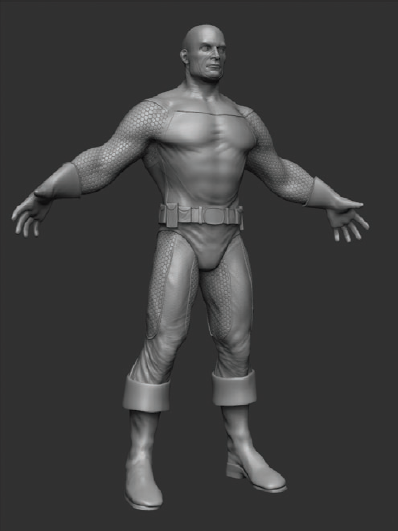
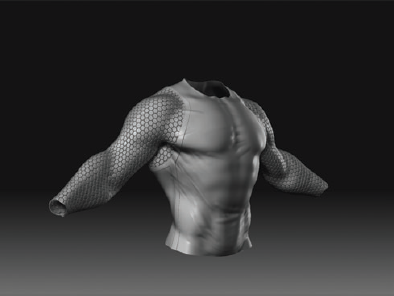
Select Tool → Deformation → Inflate, and set the slider to 4. The honeycomb pattern will now appear as etched into the surface of the arms. Ctrl+Shift-click the background to show the hidden parts of the shirt (Figure 10.55). Figure 10.56 shows the complete set of costume elements so far.


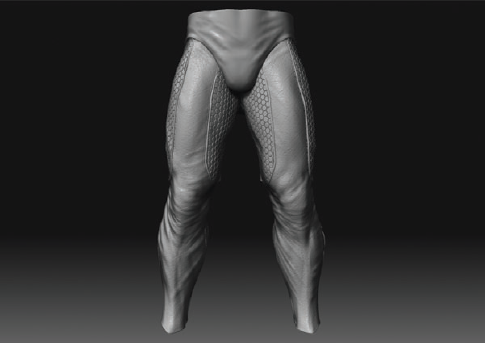
In this section you will sculpt the formfitting pants. You will be looking at ways of editing the ZTool to make it easier to work with by removing inside faces. You will also look at how to create the impression of tight-fitting leather material combined with other patterned material types. You will also look at sculpting seams with the Stitch brush.
You will begin by deleting the inner shell of the pants. You only need to retain the thickness, and you do not need the duplicate inner shell. Ctrl+Shift-click the inner shell polygroup to hide it, as shown in Figure 10.57.
If you are working along with the tutorial using the ZTool provided on the DVD, you can skip this step. The inner shell of faces has already been removed on your ZTool.
Once the inner shell is hidden, step up to the highest subdivision level, and mask everything by Ctrl-clicking the background (Figure 10.58). This mask will prevent you from losing details when you delete the hidden faces. This mask must be applied at the highest subdivision level.
Step back down to level 1. Under Tool → Geometry, click Delete Hidden to remove the inner shell faces. The outer shell remains, along with the faces of the width of the pants (Figure 10.59).
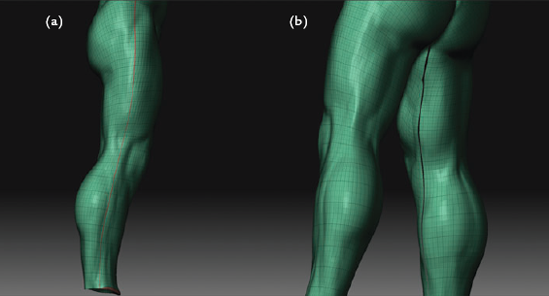
At this stage, create a seam polygroup for the outer and inner sides of the leg, just as you did previously. Figure 10.60(a) shows the polygroup for the outer leg seam, while Figure 10.60(b) shows the inner thigh seam. Isolate these seams with a mask, and using the Inflate slider, inflate them by −5. This will create a seam in the pants, as shown in Figure 10.61.

Many classic superhero costumes have the outer shorts placed over the tights. You want to create the appearance of fabric lain over fabric here in a technique similar to the one used on the borders of the shirt. You will create this outer layer of cloth for the shorts by creating a polygroup selection based on the topology and inflating it to create an offset from the rest of the legs.
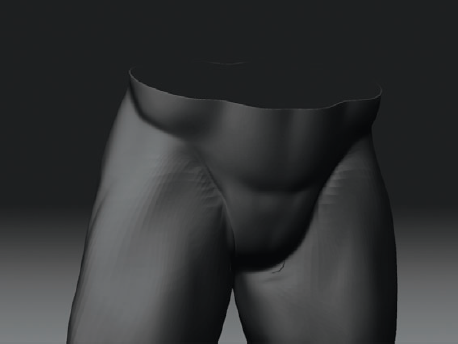
To begin, use the Claytubes brush to fill in the furrow between the glutes (Figure 10.62). This area is covered by cloth, so you wouldn't want this level of definition between the buttocks.
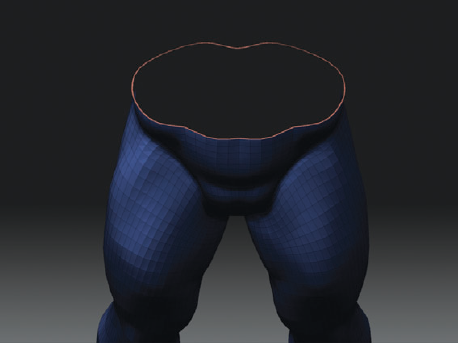
You will use topology masking to isolate the area for the shorts. Recall that when you laid out the topology for the pants, you were sure to lay edge loops in a loop around the legs. Topology masking will follow this edge loop pattern and allow you to define a perfect area for the shorts.
Step down a subdivision level, because topology masking is easier at the midlevels of resolution than at the highest. Press the W key to enter move mode. Hold down Ctrl, and drag from the pelvis toward the leg. You will see the mask grow along the leg. Stop when the mask lies approximately where the leg meets the pelvis (Figure 10.63).
Ctrl-click in the document window to invert the mask. Use the Smooth brush to remove the seam from the side of the leg where it overlaps the shorts. Since these will be sitting on top of the tighter pants, you wouldn't want the seam to continue across them (Figure 10.64).
Step up to the highest subdivision level. Select Tool → Masking → Invert to invert the mask so the legs are now unmasked. Alternately, you could Ctrl-click the document window off the model to invert the mask. Once the legs are unmasked and the shorts are masked, select Tool → Masking → HidePt to hide the legs (Figure 10.65). When these faces are isolated, polygroup them by selecting Tool → Polygroups → Group Visible.
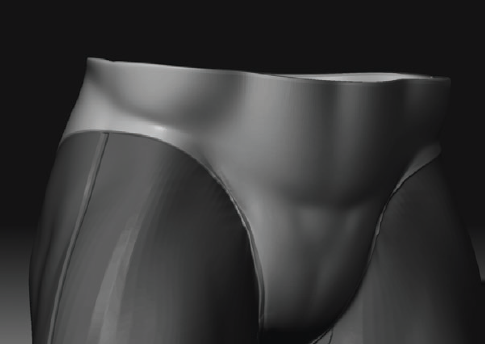
Now Ctrl+Shift-click the polygroups to mask the legs, leaving the shorts unmasked. Inflate the shorts by selecting Tool → Deformation → Inflate and setting the slider to 5. This will offset the shorts, as shown in Figure 10.66.


Now that all the seams and offsets are inflated, store a morph target. Save your work before moving on. The next step is to add some bunching of fabric at the buttocks and knees, as well as some stretching lines at the thighs.
Select the Standard brush with Alpha 01. Turn on Lazy Mouse with the L hotkey. Make sure to turn off X symmetry. When you are creating these folds and wrinkles, a perfectly symmetrical object will appear very unnatural. You will achieve much better results working with symmetry off and allowing the forms to become asymmetrical in these final stages.
Begin by adding some compression lines to the buttocks. Notice how they radiate out from the area of greatest compression beneath the buttocks. Carry these lines lightly out to the sides of the legs (Figure 10.67).
Rotate to the front. Use the same brush to create striations of cloth radiating from the inner thighs out and around the legs. Don't go overboard here; just add a slight indication of fabric across the muscle forms already there (Figure 10.68).
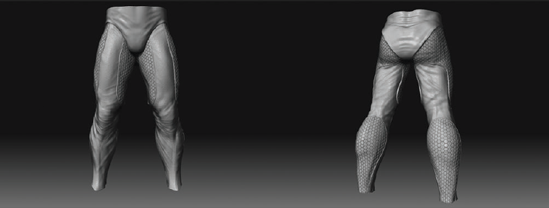
Return to the back view, and radiate folds from the inner thighs across the back of the legs. Here as well, take care that the wrinkles lightly traverse over the exist-ing muscle form. You want the impression of wrinkled fabric stretched over muscle (Figure 10.69). Also, be sure to move around the figure as you sculpt the folds. Just like sculpting any form, it will work out best if you are constantly moving around rather than working from one view. Drapery especially is defined by how it interacts with the figure in all views. Notice that I have masked the shorts in this view. This allows me to make long strokes with the Lazy Mouse without having to worry about affecting the outer layer of fabric. This helps create the impression that the wrinkles start under the shorts and extend out into view.
Return to the front view, and start to cluster finer folds at the knees. Since this is an area of high mobility, it is likely the fabric will gather here in smaller folds. This is also where the pants will eventually be tucked into the boots, which would also affect the surface quality of the fabric (Figure 10.70).
Complete the leg by adding more striations to the lower leg. Notice how the wrinkles flow from a high point near the back of the leg down to the front. Alternate the folds from left to right sides of the legs so they appear to interlock at the front of the shin. This interweaving helps add visual interest and create a sense of rhythm to the drapery (Figure 10.71). Be sure to use the Morph brush to blend off any areas that are too strong. Keep the Morph brush at a ZIntensity of 8 for the best results.


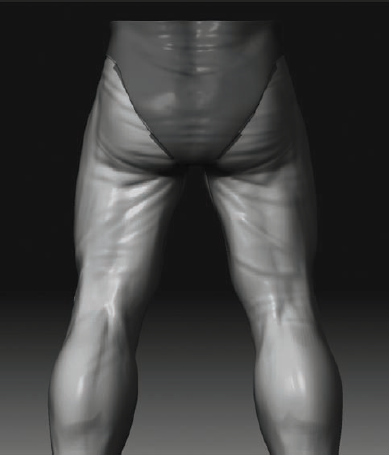
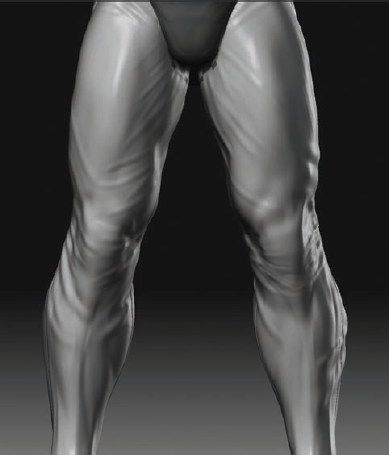
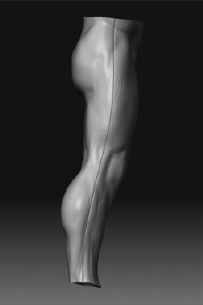
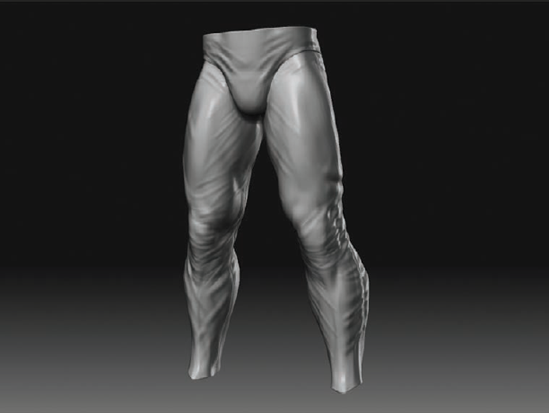
Figure 10.72 shows the sculpted folds, with overlay lines showing the general flow and rhythm I tried to keep in mind while sculpting. Try to find the flows on your own sculpture. Look at references of similar materials when possible, and try to remember to make the wrinkles tighter in areas of higher mobility or compression-like joints.

You are now ready to start adding some finer texture details to the pants. These include features such as different panels of material, leather and weave patterns, and more seams and detail elements. Because you have taken the time to add these wrinkles to the pants, any elements you add now will conform to the sculpted surface, making them look all the more convincing.
The next stages will utilize a texture map that can be tiled. You can lay out the UVs on your pants manually using Maya, Headus, or another UV layout tool, or you can simply load the UVed mesh included on the DVD. To load the UVs, step down to level 1, and import
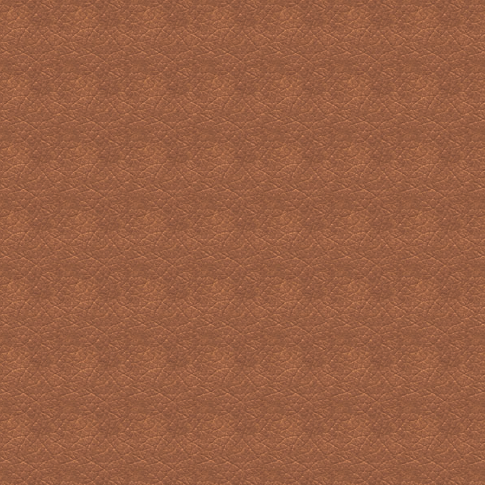
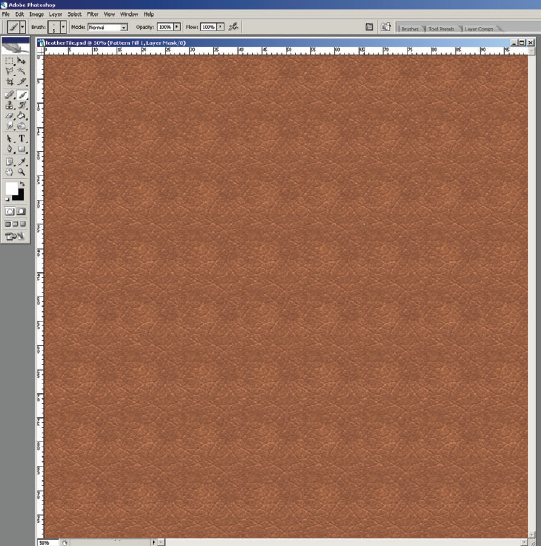
tightPantsUV.obj.You will begin by adding an overall leather texture to the pants. Select Texture → Import, and load
leatherTile.psdfrom the DVD. This is a tiled leather texture (Figure 10.73). Once loaded, this texture will cover the pants and give them the appearance of cracked leather.Select Tool → Masking, and choose Mask By Intensity. Then, using the Deformation → Inflate slider, inflate by −4 to create a craquelure of leather texture on the surface of the pants (Figure 10.74).
To add visual interest to the pants, you will now mask out some areas to create panels of different materials. You can incorporate the honeycomb tiles you used on the shirtsleeves in areas of the pants (Figure 10.75). To do this, you will mask out selections of the pants using the Lasso tool.
Make sure the Lasso button on the right dock of the screen is on. Press Ctrl and drag from the side view to create the mask selections you see in Figure 10.76. You can recreate this mask pattern or create your own. Remember, you can invert the mask by Ctrl-clicking the background.
Note
ZBrush allows you to store masks as alphas if you are working on a mesh with UV coordinates. The mask you see here has been stored as
PanelTiles.psdon the DVD. Load this file into the Alpha palette, and select Tool → Masking → Mask By Alpha to recreate the exact masking I have here. Be sure to turn off the alpha when you are done. You will look more at loading and storing alphas later in this section.You now need to clean the unmasked areas of any detail and noise. Use the Smooth brush to take down the leather texture in the unmasked areas. You want the surface to be smooth so the honeycomb tiles will appear crisp. You will also want to remove the seam on the pants in the unmasked areas (Figure 10.77).


The unmasked areas will be filled with the honeycomb tile texture that you used on the shirtsleeves. To do this, you will need to create a new texture that combines both the honeycomb pattern as well as this mask you have painted. This will involve saving the mask as an alpha. If you choose to skip these steps or if you don't have Photoshop installed, I have included the final mask file panelTiles.psd on the DVD for you to use.
Any complex mask in ZBrush can be saved for later recall and use as long as the mesh you are working on had UVs assigned. These can be hand-laid UVs like the ones on the pants mesh or any of the ZBrush automatic solutions such as AUV, GUV, or the new PUV tiles. To save your mask as an alpha, simply select Tool → Masking → Create Alpha.
This will create a new image file in the Alpha palette that represents your mask. This image can be exported as a PSD or TIFF file for later use. You can then load the alpha at any time in the future and use the mask from the Alpha button to restore the mask on the surface of your sculpture. This can save many hours of repainting complex masks when sculpting to texture mapping. It can also assist in creating complex masks for fine details, as you will soon see. Use the following steps to combine the current mask with the honeycomb texture to create a new alpha mask:
You will want the alpha generated to be 2KB resolution. The default size is 1KB, unless you have a larger alpha loaded in the Alpha palette when you generate the alpha mask. To do this, go to the UV map menu under the Tool menu, and set your resolution to 2048.
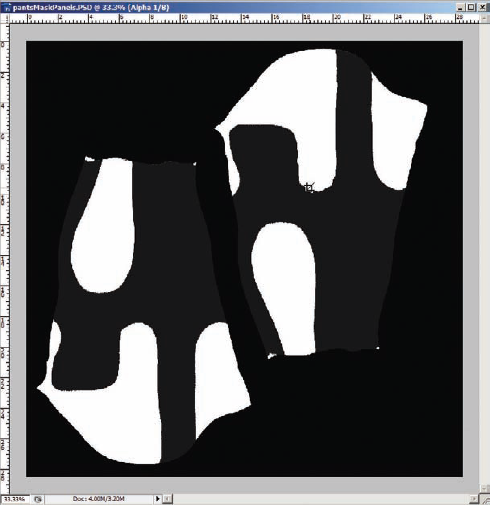
Now open the UV Map sub-palette menu under the Tool menu. Change your resolution to 2048. Go to the Masking sub-palette and click Create Alpha. A new 2K alpha will now be created based on your mask (Figure 10.78). Export this file as
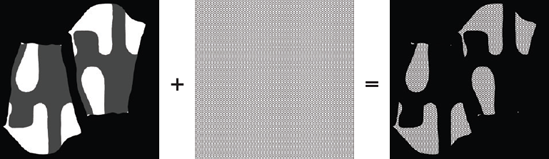
pantsMaskPanels. psd. I have included this mask on the DVD as a PSD file.You will now combine the mask you just exported from ZBrush with the honeycomb texture file to create a compound mask combining the two elements (Figure 10.79). This will allow you to have the unmasked areas filled with the honeycomb tiles. Open Photoshop, if you have it, and from the DVD load
honeycomb.psdas well as thepantsMaskPanels.psdfile you just exported from ZBrush.With the
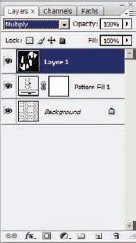
mask.psdfile open, press Ctrl+A to select all and Ctrl+C to copy. Move tohoneycomb.psd, and paste the file as a new layer by pressing Ctrl+V. You can now close thepantsMaskPanel.psdfile. This file will now be a layer over the honeycomb layer (Figure 10.80). Set the blending mode to Multiply, and the honeycomb texture will show through the white areas. You may now collapse the layers by selecting Layer → FlattenImage, and save this file aspanelTiles.psd(Figure 10.81). Be sure not to save over thehoneycomb.psdfile. You can now close Photoshop.Back in ZBrush, import
panelTiles.psdinto the Alpha palette. Select Tool → Masking → Mask By Alpha, and you will see your mask reappear on the surface with the addition of the honeycomb tiles. Using the Tool → Deformation menu, inflate the tiles by 5 (Figure 10.82).As a final detailing to the pants, you need to add a seam between the tiles and the leather pants. This will help transition between the two materials in a more natural way, rather than the abrupt change you have now.
Load
pantsTiles.psdinto the Alpha palette. This is the original mask for the pants. Using Tool → Masking → Mask By Alpha, mask the pants and invert the mask so the leather is now unmasked (Figure 10.83).ZBrush has a selection of brushes especially built for making stitches and seams. Select the Stitch3 brush from the Brush menu (Figure 10.84). Stitch3 creates a stitched seam as shown in Figure 10.85. It is custom built with Roll and Lazy Mouse options already set to create one seamless stroke. If you find it hard to keep the lines smooth, you can increase the Lazy Radius value under the Stroke menu. This increases the delay of the Lazy Mouse, helping you to make a more fluid stroke.
Stroke along the edge of the mask to create the seam, as shown in Figure 10.86. A useful technique (unless you're on a Mac, in which case you'll need to create your own shortcut) is to set the ZIntensity of the brush to Low, and use Ctrl+1 to repeat the stroke, building up the seam in increments. (On the Mac, the keystroke for ReplayLast is Command+1.) This helps if you find it difficult to create the seam in one brush stroke because the intensity appears too high. Continue the seams along the back of the leg as well.
Repeat the process by stroking along the panels on the rear of the calf. At this stage I also draw the stroke along the seams on the pants themselves (Figure 10.87).


Congratulations, you have completed the sculpting and detailing of the formfitting pants. This has involved building new geometry, capturing anatomical details, and generating a new mesh with thickness, as well as some advanced sculpting and masking techniques. Figure 10.88 shows the finished pants.
Congratulations! You have now completed working on costume elements. In this chapter you have learned some intermediate and advanced tools and processes to create complex costume elements for any style of character. You have also looked at techniques for sculpting different kinds of fabric and how they interact with the figure.