Chapter 16
Safari Web Browser
Now, we'll take you through one of the most fun things to do on your iPhone: surfing the Web. You may have heard that web surfing on the iPhone is a more intimate experience than ever before—and we agree! We'll show you how to touch, zoom around, and interact with the Web like never before with Safari on your iPhone. You'll learn how to set and use bookmarks, quickly find things with the search engine, open and switch between multiple browser windows, and even easily copy text and graphics from web pages.
Web Browsing on the iPhone
You can browse the Web to your heart's content via Wi-Fi or with your iPhone's 3G connection. Like its larger cousin, the iPad, your iPhone has what many feel is the most capable mobile browsing experience available today. Web pages look very much like web pages on your computer. With the iPhone's ability to zoom in, you don't even have to worry about the smaller screen size inhibiting your web browsing experience. In short, web browsing is a much more satisfying experience on the iPhone.
You can choose to browse in Portrait or Landscape mode, depending on your preference. Quickly zoom in on a video by double-tapping it or pinching open on it—the same motions you use to zoom in on text and graphics.
Why Do Some Videos and Sites Not Appear? (Flash Player Required)
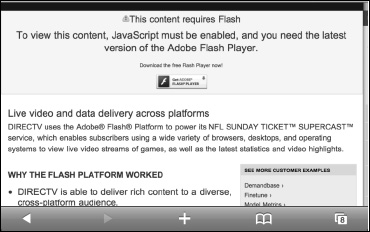
Apple does not support Flash on iOS and Adobe has recently decided to discontinue development of Flash Player Mobile. If you tap a video and the video does not play—or you see something like “Flash Plugin Required,” “Download the Latest Flash Plugin to view this video,” or “Adobe Flash Required to view this site”—then you will not be able to view the video or web page. Fortunately, an increasing number of sites are starting to use HTML5 video instead of Flash, including YouTube, Vimeo, TED, the New York Times, and Time magazine, all of which will play on your iPhone.
One way around this limitation: Some alternative browsers on the App Store (e.g., Skyfire) render Flash videos on their own servers and send HTML5 video to the iPhone instead.
An Internet Connection Is Required
You do need a live Internet connection on your iPhone—either Wi-Fi or 3G—to browse the Web (check out Chapter 4: “Connect to the Network” to learn more).
Launching the Web Browser
You should find the Safari (web browser) app on your Home screen. Usually, the Safari icon is in the Bottom Dock.

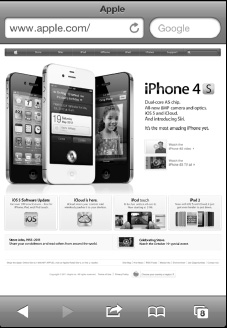
Touch the Safari icon and you will be taken to the browser's Home page. Most likely, this will be Apple's iPhone page.
Just turn your iPhone on its side to see the same page in the wider Landscape mode. As you find web sites you like, you can set bookmarks to easily jump to these sites. We will show you how to do this later in this chapter.
Layout of the Safari Web Browser Screen
As you look at your screen, notice that the Address bar is in the upper left of the screen. This bar displays the current web address.
If you are viewing a web page with suitable text content, you will notice the Reader button appear in the address bar. Tap Reader to see the web content in an easy-to-read format. Check out more on this in the “Safari Reader” section in this chapter.
The Search window is to the right of the Address bar. By default, this is set to Google search, but you can change it to another search engine if you want.
At the bottom of the screen are five icons: Back, Forward, Action, Bookmarks, and Pages view.

Typing a Web Address
The first thing you'll want to learn is how to get to your favorite web pages. Just like on your computer, you type in the web address (URL) into the browser. Follow these steps to enter a web address in Safari:
- To start, tap the Address bar at the top of the browser. You see the keyboard appear and the window for the Address bar expand.
- If there is already an address in the window and you want to erase it, press the
 at the right end of the bar.
 - Start typing your web address (you don't need the “
www.”). - When you start typing, you may see suggestions appear below the Address bar; just tap any of those suggestions to go to that page. The suggestions are very complete because they are pulled from your browsing history, bookmarks, the web address (URL), and web page titles.
- Remember the .com key at the bottom of the page. If you press and hold it, you will see .edu, .org, and other common domain types.
- When you are finished typing, tap the Go key to go to that page.
TIP: Don't type the “www.” because it's not necessary. Remember to use the colon, forward slash, underscore, dot, and .com keys at the bottom to save time.
TIP: Press and hold the .com key to see all the options: . org, .edu, .net, .de, and so on.
Moving Backward or Forward Through Open Web Pages
Now that you know how to enter web addresses, you'll probably be jumping to various web sites. The Forward and Back arrows ![]() at the bottom of the screen make it very easy to go to recently visited pages in either direction. If the Back arrow is grayed out, this chapter's “Using the Open Pages Button” section can help you figure out why.
at the bottom of the screen make it very easy to go to recently visited pages in either direction. If the Back arrow is grayed out, this chapter's “Using the Open Pages Button” section can help you figure out why.
Let's say you were looking at the news on the New York Times web site, and you jumped to ESPN to check sports scores. To go back to the New York Times page, just tap the Back arrow. To return to the ESPN site again, touch the Forward arrow.
Using the Open Pages Button
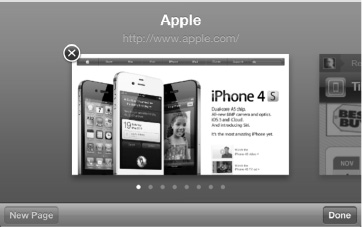
Sometimes, when you click a link, the web page you were viewing moves to the background and a new window pops up with new content (e.g., another web page or a video). You will see the page you were on move to the background and a new page being opened. In such cases, the Back arrow in the new browser window will not work.
Instead, you have to tap the Open Pages icon ![]() in the lower-right corner to see a list of open web pages, and then tap the one you want. In the example shown here, we touched a link that opened a new browser window. The only way to get back to the old one was to tap the Open Pages icon and select the desired page.
in the lower-right corner to see a list of open web pages, and then tap the one you want. In the example shown here, we touched a link that opened a new browser window. The only way to get back to the old one was to tap the Open Pages icon and select the desired page.
Zooming In and Out in Web Pages
Zooming in and out of web pages is very easy on the iPhone. There are two primary ways of zooming—double-tapping and pinching.
Double-tapping
If you tap twice on a column in a web page, the page will zoom in on that particular column. This lets you home in on exactly the right place on the web page, which is very helpful for pages that aren't formatted for a mobile screen.
To zoom out, just double-tap once more (you can see how this looks in the “Quick Start Guide” at the beginning of this book).
Pinching
This technique lets you zoom in on a particular section of a page. It takes a little bit of practice, but it will soon become second nature. Check out the “Quick Start Guide” to see how this looks.
Place your thumb and forefinger close together at the section of the web page you wish to zoom in on. Slowly pinch out, separating your fingers. You will see the web page zoom in. It takes a couple of seconds for the web page to focus, but it will zoom in and be very clear in a short while.
To zoom out to where you were before, just start with your fingers apart and move them slowly together; the page will zoom out to its original size.
Activating Links from Web Pages
When you're surfing the Web, often you'll come across a link that will take you to another web site. Because Safari is a full-function browser, you simply touch the link to jump to a new page.
Working with Safari Bookmarks
As soon as you start browsing a bit on your iPhone, you will want to quickly access your favorite web sites. One good way to do this is to add bookmarks for one-tap access to web sites.
TIP: You can sync your bookmarks from your computer's web browser (Safari or Internet Explorer only) using iCloud over the air or the iTunes app on your computer. Check out Chapter 3: “Sync with iCloud, iTunes and More” for more details.
Adding a New Bookmark
Adding new bookmarks on your iPhone takes just a few taps:
- To add a new bookmark for the web page you are currently viewing, tap the Action button
 at the bottom of the screen.
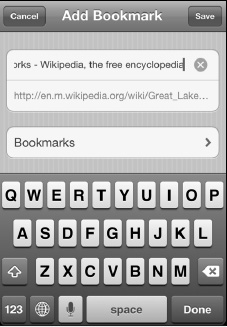
 - Choose Add Bookmark.

- We recommend that you edit the bookmark name to something short and recognizable.
- Tap Bookmarks if you want to change the folder where your bookmark is stored.
- When you're finished, tap the Save button.
Using Bookmarks and History
Once you have set a few bookmarks, it is easy to view and work with them. In the same area, you can also see and use your web browsing history. A very useful tool on your iPhone is the ability to browse the web from your History, just as you would on a computer. Follow these steps to do so:
- Tap the Bookmarks icon
 at the bottom of the page.
 - Swipe up or down to view all your bookmarks.
- Tap any bookmark to jump to that web page.
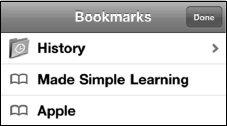
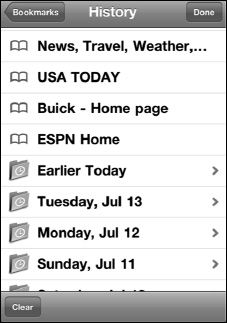
- Tap the History folder to view your recent history of visited web pages.
- Notice that, at the bottom of the list, you see additional folders for Earlier Today and previous days.
- Tap any history item to go to that web page.
TIP: To clear your history, tap the Clear button in the lower-left corner. You can also clear your history, cookies, and cache in the Settings app. Tap Settings; tap Safari; scroll to the bottom; and then tap Clear History, Clear Cookies, or Clear Cache.
Managing Your Bookmarks
It is very easy to accumulate quite a collection of bookmarks because setting them up is so easy. However, you may find you no longer need a particular bookmark, or you may want to organize them by adding new folders.
If you have organized your Phone Favorites list, you already know how to organize your bookmarks; you use the same steps.
As with other lists on your iPhone, you can reorder your Bookmarks list and remove entries. Follow these steps to do so:
- View your Bookmarks list as you did previously.
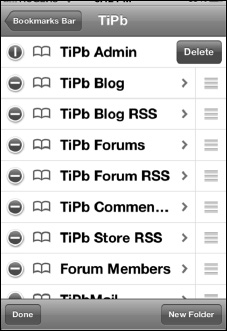
- Tap the Edit button in the lower-left corner.
- To reorder the entries, touch and drag the right edge with the three gray bars up or down the list. In this case, we are dragging the bookmark to the iPad Made Simple book page on Amazon. com up to the top.
- To create a new folder for bookmarks, tap the New Folder button in the lower-right corner.
- To delete a bookmark, tap the red Circle icon to the left of the entry to make it turn vertical.
- Tap the Delete button.
- When you are finished reordering and deleting entries, tap the Done button in the upper-left corner.
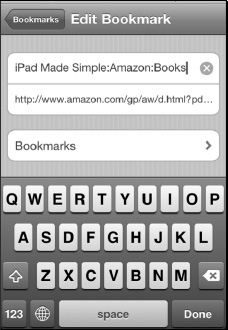
- To edit a bookmark name, folder, or web address, tap the bookmark name itself.
- Now you can make any adjustments to the name, web address, or folder.
- To change the folder where the bookmark is stored, tap the button below the web address. In this image, it says Bookmarks; but on your iPhone, it may be different. This bookmark points to the iPad Made Simple page on Amazon.com.
- Tap Done when you're finished.
Reading List
Reading List is a special type of bookmark that lets you quickly save a web article, so you can read it later at your leisure. The Reading List feature can sync via iCloud, so it's a great way to quickly mark articles on Safari on your home or work Mac or Windows PC to read on your iPhone or iPad while traveling. You can also use this feature to save a bookmark on your iPhone to read more comfortably when you get back to your iPad or PC.
Follow these steps to use the Reading List feature:
- Go to the article you want to save in Safari.
- Tap the Action button
 at the bottom middle of the page.
 - Tap Add to Reading List.
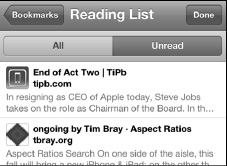
Follow these steps to view a Reading List article later:
![]()
- Tap the Bookmark button
 at the bottom right of the page.
 - Tap the Glasses icon for the Reading List option. (If you don't see the Glasses icon, you might be inside a Bookmarks folder. Just tap the Arrow icon at the top left to back out of the folder or folders you're in until the Arrow disappears, and you can see the Glasses icon.)

- To see everything in your Reading List, tap the All tab at the top left. To see only the articles you haven't read yet, tap the Unread tab at the top right.
- Tap the article you want to read.
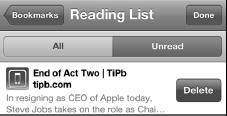
Finally, follow these steps to delete an article from Reading List:
- Swipe from left to right across the article you'd like to remove from Reading List.
- Tap the red Delete button.
Safari Reader
Safari's Reader feature allows you to enjoy an article on the web as a clean, clear page of nicely sized text, without the distraction of busy layouts or ads.
NOTE: While Safari does an excellent job detecting most web page articles because of the white variety of content and formatting, it might occasionally miss one. If you don't see the Reader button, it means Safari couldn't detect the article.
- Follow these steps to activate this feature:

- Go to the article you want to read.
- Tap the Reader button on the right side of the URL field, see Figure 16–1.
- Tap the Font Size button to make the type bigger or smaller.
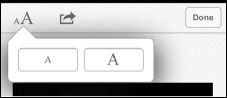
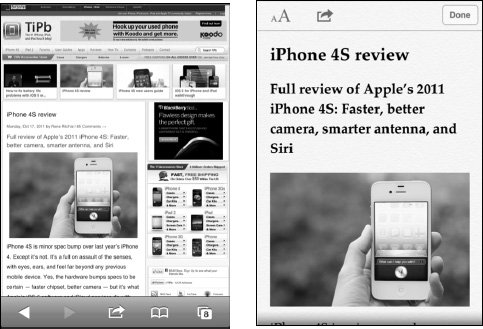
Figure 16–1. The same web page in standard view (left) and Reader View (right).
TIP: If you find yourself wishing you could get the functionality of both Reading List and Reader—along with other features like browser access, social sharing, and more—then check out App Store apps like Instapaper.
Safari Browsing Tips and Tricks
Now that you know the basics of how to get around, we will cover a few useful tips and tricks for making web browsing more enjoyable and faster on your iPhone.
Jumping to the Top of the Web Page
Sometimes, web pages can be quite long, which can make scrolling back to the top of the page a bit laborious. One easy trick is to tap the gray title bar of the web page; you'll automatically jump to the top of the page.
Emailing or Tweeting a Web Page
Sometimes while browsing, you find a page so compelling you just have to share it with a friend or colleague. Tap the Action button ![]() in the middle of the bottom bar, and then select Mail Link to this Page to create an email message with a link that you can send. Select Tweet to create a new Twitter message with a link you can share, as shown in Figure 16–2.
in the middle of the bottom bar, and then select Mail Link to this Page to create an email message with a link that you can send. Select Tweet to create a new Twitter message with a link you can share, as shown in Figure 16–2.
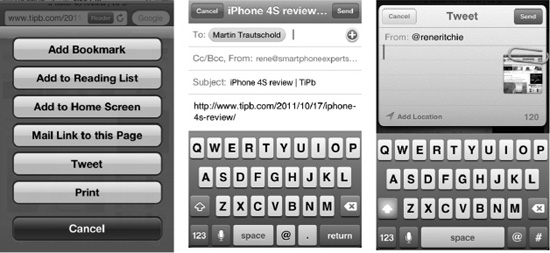
Figure 16–2. Using the Action button to do various functions with a Safari web page.
Printing a Web Page
With the iPhone, you can easily print any web page you come across to any AirPrint compatible printer over your local Wi-Fi network. Tap the Action button ![]() and then select Print.
and then select Print.
Watching Videos in Safari
You will often see videos on web sites. And you will be able to play many—but not all—of these videos. For example, videos formatted with Adobe Flash will not be playable on your iPhone (see our note at the beginning of this chapter).
When you tap the Play button, you will be taken out of Safari into the iPod video player.
You can then turn your iPhone on its side to view the video in Landscape, or wide-screen, mode.
Tap the screen to bring up the player controls if they have disappeared.
When you are finished watching the video and want to return to the web page, tap the Done button in the upper-left corner.
TIP: Check out the video player tips and tricks in Chapter 15: “Viewing Videos.”

Saving or Copying Text and Graphics
From time to time, you may see text or a graphic you want to copy from a web site. We tell you briefly how to do this in this section; however, to see how to get this done in more depth, including how to use the Cut and Paste functions, please see the “Copy and Paste” section in Chapter 2: “Typing, Copy and Search.” Here's a quick synopsis of how to copy text or a graphic from a web page:
- To copy a single word, touch and hold the word until you see it highlighted and the Copy button appears. Next, tap Copy.
- To copy a few words or entire paragraph, touch and hold a word until it is highlighted. Next, drag the blue dots left or right to select more text. You can flick up or down to select an entire paragraph. Finally, tap Copy.
TIP: Selecting a single word puts the copy feature in word-selection mode, where you can drag to increase or decrease the number of words selected. If you go past a single paragraph, it will typically switch to element-selection mode where, instead of corners, you get edges that you can drag out to select multiple paragraphs, images, and so on.
- To save or copy a graphic, touch and hold the picture or image until you see the pop-up asking if you would like to save or copy the image.
Saving Time with AutoFill
The AutoFill feature gives you a great way to save time typing your personal information, including usernames and passwords on web sites. The AutoFill tool can remember and fill in information required in web forms. You will save a lot of time by enabling AutoFill.
Check out the steps we show you later in this chapter in the “Enabling AutoFill” section to set up AutoFill to work on your iPhone.
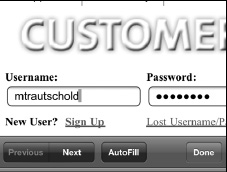
Once you enable the AutoFill option, just go to any web page that has a field to fill out. As soon as you touch the field, the keyboard will come up at the bottom of the screen. At the top of the keyboard, you will see a small button that says AutoFill. Touch it and the web form should be filled out automatically.
CAUTION: Having your name and password entered automatically means that anyone who picks up your iPhone will be able to access your personal sites and information. You may want to enable passcode security, as explained in Chapter 8: “Personalize and Secure.”
Entering Usernames and Passwords
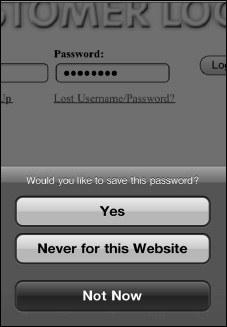
The first time you go to a web site where you have to enter a username and password, type them in and press Submit or Enter. At that time, AutoFill will ask if you want your iPhone to remember them.
Tap Yes if you want them to be remembered and automatically entered the next time you visit the site.
The next time you visit this login page, your username and password will be automatically filled in.
For Personal Information
There are many times on the Web where you have to enter your name, email address, home address, and more. With AutoFill set up and tied to your contact record on the iPhone, filling in these forms just takes a single tap of your finger.
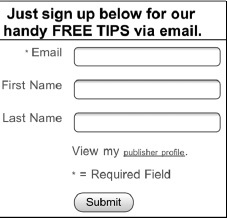
You will go to many sites with web forms that need to be completed. For example, check out this example of a web form on www.madesimplelearning.com for free iPhone tips. It would take a while to manually type your email address, first name, and last name.
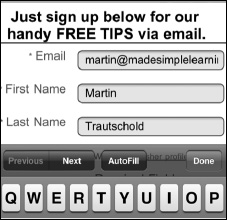
As soon as you tap the first field— Email, in this case—you see the AutoFill bar appear just above your keyboard.
Tap the AutoFill button, and your email address and name are immediately filled in from your contact record.
Adding a Web Page Icon to Your Home Screen
If you love a web site or page, it's very easy to add it as an icon to your Home screen. That way, you can instantly access the web page without going through Safari 's bookmark selection process. You'll save lots of steps by putting the icon on your Home screen. This is especially good for quickly launching web apps (e.g., Gmail from Google or web-based games).
Follow these steps to add a web app's icon:
- Tap the Action button
 at the bottom of the browser.
 - Tap Add to Home Screen.
- Adjust the name to shorten it to ten or fewer characters; you should do this because there's not much room for the icon's name on your Home screen.
- Tap the Add button in the upper-right corner.

Adjusting the Safari Browser Settings
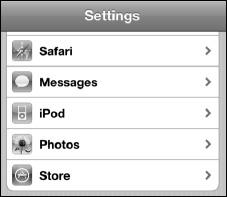
As with other settings we've adjusted so far, the settings for Safari are found in the Settings app.
- To access settings for Safari, tap the Settings icon.
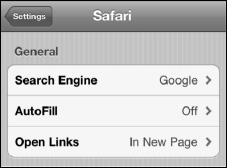
- Tap Safari.
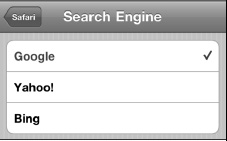
Changing the Search Engine
By default, the search engine for the Safari browser is Google. To change this to Yahoo or Bing, touch the Search Engine button and then choose the new search engine.
TIP: If you don't want to change your default search engine, you can use Siri as a way to occasionally search Yahoo! or Bing. Just activate Siri and say “Search Yahoo! for…” or “Search Bing for…” and Siri will get you the results.
Enabling AutoFill
As we showed you earlier in this chapter, AutoFill is a convenient way to have Safari automatically fill out web page forms that ask for your name, address, phone number, or even username and password. It can save you a tremendous amount of time typing and retyping your name and other information.
To enable the AutoFill option, follow these steps:
- From the Safari menu in the Settings app, tap AutoFill.
- Set the switch next to Names & Passwords to ON.
- Set the switch next to Use Contact Info to ON.
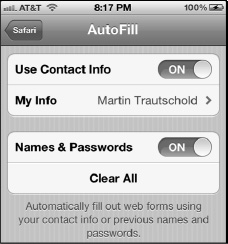
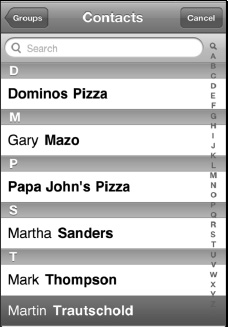
- After setting Use Contact Info to ON, you will be brought to your Contacts list to select a contact to use.
- Swipe up and down to find someone or double-tap the top bar that says Contacts to bring up the Search window.
- Once you find the contact you want to use, tap it to be returned to Safari's Settings screen.
Adjusting Privacy Options
Turning on the Private Browsing option means that no information, history, or cookies will be stored when you visit web sites. If you're concerned about other people knowing which websites you visit or about the web sites you visit tracking you, then you should toggle Private Browing to the ON position.
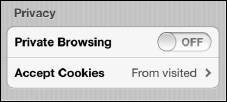
You can also Clear History and Clear Cookies and Data options.

TIP: If you notice your web browsing get slow or sluggish—or if Safari is crashing on you frequently—then try clearing both your History and Cookies and Data by tapping them and confirming your choices.
Adjusting Security Options
Under the Security heading, the Fraud Warning, JavaScript, and Block Pop-ups options should be set to ON by default. You can modify any of these settings by sliding a given switch to OFF.
NOTE: Many popular sites like Facebook require JavaScript to be ON.

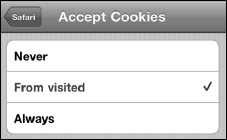
Tap the Accept Cookies button to adjust your browser's ability to accept cookies to Always, Never, or From visited. We recommend keeping it as From visited. If you make it Never, some web sites will not work properly.