
Chapter 18
Contacts and Notes
Your iPhone gives you immediate access to all your important information. Just like your computer, your iPhone can store thousands of contacts for easy retrieval. In this chapter, we'll show you how to add new contact, customize your contacts by adding new fields, organize your contacts with groups, quickly search or scroll through contacts, and even see a contact's location with the iPhone's Maps app. We will also show you how to customize the Contacts view so it is sorted and displayed just the way you like it. Finally, we will cover a few troubleshooting tips that will save you some time when you run into difficulties.
We will also give you an overview of the Notes app, which you can use to write notes, make grocery lists, and make lists of movies you'd like to watch or books you'd like to read. We will show you how to organize and email notes to yourself or others. Ideally, we hope that Notes will become so easy on the iPhone that you can eventually get rid of most, if not all, of your paper sticky notes!
What is also great is that you can use iCloud to wirelessly synchronize, share and back up your contacts and notes. So you never have to worry about losing your important information or whether or not you have the latest information on your device or computer.
Loading Your Contacts onto the iPhone
Chapter 3: “Sync withiCloud, iTunes and More” covered how to load your contacts onto the iPhone using the iTunes app on your Mac or Windows computer. You can also load contacts onto your phone using the Google Sync or iCloud services.
TIP: You can add new contact entries from email messages you receive. Learn how in Chapter 17: “Communicate with Email.”
When Is Your Contact List Most Useful?
The Contacts app is most useful when two things are true:
- You have many names and addresses in it.
- You can easily find what you need.
Improving Your Contact List
We have a couple of basic rules that can help you make your contact list on your iPhone more useful:
Rule 1: Add anything and everything to your contacts.
You never know when you might need that obscure restaurant name, plumber's number, and so on.
Rule 2: As you add entries, make sure you think about how to find them in the future (first name, last name, company).
We have many tips and tricks in this chapter to help you enter names, so you can find them instantly when you need them.
TIP: Here's a good way to find restaurants. Whenever you enter a restaurant into your contacts list, make sure to put the word “restaurant” into the company name field, even if it's not part of the name. When you type the letters “rest,” then you should instantly find all your restaurants!
Adding a New Contact on Your iPhone
You can always add your contacts right on your iPhone. This is handy when you're away from your computer—but have your iPhone—and need to add someone to your contacts. It's very easy to do; the next section will show you how.

Start the Contacts App
From your Home screen, touch the Contacts icon and you'll see the All Contacts list. Tap the Plus Sign button (+) in the upper-right corner to add a new contact, as shown in Figure 18–1.
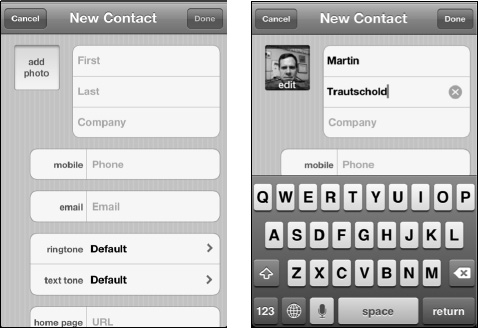
Figure 18–1. Entering a new contact name
Tap each field to enter the new contact's first name, last name and Company name.
TIP: Keep in mind that the contacts search feature uses first, last, and company names. When you add or edit contacts, adding a special word to the company name can help you find a particular contact later. For example, adding the words “Cece friend” to the Company field can help you find all of Cece's friends quickly using the search feature.
Under the First Last button are fields for mobile phone, email, ringtone, text tone, home page, add new address and add field. Under that, you can Link contacts together.
Adding a New Phone Number
![]()
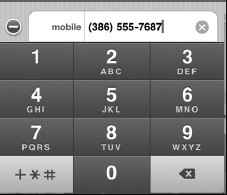
Tap the Phone button and use the Numbers keyboard to input the phone number.
TIP: Don't worry about parentheses, dashes, or dots—the iPhone will put the number into the correct format. Just type the digits of the area code and number. If you know the country code, it's a good idea to put that in, as well.
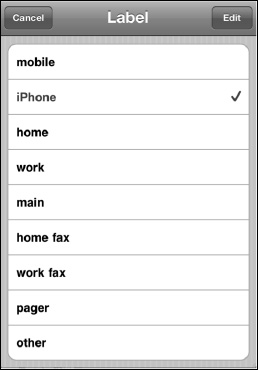
Next, choose which type of phone number this is—mobile, home, work, or other. There are nine fields you can choose from, and there's also a Custom field if you find none of the built-in fields apply.
TIP: Sometimes you need to add a pause to a phone number—for example, when the phone number is for someone at an organization where you have to dial the main number and then an extension. This is easy to do on the iPhone. You just tap the Symbols button(+*#) and then tap Pause or Wait. Pause will add a comma between the main number and the extension, like this: 386-555-7687, 19323. When you dial this number (e.g., from your iPhone), your phone will dial the main number, pause for two seconds, and then dial the extension. If you need more of a pause, simply add more commas. Wait will add a semi-colon between the main number and the extension (or conference call ID, or whatever extra digits you may need to enter). Once the first number is dialed, a second button will appear with the extra numbers. Tapping it will dial them.
Adding Email Addresses
![]()
Touch the Email tab and enter the email address for your contact. You can also touch the tab to the left of the email address and select whether this is a home, work, or other email address.
After you add one address, you will see another field appear to add more email addresses.
Custom Ringtone or Text Tone
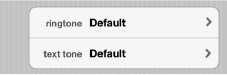
Touch the ringtone or text tone tabs to select a custom ringtone or text tone when this person calls or sends you a text message.
Entering Web Site Addresses
![]()
You will also see a home page field in which you can enter the address of your contact's web site or even multiple web sites.
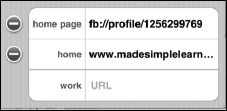
NOTE: If you used iCloud to sync your contacts, iCloud may automatically look for a Facebook homepage to integrate into the contact info.
Adding the Street Address
![]()
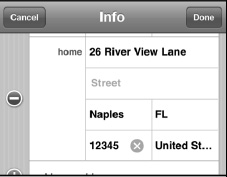
Below the home field are the fields for adding the address. Input the Street, City, State, and Zip Code. You can also specify the Country and whether this is a home or work address.
Adding New Fields
![]()
Tap the Add Field tab and select any of the suggested fields to add it to that particular contact (see Figure 18–2).

Figure 18–2. New fields available to add to your Contact entry
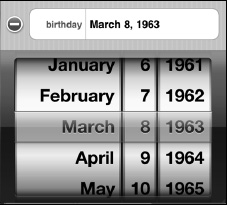
When you touch Birthday, you're presented with a wheel. You can turn the wheel to the corresponding date to add the birthday to the contact information.
When you are finished, just touch the Done button in the upper-right corner of the New Contact form.

TIP: Suppose you meet someone at the bus stop—someone you want to remember. Of course, you should enter your new friend's first and last names (if you know them); however, you should also enter the words “bus stop” in the Company name field. Then, when you type the letters “bus” or “stop,” you should instantly find everyone you've met at the bus stop, even if you can't remember their names!
Adding a Photo to Contacts
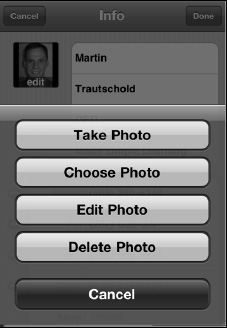
You may want to associate a photo with a contact. From the New Contact screen we've been working in, simply touch the Add Photo button next to the First Last tab.
If you are changing a photo when you are in “edit contact” mode, you'll see edit at the bottom of the existing photo.

After you touch the add photo button, you'll see that you can do the following:
- Take Photo
- Choose Photo
If there's a photo already in place, you can also do these things:
- Edit Photo
- Delete Photo
To choose an existing photo, select the photo album where the picture is located and touch the corresponding tab. When you see the picture you want to use, just touch it.
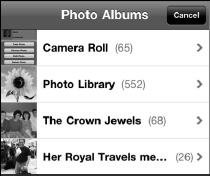
You'll notice that the top and bottom of the photo become grayed out and that you can manipulate the picture by moving it, pinching to zoom in or out, and then arranging it in the Picture window.
Once the picture is sitting where you want it, just touch the Choose button in the lower-right corner and that picture will be set for the contact.

TIP: If you just moved into a new neighborhood, it can be quite daunting to remember everyone's name. Therefore, it's good practice to add the word “neighbor” into the Company name field for every neighbor you meet. To instantly call up all your neighbors, simply type the letters “neigh” to find everyone you've met!
Searching Your Contacts
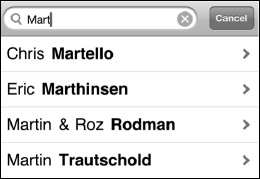
Let's say you need to find a specific phone number or email address. Just touch your Contacts icon as you did previously, and you'll see a Search box at the top of your All Contacts list (see Figure 18–3).
TIP: If you are somewhere in the middle or bottom of your Contacts list, you can quickly jump to the top of the Contacts screen and see this Search window by tapping the time at the very top of your iPhone.

Figure 18–3. The contacts Search box
To find a contact, enter the first few letters of any of these three searchable fields:
- First Name
- Last Name
- Nickname
- Company Name

The iPhone begins to filter immediately and displays only those contacts that match the letters typed.
TIP: To further narrow the search, hit the Space key and type a few more letters.
When you see the correct name, just touch it and that individual's contact information will appear.
Quickly Jump to a Letter by Tapping and Sliding on the Alphabet
If you hold your finger on the alphabet on the left edge of the screen and drag it up or down, you can jump to that letter.
Search by Flicking
If you don't want to manually input letters, you can just move your finger and flick from the bottom up, and you'll see your contacts move quickly on the screen. Just continue to flick or scroll until you see the name you want. Tapa name and the contact information for that person will appear.
Search Using Groups
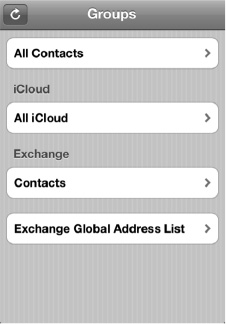
If you have your contacts sorted by groups on your PC or Mac and you sync your iPhone with your computer or over the air using iCloud then those groups will be synced to your iPhone. When you start your Contacts app, you will see Groups at the top. Under the Groups heading, you will see All Contacts.
Choose All Contacts to search all the available contact information on the iPhone.
If you have multiple accounts synced, you will see a tab for each individual account and one for All Contacts at the top.
This example shows two groups—one is from a Microsoft Exchange account (i.e., a company email account), and one is from a group of iCloudontacts.
If you have an Exchange ActiveSync account and your company has enabled it, your Exchange Global Address List shows up here, under Groups, as well. You can search to find anyone in your company there.
NOTE: You can't create groups in the Contacts app on the iPhone—they must be created on your computer or synced when you add contact accounts to your iPhone.
Adding Contacts from Email Messages
Often you'll receive an emailmessage and realize that the contact is not in your address book. Adding a new contact from an emailmessage is easy.
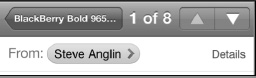
Open the email message from the contact you'd like to add to your Contacts list. Next, in the email message's From field, just touch the name of the sender next to the From: tag.
If the sender is not in your address book, you'll be taken to a screen that lets you choose whether to add that email address to an existing contact or to create a new one.
If you select Create a New Contact, you'll be taken to the same New Contact screen we saw earlier (see Figure 18–1).
But suppose this is someone's personal email address, and you already have an entry for that person with a work email address. In that case, you would select Add to Existing Contact and choose the correct person. Next, you'd give this email address a new tag—personal, in this case.
Linking a Contact to Another App
You might have contact information for the sender of the email message in another app on the phone. The iPhone makes it easy to link these contacts together.
For example, assume Steve, the sender of the email message, is in a list of your LinkedIn contacts, but not a contact on your iPhone, for some reason. Here is how you can link his contact information in your iPhone to the information you have in the LinkedIn app:
- Add him to your contacts, as shown previously.
- Start the LinkedIn app—see Chapter 25: “Social Networking” for more information on the topic.
- Find your contact information for Steve to verify that he is in your LinkedIn app.
- Go to the Connections icon.
- Choose Download All in the top-right corner.
- The LinkedIn app will inform you that doing this will add the photo, current company and title, email addresses, and web sites associated with this contact (see Figure 18–4).
- This is exactly what you want in your iPhone contacts, so choose Download All New Connections.
- Steve's picture and updated information are then brought into his contact information on your iPhone.
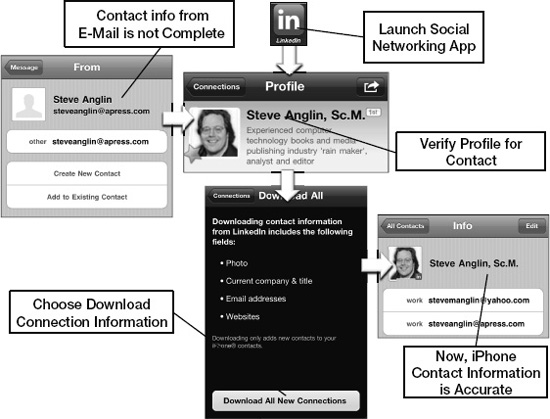
Figure 18–4. Linking a new contact in an email message to an existing social networking contact
TIP: Learning the names of the parents of a school-age child's friends can be fairly challenging. In the First field, however, you can add, not just the name of your child's friend, but also the names of the child's parents (e.g., First: Samantha (Mom: Susan, Dad: Ron)). Next, in the Company field, add the name of your child and “school friend” (e.g., Cece school friend). Now, just typing your child's name in the Search box of your All Contacts list instantly finds every person you ever met at your child's school. Now you can say, without missing a beat: “Hello, Susan, great to see you again!” Try your best to covertly look up the name.
Sending a Picture to a Contact
If you want to send a picture to a contact, then you will need to do that from the Photos app (see Chapter 20: “Working with Photos”).
Sending an Email Message from Contacts
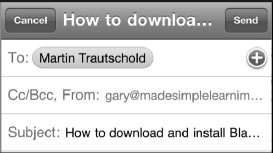
Many of the core apps (e.g., Contacts, Mail, and Messages) are fully integrated, so one app can easily trigger another. If you want to send an emailmessage to one of your contacts, simply open the contact andtap the email address. The Mail app will launch, and you can compose and send an email message to this person.
Start your Contacts app by touching the Contacts icon. Either search or flick through your contacts until you find the contact you need.

In the contact information, touch the email address of the contact you'd like to use.
You'll see that the Mail program launches automatically with the contact's name in the To: field of the email message. Finally, type and send the message.
![]()
Showing Your Contacts Addresses on the Map
One of the great things about the iPhone is its integration with Google Maps. This is very evident in the Contacts app. Let's say you want to map the home or work address of any contact in your address book. In the old days (pre-iPhone), you'd have to use Google, MapQuest, or some other program, and then laboriously retype or copy and paste the address information. This is very time-consuming—but you don't have to do this on the iPhone.
Simply open the contact as you did earlier. This time, touch the address at the bottom of the contact information.
Your Maps app (which is powered by Google Maps) immediately loads and drops a Push-Pin icon at the exact location of the contact. The contact's name will appear above the Push-Pin.
![]()
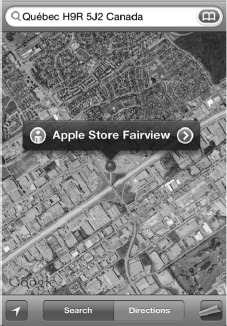
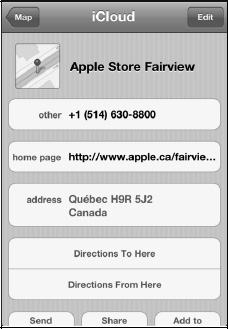
Touch the tab on the top of the Push-Pin to get to the Info screen.
Now you can select Directions To Here or Directions From Here.
Next, type the correct start or end address and touch the Route button in the lower-right corner. If you decide you don't want the directions, just tap the Clear button in the top left.
What if you had just typed the address in your Maps app, instead of clicking from your contact list? In that case, you might want to touch Add to Contacts to add this address.

TIP: To return to your contact information, tap the Map button, exit Maps, and then start up Contacts. You can also use multi-tasking (see Chapter 7: “Multitasking and Siri”) by double-clicking the Home button and choosing the Contacts app.
Changing Your Contact Sort and Display Order
Like other settings, the Contact app's options are accessible via the Settings icon.
Touch the Settings icon, scroll down to Mail, Contacts, Calendars, and then touch the tab.
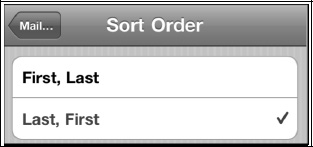
Next, scroll down until you see Contacts and the two options underneath it. To change the sort order, touch the Sort Order tab and select whether you want your contacts sorted by first name or last name.
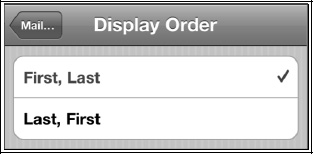
You may want to change how your contacts are displayed. Here's where you get it done; you can choose First, Last or Last, First. Tap the Display Order tab and choose whether you want your contact displayed in first name or last name order. Tap the Mail, Contacts… button in the upper-left corner to save your settings changes.
Searching for Global Address List(GAL) Contacts
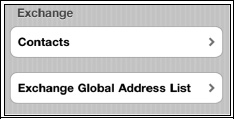
If you have an Exchange account configured, you should have an option for a Global Address List. This gives you access to your Global Address List if you are connected to your organization's server.
Open your Contacts app and look under Exchange for a tab that says Exchange Global Address List.
Contacts Troubleshooting
Sometimes, your Contacts app might not work the way you expect. (If you don't see all your contacts, review the steps in the Chapter 3: “Sync with iCloud, iTunes and More”for information on how to sync with your address book application.)Make sure you have selected All Groups in the settings ofthe iTunes app.
TIP: If you are syncing with another contact application, such as Contacts in Gmail, then make sure you select the option closest to All Contacts, rather than a subset like a particular group.
When Global Address List Contacts Don't Show Up (For Microsoft Exchange Users)
Sometimes contacts in the Global Address List won't show up on your iPhone. If this occurs, begin by making sure you are connected toa Wi-Fi or 3G cellular data network.
Next, check your Exchange settings and verify you have the correct server and login information. To do so, tap the Settings button, and then scroll to and touch Mail, Contacts and Calendar. Find your Exchange account on the list and touch it to look at the settings. You may need to contact technical support at your organization to make sure your Exchange settings are correct.
The Notes App
If you are like many people, your desk is filled with little yellow sticky notes—notes to do everything imaginable. Even with our computers, we still tend to leave these little notes as reminders. One of the great things about the iPhone is that you can write your notes on familiar yellow notepaper, and then keep them neatly organized and sorted. You can even email them to yourself or someone else to make sure that the information is not forgotten. You can also backup your notes using iTunes and, if you choose, sync notes to your computer or other web sites such as Google.
TIP: The Notes app that comes with the iPhone is pretty basic and utilitarian. If you need a more robust notes application that can sort, categorize, import items (PDF, Word, and so on), have folders, search, and more, you should check out the App Store on your iPhone. Do a search for “notes,” and you will find at least a dozen notes-related apps ranging from free to $0.99 and up.
The Notes app on the iPhone gives you a convenient place to keep your notes and simple “to-do” lists. You can also keep simple lists, such as a grocery list, or a list for other stores, such as a hardware or pet store. If you have your iPhone with you, you can add items to these lists as soon as they occur to you, and they can be accessed and edited at any time.

Sync Notes
You can sync notes between iOS devices like iPhone and IPad, or with your computer or other web site using the methods we show you in Chapter 3: “Sync with iCloud, iTunes and More.” The nice thing about syncing notes is that you can add a note on your computer and have it just “appear” on your iPhone. Then when you are out and about, you can edit that note and have it synced back to your computer. No more re-typing or remembering things. You always have your iPhone with you, so taking notes anywhere, anytime, can be a great way never to forget anything important.
Getting Started with Notes
Like all other apps, simply tap the Notes icon to start it After starting the Notes app, you see what looks like a typical yellow note pad.
Multiple Notes Accounts
If you happen to be syncing over iCloud, Exchange, or at least one IMAP email account and your computer using iTunes, then you will see that your notes from each of these accounts are kept separate. This is very much like how your contacts are kept in separate groups by email account and how your calendars are kept separate by email account.
In order to see multiple notes accounts, you have to set a switch in the account setup screen.
When you setup your IMAP email account, in Settings > Mail, Contacts, Calendars, you will see options to turn Notes syncing on or off. In order to see these notes accounts, you have to set the Notes switch to On, as shown for this Gmail account.
To view the various notes accounts, tap the Accounts button in the upper left corner of the Notes app.

Then, on the next screen, you can tap selections to view All Notes, or your notes for each account. In this image, the Gmail or MobileMe account are options.
Notes you add to an individual account will be kept with that account. For example, If you add notes to Gmail, then those would show up only on your Gmail account.

How Are My Notes Sorted?
You see that all notes are listed in reverse chronological order, with the most recently edited notes at the top and the oldest at the bottom.
The date that is shown is the last time and date that the particular note was edited, not when it was first created. So you will notice the order of your notes moving around on the screen.
This sorting can be a good thing because your most recent (or frequently edited) notes will be right at the top.
TIP: If you want to keep track of your to-do lists, you can use the built in reminders app on your iPhone, If you want something more powerful, check out Things, Appigo Todo, or OmniFocus in the App store.
Adding a New Note
To start a new note, tap the plus sign 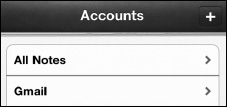 in the upper right-hand corner.
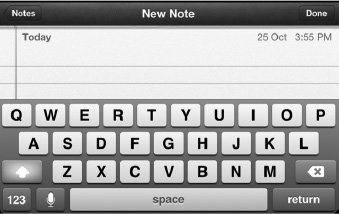
The notepad is blank, and the keyboard pops up for you to begin typing.
TIP: You can turn your iPhone on its side to see the larger, landscape keyboard.
![]()
Adding a Title to the Note
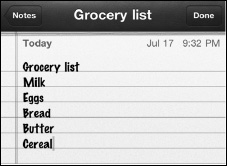
The first few words you type before you hit the Return key will become the title of the note. So think about what you want as the title, and type that first. In the image shown, Grocery list becomes the title of the note.
Put a new item on each line, and tap the Return key to go to the next line.
When you are done, touch the Notes button in the top left-hand corner to return to the main Notes screen.
Viewingor Editing Your Notes
Your notes appear in the list as tabs to touch. Touch the name of the note you wish to view or edit. The contents of the note are then displayed.
You can scroll in Notes as you do in any program. You will notice that the date and time the note was last edited appear in the upper right-hand corner.
When you are done reading the note, just touch the Notes button in the top left-hand corner to return to the main Notes screen.
To advance through multiple notes, just touch the arrows at the bottom of the screen. Touch the Forward  arrow. The page turns, and you can see the next note. To go back, just hit the Back
 ![]() arrow.
arrow.
Using Voice Dictation for Your Notes
Remember, the iPhone can take dictation for you. When you are editing or starting a new note, tap the microphone button to the left of the space key and start talking.
![]()
You know dictation is working when you see the purple microphone appear at the bottom. The amount of purple showing will pulse up and down with the volume of your voice.
When you're done, tap Done and see how well it works!
TIP: You can use dictation to enter punctuation, symbols, and formatting, for example, “period” or “question mark,” “open parenthesis” or “close square brackets,” “new paragraph,” or even “smiley face.”

Deleting Notes
To delete a note, swipe your finger on the note from left to right on the list and tap Delete. Or, if you are viewing the note, then tap the Trash Can icon 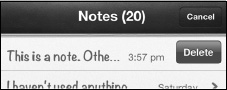 at the bottom. The iPhone prompts you to delete the note or cancel.

Emailing or Printing a Note
One of the Notes app's convenient features is the ability to email or print a note. Let's say you wrote a grocery note and wanted to email it to your spouse, or you made a list of gift ideas and want to hand them out. To email or print a note, just tap the Action button icon 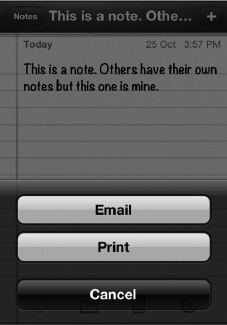 at the bottom of the screen.
![]()
Data Detectors - Cool Things With Underlined Words
If you type in the words “tomorrow morning” in a note and save it. The next time you open that note, you will see that the words have been underlined. If you tap and hold the underlined words, you will see a button asking if you want to Create Event. Tap the button to create a new calendar event for tomorrow morning.
![]()
TIP: Whenever date and time words are underlined, the iPhone recognizes them as potential calendar events. This works in notes, email messages and other places on your iPhone. The iPhone also has other “data detectors”, for example it can recognize phone numbers, web site addresses, and even tracking numbers for packages.