
Chapter 17
Communicate with Email
In this chapter, we will explore the world of email in the Mail app on your iPhone. You will learn how to set up multiple email accounts, check out all the various reading options, open attachments, and clean up your inbox.
And for cases when your email is not working quite right, you will learn some good troubleshooting tips to help you get back up and running.
Getting Started with Mail
Setting up email on your iPhone is fairly simple. Probably the fastest way to get your email up and running is to set up your accounts directly on the phone. We show you how using the Mail, Contacts and Calendar account setup screens in this section. You could also copy these account settings using a screen in the iTunes app on your computer. You do need a network connection to get email up and running.
A Network Connection Is Required
Mobile emailis certainly all the rage today. You can view, read, and compose replies to emails already synced to your iPhone without a network connection; however, you will need to have network connectivity (either Wi-Fi or 3G/cellular) to send and/or receive email from your iPhone. Check out Chapter 4: “Connect to the Network” to learn more. Also, check out the “Reading the Top Connectivity Status Icons” section in the Quick Start Guide in Part 1.
TIP: If you are taking a trip, simply download all your email before you get on the airplane; this lets you read, reply, and compose your messages while offline. All emails will be sent after you land and re-establish your connection to the Internet.
Setting up Email on the iPhone
As mentioned a moment ago, you have two options for setting up your email accounts on the iPhone:
- Set up your email accounts directly on the iPhone.
- Use iTunes to sync email account settings.
The first option, setting up your email accounts directly on the iPhone, works best if you want a special setup on your iPhone, such as Gmail over Exchange. This is also a good approach if you don't use an email program on your Windows or Mac PC.
If you have a lot of POP3 or IMAP accounts already set up on your Windows or Mac computer, you can also choose to sync them over your USB dock cable via iTunes.
Entering Passwords for Email Accounts
In Chapter 3, we showed you how to sync your email account settings to your iPhone. After this sync completes, you should be able to view all of the email accounts on your iPhone by opening the Settings app. All you will need to do is enter the password for each account.
To enter your password for each synced email account, follow these steps:
- Tap the Settings icon.
- Tap the Mail, Contacts, and Calendars option.
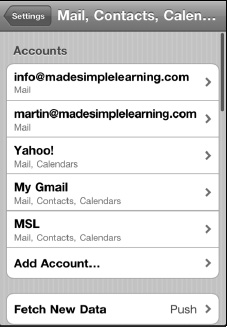
- Under Accounts, you should see all your synced email accounts listed.
- Tap any listed email account, type its password, and click Done.
- If all the information is entered correctly, checkmarks will appear and you're account will be enabled.
- Repeat for all listed email accounts.
Adding a New Email Account on the iPhone
To add a new email account on your iPhone, follow these steps:
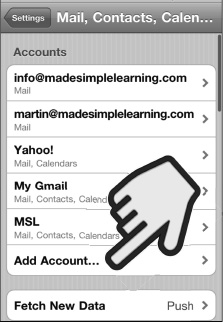
- Tap the Settings icon.
- Tap the Mail, Contacts, and Calendars option.
- Tap Add Account below your email accounts.
If you have no accounts set up, you will only see the Add Account option.
TIP: To edit any email account, just touch that account.
- Choose which type of email account to add on this screen:
- Choose iCloud if you use this service.
- Choose Microsoft Exchange if you use a Microsoft Exchange email server.
- You should also choose Microsoft Exchange if you use Google Calendar and Google Contacts to store your personal information, and you want to wirelessly sync them to your iPhone.
NOTE: We show you how to set up both Google/Microsoft Exchange and iCloud in Chapter 3: “Sync with iCloud, iTunes and More.”
- Choose Gmail if you use Google for your email, but you do not (or do not want to) wirelessly sync email with your Google Contacts.
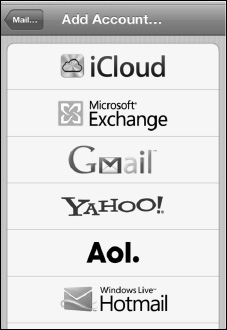
- Choose Yahoo!, AOL, or Windows Live Hotmail if you use those services.
- Choose Other if none of the above apply, and you want to sync a standard POP or IMAP email account. Finally, choose Add Mail Account from the next screen.
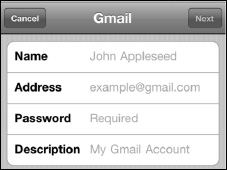
- Type your name as you would like others to see it when they receive mail from you into the Name field.
- Next, add the appropriate information into the Address, Password, and Description fields.
- Tap the Next button in the upper-right corner.
Specifying Incoming and Outgoing Servers
Sometimes, the iPhone will not be able to automatically set up your email account. In these cases, you will need to type in a few more settings manually to enable your email account.
TIP: You may be able to find the settings for your email provider by doing a web search for your email provider's name and email settings.
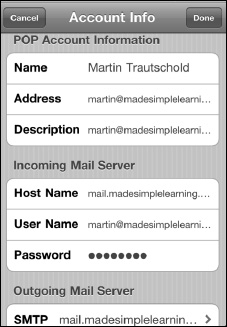
If the iPhone is unable to log into your server with only your email address and password, then you will see a screen similar to this one.
Under Incoming Mail Server, type the appropriate information into the Host Name, User Name, and Password fields. Usually, your incoming mail server is something like mail.name_of_your_isp.com.
To adjust the name of your outgoing server, tap Outgoing Mail Server. You can adjust the outgoing mail server on the following screen. These server names usually look like either smtp.name_of_your_isp.com or mail.name_of_your_isp.com.
You can try to leave the Server Name and Password fields blank. If that doesn't work, you can always go back and change them.
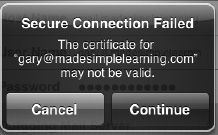
You may be asked if you want to use SSL (secure socket layer), a type of outgoing mail security that may be required by your email provider. If you don't know whether you need SSL, just check the mail settings with your email provider.
TIP: The authors recommend that you use SSL security whenever possible. If you do not use SSL, then your login credentials, messages, and any private information are sent in plain text (unencrypted), leaving them open to snoopers.
Verifying that Your Account Is Set Up
Once all the information is entered, the iPhone will attempt to configure your email account. You may get an error message; if that happens, you need to review the information you input.
If you are taken to the screen that shows all your email accounts, look for the new account name.
If you see it, your account was set up correctly.
Fixing the Cannot Get Mail Error
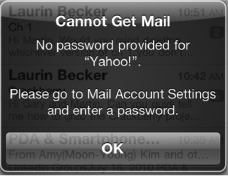
You will need to enter your password if you tap Mail icon and you receive an error that says “Cannot Get Mail—No password provided for (your account).”
Review this chapter's “Enter Passwords for E-Mail Accounts Synced from iTunes” section for help with this issue.
The Mailboxes Screen—Inboxes and Accounts
The top-level screen is your Mailboxes screen. You can always get to it by tapping the button in the upper-left corner. Keep tapping this upper-left button until you see no more buttons. When that happens, you are in the Mailboxes screen.
From the Mailboxes screen, you can access the following items:
- The unified inbox: Access this by tapping All inboxes.
- The inbox for each individual account: Access this by tapping that email account name in the Inboxes section.
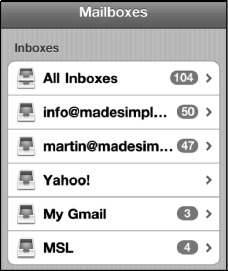
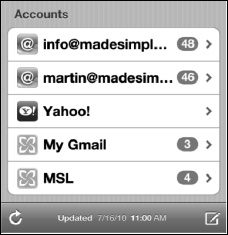
- The folders for each email account in the Accounts section: Access these by tapping the account name to see all folders.
Adding or Editing Email Folders or Mailboxes
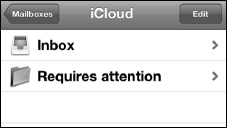
With iOS 5, you can now add or edit email folders right on your iPhone if you are using an iCloud-synced mail account or your mail server supports this feature. Say, you wanted to change a mail folder name or add a new mail folder to better organize your messages inbox. One example might be to create a new folder called “Requires Attention” and put all those emails that you cannot get to right now, but need to make sure you address later when you back at your desk. To add or edit a mailbox on your device, follow these steps:
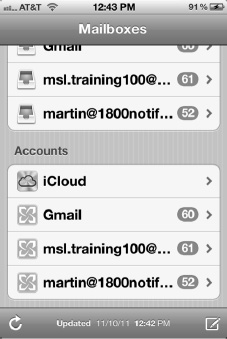
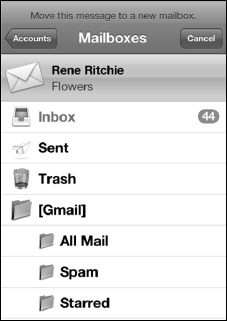
- From the Mailboxes screen scroll to the bottom and tap any of your email accounts listed under Accounts.
- In this example, we will edit the iCloud account mailboxes. On this screen tap Edit in the upper right.
- Then, you can do the following:
- Tap the New Mailbox at the bottom to create a new mailbox.
- Tap any mailbox folder to edit the name or delete it.

Inbox, Flagged (Marked) and Threaded Messages
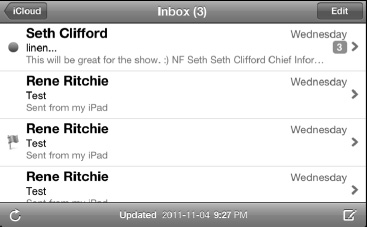
You will notice that any unread messages are marked with a blue dot ![]() to the left of the message.
to the left of the message.
You will also notice that some messages show a number and a right-facing arrow (>) to the right of the message, like this: ![]() . This shows that there are three related messages (replies and forwards) to the message shown.
. This shows that there are three related messages (replies and forwards) to the message shown.
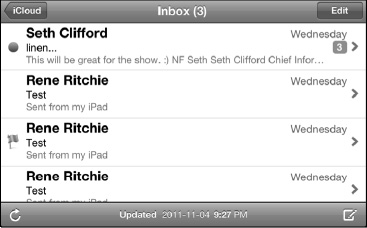
Messages that are marked have a little flag to the left of them like this: ![]()
Tap any message to open it. The only time it will not open is if there are related messages. In that case, you will first see a screen with all the related messages. Tap any of those messages to open and view it.
To leave the Inbox view, tap the button in the upper-left corner.
You can tell which email account you are viewing by looking at the button in the upper-left corner:
- If the button says Mailboxes, you know you are looking at all your inboxes together.
- If the button says an account name, such as iCloud or Exchange, then you know you are only looking at the inbox for that account.
Move, Delete, or Mark (Flag) Multiple Messages
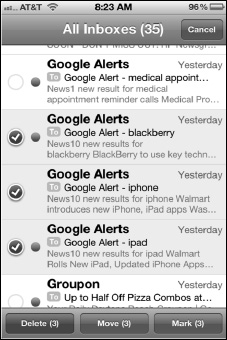
If you want to move or delete several messages at once, you can do so from the Inbox screen. Follow these steps to delete multiple messages at once:
- Tap the Edit button in the upper-right corner while you are viewing an Inbox screen.
- Tap to select the desired messages; a red Checkmark icon next to a message indicates it is selected.
- To delete the messages, tap the Delete button at the bottom.
- To move the messages to another folder, tap the Move button and select the folder.
- To Mark a message with a Flag or as Unread, tap the Mark button. Unread will put the blue dot back next to the message. If you flag a message you will see a little flag appear next to it like this:

Viewing an Individual Message
When you tap a message from the Inbox screen, you see the Main message view. You can look at messages in both portrait and landscape modes, see Figure 17–1. Portrait mode will typically display more text. Landscape mode will typically let you enjoy bigger text and images.
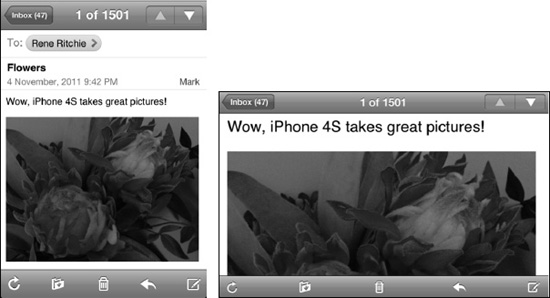
Figure 17–1. Viewing email messages in portrait and landscape modes.
TIP: If you are setting your iPhone down on a desk or holding it in your lap, then you may want to use the Portrait Lock icon to lock your view in Portrait (vertical) mode. This will prevent the image from flipping around unnecessarily. To lock the view, follow these steps:
- Double-tap the Home button and swipe left to right.
- Tap the Portrait Lock button to lock the screen in Portrait mode.
Composing and Sending Emails
To launch the email program, tap the Mail icon on your Home screen.
TIP: If you left the Mail app while viewing a particular email, list of folders, or an account, then you will be returned directly to that same location when you return to the Mail app.
If you are going into your email for the first time, you may see an empty inbox. Hit the Refresh button ![]() in the lower-left corner of the window to retrieve the latest email. The iPhone will begin to check for new mail and then display the number of new messages for each account.
in the lower-left corner of the window to retrieve the latest email. The iPhone will begin to check for new mail and then display the number of new messages for each account.
Composing a New Email Message
When you start the Mail program, your first screen should be your Accounts screen. At the bottom-right corner of the screen, you will see the Compose icon. Touch the Compose icon to start creating a new message.
![]()
Addressing Your Message—Choose the Recipients
You have a few options for selecting recipients, depending on whether the person is in your Contacts list on your iPhone:
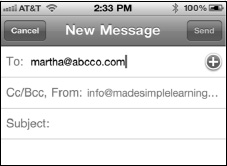
Option 1: Type a few letters of someone's first name; hit the Space key, and then type a few letters of that person's last name. The person's name should appear in the list; tap that person's name to select that contact.
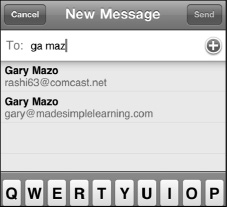
Option 2: Type an email address. Notice the @ and Period (.) keys on the bottom, which help your typing.
TIP: Press and hold the period key to see .com, .edu, .org, and other email domain name suffixes.
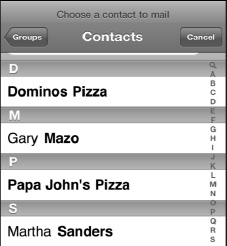
Option 3: Hit the Plus Sign (+) ![]() to view your entire Contacts list and search or select a name from it.
to view your entire Contacts list and search or select a name from it.
If you want to use a different contact group, tap the Groups button in the upper-left corner.
Double-tap Contacts at the top of the screen to see the Search window. Next, type a few letters to search for your contact.
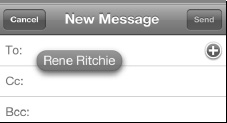
Deleting a Recipient
If you need to delete a name from the recipient list (To:, Cc:, or Bcc:), tap the name to select it![]() and hit the Backspace key.
and hit the Backspace key. ![]()
TIP: If you want to delete the last recipient you typed (and the cursor is sitting next to that name), hit the Delete key once to highlight the name and hit it a second time to delete it.
Adding a CC or BCC Recipient
 To add a carbon copy (Cc:) or blind carbon copy (Bcc:) recipient, you need to tap the Cc: or Bcc: field just under the To: field at the top of the email message. Doing so opens up the tapped field.
Moving Recipients
If you originally add a recipient as the To: field, but change your mind and decide you'd rather addher to a Cc: or Bcc: field (or vice versa), then simply tap and hold the recipient's name and drag it to the preferred field.
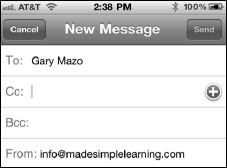
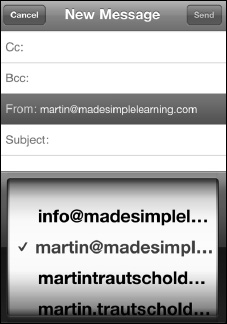
Changing the Email Account to Send From
If you have more than one email account set up, the iPhone will use whichever account is set as the default account. (This is set in Settings > Mail, Contacts, Calendars > Default Account at the bottom of the Mail section.)
Follow these steps to change the email account you send from:
- Tap an email's From: field to highlight it.
- Tap the From: field again to see a list of your accounts in a scroll wheel at the bottom of the screen.
- Scroll up or down, and then tap a new email account to select it.
- Tap the Subject field to finish changing the email address you send from.
Typing Your Subject
Now you need to enter a subject for your email. Follow these steps to do so:
- Touch the Subject: line and enter text for the Subject: field of the email.
- Press the Return key or tap the Body section of the email to move the cursor to the Body section.
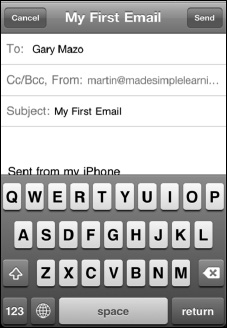
Typing Your Message
Now that the cursor is in the Body section of the email (under the subject line), you can start typing your email message.
CAUTION: There is only one email signature on your iPhone, which gets automatically applied to each message you send from your iPhone—even if you have multiple email accounts set up. So, be careful if you are running two different businesses or don't want your personal email signature to go to all your business contacts. It's probably best to make your email signature fairly generic.
Formatting Text, Defining Words, Quoting Text and More
You can tap any text to highlight it, use the blue handles to expand the selection. Then using the popup menu above the selection, you can do any of the following:
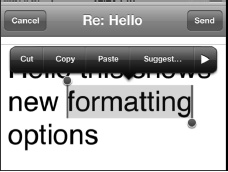
- Tap Cut, Copy or Paste to perform those functions.
- Tap Suggest if the word is underlined and you want to correct the spelling.
- Tap the triangle at the right edge to see more options.
- Tap B / Uto adjust formatting to Bold, Italics or Underline.

- Tap Define to look the selected word up in the dictionary.
- Tap Speak to have the word spoken to you.
- Tap Quote Level to increase or decrease the quote level of the selected text.

Email Signatures
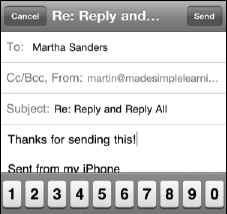
The defaultemail signature is shown in the image to the right: Sent from my iPhone.
TIP: You can change this signature to be anything you want; see the “Changing Your E-Mail Signature” section later in this chapter to learn how to change your e-mail signature.
Keyboard Options
While you are typing, remember you have two keyboard options: the smaller Portrait (vertical) keyboard and the larger Landscape (horizontal) keyboard, see Figure 17–2.
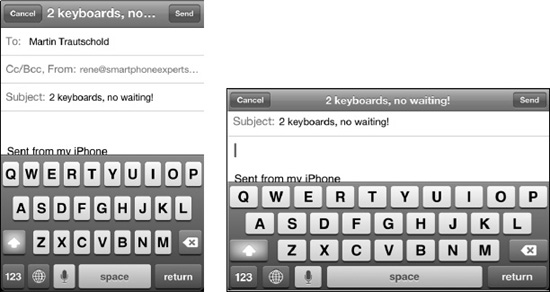
Figure 17–2. Turn your device on its side to get the larger landscape keyboard.
TIP: If you have larger hands, it might be easier to type when the keyboard is larger. Once you get the hang of typing on the larger keyboard with two hands, you will find that it is much faster than typing with one finger. See Chapter 2: “Typing, Copy and Search” for more typing tips.
Auto-Correction and Auto-Capitalization
As you type, you will notice that some words will be auto-capitalized and automatically corrected. Red underlined words are flagged as misspelled by the spelling checker. See Chapter 2: “Typing, Copy and Search” to learn how these all functions work; this chapter also provides some additional typing tips.
Send Your Email
Once you have typed your message, tap the blue Send button in the top-right corner.
Your email will be sent, and you should hear the iPhone's sent mail sound, which confirms that your email was sent. You can learn how to enable or disable this sound in the “Adjusting Sounds on your iPhone” section of Chapter 9: “Personalize and Secure.”

Save As Draft to Send Later
If you are not ready to send your message, but want to save it as a draft message to send later, follow these steps:
- Compose your message, as described earlier.
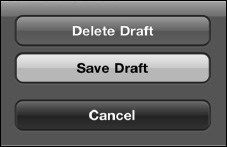
- Press the Cancel button in the upper-left corner.
- Select the Save Draft button at the bottom of the screen.
Later, when you want to locate and send your draft message, follow these steps:
- Open the Drafts folder in the email account from which you composed this message. See the “Moving Around in Mail Folders” section earlier in this chapter for help getting into the Drafts folder.
- Tap the email message in the Drafts folder to open it.
- Tap anywhere in the message to edit it.
- Tap the Send button.
Checking Sent Messages
Follow these steps to confirm that the email was sent correctly:
- Tap the Email account name button in the upper-left corner to see the mail folders for the account you just used to send your message.
- Tap the Sent folder.
- Verify that that the top email you see in the list is the one you just composed and sent.

NOTE: You will only see the Sent and Trash folders if you have actually sent or deleted email from that account on the iPhone.If your email account is an IMAP account, you may see many folders other than those described in this chapter.
Reading and Replying to Mail
Follow these steps to read your email:
- Navigate to the inbox of the email account you want to view using the steps described earlier in this chapter.
- To read any message, just touch it from your inbox.
- New, unread messages are shown with a small blue dot to the left of the message.
- Flick your finger up or down in the inbox to scroll through your messages.
- When you are reading a message, swipe up or down to scroll through it.
Marking Messages as Unread or Flagged
If you read a message but want to make sure you can quickly find it again later, you can choose to click either Mark as Unread or Flag, so it gets your attention later.
Follow these steps to Mark a message:
- Tap the word Mark located to the right of the time and date.
- Choose Flag or Mark as Unread from the slide up menu.
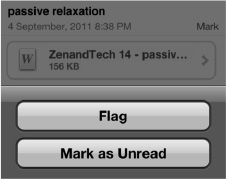
A message you Flag will have a small red Flag icon to the left of the Mark text. A message you Mark as Unread will have a small blue dot to the right of the Mark text.
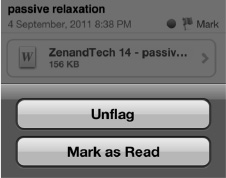
- Tap the word Mark located to the right of the time and date
- Choose Unflag or Mark as Read from the slide up menu.
Zooming In or Out
As when browsing the Web, you can zoom in to see your email in larger text.You can also double-tap, just as you doon the Web; and you can also Pinch to zoom in or out (see the “Zooming” section in the Quick Start Guide in Part 1 of this book for more information on these features).
Email Attachments
Some email attachments are opened automatically by the iPhone, so you don't even notice that they were attachments. Examples of these include Adobe's portable document format(PDF) files (used by Adobe Acrobat and Adobe Reader, among other apps) and some types of image, video, and audio files. You may also receive documents as attachments, such as Apple's Pages, Numbers, and Keynote files; or Microsoft's Word, Excel, and PowerPoint files. You will need to open these manually.
Knowing When You Have an Attachment
Any email with an attachment will have a little Paperclip icon next to the sender's name, as shown to the right. When you see that icon, you know you have an attachment.
Receiving an Auto-Open Attachment
Some types of email attachments, like images, Quicktime movies, and single-page PDF files are usually opened and displayed and displayed for you inline in the mail message.
(If you're on a 3G data connection, however, you'll have to tap on them to download and display them.)

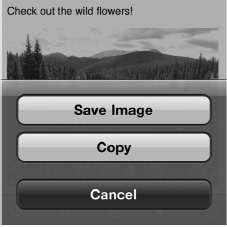
TIP: If you want to save or copy an auto-opened attachment, simply press and hold it until you see the pop-up window. At this point, you can select Copy or Save Image. When you save an image, it will be placed in your Photos app in the Camera Roll album.
Opening Email Attachments
Instead of immediately opening in the body of the email as we just described, other types of attachments—such as spreadsheets, word processing documents, and presentation files—will need to be opened manually.
Tap for Quick Look Mode
Follow these steps to open attachments in Quick Look mode:
- Open the message with an attachment, as shown in Figure 17–3.
- Quickly tap the attachment to instantly open it in Quick Look mode.
- You can navigate around the document. Remember you can zoom in or out and swipe up or down.
- If you open a spreadsheet with multiple tabs or spreadsheets, you will see tabs across the top. Touch another tab to open that spreadsheet.
- When you are done looking at the attachment, tap the document once to bring up the controls, and then tap Done in the upper-left corner.
- If you have apps installed that can open the type of attachment you are viewing (in this case, a spreadsheet), then you will see an Open In button in the upper-right corner. Tap the Open In button to open this file in another app.
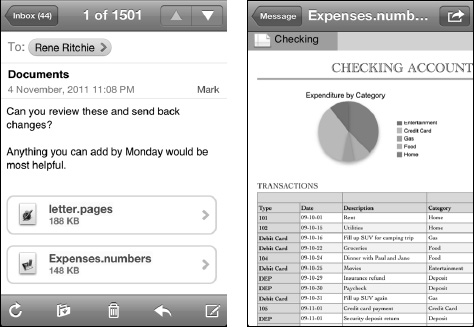
Figure 17–3. Viewing email attachments in Quick Look mode.
Opening Docs in Other Apps
You may want to open an attachment in another application. For example, you might want to open a spreadsheet in Numbers, a PDF file in iBooks, Stanz a, or GoodReader. Follow these steps to do so:
- Open the email message.
- Press and hold the attachment until you see the pop-up window.
- Select the Open In… or Open in “Numbers” option. You may see specific apps listed after Open In as Numbers is shown here when the format of the attachment matches apps on your device.
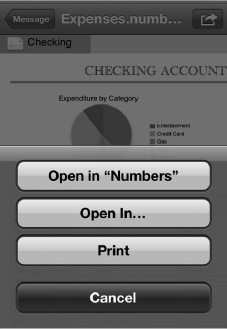
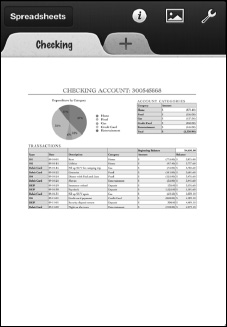
- Select the application you would like to use from the list.
- Finally, you can edit the document, save it, and email it back to the sender.
Viewing a Video Attachment
You may receive a video as an attachment to an email. Certain types of videos can be viewed on your iPhone (see the “Supported E-Mail Attachment Types” section later in this chapter for a list of supported video formats). Follow these steps to open a video attachment:
- Tap the video attachment to open it and view it in the video player.
- When you are done viewing the video, tap the screen to bring up the player controls.
- Tap the Done button in the upper-left corner to return to the email message.
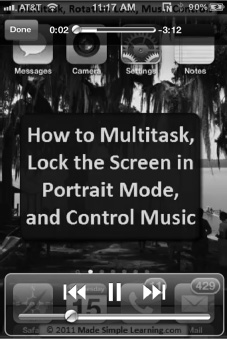
NOTE: This is an image from a video tutorial by Martin Trautschold (one of this book's authors) that shows you how to use your iPhone. Check out some free sample tutorials at www.madesimplelearning.com, Martin's web site.
Opening and Viewing Compressed .zip Files
Your iPhone will not be able to open and view a compressed file in .zip format unless you install an app such as GoodReader. At the time of publishing, GoodReader was still a free app and well worth installing.
TIP: Learn how to install and use GoodReader it in Chapter 14: “Newsstand and More.”
Follow these steps to open a .zip file in the program:
- Install the free GoodReader app from the App Store.
- Open up the email message with the
.zipfile attachment. - Touch and hold the
.zipattachment until you see a pop-up at the bottom with a button that says: Open in “GoodReader.” Tap that button to open the.zipfile in GoodReader.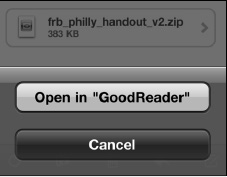
- GoodReader should now open, and your
.zipfile should be at the top of the list of files. To open or decompress the.zipfile, tap it and select the Unzip button.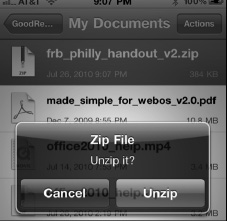
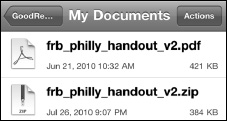
- Now you should see the uncompressed file—in this case, an Adobe
.pdffile in the list of files above the.zipfile. - Tap that uncompressed file to view it.
- When you are done reading the attachment, double-click your Home button and tap the Mail icon to return to your reading your email.
Supported Email Attachment Types
Your iPhone supports the following file types as attachments:
.docand.docx(Microsoft Word documents).htmand.html(web pages).key(a Keynote presentation document).numbers(an Apple Numbers spreadsheet document).pages(an Apple Pages document).pdf(Adobe's portable document format, used by programs such as Adobe Acrobat and Adobe Reader).pptand.pptx(Microsoft PowerPoint presentation documents).txt(a text file).vcf(a contact file).xlsand.xlsx(Microsoft Excel spreadsheet documents).mp3and.mov(audio and video formats).zip(compressed files): These are only readable if you have an app installed that can read them, such as GoodReader—see the “Opening and Viewing Compressed .zip Files” section earlier in this chapter.
Replying, Forwarding, or Deleting a Message
At the bottom of your email reading pane is a toolbar.
From this toolbar, you can move the message to a different mailbox or folder; delete it; or reply, reply all, or forwardit.
![]()
Touch the small Arrow icon  to see these option buttons appear: Reply, Reply All, and Forward.
NOTE: The Reply All button appears only if there was more than one recipient for the email message.

Replying to an Email
You will probably use the Reply command most frequently. Follow these steps to respond to an email on your iPhone:
- Touch the Reply button.
You will see that the original sender is now listed as the recipient in the To: line of the email. The subject will automatically state: “Re: (Original subject line).”
- Type your response.
- When you are done, just touch the blue Send button at the top-right corner of the screen.
Using Reply All
Using the Reply All option is just like using the Reply function, except that all of the original recipients of the email and the original sender are placed in the address lines. The original sender will be in the To: line, while all other recipients of the original email will be listed on the Cc: line. You will only see the Reply All option if more than one person received the original email.
CAUTION: Be careful when you use Reply All. This can be dangerous if some of the recipients are not shown on the original email because they stretch off the edge of the screen. If you do use Reply All, then make sure you check the To: and Cc: lists to make sure everyone should be receiving your reply.
Using the Forward Button
Sometimes, you get an email that you want to send to someone else. The Forward command will let you do that (see the “E-Mail Attachments” section in this chapter for more about working with attachments).
NOTE: You need to forward attachments to send them to others. If you want to send someone an attachment from an email you receive, you must choose the Forward option. (Note that choosing the Reply and Reply All options will not include the original email attachment(s) in your outgoing message.)
When you touch the Forward button, you may be prompted to address whether you want to Include or Don't Include the attachments from the original message.
At this point, you follow the same steps described previously to type your message, add addressees, and send it.
Cleaning up and Organizing Your Inbox
As you get more comfortable with your iPhone as an email device, you will increasingly find yourself using the Mail program. It will eventually become necessary to occasionally do some emailhouse cleaning. You can delete or move email messages easily on your iPhone.
Deleting a Single Message
To delete a single message from your inbox, follow these steps:
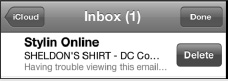
- Swipe right or left on a message in the inbox to bring up the Delete button.
- Tap Delete to remove the message.
Deleting, Moving or Marking Several Messages
We showed you earlier in this chapter how to get this done in the “Move, Delete, or Mark (Flag) Multiple Messages” section.
Deleting from the Message Viewing Screen
The Message viewing screen includes another way to delete messages. Open any message to read it and tap the Trash Can icon ![]() in the middle of the bottom of the screen. You will see the email shrink and fly into the Trash Can, so it can be deleted.
in the middle of the bottom of the screen. You will see the email shrink and fly into the Trash Can, so it can be deleted.
TIP: You can use the Settings app to make your iPhone ask you before deleting email. To do so, tap Mail, Contacts, Calendars and set the switch next to Ask Before Deleting to Yes.
You can organize your mail by moving it into other folders. Emailmessages can be moved out of your inbox for storage or for reading at another time.
NOTE: If you are using iCloud or another supported email server, you can create, rename or delete mail folders right on your device, see section “Adding or Editing Email Folders or Mailboxes” earlier in this chapter. If this does not work for you, then, you need to set them up in your main email account and sync them to your iPhone. We will show you how to do this in this chapter's “Fine Tune Your E-Mail Settings” section.
Moving an Email to a Folder While Viewing It
Sometimes, you may want to organize your email for easy retrieval later. For example, you might receive an email about an upcoming trip and want to move it to the Travel folder. Sometimes you receive emails that require attention later, in which case you can move them to the Requires Attention folder. This can help you remember to work on such emails later.
Follow these steps to move an email message:
- Open the email message.
- Tap the Move icon in the upper-right corner.
- Choose a new folder, and the message will be moved out of the current inbox.
Copy and Paste from an Email
Here are a few tips to select text or pictures and copy them from an email message:
- Double-tap text to select a word, then drag the blue handles up or down to adjust the selection. Next, select Copy.
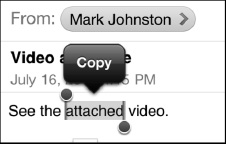
- Press and hold text, and then choose Select or Select All.
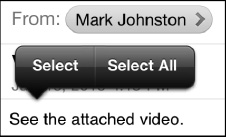
- Press and hold an image, and then select Save Image or Copy.
For a more complete description, please check out the “Copy and Paste” section in Chapter 2: “Typing, Copy and Search.”
Searching for Email Messages
The iPhone has some good built-in search functionality to help you find your emails. You can search your inbox by the From:, To:, Subject, or All fields. This helps you filter your inbox, so you can find exactly what you are searching for.
Activating Email Search
It's easy to initiate an email search. Begin by navigating to the i nbox of the account you wish to search. If you scroll up to the top, you will now see the familiar Search bar at the top of your inbox.
If your email account supports the feature, you can also search the server for email messages. At the time of writing, a few of the supported types of searchable email accounts include Exchange, iCloud (formerly called Mobile Me), and Gmail IMAP. Follow these steps to search through your email on a server:
- Tap the Search bar to see a new menu of soft keys under the Search bar.
- Type the text you wish to search for.
- Tap one of the tabs under the Search window:
- From: Searches only the sender's email addresses.
- To: Searches only the recipients' email addresses.
- Subject: Searches only message Subject fields.
- All: Searches every part of the message.
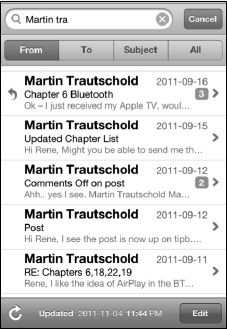
For example, assume that we want to search an inbox for an email from “Martin.” We would type Martin's name into the Search box and then touch From. The inbox would then be filtered to show only the emails from Martin.
Fine Tuning Your Email Settings
You can fine-tune the email accounts on your iPhone with the myriad options available in the Settings app. Follow these steps to change these settings: tap the Settings icon, then tap Mail, Contacts, Calendars. The sections that follow explain the adjustments you can make.
Automatically Retrieve Email (Fetch New Data)
In addition to the options under Advanced, you can use the Email settings to configure how often your email is fetched or pulled to your iPhone. By default, your iPhone automatically receives mail or other contact or calendar updates when they are “pushed” from the server.
You can adjust this setting by taking the following steps:
- Tap the Settings app.
- Tap Mail, Contacts, Calendars.
- Tap Fetch New Data under the email accounts listed.
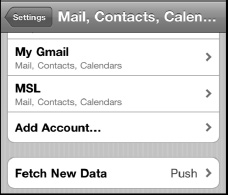
- Set Push to ON (default) to automatically have the server push data. Set it to OFF to conserve your battery life.
- Adjust the timing schedule to pull data from the server. This is how frequently applications should pull new data from the server.
NOTE: If you set this option to Every 15 Minutes, you will receive more frequent updates; however, this option sacrifices battery life compared to a setting of Hourly or Manually.

Having automatic retrieval is very handy if you just want to turn on your iPhone and see that you have messages; otherwise, you need to remember to check.
Advanced Push Options
At the bottom of the Fetch New Data screen, below the Hourly and Manually settings, you can touch the Advanced button to see a new screen with all your email accounts listed.
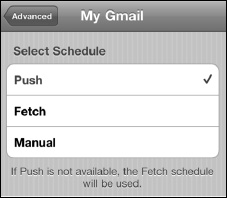
Tap any email account to adjust its settings.
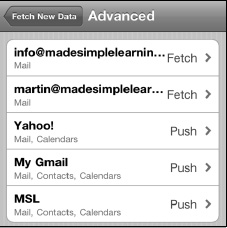
Most accounts can be Fetched on the schedule you set or set to Manual. The Manual option requires that you retrieve data using the Update button. This screen gives you the ability to adjust Fetch, Manual, or even Push settings for each account you have set up.
Adjusting Your Mail Settings
Under the Accounts section, you can see all the email settings listed under Mail. The Defaul t settings may work well for you; but if you need to adjust any of these, you can follow these steps:
Show: This sets how many emails are pulled from the server. You can specify anywhere from 50 to 1,000 messages (the default is 50 recent messages).
Preview: This option lets you set how many lines of text in addition to the Subject are shown in the inbox Preview. You can adjust this value from None to 5 Lines (the default is 2 Lines).

Minimum Font Size: This is the default font size shown when opening an email the first time. It is also smallest font size that you are allowed to zoom out to when viewing an email. Your options are Small, Medium, Large, Extra Large, and Giant (the default is Medium).
TIP: You can expand the font size further in the Accessibility area of settings. Check out Chapter 2: “Typing, Copy and Search" for more details.
Show To/Cc Label: With this option ON, you will see a small To or Cc label in your inbox before the subject. This label shows which field your address was placed in (the default state of this option is OFF).
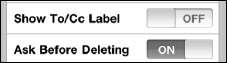
Ask Before Deleting: Turn this option ON to be asked every time you try to delete a message (the default is OFF).
Load Remote Images: This option allows your iPhone to load all the graphics (remote images) that are placed in some email messages (the default value for this option is ON).
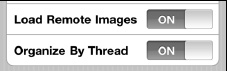
Organize by Thread: This option groups related emails together. It shows only one message, with a number next to it. That number indicates how many related emails exist. This feature gives you a good way to keep all discussions together in one place (the default value of this option is ON).

Always Bcc Myself: This option sends a blind carbon copy (Bcc:) of every email you send from your iPhone to your email account (the default value of this option is OFF).
![]()
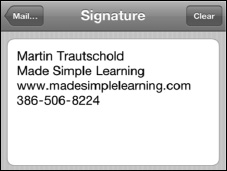
Changing Your Email Signature
By default, emails you send will say “Sent from my iPhone.” Follow these steps to change the Signature line of the email:
![]()
- Tap the Signature tab and type in the new email signature you want at the bottom of emails sent from your iPhone.
- When you are done editing the Signature field, tap the Mail, Contacts… button in the upper-left corner. This will return you to the Mail settings screen.
Changing Your Default Mail Account (Sent From)
If you have multiple emaila ccounts set up on your iPhone, you should set one of them—usually, the one you use most—as your Default Account. When you select Compose from the Email screen, the default account is always chosen. Follow these steps to change the email account you send from by default:
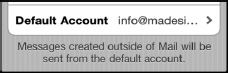
- Tap the Default Account option, and you will see a list of all your email accounts.
- Tap the email account you wish to use as your Default Account choice.
- When you are done, touch the Mail, Contacts… button to return to the Mail settings menu.

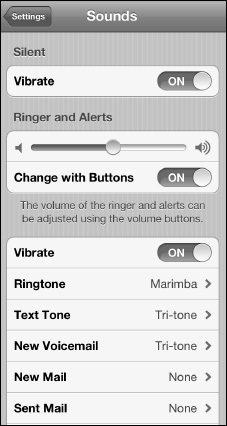
Toggling Sounds for Receiving and Sending Email
You may notice a little sound effect every time you send or receive email. What you hear is the default setting on your iPhone.
If you want to disable this or change it, you do so in the Settings program:
- Tap your Settings icon.
- Tap Sounds.
- You will see various switches to turn sound effects on or off. Tap New Mail and Sent Mail to select your mail tone options.
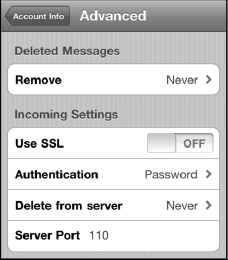
Advanced Email Options
NOTE: Email accounts set up as Exchange, IMAP, or iCloud will not have this Advanced email settings screen. This only applies to POP3 email accounts.
To get to the Advanced options for each email account, follow these steps:
- Touch the Settings icon.
- Touch Mail, Contacts, Calendars.
- Touch an email address listed under Accounts.
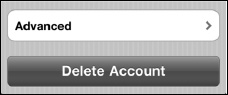
- At the bottom of the mail settings pop-up window, tap the Advanced button to bring up the Advanced dialog.
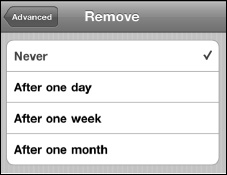
Removing_Email Messages from Your iPhone After Deletion
You can select how frequently you want email removed completely from your iPhone once it is deleted.
Touch the Remove tab and select the option that is best for you; the default setting is Never.
Using SSL and Authentication
The SSL and Authentication features were discussed previously; however, this screen gives you another location to access these features for a particular email account.
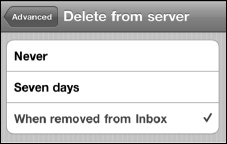
Deleting from Server
You can configure your iPhone to handle the deletion of messages from your email server. Usually, this setting is left at Never, and this function is handled on your main computer. If you use your iPhone as your main email device, however, you might want to handle that feature from the phone itself. Follow these steps to remove deleted emails on the server from your iPhone.
- Touch the Delete from Server tab to select the feature that best suits your needs: Never, Seven Days, or When removed from inbox.
- The default setting is Never. If you want to choose Seven Days; that option should give you enough time to check email on your computer, as well as your iPhone, and then decide what to keep and what to get rid of.
Changingthe Incoming Server Port
As you did with the Outgoing Server Port earlier, you can change the Incoming Server Port if you are having trouble receiving email. It is very rare that your troubles will be related to the port you receive mail on; consequently, you will rarely need to change this number.If your email service provider gives you a different number, just touch the numbers and input a new port. The value for an Incoming Server Port is usually 995, 993, or 110; however, the portvalue could also be another number.
Troubleshooting Email Problems
Usually, your email works flawlessly on your iPhone. However, sometimes your email may not work as flawlessly as you would hope. This could be due to a server issue, a network connectivity issue, or an email service provider requirement that isn't being met.
More often than not, there is a simple setting that needs to be adjusted or a password that needs to be re-entered.
If you try out some of the troubleshooting tips that follow and your email is still not working, then your email server may just be down temporarily. Check with your email service provider to make sure your mail server is up and running; you might also check whether your provider has made any recent changes that would affect your settings.
TIP: If the tips that follow do not solve the problem, please check out Chapter 26: “Troubleshooting” for more helpful tips and resources.
E-MailIsn't Being Received or Sent
If you can't send or receive email, your first step should be to verify that you are connected to the Internet. Check this by looking at your network connectivity symbols in the upper-left corner of your Home screen (see Chapter 4: “Connect to the Network” for details).
Sometimes, you need to adjust the outgoing port for email to be sent properly. Do so by following these steps:
- Tap Settings.
- Touch Mail, Contacts and Calendars.
- Touch your email account that is having trouble sending messages under Accounts.
- Touch SMTP and verify that your outgoing mail server is set correctly; also check that it is set to ON.
- Touch Outgoing Mail Server at the top and verify all the settings, such as Host Name, User Name, Password, SSL, Authentication, and Server Port. You might also try 587, 995, or 110 for the Server Port value; sometimes that helps.
- Click Done and the email account name in the upper-left corner to return to the Email settings screen for this account.
- Scroll down to the bottom and touch Advanced.
- You can also try a different port setting for the server port on this screen, such as 587, 995, or 110. If those values don't work, contact your email service provider to get a different port number and verify your settings.