
Managing PDF files in the Organizer
Viewing PDF files and pages
Acrobat has its own form of Bridge for viewing and organizing PDF documents. When Acrobat 7 Professional was developed, Adobe CS2 developers were still working on the Bridge. Because Acrobat 7 was released much earlier than the CS2 applications, inclusion for Bridge support was not possible in the earlier release. Things haven't changed in Acrobat 9 and the CS5 applications. The Acrobat Organizer is still the main document management tool used by Acrobat users. For Creative Suite users, most of the time you'll find yourself using the Bridge to organize and manage PDF documents as well as all the other CS5 documents.
The Organizer is like a junior cousin to the Bridge. Many Bridge tools and features are not included in the Organizer, but there are a few unique tools and features you can accomplish with the Organizer that you can't do with the Bridge. If PDF authoring is a major part of your workflow, perhaps you'll find working in the Organizer to be a better tool than using the Bridge. One obvious advantage is that when you work with Acrobat's Organizer you don't need to leave the program. When using the Bridge you need to toggle back and forth between the Bridge and Acrobat. It all depends on the kind of work you do and where you spend most of your time. If you are a casual user in Acrobat, then perhaps you might want to glance over the information contained in this chapter and note some of the unique features the Organizer has that the Bridge doesn't support.
Note
For information related to working with Adobe Bridge, see Chapter 6.
To open the Organizer, choose File

Figure 7.1. Click the Organizer tool or select Open Organizer from a menu command to open the Organizer window in Acrobat.
Note
You can view PDF-only files in the Organizer. Unlike the Bridge where all files are viewed in the Content area, the Organizer supports only PDF documents.
The Organizer window contains three panes, a number of tools, and menu commands that you select from context menus. When you first open the Organizer, you find three panes in the Organizer window divided by two separator bars. On the left side of the window is the Categories pane, in the center is the Files pane, and on the right side is the Pages pane. You can adjust the size of the panes by clicking a separator bar and dragging it to the left or right. As one pane is sized down, the adjacent pane is sized up. You can adjust the size of the Organizer window by dragging the lower-right corner of the window.
The Categories pane in the Organizer contains three types of categories. At the top of the pane is History, followed by My Computer (or your computer name), and at the bottom you find Collections:
The History category: Offers you the same choices for viewing history as you find in the File menu where you can see a list of recently opened files. As you click one of the History options, the files listed in the Files pane reflect the history period you choose. This is useful for opening PDF files that you accessed recently.
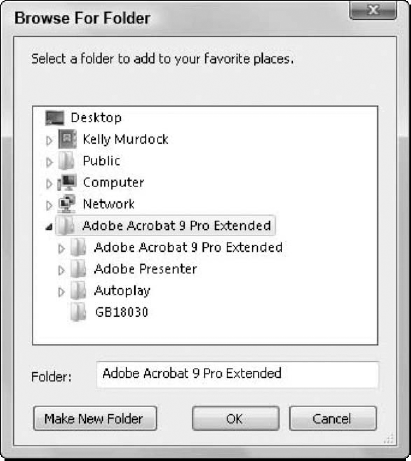
The My Computer (your computer name) category: Shows you a view of your hard drive and all servers and drives connected to your computer, similar to the Files tab in the Bridge. You can select a folder, and all PDFs within that folder are listed in the Files pane regardless of whether they appear in the view history. Below your accessible hard drives and servers you find Favorite Places. If you keep documents within folders you frequently access, right-click (Windows) or Control+click (Macintosh) to open a context menu over Favorite Places or click Add Favorite Place at the bottom of the Categories pane. The Browse For Folder dialog box, shown in Figure 7.2, opens (Windows), or the Select a folder to add to your favorite places dialog box opens on the Macintosh. Adding Favorites in this fashion is similar to adding Favorites in the Bridge.
After you select a folder and click OK, the folder you selected appears at the bottom of the Favorite Places list.
The Collections category: Works similarly to Favorite Places, except that instead of adding folders to a list, you can select individual files and add them to a collection. You can add files to collections from different folders on your hard drive. By default, Acrobat offers you three collections: Collection 1, Collection 2, and Collection 3.
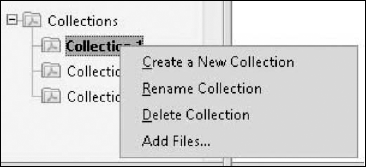
You manage collections through the use of a context menu. Open a context menu from any collection name in the Collections category, and the menu options appear as shown in Figure 7.3.
The menu selections should be self-explanatory. Select Create a New Collection to add another collection to the list. Select Rename Collection to rename a collection. Select Delete Collection to remove the collection. Note that when a collection is deleted, the files contained within that collection on your hard drive are not deleted. Click Add Files to add documents to your collection. After you add documents to a collection and click the collection name, all files added to the collection appear in the Files pane.
Tip
After installing Acrobat, you may want to rename the default collection names to more descriptive names used in your workflow. Open a context menu on each collection name and select Rename Collection. The collection name is highlighted and ready for you to type a new name. Alternately, you can double-click the name to highlight the text and type a new name. One of the first collections you may want to create is one where you add Acrobat help documents such as the help guide, the Acrobat JavaScript Specification manual, the PDFMark Reference Manual, and so on.
The Files pane contains a list of all files derived from the choice you made in the Categories pane. For example, click a History category, and all files viewed within the selected history timeframe appear in a list sorted by metadata that you select from the Sort by pull-down menu.
Note
For information related to sorting metadata, see Chapter 6.
Beginning with the tools at the top of the pane, you find:
Open: By default, the first file in the pane is selected. Click the Open tool to open the selected file. If no file is selected in the pane, the Open tool, as well as all other tools, is grayed out. A condition where you might not have a file selected is when you click a collection that contains no file in the collection folder or when you view a folder that contains no PDF documents. Otherwise, the first file, by default, is always selected when files are shown in the list.
Print: Click a file in the list, and click the Print tool to print the file. When you click Print, the PDF document opens and the Print dialog box opens in the foreground. Make your print attribute choices in the Print dialog box, and click Print to print the file.
Email: Select a file in the list and click the Email tool, and your default e-mail application opens with the selected file attached to a new e-mail message.
Combine Files: Click this tool to open the Combine Files Wizard. In the Wizard, you can select PDF documents to combine into a single file or select a variety of different file formats that can be converted to a PDF. The tool works the same as selecting the File

Note
Macintosh users are restricted to a limited number of file types that can be converted to PDF using the Combine Files Wizard. Windows users can convert all MS Office applications and a number of other file formats that aren't supported on the Mac using this menu command.
Send for Review: Select a file in the list, and choose from the pull-down menu options to Attach for Email Review and Send for Shared Review.
Note
To learn more about the feature in Acrobat 9 for sending files for Shared Reviews, see Chapter 36.
Below the tools in the Files pane is a pull-down menu used for sorting files. You can sort files on metadata contained within the file. From the pull-down menu, shown in Figure 7.4, you have several choices for sorting files.

Sorting by Filename is the default and lists files in an alphabetical ascending order. The Title, Subject, Author, and Keywords items are part of the Document Properties Description that you supply at the time of PDF creation from some authoring programs or that you later add in Acrobat. Creator and Producer are part of the Document Description supplied by Acrobat and relate to the original authoring program and the application producing the PDF file. Number of Pages, File Size, and Modified Date are data that Acrobat adds to the Document Properties derived from the structure of the file. The Last Opened Date sorts the files according to the last time you viewed them in Acrobat with the most recent file listed first and in descending order.
Note
To learn more about Document Descriptions and Document Properties, see Chapter 34.
The icon to the right of the Sort by drop-down list lets you toggle between listing the files in ascending and descending order.
You can also manage files from a context menu opened on a file in the list. This menu has commands to perform the same tasks handled by the tools at the top of the pane. In Figure 7.5 you can see the top portion of the menu, duplicating the tools' functions, such as Open, Print, Email, Combine Files, Send for Review, and more.
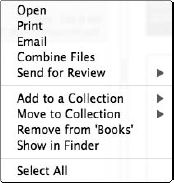
Figure 7.5. Open a context menu on a file listed in the Files pane, and the menu options offer additional commands for managing files.
The Add to Collection menu item contains a submenu that lists all the collections in the Categories pane. As you add new collections to the Categories, they dynamically appear in the Add to Collection submenu. In Figure 7.6, note the submenu for adding files to existing collections.

Figure 7.6. Clicking Add to a Collection opens a submenu that displays the existing collections by Collection name.
The next menu item, Show in Explorer (Windows) or Show in Finder (Macintosh), takes you to Windows Explorer (Windows) or switches to Finder view (Macintosh) and opens the folder where the file is located. The Select All menu command selects all the files listed in the Files pane.
By default, the Pages pane displays the first page in a PDF document of a file selected in the Files pane—something like the Preview in Adobe Bridge. One of the great features of the Organizer is that it shows multiple pages in the Pages pane for all files containing more than one page (refer to Figure 7.1). This feature is an advantage over the Bridge where only the cover pages are shown in the Content area and you need to manually scroll pages in the Preview pane to see additional pages in a document. When you select a multi-page document, all pages are displayed in thumbnail view in the Pages pane before you open the file. At the bottom of the pane is a zoom slider. Drag the slider left to display smaller thumbnails and to the right to make the thumbnail views larger. The minus and plus buttons display thumbnails smaller and larger, respectively, in zoom increments.
As you view multi-page documents in the Pages pane, you can double-click any page thumbnail to open the respective page in Acrobat. Select a page thumbnail and open a context menu, and a single menu command appears, enabling you to open that page.
You use the Organizer tool in Acrobat to organize, sort, manage, and group PDF files. Tools in the Organizer provide options for creating PDF documents and initiating review sessions.
PDF files are grouped in Collections where PDF documents are added using a single menu command.
Sorting files on metadata in the Organizer is much more limited than sorting files in Adobe Bridge.
You can view all pages in PDF files in the Organizer in the Pages pane.