
Chapter Nine: From Photoshop to the Web
Most graphic designers are most comfortable designing in Photoshop. And Photoshop provides a convenient environment to sketch and prototype Web pages.
The trick is to design in Photoshop in ways that make it easy for you, or someone else, to convert the artwork to Web elements: to design extractable background patterns; to work in design templates that translate easily to Web-page layouts; and to extract artwork or even entire Web pages that can be plopped right into a Web page in Dreamweaver CS5.
In this chapter, you’ll learn how to create tiling Web-page backgrounds.
#54 Creating Tiling Background Images
Web-page background images are often composed of tiles. These repeating tiles match up side by side and/or top to bottom, and repeat the length and width of the Web page.
To create a tiling background image, start by creating a new Photoshop file. Set the size to the size of each tile in your tiled background image. For example, if you want to create a background tile that repeats every 60 pixels horizontally and vertically, create a new Photoshop file 60 pixels wide by 60 pixels tall. Be sure the image resolution is set to 72 ppi. Then follow these steps to create and apply the background tile:
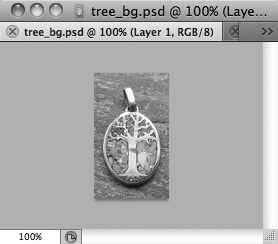
- Create the tile image. It can be the result of a fill color on the Background layer and then a drawn shape, or a selection from within a photo or other image, added to the image (Figure 54a).
Figure 54a. Using a small thumbnail as artwork for a tiling background.
- Save the file as a PSD file for future use—for example, you might want to use the same pattern for another project, but with a different color scheme.
- Select the entire image—if you have to merge the layers temporarily to do so, choose Layer > Merge Visible (you can undo this or not save after performing this step).
- Choose Edit > Define Pattern. The Pattern Name dialog appears.
- Give your new pattern a relevant name, and click OK.
Now you can apply the tile as a background image in Photoshop using the enhanced Fill feature in Photoshop CS5. To test the pattern, and see how it will look as a Web-page background, follow these steps:
- Create a new file by selecting File > New. Set the size of the new file to the intended size of your Web page, such as 960 pixels wide by 800 pixels high.
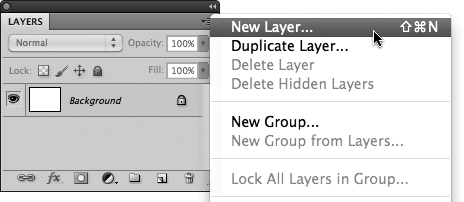
- Create a new layer by choosing New Layer from the Layer panel menu (Figure 54b).
Figure 54b. Creating a new layer.
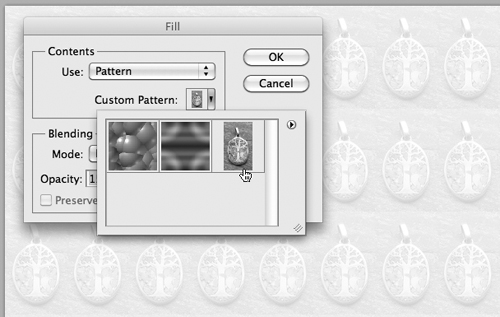
- Choose Edit > Fill, and from the Contents section of the Fill dialog, choose Pattern. Click the Custom Pattern drop-down arrow, and choose the pattern you just created.
- To reduce the opacity of the background image pattern, use the Blending section of the Fill dialog to reduce the opacity of the pattern (Figure 54c). By doing this, you can preview what your tiled background will look like with reduced opacity.
Figure 54c. Defining a fill pattern (background shows pattern applied with reduced opacity).
- The pattern appears, repeated every 60 pixels (assuming you made a 60-x-60-pixel tile). After you’ve tested (and, if necessary, modified) the background image in Photoshop, save the original background image (not the file you have open right now, but the one you completed in the previous set of steps) as a PNG, JPEG, or GIF file (for a full exploration of saving images for the Web, see #47, “Saving Photos for the Web and Mobile Devices,” in Chapter 8).
#55 Creating Semitransparent Backgrounds
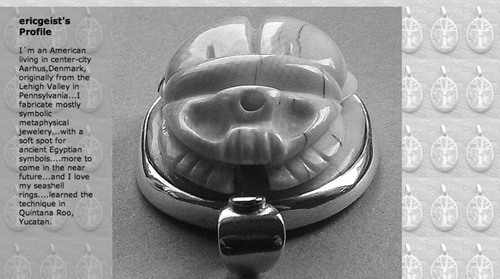
Semitransparent background fills allow you to assign a background color or pattern to an element of a Web page, like an ID or Class style, but still allow some of the page background to show through (Figure 55a).
Figure 55a. A semitransparent background on a left-side div, over a page with a background image.
The process for creating a semitransparent background is similar to that for creating a regular background image (see #54, “Creating Tiling Background Images”).
To create a semitransparent effect for a background or other overlaying image, follow these steps:
- Create a tiny new file; choose File > New and define it as 2 pixels high by 2 pixels wide. Be sure to select 72 ppi. From the Background Contents pop-up menu, choose Transparent. Click OK.
- Zoom in using View > Fit on Screen so that you can see what you’re doing. Select the Pencil tool from the Brush tool flyout in the Photoshop toolbar. Select a Foreground color in the Toolbar—this will be the semitransparent color.
- With the Pencil tool, click once to create a dot—just 1 pixel in size—in the upper-left corner.
- Create another dot in the lower-right corner. This produces what looks like a small checkerboard, with four colored blocks. The white squares will later become transparent (Figure 55b).
Figure 55b. Creating a semitransparent background pattern.

- Choose Edit > Define Pattern to turn this tiny file into a pattern you can later apply to another image.
- Start another new file (File > New). This one should be 50 pixels square and again 72 ppi. Again, choose Transparent from the Background Contents pop-up menu, and then click OK.
- Choose Edit > Fill, and from the Custom Pattern pop-up menu choose the semitransparent pattern you created.
- Choose File > Save for Web & Devices.
- Select GIF as the format for this new file, and be sure the Transparency check box is checked. You will see 2 pixels in the color table, even if you have the number of colors set as high as 256—one will be the color you used for your two dots, and the other will be transparent (represented by a white block with a diamond in the middle).
- Click the Save button and select a location and name for your semitransparent block.
#56 Setting Up Wireframe Templates
The “960 Grid System” is a technique for wireframing Web sites in a way that makes them easy to translate to Web pages. The number 960 defines the width of the Web page. It’s close to the 1024-pixel width of standard smaller-screen browsing environments (like the Apple iPad or many netbook computers). But the secret to the 960 grid is that it’s easily divisible into 2, 4, 6, 8, 12, 16, or even 24 columns. Those columns can be duplicated with CSS styles in Dreamweaver CS5 (or any Web-design environment), making it relatively easy to port a prototype of a Web page from Photoshop into a Web page.
The Photoshop template for the 960 grid can be downloaded at http://960.gs.
To create Web-page prototypes with the 960 grid in Photoshop, follow these steps:
- Open one of the three 960-grid files you’ve downloaded, and save the file with a new filename, as a PSD file (Figure 56a).
Figure 56a. The 960-grid template in Photoshop.
- Choose View > Lock Guides to protect the layout guides that come with the 960-grid template.
- Make sure that Snap To is turned on for Guides.
- Choose View > Snap To, and then make sure View > Snap is selected.
#57 Drawing Wireframes and Mockups
With a 960-grid template set up and saved as a new Photoshop file (see #56, “Setting Up Wireframe Templates”), add content, staying “within the lines” defined by the 960-grid template.
- If you wish to add a background color or image layer, create a new layer (choose Layer > New, and drag the layer to the bottom of the Layers panel list), choose Edit > Fill, and select your pattern as the fill.
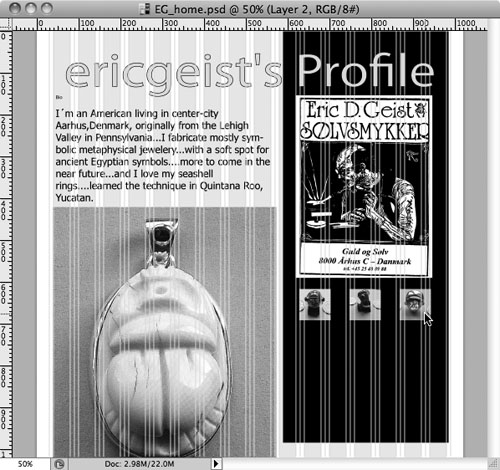
- Add text and graphic elements to the page layout, sizing and aligning horizontally to conform to the columns in the 360 grid (Figure 57a).
Figure 57a. Laying out a Web page in Photoshop using a 16-column 360 grid.
- After the page prototype is complete, you can save the file as a PSD file, or slice the file into discrete objects and save as an HTML page—as explained in the following two How-Tos.
#58 Slicing Files for the Web
If you prepare a prototype of a Web-page design in Photoshop, you can expedite workflow by slicing the file into discrete artwork objects that can then be embedded in the actual Web page. This saves time and also protects the integrity of the design elements.
Follow these steps to slice a Photoshop document:
- After designing a Web page with specific elements (like a banner or heading area, images, text, and so on), activate the Slice tool from the Crop tool flyout.
- Click and drag to create your first slice around a single element in the document (like the banner, for example). A number 1, in blue, appears on that slice, and additional slices are created from the remaining sections of the document.
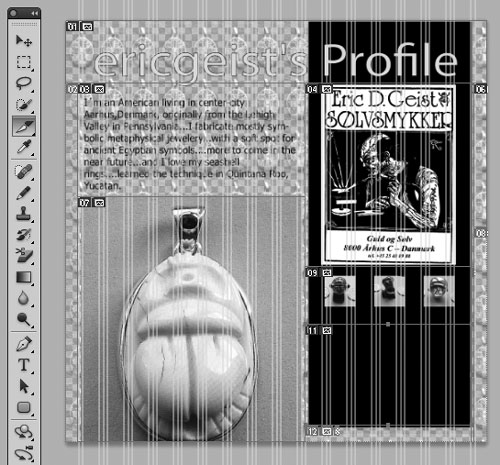
- Draw your next slice by clicking and dragging next to the first slice (the common side of the slice will turn blue if literally connected to the first slice), or create a new slice anywhere in your document (Figure 58a).
Figure 58a. A Photoshop file sliced—the Slice tool is selected.
- Continue to define slices, using existing slices as your guide.
- Save the image as a Photoshop file (PSD). In #59, “Saving Photoshop Files as Web Pages,” I’ll explain how to export all these slices to a Web page that can be edited in Dreamweaver CS5.
#59 Saving Photoshop Files as Web Pages
Once you have sliced a Photoshop Web-page prototype, you can save the entire page as an HTML Web page and the sliced elements as individual images (or text) objects.
Follow these steps to save your PSD file as a Web page:
- Choose File > Save for Web & Devices to begin saving your individual slices.
- In the Save for Web & Devices dialog box, note that the Slice Select tool (left-hand panel) is already active.
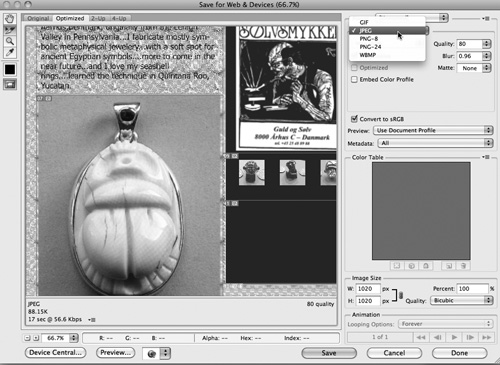
- Use the Slice Select tool in the Save for Web & Devices window to select each slice (you can pan or zoom out to see slices that don’t fit within the display area) and set the format—JPEG, GIF, PNG—for each one. You’ll make your choices based on the content of the slice (Figure 59a).
Figure 59a. Assigning the JPEG format to a slice.
- After all your slices have been set up, using the tools on the right side of the Save for Web & Devices dialog box, click the Save button.
- In the resulting Save Optimized As dialog, enter a filename in the Save As box. Photoshop will add a number (beginning with “_01”) to the filenames of the image files produced for each slice.
- From the Format pop-up, choose HTML and Images to save both your images and to generate an HTML page with your page layout. Choose Images Only to save only the sliced images, and not the HTML page layout. If for some reason you wanted to save the page layout without the images, you would choose HTML Only.
- From the Settings pop-up menu, choose Default Settings option unless you wish to save the page as a single background image (in which case you choose Background Image from the pop-up menu).
- From the Slices pop-up menu, choose All Slices to save all slices, or Selected Slices to save slices you defined by holding down the Shift key and clicking several slices with the Slice Selection tool in the Save for Web & Devices dialog.
- Click the Save button in the Save Optimized As dialog to save the slices with the settings you selected.