1. Getting to Know the Work Area
Lesson overview
In this lesson, you’ll explore the Illustrator workspace and learn how to do the following:
Open an Adobe Illustrator file.
Understand cloud documents.
Work with the toolbar.
Work with panels.
Reset and save your workspace.
Use view options to change the display magnification.
Navigate multiple artboards and documents.
Rotate the canvas view.
Explore document groups.

This lesson will take about 45 minutes to complete. To get the lesson files used in this chapter, download them from the web page for this book at adobepress.com/IllustratorCIB2022. For more information, see “Accessing the lesson files and Web Edition” in the Getting Started section at the beginning of this book.

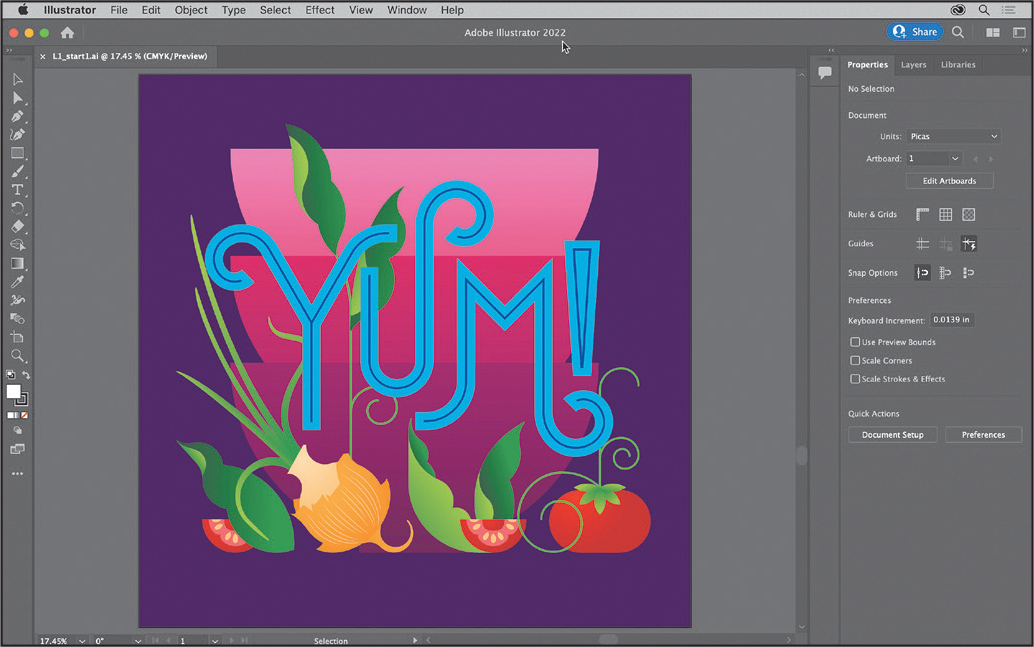
By learning how to navigate the workspace easily and efficiently, you’ll be able to make the most of the extensive drawing, painting, and editing capabilities of Adobe Illustrator. The workspace consists of the Application bar, menus, toolbar, Properties panel, Document window, and other default panels.
Introducing Adobe Illustrator
In Illustrator, you primarily create and work with vector graphics (sometimes called vector shapes or vector objects). Vector graphics are made up of lines and curves defined by mathematical objects called vectors. You can resize vector graphics to cover the side of a building or to use as a social media icon, without losing detail or clarity.
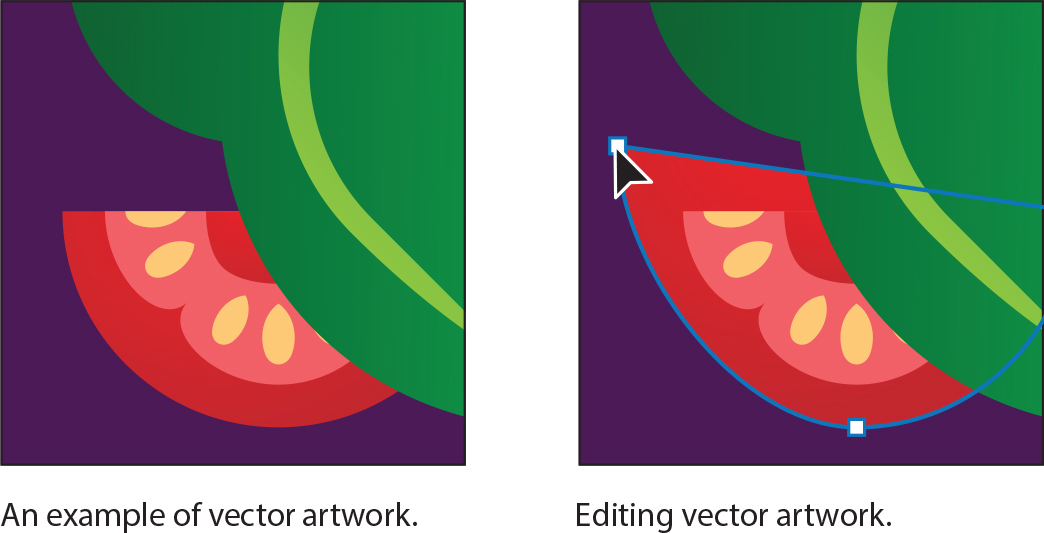
Vector graphics maintain crisp edges when printed to a PostScript printer, saved in a PDF file, or imported into a vector-based graphics application. As a result, vector graphics are the best choice for artwork like logos that will be used at various sizes and in various output media.
![]() Tip
Tip
To learn more about bitmap graphics, search for “Importing bitmap images” in Illustrator Help (Help > Illustrator Help).
Illustrator also allows you to incorporate bitmap images—technically called raster images—that are made up of a rectangular grid of picture elements (pixels). Each pixel is assigned a specific location and color value. Pictures you take on your phone camera are considered raster images. Raster images can be created and edited in a program like Adobe Photoshop.
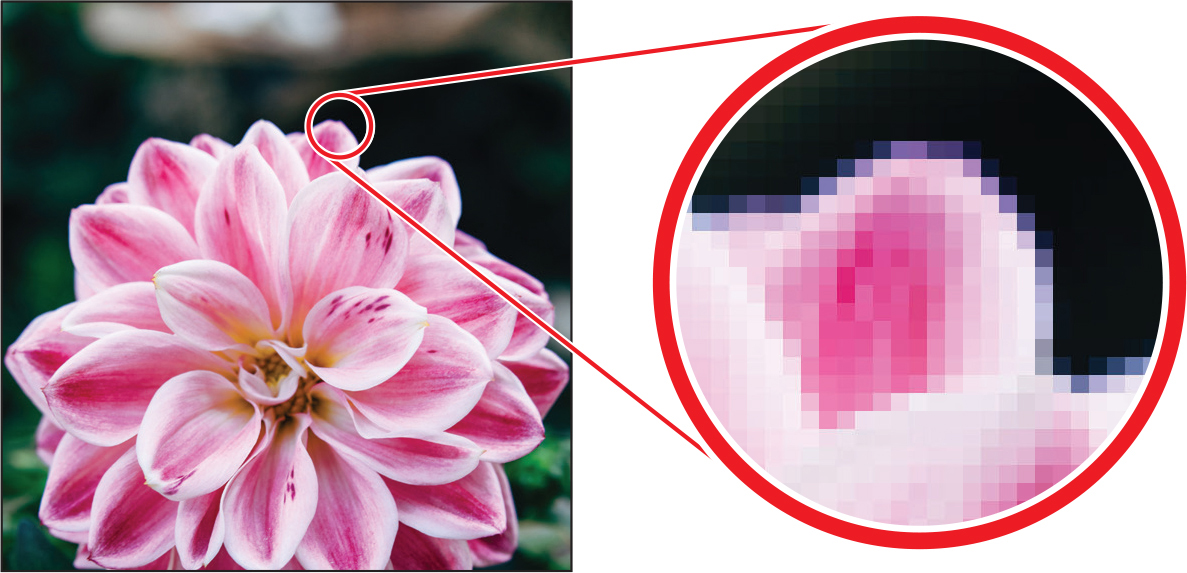
Example of a raster image and a zoomed-in portion to show the pixels.
Opening an Illustrator file
In this lesson, you’ll begin exploring Illustrator by opening a document. First, you’ll restore the default preferences for Adobe Illustrator. This is something you will do at the start of each lesson in this book to ensure that the tools function and the defaults are set exactly as described in this lesson.
![]() Note
Note
If finding the preferences file proves difficult, please email me ([email protected]) for assistance.
![]() Note
Note
If you have not already downloaded the project files for this lesson to your computer from your Account page, make sure to do so now. See the “Getting Started” section at the beginning of the book.
To delete or deactivate (by renaming) the Adobe Illustrator preferences file, see “Restoring default preferences” in the “Getting Started” section at the beginning of the book.
Double-click the Adobe Illustrator icon to launch Adobe Illustrator.
With Illustrator open, you will see the Home screen showing resources for Illustrator, and more.
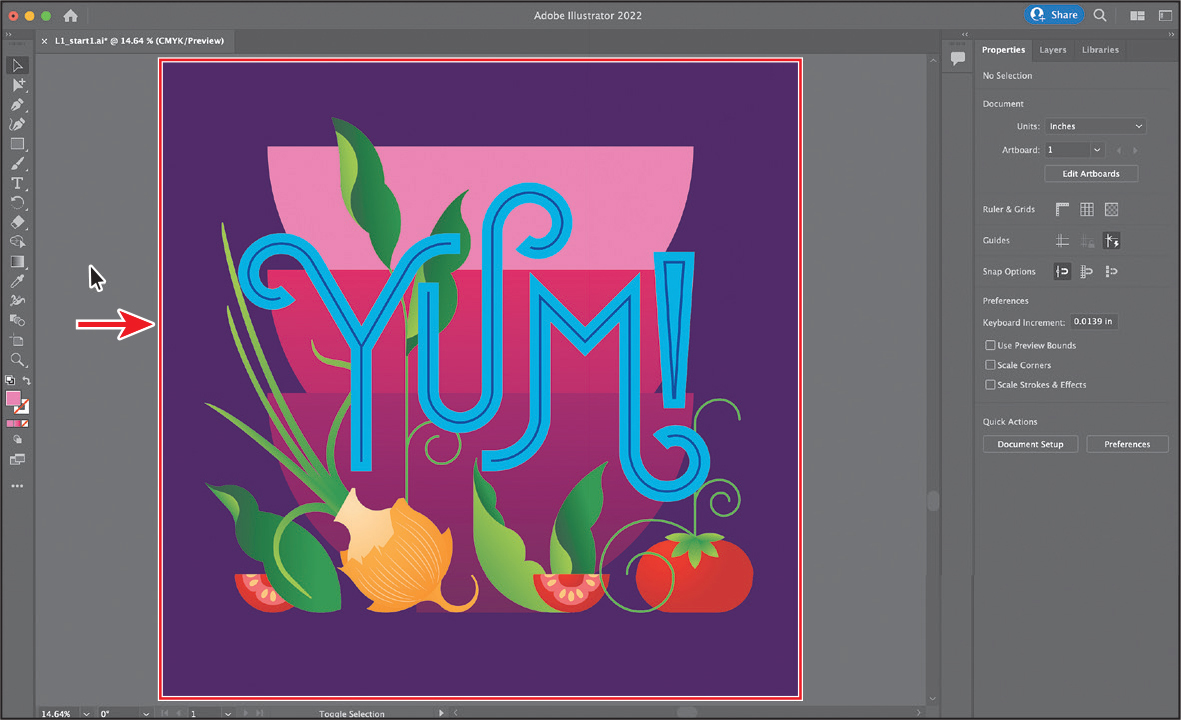
Choose File > Open or click the Open button in the Home screen. In the Lessons > Lesson01 folder on your hard disk, select the L1_start1.ai file, and click Open to open the design.
You will use the L1_start1.ai file to practice navigating, zooming, and investigating an Illustrator document and the workspace.
Choose Window > Workspace > Essentials, make sure it’s selected (a checkmark appears next to the name if selected), and then choose Window > Workspace > Reset Essentials to reset the workspace.
The Reset Essentials command ensures that the workspace, which includes all of the tools and panels, is set to the default settings. You’ll learn more about resetting the workspace in the section “Switching workspaces.”
Choose View > Fit Artboard In Window.
An artboard is the area that contains artwork that will be output and is similar to a page in Adobe InDesign or Microsoft Word. This command fits the whole artboard (the purple area in the figure) into the Document window so you can see the whole design.
Understanding cloud documents
You can save your Illustrator documents as cloud documents. A cloud document is an Illustrator document that is stored in Adobe Creative Cloud and can be accessed anywhere you sign in to Illustrator.
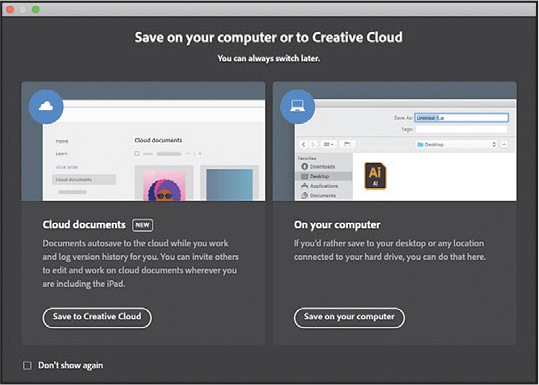
After you create a new document or open a document from your hard drive, you save the file to the cloud by choosing File > Save As. The first time you do this, you will see a Cloud Document dialog box with options to save as a cloud document or save to your computer. Click the Save To Creative Cloud button.
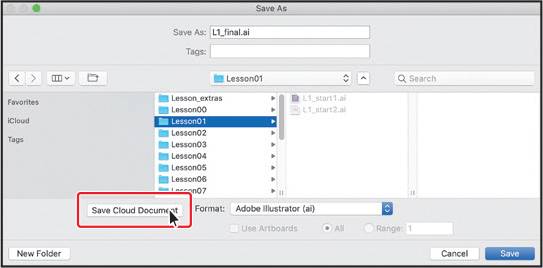
Note: If instead of the Cloud Document dialog box you see the Save As dialog box and want to save as a cloud document, you can click the Save Cloud Document button.
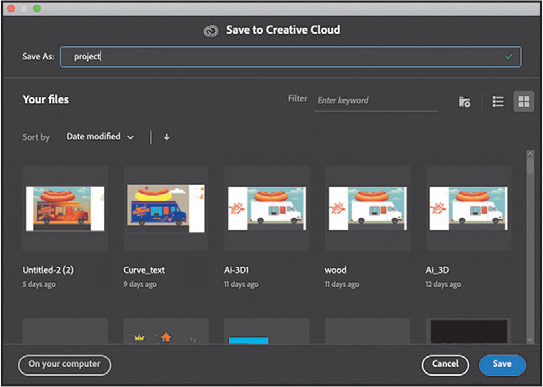
In the dialog box that appears, you can change the name and click the Save button to save the document to the cloud. If you change your mind and want to save the file locally, you can click On Your Computer in that dialog box.
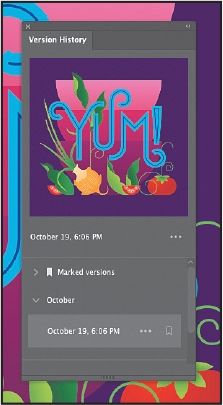
When working on cloud documents, changes are automatically saved, so the document is always up to date. In the Version History panel (File > Version History), you can access previously saved versions of a document. You can bookmark and name specific versions so they show in the Marked area of the panel, and open a version in a new window to see changes. Unmarked versions are available for 30 days and marked versions are available indefinitely.
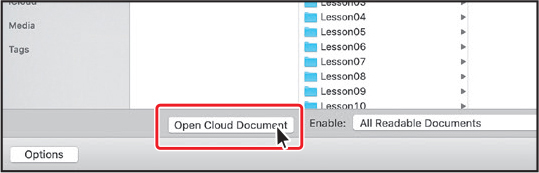
If you want to open a cloud document, choose File > Open. In the Open dialog box, click Open Cloud Document. You can then open a cloud document from the dialog box that appears.
When you launch Illustrator, you can click Your Files from the Home screen to view documents saved to the Creative Cloud. From there, you can open and organize them.
Exploring the workspace
When Illustrator is launched and a file is open, the menus, Application bar, toolbar, and panels appear on the screen. The arrangement of these elements is called a workspace. When you first start Illustrator, you see the default workspace, which you can customize how you like. You can create and save multiple workspaces—one for editing and another for viewing, for example—and switch between them as you work.
![]() Note
Note
The screen captures in this lesson were taken using macOS and may look slightly different from what you see, especially if you are using Windows.
![]() Note
Note
The screen captures in this lesson were taken using macOS and may look slightly different from what you see, especially if you are using Windows.
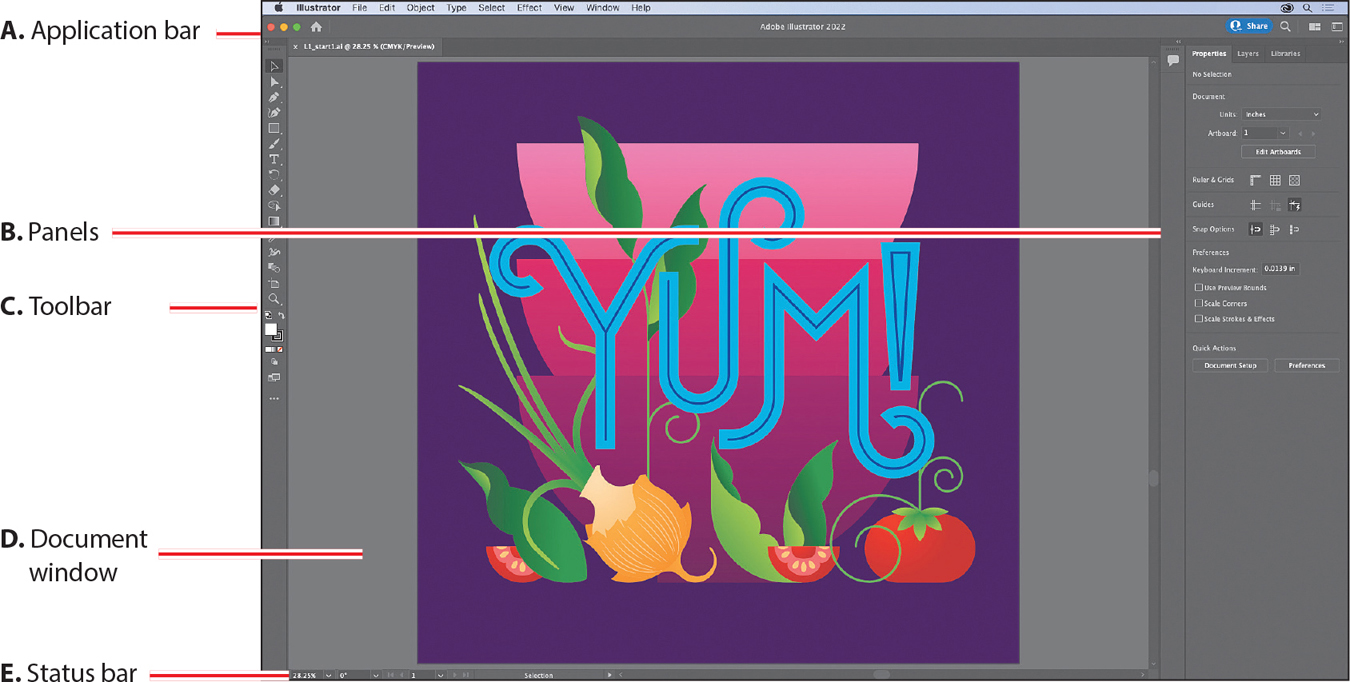
The Application bar, across the top by default, contains application controls, the workspace switcher, and search. On Windows, the main menu bar items appear inline with the Application bar—see the following figure.

Panels help you monitor and modify your work. Certain panels are displayed by default in the panel dock on the right side of the workspace, and you can display any panel by choosing it from the Window menu.
The toolbar contains tools for creating and editing images, artwork, artboard elements, and more. Related tools are grouped together.
The Document window displays the file(s) you’re working on.
The Status bar appears at the lower-left edge of the Document window. It displays information, zooming, and navigation controls.
Getting to know the toolbar
The toolbar on the left side of the workspace contains tools for selecting, drawing, painting, editing, and viewing, as well as the Fill and Stroke boxes, drawing modes, and screen modes. As you work through the lessons, you’ll learn about the specific function of many of these tools.
![]() Tip
Tip
You can turn the tool tips on or off by choosing Illustrator > Preferences > General (macOS) or Edit > Preferences > General (Windows) and selecting or deselecting Show Rich Tool Tips
Move the pointer over the Selection tool (
 ) in the toolbar. Notice that the name (Selection tool) and keyboard shortcut (V) display in a tool tip, as well as in most cases, more information about the tool.
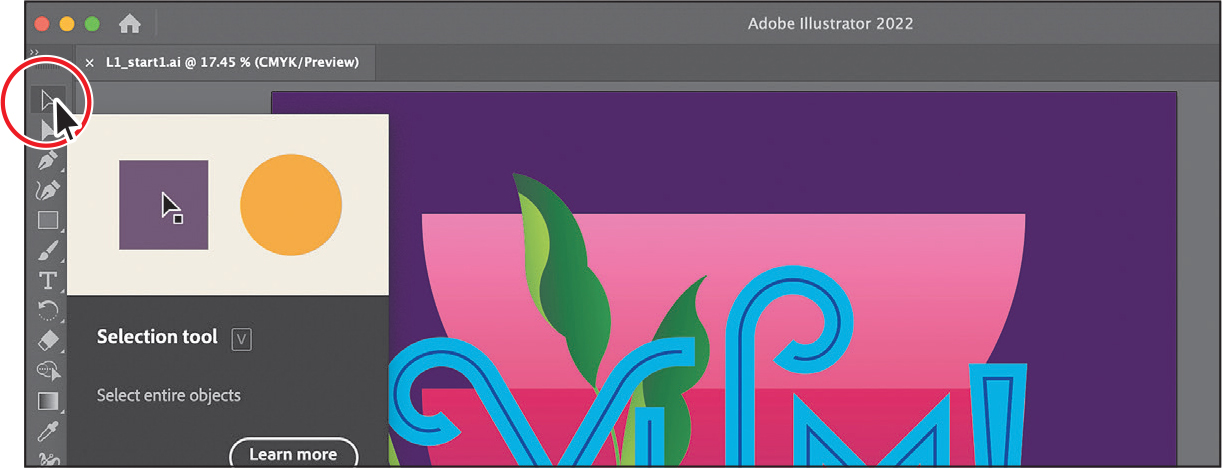
Move the pointer over the Direct Selection tool (
 ). Press and hold until a tool menu appears, and then release the mouse button. Click the Group Selection tool (
 ) in the menu to select it.
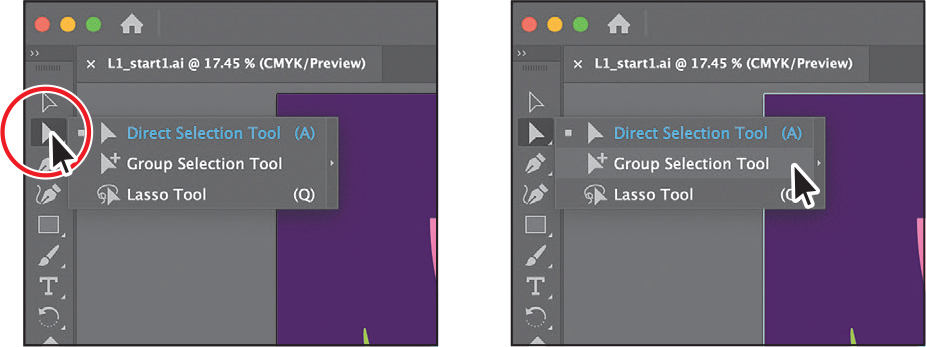
Any tool in the toolbar that displays a small triangle contains additional tools that can be selected this way.
 Tip
TipYou can also select hidden tools by pressing the Option key (macOS) or the Alt key (Windows) and clicking the tool in the toolbar. Each click selects the next hidden tool in the tool sequence.
Press and hold the Rectangle tool (
 ) to reveal more tools. Click the arrow at the right edge of the hidden tools panel to separate the tools from the toolbar as a separate floating panel of tools that you can access easily.
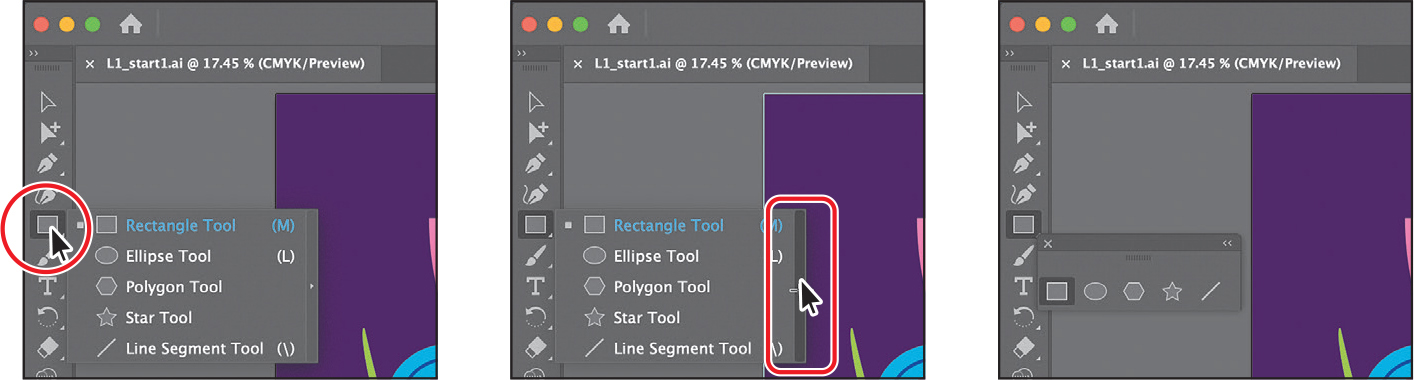
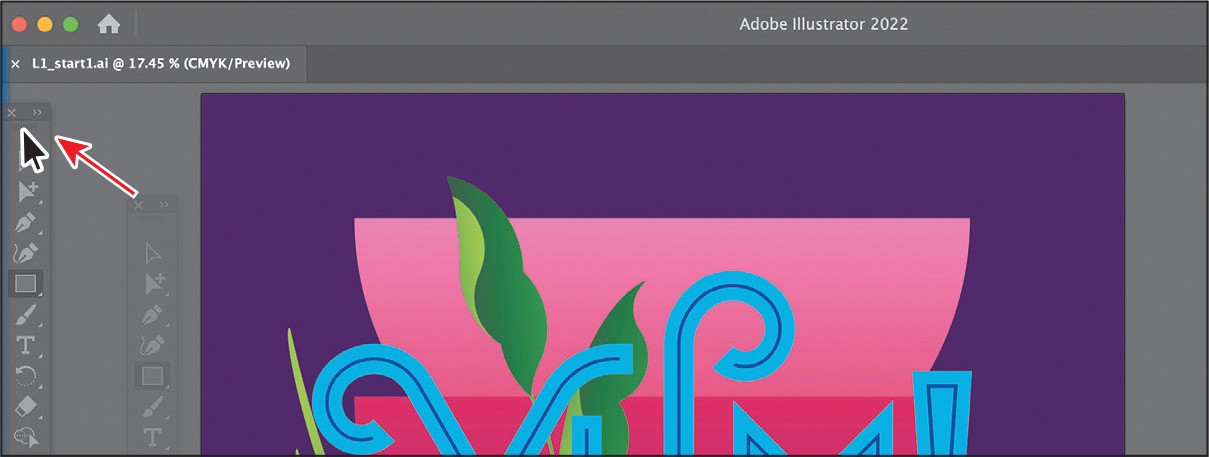
Click the Close button (X) in the upper-left corner (macOS) or upper-right corner (Windows) of the floating tool panel to close it. The tools return to the toolbar.
Next, you’ll learn how to resize and float the toolbar. In the figures in this lesson, the toolbar is a single column by default. You may initially see a double-column toolbar, depending on your screen resolution and workspace, and that’s okay.
Click the double arrow in the upper-left corner of the toolbar to either expand the single column into two columns or collapse the two columns into one (depending on your screen resolution).
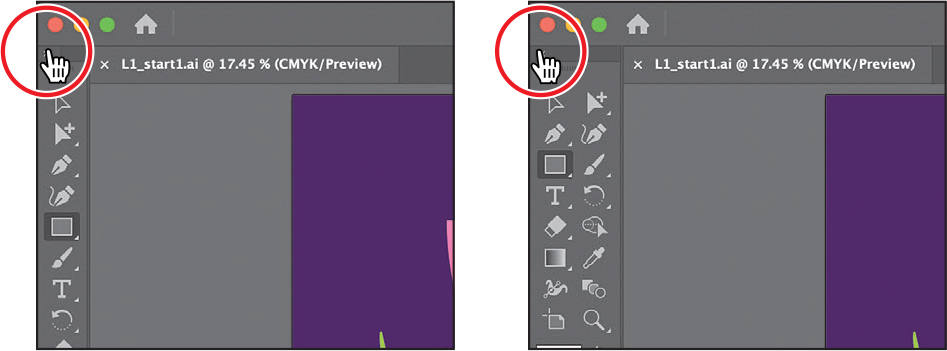
Click the same double arrow again to collapse (or expand) the toolbar.
TipYou can also double-click the title bar at the top of the toolbar to switch between two columns and one column.
 Note
NoteWhen the toolbar is floating, be careful not to click the X or it will close! If you close it, choose Window > Toolbars > Basic to reopen it.
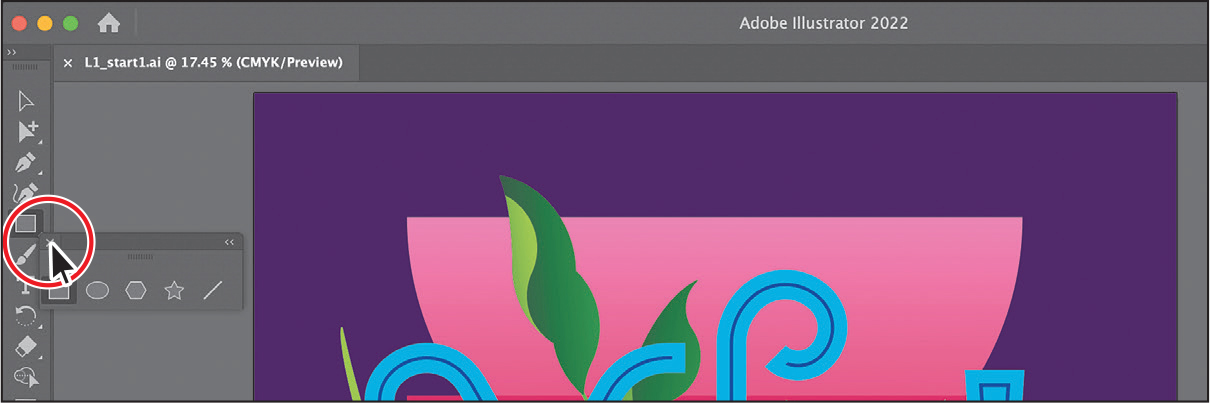
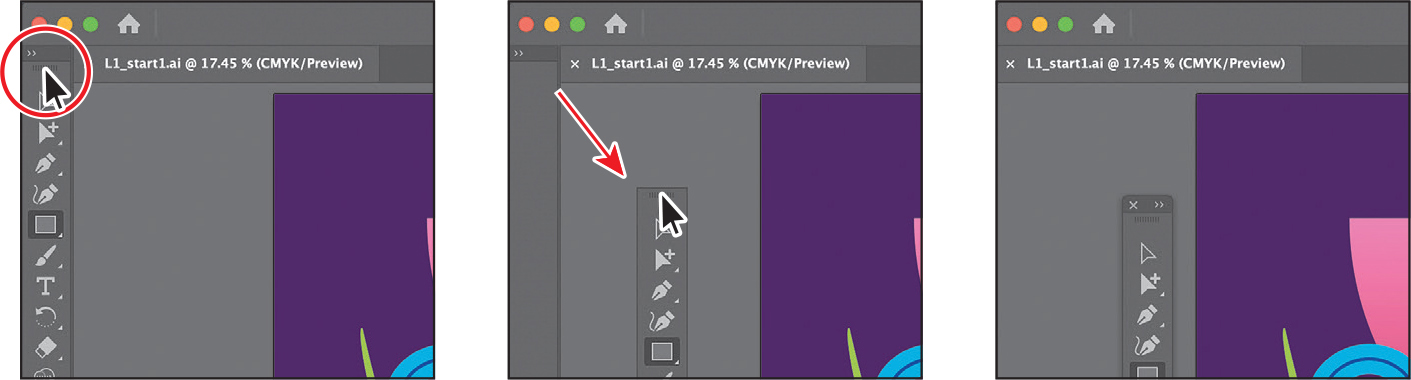
Drag the toolbar into the workspace by the dark gray title bar at the top of the toolbar or by the dashed line beneath the title bar. The toolbar is now floating in the workspace.
Drag the toolbar to the left side of the Application window using either the solid bar at the top of the toolbar or the dashed line just below the solid bar.
When the pointer reaches the left edge, a translucent blue border, called the drop zone, appears. Release the mouse button to dock the toolbar neatly into the side of the workspace.
Finding more tools
In Illustrator, the default set of tools that appears in the toolbar does not include every available tool. As you make your way through this book, you’ll explore other tools that you’ll need to know how to access. In this section, you’ll see how to access these other tools.
Click Edit Toolbar (
 ) at the bottom of the toolbar.
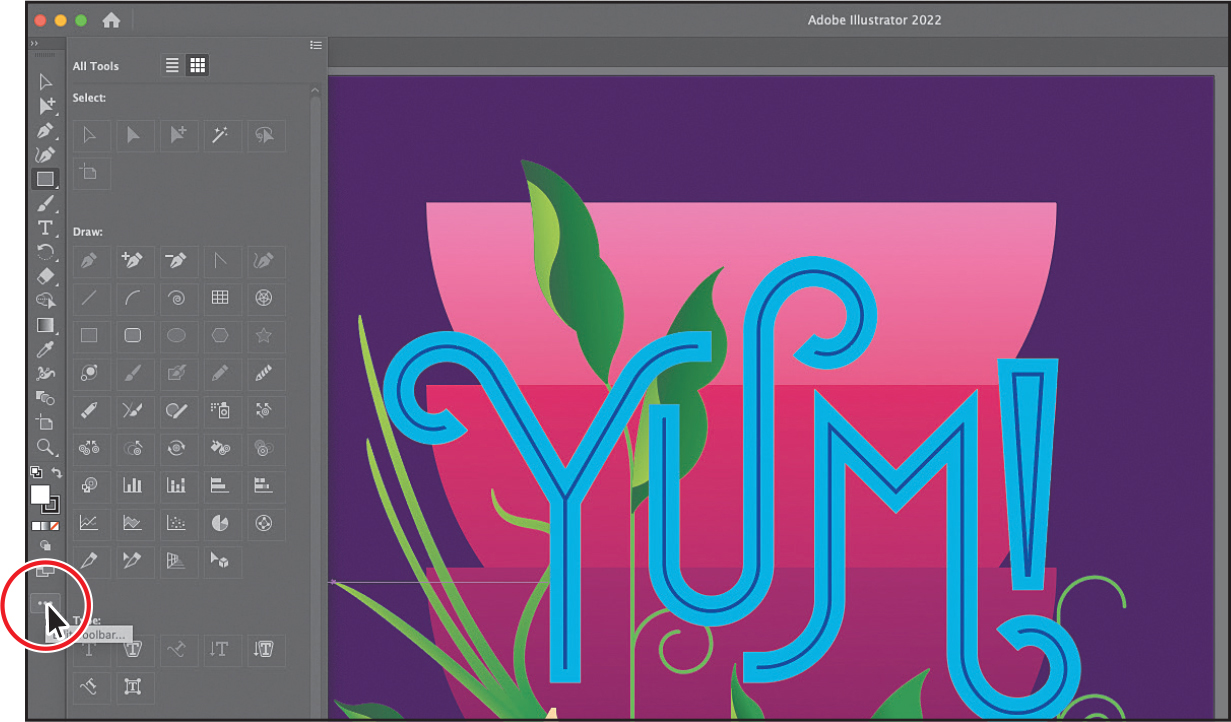
A panel appears that shows all of the available tools. The tools that appear dimmed (you can’t select them) are already in the default toolbar. You can drag any of the remaining tools into the toolbar, where you can then select and use them.
Move the pointer over a tool that is dimmed, like the Selection tool, at the top of the tools list (you may need to scroll up).
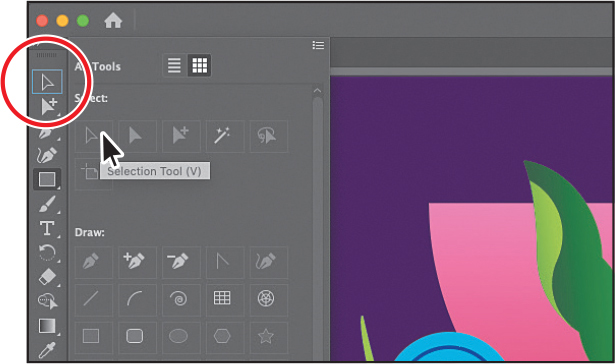
The tool is outlined in blue in the toolbar. If you hover over a tool like the Ellipse tool, which is nested within the Rectangle tool, the Rectangle tool will be outlined, showing you where it is.
Scroll in the list of tools until you see the Shaper tool (
 ). To add it to the toolbar, drag the Shaper tool onto the Rectangle tool. When a highlight appears around the Rectangle tool, release the mouse button to add the Shaper tool.
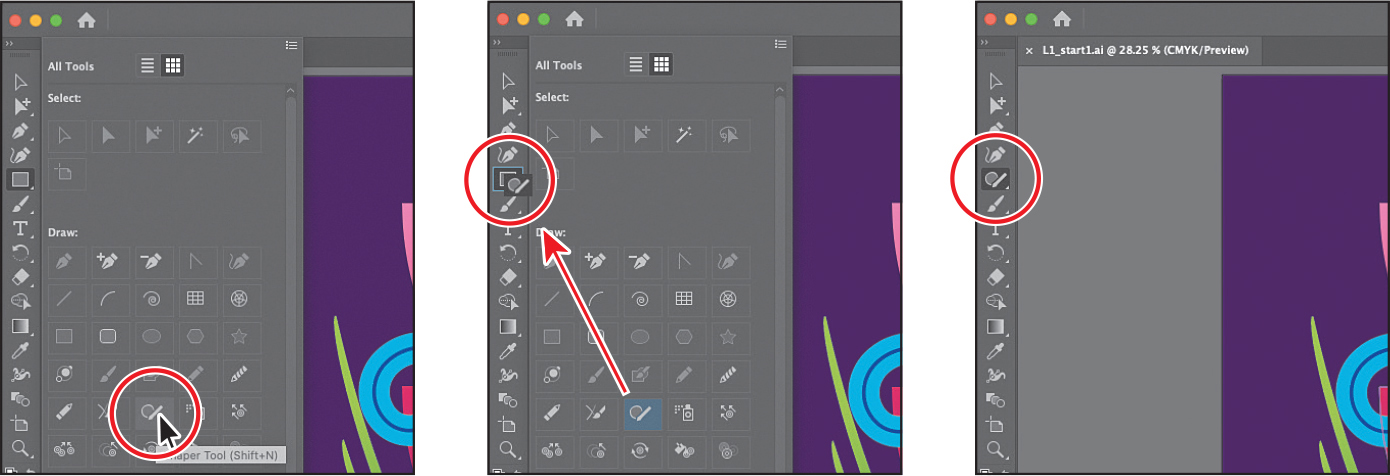
Press the Escape key to hide the extra tools.
The Shaper tool will now be in the toolbar until you remove it or reset the toolbar. Next, you’ll remove the Shaper tool. Later in the book, you will add tools to learn more about them.
TipTip: After clicking Edit Toolbar, you can reset the toolbar by clicking the panel menu icon (
 ) and choosing Reset
Click Edit Toolbar (
) at the bottom of the toolbar again to show the panel of extra tools. Drag the Shaper tool anywhere onto the panel and release the mouse button to remove the Shaper tool from the toolbar.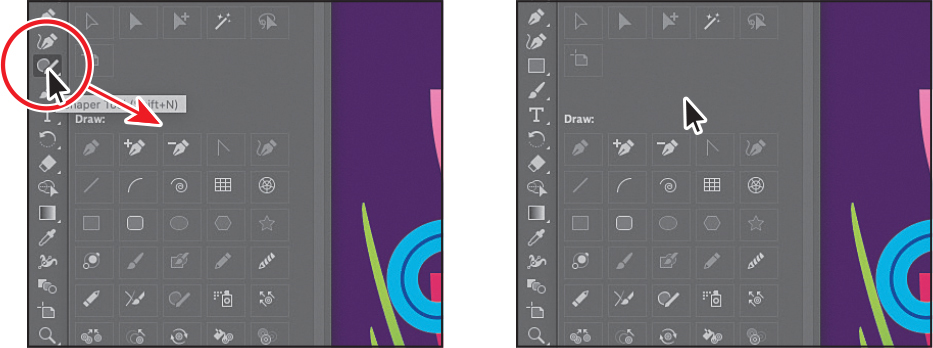
Press the Escape key to hide the extra tools.
Working with the Properties panel
When you start Illustrator for the first time and open a document, you’ll see the Properties panel on the right side of the workspace. The Properties panel displays properties for the active document when nothing is selected. It also displays appearance properties for content you select. It’s a panel you’ll use quite a bit; it puts all of the most commonly used options in one place.
Using the Properties panel, you’ll change the color of artwork in the poster.
Select the Selection tool (
) in the toolbar, and look in the Properties panel on the right.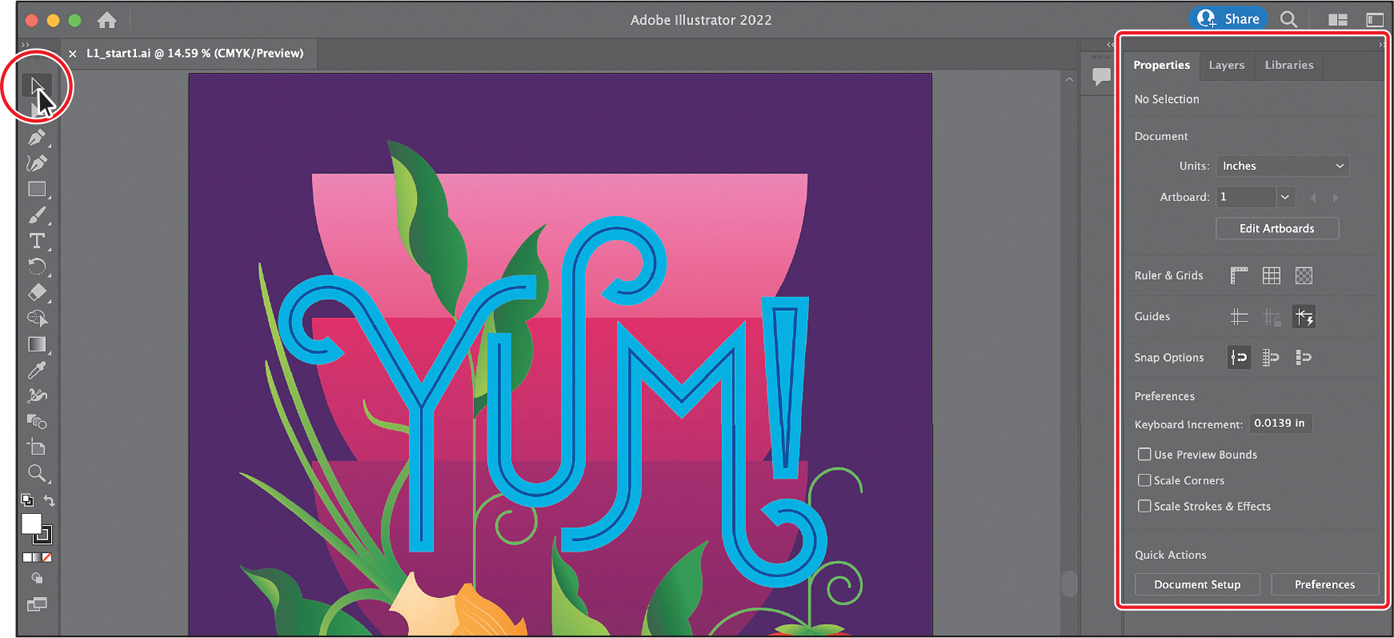
At the top of the Properties panel, you will see “No Selection.” This is called the Selection Indicator. It’s a great place to see what type of content is selected (if any). With nothing selected in the document, the Properties panel shows the current document properties and program preferences.
Move the pointer into the top bowl shape in the document, and click to select it.
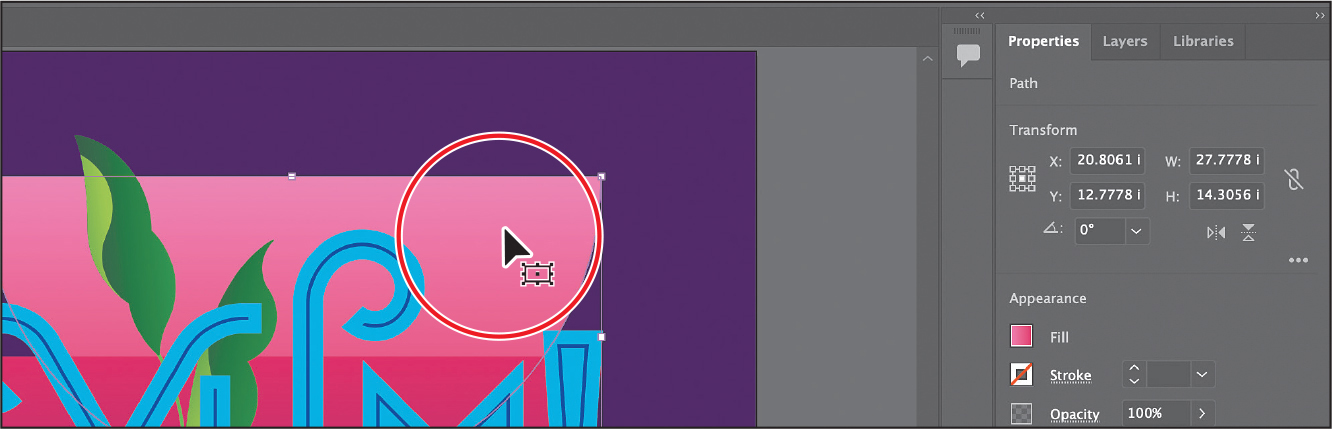
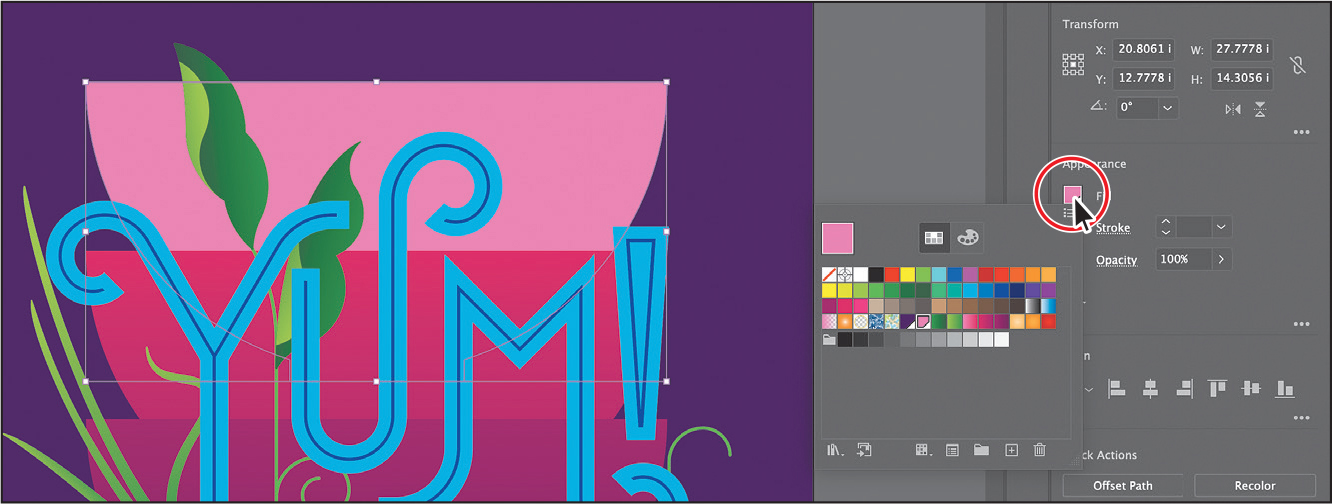
In the Properties panel, you should now see appearance options for the selected artwork, which is a path, as indicated by “Path” at the top of the panel. You can change the size, position, color, and much more for the selected artwork.
TipWords that are underlined in the Properties panel show more options when you click them.
Click the color box to the left of the word “Fill” in the Properties panel to show a panel of colors.
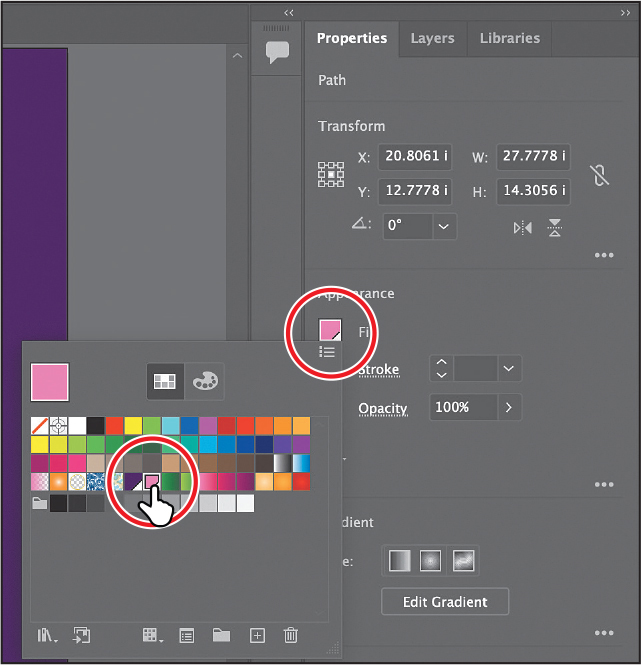
In the panel that shows, make sure the Swatches option is selected at the top (circled in the figure), and then click another color to apply it.
Press Escape to hide the panel.
Choose Select > Deselect to deselect the bowl shape.
The Properties panel once again shows document properties and program preferences when nothing is selected.
Working with panels
Panels like the Properties panel give you quick access to many of the tools and options that make modifying artwork easier. All of the panels available in Illustrator are listed alphabetically in the Window menu. Next, you’ll experiment with hiding, opening, and closing panels.
![]() Tip
Tip
To show a panel that is not currently visible, choose the panel name from the Window menu. A checkmark to the left of the panel name indicates that the panel is already open and in front of other panels in its panel group. If you choose a panel name that is already selected in the Window menu, the panel and its group either close or collapse.
![]() Tip
Tip
To expand or collapse the panel dock, you can also double-click the panel dock title bar at the top.
Click the Layers panel tab to the right of the Properties panel tab.
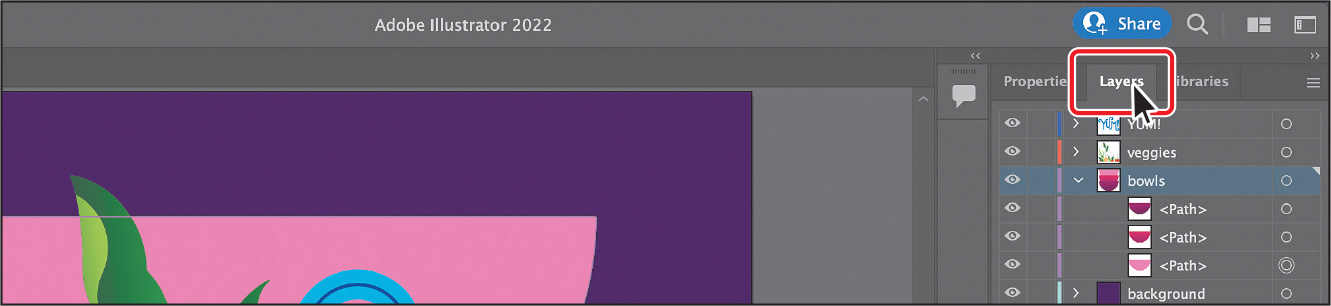
The Layers panel is grouped with two other panels—the Properties panel and the Libraries panel. They are all part of the same panel group.
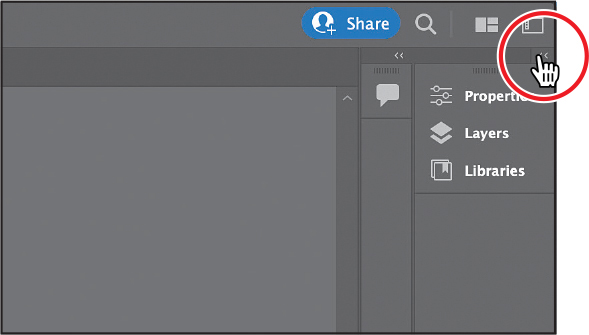
Click the double arrow at the top of the dock to collapse the panels.
You can use this method of collapsing the panels to create a larger area for working on your document. You’ll learn more about docking in the next section.
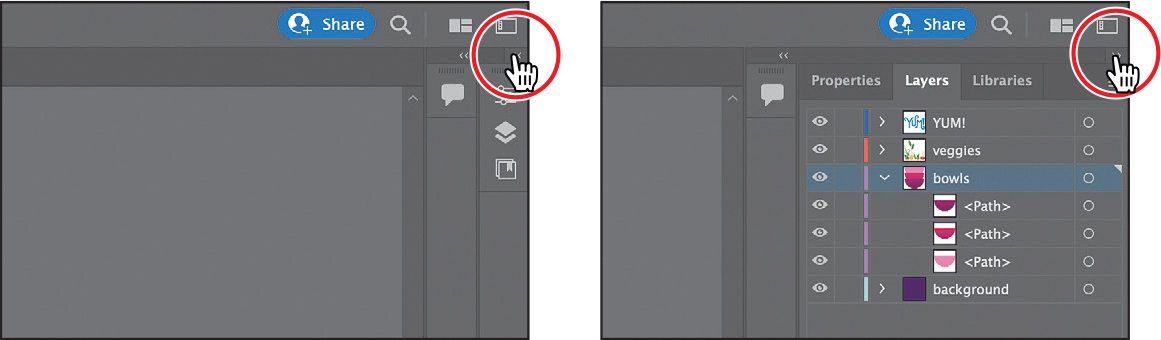
Drag the left edge of the docked panels to the right until the panel text disappears.

This hides the panel names and collapses the panel dock to icons only. To open a panel that is collapsed as an icon, you can click a panel icon.
Click the double arrow again to expand the panels.
Choose Window > Workspace > Reset Essentials to reset the workspace.
You’ll learn more about resetting and switching workspaces in the section “Switching workspaces.”
Moving and docking panels
Panels in Illustrator can be moved around in the workspace and organized to match your working needs. Next, you’ll open a new panel and dock it with the default panels on the right side of the workspace.
Click the Window menu at the top of the screen to see all of the panels available in Illustrator. Choose Align from the Window menu to open the Align panel and the other panels grouped with it by default.
Panels you open that do not appear in the default workspace are free-floating. That means they are not docked and can be moved around. You can dock free-floating panels on the right or left side of the workspace.
Drag the Align panel group by the title bar above the panel names to move the group closer to the docked panels on the right.
Next, you’ll dock the Align panel with the Properties panel group.
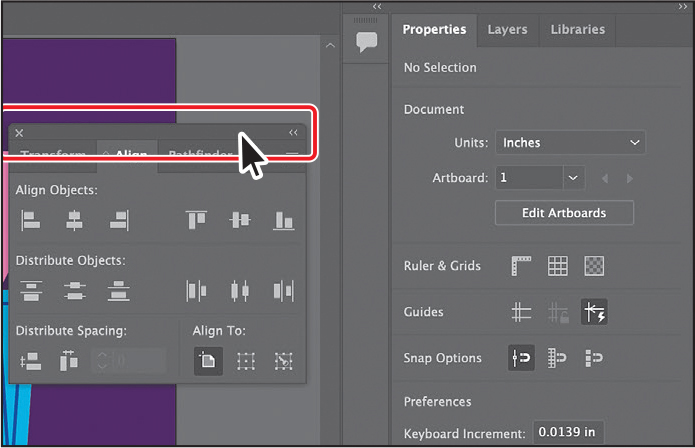
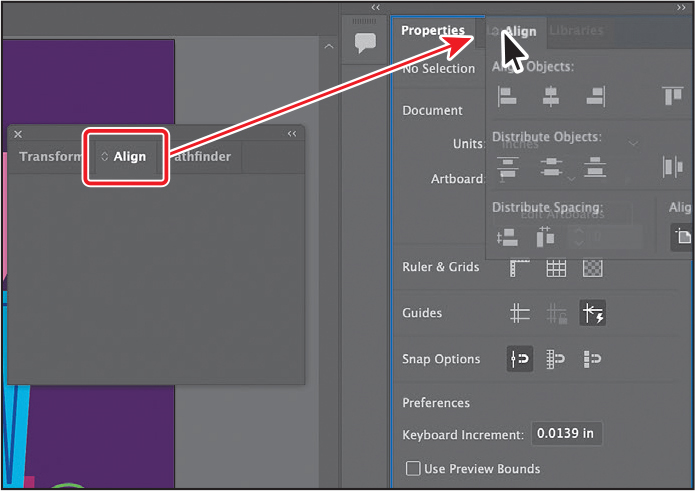
Drag the Align panel by the panel tab onto the Properties, Layers, and Libraries panel tabs on the right. When a blue highlight appears around the entire panel dock, release the mouse button to dock the panel in the group.
When dragging a panel to the dock on the right, if you see a blue line above the docked panel tabs before releasing, you’ll create a new panel group rather than docking the panel with the existing panel group.
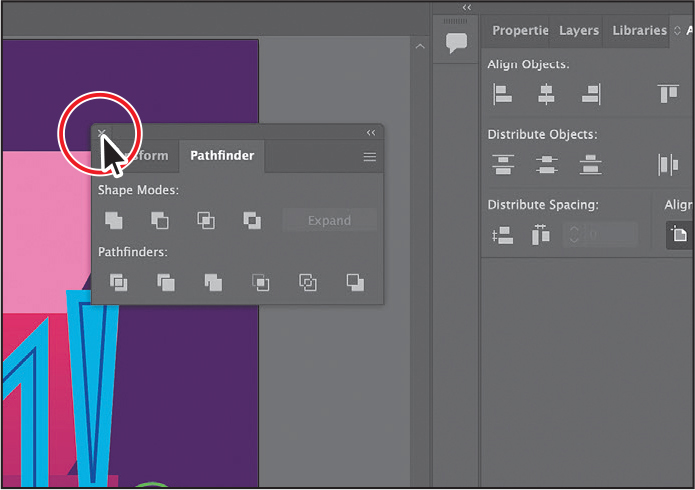
Click the X at the top of the Transform and Pathfinder panel group, which is free-floating, to close it.
Aside from adding panels to the dock on the right, you can also remove them.
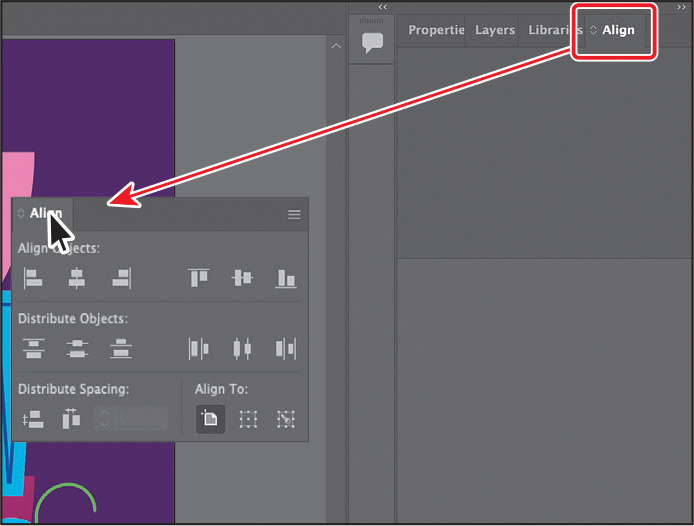
Drag the Align panel by the panel tab, to the left, away from the dock of panels, and release the mouse button.
Click the X at the top of the Align panel to close it.
Click the Libraries panel tab on the right to show that panel, if the panel isn’t already showing.
Scaling the Illustrator interface
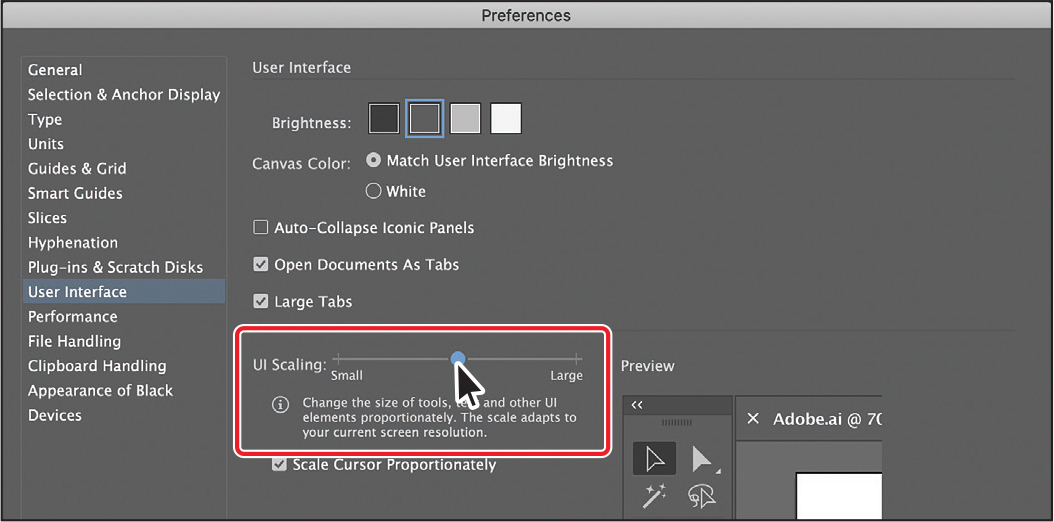
When you launch Illustrator, it identifies your screen resolution and adjusts the application scale factor accordingly. You can scale the user interface of Illustrator based on your screen resolution to make the tools, text, and other UI elements easier to see.
Choose Illustrator > Preferences > User Interface (macOS) or Edit > Preferences > User Interface (Windows) to change the UI Scaling settings. The change will take place after restarting Illustrator.
Switching workspaces
Illustrator comes with a host of workspaces that are tailored to a variety of tasks. As you’ve seen, you can also customize the parts of the default Essentials workspace, like the toolbar and panels. As you make changes, like opening and closing panels and changing their position (among other things), you can save that particular arrangement as a workspace—and switch between them while you work.
Next, you’ll switch workspaces and learn about some new panels.
![]() Tip
Tip
You can also choose Window > Workspace and choose a workspace.
![]() Tip
Tip
Press Tab to toggle between hiding and showing all panels. You can hide or show all panels at once, except for the toolbar, by pressing Shift+Tab to toggle between hiding and showing them.
Click the workspace switcher (
 ) on the right end of the Application bar above the docked panels to change the workspace. See the first part of the following figure.
You’ll see a number of workspaces listed, each with a specific purpose, that will open panels and arrange the workspace accordingly.
Choose Layout from the workspace switcher menu to change workspaces.
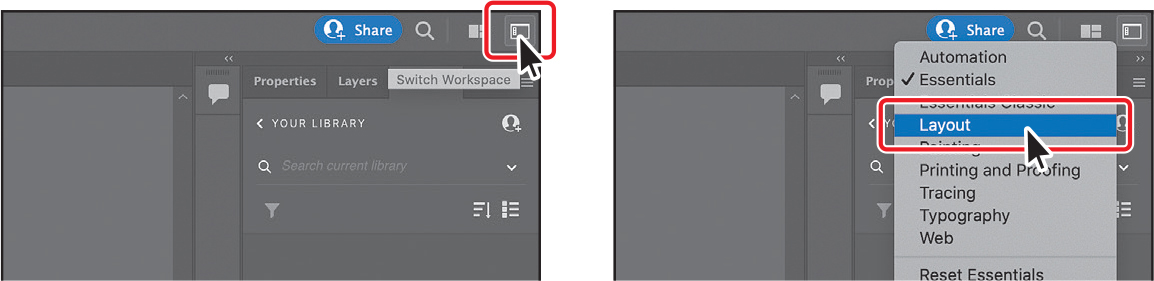
You’ll notice a few major changes in the workspace. One of the biggest is the Control panel, which is now docked at the top of the workspace, just above the Document window (it’s highlighted in the following figure). Similar to the Properties panel, it offers quick access to options, commands, and other panels relevant to the currently selected content.

Also, notice all of the collapsed panel icons on the right side of the workspace. In workspaces, you can create groups of panels that are stacked on top of others. That way, a lot more panels are visible.
Choose Essentials from the workspace switcher (
) above the docked panels to switch back to the Essentials workspace.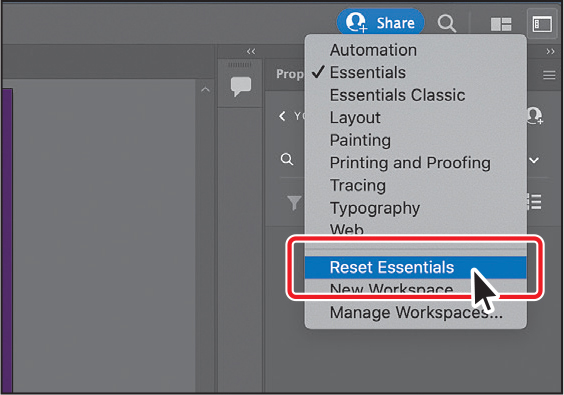
Choose Reset Essentials from the workspace switcher in the Application bar.
When you switch back to a previous workspace, it remembers any changes you made, like selecting the Libraries panel. To completely reset a workspace to its default settings, the Essentials workspace in this case, you’ll need to reset it.
![]() Tip
Tip
To delete workspaces you create, choose Window > Workspace > Manage Workspaces. Select the workspace name, and click the Delete Workspace button.
Saving a workspace
So far, you’ve reset the workspace and chosen a different workspace. You can also arrange the panels the way you like and save your own custom workspace. Next, you’ll dock a new panel and create your own workspace.
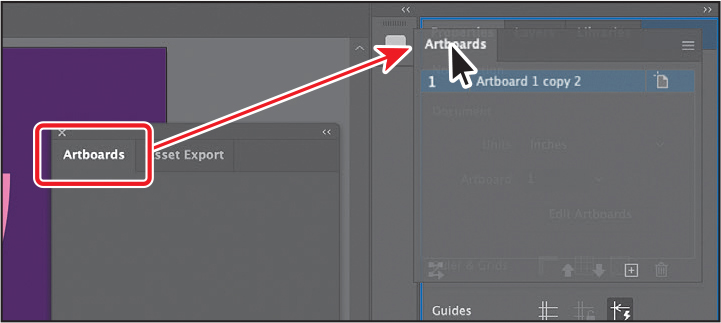
Choose Window > Artboards to open the Artboards panel group.
 Tip
TipTo change a saved workspace, reset the panels as you’d like them to appear and then choose Window > Workspace > New Workspace. In the New Workspace dialog box, name the workspace with a new, unused name. If you name a new workspace with a name that’s already in use, a message appears in the dialog box warning that you will overwrite an existing workspace with the same name if you click OK.
Drag the Artboards panel by the panel tab onto the Properties panel tab at the top of the docked panels on the right. When a blue highlight appears around the entire panel dock, release the mouse button to dock the Artboards panel and add it to the existing panel group.
Click the X at the top of the free-floating Asset Export panel to close it.
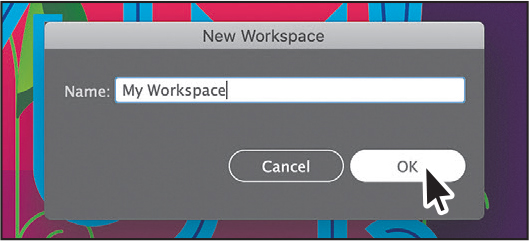
Choose Window > Workspace > New Workspace. Change its name to My Workspace in the New Workspace dialog box, and click OK.
The name of the workspace could be anything, as long as it makes sense to you. The workspace named “My Workspace” is now saved with Illustrator until you remove it.
Choose Window > Workspace > Essentials, and then choose Window > Workspace > Reset Essentials.
Notice that the panels return to their default number and positions after choosing Reset Essentials.
Choose Window > Workspace > My Workspace.
Toggle between the two workspaces using the Window > Workspace command, and return to the Essentials workspace before starting the next exercise.
Using panel and context menus
Most panels in Illustrator have more options available in a panel menu, found by clicking the panel menu icon (![]() or
or ![]() ) in the upper-right corner of a panel. These additional options can be used to change the panel display, add or change panel content, and more. Next, you’ll change the display of the Swatches panel using its panel menu.
) in the upper-right corner of a panel. These additional options can be used to change the panel display, add or change panel content, and more. Next, you’ll change the display of the Swatches panel using its panel menu.
With the Selection tool (
) selected in the toolbar on the left, click the bowl shape again.Click the Fill color box, to the left of the word “Fill,” in the Properties panel.
In the panel that appears, called the Swatches panel, make sure that the Swatches option (
 ) is selected toward the top of the panel. Click the panel menu icon () in the upper-right corner, and choose Small List View from the panel menu.
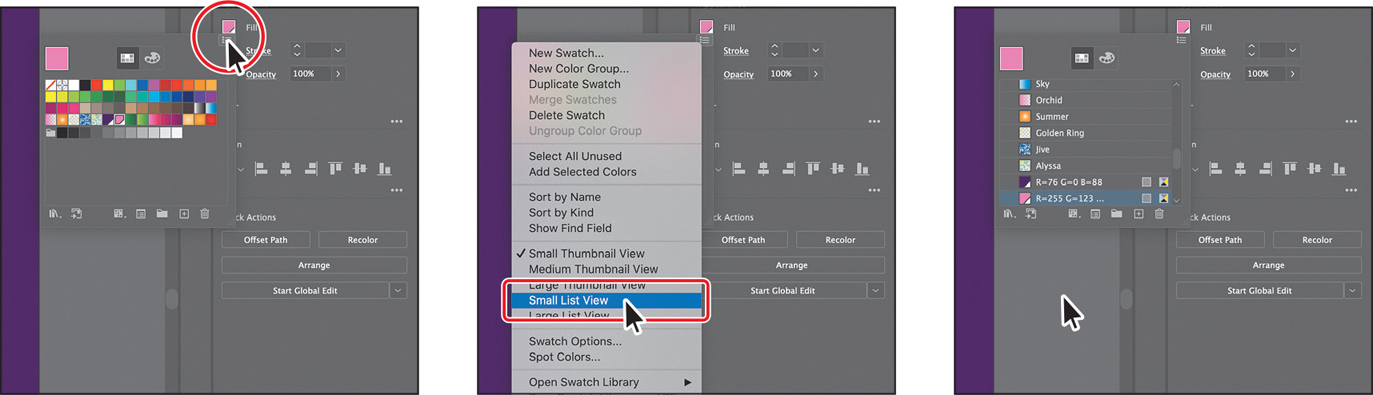
This displays the swatch names, together with thumbnails. Because the options in the panel menu apply only to the active panel, only the Swatches panel view is affected.
Click the same panel menu icon (
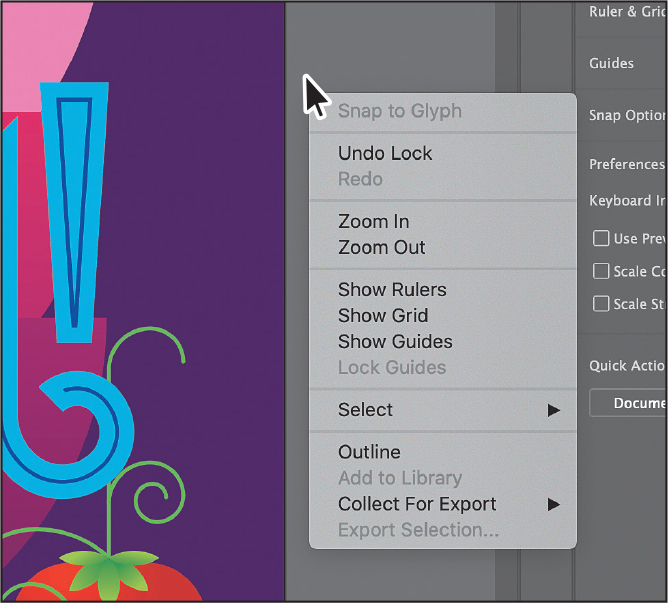
) in the panel showing, and choose Small Thumbnail View to return the swatches to their original view.In addition to the panel menus, context-sensitive menus display commands relevant to the active tool, selection, or panel. Usually the commands in a context menu are available in another part of the workspace, but using a context menu can save you time.
Press Escape to hide the Swatches panel.
Choose Select > Deselect so the bowl shape is no longer selected.
TipIf you move the pointer over the tab or title bar for a panel and right-click, you can close a panel or a panel group from the context menu that appears.
Move the pointer over the dark gray area surrounding the artwork. Then, right-click to show a context menu with specific options.
The context-sensitive menu you see may contain different commands, depending on what the pointer is positioned over.
Adjusting the brightness of the user interface
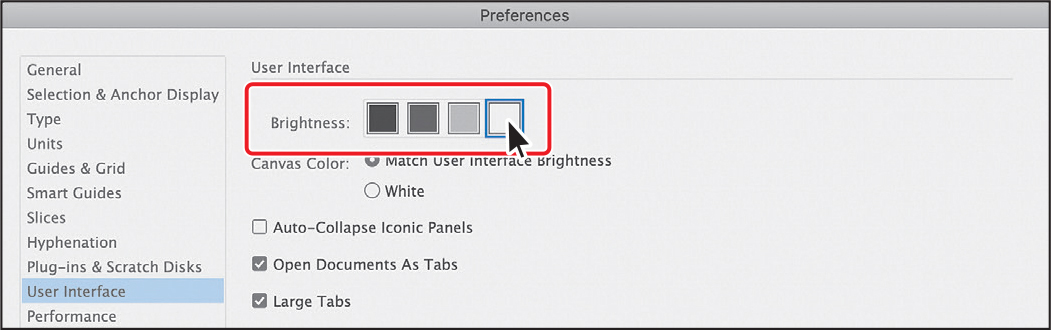
As with Adobe InDesign and Adobe Photoshop, Illustrator supports a brightness adjustment for the application user interface. This is a program-wide preference setting that allows you to choose a brightness setting from four preset levels.
To edit the user-interface brightness, you can choose Illustrator > Preferences > User Interface (macOS) or Edit > Preferences > User Interface (Windows).
Changing the view of artwork
While working in files, it’s likely that you’ll need to change the magnification level and navigate between artboards. The magnification level, which can range from 3.13% to 64000%, is displayed in the title bar (or document tab) next to the filename and in the lower-left corner of the Document window.
There are a lot of ways to change the zoom level in Illustrator, and in this section you’ll explore several of the most widely used methods.
Using view commands
View commands are found in the View menu and are an easy way to enlarge or reduce the view of artwork.
![]() Tip
Tip
The keyboard shortcut for the View > Zoom In command is Command and + (macOS) or Ctrl and + (Windows). You can zoom out using the keyboard shortcut Command and — (macOS) or Ctrl and — (Windows).
![]() Tip
Tip
Choose View > Actual Size to display the artwork at actual size
Choose View > Zoom In twice to enlarge the display of the artwork.
Using the viewing tools and commands affects only the display of the artwork, not the actual size of the artwork. Each time you choose a Zoom option, the view of the artwork is resized to the closest preset zoom level. The preset zoom levels appear in a menu in the lower-left corner of the Document window, identified by a down arrow next to a percentage.
Choose View > Fit Artboard In Window to see the entire poster again.
By choosing View > Fit Artboard In Window or by using the keyboard shortcut Command+0 (macOS) or Ctrl+0 (Windows), the entire artboard (page) is centered in the Document window.
Click the sliced tomato beneath the “M” in “YUM” to select it. Choose View > Zoom In.
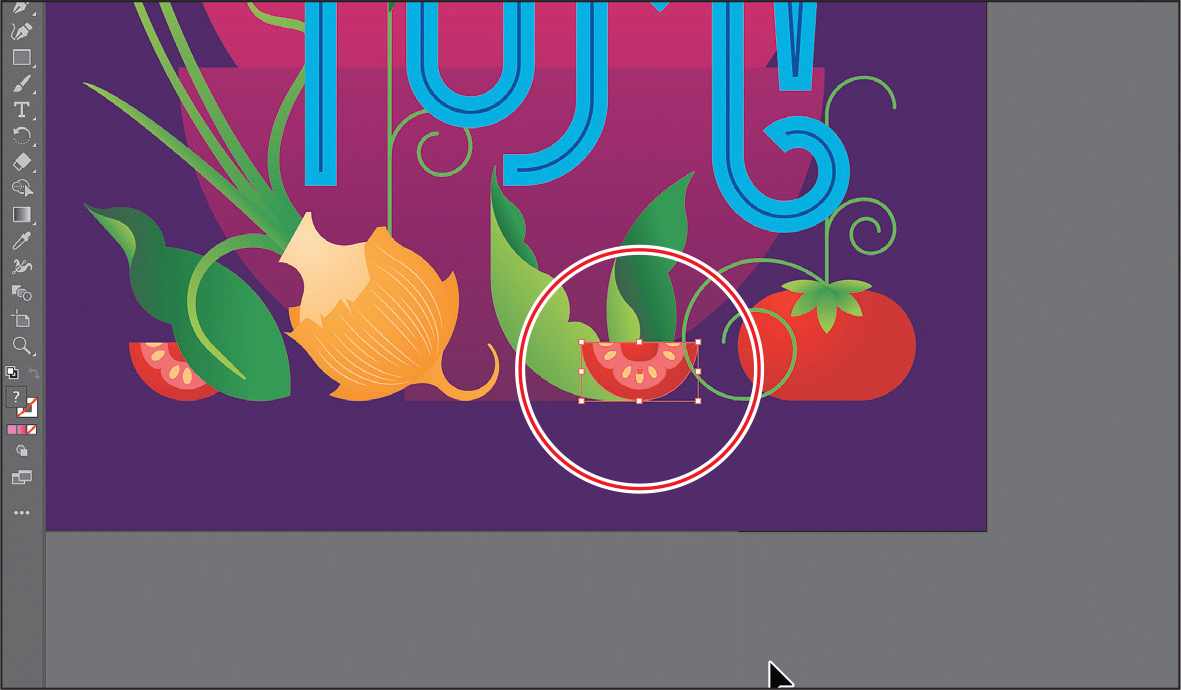
If you have artwork selected, using the View > Zoom In view command will zoom in to what is selected.
Choose View > Fit Artboard In Window.
Choose Select > Deselect so the tomato is no longer selected.
Using the Zoom tool
In addition to the View menu options, you can use the Zoom tool (![]() ) to magnify and reduce the view of artwork to predefined magnification levels.
) to magnify and reduce the view of artwork to predefined magnification levels.
Select the Zoom tool (
 ) in the toolbar, and then move the pointer into the Document window.
Notice that a plus sign (+) appears at the center of the Zoom tool pointer.
Move the Zoom tool pointer over the whole tomato, and click once.
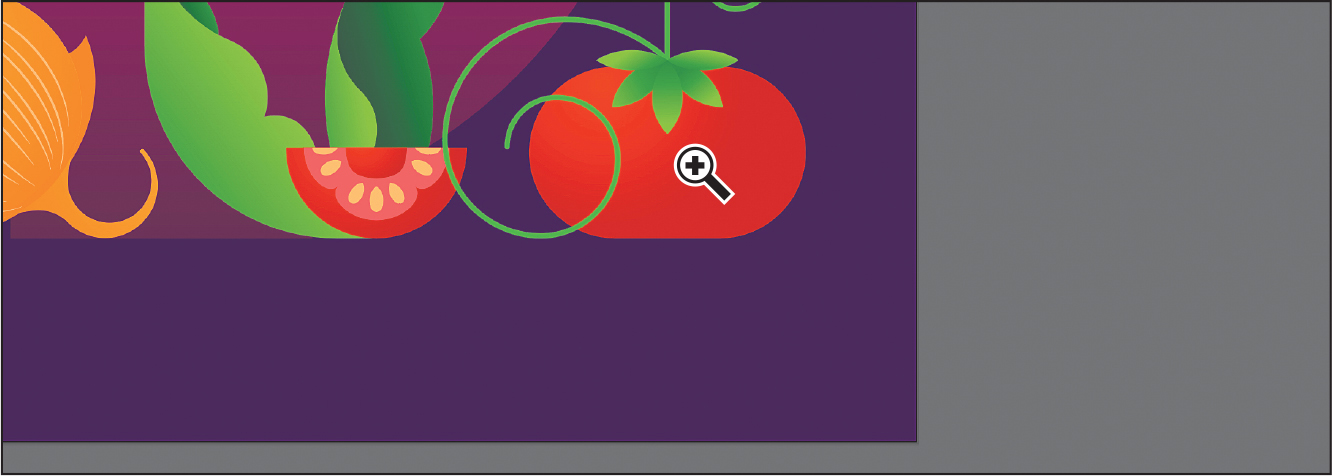
The artwork is displayed at a higher magnification, depending on your screen resolution. Notice that where you clicked is now in the center of the Document window.
Click two more times on the tomato.
The view is increased again, and you’ll notice that the area where you clicked is centered in the document window.
With the Zoom tool still selected, press the Option (macOS) or Alt (Windows) key. A minus sign (—) appears at the center of the Zoom tool pointer. With the Option or Alt key pressed, click the artwork twice to reduce the view of the artwork.

Using the Zoom tool, you can also drag in the document to zoom in and out. By default, if your computer meets the system requirements for GPU performance and it’s enabled, zooming is animated. To find out if your computer meets the system requirements, see the sidebar “GPU performance” following this section.
Choose View > Fit Artboard In Window.
TipWith the Zoom tool selected, if you move the pointer into the Document window and press the mouse button for a few seconds, you can zoom in using the animated zoom.
NoteIn certain versions of macOS, the keyboard shortcuts for the Zoom tool (
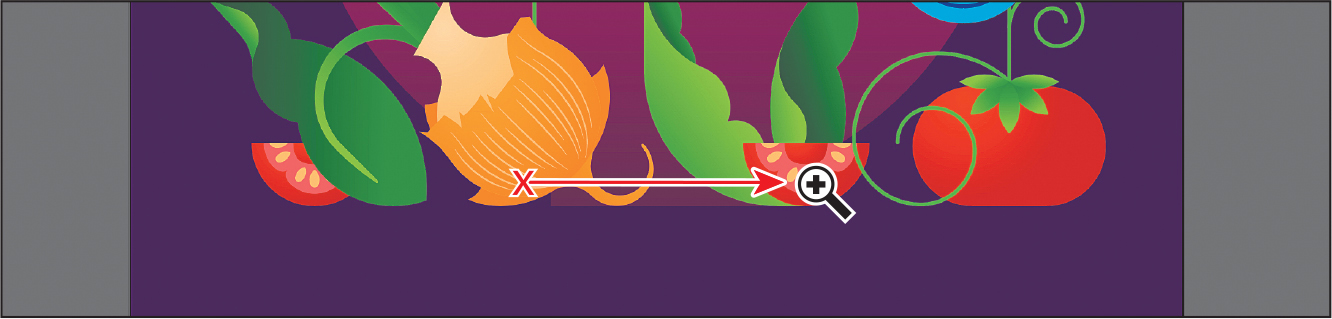
) open Spotlight or the Finder. If you decide to use these shortcuts in Illustrator, you may want to turn off or change those keyboard shortcuts in macOS System Preferences.With the Zoom tool still selected, drag from the left side of the document to the right to zoom in. The zooming is animated. Drag from right to left to zoom out.
If your computer does not meet the system requirements for GPU performance, you will instead draw a dotted rectangle, called a marquee, when dragging with the Zoom tool.
Choose View > Fit Artboard In Window to fit the artboard in the Document window.
The Zoom tool is used frequently during the editing process to enlarge and reduce the view of artwork. Because of this, Illustrator allows you to select the Zoom tool using the keyboard at any time without first deselecting any other tool you may be using.
To access the Zoom tool using your keyboard, press spacebar+Command (macOS) or Ctrl+spacebar (Windows).
To access the Zoom Out tool using your keyboard, press spacebar+Command+Option (macOS) or Ctrl+Alt+spacebar (Windows).
Panning in a document
In Illustrator, you can use the Hand tool (![]() ) to pan to different areas of a document. Using the Hand tool allows you to push the document around much like you would a piece of paper on your desk. This can be a useful way to move around in a document with a lot of artboards or when you are zoomed in. In this section, you’ll access the Hand tool a few different ways.
) to pan to different areas of a document. Using the Hand tool allows you to push the document around much like you would a piece of paper on your desk. This can be a useful way to move around in a document with a lot of artboards or when you are zoomed in. In this section, you’ll access the Hand tool a few different ways.
Press and hold on the Zoom tool in the toolbar, and select the Hand tool (
 ).
).Drag down in the Document window. As you drag, the artboard and artwork on it moves with the hand.
As with the Zoom tool (
), you can select the Hand tool with a keyboard shortcut without first deselecting the active tool.Click any other tool except the Type tool (
 ) in the toolbar, and move the pointer into the Document window. Hold down the spacebar on the keyboard to temporarily select the Hand tool, and then drag to bring the artwork back into the center of your view. Release the spacebar.
Choose View > Fit Artboard In Window.
![]() Note
Note
The spacebar shortcut for the Hand tool (![]() ) does not work when the Type tool (
) does not work when the Type tool (![]() ) is active and the cursor is in text. To access the Hand tool when the cursor is in text, press the Option (macOS) or Alt (Windows) key.
) is active and the cursor is in text. To access the Hand tool when the cursor is in text, press the Option (macOS) or Alt (Windows) key.
Panning with the Navigator panel 
To learn about a different way to pan around in a document, check out the video Panning with the Navigator panel, which is part of the Web Edition. For more information, see the “Web Edition” section of “Getting Started” at the beginning of the book.
Viewing artwork
When you open a file, the artwork is displayed in Preview mode, which is in vector form. Illustrator offers other ways of viewing your artwork, such as outlined and rasterized. Next, you’ll take a look at the different methods for viewing artwork and understand why you might view artwork each of these ways.
When working with large or complex illustrations, you may want to view only the outlines or paths of objects in your artwork. That way, the artwork doesn’t have to be redrawn each time you make a change. This is called Outline mode. Outline mode can also be helpful for selecting objects, as you will see in Lesson 2, “Techniques for Selecting Artwork.”
Choose View > Outline.
TipYou can press Command+Y (macOS) or Ctrl+Y (Windows) to toggle between Preview and Outline modes.
Only the outlines of objects are displayed. You can use this view to find and select things that might be hiding behind other objects.
With Outline mode still active, choose View > Preview (or GPU Preview) to see all the attributes of the artwork again.
Choose View > Pixel Preview.
Select the Selection tool, and click the tomato you selected earlier.
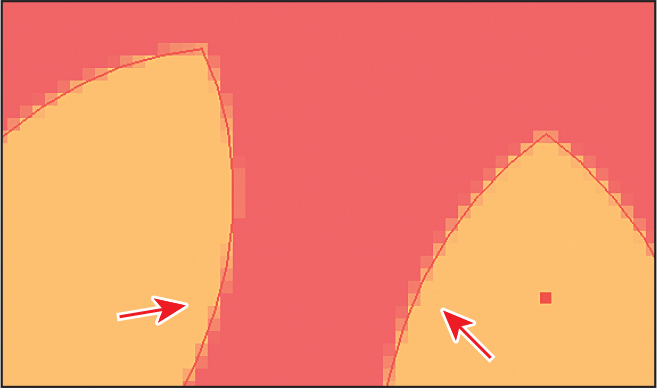
Choose 400% from the zoom level menu in the lower-left corner of the application window to more easily see the edges of the tomato.
Pixel preview shows you how the artwork would look if it were rasterized and viewed onscreen in a web browser. Note the “jagged” edge on some of the artwork. Arrows are pointing to it in the figure.

Choose View > Pixel Preview to turn off Pixel preview.
Choose View > Fit Artboard In Window to make sure that the artboard is fit in the Document window, and leave the document open.
Navigating multiple artboards
As you may recall, artboards contain artwork that will be output, similar to pages in Adobe InDesign. You can use artboards to crop areas to be output or for placement purposes. Multiple artboards help create various things, such as multi page PDFs, printed pages with different sizes or different elements, independent elements for websites, video storyboards, or individual items for animation in Adobe Animate or Adobe After Effects.
![]() Tip
Tip
You’ll learn about another method for navigating artboards, the Artboards panel, in Lesson 5, “Transforming Artwork.”
Illustrator allows for up to 1000 artboards within a single file (depending on their dimensions). Multiple artboards can be added when you initially create an Illustrator document, or you can add, remove, and edit artboards after the document is made. Next, you will learn how to navigate a document that has a few artboards.
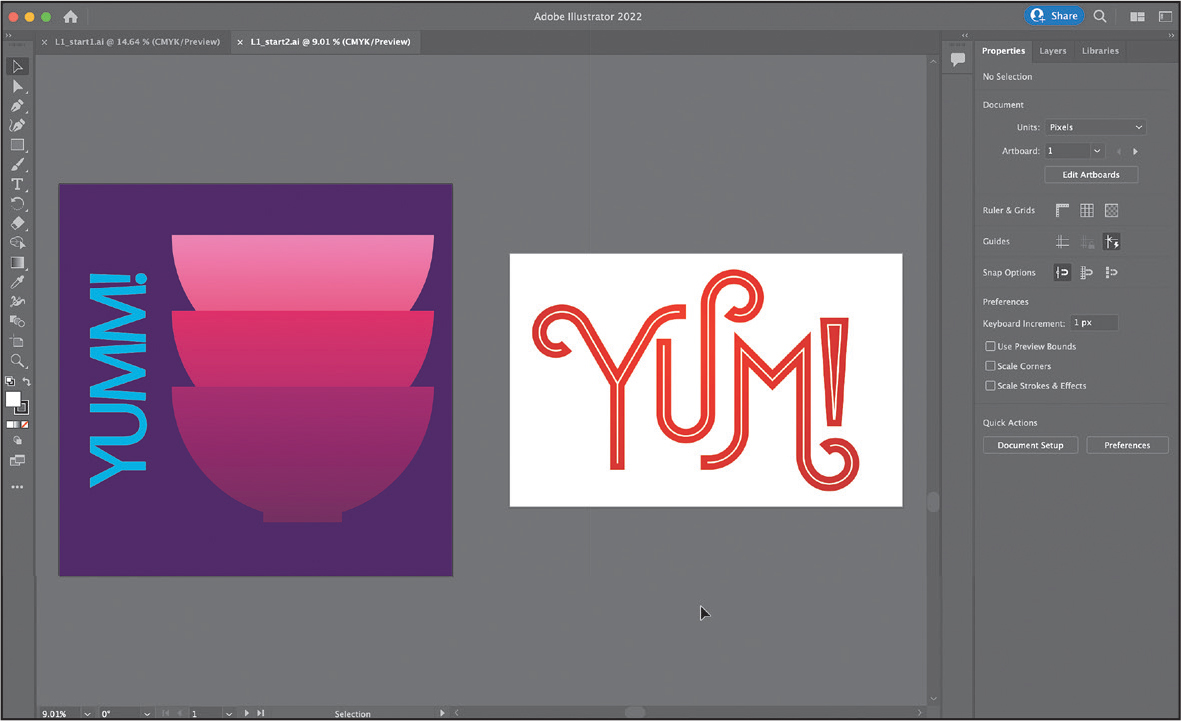
Choose File > Open. In the Open dialog box, navigate to the Lessons > Lesson01 folder, and select the L1_start2.ai file on your hard disk. Click Open to view another version of the poster.
Choose View > Fit All In Window to fit all artboards in the Document window. Notice that there are two artboards in the document; they contain two versions of the L1_start1.ai artwork.
You can arrange the artboards in a document in any order, orientation, or size—they can even overlap. Suppose that you want to create a four-page brochure. You can create different artboards for every page of the brochure, all with the same size and orientation. They can be arranged horizontally or vertically or in whatever way you like.
Select the Selection tool (
) in the toolbar, and click to select the red “YUM” text on the right.Choose View > Fit Artboard In Window.

When you select artwork, it makes the artboard that the artwork is on the active, or selected, artboard. By choosing the Fit Artboard In Window command, the currently active artboard is fit into the Document window. The active artboard is identified in the Artboard Navigation menu in the Status bar in the lower-left corner of the Document window. Currently it’s artboard 2.
Choose Select > Deselect to deselect the artwork.
Choose 1 from the Artboard menu in the Properties panel.
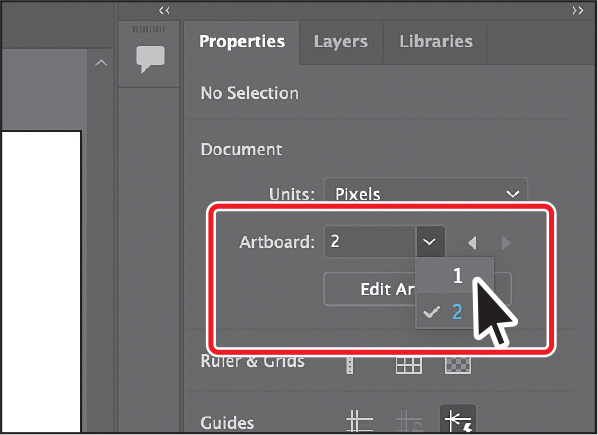
Notice the arrows to the right of the Artboard menu in the Properties panel. You can use these to navigate to the previous (
 ) and next (
 ) artboards. Those arrows plus a few others also appear in the Status bar below the document.
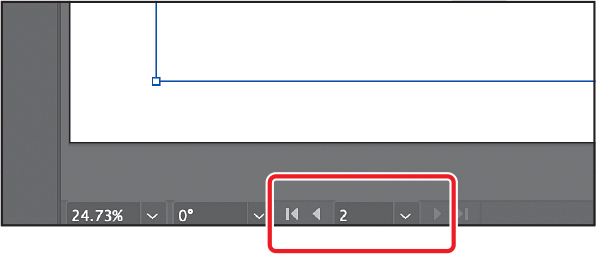
Click the Next navigation button (
) in the Status bar below the document to view the next artboard (artboard 2) in the Document window.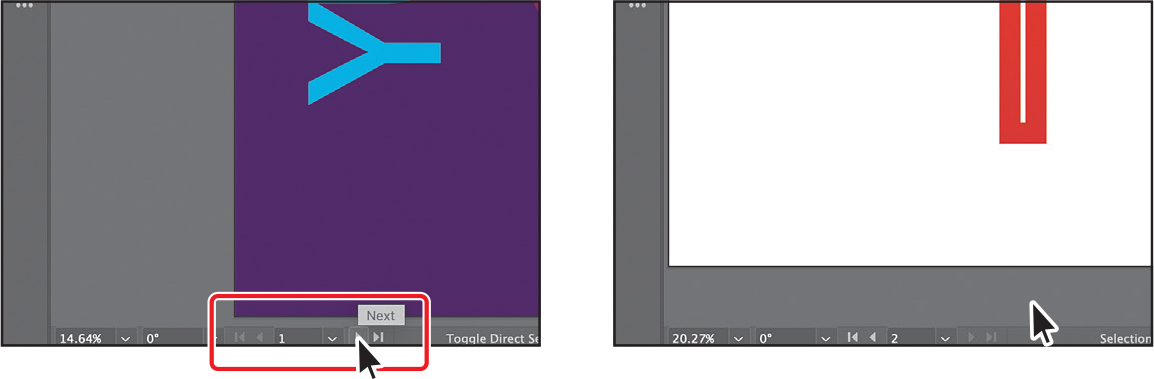
The Artboard menu and navigation arrows always appear in the Status bar below the document, but they appear in the Properties panel only when not in Artboard Editing mode, the Selection tool is active, and nothing is selected.
Rotating the view
Projects like packaging designs, logos, or any that contain rotated text can be easier to work on when you rotate them temporarily. Think of a large drawing on paper. If you wanted to edit part of the drawing, you might turn the paper on your desk. In this section, you’ll see how to rotate the canvas with the Rotate View tool and edit some text.
Choose 1 from the Artboard menu in the Properties panel to fit the artboard with the purple background in the document window.
Press and hold on the Hand tool in the toolbar, and select the Rotate View tool (
 ).
). Tip
TipTo automatically align the canvas view to a rotated object, you can choose View > Rotate View to Selection to rotate the canvas.
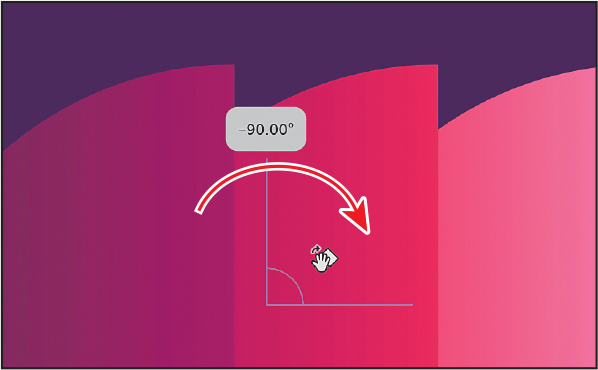
Drag clockwise in the Document window to rotate the entire canvas. As you drag, press the Shift key to rotate the view in 15-degree increments. When you see —90 degrees in the measurement label, release the mouse button and then the key.
The artboards, which are on the canvas, rotate as well.
Select the Type tool (
) in the toolbar. Now you’ll edit the “YUMM” text by adding another “M.” Click in between the Ms in the blue “YUMM!” text to insert the cursor. Type a capital M. The text now reads “YUMMM!”
When finished, you can reset the canvas.
Select the Selection tool, and click in an empty area to deselect.
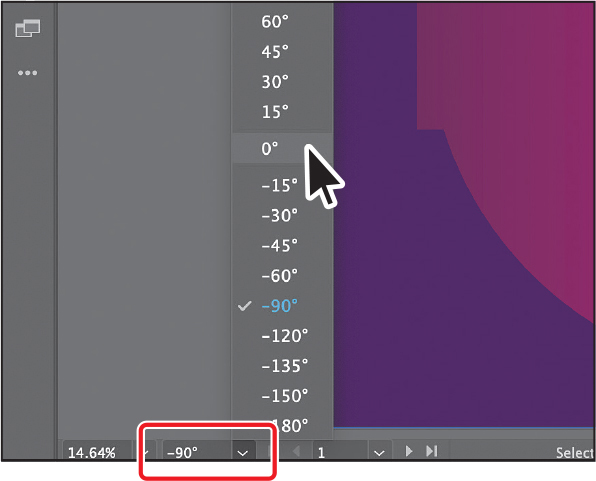
Click the —90° you see in the Status bar below the document to show a menu of canvas rotation values. Choose 0 from that menu to set the canvas back to the default rotation.
![]() Tip
Tip
To reset the rotated canvas view, you can also press the Esc key, choose View > Reset Rotate View, or press Shift+Cmd+1 (macOS) or Shift+Ctrl+1 (Windows).
Arranging multiple documents
In Illustrator, all workspace elements, such as the panels, Document window, and tools, are grouped in a single integrated window called the Application frame, which lets you treat the application as a single unit. When you move or resize the Application frame or any of its elements, all elements within it respond to each other so none overlap.
When you open more than one document in Illustrator, they appear as tabs at the top of the Document window. You can arrange the open documents in other ways, such as side by side, so that you can easily compare or drag items from one document to another. You can also use the Window > Arrange menu to display your open documents in various configurations quickly.
You should currently have two Illustrator files open: L1_start1.ai and L1_start2.ai. Each file has its own tab at the top of the Document window. These documents are considered a group of Document windows. You can create document groups to associate files while they are open.
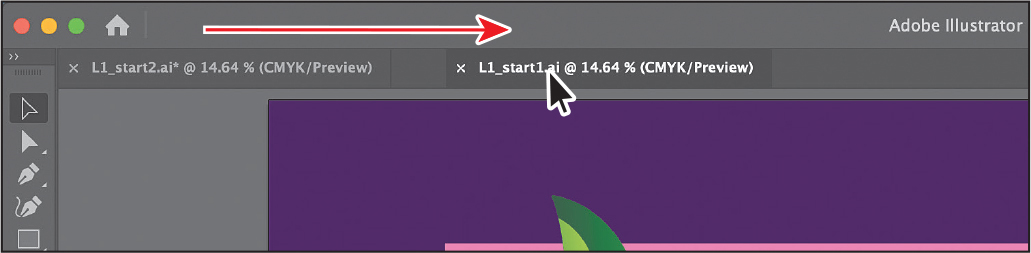
Click the L1_start1.ai tab at the top of the Document window to show the L1_start1.ai document.
NoteIf you don’t drag directly to the right, you may undock the Document window and create a new group. If that happens, choose Window > Arrange > Consolidate All Windows.
Drag the L1_start1.ai document tab directly to the right of the L1_start2.ai document tab. Release the mouse button to see the new tab order.
 Tip
TipYou can cycle between open documents by pressing Command+~ (next document) and Command+Shift+~ (previous document) (macOS) or by pressing Ctrl+F6 (next document) and Ctrl+Shift+F6 (previous document) (Windows).
Dragging the document tabs allows you to change the order of the documents. Ordering tabs may be helpful if you use the document shortcuts to navigate to the next or previous document. See the tip to the right.
To see both of the documents simultaneously, maybe to drag artwork from one to the other, you can arrange the Document windows by cascading or tiling them. Cascading allows you to stack different document groups. Tiling shows multiple Document windows at one time, in various arrangements. Next you’ll tile the open documents so that you can see both documents at one time.
Choose Window > Arrange > Tile.
The available space in the Application frame is divided between the documents.
Click in the Document window on the left to activate the document, and choose View > Fit Artboard In Window. Do the same for the Document window on the right.
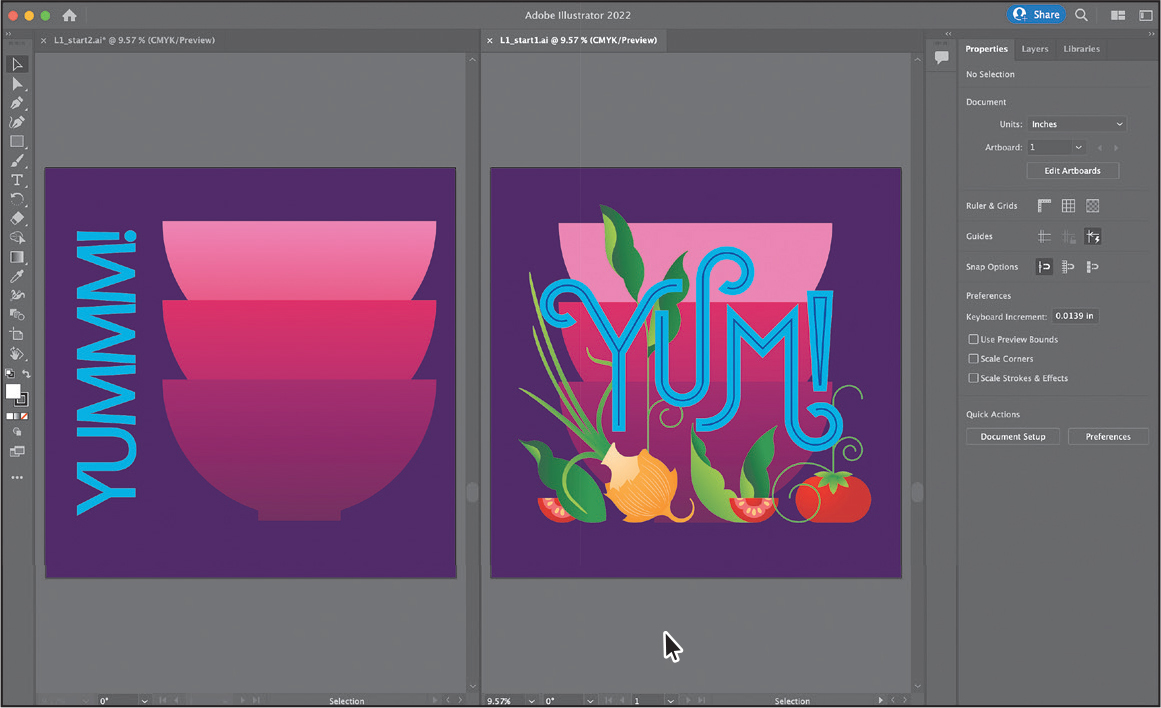
With documents tiled, you can drag artwork between documents, which copies that artwork from one document to another.
To change the arrangement of the tiled windows, you can drag document tabs to other positions. However, it’s easier to use the Arrange Documents menu to quickly arrange open documents in a variety of configurations.
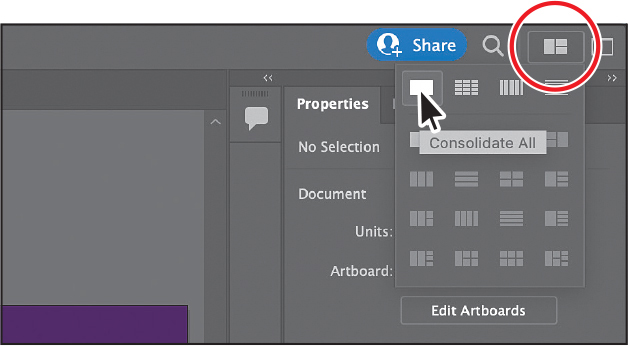
Click Arrange Documents (
 ) on the ride side of the Application bar to display the Arrange Documents menu. Click the Consolidate All button (
 ) to bring the documents back together.
In the Arrange Documents (
) menu, you can tile the documents like you did when choosing Window > Arrange > Tile. You get more options on how to tile them (vertically or horizontally).
Click the Close button (X) on the L1_start1.ai document tab to close the document. If a dialog box appears asking you to save the document, click Don’t Save (macOS) or No (Windows).
Choose File > Close to close the L1_start2.ai document without saving.
Review answers
1 You can choose commands from the View menu to zoom in or out of a document or to fit it to your screen; you can also use the Zoom tool (![]() ) in the toolbar and click or drag over a document to enlarge or reduce the view. In addition, you can use keyboard shortcuts to magnify or reduce the display of artwork.
) in the toolbar and click or drag over a document to enlarge or reduce the view. In addition, you can use keyboard shortcuts to magnify or reduce the display of artwork.
2 You can save panel locations and visibility preferences by choosing Window > Workspace > New Workspace to create custom work areas and to make it easier to find the controls you need.
3 To navigate between artboards in Illustrator, you can choose the artboard number from the Artboard Navigation menu at the lower left of the Document window. With nothing selected and while not in Artboard Editing mode, you can choose the artboard number from the Artboard menu or use the Active Artboard arrows in the Properties panel. You can use the Artboard Navigation arrows in the Status bar in the lower left of the Document window to go to the first, previous, next, and last artboards. You can also use the Artboards panel to navigate to artboards, or you can use the Navigator panel to drag the proxy view area to navigate between artboards.
4 To rotate the canvas view, drag in the Document window with the Rotate View tool (![]() ), choose a rotate value from the Rotate View menu in the Status bar, or (bonus!) choose a rotate value from the View > Rotate View menu.
), choose a rotate value from the Rotate View menu in the Status bar, or (bonus!) choose a rotate value from the View > Rotate View menu.
5 Arranging Document windows allows you to tile windows or to cascade document groups (the process for cascading wasn’t discussed in the lesson). This can be useful if you are working on multiple Illustrator files and you need to compare or share content between them.