12 Adding Video Effects
Lesson overview
In this lesson, you’ll learn about the following:
Working with fixed effects
Browsing effects with the Effects panel
Applying and removing effects
Using effect presets
Masking and tracking visual effects
Using keyframing effects
Exploring frequently used effects
Using special virtual reality (VR) video effects
Rendering effects
This lesson will take about 120 minutes to complete. Please log in to your account on peachpit.com to download the lesson files for this lesson, or go to the “Getting Started” section at the beginning of this book and follow the instructions under “Accessing the lesson files and Web Edition.” Store the files on your computer in a convenient location. Your Account page is also where you’ll find any updates to the lesson files. Look on the Lesson & Update Files tab to access the most current content.

Adobe Premiere Pro CC features more than 100 video effects. In this lesson, you’ll learn the main skills you need to work with all kinds of effects, as well as the some of the more advanced effects. Most effects come with an array of controls, all of which you can change over time using keyframes.
Starting the lesson
You might use video effects for many reasons. They can solve problems with image quality, such as exposure or color balance. They can create complex visual effects through compositing with techniques such as chromakey. They can also help solve a number of production problems, such as camera shake and poorly calibrated color balance.
Open Lesson 12.prproj.
Save the project as Lesson 12 Working.prproj.
Switch to the Effects workspace by clicking Effects in the Workspaces panel or by choosing Window > Workspaces > Effects.
Reset the workspace by double-clicking the Effects workspace name in the Workspaces panel.
Effects can also serve stylistic purposes. You can alter the color or distort footage, and you can animate the size and position of a clip within the frame. The challenge can be knowing when to use effects and when to keep it simple.
Standard effects can be constrained to elliptical or polygon masks, and these masks can automatically track your footage. For example, you might blur someone’s face to hide their identity and have the blur follow them as they move through the shot. You can use the same feature to relight a scene in post-production.
Working with effects
Adobe Premiere Pro makes working with effects easy. You can drag a visual effect onto a clip, as you have already done with audio effects, or you can select the clip and double-click the effect in the Effects panel. In fact, you already know how to apply effects and change their settings. You can combine as many effects as you want on a single clip, which can produce surprising results. Moreover, you can use an adjustment layer to add the same effects to a collection of clips.
When it comes to deciding which video effects to use, the number of choices in Premiere Pro can be a little overwhelming. Many additional effects are available from third-party manufacturers for sale or free of charge.
While the range of effects and their controls can be complex, the techniques you’ll use to apply, adjust, and remove effects are straightforward.
Modifying fixed effects
When you add a clip to a sequence, it will automatically have a few effects applied. These effects are called fixed effects, or intrinsic effects, and you can think of them as controls for the usual geometric, opacity, speed, and audio properties that every clip should have. You can modify all fixed effects using the Effect Controls panel.
If it’s not already in the Timeline panel, open the sequence 01 Fixed Effects.
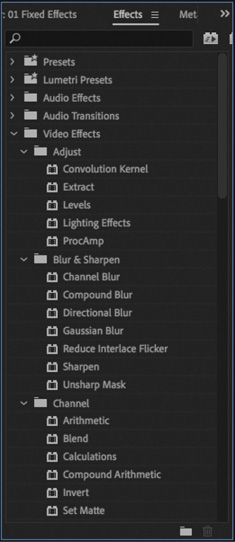
Single-click the first clip in the timeline to select it. In the Effect Controls panel, look at the fixed effects applied to this clip.

Fixed effects are automatically applied to every clip in a sequence, but they don’t change anything until you modify the settings.
You may need to click the disclosure triangle
 next to a heading or an individual control to display its properties.
Motion: The Motion effect allows you to animate, rotate, and scale a clip. You can also use the Anti-flicker Filter control to decrease shimmering edges for an animated object. This comes in handy when you scale down a high-resolution or interlaced source, and Premiere Pro must resample the image.
Opacity: The Opacity effect lets you control how opaque or transparent a clip is. You can also access special blend modes to create visual effects from multiple layers of video. You’ll explore this more in Lesson 14, “Exploring Compositing Techniques.”
Time Remapping: This effect lets you slow down, speed up, or reverse playback, and it even lets you freeze a frame.
Audio Effects: If a clip has audio, Premiere Pro displays its Volume, Channel Volume, and Panner controls. You learned about these in Lesson 10, “Editing and Mixing Audio.”
Click to select the second clip in the sequence and look at the Effect Controls panel.
These effects have keyframes, meaning that their settings change over time. In this case, a small Scale and Pan animation was applied to the clip to create a digital zoom that didn’t exist before and to recompose the shot.
You’ll explore keyframes later in this lesson.
Play the current sequence to compare the two clips.
Using the Effects panel
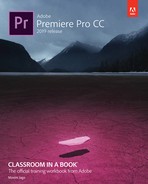
In addition to the fixed video effects, Premiere Pro has standard effects that change a clip’s appearance. Because there are so many to choose from, effects are organized into 17 categories. If you install third-party effects, you may have more choices.

There’s an additional category of Obsolete effects. These effects have been replaced with newer, better-designed versions, but they have been kept in Premiere Pro to ensure compatibility with older project files.
Effects are grouped into functions, including Distort, Keying, and Time, to make it easier to navigate them.
Each category has its own bin in the Effects panel.
Open the Effects panel.
 Tip
TipThe keyboard shortcut to display the Effects panel is Shift+7.
In the Effects panel, expand Video Effects.
Click the New Custom Bin button
 at the bottom of the panel.
 Note
NoteWith so many Video Effect subfolders, it’s sometimes tricky to locate the effect you want. If you know part or all of an effect’s name, start typing it in the Find box at the top of the Effects panel. Premiere Pro will display all effects and transitions that contain that letter combination, narrowing the search as you type.

The new custom bin appears in the Effects panel at the bottom of the list (you may need to scroll down to see it). Let’s rename it.
Click once to select the bin.
Click once more, directly on the bin’s name (Custom Bin 01), to select it.
Change its name to something like Favorite Effects.

Open any Video Effects folder, and drag a few effects to copy them into your custom bin. You may need to resize the panel to make it easier to drag and drop effects. Choose any effects that sound interesting to you. You can add or remove effects from a custom bin whenever you like. Click the Delete Custom Items button
 to remove a copied effect.
 Note
NoteWhen you add an effect to a custom bin in the Effects panel, you’re making a duplicate of that effect. The original effect remains in its original folder. You can use custom bins to create effect categories to suit your work style.
As you browse the video effects, you’ll notice icons next to many of the effect names. Understanding these icons might influence your choices when working with effects.
Accelerated effects
The Accelerated Effect icon ![]() indicates that the effect can be accelerated by your graphics processing unit (GPU). The GPU (often called the video card or graphics card) can greatly enhance the performance of Premiere Pro. The range of cards supported by the Mercury Playback Engine is broad, and with the right card installed, these effects often offer accelerated or even real-time performance and need rendering only on final export, which is also hardware accelerated. You’ll find a list of recommended cards on the Premiere Pro product page.
indicates that the effect can be accelerated by your graphics processing unit (GPU). The GPU (often called the video card or graphics card) can greatly enhance the performance of Premiere Pro. The range of cards supported by the Mercury Playback Engine is broad, and with the right card installed, these effects often offer accelerated or even real-time performance and need rendering only on final export, which is also hardware accelerated. You’ll find a list of recommended cards on the Premiere Pro product page.
![]() Note
Note
When using any 32-bit effects on a clip, try to use only combinations of 32-bit effects for maximum quality. If you mix and match effects, the non-32-bit effects switch processing back to 8-bit space for that clip.
32-bit color (high-bit-depth) effects
Effects with the 32-Bit Color Support icon ![]() can process in a 32-bits-per-channel mode, which is also called high-bit-depth or float processing.
can process in a 32-bits-per-channel mode, which is also called high-bit-depth or float processing.
You should use high-bit-depth effects whenever possible for maximum quality.
If you are editing without GPU acceleration, in Software mode, take advantage of high-bit-depth effects by making sure your sequence settings have the Maximum Bit Depth video-rendering option selected. If your project is set to use a hardware-accelerated renderer (in the Project settings), supported accelerated effects will automatically be rendered in 32-bit.
YUV effects
Effects with the YUV icon ![]() process color in YUV. This is particularly important if you’re applying color adjustments. Effects without the YUV icon are processed in the computer’s native RGB space, which might make adjusting exposure and color less accurate.
process color in YUV. This is particularly important if you’re applying color adjustments. Effects without the YUV icon are processed in the computer’s native RGB space, which might make adjusting exposure and color less accurate.
![]() Note
Note
To learn more about YUV effects, be sure to read the article at http://bit.ly/yuvexplained.
![]() Tip
Tip
You can select any of the three effect-type icons at the top of the Effects panel to display effects with those features only.
YUV effects break down the video into a Y (or luminance) channel and two channels for color information, which is how most video footage is structured natively. Because the brightness of the image is separate from the colors, it’s easy to adjust contrast and exposure without shifting colors.
Applying effects
Once you have applied an effect, virtually all the video effect settings are accessible in the Effect Controls panel. You can add keyframes to nearly every setting, making it easy to apply changes over time (just look for settings with a stopwatch icon). In addition, you can use Bezier curves to adjust the velocity and acceleration of those changes.
Open the sequence 02 Browse.
Type white into the Effects panel Find box to narrow the results. Locate the Black & White video effect.
 Tip
TipIf you type black instead of white into the Effects panel Find box, you’ll see a fantastic list of presets for lens distortion removal because they relate to a particular camera with the word black in the name. Typing the word white instead displays a shorter list of effects to scroll through.
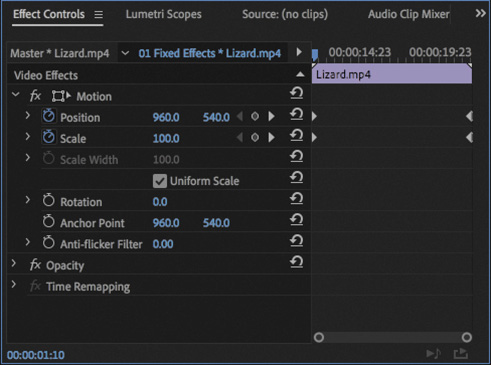
Drag the Black & White video effect onto the Run Past clip in the Timeline panel.
This effect immediately converts your full-color footage to black and white, or more accurately, grayscale.

Make sure the Run Past clip is selected in the Timeline panel, and open the Effect Controls panel.
Toggle the Black & White effect off and on by clicking the “fx” button
 next to the effect name in the Effect Controls panel. Be sure the sequence playhead is over this footage clip to view the effect.
Toggling an effect on and off is a good way to see how it works with other effects.
Make sure the clip is selected so its settings are displayed in the Effect Controls panel. Click the Black & White effect heading to select it, and press Delete/Backspace.
This removes the effect.
Type direction into the Effects panel search box to locate the Directional Blur video effect.
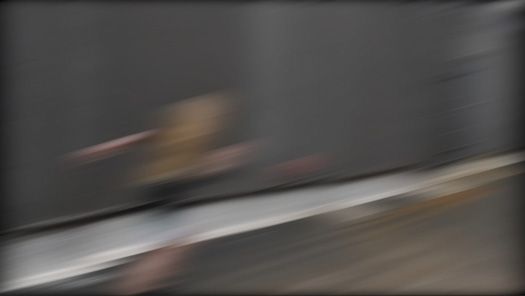
In the Effects panel, double-click the Directional Blur effect to apply it to the selected clip.
In the Effect Controls panel, expand the Directional Blur effect’s controls.
Set Direction to 75.0 degrees and Blur Length to 45.
NoteRemember, if you have a clip selected, you can apply effects by double-clicking them in the Effects panel or by dragging them into the Effect Controls panel directly.
 Tip
TipThe slider limit may be smaller than the number you can enter by typing.
It’s certainly an interesting result, but now it’s impossible to tell what’s going on in the image. Click the disclosure triangle to expand the Blur Length control and move the slider to reduce the strength of the effect.
As you change the setting, the result is displayed in the Program Monitor.
Click the panel menu for the Effect Controls panel and choose Remove Effects. The Remove Attributes dialog box opens.
NoteYou won’t always use visual effects to create dramatic results. Sometimes effects are intended to look like in-camera results.
The Remove Attributes dialog box lets you select which effects to remove and deselect which effects you want to keep. You want to remove them all, so click OK. This is an easy way to start fresh.
![]() Tip
Tip
Effects are processed in a particular order, which can lead to unwanted scaling or resizing. You can’t reorder fixed effects, but you can bypass them and use other, similar effects. For example, you can use the Transform effect instead of the Motion fixed effect, or you can use the Alpha Adjust effect instead of the Opacity fixed effect. These effects are not identical, but they’re a close match, they behave similarly, and they can be placed in any order you choose.
Using adjustment layers
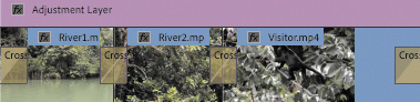
Sometimes you’ll want to apply an effect to multiple clips. One easy way to do this is to use an adjustment layer. The concept is simple: Create an adjustment layer clip that can hold effects, and position it above other clips on the Timeline, on a higher video track. Everything beneath the adjustment layer clip is viewed through it, receiving any effects it contains.
You can easily adjust the duration and opacity of an adjustment layer clip, as you would adjust any graphics clip, making it easy to control which other clips are seen through it. An adjustment layer makes it faster to work with effects because you can change the settings on the layer (a single item) to influence the appearance of several other clips.
Let’s add an adjustment layer to a sequence that’s already been edited.
Open the sequence 03 Multiple Effects.
At the bottom right of the Project panel, click the New Item button
 , and choose Adjustment Layer. You may need to resize the Project panel to see the New Item button.
The Adjustment Layer dialog box allows you to specify settings for the new item you’re creating. The settings in the dialog box will reflect the settings in the current sequence.
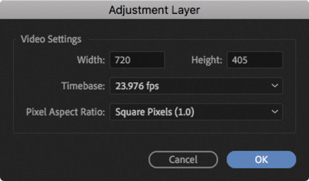
Click OK.

Premiere Pro adds a new adjustment layer to the Project panel.
Drag the adjustment layer from the Project panel to the beginning of the Video 2 track in the current sequence in the Timeline panel.

Drag to trim the right edge of the adjustment layer so it extends to the end of the sequence.

Let’s apply an effect to the adjustment layer. Once the effect is set up, you can adjust the adjustment layer’s opacity to change the intensity of the effect.
In the Effects panel, search for and locate the Gaussian Blur effect.
Drag the effect onto the adjustment layer clip in the sequence.
Move the timeline playhead to 27:00 to have a good close-up shot to use when designing the effect.
By default, the Guassian Blur effect doesn’t change the image. Make sure the adjustment layer clip is selected. In the Effect Controls panel, set Blurriness to a heavy value, like 25.0 pixels. Select the Repeat Edge Pixels option to apply the effect evenly.

Let’s blend the adjustment layer with the clips beneath it using a blend mode to create a film look. Blend modes let you mix two layers together based on their brightness and color values. You’ll learn more about them in Lesson 14, “Exploring Compositing Techniques.”
With the adjustment layer still selected in the sequence, click the disclosure triangle next to the Opacity control in the Effect Controls panel to view the settings.
Choose Soft Light from the Blend Mode menu to create a gentle blend with the footage.
Set Opacity to 75% to reduce the effect.

You can enable and disable the visibility icon
 for the Video 2 track in the Timeline panel to see the before and after states of the effect.
Sending a clip to Adobe After Effects
If you’re working with a computer that also has Adobe After Effects installed, you can easily send clips back and forth between Premiere Pro and After Effects. Thanks to the close relationship between Premiere Pro and After Effects, you can seamlessly integrate the two applications more easily than with any other editing platform. This is a useful way to significantly extend the effects capabilities of your editing workflow.
You don’t need to learn to use After Effects to get the most out of Premiere Pro. Still, many editors find working with both applications expands their creative toolset in exciting ways.
The process you use to share clips is called Dynamic Link. With Dynamic Link you can seamlessly exchange clips with no unnecessary rendering.
If you’d like to try this, follow these steps:
For After Effects to complete installation, it needs to be started at least once so that you can confirm the default preferences. Do this before following this workflow.
Open the sequence AE Dynamic Link.
This sequence has the same clip repeated multiple times, so you can experiment and compare multiple examples. Right-click the first instance of the clip in the sequence and choose Replace With After Effects Composition.
If it’s not running already, After Effects launches. If the After Effects Save As dialog appears, enter a name and location for the After Effects project. Name the project Lesson 12-01.aep and save it to a new folder inside the Lessons folder.
After Effects creates a new composition, which inherits the sequence settings from Premiere Pro. The new composition is named based on the Premiere Pro project name, followed by “Linked Comp.”
After Effects compositions are analogous to Premiere Pro sequences.
Clips become layers in After Effects compositions to make it easier to work with advanced controls on the Timeline panel.
There are lots of ways to apply effects with After Effects. To keep things simple, let’s work with animation presets (these are similar to effect presets in Premiere Pro).
For more on effects workflows, see Adobe After Effects CC Classroom in a Book.
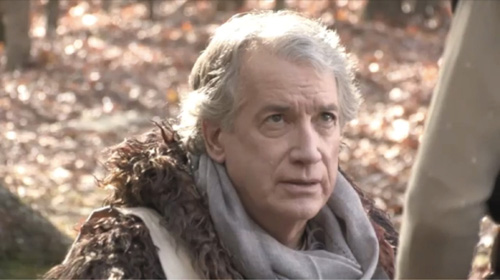
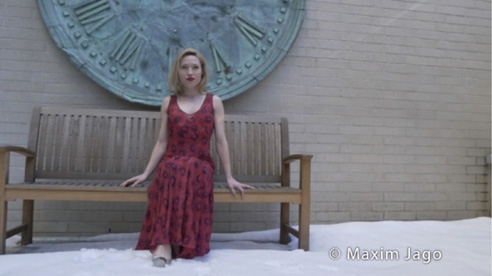
If the composition isn’t already open, look for it in the After Effects project panel, and double-click to load it. It should be called Lesson 12 Working Linked Comp 01 (the number may be higher if you have tried this workflow before). Click the Laura_02.mp4 layer in the Timeline panel to select it.

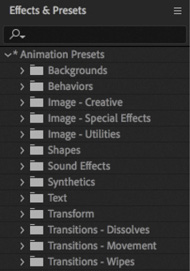
Locate the Effects & Presets panel (you can find this in the Window menu if it’s not on-screen already). Click the disclosure triangle to expand the *Animation Presets category.
The animation presets in After Effects use standard built-in effects to achieve impressive results. They are an excellent shortcut to producing a professional finish for your work.
Expand the Image – Creative folder. You may need to resize the panel a little to read the full preset names.
Double-click the Contrast – Saturation preset to apply it to the selected layer.
In the Timeline panel, make sure the clip is still selected, and press the E key to view any applied effects. You can click the disclosure triangles for each effect and effect setting to see the controls, right inside the Timeline panel.
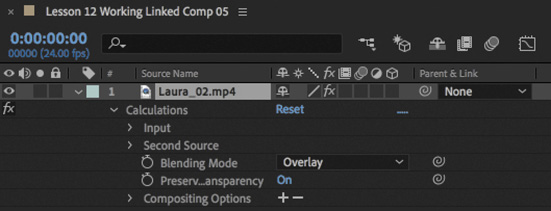
The Contrast – Saturation preset actually uses an effect with a different name, Calculations, to make changes to the appearance of the clip.
Now look at the Effect Controls panel. The same effect is displayed here.
Press the spacebar to play the clip.
After Effects displays the clip, with the effect applied, as fast as possible (depending on the power of your editing system). The green line at the top of the Timeline panel indicates a temporary preview has been created. Only playback of the highlighted section of the timeline is likely to be smooth.
The effect is subtle but gives richer color saturation and stronger contrast to a shot that would otherwise be a little flat.
Choose File > Save.
Switch back to Premiere Pro and play the sequence to view the results. You can repeat this process with other clips. If an After Effects project is already open when you send a clip, it will be added as a new composition to the existing project, rather than needing a new project.
Quit After Effects.
The original clip on the Timeline in Premiere Pro has been replaced with the dynamically linked After Effects composition. Any changes made in After Effects will updated automatically in Premiere Pro

The frames are processed in the background and handed off from After Effects to Premiere Pro. To improve preview playback performance in Premiere Pro, you can select the clip in the Timeline and choose Sequence > Render Effects In To Out.
Working with master clip effects
While all the effects work you have performed so far has been applied to clips on the Timeline, Premiere Pro also allows you to apply effects to master clips in the Project panel. You use the same visual effects and work with them in the same way. With master clips, any instance of a clip, or part of a clip, you add to a sequence will inherit the effects you have applied. You can even apply master clip effects after adding clips to sequences and the sequences will update—a powerful way to make adjustments to multiple clips segments in a single step.
For example, you could add a color adjustment to a clip in the Project panel so that it matches other camera angles in a scene. Each time you use that clip or part of that clip in a sequence, the adjustment will already be applied. Even if you don’t make the adjustment until after the scene is edited, you can use a master clip effect to quickly match the colors.
Try working with a master clip effect now.
Open the sequence 04 Master Clip Effects.
This has one clip, Laura_02, edited five times into the same sequence. The copies of the clip are divided by a series of other, similar shots. Position the playhead over the first instance of the Laura_02 clip.
 Note
NoteIf you want to open the Project panel instance of a clip you are viewing on the Timeline, position the playhead over the clip, select it, and press the F key. This is the keyboard shortcut for Match Frame, which opens the original master clip in the Source Monitor at the same frame as that displayed in the Program Monitor.
Locate the clip Laura_02 in the Project panel.
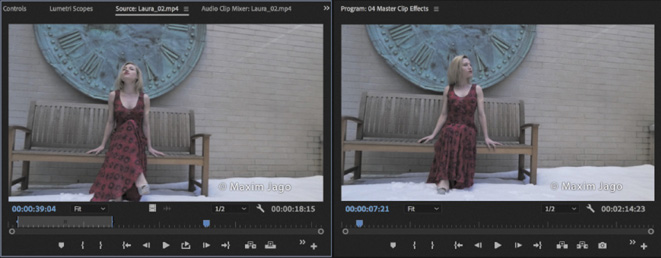
In the Project panel, double-click the Laura_02.mp4 clip to view it in the Source Monitor. Don’t double-click the clip in the sequence because this will open the wrong instance for master clip effects.
You now have the same clip open in the Source Monitor (the master clip) and displayed in the Program Monitor (the sequence segment), so you can see how the changes affect the sequence as you apply them.
 Tip
TipYou can also apply an effect to a master clip by dragging the effect onto the clip directly in the Project panel, or by selecting a clip in a sequence and clicking the master clip name at the top left of the Effect Controls panel and dragging the effect into that panel.
In the Effects panel, type 100 in the Find box to quickly locate the Lumetri Look effect preset named Cinespace 100.
Drag the Cinespace 100 effect into the Source Monitor.
This applies the effect to the master clip.
Click the Source Monitor to make sure it’s the active panel, and open the Effect Controls panel to see the effect options.

Because you applied the effect to the clip in the Source Monitor and then selected the Source Monitor to make it active, the Effect Controls panel shows the effect applied to the master clip, rather than the Timeline instance of the clip.
NoteSelection is critical in Premiere Pro. Clicking to activate the Source Monitor before going to the Effect Controls panel is necessary to see the correct options.
This is a Lumetri Color effect, and you will be learning a lot more about these in Lesson 13, “Improving Clips with Color Correction and Grading.”
Because the effect has been applied to the master clip, every instance of the clip in the sequence shows the results. Play some of the sequence to see the effect is applied to every copy of the Laura_02 clip.
TipYou can quickly tell whether you’re looking at Source effect settings or sequence clip effect settings by seeing whether the fixed effect controls are displayed.
The result of the effect is displayed in the Source Monitor and the Program Monitor because sequence clips inherit their master clip effects dynamically.
From now on, anytime you use this clip, or part of it, in a sequence, Premiere Pro will include the same effect.
However, while the master clip has the effect applied, none of the Timeline instances of the clip (the sequence clips) has the effect applied.
Click once on any of the sequence instances of the Laura_02 clip on the Timeline to select it, and look in the Effect Controls panel—no Lumetri Color effect, just the usual fixed effects (which are applicable only to sequence clips, not clips in the Project panel).
At the top of the Effect Controls panel there are two tabs. The tab on the left shows the name of the master clip, Master * Laura_02.mp4.
The tab on the right shows the name of the sequence followed by the name of the sequence clip, 04 Master Clip Effects * Laura_02.mp4.
Because you selected the clip in the sequence, the tab on the right is highlighted in blue, showing that you’re working on that instance of the clip.

There’s no Lumetri Color effect displayed because you haven’t applied the effect to the Timeline instance of the clip.
In the Effect Controls panel, click the tab at the top that shows the master clip name.
You’ll see the master clip effect options.

Experiment with the controls for the Lumetri Color effect and then play the sequence. You’ll see the changes you apply on an instance of the clip.
Master clip effects provide a powerful way to manage effects in Premiere Pro. You may need to experiment a little to make the most of them. You use the same visual effects as you would use on the timeline, so the techniques you’re learning in this book will work the same way, but the planning is a little different.
You can tell a master clip effect is applied to a clip because the “fx” badge has a red underline ![]() .
.
Masking and tracking visual effects
All standard visual effects can be constrained to elliptical, polygon, or custom masks, which you can manually animate using keyframes. Premiere Pro can also motion-track your shots to animate the position of the masks you create, following the action with the constrained special effect.
Masking and tracking effects are great ways to hide a detail like a face or logo behind a blur. You can also use the technique to apply subtle creative effects or modify the lighting in a shot.
Continue working with the 04 Master Clip Effects sequence.
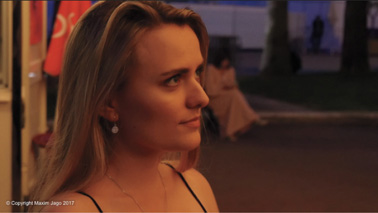
Position the playhead over the second clip in the sequence, Evening Smile.
It looks good, but it would benefit from a stronger light on the subject to help separate the foreground from the background.
Search the Effects panel for the Brightness & Contrast effect.
Apply this effect to the clip.
In the Effect Controls panel, scroll down to the Brightness & Contrast controls. Choose the following settings:
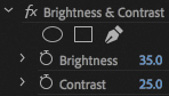
Brightness 35
Contrast 25
NoteThis example uses a vivid adjustment to illustrate a technique. You will usually make subtler adjustments.
You can set these levels by clicking the blue numbers and typing the new setting, by dragging the blue numbers, or by expanding the controls and using the sliders.
This effect changes the entire picture. You’re going to constrain the effect to just one area of the shot.
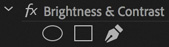
Just under the name of the Brightness & Contrast effect in the Effect Controls panel, you’ll see three buttons that allow you to add a mask to the effect.
Click the first button to add an elliptical mask.
Immediately, the effect is constrained to the mask you just created. You can add multiple masks to an effect. If you select a mask in the Effect Controls panel, you can click and modify the shape in the Program Monitor.

Position the playhead at the start of the clip, and use the mask handles in the Program Monitor to reposition the mask so it covers subject’s face and hair. You may find it helpful to adjust the Zoom level for the Program Monitor to see beyond the edges of the image.
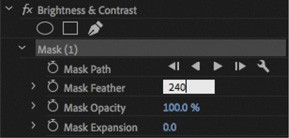
If you deselect the mask, the controls will disappear—select the name of the mask, Mask (1), to display the controls again.

Feathering softens the edge of the mask. Set Mask Feather to about 240.
If you deselect the mask in the Effect Controls panel, to hide the mask handles in the Program Monitor, you’ll see that you have lifted the area around the subject’s face, with a natural return to regular lighting in the rest of the picture. Now you just need the mask to follow the moving video.
Make sure the playhead is still on the first frame of the clip. Click the Track Selected Mask Forward button
 in the Effect Controls panel, just under the mask name, Mask (1).
The movement is quite subtle, so it should be easy for Premiere Pro to follow the action. If the mask stops following the clip, click Stop, reposition the mask, and begin again.
Deselect the mask by clicking the background of the Effect Controls panel, or an empty track in the Timeline panel, and play the sequence to view the result.
Premiere Pro can also track backward so that you can select an item partway through a clip and then track in both directions to create a natural path for the mask to follow.
In this example you’re making a subtle lighting adjustment, but almost any visual effect can be constrained to a mask in this way. You can even add multiple masks to the same effect.
Using keyframing effects
When you add keyframes to an effect, you’re setting particular values at that moment in time. One keyframe will keep information for one setting. If, for example, you were intending to keyframe Position, Scale, and Rotation, you would need three separate keyframes.
Set keyframes at precise moments where you need a particular setting and let Premiere Pro work out how to animate the controls between them.
![]() Note
Note
Be sure to move the playhead over the clip you’re working with when applying effects so you can view your changes as you work. Selecting the clip alone will not make it visible in the Program Monitor.
Adding keyframes
You can change almost all parameters for all video effects over time using keyframes. For example, you can have a clip gradually become out of focus, change color, or lengthen its shadow.
Open the sequence 05 Keyframes.
View the sequence to get familiar with the footage and then position the Timeline playhead over the first frame of the clip.
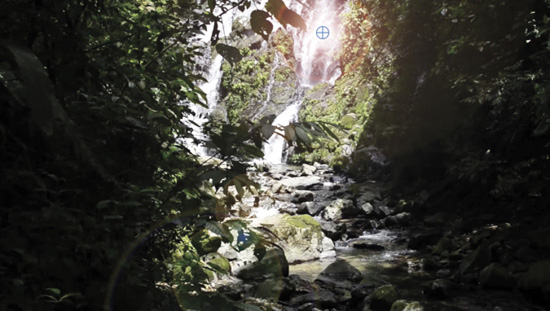
In the Effects panel, locate the Lens Flare effect and apply it to the clip in the sequence. This is not a subtle effect, but it illustrates keyframes beautifully.
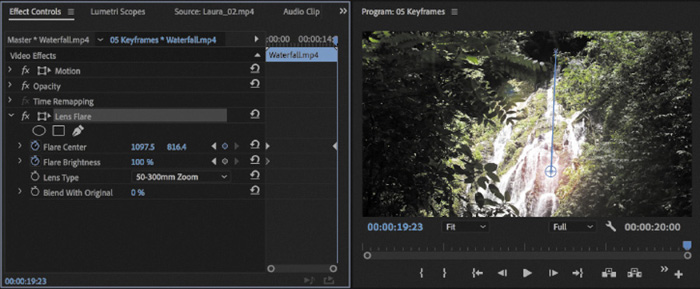
In the Effect Controls panel, select the Lens Flare effect heading. With the effect selected, the Program Monitor displays a small control handle. Use the handle to reposition the lens flare to match the following figure so that the center of the effect is near the top of the waterfall.
Make sure the Effect Controls panel timeline is visible. If it isn’t, click the Show/Hide Timeline View button
 next to the clip name at the top right of the panel to toggle the display.
Click the stopwatch icons to toggle animation for the Flare Center and Flare Brightness properties. Clicking the Stopwatch icon enables keyframing and adds a keyframe at the current location with the current settings.

Move the playhead to the last frame of the clip.
You can drag the playhead directly in the Effect Controls panel. Make sure you see the last frame of video and not black (which would be the first frame of the next clip if there were one).
Adjust Flare Center and Flare Brightness settings so the flare drifts across the screen with the camera pan and gets brighter. Use the following figure for guidance.
Deselect the Lens Flare effect and play the sequence to watch the effect animate over time. You may need to render the sequence for full frame rate playback, by choosing Sequence > Render Effects In To Out.
![]() Tip
Tip
Be sure to use the Next Keyframe and Previous Keyframe buttons to move between keyframes efficiently. This will keep you from adding unwanted keyframes.
Adding keyframe interpolation and velocity
Keyframe interpolation changes the behavior of an effect setting as it moves between keyframes with different settings. The default behavior you’ve seen so far is linear; in other words, a constant change between keyframes. What generally works better is something that mirrors your real-world experience or exaggerates it, such as gradual acceleration or deceleration.
Premiere Pro offers a way to control those changes: keyframe interpolation and the Velocity graph. Keyframe interpolation is easy and simplified, whereas adjusting the Velocity graph can be complex but more precise.
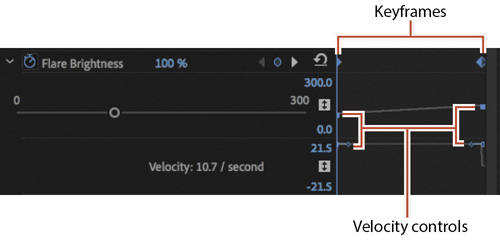
The Velocity graph appears on the right side of the Effect Controls panel, along with the keyframes, when you expand a property by clicking its disclosure triangle ![]() .
.
Open the sequence 06 Interpolation.
Position the playhead at the beginning of the clip and select the clip.
A Lens Flare effect has already been applied to this clip and is currently animated. However, the movement begins before the camera, which isn’t very natural-looking.
Toggle the Lens Flare effect off and on by clicking the “fx” button
 next to the effect name in the Effect Controls panel so you can see the result.
In the Timeline view of the Effect Controls panel, right-click the first keyframe for the Flare Center property.
Choose the Temporal Interpolation > Ease Out method to create a gentle transition into the move from the keyframe.
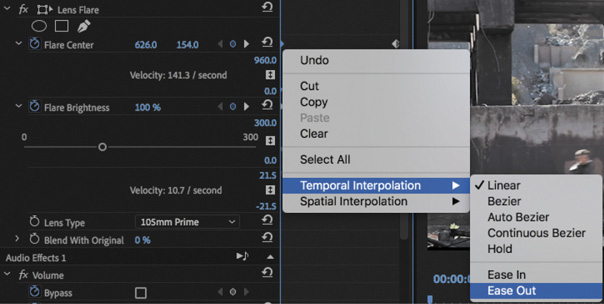
Right-click the second keyframe for the Flare Center property and choose Temporal Interpolation > Ease In. This creates a gentle transition from the stationary position of the last keyframe.
Let’s modify the Flare Brightness property. Click the first keyframe for Flare Brightness and then hold down the Shift key and click the second keyframe so both are active, highlighted in blue.
You could also click the Flare Brightness property name, which selects keyframes for the property. However, there will be occasions when you’ll want to select specific keyframes, so it’s worth remembering the Shift key.
 Note
NoteWhen working with position-related parameters, the context menu for a keyframe will offer two types of interpolation: spatial (related to location) and temporal (related to time). You can make spatial adjustments in the Program Monitor as well as in the Effect Controls panel if you select the effect in the Effect Controls panel. You can make temporal adjustments on the clip in the Timeline and in the Effect Controls panel. These motion-related topics are covered in Lesson 9, “Putting Clips in Motion.”
Right-click either one of the Flare Brightness keyframes and choose Auto Bezier to create a gentle animation between the two properties. Because both keyframes were selected, both are changed.
Play back the animation to watch the changes you’ve made.
Let’s refine the keyframes with the Velocity graph.
Hover the pointer over the Effect Controls panel and then, if your keyboard has the key, press ` (accent grave) to maximize the panel full-screen; or double-click the panel name. This will give you a clearer view of the keyframe controls.
If necessary, click the disclosure triangles next to the Flare Center and Flare Brightness properties to show the adjustable properties.

The Velocity graph shows the velocity between keyframes. Any sudden drops or jumps represent sudden changes in acceleration—jerks, in physics parlance. The farther the point or line is from the center, the greater the velocity.
Select a keyframe and then adjust its extended handle to change the steepness of the velocity curve.

After adjusting the second keyframe for the Flare Center control
Press the ` (accent grave) key, or double-click the panel name, to restore the Effect Controls panel.
Play back your sequence to see the impact of your changes. Experiment some more until you have the hang of keyframes and interpolation.
Perhaps the change to the velocity of the keyframes for the Flare Center isn’t enough to make the movement appear perfectly natural. Try dragging the first keyframe later to better match the camera movement, and adjust the velocity keyframes accordingly.
Using effect presets
To save time on repeated tasks, Premiere Pro supports effect presets. You’ll find that there are several prebuilt presets included for specific tasks already, but the true power of effects lies in creating your own presets to solve repetitive tasks. A single preset can contain more than one effect and can even include keyframes for animation.
Using built-in presets
The effect presets provided with Premiere Pro are useful for tasks such as beveling, picture-in-picture (PIP) effects, and stylized transitions.
Open the sequence 07 Presets.
This sequence has a slow start—the emphasis is on the texture of the background. Let’s use a preset to add visual interest to the opening of the shot.
In the Effects panel, click the X to clear the Search box at the top of the panel. Browse inside the Presets > Solarizes category to find the Solarize In preset.
Drag the Solarize In preset onto the clip in the sequence.
Play back the sequence to watch the Solarize effect transform the opening.

Select the clip and view its controls in the Effect Controls panel.
There are two keyframes, relatively close together. You may need to zoom in by adjusting the navigator at the bottom of the Effect Controls panel to see them both.
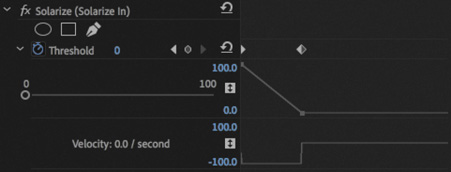
Experiment with adjusting the position of the second keyframe in the Effect Controls panel to customize the effect. If you extend the timing of the effect, it creates a more pleasing start to the shot.
Saving effect presets
Although there are several built-in effect presets to choose from, creating your own is also easy. You can also import and export presets to share them between editing systems.
Open the sequence 08 Creating Presets.
This sequence has two clips, each with an adjustment layer on the V2 track and a title on the V3 track.
Play the sequence to watch the initial animation.
Select the first instance of the “Laura in the snow” title clip on V3 and take a look at the Effect Controls panel. A Fast Blur effect has been applied to the title, and there are keyframes animating several settings.
Click in the Effect Controls panel to make it active and choose Edit > Select All to select all the effects applied to the clip.
You can also select individual effects if you want to include only some of them in the preset.
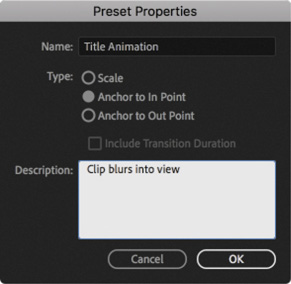
Right-click any of the selected effects in the Effect Controls panel and choose Save Preset.

In the Save Preset dialog, name the effect Title Animation. Click in the Description box and type Clip blurs into view.
When you apply an animated preset to a clip with a different duration, Premiere Pro needs to know how to distribute the keyframes.
There are three options.
Scale: Proportionally scales the source keyframes to the length of the target clip. Any existing keyframes on the original clip are deleted.
Anchor To In Point: Preserves the position of the first keyframe as well as the relationship of other keyframes in a clip. Other keyframes are added to the clip relative to its In point.
Anchor To Out Point: Preserves the position of the last keyframe as well as the relationship of other keyframes in a clip. Other keyframes are added to the clip relative to its Out point.
For this preset, choose Anchor To In Point so the timing matches at the start of each clip the preset is applied to.
Click OK to store the effects and keyframes as a new preset.
In the Effects panel, locate the Presets category and your newly created Title Animation preset. Hover the pointer over the preset to see the description you added appear as a tooltip.
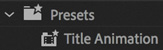
Drag the new Title Animation preset onto the second instance of the “Laura in the snow” title clip on the V3 track in the Timeline.
Watch the sequence play back to see the newly applied title animation.
You can change the settings for a preset by right-clicking it and choosing Preset Properties, or by double-clicking it.
![]() Tip
Tip
Effect presets can be exported and imported so they can be shared. You’ll find a number of free presets at https://premierepro.net/presets
Using frequently used effects
In this lesson, you’ve explored several effects. Although it’s beyond the scope of this book to explore all the options, here are a few additional effects that are useful in many editing situations. We’ll be exploring color adjustments in the next lesson.
Applying image stabilization and rolling shutter reduction
The Warp Stabilizer effect can remove jitter caused by camera movement (which is more and more common with today’s lightweight cameras). The effect is useful because it can remove unstable parallax-type movements (where images appear to shift on planes).
Let’s explore the effect.
Open the sequence 09 Warp Stabilizer.
Play the first clip in the sequence to see the wobbly shot.
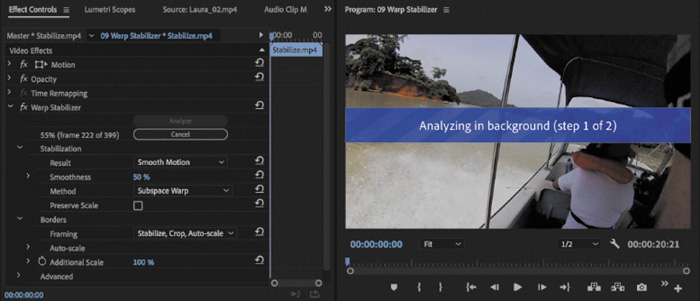
In the Effects panel, locate the Warp Stabilizer VFX effect and apply it to the shot.
As the clip is analyzed, a banner across the footage lets you know you’ll need to wait before working with the effect. There’s also a detailed progress indicator in the Effect Controls panel. The analysis takes place in the background, so you can carry on working while waiting for it to complete.
 Tip
TipIf you notice that some of the details in the shot appear to wobble, you may be able to improve the overall effect. In the Advanced section, select Detailed Analysis. This makes the Analysis phase do extra work to find elements to track. You can also use the Enhanced Reduction option from the Rolling Shutter Ripple option in the Advanced category. These options are slower to calculate but produce superior results.
Once the analysis has completed, you can adjust settings in the Effect Controls panel to improve results by choosing options that better suit the shot.
Result: You can choose Smooth Motion to retain the general camera movement (albeit stabilized), or you can choose No Motion to attempt to remove all camera movement. For this exercise, choose Smooth Motion.
Method: You can use the four methods available. The two most powerful, because they warp and process the image more heavily, are Perspective and Subspace Warp. If either method creates too much distortion, you can try switching to Position, Scale, Rotation or just to Position.
Smoothness: This option specifies how much of the original camera movement should be retained for Smooth Motion. Use a higher value to smooth out the shot the most. Experiment with this shot until you’re happy with its stability.
Play back the clip. The impact is pretty dramatic.
Repeat the process for the second clip in the sequence. This time, set the Warp Stabilizer Result menu to No Motion.

This is a common example of a shot that was intended to be static but, being handheld, has a little wobble. Warp Stabilizer is effective at locking these kinds of shots in position.
Using the Timecode and Clip Name effects
If you need to send a review copy of a sequence to a client or colleague, the Timecode and Clip Name effects are useful. You can apply the Timecode effect to an adjustment layer and have it generate a visible timecode for the entire sequence. You can enable a similar timecode overlay when exporting media, but the effect has more options.
This is helpful because it allows others to make specific feedback based on a unique point in time. You can control the display of position, size, opacity, the timecode itself, and its format and source.
![]() Note
Note
If you work with multiple sequences with different format settings in a single project, it’s worth naming adjustment layers to make it easier to identify their resolution.
Open the sequence 10 Timecode Burn-In.
At the bottom right of the Project panel, click the New Item button
, and choose Adjustment Layer. Click OK.A new adjustment layer is added to the Project panel, with settings that match your current sequence.
Drag the new adjustment layer to the beginning of track V2 in the current sequence.
Drag the right edge of the new adjustment layer to the right to trim it to the end of the sequence. The adjustment layer should cover all three clips.
In the Effects panel, locate the Horizontal Flip effect. Drag it onto the adjustment layer to apply it. This switches the video horizontally, giving the effect of changing the direction of movement.

This effect works well with this kind of content but may not work if there is visible text or a recognizable logo in the picture.
There are no additional controls for this effect.
Now let’s apply an effect that will display the name of each clip in the exported movie. This will make it easier to get specific feedback from a client or collaborator.
In the Effects panel, search for the Clip Name effect.
Apply the Clip Name effect to the adjustment layer clip.
By default, the effect shows the name of the clip you applied it to, which in this case is Adjustment Layer—not very useful!
In the Effect Controls panel, in the Clip Name section, choose Video 1 from the Source Track menu, and set the size to 25%. Now the clip names from the V1 track are displayed.

Clear the Effects panel Search box by clicking the X.
![]() Tip
Tip
You can click the Clip Name effect heading in the Effect Controls panel and then drag the anchor point for the name displayed in the Program Monitor to reposition it.
Using immersive video effects
Premiere Pro includes comprehensive tools and effects for equirectangular 360 video (often referred to as VR video or immersive video).
The effects workflow for 360 video is similar to the workflow for any other kind of video. However, there are dedicated effects available that take into account the wraparound nature of 360 video.
The fact that 360 video seamlessly surrounds the viewer and can connect on all sides (depending on the configuration) does not impact most visual effects. The exception is any effect that generates changes to surrounding pixels, such as blurs and glows. These effects make changes to multiple pixels, and only effects specially designed to work with seamless 360 video images will result in an image without a visible join along the original edges.
Let’s try this.
Open the sequence 11 Immersive Video.

This is equirectangular 360 video, so let’s switch to the VR video viewing mode in the Program Monitor.
Use the Program Monitor Settings menu to choose VR Video > Enable.
The viewing angle is a little narrow by default. Go to the Program Monitor Settings menu again, and choose VR Video > Settings.
Set Monitor View Horizontal to 150 and click OK.

When producing immersive video, you’ll want to choose the viewing angle of the intended VR headset.

In the Effects panel, find the VR Glow effect, in the Video Effects > Immersive Video category. Add the effect to the video clip in the sequence.
This is a processing-intensive effect, and you may find the preview is slower to update than when working with other effects.
Try dragging the image in the Program Monitor to see different views.

The original video clip has some minor “stitching” errors, where the overlap between sections of the image is visible. However, the glow effect is seamless.
Like other effects, you’ll find settings for the VR Glow effect in the Effect Controls panel. Experiment with the VR Glow settings.
When you have finished, use the Program Monitor Settings menu to deselect VR video mode.
Removing lens distortion
Action and point-of-view (POV) cameras such as the GoPro and DJI Phantom are popular, especially with the advent of affordable aerial camera mounts. While the results can be amazing, the wide-angle lenses can introduce unwanted distortion.
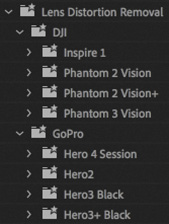
The Lens Distortion effect can be used to introduce the appearance of lens distortion as a creative look. It can also be used to correct lens distortion. Premiere Pro has a number of built-in presets intended to correct distortion from popular cameras. You’ll find the presets in the Effects panel, under Lens Distortion Removal.
Remember, you can make a preset from any effect, so if you are working with a camera that has no existing preset, you can always create your own.
Rendering all sequences
If you have several sequences with effects you want to render, you can render them all as a batch, without opening each sequence to render it individually.
Simply select the sequences you would like to render in the Project panel and choose Sequence > Render Effects In To Out.
All effects that need to render in the selected sequences will be rendered.
Rendering and replacing
If you are working on a low-powered system and your media is high resolution, you may find media tends not to preview without dropping frames. You may also see dropped frames when working with dynamically linked After Effects compositions or complex third-party visual effects that don’t support GPU acceleration.
If all your media is high resolution, you may decide to use the proxy workflow, which allows you to switch between full-resolution and lower-resolution media file playback.
However, if just one or two clips are difficult to play back, you also have the option to render the clips as a new media file and replace the original item in a sequence quickly and easily.
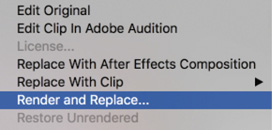
To replace a sequence clip segment with a version that’s easier to play back, right-click the clip and choose Render And Replace.
The Render And Replace dialog has similar options to the proxy workflow. Here are the main settings:
Source: Create a new media file that matches the frame rate and frame size of the sequence or of the original media, or use a preset.
Format: Specify your preferred file type. Different formats give access to different encoders.
Preset: While you can use a custom preset created with Adobe Media Encoder, several are included by default—choose one here.
Once you have chosen a preset and a location for the new file, click OK and the sequence clip is replaced.
A rendered and replaced clip is no longer directly linked to the original media—it’s a new media file. This means, for example, changes made to a dynamically linked After Effect composition will not update in Premiere Pro. To restore the link to the original item, right-click the clip and choose Restore Unrendered.
Review questions
What are two ways to apply an effect to a clip?
List three ways to add a keyframe.
Dragging an effect onto a clip turns on its parameters in the Effect Controls panel, but you don’t see the effect in the Program Monitor. Why not?
Describe how you can apply one effect to a range of clips.
Describe how to save multiple effects to a custom preset.
Review answers
Drag the effect to the clip, or select the clip and double-click the effect in the Effects panel.
Move the playhead in the Effect Controls panel to where you want a keyframe and activate keyframing by clicking the “Toggle animation” button; move the playhead and click the Add/Remove Keyframe button; and with keyframing activated, move the playhead to a position and change a parameter.
You need to move the Timeline playhead to the selected clip to see it in the Program Monitor. Selecting a clip does not move the playhead to that clip.
You can add an adjustment layer above the clips you want to affect. You can then apply an effect that will modify all the clips below the layer. You can also select the clips you would like to apply the effect to and then drag the effect onto the group or double-click the effect in the Effects panel.
You can click the Effect Controls panel and choose Edit > Select All. You can also Command-click (macOS) or Ctrl-click (Windows) multiple effects in the Effect Controls panel. Once the effects are selected, choose the Save Preset command from the Effect Controls panel menu.