
Chapter 28. An Introduction to Access and the Internet/Intranet
IN THIS CHAPTER
- Why This Chapter Is Important
- Saving Database Objects as HTML
- Linking to HTML Files
- Importing HTML Files
- Saving Database Objects as XML
- Importing XML Files
- Practical Examples
Why This Chapter Is Important
The Internet is part of our everyday lives. The Internet’s penetration into the life of an Access developer is no exception. You can save almost every Access 2007 object as HTML. In this chapter, you’ll save tables, query results, forms, and reports, all to HTML. As you’ll see, the process is quite simple and produces excellent results.
Note
The examples in this chapter are based on the Northwind sample database that you can download from within Microsoft Access.
Saving Database Objects as HTML
Probably one of the most basic but powerful features in Access is the capability to save database objects as Hypertext Markup Language (HTML) documents. You can publish table data, query results, form datasheets, and reports, all as HTML. The following sections cover each of these objects.
Saving Table Data as HTML
When saving table data to HTML, you can store it in the HTML file format so that you can easily publish it on the Web. Just follow these steps:
- Use the Navigation Pane to select the table that you want to export.
- Click to select the External Data tab and then open the More drop-down in the Export group.
- Select HTML Document (see Figure 28.1). The Export – HTML Document dialog box appears (see Figure 28.2).
Figure 28.1. Select HTML Document from the More drop-down in the Export group.
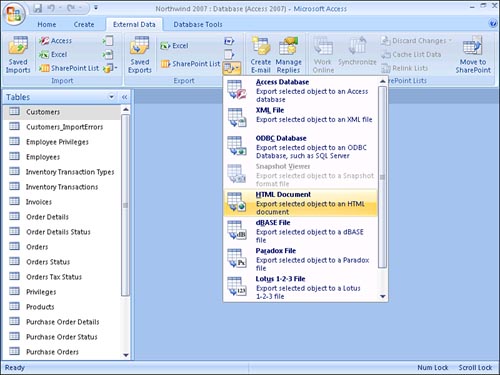
Figure 28.2. The Export – HTML dialog box allows you to select options for the export process.
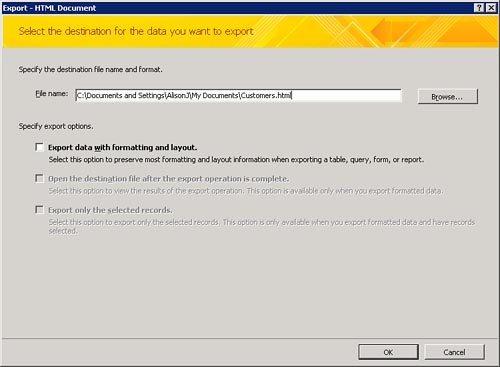
- Enter a name and location for the HTML document that you are generating.
- Indicate if you want to export the document with formatting and layout and whether you want to open the document when the export process is complete.
- Designate whether you want to export just selected records, and click OK to proceed. The HTML Output Options dialog box appears (see Figure 28.3).
Figure 28.3. The HTML Output Options dialog box allows you to designate additional options used during the export process.
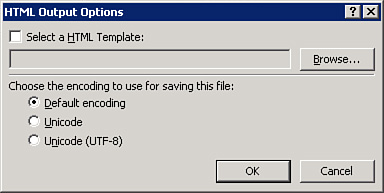
- Designate a template that you want to use for the outputted document and what type of encoding you want to use.
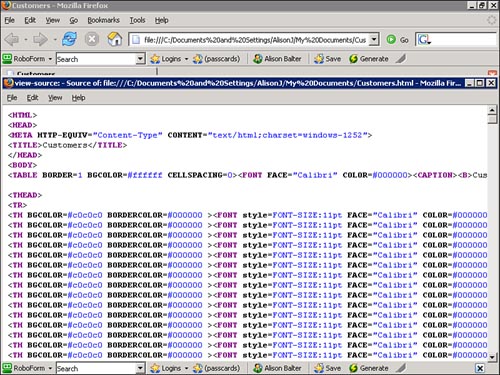
- Click OK to finish the process. Access 2007 generates the HTML file and displays it (see Figure 28.4) if you indicated that you wanted to open the document when the export process was complete. If you’d like, you can view the HTML source (see Figure 28.5).
Figure 28.4. Access displays the generated document in your browser.
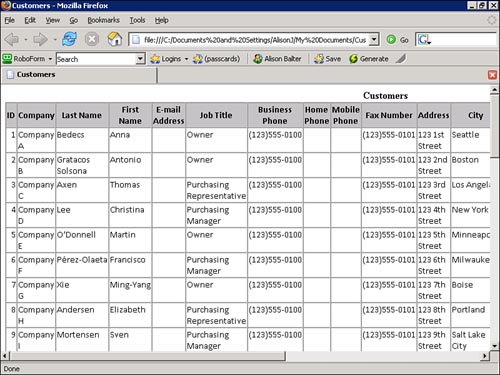
Figure 28.5. You can easily view the HTML source associated with the generated web page.
- Access prompts you to save the export steps. Indicate your option and click Close to complete the process.
Saving Query Results as HTML
The capability to save query results as HTML means you don’t need to save all fields and all records to an HTML file. In fact, you can even save the results of Totals queries and other complex queries as HTML. Saving the result of a query as HTML is similar to saving a table as HTML:
- Use the Navigation Pane to select the query that you want to export.
- Click to select the External Data tab, and then open the More drop-down in the Export group.
- Select HTML Document. The Export – HTML Document dialog box appears.
- Enter a name and location for the HTML document that you are generating.
- Indicate if you want to export the document with formatting and layout and whether you want to open the document when the export process is complete.
- Designate whether you want to export just selected records, and click OK to proceed. The HTML Output Options dialog box appears.
- Designate a template that you want to use for the outputted document and what type of encoding you want to use.
- Click OK to finish the process. Access 2007 generates the HTML file and displays it if you indicated that you wanted to open the document when the export process was complete. If you’d like, you can view the HTML source.
- Access prompts you to save the export steps. Indicate your option and click Close to complete the process.
Access exports the file to HTML so that you can view it from any web browser. You can also view the HTML source.
Saving Forms as HTML
Because an HTML file is a static file, you can save only a form’s datasheet as HTML. A static HTML file doesn’t change as the data in the database changes; plus, you cannot modify the data in the HTML file. To save a form’s datasheet as HTML, follow these steps:
- Use the Navigation Pane to select the form that you want to export.
- Click to select the External Data tab, and then open the More drop-down in the Export group.
- Select HTML document. The Export – HTML Document dialog box appears.
- Enter a name and location for the HTML document that you are generating.
- Indicate whether you want to open the document when the export process is complete, and click OK. The HTML Output dialog box appears.
- Designate a template that you want to use for the outputted document and what type of encoding you want to use.
- Click OK to finish the process. Access 2007 generates the HTML file and displays it if you indicated that you wanted to open the document when the export process was complete. If you’d like, you can view the HTML source.
- Access prompts you to save the export steps. Indicate your option, and click Close to complete the process.
Access exports the file to HTML so that you can view it from any web browser. You can also view the HTML source.
Saving Reports as HTML
You can save reports and their formatting as HTML, too, which is an elegant way to publish data on an Internet or intranet site. To publish a report as HTML, just follow these steps:
- Use the Navigation Pane to select the report that you want to export.
- Click to select the External Data tab, and then open the More drop-down in the Export group.
- Select HTML document. The Export – HTML Document dialog box appears.
- Enter a name and location for the HTML document that you are generating.
- Indicate whether you want to open the document when the export process is complete, and click OK. The HTML Output dialog box appears.
- Designate a template that you want to use for the outputted document and what type of encoding you want to use.
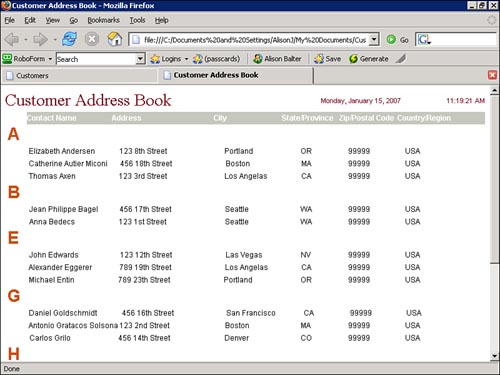
- Click OK to finish the process. Access 2007 generates the HTML file as a nicely formatted report (see Figure 28.6). If you indicated that you wanted to open the document when the export process was complete, Access displays the report. If you’d like, you can view the HTML source.
Figure 28.6. The report appears as a nicely formatted document.
- Access prompts you to save the export steps. Indicate your option, and click Close to complete the process.
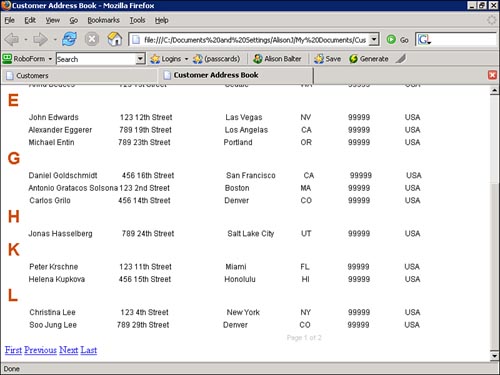
Access exports the file to HTML so that you can view it from any web browser. You can also view the HTML source. Figure 28.6 shows a report published as HTML. Because this is a multipage report, Access generates several HTML files. Each page of the report is linked, and you can easily navigate from page to page by using the First, Previous, Next, and Last hyperlinks automatically generated during the export process (see Figure 28.7).
Figure 28.7. The export process generates First, Previous, New, and Last hyperlinks, allowing you to navigate between the pages.
Linking to HTML Files
Just as you can link to dBASE tables, Paradox tables, or Open Database Connectivity (ODBC) data sources, you can also link to HTML files by following these steps:
- Click to select the External Data tab, and then open the More drop-down in the Import group.
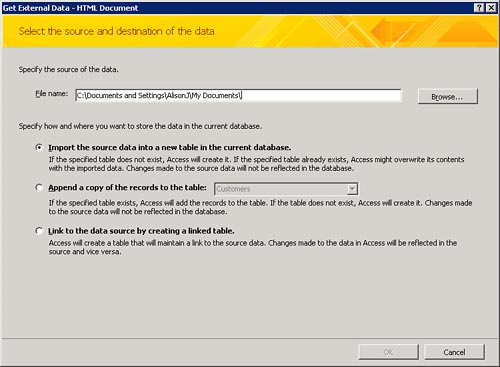
- Select HTML document. The Get External Data – HTML Document dialog box appears (see Figure 28.8).
Figure 28.8. The Get External Data – HTML dialog box allows you to select options for the import process.
- Enter a name and location for the HTML document that you are linking to.
- Indicate whether you want to import the source data into a new table, append it to an existing table, or link to it. In this case, select Link to the Data Source By Creating a Linked Table. Click OK to proceed. The Link HTML Wizard appears (see Figure 28.9).
Figure 28.9. The Link HTML Wizard allows you to designate the specifics of the linking process.
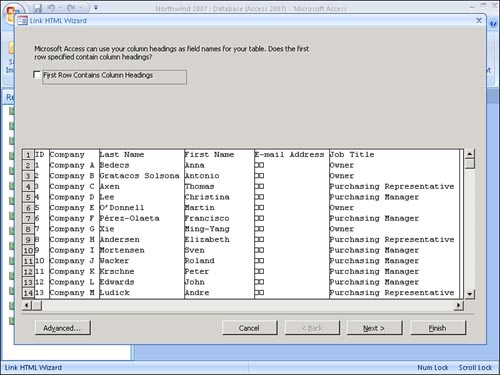
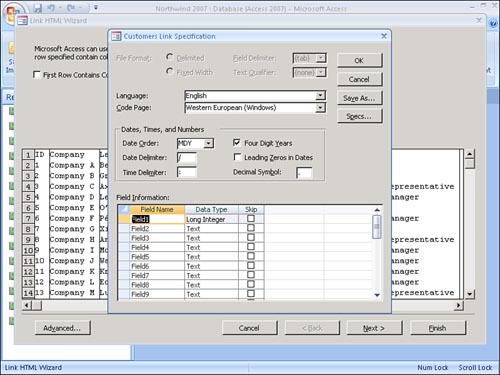
- Designate whether the first row contains column headings. If you click Advanced, a plethora of additional options appear (see Figure 28.10). Options include the ability to change field names and data types as well as specifications for dates, times, and numbers. Click OK to close the dialog box and return to the wizard.
Figure 28.10. Using the Advanced dialog box, you can refine the linking options.
- Click Next. The second step of the wizard appears (see Figure 28.11). Once again, Access gives you the opportunity to modify field types and field names. After you have made any desired changes, click Next to continue. The final step of the wizard appears.
Figure 28.11. The second step of the wizard allows you to designate field types and field names that will apply to the new table.

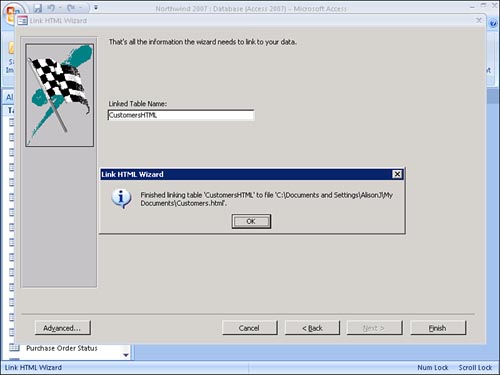
- Select a name for the linked table, and click Finish. A dialog box appears indicating that the linking process was successful (see Figure 28.12).
Figure 28.12. A dialog box appears indicating the linking process was successful.
- Click OK to complete the process.
Importing HTML Files
You can import the data in an HTML file so that it can be used exactly like any other Access table. Follow these steps to import an HTML file:
- Click to select the External Data tab, and then open the More drop-down in the Import group.
- Select HTML document. The Get External Data – HTML Document dialog box appears.
- Enter a name and location for the HTML document that you are importing. Click OK.
- Select Import the Source Data into a New Table in the Current Database. Click OK to proceed. The Import HTML Wizard appears.
- Designate whether the first row contains column headings. If you click Advanced, a plethora of additional options appear. Options include the ability to change field names and data types as well as specifications for dates, times, and numbers. Click OK to close the dialog box and return to the wizard.
- Click Next. The second step of the wizard appears. Once again, Access gives you the opportunity to modify field types and field names. After you have made any desired changes, click Next to continue. The third step of the wizard appears (see Figure 28.13).
Figure 28.13. You can designate whether you want a primary key for your new table.
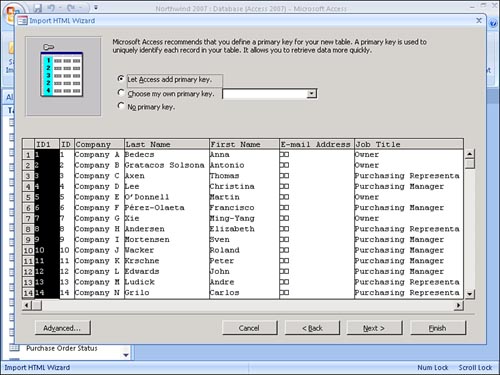
- Designate whether you want to set the primary key, let Access set the primary key, or import the table without a primary key. Select your option, and click Next.
- Select a name for the linked table, and click Finish. A dialog box appears asking whether you want to save your import steps.
- Click Close to complete the process.
Saving Database Objects as XML
You not only can save database objects as HTML, but you also can save them as XML. XML is another commonly used file format on the Internet. Here’s how you save a table as XML:
- Use the Navigation Pane to select the table that you want to export.
- Click to select the External Data tab, and then use the More drop-down to select XML File. The Export – XML File dialog box appears (see Figure 28.14).
Figure 28.14. The Export – XML File dialog box allows you to designate the file and location that you wish to export to.
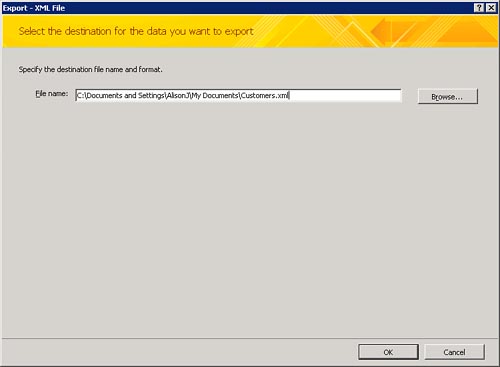
- Select a name and location for the new file and click OK.
- Indicate whether you want to export the data, schema, and presentation of your data. Make your selections, and then click OK.
- The final step of the wizard appears, prompting you to save your export steps. Click Close to close the dialog.
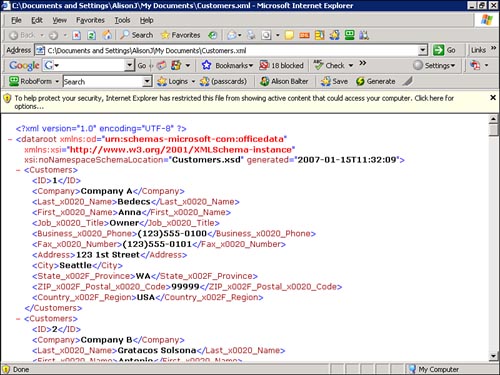
- If you browse the XML file that you generated, it will appear as in Figure 28.15.
Figure 28.15. You can open the generated XML file in your browser.
Importing XML Files
Another option available to you is the ability to import an existing XML document. The process is similar to that used for an HTML document. Just follow these steps:
- Click to select the External Data tab, and then click the XML button in the Import group. The Get External Data – XML Document dialog box appears.
- Enter a name and location for the XML document that you are importing. Then click OK. The Import XML dialog box appears (see Figure 28.16).
Figure 28.16. The Import XML dialog box allows you to designate the specifics of the import process.
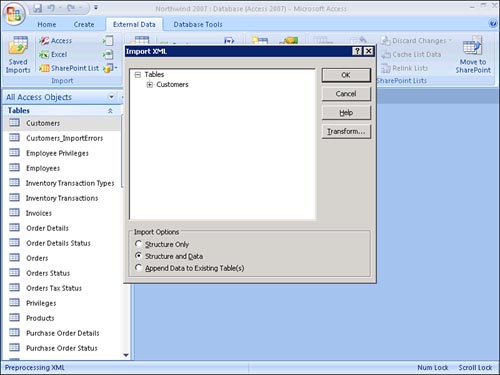
- Designate whether you want to import the structure only, import structure and data, or append the XML data to an existing table. Click OK to continue. The wizard asks whether you want to save your import steps.
- Click Close to close the dialog box. The table should now appear in the Navigation Pane along with the other Access tables.
Practical Examples
Practice saving one of your own tables as HTML. Next, save a query, form, and report as HTML. View the resulting pages in your browser.
Summary
You can easily integrate Access with the Internet or with an intranet. Access enables you to easily publish database objects to the Web and import HTML data from the Web. In fact, you can even create dynamic web pages and build forms that display and update live data directly from a browser! Access 2007 helps bring your data to the continually evolving IT world; the possibilities are endless!