Create a new project called Pong, and leave all the settings at their defaults.
Using your operating system's file browser, go to the app/src/main folder of the project and add a new folder called assets.
There are four sound files already made for you in the Chapter 28/Pong/assets folder of the download bundle. Place these four files into the assets directory you just created, or you can use some sound effects you create yourself. The important thing is that their filenames must be beep1.ogg, beep2.ogg, beep3.ogg, and loseLife.ogg.
Create a new class called Ball. Unsurprisingly, this class will handle everything to do with the ball in the game. We will code it in eight short segments.
First, add the following member variables. The only one that is completely new is the RectF object. This is simply an object that holds four float values that define the four coordinates of a rectangle. This is perfect for a ball that looks like the primitive graphics from the 1970s. In addition, we have four more separate float variables to represent the speed of the ball in the x and y axes, as well as the width and height of the ball.
Add the member variables to the Ball class:
public class Ball {

  private RectF mRect;
  private float mXVelocity;
  private float mYVelocity;
  private float mBallWidth;
  private float mBallHeight;

}
In the Ball constructor method, we initialize the ball's width and height relative to the width of the screen that was passed into the constructor method. Then, we initialize the x and y speed relative to the screen height. The ball will be one hundredth of the screen width and will travel at one quarter of the screen height per second. We will see how we control this in our thread shortly.
We also initialize our RectF object, but don't assign any coordinates yet.
Add the Ball constructor method we have just discussed:
public Ball(int screenX, int screenY){

  // Make the mBall size relative to the screen resolution
  mBallWidth = screenX / 100;
  mBallHeight = mBallWidth;

  /*
    Start the ball travelling straight up
    at a quarter of the screen height per second
  */
  mYVelocity = screenY / 4;
  mXVelocity = mYVelocity;

  // Initialize the Rect that represents the mBall
  mRect = new RectF();

}
Next, we will code a getter method so we can get a hold of the RectF (which will represent the location of the ball) from outside the Ball class. Add the getRect method:
// Give access to the Rect
public RectF getRect(){
  return mRect;
}
Next, we see the update method, not to be confused with the update method we will write in our thread. This update method will be called once every frame of the game.
It updates the top and left values of the ball based on the velocity member variables (mXVelocity and mYVelocity) divided by the number of frames per second (fps) that the device is managing to run the game at. Then, the other points of mRect are updated relative to the top-left and size of the ball.
The effect of this is that regardless of how fast or slow the device's CPU might be, the ball will travel at the same rate. We will soon see how we get fps (frames per second) and pass it in to the ball's update method.
Add the update method to the Ball class:
// Change the position each frame
public void update(long fps){
  mRect.left = mRect.left + (mXVelocity / fps);
  mRect.top = mRect.top + (mYVelocity / fps);
  mRect.right = mRect.left + mBallWidth;
  mRect.bottom = mRect.top - mBallHeight;
}
Now, we need a few little helper methods that will enable us to easily deal with various situations we will learn about soon. We need to be able to reverse the vertical and horizontal headings, set a new random x velocity and speed up by 10%. The reverseYVelocity, reverseXVelocity, setRandomXVelocity, and increaseVelocity methods achieve these things.
Add the four methods we have just discussed to the Ball class:
// Reverse the vertical heading
public void reverseYVelocity(){
  mYVelocity = -mYVelocity;
}

// Reverse the horizontal heading
public void reverseXVelocity(){
  mXVelocity = -mXVelocity;
}

public void setRandomXVelocity(){
  Random generator = new Random();
  int answer = generator.nextInt(2);

  if(answer == 0){
    reverseXVelocity();
  }
}

// Speed up by 10%
// A score of 25 is quite tough on this setting
public void increaseVelocity(){
  mXVelocity = mXVelocity + mXVelocity / 10;
  mYVelocity = mYVelocity + mYVelocity / 10;
}
Next, we add three more helper methods—one that clears an obstacle on the y axis (clearObstacleY), another that clears an obstacle on the x axis (clearObstacleX), and one that resets the position of the ball in the bottom-center of the screen (reset). Each of these methods simply tweaks/repositions the ball. Their usefulness will become apparent when we see them in action:
public void clearObstacleY(float y){
  mRect.bottom = y;
  mRect.top = y - mBallHeight;
}

public void clearObstacleX(float x){
  mRect.left = x;
  mRect.right = x + mBallWidth;
}

public void reset(int x, int y){
  mRect.left = x / 2;
  mRect.top = y - 20;
  mRect.right = x / 2 + mBallWidth;
  mRect.bottom = y - 20 - mBallHeight;
}
The ball is ready to start bouncing all over the place, so let's get the paddle coded, and then we can start on the game engine itself.
Create a new class and call it Paddle. First, we will add the constructor method. We have RectF for holding the paddle's four coordinates. We also have separate mXcoord and mYCoord float variables, which hold the left and top positions.
We have a float for the speed (mPaddleSpeed). Next, we have three final int members (STOPPED, LEFT, and RIGHT), which are public. We will be able to refer to these values from outside the class to manipulate the paddle's direction.
We also have a private variable (mPaddleMoving), which will always be assigned one of those three public final values. We begin by setting it to STOPPED.
In the Paddle class, we want to keep a permanent copy of the screen resolution (size in pixels), so we declare mScreenX and mScreenY, which we will initialize soon.
Add the Paddle members we have just discussed:
public class Paddle {

  // RectF is an object that holds four coordinates// - just what we need
  private RectF mRect;

  // How long and high our mPaddle will be
  private float mLength;
  private float mHeight;

  // X is the far left of the rectangle which forms our mPaddle
  private float mXCoord;

  // Y is the top coordinate
  private float mYCoord;

  // This will hold the pixels per second speed that
  // the mPaddle will move
  private float mPaddleSpeed;

  // Which ways can the mPaddle move
  public final int STOPPED = 0;
  public final int LEFT = 1;
  public final int RIGHT = 2;

  // Is the mPaddle moving and in which direction
  private int mPaddleMoving = STOPPED;

  // The screen length and width in pixels
  private int mScreenX;
  private int mScreenY;

}
In the constructor, we initialize mScreenX and mScreenY with the passed in x and y values. We initialize the length of the paddle to one-eighth of the screen width and the height to one-twenty-fifth.
We initialize mXCoord and mYCoord to roughly the bottom-center of the screen. We set mPaddleSpeed to the same value as mScreenX, which has the effect of setting the paddle's movement to be able to cover the whole screen in one second. This is not as overpowering as it might first seem.
Add the Paddle constructor we have just discussed:
// This is the constructor method
// When we create an object from this class we will pass
// in the screen width and mHeight
public Paddle(int x, int y){

  mScreenX = x;
  mScreenY = y;

  // 1/8 screen width wide
  mLength = mScreenX / 8;

  // 1/25 screen mHeight high
  mHeight = mScreenY / 25;

  // Start mPaddle in roughly the screen center
  mXCoord = mScreenX / 2;
  mYCoord = mScreenY - 20;

  mRect = new RectF(mXCoord, mYCoord, mXCoord + mLength, mYCoord + mHeight);

  // How fast is the mPaddle in pixels per second
  mPaddleSpeed = mScreenX;
  // Cover entire screen in 1 second
}
Add the public getter to return the RectF that represents the paddle's location:
// This is a getter method to make the rectangle that
// defines our paddle available in GameView class
public RectF getRect(){
  return mRect;
}
The setMovementState method receives int as a parameter. We will call this method using one of the three public final int members: LEFT, RIGHT, or STOPPED. This method will simply set that state to the mPaddleMoving member:
// This method will be used to change/set // if the mPaddle is going
// left, right or nowhere

public void setMovementState(int state){
  mPaddleMoving = state;
}
The final method for the Paddle class is its update method. First, it uses a couple of if statements to see if it is moving left or right. If it is, it moves the mXCoord by the mPaddleSpeed divided by the frames per second, just like the ball.
Then, it does two checks to see if the paddle might be moving off the screen. If the paddle is about to disappear off the left-hand side, it prevents it from doing so by setting mXCoord to 0. If it is about to disappear off the right-hand side, it sets mXCoord to mScreenX, take away the width of the paddle.
Finally, based on the results of all those if statements, it updates the values held by the RectF, ready for the game engine to make use of them when it calls getRect:
// This update method will be called from update in GameView
// It determines if the paddle needs to move // and changes the coordinates
// contained in mRect if necessary
public void update(long fps){
  if(paddleMoving == LEFT){
    mXCoord = mXCoord - mPaddleSpeed / fps;
  }
  if(paddleMoving == RIGHT){
    mXCoord = mXCoord + mPaddleSpeed / fps;
  }

  // Make sure it's not leaving screen
  if(mRect.left < 0){
    mXCoord = 0;
  }

  if(mRect.right > mScreenX){
    mXCoord = mScreenX -
    // The width of the paddle
    (mRect.right - mRect.left);
  }

  // Update the paddle graphics
  mRect.left = mXCoord;
  mRect.right = mXCoord + mLength;
}Most of the action will take place in the next class we create. We will call that class GameView. So, the job of MainActivity is to communicate with the lifecycle events of the OS and pass on any relevant information to GameView. It needs to instantiate a GameView object as well. Notice in the next code there is indeed an object of the type GameView declared as a member.
In the onCreate method, we use a Display object and the getWindowManager().getDefaultDisplay() chained methods to initialize it. Then, we declare an object of the type Point. Using the Display object, we can load the screen resolution into point using the getSize method.
We can now call the constructor of GameView to initialize gameView. Notice when we do that we pass in x and y, which is the screen resolution. It is from here that our Paddle and Ball objects will eventually get hold of them.
Finally, in onCreate, we do something that might at first look slightly odd. Look at the call to setContentView. Instead of passing in the XML layout file, we pass in our GameView reference.
This is exactly what we need. GameView will extend a class called SurfaceView, which not only allows us to have a Thread, but also implements onTouchListener and allows us to attach a Canvas object directly to it.
So, GameView, because it extends SurfaceView, is like an all-in-one solution to our thread, touching, and drawing needs, and we simply set it as the view of our entire Activity.
Add the highlighted member variable and code to onCreate:
// gameView will be the view of the game
// It will also hold the logic of the game
// and respond to screen touches as well
GameView gameView;

@Override
protected void onCreate(Bundle savedInstanceState) {
  super.onCreate(savedInstanceState);

  // Get a Display object to access screen details
  Display display = getWindowManager().getDefaultDisplay();

  // Load the resolution into a Point object
  Point size = new Point();
  display.getSize(size);

  // Initialize gameView and set it as the view
  gameView = new GameView(this, size.x, size.y);
  setContentView(gameView);

}
Lastly, in MainActivity, we will override the onResume and onPause methods. In these methods, we will call the resume and pause methods on GameView. In these methods, in the GameView class, we will start and stop our thread. This is just what we need because after our GameView class is set up, as its constructor is called in onCreate, then onResume will run and set the thread going as well. Then, when the player quits the app and the OS calls onPause, our pause method will be called and the thread will be stopped. Otherwise, our ball will still be bouncing and beeping around the screen, perhaps while the player is taking a phone call from his boss.
Add the overridden onResume and onPause methods to the MainActivity class:
// This method executes when the player starts the game
@Override
protected void onResume() {
  super.onResume();

  // Tell the gameView resume method to execute
  gameView.resume();
}

// This method executes when the player quits the game
@Override
protected void onPause() {
  super.onPause();

  // Tell the gameView pause method to execute
  gameView.pause();
}
Now, we can code the main class of our game.
Create a new class called GameView, extend SurfaceView, and implement Runnable.
Now, we will add a whole bunch of members:
- A thread called
mGameThreadthat we will start and stop from thepauseandresumemethods that we will implement soon. These methods are of course called by theonResumeandonPausemethods of theMainActivityclass. SurfaceHolderis what we need to allow us to do to our drawing.Volatile boolean mPlayingwill betruewhen the thread is running andfalseotherwise. It will be used to determine whether we enter awhileloop that will control the whole game loop. We have not seen thevolatilekeyword before, and we use it becausemPlayingcan be accessed from outside and inside the thread.- We have a
boolean mPausedvariable, which will determine whether the game is currently paused. - We have a
PaintandCanvasobject, which we will use in the same way we did in the Canvas Demo mini app. - Next, we have a
longvariable,mFPS, which will hold the current number of frames per second that our game loop is achieving, and of course this is the value we will be passing in to theupdatemethods ofPaddleandBallto allow them to move by the correct amount. - Next, we declare
mScreenXandmScreenYto hold the screen resolution, which as we saw is passed into the constructor fromMainActivitywhen we instantiate aGameViewobject. We will code that constructor very soon. - Now, we get to the neat stuff: a
Ballobject calledmBalland aPaddleobject calledmPaddle. - Next up, we have all the members that will take care of sound effects, including a
SoundPooland fourintIDs for sound effects. - Finally,
mLivesandmScorewill keep track of the player's score and how many lives he or she has left.
Code the GameView class and its members as we have just discussed:
// Notice we implement runnable so we have
// A thread and can override the run method.
class GameView extends SurfaceView implements Runnable {

  // This is our thread
  Thread mGameThread = null;

  // This is new. We need a SurfaceHolder
  // When we use Paint and Canvas in a thread
  // We will see it in action in the draw method soon.
  SurfaceHolder mOurHolder;

  // A boolean which we will set and unset
  // when the game is running- or not
  volatile boolean mPlaying;

  // Game is mPaused at the start
  boolean mPaused = true;

  // A Canvas and a Paint object
  Canvas mCanvas;
  Paint mPaint;

  // This variable tracks the game frame rate
  long mFPS;

  // The size of the screen in pixels
  int mScreenX;
  int mScreenY;

  // The players mPaddle
  Paddle mPaddle;

  // A mBall
  Ball mBall;

  // For sound FX
  SoundPool sp;
  int beep1ID = -1;
  int beep2ID = -1;
  int beep3ID = -1;
  int loseLifeID = -1;

  // The mScore
  int mScore = 0;

  // Lives
  int mLives = 3;
}
The constructor has quite a lot of code, but we have seen much of it before, and what is left is fairly straightforward.
We initialize mScreenX and mScreenY from the passed in screen resolution.
We initialize mOurHolder by calling getHolder, and we initialize mPaint by calling the default Paint constructor.
Next, we instantiate our paddle and ball by calling their constructors and passing in the screen resolution, as is required.
Almost all the rest of the code sets up the sound in exactly the same manner we saw in Chapter 17, Sound FX and Supporting Different Versions of Android.
The final line of code calls the setupAndRestart method to start a new game, and we will code that method shortly.
Add the GameView constructor we have just discussed:
/*
  When we call new() on gameView
  This custom constructor runs
*/

public GameView(Context context, int x, int y) {

  /*
    The next line of code asks the
    SurfaceView class to set up our object.
  */
  super(context);

  // Set the screen width and height
  mScreenX = x;
  mScreenY = y;

  // Initialize mOurHolder and mPaint objects
  mOurHolder = getHolder();
  mPaint = new Paint();

  // A new mPaddle
  mPaddle = new Paddle(mScreenX, mScreenY);

  // Create a mBall
  mBall = new Ball(mScreenX, mScreenY);

  /*
    Instantiate our sound pool
    dependent upon which version
    of Android is present
  */

  if (Build.VERSION.SDK_INT >= Build.VERSION_CODES.LOLLIPOP) {
    AudioAttributes audioAttributes = new AudioAttributes.Builder()
      .setUsage(AudioAttributes.USAGE_MEDIA)
      .setContentType(AudioAttributes.CONTENT_TYPE_SONIFICATION)
      .build();

    sp = new SoundPool.Builder()
      .setMaxStreams(5)
      .setAudioAttributes(audioAttributes)
      .build();

  } else {
    sp = new SoundPool(5, AudioManager.STREAM_MUSIC, 0);
  }


  try{
    // Create objects of the 2 required classes
    AssetManager assetManager = context.getAssets();
    AssetFileDescriptor descriptor;

    // Load our fx in memory ready for use
    descriptor = assetManager.openFd("beep1.ogg");
    beep1ID = sp.load(descriptor, 0);

    descriptor = assetManager.openFd("beep2.ogg");
    beep2ID = sp.load(descriptor, 0);

    descriptor = assetManager.openFd("beep3.ogg");
    beep3ID = sp.load(descriptor, 0);

    descriptor = assetManager.openFd("loseLife.ogg");
    loseLifeID = sp.load(descriptor, 0);

    descriptor = assetManager.openFd("explode.ogg");
    explodeID = sp.load(descriptor, 0);

  }catch(IOException e){
    // Print an error message to the console
    Log.e("error", "failed to load sound files");
  }

  setupAndRestart();

}
Here is the setupAndRestart method that we first call from the constructor. We will also call this method at the end of every game to start a new one. The code calls the reset method on ball to position it for the start of a game and if necessary, resets the mScore and mLives variables to 0 and 3 respectively.
Add the setupAndRestart method to the GameView class:
public void setupAndRestart(){

  // Put the mBall back to the start
  mBall.reset(mScreenX, mScreenY);

  // if game over reset scores and mLives
  if(mLives == 0) {
    mScore = 0;
    mLives = 3;
  }

}
Here, we have our run method, which is the code that is running in a thread. We have a while loop controlled by the value of our volatile boolean called mPlaying. This while loop wraps all the rest of the code inside the run method.
Inside the while loop, we get the system time in milliseconds (thousandths of a second) and initialize the startFrameTime variable with the result. Then, we check if the game is currently paused if(!mPaused), and if the game isn't paused, we call the update method. Note this is the update method of the GameView class, not the Ball or Paddle classes' update methods. We will code this method soon.
Next, we call the draw method, which will contain all our drawing code. Now, we calculate the time the frame took to execute by getting the current system time again and subtracting startFrameTime from the result. We then put the result into mFPS, which of course will be passed to the update methods of the Ball and Paddle classes when they are called.
The reason we wrap the last bit of code in if (timeThisFrame >= 1) is because if timeThisFrame equals zero, trying to divide by zero will crash the app.
Tip
Dividing by zero is a bad move in any language and on any platform. If you want to know more, take a look at this article: https://en.wikipedia.org/wiki/Division_by_zero.
Code the overridden run method we have just discussed:
@Override
public void run() {
  while (mPlaying) {

    // Capture the current time in milliseconds in startFrameTime
    long startFrameTime = System.currentTimeMillis();

    // Update the frame
    // Update the frame
    if(!mPaused){
      update();
    }

    // Draw the frame
    draw();

    /*
      Calculate the FPS this frame
      We can then use the result to
      time animations in the update methods.
    */
    long timeThisFrame = System.currentTimeMillis() - startFrameTime;
    if (timeThisFrame >= 1) {
      mFPS = 1000 / timeThisFrame;
    }

  }

}
Now, we can code the update method.
The update method is quite long, so we will go through and code it a chunk at a time to make sure everything is explained.
Add the signature and the body of the update method, and we will steadily add all the code to it:
// Everything that needs to be updated goes in here
// Movement, collision detection etc.
public void update(){

}
Call the update methods on our ball and paddle to handle any required movement. Add the highlighted code we have just discussed to the update method:
// Everything that needs to be updated goes in here
// Movement, collision detection etc.
public void update() {

  // Move the mPaddle if required
  mPaddle.update(mFPS);

  mBall.update(mFPS);
}
Now that the ball and paddle are in their new positions for this frame, we can run a bunch of tests to see if anything important has happened to our game.
The first test is to see if the ball has hit the paddle. Using the getRect methods of both the ball and the paddle, we pass the two returned results into the static intersects method of RectF. The intersects method returns true if the ball and the paddle overlap (have touched) each other.
If a collision is detected, execution enters the if block and does a number of things:
- Calls
setRandomXVelocityon the ball to choose a random horizontal direction for when the ball heads back up the screen - Calls
reverseYVelocityto start to head back up the screen - Calls
clearObstacle, which jumps the ball a few pixels and avoids the possibility of the ball getting stuck on the paddle - Increments
mScoreto increase the player's score - Plays a beep sound from
SoundPool
Add the code we have just discussed to the update method:
// Check for mBall colliding with mPaddle
if(RectF.intersects(mPaddle.getRect(), mBall.getRect())) {
  mBall.setRandomXVelocity();
  mBall.reverseYVelocity();
  mBall.clearObstacleY(mPaddle.getRect().top - 2);

  mScore++;
  mBall.increaseVelocity();

  sp.play(beep1ID, 1, 1, 0, 0, 1);
}
...
Next, we handle what happens if the ball hits the bottom of the screen. The test to see if this has happened works by calculating the position of the underside of the ball (mBall.getRect.bottom) and comparing it to the height of the screen in pixels (mScreenY).
If a collision has occurred, the following steps happen inside the if block:
- Reversing the ball's velocity
- Jumping a few pixels in case the ball gets stuck
- Decrementing
mLives - Playing a gloomy sound
- Checking if that was the last life and if it was, pause the game and calling
setupAndRestart
Add the highlighted code we have just discussed to the update method:
// Bounce the mBall back when it hits the bottom of screen
if(mBall.getRect().bottom > mScreenY){
  mBall.reverseYVelocity();
  mBall.clearObstacleY(mScreenY - 2);

  // Lose a life
  mLives--;
  sp.play(loseLifeID, 1, 1, 0, 0, 1);

  if(mLives == 0){
    mPaused = true;
    setupAndRestart();
  }
}
The next code uses the top of the ball and compares it to zero to see if it has reached the top of the screen. If it has, it just reverses the ball on the y axis, clears any potential obstacles, and plays a beep.
Add the highlighted code we have just discussed to the update method:
// Bounce the mBall back when it hits the top of screen
if(mBall.getRect().top < 0){
  mBall.reverseYVelocity();
  mBall.clearObstacleY(12);

  sp.play(beep2ID, 1, 1, 0, 0, 1);
}
The next code uses the left of the ball and compares it to zero to see if it has reached the left of the screen. If it has, it just reverses the ball on the x axis, clears any potential obstacles, and plays a beep.
Add the highlighted code we have just discussed to the update method:
// If the mBall hits left wall bounce
if(mBall.getRect().left < 0){
  mBall.reverseXVelocity();
  mBall.clearObstacleX(2);

  sp.play(beep3ID, 1, 1, 0, 0, 1);
}
The next code uses the right of the ball and compares it to mScreenX to see if it has reached the right of the screen. If it has, it just reverses the ball on the x axis, clears any potential obstacles, and plays a beep.
Add the highlighted code we have just discussed to the update method:
// If the mBall hits right wall bounce
if(mBall.getRect().right > mScreenX){
  mBall.reverseXVelocity();
  mBall.clearObstacleX(mScreenX - 22);

  sp.play(beep3ID, 1, 1, 0, 0, 1);
}
Now, we move on to the draw method.
The first thing we have to do is attempt to get a lock on the surface to draw on and check if it is valid. This is achieved with the following line of code (don't add it just yet):
// Make sure our drawing surface is valid or we crash
  if (mOurHolder.getSurface().isValid()) {

  // Draw everything here

}
If the test returns true, we are almost ready to draw. We just need this code before we start using our canvas (don't add this yet):
// Lock the mCanvas ready to draw
mCanvas = mOurHolder.lockCanvas();
Now, we can go mad with mPaint. In this order, we:
- Make sure the surface is valid and lock the canvas, as discussed just now
- Draw a background
- Change the brush color
- Draw the paddle as a rectangle by passing in
getRectas the argument - Draw the ball as a rectangle by calling
getRectas the argument - Change the brush color again
- Change the size of the text
- Draw the score and number of lives on the screen
- Call
mOurHolder.unlockCanvasAndPost(mCanvas)to finish the drawing process for this frame
Add the draw method we have just discussed to the GameView class:
// Draw the newly updated scene
public void draw() {
// Make sure our drawing surface is valid or we crash
if (mOurHolder.getSurface().isValid()) {
// Draw everything here
// Lock the mCanvas ready to draw
mCanvas = mOurHolder.lockCanvas();
// Draw the background color
mCanvas.drawColor(Color.argb(255, 26, 128, 182));
// Choose the brush color for drawing
mPaint.setColor(Color.argb(255, 255, 255, 255));
// Draw the mPaddle
mCanvas.drawRect(mPaddle.getRect(), mPaint);
// Draw the mBall
mCanvas.drawRect(mBall.getRect(), mPaint);
// Choose the brush color for drawing
mPaint.setColor(Color.argb(255, 255, 255, 255));
// Draw the mScore
mPaint.setTextSize(40);
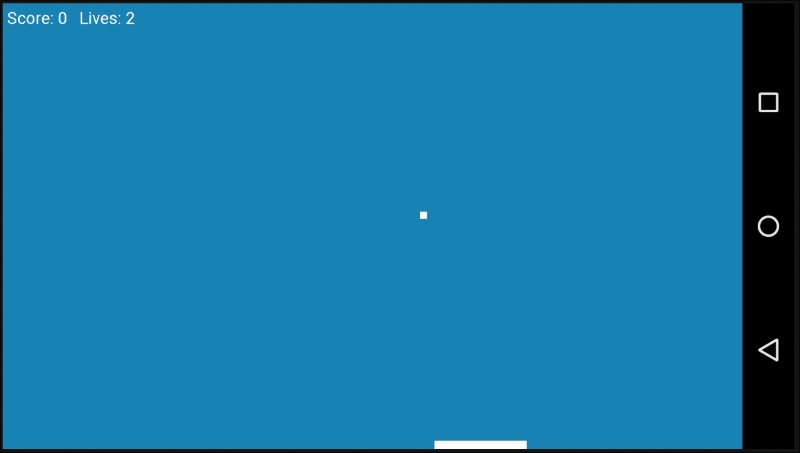
mCanvas.drawText("Score: " + mScore + " Lives: " + mLives, 10, 50, mPaint);
// Draw everything to the screen
mOurHolder.unlockCanvasAndPost(mCanvas);
}
}Now, we can implement our pause and resume methods, which stop and start the thread. Of course, these methods are called by the MainActivity class in response to the Activity lifecycle methods:
// If the Activity is paused/stopped
// shutdown our thread.
public void pause() {
  mPlaying = false;
  try {
    mGameThread.join();
  } catch (InterruptedException e) {
    Log.e("Error:", "joining thread");
  }

}

// If the Activity starts/restarts
// start our thread.
public void resume() {
  mPlaying = true;
  mGameThread = new Thread(this);
  mGameThread.start();
}
The last major piece of our Pong game is handling the user's touches. To make the controls as easy as possible, we will say that holding anywhere on the right will move the paddle right, and anywhere on the left will move the paddle left.
When the onTouchEvent method is called, we switch based on the type of event. The first case that we handle is MotionEvent.ACTION_DOWN. This occurs when the player touches the screen. We can access the precise location with the motionEvent.getX method.
Therefore, in the code that follows, we use the following if statement:
if(motionEvent.getX() > mScreenX / 2){This determines if the screen has been touched at a position higher than the width of the screen divided by two (the right-hand side). If the preceding statement is true, we simply call paddle.setMovementState(mPaddle.RIGHT), and the Paddle class will take care of moving correctly the next time update is called.
If the previous if statement is false, then it must have been touched on the left, and we call paddle.setMovementState(mPaddle.LEFT).
We also need to remember to stop the paddle if the player removes their finger from the screen. We can handle this in the MotionEvent.ACTION_UP case of the switch block.
Add the overridden
onTouchEvent method:
// The SurfaceView class implements onTouchListener
// So we can override this method and detect screen touches.
@Override
public boolean onTouchEvent(MotionEvent motionEvent) {

  switch (motionEvent.getAction() & MotionEvent.ACTION_MASK) {

    // Player has touched the screen
    case MotionEvent.ACTION_DOWN:

      mPaused = false;

      // Is the touch on the right or left?
      if(motionEvent.getX() > mScreenX / 2){
        mPaddle.setMovementState(mPaddle.RIGHT);
      }
      else{
        mPaddle.setMovementState(mPaddle.LEFT);
      }

      break;

    // Player has removed finger from screen
    case MotionEvent.ACTION_UP:

      mPaddle.setMovementState(mPaddle.STOPPED);
      break;
  }
  return true;
}
If you are wondering why we set mPaused to false in the MotionEvent.ACTION_DOWN case, it is because we pause the game when the player runs out of lives. When the player taps the screen, this will then have the effect of starting it again.
We are nearly there now.
We can achieve this by adding the highlighted line to the AndroidManifest.xml file:
<?xml version="1.0" encoding="utf-8"?>
<manifest xmlns:android="http://schemas.android.com/apk/res/android"
  package="com.gamecodeschool.pong" >

  <application
    android:allowBackup="true"
    android:icon="@mipmap/ic_launcher"
    android:label="@string/app_name"
    android:theme="@style/AppTheme" >
    <activity
      android:name=".MainActivity"
      android:theme="@android:style/Theme.NoTitleBar.Fullscreen"
      android:screenOrientation="landscape"

      android:label="@string/app_name" >
      <intent-filter>
        <action android:name="android.intent.action.MAIN" />

        <category android:name="android.intent.category.LAUNCHER"

        />
      </intent-filter>
    </activity>
  </application>

</manifest>
And we're ready to play!