
Take a look at the MyActivity.java tab. Here, we can see the code that we briefly discussed.
Before we write our own methods to correspond with the methods that our buttons are already wired up to call, let's take a look at Java comments. Java comments are really handy when we are learning to code, as well as for experienced developers too.
In programming, it is always a good idea to write messages known as code comments and sprinkle them liberally among your code. This is to remind us what on earth we were thinking at the time we wrote the code. To do this, you simply need to append a double forward slash and then type your comment like this:
// This is a comment and it could be useful
In addition to this, we can use comments to comment out a line of code. Suppose we have a line of code that we temporarily want to disable, then we can do so by adding two forward slashes, like this:
// The code below used to send a message
// Log.i("info","our message here");
// But now it doesn't do anything
// And I am getting ahead of where I should beLet's look at the two different ways to send messages in Android, and then we can write a few methods that will send messages when our new UI buttons are pressed.
In the introduction section of the previous chapter, we talked a bit about using other people's code. We saw that we could do some quite complex things with a relatively small amount of code (like talk to satellites). To get our coding started, we are going to use two different classes from the Android API that simply allow us to output messages. The first class, Log, allows us to output messages to the logcat window. The second class, Toast, is not a tasty breakfast treat, but it will produce a toast-shaped pop-up message for the user to see.
Here is the code that we need to write to send a message to the logcat:
Log.i("info","our message here");Exactly why this works will become clearer in Chapter 9, Object-Oriented Programming, but for now, we just need to know that whatever we put between the two sets of quote marks will be the output of the logcat window. We will see where to put this type of code shortly.
Here is the code we need to write in order to send a message to the user's screen:
Toast.makeText(this, "our message", Toast.LENGTH_SHORT).show();
This is a very convoluted-looking line of code, and exactly how it works, again, will not become clear until Chapter 9, Object-Oriented Programming. The important thing here is that whatever we put between the quote marks will appear in a pop-up message to our users.
Let's put some code just like this into a real app.
So we now know the code that will provide an output to logcat or the user's screen. But, where do we put it? For now, we just need to understand that the onCreate method is executed as the app prepares to be shown to the user. So if we put our code at the end of this method, it will run just as the user sees the app. Sounds good.
Tip
We know that to execute the code in a method, we need to call it. We have wired our buttons up to call a couple of methods: topClick and bottomClick. Soon, we will write these methods. But who or what is calling onCreate!? The answer to this mystery is that Android itself calls onCreate in response to the user clicking on the app icon to run the app. In Chapter 6, The Life and Times of an Android App, we will explore the Android lifecycle and it will be really clear exactly which code is executed and when. You don't need to completely comprehend this now. I just wanted to give you an overview of what was going on.
Let's quickly try this out. We know that the onCreate method is called just before the app starts for real. Let's copy and paste the following lines of code into the onCreate method of our Hello Android app and see what happens when we run it:
- Identify the closing curly brace
}of theonCreatemethod and add the highlighted code, as shown in the next snippet:@Override protected void onCreate(Bundle savedInstanceState) { super.onCreate(savedInstanceState); setContentView(R.layout.my_layout); // Let's take a look at Toast and Log in action Toast.makeText(this, "Can you see me", Toast.LENGTH_SHORT).show(); Log.i("info", "Done creating the app"); } - Note that the two instances of the word
Toastand the wordLogare highlighted in red in Android Studio. They are errors. We know thatToastandLogare classes and that classes are containers for code. Android Studio doesn't know about them until we tell it about them. We must addimportto each class. Fortunately, this is semi-automatic. Click anywhere in theonCreatemethod. - Hold the Alt key and then press Enter. You need to perform this step twice. Once for
Toastand once forLog. Android Studio adds the import directives at the top of the code with our other imports, and with this, the errors are gone. - Scroll to the top of MyActivity.java and take a look at the added import directives. Here they are, in case you are following along on a tablet or a paperback and don't have your development machine close by:
import android.util.Log;
import android.widget.Toast;
- Now, run the app in the usual way.
The next figure is a screenshot of the output in the logcat window:

Look at the logcat you can see that our message Done creating the app was the output. Although it is mixed up among other system messages that we are currently not interested in. If you watch the emulator when the app first starts you will also see the neat pop-up message that the user will see.
It is possible that you might be wondering why the messages were output at the time they were. The simple answer is that the onCreate method is called just before the app starts to actually respond to the user. We will often put code in this method to get our apps set up and ready for user input. This is part of the lifecycle of an Android app, and you will learn more about it in Chapter 6, The Life and Times of an Android App.
Tip
Alt + E is just one of the numerous useful keyboard shortcuts. The following is a keyboard shortcut reference for Android Studio. More specifically, it is for the IntelliJ Idea IDE, on which Android Studio is based. Take a look at it and bookmark this web page as it will be invaluable over the course of this book: http://www.jetbrains.com/idea/docs/IntelliJIDEA_ReferenceCard.pdf
Now, we will go a step further and write our own methods that are called by our UI buttons. We will place similar Log and Toast messages in them.
Let's get straight on with writing our first Java methods with a few more Log and Toast messages inside them. Open up our Hello Android project in Android Studio if it is not open already:
- Identify the closing curly brace
}of theMyActivityclass, as discussed previously. Inside that curly brace, enter the following code that is highlighted after theonCreatemethod that we just dealt with:@Override protected void onCreate(Bundle savedInstanceState) { super.onCreate(savedInstanceState); setContentView(R.layout.my_layout); // Let's take a look at Toast and Log in action Toast.makeText(this, "Can you see me", Toast.LENGTH_SHORT).show(); Log.i("info", "Done creating the app"); } public void topClick(View v){ Toast.makeText(this, "Top button clicked", Toast.LENGTH_SHORT).show(); Log.i("info","The user clicked the top button"); } public void bottomClick(View v){ Toast.makeText(this, "Bottom button clicked", Toast.LENGTH_SHORT).show(); Log.i("info","The user clicked the bottom button"); } - First, note that we appear to have two lines that contain part of our
Toastcode each. This is not strictly true. The problem is that the line of code is quite long and it wraps onto a second line in this book. If you check the code from the download bundle, you will see that it is on one line. The actual ending of a line of code in a method can be determined by the position of the semicolon;. When you enter the code from step 1, be sure to enter all theToastcode on one line. - Note that the two instances of the word "
View" are in red, indicating an error. Simply use the Alt + Enter keyboard combination to import theViewclass and remove the errors. - Deploy the app on a real device or emulator and start tapping away so we can observe the output.
At last, our app does something we told it to do and when we told it to. We can see that the method names we defined in the button properties are indeed called when the buttons are clicked. Admittedly, we still don't understand why Toast and Log really work, and neither do we fully comprehend the public void and (View v) parts of our method's syntax. This will become clear as we progress.
Note
Presenting the code as clearly as possible
Future code will usually not be presented as numbered steps. On this occasion, I have presented the code as part of some numbered steps in a tutorial. Presenting code in a book, especially when it is being read on a mobile device, can be problematic. As soon as a line of code is too long for the width of the medium it is being presented on, the line wraps to the next, causing a lack of clarity. We saw this with our Toast code in the last tutorial. As we will see, to some extent this is unavoidable, but to mitigate this as much as possible, blocks of code will typically not be shown as numbered steps any more. Instead, great effort will be made on my part to make sure that the context of the code and the order it should be entered in is made abundantly clear in other ways.
If you check the logcat output, you can see that a log entry was made from the onCreate method, just as before, as well as from the two methods that we wrote each time you clicked on a button.
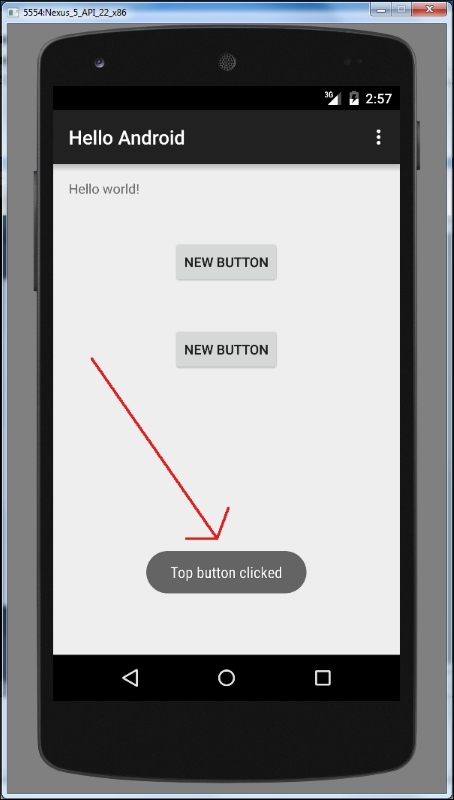
And in the next figure, you can see that the top button has been clicked and the topClick method was called, triggering the Toast pop-up message, which is highlighted in the following figure:
Throughout this book, we will regularly provide an output to the logcat so we can see what is going on behind the UI of our apps. Toast messages are more appropriate for notifying the user that something has occurred, perhaps a download that has completed or a new e-mail has arrived.