
Let's create our new project now. Create a new project and call it Note to self. Leave the other settings at their default values, including choosing a blank activity.
Open a web browser and visit the Android developer website, https://www.google.com/design/icons/index.html.
We want to download four icon sets, which are listed as follows:
- An add icon that we will add to the action bar later in this chapter
- An item that looks like a light bulb that we will use for an icon to represent an idea
- An exclamation mark icon that we will use to represent important notes
- A blank checkbox icon that we will use to represent something that the user needs to do
We saw all these icons when we looked at the final appearance of our app.
You can find all these icons at the previous URL in the categories described as follows:
- Find an image called
addunder the Content category. Select white (white is the best with a dark default action bar). Click onPNGSto downloadadd - ic_add_white_24dp. - In the toggle category, you will find check box outline blank; select the black version of
ic_outline_blank_black_24dp. Click onPNGSto download it. - In the Alert category, find warning and select the black version of
ic_warning_black_24dp. Click onPNGSto download it. - In the Image category, find wb incandescent and select the black version of
ic_wb_incandescent_black_24dp. Click onPNGSto download it. - Unzip each of the preceding downloads. In each of the unzipped downloads, we want the full contents of the
Androidfolder. Note that within theAndroidfolder there is a fairly complicated hierarchy of folders and icons. Here is a figure of the contents of theincandescent (black)- ic_wb_incandescent_black_24dp/Androidfolder as an example: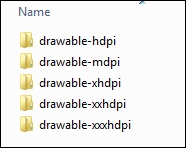
- Copy and paste all the folders (from inside the
Androidfolder) and their contents into theresfolder in the project explorer. Android Studio will arrange them for us. Note that dragging and dropping does not work. You need to select each of the folders shown in the previous figure, copy them, then select theresfolder, right-click on it, and select Paste. - Finally, to ensure that Android Studio has properly prepared and registered all the new files and folders that we just added, from the menu bar, navigate to Tools | Android | Sync Project with Gradle Files. Give this process a little time to complete. You can watch the progress of the process in the status bar.
The reason we need this hierarchy of folders with multiple versions of the same image is so that our app can use the appropriately sized icon depending upon the density of the screen on the Android device it is running on.
Here is a screenshot showing the drawable folder in the project explorer window after the previous actions. Compare the results in the next figure to your own:
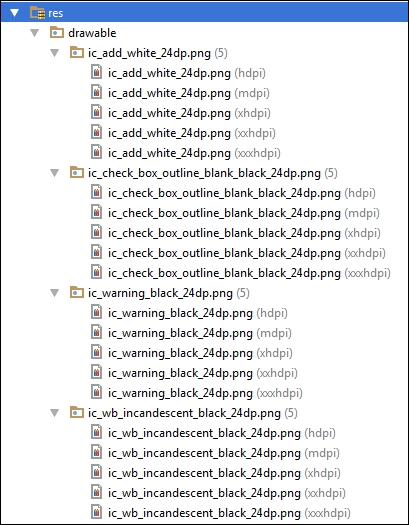
We now have all the images we need for the entire project.
Here, we will create all the String resources that we will refer to from our layout files instead of hardcoding the text property, as we have been doing up until now. Strictly speaking, this is a step that could be avoided; however, if you are looking to make in-depth Android apps sometime in the near future, you will definitely benefit from learning to do things this way.
To get started, open the strings.xml file from the values folder in the project explorer. You will see a few autogenerated resources there. Add the following highlighted string resources that we will use in our app throughout the rest of the project. Add the code before the closing </resources> tag:
…
<resources>
    <string name="app_name">Note To Self</string>
    <string name="hello_world">Hello world!</string>
    <string name="action_settings">Settings</string>

    <string name="action_add">add</string>
    <string name="title_hint">Title</string>
    <string name="description_hint">Description</string>
    <string name="idea_checkbox">Idea</string>
    <string name="important_checkbox">Important</string>
    <string name="todo_checkbox">To do</string>
    <string name="cancel_button">Cancel</string>
    <string name="ok_button">OK</string>

    <string name="sound_checkbox">On or Off</string>
    <string name="settings_title">Settings</string>
    <string name="sound_title">Sound</string>
    <string name="amims_title">Animation Speed</string>
    <string name="rb_fast">Fast</string>
    <string name="rb_slow">Slow</string>
    <string name="rb_none">None</string>
</resources>
Note that in the preceding code, each string resource has a name property, which is unique and distinguishes it from all the others, as well as provides a meaningful and, hopefully, memorable clue as to the actual string value that it represents. It is these name values that we will use to refer to the String that we want to use from within our layout files.
We will not need to revisit this file for the rest of the app.