
Welcome to the first of the three major apps that we will implement in this book. When we do these projects, we will work on them more professionally than we work on the mini apps. We will use Android naming conventions, string resources, and proper encapsulation.
Sometimes, these things are overkill when you try to learn a new Android/Java topic, but they are really useful and important for real-world projects. It is good to start using them as soon as possible. Then, they become like your second nature, and the quality of our apps will benefit from this. Here is a quick refresher of String resources and Android naming conventions.
In Chapter 3, Exploring Android Studio, we talked about using String resources instead of hardcoding text in our layout files. There were a few benefits of doing things this way, but it was also slightly long-winded.
As this is our first real-world project, it would be a good time to do things the right way, so we can get an experience of doing this. If you want a quick refresher on the benefits of String resources, refer to Chapter 3, Exploring Android Studio.
Naming conventions are the conventions or rules that are used to name the variables, methods, and classes in our code. Throughout this book, we have somewhat loosely applied the Android naming conventions. As this is our first real-world app, we will be slightly stricter in applying these naming conventions. Most notably, when a variable is a member of a class, we will add a lowercase prefix m to it .
Tip
You can find more information about Android naming conventions and code style at https://source.android.com/source/code-style.html.
In general, throughout the book, we will be fairly relaxed about naming conventions and String resources when learning new things or building mini apps, but we will apply them fairly strictly when building the main apps. There are three such apps (four if you include Chapter 18, Design Patterns, Fragments, and the Real World) throughout the book, of which Note To Self is the first.
The fully completed app, including all the code and resources, can be found in the Chapter 17/Note to self folder within the download bundle. As we are implementing this app over the next six chapters, it will probably be useful to see the part-completed, runnable app at the end of almost every chapter as well. The part-completed runnable apps and all their associated code and resources can be found in their respective folders:
Chapter 12/Note to selfChapter 14/Note to selfChapter 15/Note to selfChapter 16/Note to selfChapter 17/Note to self
The runnable project for Chapter 16, UI Animations, is combined with the new code for Chapter 17, Sound FX and Supporting Different Versions of Android?
Be aware that each of these is a separate, runnable project and each is contained within its own unique Java package. This is because then you can easily see the app running, as it would be having completed a given chapter. When copying and pasting the code, be careful not to include the package name because it will likely be different from yours and the code will not compile.
If you are following along and intend to build Note To Self from start to finish, we will simply build a project called Note To Self. There is still nothing stopping you, however, from taking a look at the code files of the projects from each chapter if you want to do a bit of copying and pasting at any time. Just don't copy the package directive from the top of a file, and be aware that at a couple of rare points in the instructions, you will be asked to delete/replace the occasional line of code from a previous chapter.
So, even if you are copying and pasting more than you are typing the code, be sure to read the instructions completely and look at the code in the book for extra comments that might be useful.
In each chapter, the code will be presented as if you have completed the last chapter completely, showing code from previous chapters where necessary as context for our new code.
Each chapter will not be solely devoted to the Note To Self app; you will learn about other, usually related, things and build a few mini apps as well. So, when we come to the Note To Self implementation, we will be technically prepared for it.
It is worth having a heads-up on when we will implement the different parts of the app:
- In this chapter, we will look into the resources, dialogs, and the
Noteclass. We will gather and add to the project all of the String and image resources that we will need throughout the entire project. The image resources are quite important, and for copyright reasons, they are not included in the download bundle. They are, however, free to download from the Android developer site. We will also create two classes that extendDialogFragmentand create custom layout files, which enable the user to add a new note or view an existing note. We will also see how the dialog windows can communicate with theMainActivityclass. In addition to this, we will implement a simple class of our own that will represent the structure of the data contained in a note. - In Chapter 13, Handling and Displaying Arrays of Data, we will complete a few mini apps; this will prepare us to add new features to Note To Self in Chapter 14, Handling and Displaying Notes in Note To Self.
- In Chapter 14, Handling and Displaying Notes in Note To Self, we will use our new-found data handling skills along with a few neat new classes from the Android API to enable all our app's data that is to be shown in a scrolling list.
- In Chapter 15, Android Intent and Persistence, none of this data is any good to our user if it disappears when they quit the app or turn the phone off. You will learn and use two strategies to permanently persist data. One strategy is for simple data from the Settings screen of the app and the other for the actual app data: the notes.
- In Chapter 16, UI Animations, we will add neat animations such as flashing notes when they have been marked important by the user.
- In Chapter 17, Sound FX and Supporting Different Versions of Android? we will add a simple sound to our app and the ability to delete notes from the app.
So, what exactly can the user of our new app do?
The following features and screenshots are from the completed app. The app will look slightly different than this at the various stages of development. Where necessary, we will look at more images either as a reminder or to see the slight differences throughout the development process.
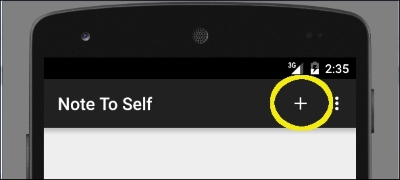
The completed app will allow the user to tap a + icon in the action bar of the app to open a dialog window to add a new note. Here is the action bar with the + icon highlighted:
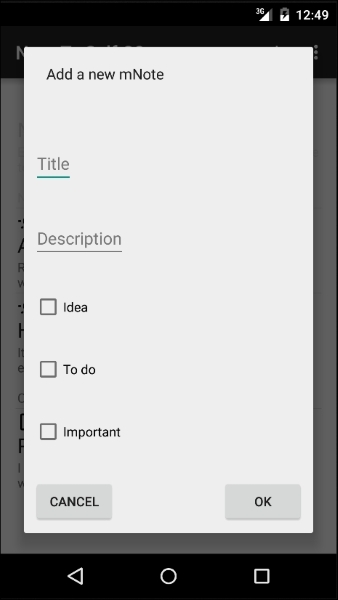
This screenshot shows the dialog window where the user can add a new note:
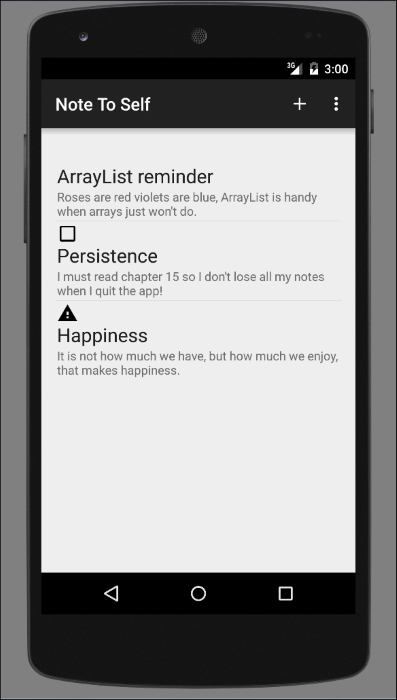
The user will have a list of all the notes that they have added on the main screen of the app, as shown in this next screenshot. Notice the little icons above some of the notes? Through these, the user can see whether the note is important, an idea, and/or a to-do list.
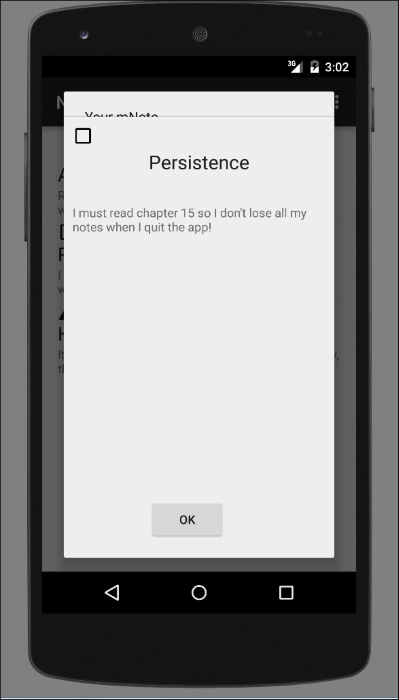
They will be able to scroll down the list and tap on a note to see it shown in another dialog window that is dedicated to the one note. Here is that dialog window:
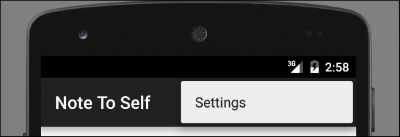
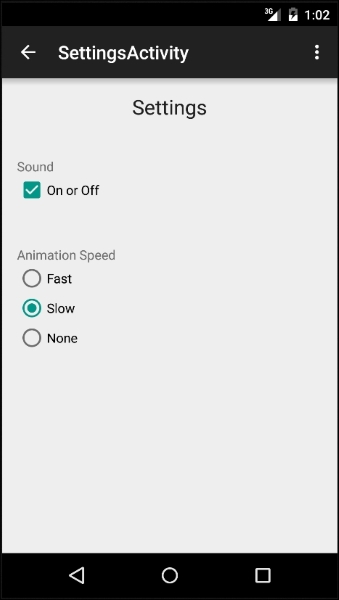
There will also be a Settings screen accessible from the menu in the action bar that will allow the user to configure basic settings, such as sound and animation speed. Here is the settings menu option in action:
This is the settings screen itself:
The user will also be able to long-press a note in the list to permanently delete a note when they don't need it any more.
Now that we know exactly what we are going to build, we can go ahead and start implementing it.