
Place Collectibles and Doors
Switch to the GameScene.sks file to open it in the Scene Editor. Once there, add three new sprite nodes with the following settings.
First, start with the key:

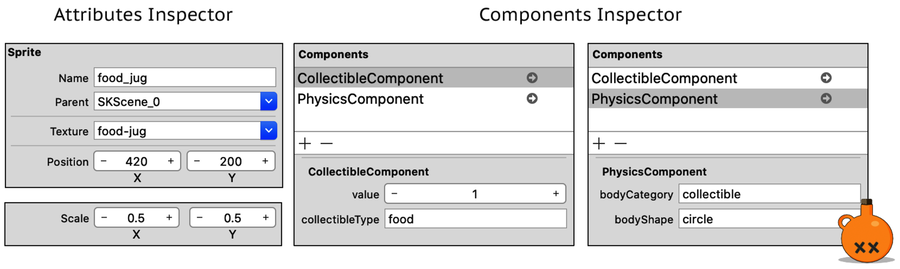
Next, add some food:
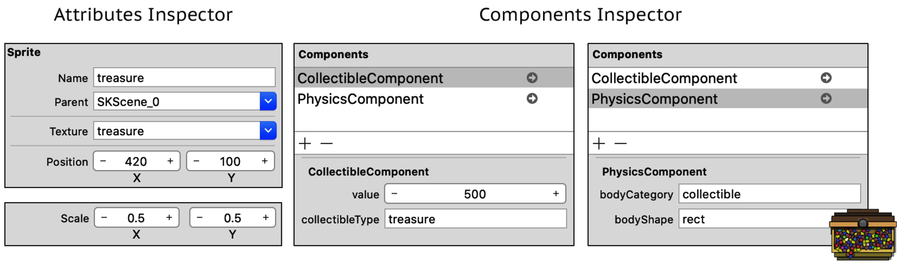
Finally, give Val some treasure:
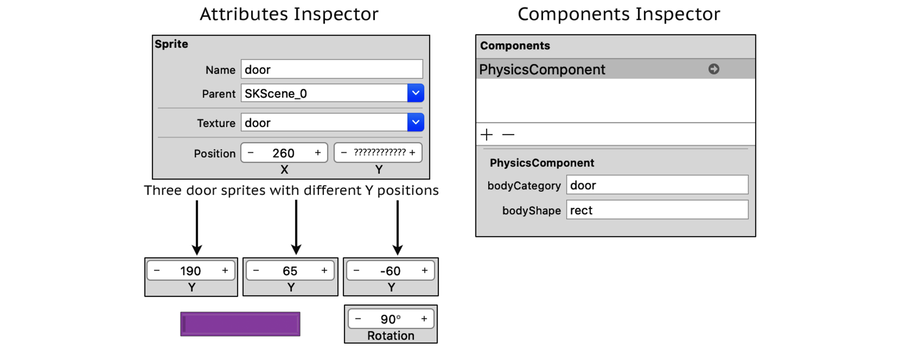
With the items in place, you’re ready to add some doors—three, actually—so drag three more sprite nodes into the scene. Set them up, as shown in the image.
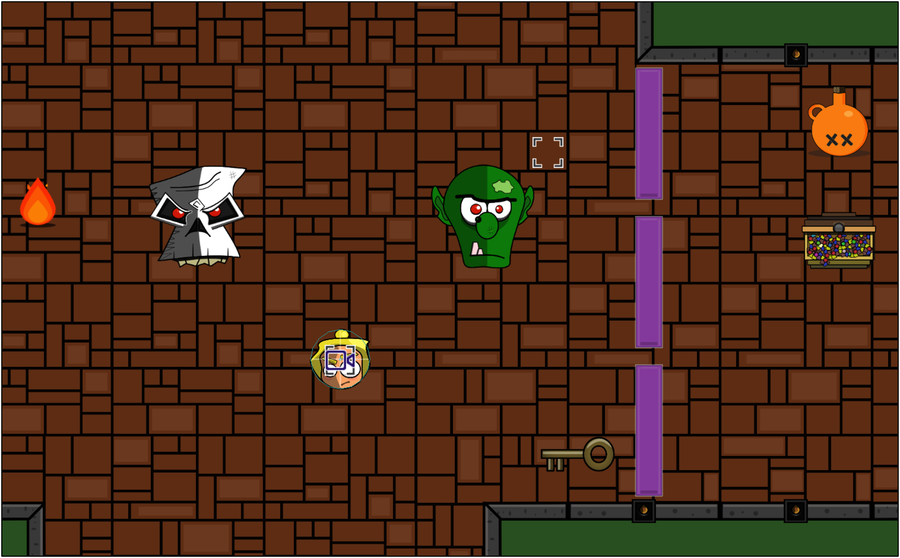
When you’re done, your scene will look something like this:
Before you build and run the project, you need to update the player node to use the new physics component. You also need to modify the tile physics to use the new wall category.
In the Scene Graph View, select the player node and switch to the Attributes Inspector. In the Physics Definition section, set the Body Type to None. Once you have that done, switch to the Components Inspector and add the Physics Component, setting the bodyCategory to player and the bodyShape to circle.
Save the GameScene.sks file and then switch to the SKTileMapNode+Physics.swift file. Once there, replace the following line of code:
| | physicsBody?.categoryBitMask = 2 |
with this code instead:
| | physicsBody?.categoryBitMask = PhysicsBody.wall.categoryBitMask |
| | physicsBody?.collisionBitMask = PhysicsBody.wall.collisionBitMask |
| | physicsBody?.contactTestBitMask = PhysicsBody.wall.contactTestBitMask |
Scroll down a bit, and then switch this line of code:
| | tileNode.physicsBody?.categoryBitMask = 2 |
with this code:
| | tileNode.physicsBody?.categoryBitMask = |
| | PhysicsBody.wall.categoryBitMask |
| | tileNode.physicsBody?.collisionBitMask = |
| | PhysicsBody.wall.collisionBitMask |
| | tileNode.physicsBody?.contactTestBitMask = |
| | PhysicsBody.wall.contactTestBitMask |
Fantastic, now all of your game objects are set up using the new physics categories.
Last, but certainly not least, you need to tell the GameScene class that it is now responsible for handling the physics. Switch to the GameScene.swift file, and at the end of the didMove(to:) method, add the following line of code:
| | physicsWorld.contactDelegate = self |
Build and run the project. Before you run off and collect the key, try to go “through” one of the doors first. You shouldn’t be able to get through any of them because they’re “locked.” Once you confirm that’s working, collect the key (notice the sound), and then try to go through the door again. This time, the door should unlock and disappear. Go into the now unlocked area and collect the treasure and the food.
(Oh, and don’t worry about those monsters. They can’t harm you—yet.)
As you’re collecting items, you’ll see something like the following in the console, which confirms everything is working as expected:
| | Entering PlayerHasNoKeyState |
| | Keys: 1 |
| | Entering PlayerHasKeyState |
| | Keys: 0 |
| | Entering PlayerHasNoKeyState |
| | Treasure: 500 |
Before wrapping up this chapter, you need to add the necessary code to handle what happens when Val accidentally shoots a collectible whose canDestroy property is set to true.