We are in the middle of a fundamental shift in how websites interact with visitors. We've moved from designing and developing websites that allow visitors to look at content to sites that allow visitors to participate in the process of creating content and sharing that content with the their circle of friends. While the general term used for this is "social networking," I like to think of it as the concept of the participative web.
In this appendix, I'll show you how to leverage Drupal's core capabilities as well as contributed modules to extend the reach of your website by enabling your visitors to participate in the content creation process and share their experience and content on your site with their circle of influence. I'll show you how to put your face on Facebook, tweet your expertise on Twitter, picture things on Flickr, and avail of other social networking capabilities.
Note
The capabilities discussed here were not available in Drupal 7 at the time the book was written, but are available in Drupal 6 and will be ported to Drupal 7 at some point in the future.
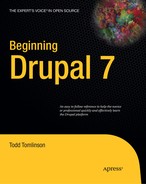
One of the easiest mechanisms for embracing social networking on your Drupal site is to allow visitors to post content they find interesting on your site to one or more social networking sites. It's a feature that enables visitors to say, "hey, look what I found" by posting your content on one or more of the sites shown in Figure C-1.
Allowing visitors to post your content on their favorite social networking sites turns your visitors into marketing engines for your site. If a visitor likes something on your website, they will likely post it on one or more social networking sites. The great aspect of social networking is that people of similar interests tend to congregate on the same sites. The potential result for you is new visitors that you didn't have to search for yourself. It's a powerful capability that you should not overlook.
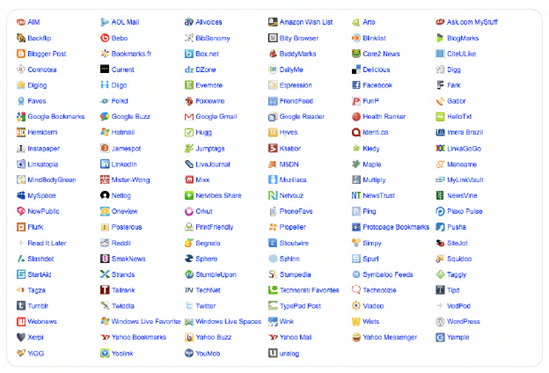
To provide the ability to easily share your content with social networking sites, all you have to do is install and configure the Add to Any Share/Bookmark module (Drupal.org/project/addtoany). After installing and configuring the module, Drupal will automatically render a small button beneath each content item on your site. When a visitor clicks on the button, a list of social networking sites that you have selected appears, allowing the visitor to click and submit your content item to a social networking site (see Figure C-2). The module also provides the ability to e-mail the content item to a friend and bookmark the page.
Linking content to social networking sites is only one dimension of the capabilities you have with Drupal. Another approach is to integrate the content from various social networking sites into your Drupal site and automatically post new content items created on your site on various social networking sites. There are several Drupal contributed modules for integrating your site with social networking sites like Facebook, Twitter, Flickr, and YouTube.
With over 400 million users and 200 million users who sign on daily, Facebook is the granddaddy of all social networking sites. Tapping the Facebook community with your Drupal site is a relatively simple process that involves the use of two Drupal modules.
The Facebook Status Module(
drupal.org/project/fbstatus). This module provides the ability to display Facebook status updates from your Facebook account on your Drupal site. Using Facebook's RSS feed capability, status updates from your Facebook profile are automatically captured and displayed on your Drupal site in a block.The Drupal for Facebook Module(
drupal.org/project/fb). This module provides a powerful set of features that allow you to essentially embed your Drupal website within Facebook as a Facebook application. Using this module you can deploy all the content, features, and functionality of your Drupal website as a Facebook application. You can see a demonstration of the capabilities enabled by this module athttp://apps.facebook.com/drupalforfacebook/.
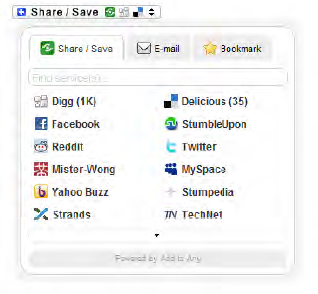
The Twitter module (http://drupal.org/project/twitter) provides the ability to display your tweets in a block on your Drupal site and the ability to post tweets whenever a new content item is created on your site. Figure C-3 demonstrates the ability to post a tweet when you create a new content item and the display of tweets in a block.
There are several Drupal modules that provide the ability to integrate your site with Flickr. Examples of modules that you may wish to use include:
The Flickr module (
http://drupal.org/project/flickr) provides the ability to download and display images stored on Flickr on your Drupal website.The Flickr Imagefield module (
http://drupal.or/project/flickr_imagefield) provides the ability to upload images to Flickr when new images are saved on your Drupal site.The Galerie module (
http://drupal.org/project/galerie) provides a simple to use tool for creating galleries from Flickr images, allow you to select Flickr images based on tags or a specific user.
Integrating your Drupal site with YouTube provides a low-cost approach for hosting video content on your site without having to pay the bandwidth charges for streaming or downloading video directly from your server. The two key YouTube related modules are:
The Video Upload module(
http://drupal.org/project/video_upload). Provides the ability to upload a video from your Drupal site directly to YouTube when the author attaches a video to a node.The Embedded Media module(
http://drupal.org/project/emfield). Provdes the ability to incorporate YouTube videos into nodes on your site.
There may be cases where you want to display the latest posts from several social networking sites as a single integrated list of posts. The Activity Stream module (www.drupal.org/project/activitystream) enables the ability to pull your latest posts from sites like Twitter, Flickr, Facebook, Digg, Delicious, YouTube, Goodreads, and StumbleUpon, and display your latest postings from all the sites in a block. Figure C-4 demonstrates the type of output generated by this module.

Integrating your Drupal site with existing social networking websites is one approach for incorporating social networking capabilities. Another is to create your own Drupal based stand-alone social networking site that provides features similar to Facebook and other sites using Drupal core and contributed modules.
The primary functionality provided by most social networking sites includes the ability for user to
write about their current activities and have those activities show up on their personal page on your site
display their status updates so other friends can see what they're up to
identify and connect with friends
communicate privately with friends
post on a friend's "wall"
upload and share photographs
The following modules provide the features listed above in much the same fashion as you would find on popular social networking sites
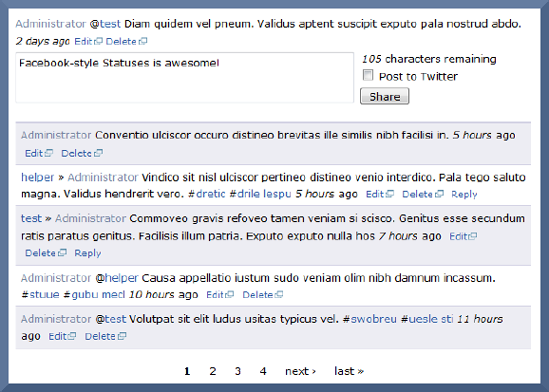
The Facebook Style Statuses module (
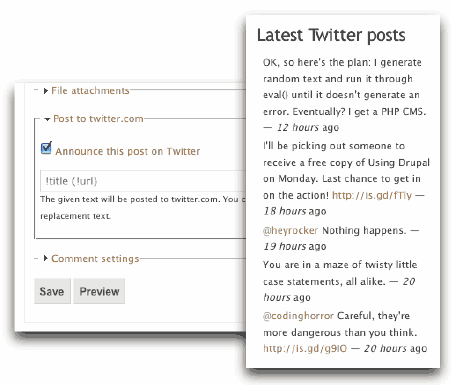
http://drupal.org/project/facebook_status) mimics Facebook's wall feature, allowing users to post status updates or "micro blogs.". Users can also post on other users' profiles, much in the same fashion that Facebook supports. Figure C-5 demonstrates the user interface for this module.The User Relationships module (
http://drupal.org/project/user_relationships) enables the ability to create Facebook like lists of friends. The module allows the site administrator to define categories of relationships (e.g., manager, family member, classmate) where users can specify a type of relationship when requesting that someone becomes their friend. The module also provides an e-mail request that is sent to the person who is identified in the friend request, as well as e-mails distributed to the user community on updates to relationship statuses.The Private Messages Module (
http://drupal.org/project/privatemsg) provides the ability for visitors to send private messages to one or more users on your site. It also provides useful features such as private threaded conversations, a search feature, and taxonomy integration that allows users to tag messages, block users from sending you a private message, and e-mail notifications when new messages are sent.The Hearbeat Module (
http://drupal.org/project/heartbeat) provides the ability to display user activity on your website in a Facebook "wall" like format. Figure C-6 demonstrates the type of output created by the module.Imagefield, ImageCache, ImageAPI, and Views for Uploading and Sharing Images enables you to use the standard suite of image modules to provide the capability for users to upload and share pictures on their personal pages. To create this capability you could create a content type for image upload and provide features such as automatic image resizing and cropping through the ImageCache module. You could create a standard image gallery display of those images using the Views module, using the grid display type.

With these modules, you can easily create a social networking site that provides the features and functionality that users have become accustomed to on the major social networking sites.
Another approach for building social networking sites is to use Drupal's Organic Groups (OG) module. This module provides the ability for users on your site to create their own "group," where a group consists of a homepage and the ability for other users to join and create content. You can think of OG as the Drupal version of Yahoo or Google Groups. An excellent example of a site built using OG is www.popsugar.com/community/groups.
Setting up Organic Groups is a relatively simple process that begins with installing the OG module and its dependencies. Other modules required by OG are Notifications, Messaging, and Tokens. Follow the instructions found in Chapter 8 for installing and enabling modules.
After you get the right modules installed, you need to set up a group node and group post. The group node is used to configure a new organic group and a group post is the content type used by members of a group to create content. Following the directions in Chapter 10, create both content types as described here.
For the group node, use Set-up an Organic Group as the title and set_up_an_organic_group as the name of the content type. On the submission forms setting, enter Group Name in the title and Welcome Message for the body. For workflow settings, uncheck the promote to the front page option and disable attachments. In the Organic Groups section, select the Group node option, and, finally, disable comments.
For the group post node, use Group Post as the title and group_post as the name of the content type. On the submission form settings and workflow settings page, leave the default values. On the Organic Groups section, select either Standard group post or Wiki group post. The difference between the two options is that a Standard group post may be edited only by the author and the group administrator, whereas a wiki post can be edited by any member of the group. It's a good idea to leave the ability to comment on posts enabled, as that's a standard approach for most group websites.
With the content types in place, the next step is to configure the OG module. On the Configuration page, find the section for Organic Groups. There are two configuration options: Organic Groups Configuration and Organic Groups Access Configuration. On the Organic Groups Configuration page, you will find three categories of configuration options: Content types, Group details, and Messaging & Notifications.
The Content types configuration options were automatically set when we created the new OG content types. You can look at the options to see the values that were set in the previous step, but you shouldn't have to change any of the values. You'll see that the Set Up an Organic Group node is set to the default Group node and Group Post is set to the standard group posting content type. You shouldn't have to change any values.
The Group details configuration options control whether groups appear in the groups directory, whether the group appears on the group registration form, whether the groups that a user belongs to are displayed on their profile, whether a user must select a group when creating a post, and the default view used to create the homepage for that group. For demonstration purposes I'll leave all of the settings at their default values.
The Messaging and Notifications configuration options allow you to customize the content generated when a message is sent to a user. There are several tokens that you can use to embed values such as user name or group name into the body of a message. For demonstration purposes I'll leave all of the values set to their defaults.
The OG module provides a number of blocks that enable users and administrators to create, join, and participate in groups. The standard blocks include:
New groups. This block provides a list of the groups that were recently created.
My groups. If the user is logged in, this block displays a list of groups to which the user belongs.
Group details. This block provides the links for group members to create a group post, invite a friend, manage their membership, see the number of members, and the designated group manager.
Group search. This block provides the ability to search content within the group.
Group notifications. This block enables the group feed options and is active once the user enters the group.
Group admins. This block provides the same information as in group details, but directed at the administrator of the group.
Group members. This block lists all of the members in a group.
Group files. This block lists all of the files associated with this group.
For demonstration purposes, I'll assign every block to the right sidebar of my test site. You may assign the blocks that make sense to your site to any region you desire.
The next step in the process is to set up the access configuration for OG. On the Configuration page, you will find an option called "Organic groups access configuration. On the configuration page you will find two options, one for setting the visibility of posts on your site and the second option defines how private groups are handled. For the visibility of posts settings, you have the option of defining whether posts are visible only within a specific group or across all groups, or whether you want the author to have the ability to specify if the visibility of the post. I'll leave the default option that specifies that the posts are only visible within the designated group.
The second configuration option defines whether new groups are visible to the public. You can set groups to automatically default to public or private, or you can allow the group administrator to set the visibility of the group. For demonstration purposes I'll leave the default option set so that every new group is automatically set to public.
There are several permissions that you will need to set before creating your first group. You will first need to decide whether you will have a special role for users who will create and administer groups. If you want any user on your site to have the ability to create a group, you can just use the authenticated user role. If you want to restrict who can create new groups then you'll need to create a specific role (e.g., group administrator) and assign that role to the users who will have the ability to create and manage groups. For demonstration purposes I'll set up my site so that any authenticated user can create and administer their own groups.
The permissions that I'll set to enabled for authenticated users are
create setup_organic_group content
create group_post content
delete own group_post content
edit own group_post content
edit own setup_organic_group content
og_notifications module - subscribe to content in groups
I'll leave the "administer organic groups" permission unchecked, as I only want the site administrator to have the ability to change global organic settings.
At this point you have OG set up and ready to use. I'll create a group to demonstrate how easy the OG group module is to use. To create a group, click on the "Create content" link and select the "Set up an organic group" content type. The key fields associated with the Set up an organic group content type includes:
Group name. Enter the name you wish to associate with the group. For demonstration purposes I'll create a group called Drupal 7 Fans.
Description. Enter a brief description about the group. This value is used in the group details block and the group directory. I'll use "A group for fans of Drupal 7" as the description.
Membership requests. This field presents a list of options on how requests for membership are handled. You can select "Open – all membership requests are automatically approved," "Moderated – all memberships must be approved by the group administrator," "Invite only – the group administrator sends invitations to users," or "Closed." I'll select open allowing any user to register without requiring administrator approval.
Registration form. Specifies whether a request to join this group is displayed on the user registration form. I would like my group to show on the user registration form, so I'll check the box.
List groups in directory. Specifies whether this group is listed in the groups directory. I want my group listed in the directory, so I'll check the box.
Private group. Hides the group from everyone who is not a member of the group. I want my group to be publicly visible, so I'll leave the box unchecked.
Welcome message. A message that is displayed on the homepage of the group. I'll enter a paragraph or two that describes the purpose of the group.
After saving the Set up an organic group content item the group homepage is displayed along with the group being listed in the various OG blocks, as shown in Figure C-2.
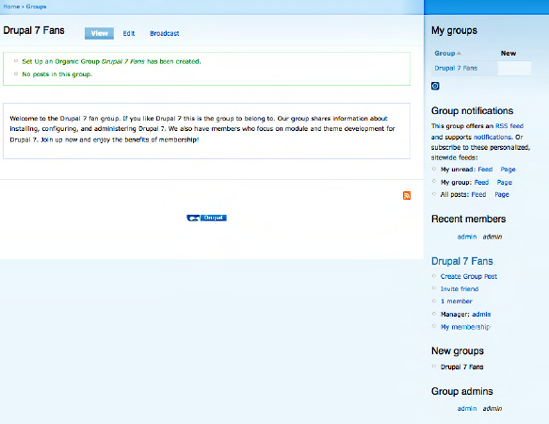
With the group set up I can now create a new Group post. Creating a post is as simple as clicking on the Create Group Post link in the Drupal 7 Fans block (see the Drupal 7 Fans block in the right column in Figure C-7). The form for creating a group post is a standard Drupal content creation form consisting of a title, body, an assign to group feature that allows the author to select which groups they wish to publish their posting to. By default, OG automatically checks the box associated with the group where the user clicked the "Create group post" link. If the user belongs to multiple groups, their other groups will be listed as checkboxes allowing the user to post the same item to multiple groups.
After saving the post it automatically appears on the homepage for the assigned group(s), and with commenting enabled, other members of the group can post comments against the post.
The functionality of a base Organics Group site is pretty impressive, but there are over 100 additional contributed modules that expand on the base capabilities of the base OG module. For a complete list of add-on modules visit http://drupal.org/project/modules and click on the Organic groups link in the projects block in the right column.
Social networking represents a tremendous opportunity for expanding the reach of your website by enticing visitors to participate, collaborate, and communicate. The value of offering social networking capabilities is huge due to the viral nature of visitors telling friends about your site, and those friends telling their friends. Deploying the capabilities outlined in this appendix could have a significant impact on the overall success of your site. Roll up your sleeves and give social networking a chance to work its magic on your site.