
Chapter 11
Event-Driven Programming
WHAT YOU WILL LEARN IN THIS CHAPTER:
- Necessity of XML data access methods: SAX and .NET’s XMLReader
- Why SAX and XMLReader are considered event-driven methods
- How to use SAX and XMLReader
- The right time to choose one of these methods to process your XML
There are many ways to extract information from an XML document. You’ve already seen how to use the document object model and XPath; both of these methods can be used to find any relevant item of data. Additionally, in Chapter 12 you’ll meet LINQ to XML, Microsoft’s latest attempt to incorporate XML data retrieval in its universal data access strategy.
Given the wide variety of methods already available, you may be wondering why you need more, and why in particular do you need event-driven methods? The main answer is because of memory limitations. Other XML processing methods require that the whole XML document be loaded into memory (that is, RAM) before any processing can take place. Because XML documents typically use up to four times more RAM than the size of the file containing the document, some documents can take up more RAM than is available on a computer; it is therefore necessary to find an alternative method to extract data. This is where event-driven paradigms come into play. Instead of loading the complete file into memory, the file is processed in sequence. There are two ways to do this: SAX and .NET’s XMLReader. Both are covered in this chapter.
UNDERSTANDING SEQUENTIAL PROCESSING
There are two main ways of processing a file sequentially. The first relies on events being fired whenever specific items are found; whether you respond to these events is up to you. For example, say an event is fired when the opening tag of the root element is encountered, and the name of this element is passed to the event handler. Any time any textual content is found after this, another event is fired. In this scenario there would also be events that capture the closing of any elements with the final event being fired when the closing tag of the root element is encountered.
The second method is slightly different in that you tell the processor what sort of content you are interested in. For example, you may want to read an attribute on the first child under the root element. To do so, you instruct the XML reader to move to the root element and then to its first child. You would then begin to read the attributes until you get to the one you need. Both of these methods are similar conceptually, and both cope admirably with the problem of larger memory usage posed by using the DOM that requires the whole XML document to be loaded into memory before being processed.
Processing files in a sequential fashion includes one or two downsides, however. The first is that you can’t revisit content. If you read an element and then move on to one of its siblings or children, you can’t then go back and examine one of its attributes without starting from the beginning again. You need to plan carefully what information you’ll need. The second problem is validation. Imagine you receive the document shown here:
<document>
  <data>Here is some data.</data>
  <data>Here is some more data.</data>
</document>
This document is well-formed, but what if its schema states that after all <data> elements there should be a <summary> element? The processor will report the elements and text content that it encounters, but won’t complain that the document is not valid until it reaches the relevant point. You may not care about the extra element, in which case you can just extract whatever you need, but if you want to validate before processing begins, this usually involves reading the document twice. This is the price you pay for not needing to load the full document into memory.
In the following sections you’ll examine the two methods in more detail. The pure event-driven method is called SAX and is commonly used with Java, although it can be used from any language that supports events. The second is specific to .NET and uses the System.Xml.XmlReader class.
USING SAX IN SEQUENTIAL PROCESSING
SAX stands for the Simple API for XML, and arose out of discussions on the XML-DEV list in the late 1990s.
Back then people were having problems because different parsers were incompatible. David Megginson took on the job of coordinating the process of specifying a new API with the group. On May 11, 1998, the SAX 1.0 specification was completed. A whole series of SAX 1.0–compliant parsers then began to emerge, both from large corporations, such as IBM and Sun, and from enterprising individuals, such as James Clark. All of these parsers were freely available for public download.
Eventually, a number of shortcomings in the specification became apparent, and David Megginson and his colleagues got back to work, finally producing the SAX 2.0 specification on May 5, 2000. The improvements centered on added support for namespaces and tighter adherence to the XML specification. Several other enhancements were made to expose additional information in the XML document, but the core of SAX was very stable. On April 27, 2004, these changes were finalized and released as version 2.0.2.
SAX is specified as a set of Java interfaces, which initially meant that if you were going to do any serious work with it, you were looking at doing some Java programming using Java Development Kit (JDK) 1.1 or later. Now, however, a wide variety of languages have their own version of SAX, some of which you learn about later in the chapter. In deference to the SAX tradition, however, the examples in this chapter are written in Java.
All the latest information about SAX is at www.saxproject.org. It remains a public domain, open source project hosted by SourceForge. To download SAX, go to the homepage and browse for the latest version, or go directly to the SourceForge project page at http://sourceforge.net/projects/sax.
This is one of the extraordinary things about SAX — it isn’t owned by anyone. It doesn’t belong to any consortium, standards body, company, or individual. In other words, it doesn’t survive because some organization or government says that you must use it to comply with their standards, or because a specific company supporting it is dominant in the marketplace. It survives because it’s simple and it works.
Preparing to Run the Examples
The SAX specification does not limit which XML parser you use with your document. It simply sits on top of it and reports what content it finds. A number of different parsers are available out in the wild, but these examples use the one that comes with the JDK.
If you don’t have the JDK already installed, perform the following steps to do so:
java -version
java version “1.6.0_25”
Java(TM) SE Runtime Environment (build 1.6.0_25-b06)
Java HotSpot(TM) 64-Bit Server VM (build 20.0-b11, mixed mode)
Once you have the correct output showing, you are all set to try the examples in this chapter.
Receiving SAX Events
SAX works by firing an event each time it comes across any content. An abbreviated list of events is shown in Table 11-1.
TABLE 11.1: SAX Events
| EVENT NAME | DESCRIPTION | EXAMPLE CONTENT |
| startDocument | Processing has started and the first event fired. | |
| endDocument | The document is fully read, the last event fired. | |
| startElement | The opening tag of an element is encountered. | <document> |
| endElement | The closing tag of an element is encountered. | </document> |
| characters | A string of pure text is encountered, and can be fired multiple times for the same text node. | This is some example text |
| processingInstruction | A processing instruction was encountered. | xml-stylesheet href=”web.xsl” type=”text/xml” |
| ignorableWhitespace | Called when whitespace that is not an inherent part of the document is encountered. | |
| skippedEntity | Called when an external entity has been skipped. | |
| setDocumentLocator | Enables the parser to pass a Locator object to the application. |
When SAX was originally developed, it was quite a chore to create a class that handled all these events. Even if you didn’t care about any comments or processing instructions, you still had to write a method to cope with them being fired from the SAX processor. The situation has improved since then and you can base your class on what is known as the DefaultHandler. This handles all the events for you, and you have to write methods only for those in which you are interested. For example, the startDocument, startElement, and characters events are the most commonly handled ones.
The following Try It Out puts the previous theory into practice. You’ll use SAX to read a simple XML file and report back on some of the events that are received.
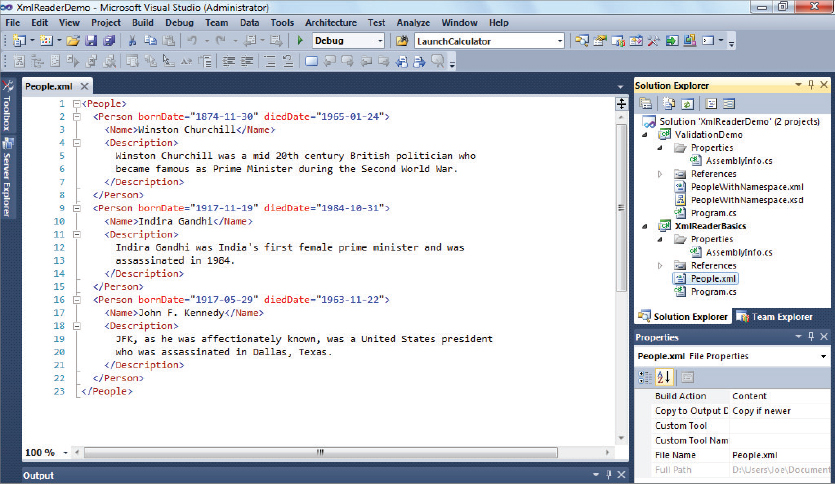
![]() LISTING 11-1: People.xml
LISTING 11-1: People.xml
<People>
  <Person bornDate=”1874-11-30” diedDate=”1965-01-24”>
    <Name>Winston Churchill</Name>
    <Description>
      Winston Churchill was a mid-20th century British politician who
      became famous as Prime Minister during the Second World War.
    </Description>
  </Person>
  <Person bornDate=”1917-11-19” diedDate=”1984-10-31”>
    <Name>Indira Gandhi</Name>
    <Description>
      Indira Gandhi was India's first female prime minister and was
      assassinated in 1984.
    </Description>
  </Person>
  <Person bornDate=”1917-05-29” diedDate=”1963-11-22”>
    <Name>John F. Kennedy</Name>
    <Description>
      JFK, as he was affectionately known, was a United States president
      who was assassinated in Dallas, Texas.
    </Description>
  </Person>
</People>![]() LISTING 11-2: SaxParser1.java
LISTING 11-2: SaxParser1.java
import org.xml.sax.*;
import org.xml.sax.helpers.*;
import java.io.*;

public class SaxParser1 extends DefaultHandler {

  public void startDocument( ) throws SAXException {
    System.out.println( “SAX Event: START DOCUMENT” );
   }

  public void endDocument( ) throws SAXException {
    System.out.println( “SAX Event: END DOCUMENT” );
   }

  public void startElement(String namespaceURI,
                           String localName,
                           String qName,
                           Attributes attr ) throws SAXException {
    System.out.println( “SAX Event: START ELEMENT[ “ + localName + “ ]”);
   }

  public void endElement(String namespaceURI,
                         String localName,
                         String qName ) throws SAXException {
    System.out.println( “SAX Event: END ELEMENT[ “ + localName + “ ]” );
   }

  public void characters(char[] ch,
                         int start,
                         int length ) throws SAXException {
    System.out.print( “SAX Event: CHARACTERS[ “ );

    try {
      OutputStreamWriter output = new OutputStreamWriter(System.out);
      output.write( ch, start,length );
      output.flush();
    } catch ( Exception e ) {
     e.printStackTrace();
    }

    System.out.println( “ ]” );
   }

  public static void main( String[] argv ){
    String inputFile = argv[0];
    System.out.println( “Processing '” + inputFile + “'.” );
    System.out.println( “SAX Events:” );
    try {
      XMLReader reader = XMLReaderFactory.createXMLReader();
      reader.setContentHandler( new SaxParser1() );
      reader.parse( new InputSource(
                 new FileReader( inputFile )));
    } catch ( Exception e ) {
       e.printStackTrace();
    }
  }
}javac SaxParser1.java
java SaxParser1 People.xml
SAX Events:
SAX Event: START DOCUMENT
SAX Event: START ELEMENT[ People ]
SAX Event: CHARACTERS[
     ]
SAX Event: START ELEMENT[ Person ]
SAX Event: CHARACTERS[
     ]
SAX Event: START ELEMENT[ Name ]
SAX Event: CHARACTERS[ Winston Churchill ]
SAX Event: END ELEMENT[ Name ]
SAX Event: CHARACTERS[
     ]
SAX Event: START ELEMENT[ Description ]
SAX Event: CHARACTERS[
      Winston Churchill was a mid-20th century British politician who
      became famous as Prime Minister during the Second World War. ]
SAX Event: CHARACTERS[
     ]
SAX Event: END ELEMENT[ Description ]
SAX Event: CHARACTERS[
     ]
SAX Event: END ELEMENT[ Person ]
SAX Event: CHARACTERS[
     ]
SAX Event: START ELEMENT[ Person ]
SAX Event: CHARACTERS[
     ]
SAX Event: START ELEMENT[ Name ]
SAX Event: CHARACTERS[ Indira Gandhi ]
SAX Event: END ELEMENT[ Name ]
SAX Event: CHARACTERS[
     ]
SAX Event: START ELEMENT[ Description ]
SAX Event: CHARACTERS[
      Indira Gandhi was India's first female prime minister and was
      assassinated in 1984. ]
SAX Event: CHARACTERS[
     ]
SAX Event: END ELEMENT[ Description ]
SAX Event: CHARACTERS[
     ]
SAX Event: END ELEMENT[ Person ]
SAX Event: CHARACTERS[
     ]
SAX Event: START ELEMENT[ Person ]
SAX Event: CHARACTERS[
     ]
SAX Event: START ELEMENT[ Name ]
SAX Event: CHARACTERS[ John F. Kennedy ]
SAX Event: END ELEMENT[ Name ]
SAX Event: CHARACTERS[
     ]
SAX Event: START ELEMENT[ Description ]
SAX Event: CHARACTERS[
      JFK, as he was affectionately known, was a United States president
      who was assassinated in Dallas, Texas. ]
SAX Event: CHARACTERS[
     ]
SAX Event: END ELEMENT[ Description ]
SAX Event: CHARACTERS[
     ]
SAX Event: END ELEMENT[ Person ]
SAX Event: CHARACTERS[
     ]
SAX Event: END ELEMENT[ People ]
SAX Event: END DOCUMENT public void startDocument( ) throws SAXException {
System.out.println( “SAX Event: START DOCUMENT” );
}
public void endDocument( ) throws SAXException {
System.out.println( “SAX Event: END DOCUMENT” );
}
public void startElement(String namespaceURI,
String localName,
String qName,
Attributes attr ) throws SAXException {
System.out.println( “SAX Event: START ELEMENT[ “ + localName + “ ]” );
}
public void endElement(String namespaceURI,
String localName,
String qName ) throws SAXException {
System.out.println( “SAX Event: END ELEMENT[ “ + localName + “ ]” );
}
public void characters(char[] ch,
int start,
int length ) throws SAXException {
System.out.print( “SAX Event: CHARACTERS[ “ );
try {
OutputStreamWriter output = new OutputStreamWriter(System.out);
output.write( ch, start,length );
output.flush();
} catch (Exception e) {
e.printStackTrace();
}
System.out.println( “ ]” );
}
public static void main( String[] argv ){
String inputFile = argv[0];
System.out.println( “Processing '” + inputFile + “'.” );
System.out.println( “SAX Events:” );
try {
XMLReader reader = XMLReaderFactory.createXMLReader();
reader.setContentHandler( new SaxParser1() );
reader.parse( new InputSource(
new FileReader( inputFile )));
}catch ( Exception e ) {
e.printStackTrace();
}
}
Now that you’ve seen the basics in action, in the following activity you see how you can deal with attributes within an XML document.
public void startElement
(String namespaceURI,
String localName,
String qName,
Attributes attr ) throws SAXException {
System.out.println( “SAX Event: START ELEMENT[ “ + localName + “ ]” );
for ( int i = 0; i < attr.getLength(); i++ ){
System.out.println( “ ATTRIBUTE: “ + attr.getLocalName(i) + “ VALUE: “
+ attr.getValue(i) );
}
}javac SaxParser2.java
java SaxParser2 People.xml
SAX Event: START ELEMENT[ Person ] ATTRIBUTE: bornDate VALUE: 1917-05-29 ATTRIBUTE: diedDate VALUE: 1963-11-22 SAX Event: CHARACTERS[ ] SAX Event: START ELEMENT[ Name ] SAX Event: CHARACTERS[ John F. Kennedy ] SAX Event: END ELEMENT[ Name ] SAX Event: CHARACTERS[ ] SAX Event: START ELEMENT[ Description ] SAX Event: CHARACTERS[ JFK, as he was affectionately known, was a United States president who was assassinated in Dallas, Texas. ] SAX Event: CHARACTERS[ ] SAX Event: END ELEMENT[ Description ] SAX Event: CHARACTERS[ ] SAX Event: END ELEMENT[ Person ] SAX Event: CHARACTERS[ ] SAX Event: END ELEMENT[ People ]
for ( int i = 0; i < attr.getLength(); i++ ){
System.out.println( “ ATTRIBUTE: “ + attr.getLocalName(i) + “ VALUE: “
+ attr.getValue(i) );
}
The two previous Try It Outs have both used the characters event to directly display any text nodes in the XML document reported by the SAX parser. There are two problems with this approach. First is the fact that you simply wrote any content directly to the output stream, in this case the console window. Usually you will want to store the text in a variable for processing. The second problem with the characters event is that it is not guaranteed to return all of an element’s content in one call. Many times you’ll find that a long block of text is broken down into one or more characters events. The next section shows a more sophisticated way to handle one or more characters events.
Handling the characters Event
A better way to handle the characters event is to build up the entire text content from the multiple firings of the event using the startElement and endElement events to indicate which characters belong to each element. To do so, follow these steps:
public class SaxParser3 extends DefaultHandler {
private StringBuffer buffer = new StringBuffer();public void startElement(String namespaceURI,
String localName,
String qName,
Attributes attr ) throws SAXException {
System.out.println( “SAX Event: START ELEMENT[ “ + localName + “ ]” );
for ( int i = 0; i < attr.getLength(); i++ ){
System.out.println( “ ATTRIBUTE: “
+ attr.getLocalName(i) + “ VALUE: “ + attr.getValue(i) );
}
buffer.setLength(0);
} public void characters(char[] ch,
int start,
int length ) throws SAXException {
try {
buffer.append(ch, start, length);
} catch (Exception e) {
e.printStackTrace();
}
} public void endElement(String namespaceURI,
String localName,
String qName ) throws SAXException {
System.out.print( “SAX Event: CHARACTERS[ “ );
System.out.println(buffer.toString());
System.out.println( “ ]” );
System.out.println( “SAX Event: END ELEMENT[ “ + localName + “ ]” );
}The entire code is shown in Listing 11-3.
![]() LISTING 11-3: SaxParser3.java
LISTING 11-3: SaxParser3.java
import org.xml.sax.*;
import org.xml.sax.helpers.*;
import java.io.*;
public class SaxParser3 extends DefaultHandler {
private StringBuffer buffer = new StringBuffer();
  public void startDocument( ) throws SAXException {
    System.out.println( “SAX Event: START DOCUMENT” );
  }
  public void endDocument( ) throws SAXException {
    System.out.println( “SAX Event: END DOCUMENT” );
  }
public void startElement(String namespaceURI,
String localName,
String qName,
Attributes attr ) throws SAXException {
System.out.println( “SAX Event: START ELEMENT[ “ + localName + “ ]”);
    for ( int i = 0; i < attr.getLength(); i++ ){
    System.out.println( “ ATTRIBUTE: “ + attr.getLocalName(i) +  “ VALUE: “
     + attr.getValue(i) );
    }
buffer.setLength(0);
}
public void endElement(String namespaceURI,
String localName,
String qName ) throws SAXException {
System.out.print( “SAX Event: CHARACTERS[ “ );
System.out.println(buffer.toString());
System.out.println( “ ]” );
System.out.println( “SAX Event: END ELEMENT[ “ + localName + “ ]” );
}
  public void characters(char[] ch,
                         int start,
                         int length ) throws SAXException {
    try {
      buffer.append(ch, start, length);
    } catch (Exception e) {
     e.printStackTrace();
    }
  }
public static void main( String[] argv ){
String inputFile = argv[0];
System.out.println( “Processing '” + inputFile + “'.” );
System.out.println( “SAX Events:” );
try {
XMLReader reader = XMLReaderFactory.createXMLReader();
reader.setContentHandler( new SaxParser3() );
reader.parse( new InputSource(
new FileReader( inputFile )));
}catch ( Exception e ) {
e.printStackTrace();
}
}
}
The results from running this are the same as the earlier version, but now you have a much more flexible way of coping with textual data. This technique does not work, however, if you have mixed content. In that case you would need to have separate buffers for each element’s content and keep track of which one was needed via flags set in startElement and endElement.
So far you’ve treated all character data as significant, even the whitespace that comes between elements such as <Name> and <Description>, which is only there to make the XML more human-readable. The next section shows how you can use the ignorableWhitespace event to treat significant and insignificant whitespace differently.
Using the ignorableWhitespace Event
The ignorableWhitespace event is very similar to the characters event. It has the same signature:
public void ignorableWhitespace(char[ ] ch, int start, int len) throws SAXException
As with the characters event, it can be called multiple times for a block of contiguous whitespace. The reason that the event was not called at all when parsing the People.xml file is that the parser can tell if whitespace is significant or not only by referring to a document type definition (DTD). If there were a DTD associated with your document that said that each <Person> element contained only parsed character data (PCDATA), the linefeeds between elements would be taken as insignificant whitespace and reported accordingly.
Another event that is thrown by the SAX parser is when an external entity is encountered, but for some reason not retrieved or expanded.
Understanding the skippedEntity Event
The skippedEntity event, much like the ignorableWhitespace event, alerts the application that the SAX parser has encountered information it believes the application can or must skip. In the case of the skippedEntity event, the SAX parser has not expanded an entity reference it encountered in the XML document. An entity might be skipped for several reasons:
- The entity is a reference to an external resource that cannot be parsed or cannot be found
- The entity is an external general entity and the http://xml.org/sax/features/external-general-entities feature is set to false
- The entity is an external parameter entity and the http://xml.org/sax/features/external-parameter-entities feature is set to false
You learn more about the external-general-entities and external-parameter-entities features later in this chapter. The skippedEntity event is declared as follows:
public void skippedEntity(String name) throws SAXException
The name parameter is the name of the entity that was skipped. It begins with % in the case of a parameter entity. SAX considers the external DTD subset an entity, so if the name parameter is [dtd], it means the external DTD subset was not processed. For more information on DTDs, refer to Chapter 4.
Applications can make use of processing instructions within an XML document, although they are not that common. The most common one is xml-stylesheet, which is recognized by browsers as an instruction to transform the current XML using the specified XSLT.
Handling the processingInstruction Event
The signature of the processingInstruction event is as follows:
public void processingInstruction(String target, String data) throws SAXException
If you were writing an application that needed to process the common xml-stylesheet instruction and it encountered the following:
<?xml-stylesheet type=”text/xsl” href=”myTransform.xsl”?>
The target parameter would be set to xml-stylesheet and the data parameter would contain type=”text/xsl” href=”myTransform.xsl”. Notice how the data is not broken into separate attributes; this is because processing instructions don’t have them. The fact that two pieces of data are referred to as type and href is really just coincidental — these two items are usually called pseudo-attributes.
You probably don’t need to be reminded at this point that the XML declaration at the start of an XML document is not really a processing instruction, and as such it shouldn’t result in a processingInstruction event. If it does, you should switch to another parser quickly.
Handling Invalid Content
What happens if, while you are parsing a document, you come across some data that is invalid? Hopefully this would have already been caught by an earlier validation process, either via a DTD, XML Schema, or one of the other methods discussed in previous chapters. However, sometimes business rules exist that cannot be expressed easily in the chosen validation language. For example, in DTDs and version 1.0 of XML Schema, it’s not possible to say: if attribute x equals y then the next element should be <a>, otherwise it should be <b>. If you come across this sort of situation or a similar one where you want to report a fatal error, the standard way to do so is to throw a SAXException. You may have noticed that all the standard parser events throw this. The SAXException has three constructors. The simplest takes a string as its parameter; this can be used to specify the reason for the error and any other information such as the location. The second constructor takes an Exception as its sole argument. This is for when you have already trapped an Exception and want to wrap it. The third constructor takes both a string and an Exception. This means you can trap an Exception and then add your own message to add details about where the error occurred, and so on. One way to do this is to use another event handler, setDocumentLocator.
Using the setDocumentLocator Event
The setDocumentLocator event has only one argument, an instance of the Locator class. The methods for this class are shown in Table 11-2:
TABLE 11.2: Locator Methods
| METHOD | DESCRIPTION |
| getLineNumber() | Retrieves the line number for the current event. |
| getColumnNumber() | Retrieves the column number for the current event (the SAX specification assumes that the column number is based on right-to-left reading modes). |
| getSystemId() | Retrieves the system identifier of the document for the current event. Because XML documents may be composed of multiple external entities, this may change throughout the parsing process. |
| getPublicId() | Retrieves the public identifier of the document for the current event. Because XML documents may be composed of multiple external entities, this may change throughout the parsing process. |
Although it is often used for increasing the helpfulness of error messages, it can be used elsewhere, as the following activity shows.
public class SaxParser4 extends DefaultHandler {
private Locator docLocator = null;
private StringBuffer buffer = new StringBuffer(); public void setDocumentLocator(Locator locator)
{
docLocator = locator;
} public void startElement(String namespaceURI,
String localName,
String qName,
Attributes attr ) throws SAXException {
int lineNumber = 0;
if (docLocator != null)
{
lineNumber = docLocator.getLineNumber();
}
System.out.println( “SAX Event: START ELEMENT[ “ + localName + “ ]”);
if (lineNumber != 0)
{
System.out.println( ”(Found at line number: “ + lineNumber + “.)”);
}
for ( int i = 0; i < attr.getLength(); i++ ){
System.out.println( “ ATTRIBUTE: “ + attr.getLocalName(i) +
“ VALUE: “ + attr.getValue(i) );
} try {
XMLReader reader = XMLReaderFactory.createXMLReader();
reader.setContentHandler(new SaxParser4());
reader.parse( new InputSource(
new FileReader( inputFile )));
}java SaxParser4 People.xml
Processing 'people.xml'. SAX Events: SAX Event: START DOCUMENT SAX Event: START ELEMENT[ People ] (Found at line number: 1.) SAX Event: START ELEMENT[ Person ] (Found at line number: 2.) ATTRIBUTE: bornDate VALUE: 1874-11-30 ATTRIBUTE: diedDate VALUE: 1965-01-24 SAX Event: START ELEMENT[ Name ] (Found at line number: 3.) SAX Event: CHARACTERS[ Winston Churchill ] SAX Event: END ELEMENT[ Name ] SAX Event: START ELEMENT[ Description ] (Found at line number: 4.) SAX Event: CHARACTERS[ Winston Churchill was a mid 20th century British politician who became famous as Prime Minister during the Second World War. ] SAX Event: END ELEMENT[ Description ] SAX Event: CHARACTERS[ Winston Churchill was a mid 20th century British politician who became famous as Prime Minister during the Second World War. ] SAX Event: END ELEMENT[ Person ]
public void setDocumentLocator(Locator locator)
{
docLocator = locator;
}
int lineNumber = 0;
if (docLocator != null)
{
lineNumber = docLocator.getLineNumber();
}
System.out.println( “SAX Event: START ELEMENT[ “ + localName + “ ]” );
if (lineNumber != 0)
{
System.out.println(“ (Found at line number: “ + lineNumber + “.)”);
}
![]() LISTING 11-4: SaxParser4.java
LISTING 11-4: SaxParser4.java
import org.xml.sax.*;
import org.xml.sax.helpers.*;
import java.io.*;
public class SaxParser4 extends DefaultHandler {
private Locator docLocator = null;
private StringBuffer buffer = new StringBuffer();
public void setDocumentLocator(Locator locator)
{
docLocator = locator;
}
public void startDocument( ) throws SAXException {
System.out.println( “SAX Event: START DOCUMENT” );
}
public void endDocument( ) throws SAXException {
System.out.println( “SAX Event: END DOCUMENT” );
}
public void startElement(String namespaceURI,
String localName,
String qName,
Attributes attr ) throws SAXException {
int lineNumber = 0;
if (docLocator != null)
{
lineNumber = docLocator.getLineNumber();
}
System.out.println( “SAX Event: START ELEMENT[ “ + localName + “ ]”);
if (lineNumber != 0)
{
System.out.println(“ (Found at line number: “ + lineNumber + “.)”);
}
for ( int i = 0; i < attr.getLength(); i++ ){
System.out.println( “ ATTRIBUTE: “ + attr.getLocalName(i) + “ VALUE: “
+ attr.getValue(i) );
}
buffer.setLength(0);
}
  public void endElement(String namespaceURI,
                         String localName,
                         String qName ) throws SAXException {
    System.out.print( “SAX Event: CHARACTERS[ “ );
    System.out.println(buffer.toString());
    System.out.println( “ ]” );
    System.out.println( “SAX Event: END ELEMENT[ “ + localName + “ ]” );
  }
public void characters(char[] ch,
int start,
int length ) throws SAXException {
try {
buffer.append(ch, start, length);
} catch (Exception e) {
e.printStackTrace();
}
}
public static void main( String[] argv ){
String inputFile = argv[0];
System.out.println (“Processing '” + inputFile + “'.” );
System.out.println( “SAX Events:” );
try {
XMLReader reader = XMLReaderFactory.createXMLReader();
reader.setContentHandler(new SaxParser4());
reader.parse( new InputSource(
new FileReader( inputFile )));
}catch ( Exception e ) {
e.printStackTrace();
}
}
}
It’s easy to see how using setDocumentLocator and storing the reference to the input document could be used to improve the information produced by an error handler. Instead of just the reason for the error, the location of the offending item could also be given.
Using the ErrorHandler Interface
So far all the information about the XML has been passed via the ContentHandler interface. Error information, however, comes from ErrorHandler. Fortunately, the DefaultHandler class also provides stubs for the three events this interface fires. The three events are shown in the Table 11-3.
TABLE 11.3: Events Fired By ErrorHandler
| EVENT | DESCRIPTION |
| warning | Allows the parser to notify the application of a warning it has encountered in the parsing process. Though the XML Recommendation provides many possible warning conditions, very few SAX parsers actually produce warnings. |
| error | Allows the parser to notify the application of an error it has encountered. Even though the parser has encountered an error, parsing can continue. Validation errors should be reported through this event. |
| fatalError | Allows the parser to notify the application of a fatal error it has encountered and that it cannot continue parsing. Well-formedness errors should be reported through this event. |
The default implementation within DefaultHandler simply throws a SAXException when these events are fired. If you want to do anything other than that, such as include the line number of the offending code, you need to do two things:
XMLReader reader = XMLReaderFactory.createXMLReader();
SaxParser5 parser = new SaxParser5();
reader.setContentHandler(parser);
reader.setErrorHandler(parser);If you want to trap specific errors, such as those generated when document validation fails, you will also need to use feature activation to enable this. Feature activation is covered later in the chapter.
The following Try It Out shows how to make use of the events of ErrorHandler. It demonstrates the preliminary steps you need to take to turn on full error handling and then deliberately gives the parser a flawed document to see the events in action.
public static void main( String[] argv ){
String inputFile = argv[0];
System.out.println(“Processing '” + inputFile + “'.”);
System.out.println( “SAX Events:” );
try {
XMLReader reader = XMLReaderFactory.createXMLReader();
SaxParser5 parser = new SaxParser5();
reader.setContentHandler(parser);
reader.setErrorHandler(parser);
reader.parse( new InputSource(
new FileReader( inputFile )));
}catch ( Exception e ) {
e.printStackTrace();
}
} reader.setErrorHandler(parser);
try
{
reader.setFeature(“http://xml.org/sax/features/validation”, true);
} catch (SAXException e) {
System.err.println(“Cannot activate validation”);
}
reader.parse( new InputSource(
new FileReader( inputFile )));<!DOCTYPE People [ <!ELEMENT People (Person*)> <!ELEMENT Person (Name, Description)> <!ATTLIST Person bornDate CDATA #REQUIRED> <!ATTLIST Person diedDate CDATA #REQUIRED> <!ELEMENT Name (#PCDATA)> <!ELEMENT Description (#PCDATA)> ]> <People> <!-- rest of people.xml --> </People>
public void warning (SAXParseException exception)
throws SAXException {
System.err.println(“[Warning] “ +
exception.getMessage() + “ at line “ +
exception.getLineNumber() + “, column “ +
exception.getColumnNumber() );
}
public void error (SAXParseException exception)
throws SAXException {
System.err.println(“[Error] “ +
exception.getMessage() + “ at line “ +
exception.getLineNumber() + “, column “ +
exception.getColumnNumber() );
}
public void fatalError (SAXParseException exception)
throws SAXException {
System.err.println(“[Fatal Error] “ +
exception.getMessage() + “ at line “ +
exception.getLineNumber() + “, column “ +
exception.getColumnNumber() );
throw exception;
}[Error] Attribute “diedDate” is required and must be specified for element type
“Person” at line 17, column 33
SAX Event: START ELEMENT[ Person ]
(Found at line number: 17.)
ATTRIBUTE: bornDate VALUE: 1917-11-19![]() LISTING 11-5: SaxParser5.java
LISTING 11-5: SaxParser5.java
import org.xml.sax.*;
import org.xml.sax.helpers.*;
import java.io.*;
public class SaxParser5 extends DefaultHandler {
private Locator docLocator = null;
private StringBuffer buffer = new StringBuffer();
  public void setDocumentLocator(Locator locator)
  {
    docLocator = locator;
  }
public void startDocument( ) throws SAXException {
System.out.println( “SAX Event: START DOCUMENT” );
}
public void endDocument( ) throws SAXException {
System.out.println( “SAX Event: END DOCUMENT” );
}
public void startElement(String namespaceURI,
String localName,
String qName,
Attributes attr ) throws SAXException {
    int lineNumber = 0;
    if (docLocator != null)
    {
      lineNumber = docLocator.getLineNumber();
    }
    System.out.println( “SAX Event: START ELEMENT[ “ + localName + “ ]” );
    if (lineNumber != 0)
    {
      System.out.println(“	(Found at line number: “ + lineNumber + “.)”);
    }
for ( int i = 0; i < attr.getLength(); i++ ){
System.out.println( “ ATTRIBUTE: “ + attr.getLocalName(i) +
“ VALUE: “ + attr.getValue(i) );
}
buffer.setLength(0);
}
public void endElement(String namespaceURI,
String localName,
String qName ) throws SAXException {
System.out.print( “SAX Event: CHARACTERS[ “ );
System.out.println(buffer.toString());
System.out.println( “ ]” );
System.out.println( “SAX Event: END ELEMENT[ “ + localName + “ ]” );
}
public void characters(char[] ch,
int start,
int length ) throws SAXException {
try {
buffer.append(ch, start, length);
} catch (Exception e) {
e.printStackTrace();
}
}
public void warning (SAXParseException exception)
throws SAXException {
System.err.println(“[Warning] “ +
exception.getMessage() + “ at line “ +
exception.getLineNumber() + “, column “ +
exception.getColumnNumber() );
}
public void error (SAXParseException exception)
throws SAXException {
System.err.println(“[Error] “ +
exception.getMessage() + “ at line “ +
exception.getLineNumber() + “, column “ +
exception.getColumnNumber() );
}
public void fatalError (SAXParseException exception)
throws SAXException {
System.err.println(“[Fatal Error] “ +
exception.getMessage() + “ at line “ +
exception.getLineNumber() + “, column “ +
exception.getColumnNumber() );
throw exception;
}
public static void main( String[] argv ){
String inputFile = argv[0];
System.out.println( “Processing '” + inputFile + “'.” );
System.out.println( “SAX Events:” );
try {
      XMLReader reader = XMLReaderFactory.createXMLReader();
      SaxParser5 parser = new SaxParser5();
      reader.setContentHandler(parser);
      reader.setErrorHandler(parser);
try
{
reader.setFeature(“http://xml.org/sax/features/validation”, true);
} catch (SAXException e) {
System.err.println(“Cannot activate validation”);
}
reader.parse( new InputSource(
new FileReader( inputFile )));
}catch ( Exception e ) {
e.printStackTrace();
}
}
}
You may want to use two other interfaces to receive notifications when the document is parsed. These are covered in the next two sections.
Using the DTDHandler Interface
Now that you have added a DTD to your document, you may want to receive some events about the declarations. The logical place to turn is the DTDHandler interface. Unfortunately, the DTDHandler interface provides you with very little information about the DTD itself. In fact, it allows you to see the declarations only for notations and unparsed entities. Table 11-4 shows the two events produced by the DTDHandler interface and their use.
TABLE 11.4: DTDHandler Events
| EVENT | DESCRIPTION |
| notationDecl | Allows the parser to notify the application that it has read a notation declaration. |
| unparsedEntityDecl | Allows the parser to notify the application that it has read an unparsed entity declaration. |
When parsing documents that make use of notations and unparsed entities to refer to external files — such as image references in XHTML or embedded references to non-XML documents — the application must have access to the declarations of these items in the DTD. This is why the creators of SAX made them available through the DTDHandler, one of the default interfaces associated with an XMLReader.
The declarations of elements, attributes, and internal entities, however, are not required for general XML processing. These declarations are more useful for XML editors and validators. Therefore, the events for these declarations were made available in one of the extension interfaces, DeclHandler. You look at the extension interfaces in more detail later in the chapter.
Using the DTDHandler interface is very similar to using the ContentHandler and ErrorHandler interfaces. The DefaultHandler class you used as the base class of the TrainReader also implements the DTDHandler interface, so working with the events is simply a matter of overriding the default behavior, just as you did with the ErrorHandler and ContentHandler events. To tell the XMLReader to send the DTDHandler events to your application, you can simply call the setDTDHandler function, as shown in the following code:
reader.setDTDHandler(SaxParser5);
The second interface is EntityResolver, used for providing information and control when an external entity reference is encountered.
EntityResolver Interface
The EntityResolver interface enables you to control how a SAX parser behaves when it attempts to resolve external entity references within the DTD, so much like the DTDHandler, it is frequently not used. However, when an XML document utilizes external entity references, it is highly recommended that you provide an EntityResolver.
The EntityResolver interface defines only one function, resolveEntity, which enables the application to handle the resolution of entity lookups for the parser.
As shown with the other default interfaces, the EntityResolver interface is implemented by the DefaultHandler class. Therefore, to handle the event callback, you simply override the resolveEntity function in the TrainReader class and make a call to the setEntityResolver function like so:
reader.setEntityResolver(SaxParser5);
Consider the following entity declaration:
<!ENTITY People PUBLIC “-//People//people xml 1.0//EN”
    “http://wrox.com/people.xml”>
In this case, the resolveEntity function would be passed — //People//people xml 1.0//EN as the public identifier, and http://wrox.com/people.xml as the system identifier. The DefaultHandler class’s implementation of the resolveEntity function returns a null InputSource by default. When handling the resolveEntity event, however, your application can take any number of actions. It could create an InputSource based on the system identifier, or it could create an InputSource based on a stream returned from a database, hash table, or catalog lookup that used the public identifier as the key. It could also simply return null. These options and many more enable an application to control how the processor opens and connects to external resources.
Earlier you saw how validation was turned on by setting a feature; in the next section you’ll look at this in more detail.
Understanding Features and Properties
As shown earlier in this chapter, some of the behavior of SAX parsers is controlled through setting features and properties. For example, to activate validation, you needed to set the http://xml.org/sax/features/validation feature to true. In fact, all features in SAX are controlled this way, by setting a flag to true or false. The feature and property names in SAX are full URIs so that they can have unique names — much like namespace names.
Working with Features
To change a feature’s value in SAX, you simply call the setFeature function of the XMLReader like so:
public void setFeature(String name, boolean value)
  throws SAXNotRecognizedException, SAXNotSupportedException
When doing this, however, it is important to remember that parsers may not support, or even recognize, every feature. If a SAX parser does not recognize the name of the feature, the setFeature function raises a SAXNotRecognizedException. If it recognizes the feature name but does not support a feature (or does not support changing the value of a feature at a certain time), the setFeature function raises a SAXNotSupportedException. For example, if a SAX parser does not support validation, it raises a SAXNotSupportedException when you attempt to change the value to true.
The getFeature function enables you to check the value of any feature like so:
public boolean getFeature(String name)
  throws SAXNotRecognizedException, SAXNotSupportedException
Like the setFeature function, the getFeature function may raise exceptions if it does not recognize the name of the feature or does not support checking the value at certain times (such as before, during, or after the parse function has been called). Therefore, place all of your calls to the setFeature and getFeature functions within a try/catch block to handle any exceptions.
All SAX parsers should recognize, but may not support, the following features in Table 11-5:
TABLE 11.5: Configurable SAX Features
| FEATURE | DEFAULT | DESCRIPTION |
| http://xml.org/sax/features/validation | Unspecified | Controls whether the parser will validate the document as it parses. In addition to controlling validation, it also affects certain parser behaviors. For example, if the feature is set to true, all external entities must be read. |
| http://xml.org/sax/features/namespaces | true | In the latest version of SAX, this feature should always be true, meaning that namespace URI and prefix values will be sent to the element and attribute functions when available. |
| http://xml.org/sax/features/namespace-prefixes | false | In the latest version of SAX, this feature should always be false. It means that names with colons will be treated as prefixes and local names. When this flag is set to true, raw XML names are sent to the application. |
| http://xml.org/sax/features/xmlns-uris | false | Enables you to control whether xmlns declarations are reported as having the namespace URI http://www.w3.org/2000/xmlns/. By default, SAX conforms to the original namespaces in the XML Recommendation and will not report this URI. The 1.1 Recommendation and an erratum to the 1.0 edition modified this behavior. This setting is used only when xmlns declarations are reported as attributes. |
| http://xml.org/sax/features/resolve-dtd-uris | true | Controls whether the SAX parser will “absolutize” system IDs relative to the base URI before reporting them. Parsers will use the Locator’s systemID as the base URI. This feature does not apply to EntityResolver.resolveEntity, nor does it apply to LexicalHandler.startDTD. |
| http://xml.org/sax/features/external-general-entities | Unspecified | Controls whether external general entities should be processed. When the validation feature is set to true, this feature is always true. |
| http://xml.org/sax/features/external-parameter-entities | Unspecified | Controls whether external parameter entities should be processed. When the validation feature is set to true, this feature is always true. |
| http://xml.org/sax/features/lexical-handler/parameter-entities | Unspecified | Controls the reporting of the start and end of parameter entity inclusions in the LexicalHandler. |
| http://xml.org/sax/features/is-standalone | None | Enables you to determine whether the standalone flag was set in the XML declaration. This feature can be accessed only after the startDocument event has completed. This feature is read-only and returns true only if the standalone flag in the XML declaration has a value of yes. |
| http://xml.org/sax/features/use-attributes2 | Unspecified | Check this read-only feature to determine whether the Attributes interface passed to the startElement event supports the Attributes2 extensions. The Attributes2 extensions enable you to examine additional information about the declaration of the attribute in the DTD. Because this feature was introduced in a later version of SAX, some SAX parsers will not recognize it. |
| http://xml.org/sax/features/use-locator2 | Unspecified | Check this read-only feature to determine whether the Locator interface passed to the setDocumentLocator event supports the Locator2 extensions. The Locator2 extensions enable to you determine the XML version and encoding declared in an entity’s XML declaration. Because this feature was introduced in a later version of SAX, some SAX parsers will not recognize it. |
| http://xml.org/sax/features/use-entity-resolver2 | true (if recognized) | Set this feature to true (the default) if the EntityResolver interface passed to the setEntityResolver function supports the EntityResolver2 extensions. If it does not support the extensions, set this feature to false. The EntityResolver2 extensions allow you to receive callbacks for the resolution of entities and the external subset of the DTD. Because this feature was introduced in a later version of SAX, some SAX parsers will not recognize it. |
| http://xml.org/sax/features/string-interning | Unspecified | Enables you to determine whether the strings reported in event callbacks were interned using the Java function String.intern. This allows for fast comparison of strings. |
| http://xml.org/sax/features/unicode-normalization-checking | false | Controls whether the parser reports Unicode normalization errors as described in Section 2.13 and Appendix B of the XML 1.1 Recommendation. Because these errors are not fatal, if encountered they are reported using the ErrorHandler.error callback. |
| http://xml.org/sax/features/xml-1.1 | Unspecified | Read-only feature that returns true if the parser supports XML 1.1 and XML 1.0. If the parser does not support XML 1.1, this feature will be false. |
Working with Properties
Working with properties is very similar to working with features. Instead of boolean flags, however, properties may be any kind of object. The property mechanism is most often used to connect helper objects to an XMLReader. For example, SAX comes with an extension set of interfaces called DeclHandler and LexicalHandler that enable you to receive additional events about the XML document. Because these interfaces are considered extensions, the only way to register these event handlers with the XMLReader is through the setProperty function:
public void setProperty(String name, Object value)
  throws SAXNotRecognizedException, SAXNotSupportedException

public Object getProperty(String name)
  throws SAXNotRecognizedException, SAXNotSupportedException
As you saw with the setFeature and getFeature functions, all calls to setProperty and getProperty should be safely placed in try/catch blocks, because they may raise exceptions. Some of the default property names are listed in Table 11-6:
TABLE 11.6: Configurable SAX Properties
| PROPERTY NAME | DESCRIPTION |
| http://xml.org/sax/properties/declaration-handler | Specifies the DeclHandler object registered to receive events for declarations within the DTD. |
| http://xml.org/sax/properties/lexical-handler | Specifies the LexicalHandler object registered to receive lexical events, such as comments, CDATA sections, and entity references. |
| http://xml.org/sax/properties/document-xml-version | Read-only property that describes the actual version of the XML document, such as 1.0 or 1.1. This property can only be accessed during the parse and after the startDocument callback has been completed. |
Using the Extension Interfaces
The two primary extension interfaces are DeclHandler and LexicalHandler. Using these interfaces, you can receive events for each DTD declaration and specific items such as comments, CDATA sections, and entity references as they are expanded. It is not required by the XML specification that these items be passed to the application by an XML processor. All the same, the information can be very useful at times, so the creators of SAX wanted to ensure that they could be accessed.
The DeclHandler interface declares the following events in Table 11-7:
TABLE 11.7: DeclHandler Interface Definition
| EVENT | DESCRIPTION |
| attributeDecl | Allows the parser to notify the application that it has read an attribute declaration. |
| elementDecl | Allows the parser to notify the application that it has read an element declaration. |
| externalEntityDecl | Allows the parser to notify the application that it has read an external entity declaration. |
| internalEntityDecl | Allows the parser to notify the application that it has read an internal entity declaration. |
The LexicalHandler interface declares the following events in Table 11-8:
TABLE 11.8: LexicalHandler Interface Definition
| EVENT | DESCRIPTION |
| comment | Allows the parser to notify the document that it has read a comment. The entire comment is passed back to the application in one event call; it is not buffered, as it may be in the characters and ignorableWhitespace events. |
| startCDATA | Allows the parser to notify the document that it has encountered a CDATA section start marker. The character data within the CDATA section is always passed to the application through the characters event. |
| endCDATA | Allows the parser to notify the document that it has encountered a CDATA section end marker. |
| startDTD | Allows the parser to notify the document that it has begun reading a DTD. |
| endDTD | Allows the parser to notify the document that it has finished reading a DTD. |
| startEntity | Allows the parser to notify the document that it has started reading or expanding an entity. |
| endEntity | Allows the parser to notify the document that it has finished reading or expanding an entity. |
Because these are extension interfaces, they must be registered with the XMLReader using the property mechanism, as you just learned. For example, to register a class as a handler or LexicalHandler events, you might do the following:
reader.setProperty(“http://xml.org/sax/properties/lexical-handler”, lexHandler);
The great thing about SAX is that it’s not just limited to Java. Implementations exist for C++, PHP, and Microsoft’s COM as well as many other languages. People have accepted the fact that a good way to handle large documents is to use an event-based method.
Now that you’ve seen how SAX copes with documents using events, in the next section you look at .NET’s answer to the problems posed by large documents, System.Xml.XmlReader.
USING XMLREADER
Whereas with SAX you handle events thrown by the parser, XmlReader takes a different approach, albeit one that needs a similar mindset to work with. Again you are working through the document in a serial fashion, but whereas with SAX the process is somewhat akin to watching a conveyor belt loaded with goods go by, with you plucking items from it as it passes, with XmlReader the process is more like the XML being laid out like a long buffet, where you need to move along picking up whatever items you want.
XmlReader has similar advantages and disadvantages to SAX, too. It is very efficient from a memory point of view because the whole document is not loaded into RAM. This also means that once you’ve passed a particular spot, you can’t go back; you have to begin the process anew. You also can’t validate a complete document. You can only know that the XML is valid or invalid up to the furthest point you’ve reached. If you want full validation before you start processing, you’ll need two passes.
In the following activity you see how to get started with XmlReader. You’ll start out with the basics: how to load an XML document and how to use basic navigation to read its content.
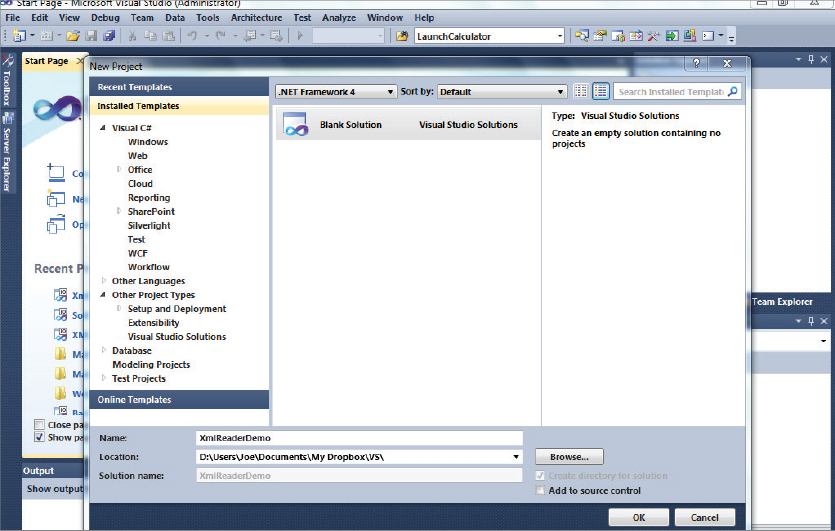
![]() LISTING 11-6: Program.cs (in project XmlReaderBasics)
LISTING 11-6: Program.cs (in project XmlReaderBasics)
using System;
using System.Xml;

namespace XmlReaderBasics
{
  internal class Program
  {
    private static void Main(string[] args)
    {
      var xmlUri = “People.xml”;
      var reader = DisplayRootElement(xmlUri);
      Console.ReadLine();
    }

    private static XmlReader DisplayRootElement(string uri)
    {
      var reader = XmlReader.Create(uri);
      reader.MoveToContent();
      var rootElementName = reader.Name;
      Console.WriteLine(“Root element name is: {0}”, rootElementName);
      return reader;
    }
  }
}Root element name is: People
var reader = XmlReader.Create(uri);
reader.MoveToContent();
var rootElementName = reader.Name;
Console.WriteLine(“Root element name is: {0}”, rootElementName);
return reader;
So far you’ve seen the basics in action — loading a document and moving to the document element. The next step is to read some useful information from the document, which you do in the following activity.
    private static XmlReader DisplayPeopleWithDates(XmlReader reader)
    {
      while (reader.Read())
      {
        if (reader.NodeType == XmlNodeType.Element
            && reader.Name == “Person”)
        {
          DateTime bornDate = new DateTime();
          DateTime diedDate = new DateTime();
          var personName = string.Empty;
          while (reader.MoveToNextAttribute())
          {
            switch (reader.Name)
            {
              case “bornDate”:
                bornDate = reader.ReadContentAsDateTime();
                break;
              case “diedDate”:
                diedDate = reader.ReadContentAsDateTime();
                break;
            }
          }

          while (reader.Read())
          {
            if (reader.NodeType == XmlNodeType.Element
                && reader.Name == “Name”)
            {
              personName = reader.ReadElementContentAsString();
              break;
            }
          }
          Console.WriteLine(“{0} was born in {1} and died in {2}”,
                            personName,
                            bornDate.ToShortDateString(),
                            diedDate.ToShortDateString());
        }
      }

      return reader;
} private static void Main(string[] args)
{
var xmlUri = “People.xml”;
var reader = DisplayRootElement(xmlUri);
reader = DisplayPeopleWithDates(reader);
Console.ReadLine();
}Root element name is: People Winston Churchill was born in 30/11/1874 and died in 24/01/1965 Indira Gandhi was born in 19/11/1917 and died in 31/10/1984 John F. Kennedy was born in 29/05/1917 and died in 22/11/1963
    private static XmlReader DisplayPeopleWithDates(XmlReader reader)
    {
      while (reader.Read())
        if (reader.NodeType == XmlNodeType.Element
            && reader.Name == “Person”)
        {
          DateTime bornDate = new DateTime();
          DateTime diedDate = new DateTime();
          var personName = string.Empty;
          while (reader.MoveToNextAttribute())
          {
            switch (reader.Name)
            {
              case “bornDate”:
                bornDate = reader.ReadContentAsDateTime();
                break;
              case “diedDate”:
                diedDate = reader.ReadContentAsDateTime();
                break;
            }
          }
          while (reader.Read())
          {
            if (reader.NodeType == XmlNodeType.Element
                && reader.Name == “Name”)
            {
              personName = reader.ReadElementContentAsString();
              break;
            }
          }
          Console.WriteLine(“{0} was born in {1} and died in {2}”,
                            personName,
                            bornDate.ToShortDateString(),
                            diedDate.ToShortDateString());
The preceding Try It Out example made use of the XmlNodeType enumeration. The most common test is for elements but there are times when you are targeting other content types. The full list of values returned by XmlReader is shown in Table 11-9.
TABLE 11.9: XmlNodeType Enumeration
| NAME | DESCRIPTION |
| None | The Read() method has not yet been called. |
| Element | An element has been read. |
| Attribute | An attribute has been read. |
| Text | The text content of a node, such as an element or an attribute, has been read. |
| CDATA | A CDATA section was read. |
| EntityReference | An entity reference, such as é, has been read. |
| ProcessingInstruction | A processing instruction has been read. |
| Comment | A comment has been read. |
| DocumentType | A document type declaration has been read. |
| Whitespace | Whitespace between markups has been read. |
| SignificantWhitespace | Whitespace that is known to be significant (because a schema or DTD has been used, for instance) has been read. |
| EndElement | The closing tag of an element has been read. |
| XmlDeclaration | The document’s XML declaration has been read. |
There are other members of the enumeration, such as Document, but these are never returned by the XmlReader.
So far you’ve used the basic XmlReader.Create() method to get a standard XmlTextReader. In the next section you see how you can use the XmlReaderSettings class to more tightly control how the reader will work.
Using XmlReaderSettings
Many questions can arise when parsing and reading XML, for example:
- How do you want to treat whitespace?
- Do you want validation?
- If you do want validation, where are the relevant schemas?
- Do you want attention paid to any document type definition?
- Are you interested in comments, or can they be ignored?
- What should be done with the stream after reading? Should it be closed or left open?
- How do you provide credentials to access secured online resources?
All these questions, along with others, can be answered by using the XmlReaderSettings class — to create a new instance of the class, set the appropriate properties, and then pass it as a second argument to the XmlReader.Create() method.
For example, suppose you want to ignore any comments in the document; you are not going to do anything with them so they’ll only get in the way. The following code shows how to do this:
var settings = new XmlReaderSettings();
settings.IgnoreComments = true;
var reader = XmlReader.Create(xmlUri, settings);
The next example shows a more complicated scenario: how to provide credentials for a secured online resource. Any time an XmlReader needs to access a resource, it uses an XmlResolver. The built-in resolver uses the credentials of the account running the code, which may not be sufficient. You can access the resolver and change the credentials via the XmlReaderSettings in the following manner:
var settings = new XmlReaderSettings();
var resolver = new XmlUrlResolver();
var credentials = new Syystem.Net.NetworkCredential(username,
                                                    password,
                                                    domainName);
resolver.Credentials = credentials;
settings.XmlResolver = resolver;
var reader = XmlReader.Create(xmlUri, settings);
The next activity illustrates another common scenario: how to use an XmlReader to validate a document. You’ll see how you need to specify in advance that you want a validating reader and how any validation errors are handled.
<People xmlns=”http://wrox.com/namespaces/BeginningXml/People”>
![]() LISTING 11-7: PeopleWithNamespace.xsd
LISTING 11-7: PeopleWithNamespace.xsd
<?xml version=”1.0” encoding=”utf-8”?>
<xs:schema attributeFormDefault=”unqualified”
           elementFormDefault=”qualified”
           targetNamespace=”http://wrox.com/namespaces/BeginningXml/People”
           xmlns:xs=”http://www.w3.org/2001/XMLSchema”>
  <xs:element name=”People”>
    <xs:complexType>
      <xs:sequence>
        <xs:element maxOccurs=”unbounded” name=”Person”>
          <xs:complexType>
            <xs:sequence>
              <xs:element name=”Name” type=”xs:string” />
              <xs:element name=”Description” type=”xs:string” />
            </xs:sequence>
            <xs:attribute name=”bornDate” type=”xs:date” use=”required” />
            <xs:attribute name=”diedDate” type=”xs:date” use=”required” />
          </xs:complexType>
        </xs:element>
      </xs:sequence>
    </xs:complexType>
  </xs:element>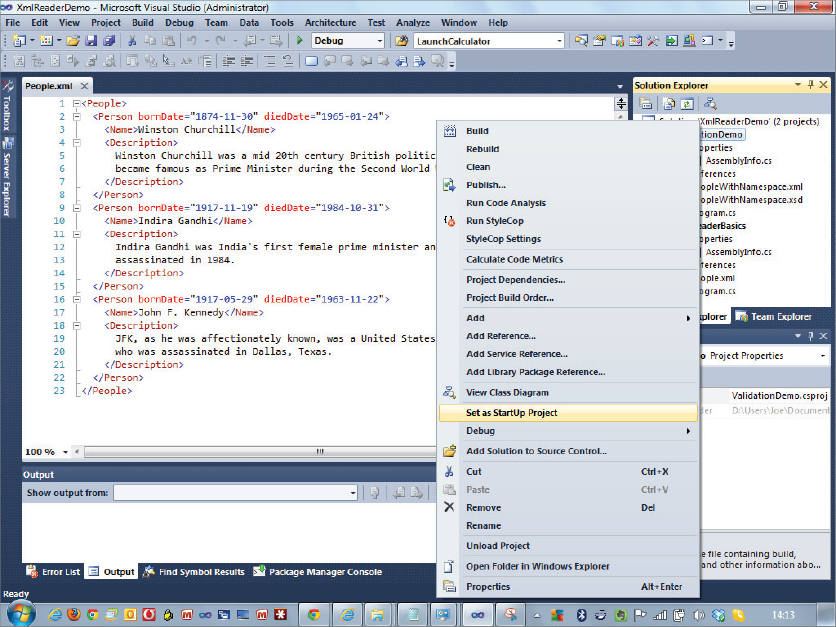
</xs:schema>![]() LISTING 11-8: Program.cs (in project ValidationDemo)
LISTING 11-8: Program.cs (in project ValidationDemo)
using System;
using System.Xml;
using System.Xml.Schema;

namespace ValidationDemo
{
  internal class Program
  {
    private static void Main(string[] args)
    {
      var xmlUri = “PeopleWithNamespace.xml”;
      var targetNamespace =
         “http://wrox.com/namespaces/BeginningXml/People”;
      var schemaUri = “PeopleWithNamespace.xsd”;
      ValidateDocument(xmlUri, targetNamespace, schemaUri);
      Console.ReadLine();
    }

    private static void ValidateDocument(string uri,
                                         string targetNamespace,
                                         string schemaUri)
    {
      var schemaSet = new XmlSchemaSet();
      schemaSet.Add(targetNamespace, schemaUri);
      var settings = new XmlReaderSettings();
      settings.ValidationType = ValidationType.Schema;
      settings.Schemas = schemaSet;
      settings.ValidationEventHandler += ValidationCallback;
      var reader = XmlReader.Create(uri, settings);
      while (reader.Read()) ;
      Console.WriteLine(“Validation complete.”);
    }

    private static void ValidationCallback(object sender,
                                           ValidationEventArgs e)
    {
      Console.WriteLine(
            “Validation Error: {0}
	Line number {1}, position {2}.”,
                        e.Message,
                        e.Exception.LineNumber,
                        e.Exception.LinePosition);
    }
  }
}
Validation complete.
  <Person bornDate=”1917-11-19”>
<Name>Indira Gandhi</Name>Validation Error: The required attribute 'diedDate' is missing.
Line number 9, position 4.
Validation complete. private static void ValidateDocument(string uri,
string targetNamespace,
string schemaUri)
{
var schemaSet = new XmlSchemaSet();
schemaSet.Add(targetNamespace, schemaUri);
// method continues
      var settings = new XmlReaderSettings();
      settings.ValidationType = ValidationType.Schema;
      settings.Schemas = schemaSet;
settings.ValidationEventHandler += ValidationCallback;
      var reader = XmlReader.Create(uri, settings);
      while (reader.Read()) ;
      Console.WriteLine(“Validation complete.”);
    private static void ValidationCallback(object sender,
                                           ValidationEventArgs e)
    {
      Console.WriteLine(“Validation Error: {0}
	Line number {1}, position {2}”,
                        e.Message,
                        e.Exception.LineNumber,
                        e.Exception.LinePosition);
    }
  }
Now that you’ve covered most of the standard scenarios in reading data, using Read() to move through the XML and returning content from elements and attributes, next you’ll look at the role of the XmlResolver more deeply and see how you can limit where external resources are loaded from.
Controlling External Resources
You saw earlier how an XmlReaderSettings class has a property, XmlResolver, which, by default, returns an instance of an XmlUrlResolver. By default, the XmlUrlResolver handles requests for files using the file:// and http:// protocols, but it’s possible to write your own class that inherits from XmlResolver, which knows how to handle other ones. The XmlResolver class is also used when transforming XML using the System.Xml.Xsl.CompiledTransform, again to govern how external resources are dealt with. A common requirement when loading or especially transforming a file is to have access to data that resides in a traditional SQL database. Many people have therefore written XmlResolvers that can do this. Most of them allow you to specify a resource such as the following:
sql://executeProcedure?name=GetAllCustomers&City=Seattle
This would cause the data returned by the procedure — all customers who reside in Seattle — to be embedded in the XML.
Another common request is to be able to call a web service. This can be achieved in a limited way if the service is a RESTful one that only uses the querystring to provide data, but is impossible to do so where a post is required, as is the case for most SOAP-based services.
Both of the preceding scenarios involve writing your own implementation of XmlResolver, but there is another case that is so common that Microsoft has done the work for you. This is when you want to restrict access to external files, normally based on where they reside. Why would you want to do this? The common reason is that you are accepting XML files from a third party. Maybe your web orders are sent from other businesses using a business-to-business (B2B) system and you need to process these. Although it’s legitimate for these files to contain references to external resources (maybe a schema, a DTD, or an entity), these resources should only reside on servers that have been approved beforehand. To prevent the chance of infected files getting on to your servers, or to prevent a denial of service (DoS) attack, it’s essential to have a way of limiting the locations from where files are retrieved.
For these and related reasons, Microsoft offers the XmlSecureResolver class, whereby you can easily restrict which domains can be accessed.
For this scenario, assume that any external resources can only come from two specific URLs, http://myWebServer.com and http://myDataServer.com. Now perform the following steps:
var permission = new WebPermission(PermissionState.None);
permission.AddPermission(NetworkAccess.Connect, “http://myWebServer.com”);
permission.AddPermission(NetworkAccess.Connect, “http://myDataServer.com”);
var permissionSet = new PermissionSet(PermissionSet.None);
permissionSet.AddPermission(permission);
var resolver = new XmlSecureResolver(new XmlUrlResolver(), permissionSet);
var settings = new XmlReaderSettings();
settings.XmlResolver = resolver;
var reader = XmlReader.Create(xmlUri, settings);
SUMMARY
- There are two new methods for processing XML: SAX and .NET’s XmlReader.
- SAX is an event-driven paradigm whereby the SAX parser fires events when different types of content are found. Registered listeners can react to these events.
- In XmlReader the programmer instigates moving through the document and stops when the target content is reached.
EXERCISES
Answers to the exercises can be found in Appendix A.
WHAT YOU LEARNED IN THIS CHAPTER
| TOPIC | KEY POINTS |
| The need for event-driven methods | Building an XML tree in memory consumes a lot of RAM. Large documents need a more efficient way of being processed. |
| SAX | Developed with Java in mind but available in many other languages, SAX is an interface that relies on events being fired as content is encountered when a document is read sequentially. |
| Features | Extra features, such as validation, can be configured by specifying them using the setFeature(name, value) method. |
| Properties | Properties, such as which handlers are registered, can be configured using the setProperty(name, value) method. |
| XmlReader | .NET’s XmlReader also reads a document sequentially. However, it does not fire events but relies on the developer to pinpoint a target by specifying its features. For example: Is it an element or an attribute? What is its name? |
| XmlReaderSettings | Advanced options, such as wanting validation for an XML document, can be configured by using the XmlReaderSettings class which is then passed to the XmlReader.Create() method. |
| XmlResolver | Access to supplementary documents that are needed to complete processing of the XML, such as DTDs and external entities, is controlled via the XmlResolver used by XmlReader. For example, you can limit file access to specific locations using XmlSecureResolver combined with a PermissionSet. |